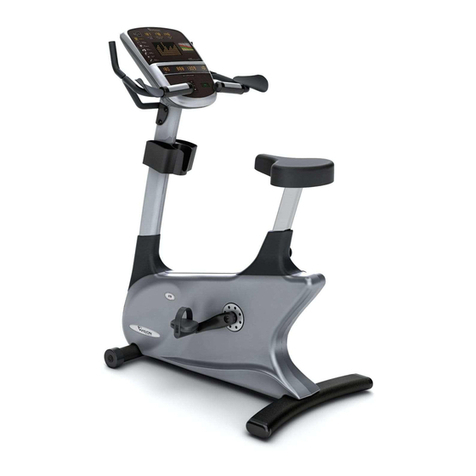
Sears PRO-FORM GL36 User manual

GL36
Model No. 831,283120
Serial No.
Write the serial number in the
space above for reference.
•Assembly
•Operation
•Maintenance
•Part List and Drawing
BIKE EXERCISER
User's Manual
Patent Pending
Sears, Roebuck and Co., Hoffman Estates, IL 60179

GL36
TABLE OF CONTENTS
IMPORTANT PRECAUTIONS ............................................................. 3
BEFORE YOU BEGIN ................................................................... 4
ASSEMBLY ........................................................................... 5
HOW TO OPERATE THE EXERCISE CYCLE ................................................. 9
MAINTENANCE AND TROUBLESHOOTING ................................................. 20
CONDITIONING GUIDELINES ............................................................ 21
PART LIST ........................................................................... 22
EXPLODED DRAWING ................................................................. 23
HOW TO ORDER REPLACEMENT PARTS ........................................... Back Cover
FULL 90 DAY WARRANTY ....................................................... Back Cover
2

3

BEFORE YOU BEGIN
Congratulations for selectingthe new PROFORM ®
GL36 exercise cycle. Cycling is one of the most effec-
tive exercisesfor increasingcardiovascularfitness,
buildingendurance, and toningthe entire body.The
PROFORM®GL36 exercise cycle offersan impressive
array of features to let you enjoythis healthfulexer-
cise in the convenience and privacyof your home.
For your benefit, read this manual carefully before
you use the exercise cycle, If you have questions
after readingthis manual, call 1-80O-4-MY-HOME®
(1-800-469-4663). To help us assistyou, please note
the productmodel numberand serial number before
calling.The model numberis831.283120. The serial
numbercan be found on a decal attachedto the exer-
cise cycle(see the front cover ofthis manual).
Beforereadingfurther, please familiarizeyourselfwith
the partsthat are labeled in the drawingbelow.
HandgripPulse Sensor
Fan
Console
Water BottleHolder*
Handlebar
Seat FRONT
Adjustment Knob
Adjustment Knob
AdjustmentKnob
Pedal/Strap
-Wheel
REAR LevelingFoot
*No water bottleis included
RIGHT SIDE
4

ASSEMBLY
Assembly requires two persons. Place all parts ofthe exemisecycle in aclearedarea and remove the packing
matedals. Do not dispose ofthe packing materialsuntilassembly iscompleted.
Assembly requires the included tools and your own adjustable wrench _and Phillips screw-
driver _-.
Use the part drawingsbelow to identifythe small parts used in assembly.The number in parenthesis below
each drawing refersto the key number of the part,from the PART LIST on page 22. The secondnumber refers
to the quantity needed for assembly.Note: Some small parts may have been prs-attached. If a part is not in
the parts bag, check to see if it has been pre-attached.
Note: If a part is not in the parts bag, first checkto see if it has been pre-assembled. If a part is missing,
call toll-free 1-800-999-3756.
M8 Nylon MIO Black Nylon M8 Split M4 x16mm
Locknut (10)-6 Locknut (63)-4 Washer (70)-4 Screw (66)-6 M4 x 22mm
Screw (21)-2
M6 x 25.4mm Button
Screw (33)-1 M8 x 14mm Button
Screw (49)-1 M8x 22mm Button
Screw (74)-4
M10 x 112mm Carriage Bolt(65)-4
M8 x 39mm Button
Bolt(64)-2
5

1. Identifythe FrontStabilizer (2). While another person
liftsthe frontof the Frame (1), attachthe Front
Stabilizerto the Frame with two M10 x 112mm
Carriage Bolts(65) and two M10 Black Nylon Locknuts
(63). Make sure that the Front Stabilizer is turned
so the Wheels (30) are not touching the floor.
2. While another person liltsthe rear ofthe Frame (1),
attach the Rear Stabilizer (3) to the Frame with two
M10 x 112mm Carriage Bolts(65) and two M10 Black
Nylon Locknuts (63).
3. While another person holds the Upright(13) in the
positionshown, connectthe Upper Wire Harness (36)
to the LowerWire Harness (35). Carefully pull the
upper end of the Upper Wire Harness to remove
any slack from the Wire Harnesses; make sure that
the connectors do not catch on the indicated rod.
Turnthe indicatedAdjustmentKnob(28) counterclock-
wise two or three turnsto loosenit. Next, pullthe Knob,
insertthe Upright(13) intothe Frame (1), and then
release the Knob. Be careful to avoid pinching the
Wire Harnesses (35, 36). Move the Upright up and
down slightly until the pin on the Knob snaps into
one of the holes in the Upright. Then, turnthe Knob
clockwiseuntil it istight.
Tightenthe M6 x 25.4mm ButtonScrew (33) intothe
Frame (1) and into the slot in the sideofthe Upright(13).
Attach the Water Bottle Holder(9) to the Upright(13)
withtwo M4 x 22mm Screws (21).
3
30
65
2
63
63 3
65
Make sure the
wire harnesses
do not get
pinched and
9 damaged during
this step.
21
Rod
1
28

4. Slidethe two Handlebar Collars (7) ontothe Left
Handlebar (50). Insertthe Right Handlebar (51) into
the LeftHandlebar. Connect the Handlebar Collars, the
Left Handlebar, and the Right Handlebar with two M4 x
16mm Screws (66).
Attach the Handlebar Bracket (15) to the Left and
Right Handlebars (50, 51) with four M8 x 22mm Button
Screws (74).
Attach the Handlebar Bracket (15) to the Upright(13)
with two M8 x 39mm ButtonBolts(64), two M8 Nylon
Locknuts(10), and an M8 x 14mm ButtonScrew (49).
5. While another person holdsthe Console (16) inthe
positionshown, connectthe wire harness on the
Console tothe Upper Wire Harness (36). Insertthe
excess wire harness intothe Updght (13).
Attach the Console (16) to the Upright(13) with four
M4 x 16mm Screws (66). Be careful to avoid pinch-
ing the wire harnesses.
6. The Console (16) requiresfour "D" batteries(not
included);alkaline batteries are recommended. Pull
the battery drawer open. Insertfour batteriesintothe
battery drawer. Make sure that the batteries are ori-
ented as shown by the markings inside the battery
drawer. Closethe battery drawer. Note:When the bat-
teriesare installedcorrectly, the fanwillturnon for a
moment.
7. Turnthe indicatedAdjustmentKnob(28) counterclock-
wisetwo or three turnsto loosen it. Next, pullthe Knob,
insertthe Seat Post (5) intothe Frame (1), and then
release the Knob.Move the Seat Post up and down
slightly until the pin on the Knob snaps into one of
the holes in the Seat Post. Then, turnthe Knobclock-
wise untilitis tight.
4
5
6
7
66
51
66 Wire
Harness
1\
16
Batteries
Drawer
7

8. Attach the Seat (12) to the Seat Bracket (6) with four
M8 Nylon Locknuts(10) and four M8 SplitWashers
(70). Note: The Nylon Locknutsand the SplitWashers
may be pre-attached to the undersideof the Seat.
Tum the indicatedAdjustment Knob (28) counterclock-
wise two or three tums to loosenit. Next, pull the Knob,
slidethe Seat Bracket (6) intothe top ofthe Seat Post
(5), and then release the Knob.Move the Seat
Bracket forward and backward slightly until the pin
on the Knob snaps into one of the holes in the Seat
Bracket. Then, turnthe Knobclockwiseuntilit istight.
9. Identifythe LeftPedal (24), which ismarked with an
"L." Using an adjustablewrench, firmly tighten the
Left Pedal counterclockwiseintothe LeftCrank Arm
(42). "13ghtenthe Right Pedal (not shown)clockwise
intothe Right Crank Arm. Important: Tighten both
Pedals as firmly as possible. After using the exer-
cise cycle for one week, retighten the Pedals. For
best performance, the Pedals must be kept tight-
ened.
Adjustthe Left Pedal Strap (25) tothe desired position,
and press the end of the Pedal Strap onto the tab on
the LeftPedal (24). Adjustthe Right Pedal Strap (not
shown)in the same way.
9
Tab
12
42
24
10 _5
28
1O.Makesure that all parts are properly tightened before you use the exercise cycle. Note:After assemblyis
completed,some extraparts may be leftover.Place a mat beneath the exercisecycleto protectthefloor.
8

HOW TO OPERATE THE EXERCISE CYCLE
HOW TO ADJUST THE SEAT POST
For effectiveexer-
cise, the seat
shouldbe at the
proper height.As
you pedal, there
shouldbe a slight
bend in your knees Knob
when the pedals Post
are in the lowest
position.To adjust
the heightof the
seat, firstturnthe
indicatedknob counterclockwisetwoor three turnsto
loosen it(ifthe knobis not loosenedenough, it may
scratchthe seat post).Next, pullthe knob, slidethe
seat postto the desired height,and then release the
knob. Move the seat post up and down slightly until
the pin on the knob snaps into one of the holes in
the seat post. Then, turnthe knobclockwiseuntilitis
tight.
HOW TO ADJUST THE SEAT
The seat can be
adjustedtothe
positionthat isthe
mostcomfortable
for you. Before
adjusting the seat,
dismount the
exercise cycle; do
not adjust the
seat while you are
sitting on it. To
adjustthe seat, first
Seat
BrScketeat__
turn the indicated knob counterclockwisetwo or three
turnsto loosenit(ifthe knobis not loosenedenough, it
may scratchthe seat bracket). Next, pullthe knob,
slidethe seat tothe desired position,and then release
the knob. Move the seat bracket forward and back-
ward slightly until the pin on the knob snaps into
one of the holes in the seat bracket. Then, turnthe
knob clockwiseuntilitis tight.
HOW TO ADJUST THE UPRIGHT
The updghtcan be
adjustedto the
heightthat isthe
mostcomfortable for
you.To adjustthe
upright,firstturnthe
indicatedknob
counterclockwise
two or three turnsto
loosenit (ifthe knob Knob
is notloosened
enough, it may
scratchthe upright).
Next, pullthe knob,
slidethe uprightto
the desired height,
and then release
the knob. Move the upright up and down slightly
until the pin on the knob snaps into one of the
holes in the upright. Then, turnthe knobclockwise
untilitistight.
HOW TO ADJUST THE PEDAL STRAPS
To adjustthe pedal
straps,first pull the
ends ofthe straps
offthe tabs on the
pedals. Adjust the
strapsto the
desired position,
and press the ends
of the straps back
onto the tabs.
9

Display Buttons
Button
BuRons
FEATURES OF THE CONSOLE
The advanced console offersaselectionof features
designed to make yourworkoutsmore enjoyableand
effective. When the manual mode ofthe console is
selected, the resistanceofthe pedalscan be changed
with the touch ofa button.As you pedal, the console
will providecontinuousexercisefeedback. You can
even measure yourheart rate usingthe built-inhand-
grip pulse sensor.
The consolealso offersfour Smart programs. Each pro-
gram automaticallychangesthe resistanceofthe ped-
als and promptsyouto increaseordecrease your pace
as itguidesyou throughaneffectiveworkout.
In addition,the consolefeatures two Heart Rate pro-
grams that changethe resistanceofthe pedalsand
prompt you to vary yourpace to keep yourheart rate
near a target heart rate as you exercise.
The console alsofeatures iFIT.cominteractivetechnol-
ogy.Having iFIT.comtechnologyis likehavinga per-
sonaltrainer in yourhome. Usinga stereo audiocable
(available at electronicsstores),you can connectthe
exercise cycletoyour home stereo, portablestereo,
computer,or VCR and play specialiFIT.comCD and
video programs(iFIT.comCDs and videocassettesare
available separately), iFIT.comCD and videoprograms
automaticallycontrolthe resistanceof the pedalsand
promptyou to vary your pace as a personaltrainer
coaches you throughevery step of yourworkout.High-
energy musicprovidesadded motivation.To purchase
iFIT,com CDs and videocassettes, call toll-free 1-
800-735-0768.
Withthe exercise cycleconnected to yourcomputer,
you can also go to ourWeb siteat www.iFIT.comand
access programsdirectlyfrom the intemet. Explore
www.iFIT.com for more information.
To use the manual mode of the console, see page
11.To use a Smart program, see page 13. To use a
Heart Rate program, see page 14. To use an
iFIT.com CD or videocassette, sea page 18. To use
a program directly from our Web site, see page 19.
10
B
B
Turn on the console,
Note:The consolerequires four 1.5V "D" battedes
(see assembly step6 on page 7).
To turn on the console,pressthe On/Reset button
or begin pedaling. (See the drawing on page 10 to
identifythe On/Reset button.)
Select the manual mode.
Each time the consoleis
turned on, the manual
mode willbe selected. Ifa
programhas been select-
ed, select the manual
mode by pressingthe
Program button repeated-
ly untilthe letters RPM
appear inthe small display.
_1 Begin pedaling and change the resistance of
the pedals as desired.
As you pedal, change the resistanceof the ped-
als by pressing the + and - buttonsbelow the
large display.There are ten resistancelevels--
level 10 isthe mostchallenging.Note:After the
buttonsare pressed, itwilltake a few secondsfor
the resistanceto reachthe selectedsetting.
D Follow your progress with small display and
the large display.
The small display will
showyour pedaling pace,
in revolutionsper minute
(RPM). The indicatorbar
in the small displaywill
increaseor decrease in
lengthas you increaseor
decrease your pedaling
pace.
Indicator Bar
The upper sec-
tion of the
large display
will show the
distance you
have pedaled
and the numbers of calodesand fat caloriesyou
have burned (see FAT BURNING on page 21 for
an explanation of fat calories). The display will
change from one number to the next every few
seconds.If you usethe handgdp pulse sensor,
the display will also show yourheart rate (see
step 5 on page 12).
To view onlythe distance
you have pedaled or the
number of calodes or fat
calories you have burned,
press the upper button on
the left side of the large
display until only the word
DISTANCE, CALORIES, or
Upper Button
FATCALORIES appears in the upper sectionof
the large display.Make sure that the wordSCAN
does not appear. To again view the distanceyou
have pedaled and the numbers of calodesand
fat calories you have burned, press the upper
buttonuntilthe word SCAN reappears.
The centerof I // J.:*_l \\ I
the large display _!._ _8 ._!)
will show the
elapsed time and
your current pace
(pace is shownin
minutesper mile). The display willchange from
one number tothe otherevery few seconds.
Note: When a programisselected (exceptfor the
SelfSelect program), the displaywillshow the
time remainingin the programinsteadof the
elapsed time.
To view onlythe elapsed time or your pace, press
the canter button on the left side ofthe largedis-
play untilonlythe wordTIME or PACE appears.
Make sure that the word SCAN does not appear.
To view boththe elapsed time and yourpace,
press the center buttonuntiltheword SCAN
reappears.
The lower sec-
tion of the large
display willshow
your pedaling
speed and the
resistance level.
The displaywillchange from one number to the
otherevery few seconds.
To view onlyyourpedaling speed or the resis-
tance level, press the lower buttonon the left
side of the large display until only the word
SPEED or RESISTANCE appears. Make sure
that the word SCAN does not appear. Toview
both your pedaling speed and the resistance
level, press the lower button until the word SCAN
reappears.
11

To resetthe displays,pressthe On/Reset button.
Note: The con-
sole can show
speed and dis-
tance in either
miles or kilo-
meters. The let-
ters MPH or KM/H willappear inthe lower section
of the large display to show whichsystemof mea-
surementisselected.To changethe systemof
measurement, holddownthe On/Reset buttonfor
aboutsixseconds.Note: When the buttonis held
down,the fan willturnon for a moment.When the
batteriesare replaced,it may be necessaryto res-
electthe desiredsystemof measurement.
Measure your heart rate if desired.
If there are
thin sheets of
plastic on the
metal contacts
on the hand-
grips, peel off
the plastic. To
use the hand-
grip pulsesen-
sor,hold the handgripswith yourpalms resting
against the metal contacts.Avoid moving your
hands. When yourpulse isdetected, the heart-
shaped indicatorin the large displaywillflash
each time your heart beats. After a moment,two
dashes (- -) willappear and then your heart rate
willbe shown.
%
Forthe mostaccurate heart rate reading,continue
to holdthe handgripsfor about30 seconds.Note:
When you firsthold the handgdps,the largedis-
play willshowyour heart rate continuouslyfor 30
seconds.The display willthen show yourheart
rate along with otherfeedback modes.
mTurn on the fan if desired.
Toturn on the
fan at low speed,
pressthe fan
button.Toturn
on the fan at
high speed, Fan
pressthe fan Button
buttona second
time. Toturn off
thefan, press the fan buttona thirdtime.
Rotate the thumb wheel on the dght side of the
consoleto pivotthe fan to the desired angle.
B When you are finished exercising, the console
will automatically turn off.
Ifthe pedals are notmoved for afew seconds,
the displayswill pause and the time willflash in
the large display.
Ifthe pedalsare not moved and the console but-
tons are not pressedfor afew minutes,the con-
solewill turnoffto conserve the batteries.
12

Each Smart programwillautomatically changethe
resistanceof the pedalsand promptyou toincreaseor
decrease your paceas itguidesyou throughan effec-
tiveworkout. Programs 3 and 4 are weight losspro-
grams, program 5 is an aerobic program, and program
6 isa high-performanceinterval-trainingprogram.
Followthe steps belowto use a Smart program.
_11 Turn on the console.
See step 1 on page 11.
BSelect one of the Smart programs.
Each timethe console is
turned on, the manual
mode willbe selected.To
select a Smart program,
pressthe Program button
repeatedly untilthe num-
ber 3, 4, 5, or 6 appears in
the small display.
BBegin pedaling to start the program.
To start the program,simplybegin pedaling. Each
Smart programconsistsof 20 or 30 one-minute
periods. One resistancelevel and one target pace
are programmed for each period.(The same
resistancelevel and/or target pace may be pro-
grammed for twoor more consecutiveperiods.)
At the end ofeach period of the program, the
resistanceof the pedals willautomaticallychange
if a differentresistancelevel isprogrammedfor
the next period. Note: Ifthe resistancelevel istoo
high or too low, you can change it by pressingthe
+ and - buttons belowthe largedisplay.However,
when the current periodis completed,the resis-
tance of the pedals willautomaticallychangeifa
differentresistancelevel isprogrammedforthe
nextperiod.
The target pace
for the current
pedod winbe
shown bythe
arrowsin the
small display.To
pedal at the target
pace, simply
Indicator..q.__._lp_ \\ ,
Bar //f_ ,._) );_
Arrows_ _j'/"
increase or decrease yourpace untilthere is one
arrow pointingtoeach segment of the indicator
bar (see the drawingabove). Atthe end of each
period,the number of arrowswillchange if a dif-
ferent target pace is programmedfor the next
period.When the number ofarrows changes,
change yourpace untilthere is one arrow point-
ingto each segment of the indicatorbar.
Important: The target pace is intended only to
provide a goal. Your actual pace may be slow-
er than the target pace, especially during the
first few months of your exercise program.
Make sure to pedal at a pace that is comfort-
able for you.
Duringthe program,the center ofthe large dis-
play willshow the timeremaining in the program.
If you stop pedalingfor a few seconds,the dis-
playswill pause and the timewillflash. Ifyou
continuepedalingafterthe programis completed,
the displayswillcontinueto show exercise feed-
back.
B Follow your progress with the large display.
See step 4 on page 11.
l_l Measure your heart rate if desired.
See step 5 on page 12.
r_ Turn on the fan if desired.
See step 6 on page 12.
B When you are finished exercising, the console
will automatically turn off.
See step 7 on page 12.
13

Heart Rate program 1is designedto keep yourheart
rate between 65% and 85% of your maximum heart
rate duringyourworkout.(Your maximum heart rate is
estimated by subtractingyour age from 220. For
example, if you are 25 years old, your maximum heart
rate is 195 beats per minute.) Heart Rate program 2 is
designed to keep your heart rate near a target heart
ratethat you select.
Followthe steps below to use a Heart Rate program.
B Turn on the console.
See step 1 on page 11.
BSelect one of the Heart Rate programs.
Each time the console is
turned on, the manual
mode will be selected. To
select a Heart Rate pro-
gram, press the Program
buttonrepeatedly untilthe
number 1 or 2 appears in
the small display.
BEnter your age or a target heart rate.
If program 1 is selected, the wordAGE will
appear in the largedisplay and the currentage
settingwillflash. Ifyou have already entered your
age, press the Enter button.If you have not
enteredyour age, pressthe small + and - buttons
to enter yourage. Then, press the Enter button.
Once you have entered yourage, itwill be saved
in memory untilthe batteriesare replaced.
If program 2 is selected, the letters PLS (pulse)
willappear in the largedisplay and the current
target heart rate willflash. Ifyou do not wish to
changethe target heart rate, press the Enter but-
ton. If you wish to change the target heart rate,
pressthe small + and - buttons.Then, pressthe
Enter button.The target heart rate can be from 70
to 170 beats per minute.
BHold the handgrip pulse sensor.
Itis not necessaryto holdthe handgripscontinu-
ouslyduring aHeart Rate program; however,you
must holdthe handgripsfrequently for the program
D
tooperate properly.Each time you hold the
handgrips, keep your hands on the metal con-
tacts for at least 30 seconds. Note:When you
are not holdingthe handgrips,the lettersPLS will
appearin the largedisplayinsteadofyourheart
rate.
Begin pedaling to start the program.
To startthe program, simplybegin pedaling.
Program 1 consistsof 20 one-minute periods.
One resistancelevel and one target heart rate are
programmedfor each period. (The same resis-
tance level and/or target heart rate may be pro-
gremmedfor two or more consecutive periods.)
Program 2 issixtyminuteslong (you may choose
to use onlypart ofthe program).The same resis-
tance level and target heart rate are programmed
for the entireprogram.
If program 1 is selected, the resistanceofthe
pedalswill periodicallychange. (Note: If the resis-
tance level is too highor too low,you can change
it bypressingthe + and - buttonsbelowthe large
display.However, when the currentperiodis com-
pleted, the resistanceof the pedals may automati-
cally change.) If program 2 is selected, the
resistanceof the pedalswillnot change. Note:
Youcan changethe resistancelevel for the entire
programby pressingthe + and - buttonsbelow
the large displayifdesired.
During programs
1 and 2, the
arrowsin the
smalldisplaywill
helpyou to keep
your heart rate
near the current
target heart rate.
Indicat_ \\
Bar / (f_" _)f
Arrows -_w_J
I!
When you hold the handgrip pulse sensor,the
console willcompareyour heart rate to the cur-
renttarget heart rate. If yourheart rate istoo far
above or below thetarget heart rate, the number
of arrowsin the small display willchangeto
promptyou to increase or decrease yourpace.
When the numberof arrowschanges, change
yourpace untilthere isone arrow pointingto
each segment of the indicatorbar. Important:
The target pace is intended only to provide a
goal. Your actual pace may be slower than the
target pace, especially during the first few
months of your exercise program. Make sure
to pedal at a pace that is comfortable for you.
14

Note: If you stop pedaling for a few seconds, the
program will end. To use the program again, rese-
lect itand start itat the beginning.
r_ Follow your progress with the large display.
See step 4 on page 11.
B Turn on the fan if desired.
See step 6 on page 12.
B When you are finished exercising, the console
will automatically turn off.
See step 7 on page 12.
To use iFIT.com CDs, the exercisecyclemustbe con-
nectedto yourportableCD player,portablestereo,home
stereo,or computerwith CD player.See pages 15 to 17
for connecting instructions.To use iFIT.¢orovideocas-
settee, the exercisecyclemustbe connectedtoyour
VCR. See page 17 for connecting instructions.To use
iFt'r.coroprograms directly from our Web site, the
exercisecyclemustbeconnectedto yourcomputer. See
page 17for connecting instructions.
HOW TO CONNECT YOUR PORTABLE CD PLAYER
Note: If your CD player has separate LINE OUT and
PHONES jacks, see instruction A below. If your CD
player has only one jack, see instruction B.
A. Plug one end of a 1/8"to 1/8" stereoaudio cable
(available at electronicsstores) intothejack
beneaththe console. Plugthe other end ofthe
cable intothe LINE OUT jack on your CD player.
Plugyour headphones intothe PHONES jack.
..... \\ _ , UNE_@i. _,Es @i
i\\ [- ".........;.............
;_ '_ Audio_] Head-
i Oeb,eVphenes
B. Plugone end ofa 1/8"to 1/8" stereo audiocable
(available at electronicsstores) intothe jack
beneath the console.Plug the otherend ofthe
cable intoa 1/8"Y-adapter (available at electronics
stores).Plug the Y-adapter intothe PHONES jack
on yourCD player. Plug yourheadphones intothe
other side ofthe Y-adapter.
....\\ _ L!.'.._.?.._,
_" ("_ Audio Y-adapter I_
cab,e
15

HOW TO CONNECT YOUR PORTABLE STEREO
Note: If your stereo has an RCA-type AUDIO OUT
jack, see instruction A below. If your stereo has a
1/8" LINE OUT jack, see instruction B. If your
stereo has only a PHONES jack, see instruction C.
A. Plug one end of a 1/8"to RCA stereo audio cable
(available at electronicsstores) into the jack
beneath the console.Plugthe otherend of the
cable intotheAUDIO OUT jack on yourstereo.
! ,i•
..............
AudioCable
HOW TO CONNECT YOUR HOME STEREO
Note: If your stereo has an unused LINE OUT jack,
see instruction A below• Ifthe LINE OUT jack is
being used, see instruction B.
A. Plugone end of a 1/8"to RCA stereo audio cable
(available at electronicsstores) intothe jack
beneaththe console. Plugthe other end of the
cable intothe LINE OUT jack on yourstereo.
AudioCable
B. Refer to the drawing above. Plug one end of a 1/8"
to 1/8" stereo audio cable (available at electronics
stores) into the jack beneath the console. Plug the
other end of the cable into the LINE OUT jack on
your stereo.
C. Plug one end ofa 1/8"to I/8" stereo audio cable
(available at electronicsstores) into thejack
beneath the console. Plug the other end of the
cable into a1/8"Y-adapter (available at electronics
stores). Plug the Y-adapter into the PHONES jack
on your stereo. Plug your headphones into the
other side of the Y-adapter.
O r • •
:_/ _P"_ Audio Y-adapter--_
_ Cable /
...... _._, _-_=_
..... Headphones_
B. Plug one end ofa 1/8"to RCAstereo audiocable
(availableat electronics stores)into thejack beneath
theconsole.Plugthe otherend of thecable intoan
RCAY-adapter(available at electronicsstores).
Next, removethe wire thatis currentlypluggedinto
the LINE OUT jack on yourstereo and plugthewire
intotheunused side ofthe Y-adapter.Plugthe Y-
adapter intothe LINE OUT jack on yourstereo.
Audio
Cable
c......... .
_e----'--,
RCA
Y-adapter
Wire removed from--_-[::_-'
LINE OUT jack
16

NOW TO CONNECT YOUR COMPUTER
Note: If your computer has a 118"LINE OUT jack,
see instruction A. If your computer has only a
PHONES jack, see instruction B.
A. Plug one end of a 1/8"to 1/8" stereo audio cable
(available at electronicsstores) intothe jack
beneath the console.Plugthe otherand of the
cable intothe LINE OUT jack on yourcomputer.
: 9 !
Audio
Cable
B. Plugone end of a 1/8" to 1/8"stereo audio cable
(available at electronicsstores) into thejack
beneath the console.Plug the otherend of the
cable intoa 1/8"Y-adapter (available at electronics
stores). Plugthe Y-adapter intothe PHONES jack
on your computer.Plug yourheadphones or speak-
ers intothe other side of the Y-adapter.
...........i
•"- 1/8"
Audio Cable "= Y-adapter
..... -==_=_ _13==-
Headphones/Speakem_ -_
HOW TO CONNECT YOUR VCR
Note: If your VCR has an unused AUDIO OUT jack,
see instruction A below. If the AUDIO OUT jack is
being used, see instruction B. If you have a TV
with a built-in VCR, see instruction B. If your VCR
is connected to your home stereo, see HOW TO
CONNECT YOUR HOME STEREO on page 18.
A. Plug one end of a 1/8"to RCA stereo audio cable
(available at electronicsstores) intothe jack
beneaththe console. Plugthe other end of the
cable intotheAUDIO OUT jack on your VCR.
A
:\\
Audio Cable
B. Plugone end ofa 1/8"to RCA stereo audio cable
(available at electronicsstores)into the jack
beneath the console.Plugthe otherend ofthe
cable into an RCA Y-adapter(available at electron-
icsstores). Next, remove thewire that iscurrently
plugged intothe AUDIO OUT jack on your VCR
and plugthe wire intothe unused side ofthe Y-
adapter. Plug the Y-adapter intotheAUDIO OUT
jack on yourVCR.
B
_:-_-----.-,
i ___ Y-adapter _
A;'dio_W_W._e_o'm _J
Cable AUDIO OUT jack
17

To use iFIT.com CDs or videocassettes,the exercise
cycle mustbe connectedto yourportable CD player,
portablestereo, home stereo, computerwith CD play-
er, or VCR. See HOW TO CONNECT YOUR CD
PLAYER, VCR, OR COMPUTER on page 15. To
purchase iFIT.com CDs and videocassettes, call
toll-free 1-800-735-0768.
Followthe stepsbelow to use an iFIT.comCD or
video program.
Turn on the console.
See step 1 on page 11.
B Select the iFIT.com mode.
Each time the console is
turned on,the manual
mode will be selected. To
selectthe iFIT.com mode,
press the iFIT.combutton.
The indicatornear the but-
ton willlight end the letters
IF will appear in the small
display.
Insert the iFIT.com CD or videocassette.
Ifyou are usingan iFIT.comCD, insertthe CD
intoyour CD player. Ifyou are usingan iFIT.com
videocassette, insertthe videocassetteintoyour
VCR.
L_J Press the play button on your CD player or
VCR.
A moment afterthe play buttonis pressed, your
personal trainer willbegin guidingyou through
yourworkout.Simplyfollow yourpersonaltrainer's
instructions.
The programwillfunctioninalmostthe same way
as a Smart program(see step3 on page 13).
However,an electronic=chirping"soundwillalert
you when the resistance leveland/orthetarget
pace isabouttochange.
Note: If the resistance of the pedals and/or the
target pace does not change when a "chirp" is
heard:
•Make sure that the indicator near the iFIT.com
button is lit.
•Adjust the volume of your CD player or VCR.
Ifthe volume is too high or too low,the con-
sole may not detect the program signals.
•Make sure that the audio cable is properly
connected and that it isfully plugged in,
[]Follow your progress with the large display.
See step 4 on page 11.
r_ Measure your heart rate if desired.
See step5 on page 12.
B Turn on the fan if desired.
See step 6 on page 12.
1[_1 When you are finished exercising, the console
will automatically turn off.
See step 7 on page 12.
18

L_J Start your Web browser, if necessary, and go
to our Web site at www.iFIT.com.
Our Web siteat www.iFIT.comallowsyou to play
iFIT.com programsdirectlyfrom the intemet. To use
programsfrom ourWeb site, the exercise cyclemust
be connected to your computer.See HOW TO CON-
NECT YOUR COMPUTER on page 17. In addition,
you must have an intemet connectionand an intemet
service provider.A listof specificsystem requirements
will be found on ourWeb site.
Follow the steps below to use a programfrom our
Web site.
BTurn on the console.
See step 1 on page 11.
B Select the iFIT.com mode.
Each time the console is
turned on,the manual
mode willbe selected.To
selectthe iFIT.com mode,
press the iFIT.combutton.
The indicatornear the but-
ton will lightand the letters
IF willappear inthe small
display.
l_'._ Follow the desired links on our Web site to
select a program.
r_ Follow the on-line instructions to start the
program.
When you start the program, an on-screen count-
downwillbegin.
B Return to the exercise cycle and begin
pedaling.
When the on-screen countdown ends,the pro-
gram willbegin.The programwillfunction in
almostthe same way as a Smart program(see
step 3 on page 13). However,an electronic"chirp-
ing"soundwillalertyou when the resistance level
and/orthe target pace isabouttochange.
1_!_Go to your computer and start an intsmet con-
nection.
Follow your progress with the large display.
See step 4 on page 11.
Measure your heart rate if desired.
See step 5 on page 12.
_r_VVhen you are finished exercising, the console
will automatically turn off.
See step 7 on page 12.
19

MAINTENANCE AND TROUBLESHOOTING
Inspectand tightenall parts ofthe exercise cyclereg-
ularly.Replace any worn parts immediately.
To clean the exercise cycle, use a damp clothand a
small amount of mildsoap. Important: To avoid
damage to the console, keep liquids away from
the console and keep the console out of direct
sunlight.
BATTERY REPLACEMENT
Ifthe console display becomes dim, the batteries
shouldbe replaced; most console problemsare the
resultof low batteries. Refer toassembly step 6 on
page 7 for replacement instructions.
HOW TO LEVEL THE EXERCISE CYCLE
After the exer-
cise cycle has
been moved to
the location
where itwillbe
used, make sure
that bothends of
frontstabilizer Leveling
are touchingthe Foot
floor. If the exer-
cise cycle rocks
slightlyduring use, turn one or bothof the leveling
feet underthe front stabilizeruntilthe rockingmotion
iseliminated.
HANDGRIP PULSE SENSOR TROUBLESHOOTING
• Avoid movingyour handswhile usingthe handgrip
pulse sensor. Excessivemovement may interfere
with heart rate readings.
•Do not holdthe metal contactstoo tightly;doingso
may interferewith heart rate readings.
•For the mostaccurate heart rate reading, holdthe
metal contactsfor about 30 seconds.
• For optimal performance of the handgrippulsesen-
sor,keep the metal contacts clean. The contacts
can be cleaned with a soft cloth; never use alcohol,
abrasives, or chemicals.
HOW TO MOVE THE EXERCISE CYCLE
To move the exercise cycle, stand in front of the exer-
cise cycle, holdthe handlebars,and place one foot on
the frontstabilizer.Pullthe handlebars untilthe exer-
cise cyclecan be moved on the front wheels.
Carefullymove the exercise cycleto the desired loca-
tion and then lower it.
Handlebars_
Place
Foot
Here
20
This manual suits for next models
1
Table of contents
Other Sears Exercise Bike manuals

Sears
Sears FREE SPIRIT C249 30045 0 User manual

Sears
Sears PRO-FORM SR 20 User manual

Sears
Sears 831.287602 User manual

Sears
Sears C249 30101 0 16216802 User manual

Sears
Sears PRO-FORM CrossTrainer 56 User manual

Sears
Sears Lifestyler 142.288040 User manual

Sears
Sears Free Spirit User manual

Sears
Sears 831.288265 User manual