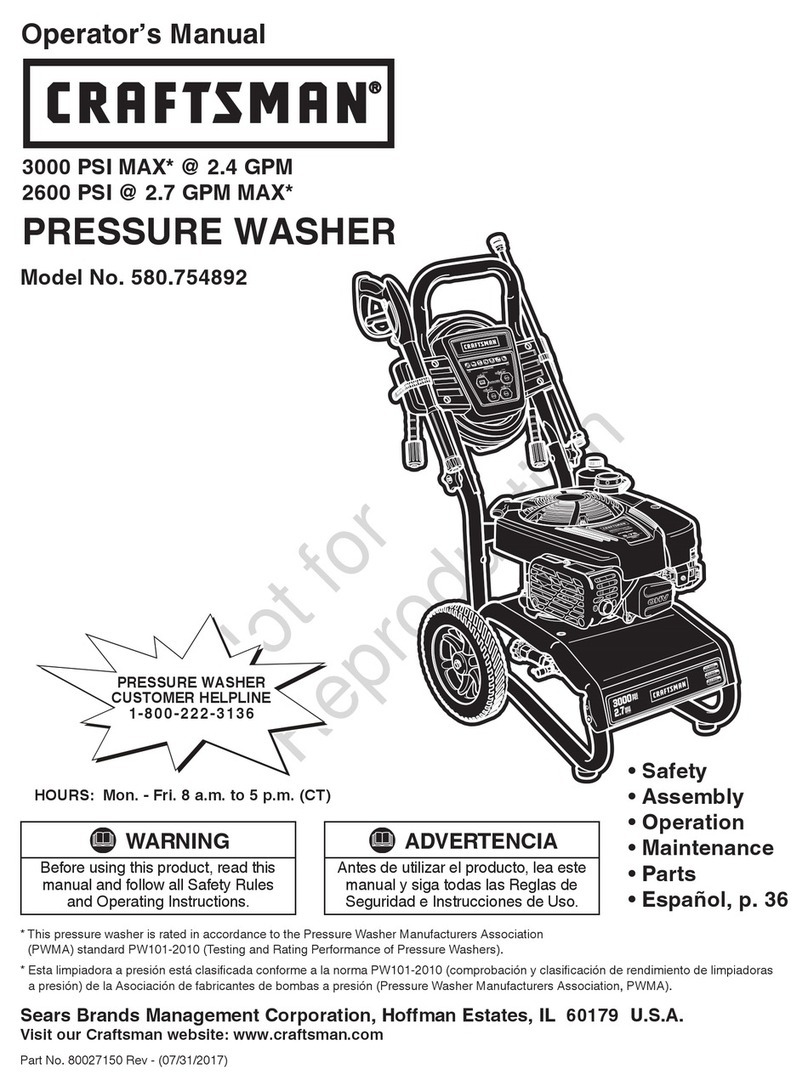
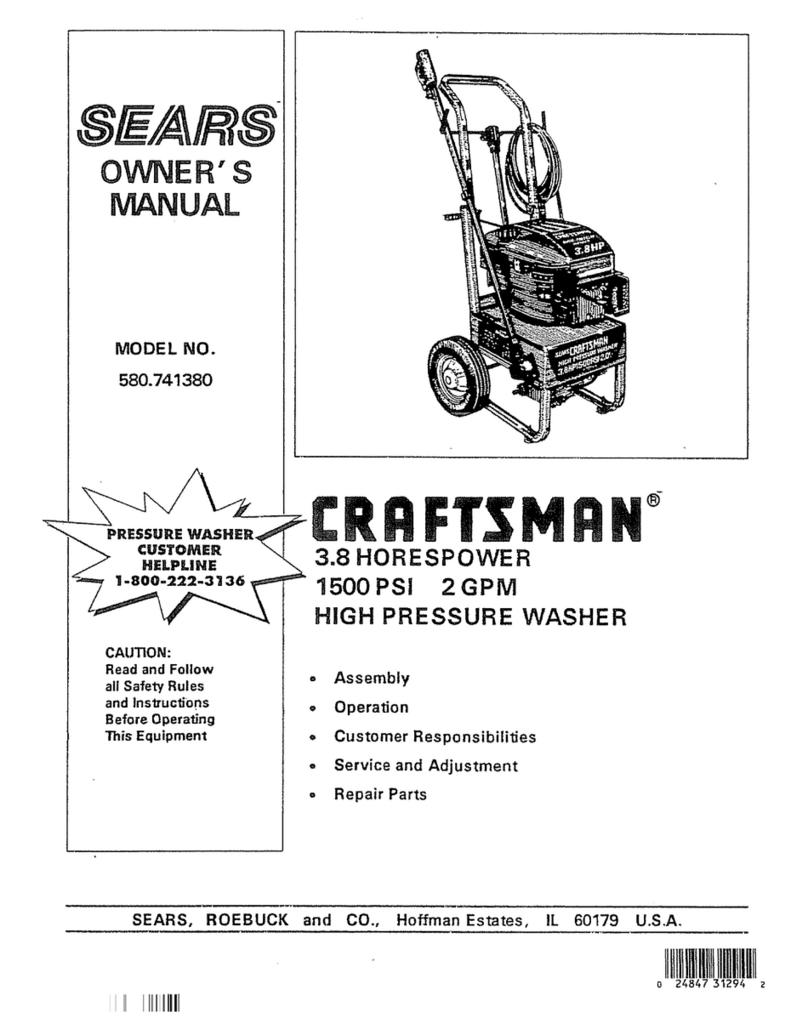
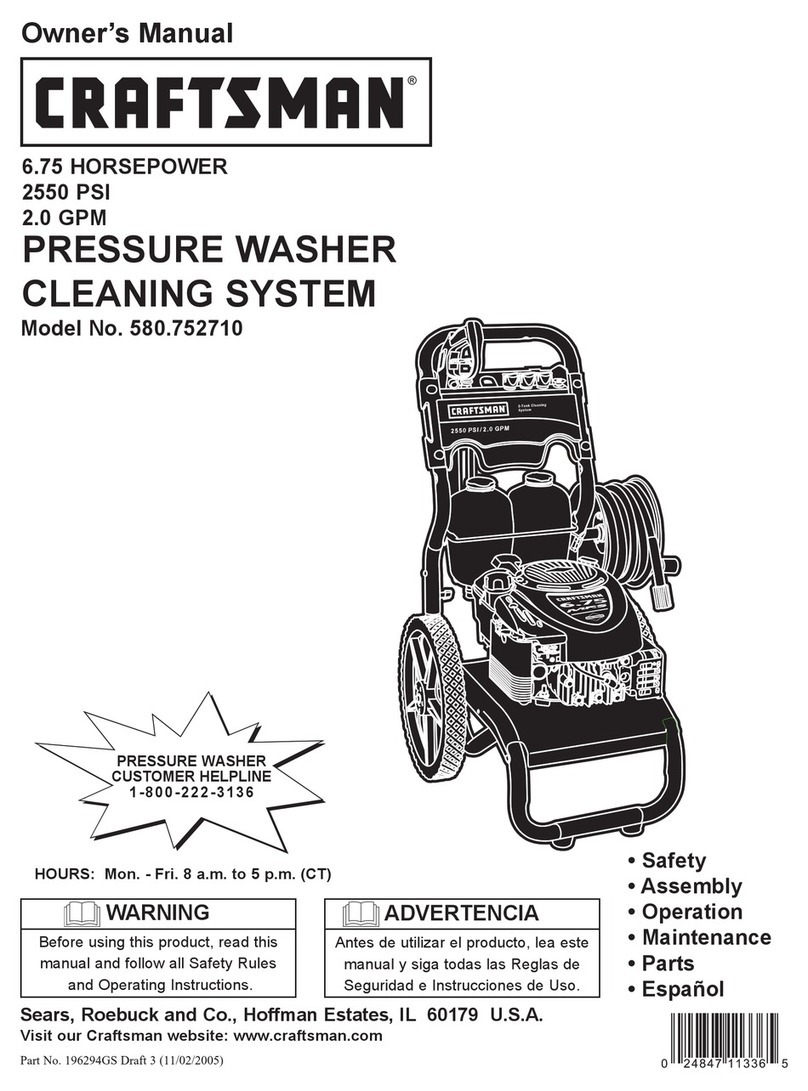
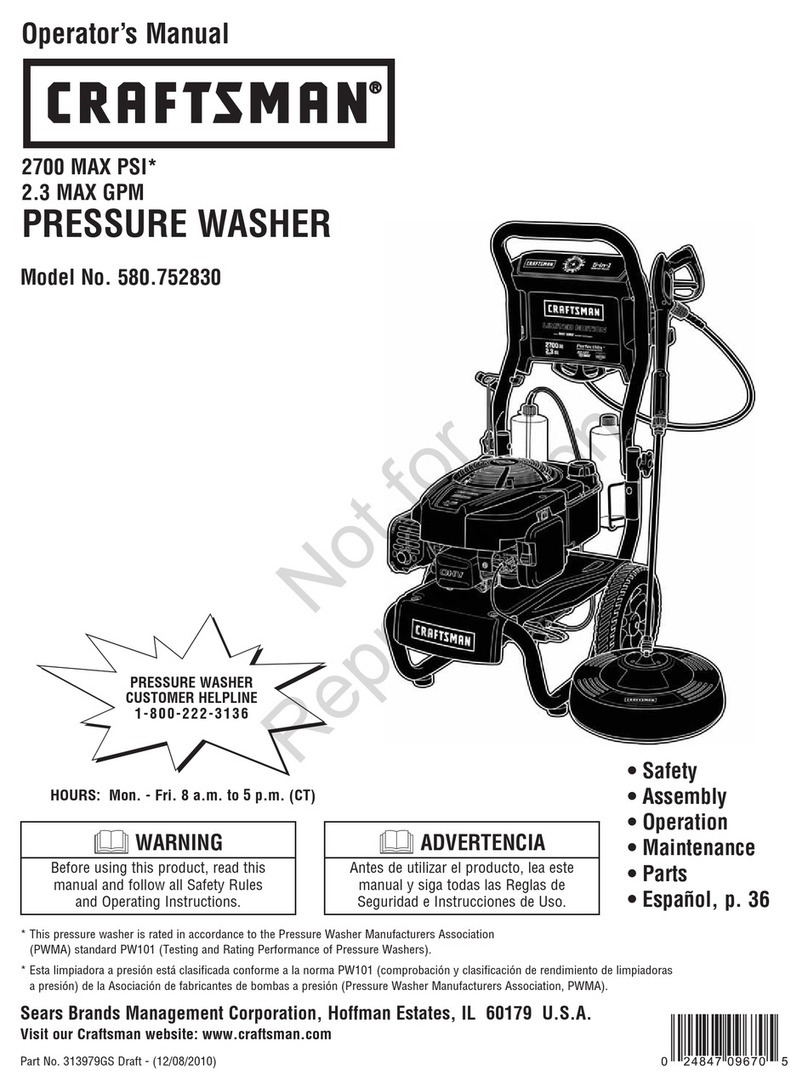
Sears CRAFTSMAN 580.751410 User manual

&EAIRI&
OWNER
’
S
MANUAL
MODEL
NO.
580.751410
PRESSURE
WASHER
CUSTOMER
HELPLINE
1-800-222-3136
HOURS:
Mon.- ri.
8
a.m.
to
5
p.m.
(CST)
CRA TSMAN
1200
PSI
AT
1.6
GPM
ELECTRIC
HIGH
PRESSURE
WASHER
DOUBLE
INSULATED
□
•
Assembly
•
Operation
CAUTION:
Read
and
ollow
all
Safety
Rules
and
Instructions
Before
Operating
This
Equipment
Customer
Responsibilities
Service
and
Adjustment
Repair
Parts
SEARS,
ROEBUCK
and
CO.,
Hoffman
Estates,
IL
60179
U.S.A.
Part
No.
97992
Revision
0
(3/7/96)

IMPORTANT
SA ETY
INSTRUCTIONS
Know
how
to
stop
the
product
and
bleed
the
pressure
quickly.
Be
thoroughly
familiar
with
controls.
Stay
alert.
Watch
what
you
are
doing.
Do
not
operate
the
product
when
fatigued
or
under
the
influence
of
alcohol
or
drugs.
Keep
operating
area
clear
of
all
persons.
A
WARNING
RISK
O
ELECTROCUTION
A
WARNING
Risk
of
injury
or
injection
to
persons
-
Do
not
discharge
stream
at
persons.
•
Save
these
instructions
Locate
this
pressure
washer
in
areas
away
from
combustible
materials,
combustible
fumes
or
dust.
Some
chemicals
or
detergents
may
be
harmful
if
inhaled
or
ingested,
causing
se ere
nausea,
fainting
or
poisoning.
The
harmful
elements
may
cause
property
damage
or
se ere
injury.
Do
not
allow
CHILDREN
to
operate
the
Pressure
Washer
at
any
time.
PREPARATION:
•
Before
starting
the
Pressure
Washer
in
cold
weather,
check
all
parts
of
the
equipment
and
be
sure
ice
has
not
formed
there.
•
Units
with
broken
or
missing
parts,
or
without
protecti e
housing
or
co ers
should
NEVER
be
operated.
OPERATION:
A
WARNING
Do
not
spray
flammable
liquids.
•
Ne er
aim
the
gun
at
people,
animals
or
plants.
•
For
household
use.
For
indoor
or
outdoor
use.
High
pressure
hose
can
de elop
leaks
from
wear,
kinking,
abuse,
etc.
Water
spraying
from
a
leak
is
capable
of
injecting
material
into
skin.
Do
not
point
the
pressure
washer
spray
at
people
or
animals.
Do
not
o erreach
or
stand
on
unstable
support.
Keep
good
footing
and
balance
at
all
times.
Follow
the
maintenance
instructions
specified
in
the
manual.
This
product
shall
only
be
connected
to
a
power
supply
recep
tacle
protected
by
a
Ground
Fault
Circuit
Interrupter
(GFCI).
This
is
done
to
comply
with
National
Electrical
Code
(NFPA
70)
and
to
pro ide
additional
protection
from
risk
of
electrical
shock.
Sa e
these
instructions.
TRAINING:
Inspect
cord
before
e ery
use.
Do
not
use
if
cord
is
damaged.
Keep
all
connections
dry
and
off
the
ground.
Do
not
touch
plug
with
wet
hands.
Double-insulated
—
When
ser icing,
use
only
identical
replace
ment
parts.
This
product
shall
only
be
connected
to
a
power
supply
recep
tacle
protected
by
a
Ground
Fault
Circuit
Interrupter
(GFCI).
Read
instruction
manual
before
using.
A
WARNING
When
using
this
product,
basic
precautions
should
always
be
followed,
including
the
following:
•
Read
all
instructions
before
using
the
product.
A
WARNING
To
reduce
the
risk
of
Injury,
close
supervision
Is
necessary
when
product
is
used
near
children,
o
Operate
and
store
this
unit
on
a
stable
surface.
Inspect
hose
each
time
before
using
it.
Check
all
hoses
for
cuts,
leaks,
abrasions
or
bulging
of
co er,
or
damage
or
mo ement
of
couplings.
If
any
of
these
conditions
exist,
replace
hose
imme
diately.
Ne er
repair
high
pressure
hose.
Replace
it
with
another
hose
that
meets
minimum
pressure
rating
of
your
pressure
washer.
Store
in
a
dean,
dry
area.
Ideally,
the
unit
should
be
stored
in
a
frost-free
room.
SERVICING
O
A
DOUBLE-INSULATED
PRODUCT
In
a
double-insulated
product,
two
systems
of
insulation
are
pro ided
instead
of
grounding.
No
means
of
grounding
is
pro ided
on
a
double-insulated
product,
nor
should
a
means
for
grounding
be
added.
Ser icing
a
double-insulated
product
requires
extreme
care
and
knowledge
of
the
system
and
should
be
done
only
by
qualified
ser ice
personnel.
Replacement
parts
for
a
double-insulated
product
must
be
identical
to
the
parts
they
replace,
use
only
genuine
replacement
paijs.
A
double-insulated
product
is
marked
with
the
words
“
DOUBLE
INSULATION
”
or
“
DOUBLE
INSULATED
”
.
The
symbol
may
also
be
marked
on
the
product.
EXTENSION
CORDS
Use
only
extension
cords
that
are
intended
for
outside
use.
These
extension
cords
are
identified
by
a
marking
“
ACCEPTABLE
FOR
USE
WITH
OUTDOOR
APPLIANCES;
STORE
INDOORS
WHILE
NOT
IN
USE.
”
Use
only
extension
cords
ha ing
an
electrical
rating
not
less
than
the
rating
of
the
product.
Do
not
use
damaged
extension
cords.
Examine
extension
cord
before
using
and
replace
if
damaged.
Do
not
abuse
extension
cord
and
do
not
yank
on
any
cord
to
disconnect
it.
Keep
cord
away
from
heat
and
sharp
edges.
Always
disconnect
the
extension
cord
from
the
receptacle
before
disconnecting
the
pressure
washer
from
the
extension
cord.
High
pressure
stream
of
fluid
that
this
equipment
can
produce
can
pierce
skin
and
its
underlying
tissues,
leading
to
serious
injury
and
possible
amputation.
High
pressure
spray
can
cause
paint
chips
or
other
particles
to
become
airborne
and
fly
at
high
speeds.
Always
wear
eye
protection
when
you
use
this
equipment
or
when
you
are
in
icinity
where
the
equipment
is
in
use.
Operate
the
pressure
at
no
more
than
the
PSI
fluid
pressure
rated
for
your
pressure
washer.
Ne er
mo e
the
machine
by
pulling
on
high
pressure
hose.
Use
the
handle
pro ided
on
the
top
of
the
unit.
Use
a
respirator
or
mask
whene er
there
is
a
chance
that
apors
may
be
inhaled.
Read
all
instructions
with
the
mask
so
you
are
certain
the
mask
will
pro ide
the
necessary
protection
against
inhaling
harmful
apors.
High
pressure
spray
may
damage
fragile
items
including
glass.
Do
not
point
spray
gun
at
glass
when
in
the
high
pressure
mode.
Keep
the
hose
connected
to
machine
or
the
spray
gun
while
the
system
is
pressurized.
Disconnecting
the
hose
while
the
unit
is
pressurized
is
dangerous.
Hold
the
spray
gun
firmly
in
your
hand
before
you
start
the
unit.
Failure
to
do
so
could
result
in
an
injury
from
a
whipping
spray
gun.
Do
not
lea e
the
spray
gun
unattended
while
the
machine
is
running.
Cleaning
area
should
ha e
adequate
slopes
and
drainage
to
reduce
possibility
of
a
fall
due
to
slippery
surfaces.
Keep
water
spray
away
from
electric
wiring
or
fatal
electric
shock
may
result.
Do
not
by-pass
any
safety
de ice
on
this
machine.
Do
not
lea e
gun
in
closed
position
for
more
than
5
minutes
with
pressure
wasner
running.
This
could
damage
pump.
MAINTENANCE
AND
STORAGE:
A
LOOK
OR
THIS
SYMBOL
TO
POINT
OUT
IMPORTANT
SA ETY
PRECAUTIONS.
IT
MEANS
“
ATTENTION!!!
BECOME
ALERT!!!
YOUR
SA ETY
IS
INVOLVED.
”
2

CONGRATULATIONS
on
your
purchase
of
a
Sears
Crafts
man
high
pressure
washer.
It
has
been
designed,
engi
neered
and
manufactured
to
gi e
you
the
best
possible
dependability
and
performance.
Should
you
experience
any
problem
you
cannot
easily
remedy,
please
contact
your
nearest
Sears
Ser ice
Cen-
ter/Department
or
call
the
1
-800
number
listed
on
the
front
of
this
manual.
We
ha e
competent,
well-trained
techni
cians
and
the
proper
tools
to
ser ice
or
repair
this
unit.
Please
read
and
retain
this
manual.
The
instructions
will
enable
you
to
assemble
and
maintain
your
high
pressure
washer
properly.
Always
obser e
the
“
SAFETY
RULES.
”
MODEL
NUMBER
580.751410
SERIAL
NUMBER
DATE
OF
PU
RCHASE
THE
MODEL
AND
SERIAL
NUMBERS
WILL
BE
FOUND
ON
A
DECAL
ATTACHED
TO
THE
PRES
SURE
WASHER.
YOU
SHOULD
RECORD
BOTH
SERIAL
NUMBER
AND
DATE
OF
PURCHASE
AND
KEEP
IN
A
SAFE
PLACE
FOR
FUTURE
REFERENCE.
PRODUCT
SPECI ICATIONS
Pressure
Washer
Specifications
MAINTENANCE
AGREEMENT
OUTLET
PRESSURE
Adjustable
to
1200
psi
FLOW
RATE
1.6
gpm
DETERGENT
MIX
Use
undiluted
detergent
DETERGENT
RATIO,
fixed
17:1
WATER
SUPPLY
TEMPERATURE
Not
to
exceed
104°F
MOTOR
Brush
type
(uni ersal)
RATED
VOLTAGE
120
olts
CURRENT
14
amperes
A
Sears
Maintenance
Agreement
is
a ailable
on
this
prod
uct.
Contact
your
nearest
Sears
store
for
details.
CUSTOMER
RESPONSIBILITIES
•
Read
and
obser e
the
safety
rules.
•
Follow
regular
schedule
in
maintaining,
caring
for
and
using
your
high
pressure
washer.
•
Follow
the
instructions
under
“
Customer
Responsibili
ties
”
and
“
Storage
”
sections
of
this
Owner
’
s
Manual.
ULL
ONE
YEAR
WARRANTY
ON
CRA TSMAN
ELECTRIC
PRESSURE
WASHER
For
one
year
from
the
date
of
purchase,
when
this
Craftsman
High
Pressure
Washer
is
maintained
and
operated
according
to
the
instructions
in
the
owner
’
s
manual,
Sears
will
repair,
free
of
charge,
any
defect
in
material
and
workmanship.
If
this
washer
is
used
for
commercial
purposes,
this
warranty
applies
for
only
90
days
from
the
date
of
purchase.
If
this
high
pressure
washer
is
used
for
rental
purposes,
this
warranty
applies
for
only
30
days
after
date
of
purchase.
This
warranty
does
not
co er:
•
Repairs
necessary
because
of
operator
abuse
or
negligence,
including
damage
resulting
from
no
water
being
supplied
to
pump
or
failure
to
maintain
the
equipment
according
to
the
instructions
contained
in
the
owner
’
s
manual.
WARRANTY
SERVICE
IS
AVAILABLE
BY
RETURNING
THE
HIGH
PRESSURE
WASHER
TO
THE
NEAREST
SEARS
SERVICE
CENTER/DEPARTMENT
THROUGHOUT
THE
UNITED
STATES.
This
warranty
gi es
you
specific
legal
rights
and
you
may
also
ha e
other
rights,
which
ary
from
state
to
state.
SEARS,
ROEBUCK
AND
CO.,
D/817
WA,
Hoffman
Estates,
IL
60179
3

TABLE
O
CONTENTS
SAFETY
RULES
...................................................................
2
PRODUCT
SPECIFICATIONS
...........................................
3
CONTENTS
OF
HARDWARE
PACK
.................................
5
KNOW
YOUR
HIGH
PRESSURE
WASHER
....................
6
ASSEMBLY
.........................................................................
7-8
OPERATION
..................................................................
9
—
11
CUSTOMER
RESPONSIBILITIES
.............................
11-12
STORAGE
............................................................................
12
TROUBLESHOOTING
........................................................
13
REPLACEMENT
PARTS
..............................................
14-17
HOWTO
ORDER
PARTS
...................................
backpage
INDEX
-A-
-G
-
-R
-
Assembly
Checklist
..........................................
8
Remo ing
from
Carton
...................
7
SetUp
........................................
7,8
—
B
—
Before
starting
........................
9
Before
each
use
....................
10
-C
-
Cleaning
Tips
........................
10
Customer
Responsibilities
.
3,10
Check
washer
components
....
10
—
E
—
Electrical
supply
....................
10
Extension
cords
....................
10
Extensions,
wand
....................
9
Gun
and
Wand
Assembly
..
6-8
-H
-
Hardware
Pack
..........................
5
High
Pressure
Hose
...............
6,
8
-M-
Maintenance
Agreement
.........3
-N
-
Nozzle,
adjustable
......................
9
-O
-
Operation
Detergent
Application
...............
10
Know
Your
Pressure
Washer
...
8
Stopping
........................................
8
To
Turn
on
Washer
........................
9
Order
Parts
.............
backpage
Replacement
Parts
...........
13-17
-S
-
Safety
Rules
.............................
2
Siphoning
.................................
10
Specifications
...........................
3
Storage
.....................................
11
-T
-
Troubleshooting
......................
13
—
u
—
Utility
brush
...............................
9
-W-
Warranty
....................................
3
ACCESSORIES
AND
ATTACHMENTS
These
accessories
and
attachments
were
a ailable
when
the
high
pressure
washer
was
purchased.
They
are
also
a ailable
at
most
Sears
retail
outlets
and
ser ice
centers.
Most
Sears
stores
can
order
these
items
for
you
when
you
pro ide
the
model
number
of
your
high
pressure
washer.
Some
of
these
accessories
may
not
apply
to
your
pressure
washer.
4
CONTENTS
O
HARDWARE
PACK
Parts
Packed
Separately
in
Carton
Qdick-Connect
Guide
Handle
Product
Introduction
Videotape
Nozz
e
Cleaner
Kit
(2)
Handle
Extensions
fl
—
/
■-)
o
-y
------------
Parts
Packed
in
Hardware
Pack
Detergent
Holder
(4)
Phillips
Head
Self-drilling
Screws
(2)
Flat
Head
Machine
Screws
®D
(2)
Spacers
Vibration
Mount
(2)
Washers
and
(2)
Nuts
5

KNOW
YOUR
HIGH
PRESSURE
WASHER
READ
THIS
OWNER'S
MANUAL
AND
SAFETY
RULES
BEFORE
OPERATING
YOUR
HIGH
PRESSURE
WASHER.
Compare
the
illustrations
Jth
your
high
pressure
washer
to
familiarize
yourself
uth
the
locations
of
arious
controls
and
adjustments.
Sa e
this
manual
for
future
reference.
POWER
CORD
DETERGENT
HOLDER
UTILITY
BRUSH
BRUSH
HOLDER
HIGH
PRESSURE
HOSE
HIGH
PRESSURE
OUTLET
WHEEL
KIT
WATER
INLET
(see
also
Fig.
"A")
BACK
VIEW
OF
GUIDE
HANDLE
TURBO
NOZZLE
EXTENSION
ADJUSTABLE
NOZZLE
EXTENSION
DETERGENT
PICKUP
TUBE
AND
FILTER
SPRAY
GUN
GUN
AND
WAND
ASSEMBLY
—
Controls
the
application
of
water
onto
cleaning
surface
with
trigger
de ice.
Includes
safety
latch.
UTILITY
BRUSH
—
Used
to
apply
detergent
and
scrub
surface.
DETERGENT
PICKUP
TUBE
AND
FILTER
—
Mixes
water
and
detergent
in
outlet
water
flow.
HIGH
PRESSURE
OUTLET
—
Connection
for
high
pres
sure
hose.
QUICK-CONNECT
—
Easy
connection
for
intake
water
supply.
6

ASSEMBLY
Read
these
instructions
and
Operator's
Manual
in
its
en
tirety
before
you
attempt
to
assemble
or
operate
your
new
high
pressure
washer.
Your
high
pressure
washer
has,
for
the
most
part,
been
assembled
at
the
factory,
except
those
parts
left
unassembled.
Before
you
can
operate
your
new
high
pressure
washer,
install
the
wheel
kit
then
you
must
properly
connect
the
high
pressure
hose.
IF
YOU
HAVE
ANY
PROBLEMS
WITH
THE
ASSEMBLY
OF
YOUR
PRESSURE
WASHER,
PLEASE
CALL
THE
PRESSURE
WASHER
HELPLINE
AT
1-800-222-3136.
TO
REMOVE
PRESSURE
WASHER
ROM
CARTON
•
Remo e
gun
and
wand
assembly
from
cardboard
holder.
•
Remo e
base
and
fasteners
from
carton.
•
Remo e
all
other
packing
material
from
box
before
remo ing
your
high
pressure
washer.
Refer
to
Page
5,
"Contents
of
Hardware
Pack"
for
an
illustrated
listing
of
all
the
items
included
with
your
pressure
washer.
Become
familiar
with
each
piece
before
assem
bling
pressure
washer.
Check
all
contents
against
illustra
tions
on
Page
5.
If
any
parts
are
missing
or
damaged,
call
the
Pressure
Washer
Helpline
at
1-800-222-3136.
TOOLS
YOU
WILL
NEED
OR
ASSEMBLY
•
Flathead
screwdri er
•
Phillips
head
screwdri er
HOWTO
ASSEMBLE
THE
BASE
•
Place
the
base
with
wheels
on
a
flat
le el
surface.
•
Insert
the
two
metal
handle
extensions
into
the
slots
pro ided
on
the
base
(Fig.
1).
Secure
the
extensions
with
two
of
the
Phillips
head
screws.
•
Snap
the
ibration
mount
into
the
the
cross
bracket
(Fig.
2).
•
Slip
the
cross
bracket
with
the
ibration
mount
facing
downward
toward
the
base
onto
the
handle
extensions
(Fig.
2).
Secure
the
cross-bracket
with
the
flat
head
screws
(A),
washers
(B),
spacers
(C),
and
hex
nuts
(D).
Do
not
tighten
completely.
•
Attach
the
guide
handle
onto
the
handle
extensions.
On
the
side
opposite
the
extension
cord
hook
insert
the
brush
holder
as
shown
and
fasten
the
handle
to
the
the
extensions
with
the
Phillips
head
self-drilling
screws
(Fig.
3).
HANDLE
EXTENSIONS
PHILLIPS
HEAD
SCREW
FIG.l
7

ASSEMBLY
•
Place
the
main
uniton
the
base
as
shown
in
Fig.
4,
then
slide
the
cross
bracket
down
so
it
sits
on
the
carrying
handle
of
the
main
unit.
FIG.
4
•
The
Detergent
Holder
fits
on
the
guide
handle
where
the
high
pressure
hose
is
to
be
placed
(Fig.
4).
HOWTO
SETUP
YOUR
PRESSURE
WASHER
•
Included
with
this
unitis
a
quick-connect
fitting
thatyou
attach
to
the
water
inlet.
It
can
separate
into
two
parts
—
a
male
connector
and
a
female
connector
that
contains
an
inletscreen.
Make
sure
this
screen,
as
well
as
the
intake
supply
filter,
is
clean.
Attach
the
male
connector
of
quick-connect
to
the
intake
supply
open
ing
on
the
front
of
the
pump
(Fig.
5).
The
garden
hose
will
be
attached
to
the
female
connector.
FIG.
5
•
Unra el
high
pressure
hose
and
attach
to
spray
gun
(Fig.
6).
Tighten
by
hand.
•
To
attach
the
high
pressure
hose
to
1he
unit
(Fig.
7)
push
the
“
O"-ring
connector
of
the
hose
into
the
high
pressure
outlet
and
then
hand
tighten
until
secure.
FIG.7
•
Attach
adjustable
nozzle
extension
to
spray
gun
by
inserting
threaded
end
of
extension
into
end
of
spray
gun
and
tightening
the
extension
by
hand
until
it
locks
CHECKLIST
•
Check
for
proper
hose
connections
(high
pressure
and
water
supply)
and
for
tight
connections
and
that
there
are
no
kinks,
cuts,
or
damage
to
the
high
pressure
hose.
•
Pro ide
proper
water
supply
(not
to
exceed
104
c
F).
•
Be
sure
to
read
“
Safety
Rules"
and
“
Operation"
sec
tions
before
using
the
pressure
washer.
•
IF
YOU
HAVE
ANY
OTHER
PROBLEMS
SETTING
UP
THE
PRESSURE
WASHER,
REFER
TO
THE
VIDEOTAPE
INCLUDED
WITH
THIS
PRODUCT.
8

OPERATION
HOW
TO
USE
YOUR
WASHER
IF
YOU
HAVE
ANY
PROBLEMS
OPERATING
YOUR
PRESSURE
WASHER,
PLEASE
CALL
THE
PRESSURE
WASHER
HELPLINE
AT
1-800-222-3136.
STOPPING
YOUR
PRESSURE
WASHER
•
If
the
pressure
washer
is
running,
press
the
ON/OFF
switch
(Fig.
9).
•
Simply
shutting
O
washer
will
not
release
pres
sure
in
the
system.
Pull
the
trigger
on
the
spray
wand
assembly
to
relie e
the
pressure
in
the
hose.
NOTE:
A
small
amount
of
water
will
squirt
out
when
you
release
the
pressure.
WAND
EXTENSIONS
Your
high
pressure
washer
comes
equipped
with
a
choice
of
three
wand
extensions
—
one
with
a
turbo
nozzle
(Fig.
10)
one
with
a
utility
brush
(Fig.
11)
and
one
with
an
adjustable
nozzle
(Fig.
12).
Remo e
the
adjustable
nozzle
extension
if
you
wish
to
use
the
utility
brush
or
the
turbo
nozzle.
Attach
the
Brush
Adaptor
to
the
utility
brush
and
then
insert
the
threaded
end
into
the
spray
gun
and
hand
tighten.
The
turbo
nozzle
extension
connects
the
same
as
the
adjustable
nozzle.
HOW
TO
USE
ADJUSTABLE
NOZZLE
WARNING:
NEVER
ADJUST
SPRAY
PATTERN
WHEN
SPRAYING.
NEVER
PUT
HANDS
IN
RONT
O
SPRAY
NOZZLE
TO
ADJUST
SPRAY
PAT
TERN.
With
the
adjustable
nozzle
you
can
adjust
the
spray
pattern
to
be
either
high
pressure
or
low
pressure.
You
can
also
adjust
the
spray
so
it
is
concentrated
in
a
stream
pattern
or
expanded
into
a
fan
pattern.
Use
this
nozzle
to
apply
detergent.
•
Push
the
nozzle
attachment
forward
when
you
wish
to
adjust
the
spray
to
low
pressure
mode
(Fig.
12).
Pull
the
nozzle
backward
to
achie e
high
pressure.
•
Twisting
the
nozzle
adjusts
the
spray
pattern
from
a
narrow
stream
to
an
expanded
stream.
PUSH
NOZZLE
FORWARD
FOR
NOZZLE
IN
HIGH
LOW
PRESSURE
MODE
AND
DE
PRESSURE
MODE
TERGENT
APPLICATION
TWIST
NOZZLE
TO
EXPAND
SPRAY
TWIST
NOZZLE
TO
NARROW
SPRAY
STREAM
FIG.
12
9

OPERATION
APPLYING
DETERGENT
WITH
ADJUSTABLE
NOZZLE
IMPORTANT:
USE
SOAPS
DESIGNED
SPECIFICALLY
FOR
PRESSURE
WASHERS.
HOUSEHOLD
DETER
GENTS
ARE
NOT
RECOMMENDED.
IMPORTANT:
YOU
MUST
ATTACH
ALL
HOSES
BE
FORE
YOU
STARTTHE
PRESSURE
WASHER.
START
ING
THE
PRESSURE
WASHER
WITHOUT
ALL
THE
HOSES
CONNECTED
WILL
DAMAGE
THE
PUMP.
Pressure
washers
are
useful
cleaning
tools
designed
to
clean
almost
any
surface
in
two
easy
steps.
•
The
first
step
in ol es
applying
an
appropriate
deter-
gent/sol ent
solution
to
penetrate
and
loosen
grime.
The
detergent
is
applied
at
low
pressure
to
a oid
splashing,
o erspraying
and
waste.
Lea e
the
solution
on
surface
for
3
to
5
minutes
to
allow
solution
to
work.
•
The
second
step
in ol es
cleaning
the
surface
you
ha e
prepared
with
the
pressure
washer
and
then
rinsing
it
clean.
To
apply
detergent
followthese
steps:
Prepare
your
detergent
solution
as
required
by
your
job.
Place
small
filter
of
the
clear,
detergent
siphon
ing
tube
into
the
deter
gentcontainer
(Fig.
13).
Set
nozzle
to
low
pres
sure
mode.
Detergent
cannot
be
siphoned
with
nozzle
in
high
pressure
mode
(see
Fig.
12).
FIG.
13
•
Start
washer
and
apply
detergent
to
a
dry
surface,
starting
from
the
bottom
and
working
up.
•
Remo e
siphon
from
bottle
to
stop
detergent
in
low
pressure
mode.
NOTE
:
Detergents
are
mosteffecti e
applied
to
a
dry
surface.
HOWTO
USE
UTILITY
BRUSH
•
You
can
apply
detergent
with
this
nozzle.
As
you
are
applying
detergent
to
surface
you
want
to
clean,
you
can
also
combine
the
liquid
spray
with
scrubbing
to
clean
ery
dirty
areas.
•
You
cannot
adjust
the
spray
pattern
with
this
nozzle.
•
Store
utility
brush
on
guide
handle.
HOWTO
USE
TURBO
NOZZLE
EXTENSION
•
The
rotating
turbo
nozzle,
in
essence,
expands
the
area
of
the
high
pressure
stream.
•
You
cannot
adjust
the
spray
pattern
with
this
nozzle.
•
You
cannot
apply
detergent
with
this
nozzle.
IMPORTANT:
IF
YOU
HAVE
ANY
OTHER
PROBLEMS
USING
THE
PRESSURE
WASHER,
REFER
TO
THE
VIDEOTAPE
INCLUDED
WITH
THIS
PRODUCT.
PRESSURE
WASHING/RINSING
A
WARNING:
BE
EXTREMELY
CARE UL
I
YOU
MUST
USE
PRESSURE
WASHER
ROM
LADDER,
SCA OLDING
OR
ANY
OTHER
RELATIVELY
UN
STABLE
LOCATION.
PRESSURE
IN
A
RUNNING
WASHER
BUILDS
IN
THE
WAND
AS
YOU
CLIMB.
WHEN
YOU
PRESS
THE
TRIGGER,
THE
RECOIL
ROM
THE
INITIAL
SPRAY
COULD
ORCE
YOU
TO
ALL,
OR
I
YOU
ARE
TOO
CLOSE
TO
THE
CLEANING
SUR ACE,
HIGH
PRESSURE
COULD
ORCE
YOU
O
CLIMBING
APPARATUS.
•
Adjust
nozzle
to
select
high
pressure
mode
(see
Fig.
12).
NOTE
:
Detergent
will
not
flow
when
in
the
high
pressure
mode.
•
Start
washer
and
work
from
the
top
of
the
surface
to
the
bottom.
NOTE
:
The
high
pressure
mode
is
most
effecti e
when
tie
tip
of
the
wand
is
held
between
8
to
24
inches
from
the
surface
being
cleaned.
BE ORE
STARTING
PRESSURE
WASHER
To
operate
the
unit
you
will
need
the
following:
•
Electrical
supply
rated
for
120
olts
at
15
amps.
•
If
using
an
extension
cord,
obser e
the
following
speci
fications:
CABLE
LENGTH
WIRE
GAUGE
Up
to
33
ft
(10m)
14/3
AWG
33
to
66
ft
(10m
to
20m)
12/3
AWG
•
Use
only
extension
cords
that
are
intended
for
outside
use.
These
extension
cords
are
identified
by
a
marking
"ACCEPTABLE
FOR
USE
WITH
OUTDOOR
APPLI
ANCES;
STORE
INDOORS
WHILE
NOT
IN
USE."
Use
only
extension
cords
ha ing
an
electrical
rating
not
less
than
the
rating
of
the
product.
Do
notuse
damaged
extension
cords.
Examine
extension
cord
before
using
and
replace
if
damaged.
Do
notabuse
extension
cord
and
do
not
yank
on
any
cord
to
disconnect
it
Keep
cord
away
from
heat
and
sharp
edges.
Always
discon
nect
the
extension
cord
from
the
receptacle
before
disconnecting
the
pressure
washer
from
the
extension
cord.
10

OPERATION
TO
TURN
ON
WASHER
A
WARNING:
NEVER
ADJUST
SPRAY
PATTERN
WHEN
WATER
IS
SPRAYING.
NEVER
PUT
HANDS
IN
RONT
O
SPRAY
NOZZLE
TO
ADJUST
SPRAY
PATTERN.
ALWAYS
KEEP
HANDS
IN
THE
POSI
TION
SHOWN
IN
IG.
12
CAUTION:
Gun
kicks
back.
Use
both
hands.
A
WARNING:
Risk
of
Injury
or
Injection
to
persons
—
Do
not
discharge
stftam
at
persons.
•
Check
that
high
pressure
hose
is
attached
to
pump
outlet
and
that
water
supply
is
attached
to
pump
inlet
(female
connector
of
quick-connect).
•
Turn
ON
water.
Water
supply
should
not
exceed
104°F
(36°C).
•
Press
trigger
on
gun
and
wand
assembly
to
force
air
from
high
pressure
hose
(Fig.
15).
•
Maintain
trigger
as
shown
in
Fig.
15
and
press
ON/OFF
switch.
IMPORTANT:
DO
NOT
RUN
PUMP
WITHOUT
THE
WATER
SUPPLY
CONNECTED
AND
TURNED
ON
OR
THE
PUMP
WILL
BE
DAMAGED.
SIPHONING
We
do
not
recommend
that
you
siphon
your
water
supply
from
sources
other
than
from
connecting
to
household
water
supply.
TIPS
•
Initially
clean
an
area
and
then
check
the
surface
for
damage.
If
no
damage
is
found,
you
can
assume
it
is
okay
to
continue
cleaning.
Detergents
work
best
when
applied
to
dry
surface.
•
For
most
effecti e
cleaning,
keep
spray
nozzle
be
tween
8
to
24
inches
of
cleaning
surface.
•
Allow
the
detergent
to
soak
in
between
3-5
minutes
before
washing
and
rinsing.
•
For
cleaning,
start
at
lower
portion
of
area
to
be
washed
and
work
upward,
using
long,
e en
o erlapping
strokes.
•
For
rinsing,
push
the
nozzle
slee e
to
high
pressure
and
wait
for
detergent
to
clear.
Start
at
the
top
of
area
to
be
rinsed,
working
down
with
the
same
action
as
for
cleaning.
•
Ne er
use
the
garden
hose
inlet
to
siphon
detergent
or
wax.
•
If
you
get
the
spray
nozzle
too
close,
especially
using
high
pressure
mode,
you
may
damage
the
cleaning
surface.
•
If
you
ha e
the
spray
nozzle
too
far
away,
the
cleaning
will
not
be
as
effecti e.
•
Do
not
get
closer
than
6
inches
when
cleaning
automo
bile
tires.
CUSTOMER
RESPONSIBILITIES
GENERAL
RECOMMENDATIONS
The
warranty
of
the
high
pressure
washer
does
not
co er
items
that
ha e
been
subjected
to
operator
abuse
or
neg
ligence.
To
recei e
full
alue
from
the
warranty,
operator
must
maintain
high
pressure
washer
as
instructed
in
this
manual.
BE ORE
EACH
USE
DANGER
:
WATER
SPRAYING
ROM
A
LEAK
IS
CAPABLE
O
INJECTING
MATERIAL
INTO
SKIN.
INSPECT
HOSE
EACH
TIME
BE ORE
USING
IT.
NEVER
REPAIR
HIGH
PRESSURE
HOSE.
RE
PLACE
IT
WITH
ANOTHER
HOSE
THAT
MEETS
MINIMUM
PRESSURE
RATING
O
YOUR
PRES
SURE
WASHER.
Check
and
Clean
Quick-Connect
Screen:
Remo e
quick-connect
and
examine
the
inlet
screen
on
the
female
connector.
Clean
if
clogged
or
replace
the
quick-connect
inlet
screen.
Check
High
Pressure
Hose:
High
pressure
hose
can
de elop
leaks
from
wear,
kinking,
abuse.
Check
all
hoses
for
cuts,
leaks,
abrasions
or
bulging
of
co er,
or
damage
or
mo ement
of
couplings.
If
any
of
these
conditions
exist,
replace
hose
immediately.
Check
Detergent
Hose:
Examine
the
filter
on
the
deter
gent
hose
and
clean
if
clogged.
Hose
should
fit
tightly
on
barbed
fitting.
Examine
hose
for
leaks
or
tears.
Replace
the
filter
or
hose
if
either
is
damaged.
Check
Gun
and
Wand:
Examine
hose
connection
and
make
sure
it
is
secure.
Test
trigger
by
pressing
it
and
making
sure
it
springs
back
into
place
when
released.
Put
safety
latch
in
ON
position
and
test
trigger.
You
should
not
be
able
to
press
trigger.
11

CUSTOMER
RESPONSIBILITIES
Purge
Pump
of
Air
and
Contaminants:
To
remo e
the
air
from
the
pump,
followthese
steps:
•
Set
up
the
pressure
washer
as
described
in
the
AS
SEMBLY
section
and
connect
the
water
supply.
•
Remo e
the
nozzle
attachment
from
the
gun.
•
Pull
the
trigger
on
the
gun
and
hold.
To
remo e
the
contaminants
from
the
pump,
followthese
steps:
•
Set
up
the
pressure
washer
as
described
in
the
AS
SEMBLY
section,
connect
the
water
supply
and
start
the
engine
according
to
instructions
in
the
OPERA
TION
section.
•
Remo e
the
nozzle
attachment
from
the
gun.
•
Pull
the
trigger
on
the
gun
and
hold.
•
When
the
water
supply
is
steady
and
constant,
you
may
refasten
the
nozzle
attachment
and
start
the
pump.
NOZZLE
MAINTENANCE
If
the
nozzle
becomes
restricted
or
clogged
with
foreign
materials,
such
as
dirt,
excessi e
pump
pressure
may
de elop.
A
partially
clogged
nozzle
can
cause
a
pulsing
sensation
during
use.
This
generally
is
not
a
pump
related
problem,
but
rather
a
clogged
or
partially
restricted
nozzle.
If
the
nozzle
becomes
clogged
or
partially
restricted,
imme
diately
clean
the
nozzle
with
the
kit
included
with
your
pressure
washer
by
following
these
instructions:
•
Shut
off
the
engine
and
turn
off
the
water
supply.
•
Separate
the
wand
from
the
gun.
•
Remo e
nozzle
from
the
end
of
the
wand
using
a
2mm
or
5/64
alien
wrench
(like
the
one
included
in
the
kit).
•
Use
the
wire
included
in
the
kit
(Fig.
16)
or
a
small
paper
clip
to
free
the
foreign
materials
clogging
or
restricting
the
nozzle.
•
Remo e
additional
debris
by
back
flushing
water
sup
ply
through
wand
(Fig.
17).
Back
flush
between
30
to
60
seconds.
Turn
wand
to
stream
spray
and
mo e
nozzle
from
low
to
high
while
flushing.
•
Reinstall
nozzle
into
the
wand.
DO
NOT
o er
tighten.
•
Reconnect
the
wand
to
the
gun
•
Reconnect
the
water
supply,
turn
on
the
water,
and
start
the
engine.
•
Test
the
pressure
washer
by
operating
with
nozzle
in
the
high
and
in
the
low
position.
STORAGE
PRESSURE
WASHER
PUMP
Water
should
not
remain
in
the
unit
for
long
periods
of
time.
Sediments
of
minerals
can
deposit
on
pump
parts
and
"freeze
”
pump
action.
After
each
time
you
are
finished
using
your
pressure
washer,
follow
this
procedure:
•
Flush
detergent
hose
by
placing
the
injector
filter
into
a
pail
of
clear
water
while
running
Pressure
Washer
with
nozzle
in
low
pressure
mode.
Flush
until
you
can
see
clear
water
flowing
through
hose.
•
Shut
off
the
pressure
washer,
unplug
it
and
let
it
cool,
THEN
REMOVE
ALL
HOSES.
•
Store
the
pressure
washer
and
its
components
in
such
a
way
as
to
protect
it
from
freezing.
•
Store
in
a
clean,
dry
area.
Ideally,
the
unit
should
be
stored
in
a
frost-free
room.
•
Coil
the
high
pressure
hose
and
inspect
it
for
damage.
Cuts
in
the
hose
or
fraying
of
it
could
result
in
leaks
and
loss
of
pressure.
Should
any
damage
be
found,
replace
the
hose.
DO
NOT
attempt
to
repair
a
damaged
hose
and
use
it.
Replace
the
hose
with
the
genuine
Crafts
man
part.
•
Drain
water
from
hose
and
properly
store
it
to
pre ent
cuts
and
general
wear.
12

TROUBLESHOOTING
A
WARNING:
MANY
O
THE
ACTIONS
YOU
ARE
ASKED
TO
CORRECT
ARE
PROBLEMS
THAT
INVOLVE
CLEANING
A
COMPONENT
O
THE
PRESSURE
WASHER.
WHEN
CLEANING
ANY
PART
O
THIS
UNIT,
TURN
O
THE
UNIT
AND
COMPLETELY
DISCONNECT
THE
POWER
SUPPLY.
PROBLEM
CAUSE
CORRECTION
Pressure
Washer
will
not
start.
1.
No
electrical
power
is
a ailable.
1.
Check
cable,
plug,
power
socket
and
fuse.
2.
Motor
o erheats.
2.
Press
trigger
of
wand
to
relie e
pressure
on
the
unit.
Allow
unit
to
cool
for
about
2
min.
It
should
run
when
you
turn
it
ON
again.
Length
of
extension
cord
is
well
beyond
66
feet.
3.
Low
oltage.
3.
Contact
Sears
Ser ice
Department.
4.
Trigger
not
open.
4.
Open
trigger.
5.
Electrical
defect.
5.
Contact
Sears
Se ice
Department.
Pressure
Washer
does
not
come
up
to
pressure.
1.
Spray
gun
is
in
low
pressure
mode.
1.
Adjust
nozzle
to
high
pressure
mode.
2.
Pump
is
sucking
air.
2.
Water
hose
must
be
1/2
“
diameter.
Make
sure
water
supply
is
ON.
Make
sure
water
supply
is
clean.
Check
all
connections
for
leaks
or
blockage.
Turn
OFF
the
unit,
hold
trigger
in
OPEN
position
to
relie e
pressure
and
allow
air
in
line
to
escape.
With
trigger
still
in
OPEN
position,
turn
ON
the
unit.
Repeat
if
necessary.
3.
Water
filter
clogged.
3.
Clean
filter.
4.
Pump
not
bled
to
remo e
air.
4.
Switch
OFF
washer,
press
trigger,
switch
ON
washer
while
pressing
trigger.
Repeat
if
necessary.
5.
Pump
is
defecti e.
5.
Contact
Sears
Ser ice
Department.
High
pressure
spray
is
irregular.
1.
Nozzle
or
water
supply
is
restricted.
1.
Position
nozzle
completely
in
low
pressure
or
high
pressure
position.
Unplug
unit
and
clean
nozzle.
2.
Water
supply
inadequate.
2.
Turn
ON
water
to
full
position.
Operate
washer
in
suction
operation
with
open
container.
No
intake
of
cleaning
agent.
1.
Wrong
nozzle
setting.
1.
Adjust
nozzle
to
low
pressure
mode.
2.
Nozzle
clogged.
2.
Clean
nozzle.
3.
Detergent
hose
filter
clogged.
3.
Clean
filter
in
detergent
hose.
13

CRA STMAN
ELECTRIC
HIGH
PRESSURE
WASHER
580.751410
REPAIR
PARTS
14

CRA STMAN
ELECTRIC
HIGH
PRESSURE
WASHER
580.751410
REPAIR
PARTS
*
—
Part
is
included
with
Pump
Repair
Kit
(Part
No.
94301)
ITEM
PART
NO.
DESCRIPTION
1
96160
HOUSING
(1
REQ.)
2
*
SPILL
VALVE
1(
REQ.)
3
*
SLEEVE
(1
REQ.)
4
96161
SELF-TAPPING
SCREW
(2
REQ.)
5
96162
SPARE
PARTS
KIT
(1
REQ.)
6
96163
PUMP
COVER
(1
REQ.)
7
★
19.3
x
2.4mm
O-RING
(1
REQ.)
8
94304
NOZZLE
INSERT
(1
REQ.)
9
96164
OVAL
HEAD
SCREW
(4
REQ.)
10
94302
10
x
2.5mm
O-RING
(3
REQ.)
11
*
VALVE
(3
REQ.)
12
★
76
x
2mm
O-RING
(1
REQ.)
13
96165
LINDER
HEAD
(1
REQ.)
14
94303
PISTON
(3
REQ.)
15
94305
HELICAL
SPRING
(3
REQ.)
16
96166
HOUSING
(1
REQ.)
17
94306
GROOVED
RING
(3
REQ.)
18
★
WASHER
(3
REQ.)
19
★
GROOVED
RING
(3
REQ.)
20
*
O-RING
(3
REQ.)
21
*
PRESSURE
VALVE
(3
REQ.)
22
★
GASKET
(1
REQ.)
75

CRA STMAN
ELECTRIC
HIGH
PRESSURE
WASHER
580.751410
REPAIR
PARTS
HOSE
[25
FT
]
ITEM
PART
NO.
DESCRIPTION
ITEM
PART
NO.
DESCRIPTION
1
94293
COVER
(1
REQ.)
17
95566
TURBO
NOZZLE
(1
REQ.)
2
94294
FILTER
(1
REQ.)
18
100
20055
WHEEL
KIT
BASE
(1
REQ.)
3
94295
HOSE
(1
REQ.)
19
101
20055
HANDLE
EXTENSION
(2
REQ.)
4
96150
SCREW(7
REQ.)
20
105
20055
PHILLIPS
HEAD
SCREW
(4
REQ.)
5
94296
ELECTRIC
CORD
(1
REQ.)
21
107
20055
SPACER
(2
REQ.)
6
94297
CORD
BUSHING
(1
REQ.)
22
106
20055
FLAT
HEAD
SCREW
(2
REQ.)
7
94298
SWITCH
(1
REQ.)
23
102
20055
GUIDE
HANDLE
(1
REQ.)
8
96151
BRACKET
(1
REQ.)
24
103
20055
CROSS-BRACKET
(1
REQ.)
9
94299
PROTECTING
CAP
(1
REQ.)
25
104
20055
VIBRATION
MOUNT
(1
REQ.)
10
96152
SWITCH
FRAME(1
REQ.)
26
99919
DETERGENT
HOLDER
(1
REQ.)
11
96153
RUBBER
BUFFER(1
REQ.)
27
99742
BRUSH
HOLDER
(1
REQ.)
12
91129
QUICK
DISCONNECT
28
88185
UTILITY
BRUSH
(1
REQ.)
ADAPTOR
(1
REQ.)
29
95577
ATTACHMENT
ADAPTOR
13
94300
WATER
INLET
FILTER
(1
REQ.)
(1
REQ.)
14
91029
WAND
EXTENSION
(1
REQ.)
30
80857
WASHER
(4
REQ.)
15
88253
SPRAY
GUN
(1
REQ.)
31
51716
NUT
(2
REQ.)
16
90610
HIGH
PRESSURE
(1
REQ.)
16

CRA STMAN
ELECTRIC
HIGH
PRESSURE
WASHER
580.751410
REPAIR
PARTS
ITEM
PART
NO.
DESCRIPTION
ITEM
PART
NO.
DESCRIPTION
2
96154
SCREW
(4
REQ.)
11
96158
MOTOR
HOUSING
(1
REQ.)
3
96155
MOTOR
HOUSING
(1
REQ.)
12
94307
CABLE
(2
REQ.)
4
94313
GEAR
WHEEL
(1
REQ.)
13
94308
SEAL
(1
REQ.)
5
94314
GASKET
(1
REQ.)
14
94309
CELLULAR
RUBBER
CORD
6
94315
O-RING
(1
REQ.)
(1
REQ.)
7
96156
ROTARY
SHAFT
SEAL
15
96159
HOUSING
COVER
(1
REQ.)
(1
REQ.)
16
94310
INSULATING
MAT
(1
REQ.)
8
94316
BEARING
(1
REQ.)
17
94312
MOTOR
(1
REQ.)
9
94317
SWASH
PLATE
(1
REQ.)
18
94311
INSULATING
MAT
(1
REQ.)
10
96157
SCREW
(1
REQ.)
19
96011
OWNER'S
MANUAL
(1
REQ.)
17
Other Sears Pressure Washer manuals

Sears
Sears Craftsman 580.752830 User manual

Sears
Sears CRAFTSMAN POWER WASHER 900 User manual

Sears
Sears Craftsman 580.754892 User manual

Sears
Sears Craftsman 580.752330 User manual

Sears
Sears CRAFTSMAN 580.747100 User manual

Sears
Sears 580.676641 User manual

Sears
Sears Craftsman 580.751500 User manual

Sears
Sears Craftsman 580.752051 User manual

Sears
Sears Cratsman 919.762000 User manual

Sears
Sears 580.741380 User manual