SeaSTAR i6800 User manual

i6800 Shift & Throttle System
INSTALLATION MANUAL
ELECTRONIC SHIFT & THROTTLE (EST)
Before you do it your way,
please try it our way
www.seastarsolutions.com
68
SIXTY EIGHT
ISO 9001

All information, illustrations and specifications in this manual are
based on the latest information available at the time of publishing.
The illustrations used in this manual are intended as representative
reference views only. Moreover, because of our continuous product
improvement policy, we may modify information, illustrations and/or
specifications to explain and/or exemplify a product, service or
maintenance improvement. We reserve the right to make any
change at any time without notice.
©2014 SeaStar Solutions.
All Rights Reserved. This document, subject matter and all information
herein is the sole, exclusive and confidential property of SeaStar
Solutions and shall not be disclosed, copied, reproduced or used in
whole or in part for any purpose other than as specifically authorized
in writing by Marine Canada Acquisition (DBA SEASTAR SOLUTIONS).
is a registered trademark of the American Boat &
Yacht Council (http://www.abycinc.org)
NMEA 2000®is a registered trademark of the National Marine
Electronics Association.
Optimus, Optimus 360, SeaStar, and BayStar are all trademarks of
SeaStar Solutions.
California
Proposition 65 Warning
Battery posts, terminals, and related
accessories contain lead and lead
compounds, chemicals known to the
state of California to cause cancer
and reproductive harm.
Wash hands after handling.

i
© 2013 SeaStar Solutions i6800 Installation Supplement, Rev. C
IMMEDIATE HAZARDS WHICH, IF NOT ACTED UPON, WILL RESULT
IN SEVERE PERSONAL INJURY OR DEATH.
DANGER
HAZARDS OR UNSAFE PRACTICES WHICH, IF NOT ACTED UPON,
COULD RESULT IN SEVERE PERSONAL INJURY OR DEATH.
WARNING
Hazards or unsafe practices which COULD result in minor injury or
product or property damage.
CAUTION
Throughout this publication, Dangers, Warnings and Cautions
(accompanied by the International Hazard Symbol )are used to
alert the user to special instructions concerning a particular service
or operation that may be hazardous if ignored or performed
incorrectly or carelessly. Observe Them Carefully!
These safety alerts alone cannot eliminate the hazards that they
signal. Strict compliance with these special instructions during
installation, operation, and maintenance, plus common sense
operation, are important measures to prevent accidents.
This book contains the information required to install and setup the
i6800 EST System.
It is to be delivered to the customer when installation is complete.
Thank you for choosing an i6800 Electronic Shift and Throttle (EST)
System. You have chosen a state of the art shift and throttle system
that will provide years of effortless and trouble free performance.
Information which is important to proper use or maintenance, but is
not hazard-related.
NOTICE
About this Book
Notice to the Installer

ii © 2013 SeaStar Solutions i6800 Installation Supplement, Rev. C
This page left intentionally blank.

INDEX
1.0 Safety .................................................................................... 1-1
1.1 Safety Labels ................................................................... 1-3
2.0 System Overview..................................................................... 2-1
2.1 System Description........................................................... 2-1
2.2 System Overview Diagram ................................................. 2-2
3.0 Installation ............................................................................. 3-1
3.1 Important Information/Technical Support Contact ............... 3-1
3.2 Installing the Control Head ................................................ 3-1
3.2.1 Control Head Trim Switch Connection ........................ 3-1
3.3 Installing the Actuators .................................................... 3-3
3.3.1 Location, Identification & Mounting .......................... 3-3
3.3.2 Start-In-Gear Protection .......................................... 3-3
3.3.3 Actuator Power Connections .................................... 3-4
3.3.4 Actuator Ignition Connections .................................. 3-4
3.3.5 Shift Actuator Electrical Connections........................ 3-5
3.3.6 Throttle Actuator Electrical Connections.................... 3-6
3.4 CAN2 Harness Connections............................................... 3-7
3.5 Engine RPM Source ........................................................ 3-10
3.5.1 NMEA Gateway Connection..................................... 3-10
4.0 System Setup ......................................................................... 4-1
4.1 Initial Setup...................................................................... 4-1
4.2 Actuator Setup ................................................................ 4-4
4.2.1 Step 1 – Actuator Configuration Using the
CANtrak Display...................................................... 4-4
4.2.2 Step 2 – Cable Installation and Adjustment ............... 4-7
4.2.2.1 Shift Cable Installation................................ 4-8
4.2.2.2 Throttle Cable Installation............................ 4-9
4.2.3 Final Setup and Actuator Adjustment....................... 4-10
4.3 Control Head Setup ........................................................ 4-13
5.0 Sea Trial .............................................................................. 5-1
5.1 Shift Performance............................................................. 5-1
5.2 Throttle Performance ........................................................ 5-1
5.3 Control Head Adjustments................................................. 5-1
5.4 Conclusion of Sea Trial...................................................... 5-2
6.0 System Faults & Hazards......................................................... 6-1
6.1 Hazard Definitions ............................................................ 6-1
6.1.1 Danger ................................................................... 6-1
6.1.2 Warning .................................................................. 6-1
7.0 Warranty .............................................................................. 7-1
7.1 Statement of Limited Warranty ........................................... 7-1
iii
© 2013 SeaStar Solutions i6800 Installation Supplement, Rev. C

7.2 Return Goods Procedure .................................................... 7-1
7.3 Technical Support.............................................................. 7-1
Appendix A – Mounting Templates .................................................... A-1
A.1 Control Head – Dual Lever. ................................................ A-1
A.2 Control Head – Single Lever............................................... A-2
Appendix B – Using the Color CANtrak Display ................................... B-1
B.1 Display Navigation ............................................................ B-1
B.2 Documentation Conventions ...............................................B-2
B.3 Initial Startup .................................................................. B-3
B.4 Unlocking the Dealer Menu............................................... B-3
B.5 Menu Structure ............................................................... B-4
Appendix C – Setup with Datalink ..................................................... C-1
C.1 Dealer Tools ......................................................................C-1
C.2 Connection........................................................................C-1
C.3 Navigating Datalink ........................................................... C-3
C.4 Actuator Setup ................................................................ C-5
C.4.1 Step 1 – Actuator Configuration Using Datalink ....... C-5
C.4.2 Step 2 – Cable Installation and Adjustment ............. C-7
C.4.3 Step 3 – Final Setup and Actuator Adjustment ......... C-7
C.5 Control Head Setup ......................................................... C-9
Appendix D – Updating Firmware ..................................................... D-1
D.1 Checking Component Firmware Revision Levels.................. D-2
D.1.1 Using DATALINK ...................................................... D-2
D.2 Updating Actuators and Control Head................................ D-3
D.3 Updating the CANtrak Software......................................... D-4
iv © 2013 SeaStar Solutions i6800 Installation Supplement, Rev. C

1.0 SAFETY INFORMATION
THE SAFETY INFORMATION PROVIDED HERE IS INTENDED TO
INFORM YOU OF THE DANGERS THAT MAY BE PRESENT BEFORE,
DURING, AND AFTER INSTALLATION. IT IS CRITICAL THAT YOU
READ AND UNDERSTAND THIS INFORMATION.
WARNING
Safe operation of the shift and throttle system depends upon proper
installation and maintenance of the system, and the common sense,
safe judgment, knowledge, and expertise of the operator. Every
installer and operator of the i6800 system should know the following
requirements before installing or operating the system. If you have
any questions regarding any of these warnings, contact SeaStar
Solutions.
1. Read and understand all installation and user's manuals provided
with the i6800 components.
2. Ensure that all components required to complete the installation
are on hand (including cables, harnesses, and the proper tools).
3. SeaStar and i6800 components are highly engineered and safety
tested to ensure system integrity. DO NOT substitute any component.
Substitution with non-SeaStar or non-i6800 components may
compromise system safety, performance, and reliability.
Before installation
1. Check that there is no interference between the control head levers
and the steering wheel or any other dash-mounted components.
2. Operate the trim/tilt switch on the control head lever and verify that
the engines tilt in the expected direction.
3. Check that the mechanical cable bends are smooth and have an
appropriate minimum radius.
After Installation
1. Install system components as directed in this manual. Some
component parts and kits may be supplied with additional
installation instructions—refer also to these instructions.
2. SeaStar and i6800 components are highly engineered and safety
tested to ensure system integrity. DO NOT substitute any component.
Substitution with non-SeaStar or non-i6800 components may
compromise system safety, performance, and reliability.
3. If an instruction is unclear, contradictory, or you are otherwise
uncertain how to proceed, do not guess. Call SeaStar Solutions
technical support.
During Installation
1-1
© 2013 SeaStar Solutions i6800 Installation Supplement, Rev. C

Perform a system inspection as outlined below.
1. Check steering fluid level.
2. Verify immediate steering response when turning steering wheel(s).
3. Inspect all steering hoses, fittings, mechanical cables, and
electrical harnesses for wear, kinks, or leaks.
4. Check for binding, loose, worn or leaking steering or shift/throttle
control components.
5. Verify proper shift and throttle response for all control handles.
Prior to every use
1. WEAR A COAST GUARD-APPROVED PERSONAL FLOTATION
DEVICE (PFD).
2. ATTACH ENGINE SHUT-OFF CORD (LANYARD) TO YOUR PFD.
3. Never allow anyone who is not familiar with the operation of the
shift and throttle system to operate the boat at any time.
4. If boat is equipped with multiple helms, ensure that only one is
used at a time.
5. Know and adhere to all applicable federal, state, and municipal laws
and regulations that govern boating in your area.
During use
The i6800 system requires no special attention after use. Periodically
clean the control head with a damp cloth or mild soap. DO NOT use
acetone, or cleaners containing ammonia, acids, or any other
corrosive ingredients.
After use
DO NOT OPERATE BOAT IF ANY COMPONENT IS NOT IN PROPER
WORKING CONDITION.
WARNING
DO NOT OPERATE BOAT IF ANY COMPONENT IS NOT IN PROPER
WORKING CONDITION.
WARNING
FAILURE TO COMPLY WITH ANY WARNING, NOTICE OR CAUTION
MAY LEAD TO LOSS OF STEERING OR SHIFT/THROTTLE CONTROL
RESULTING IN A COLLISION AND/OR EJECTION FROM THE BOAT
LEADING TO PROPERTY DAMAGE, PERSONAL INJURY AND/OR
DEATH.
WARNING
1-2 © 2013 SeaStar Solutions i6800 Installation Supplement, Rev. C

1.1 Safety Labels
THE LABELS BELOW SHOULD CALL ATTENTION TO THE POSSIBLE
HAZARDS ASSOCIATED WITH THE EQUIPMENT SHOWN LATER IN
THIS MANUAL.
WARNING
Component labels
WARNING
PID# 682050
PID# 682049
A B
Insert appropriate
F, R, IDLE or INCREASE
decal here. Consult
installation manual.
Insert appropriate
F, R, IDLE or INCREASE
decal here. Consult
installation manual.
USING THE ACTUATOR OVERRIDE SYSTEM MAY SEVERELY LIMIT
YOUR BOATS CONTROL. IT SHOULD ONLY BE USED IN AN EMERGENCY
IF YOU ARE UNABLE TO CALL FOR ASSISTANCE. ALWAYS TRY
ALTERNATIVE CONTROLLING DEVICES. PROCEED WITH EXTREME
CAUTION, READ USER’S MANUAL, ALWAYS WEAR A PFD & LANYARD.
MANUAL OVERRIDE OPERATION
ACTUATOR
1. MOVE ALL LEVERS AIN THE DIRECTION OF ARROW TO
DISENGAGE DRIVE MECHANISM.
2. ROTATE "SHIFT" LEVER BCLOCKWISE, OR COUNTER-
CLOCKWISE TO MOVE CONTROL CABLE INTO DESIRED GEAR.
3. CONFIRM YOUR DESIRED GEAR IS ENGAGED
BEFORE APPLYING THROTTLE.
4. VERY SLOWLY ROTATE LEVER BON THROTTLE ACTUATOR
TO “INCREASE” RPM. NO MORE THAN 1/2 TURN SHOULD
BE REQUIRED.
5. KEY OFF IGNITION TO SLOW AND STOP VESSEL.
U.S. COAST GUARD REQUIRES START-IN-GEAR PROTECTION.
IF YOUR ENGINE DOES NOT HAVE THIS FEATURE, THIS CONTROL
SYSTEM WILL PROVIDE START-IN-GEAR PROTECTION MEETING
U.S.C.G. REQUIREMENTS OF 33 CFR PART 183, SUB PART L.
CONSULT INSTALLATION MANUAL.
PID# 682048
Affix PORT/STARBOARD decal here,
consult installation manual.
Affix SHIFT/THROTTLE decal here,
consult installation manual.
WARNING
WARNING
Figure 1-1. Start-In-Gear Advisory Decal, PID# 682050.
Figure 1-2. A and B Locator Decal, PID# 682049.
Figure 1-3. Actuator decal, PID# 682048.
The labels shown below are found on the i6800 actuators
.
1-3
© 2013 SeaStar Solutions i6800 Installation Supplement, Rev. C

1-4 © 2013 SeaStar Solutions i6800 Installation Supplement, Rev. C

This page left intentionally blank.

2-1
© 2013 SeaStar Solutions i6800 Installation Supplement, Rev. C
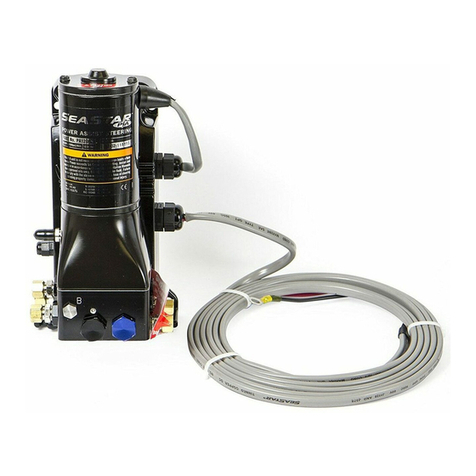
SeaStar i6800 is an electromechanical system that replaces a
traditional cable-operated engine remote control with an electronic
control. Shift and throttle settings are sent over a serial data network
to electro-mechanical actuators, where they are converted to cable
motion. The elimination of mechanical cables to the control head
simplifies multi-station installations, especially when a station is
installed onto a flybridge or tower that is removed for shipping. The
system supports the installation of up to three control heads.
The i6800 system consists of the major components listed below.
CAN Network
CAN (controller area network) is a serial network protocol that is
widely used in marine and automotive control systems. Each device
(node) on the network can send and receive data using specially
formatted messages. The ability to reliably communicate data between
devices is what enables the functionality of i6800.
i6800 implements the high-speed CAN protocol using DeviceNet
harnesses and connectors. We refer to the network as CAN2 in the
documentation to distinguish it from other CAN protocols used on
SeaStar products.
Control Head
The control head looks much like a conventional mechanical remote
control, but it is an electromechanical device that converts lever
position into digital messages that are sent over CAN2 to the shift
and throttle actuators. The control head features adjustable lever
feel, status lights, a synchronous trim switch (optional), and control
buttons for added functionality.
Shift and Throttle Actuators
The actuators are electromechanical devices that receive digital
commands on the CAN2 network and convert these commands into
movement of a mechanical cable for gear selection and throttle
control. The actuators are universal, and are easily setup for their
specific application using the CANtrak display tool. They can also
provide the start-in-gear protection required by the U.S. Coast Guard.
2.1 System Description
2.0 SYSTEM OVERVIEW

2-2 © 2013 SeaStar Solutions i6800 Installation Supplement, Rev. C
2.2 System Overview Diagram
1
2
1
DUAL STATION/DUAL ENGINE
1. Control Head
2. Throttle/Shift Actuator
3. CAN Network Bus
1
23 3
SINGLE STATION/SINGLE ENGINE
Figure 2-1. System Overview.

3-1
© 2013 SeaStar Solutions i6800 Installation Supplement, Rev. C
To assist with the installation and maintenance of this Electronic Shift
and Throttle system SeaStar Solutions recommends that:
• Installation MUST be performed by a SeaStar Solutions
authorized installer.
• Read and understand ALL installation manuals before starting
the installation process. Knowing the correct order of installation
and location of components will drastically reduce installation
time as well as prevent common installation errors.
• Read and understand ALL Safety Information that is noted in this
manual and ALL other Installation Manuals.
If any problems are found before, during or after the installation of the
steering system, please contact Technical Support for assistance:
Technical Support
Web: www.seastarsolutions.com
E-mail: seastar@seastarsolutions.com
Phone: 604.248.3858
Fax: 604.279.2202
3.1 Important Information/Technical
Support Contact
3.0 INSTALLATION
Mount the control head on the dash in an area which will allow for
convenient access during use. Whenever possible, it should be
mounted in a location to minimize water spray. Ensure that the control
handle(s) can be moved throughout the complete range of motion in
both forward and reverse without interference. ABYC standard P-14
calls for a minimum of 2 1/2" (64 mm) clearance between the
control lever and the steering wheel rim under all possible lever and
wheel positions.
The control head requires one of the dash cutout templates in
Appendix A.
Control Head Trim Switch Connection (Optional)
The control head includes a single trim/tilt switch on the end of the
port handle. This switch can be wired to provide synchronous trim/
tilt control of all engines. If independent trim/tilt is desired use tilt/
trim kit HA5491 (for twin engine configurations) and connect the
wiring as shown in Figure 3-1.
3.2 Installing the Control Head
3.2.1

3-2 © 2013 SeaStar Solutions i6800 Installation Supplement, Rev. C
Figure 3-1. Trim switch wiring.
ALL ELECTRICAL CONNECTIONS AND HARNESS MUST COMPLY
WITH ABYC WIRING STANDARDS, BE RATED FOR 105°C (221°F),
AND COMPLIANT WITH SAEJ1128.
WARNING
CONTROL HEAD
DIODE PACKS
(INCLUDED IN HARNESS)
GN
RD
BL BL / WH
RD / WH
GN / WH
TO SECOND
STATION
(OPTIONAL)
SPLICE
TRIM HARNESS 6345518
(INCLUDED IN TILT/TRIM KIT HA5491)
HA5491 DUAL ENGINE
TILT/TRIM SWITCH KIT
AVAILABLE SEPARATELY
IF SUPPLIED BY OTHERS,
SWITCHES TO BE DP/DT,
MOMENTARY CONTACT
ON – OFF – ON
36
25
14
36
25
14
PORT ENGINE
TRIM HARNESS
TILT/TRIM KIT
HA5491
VIEWED FROM REAR OF SWITCHES
PORT SWSTBD SW
GN
RD
BL
STBD ENGINE
TRIM HARNESS
PORT
ENGINE
TRIM
GN
RD
BL
STBD
ENGINE
TRIM
WIRE COLOR LEGEND
TRIM UP
TRIM DOWN
POWER
BLUE
GREEN
RED

3-3
© 2013 SeaStar Solutions i6800 Installation Supplement, Rev. C
Location, Identification & Mounting
• Actuators should be mounted to allow for the shortest, straightest,
most direct mechanical cable run. Check the information included
with your cables and note the minimum bend radius.
• Actuators should be mounted in as dry of a location as possible.
• The actuators will require power and network connections and may
require start-in-gear protection wiring connections.
• Shift and Throttle cables require adequate clearance where they exit
the actuators and enter the engines and should avoid tight bends.
• Actuators should be mounted where they can be accessed for
manual operation if required and where manual override instruction
decals are clearly visible.
All actuators are configured identically from the factory so they can be
used interchangeably during installation. Once an actuator’s function
has been decided, apply labels from the label sheet provided to
identify its type (shift vs. throttle) and side (port vs. starboard, if
applicable), then record the serial numbers in Table 3-1 below. (See
figure 4-11 for location of serial number.) These serial numbers will be
used when the actuators are configured electronically in Section 4.2.
3.3 Installing the Actuators
3.3.1
3.3.2
NOTICE
Start-In-Gear Protection
The US Coast Guard requires start-in-gear protection. If your engine
does not have this feature, this control system will provide start-in-
gear protection meeting U.S.C.G requirements of 33CFR part 183,
sub part L.
The shift actuators contain a switch that is continuous electrically
when the actuator is in neutral position and open circuit when in gear
position. This switch may be used to interrupt the ignition start wire
to the engine as start-in-gear protection if required. See Section
3.3.5 for actuator wire identification.
The label sheet also contains labels to identify the correct override knob
direction. These will be applied when the actuators are configured in
Section 4.2.
There are two ways to mount the actuators:
1. Three bolts (M8 x 1.25 x 440 mm) can be used for rear mount
applications (Bolt heads behind the mounting panel).
2. Three screws and washers can be used for front mount
applications (#12 MAX).
You may rough in the mechanical cables but do not connect them
to the actuators at this point.
Actuator Serial Number
Port Shift
Port Throttle
Starboard Shift
Starboard Throttle
Table 3-1. Actuator serial numbers.

3-4 © 2013 SeaStar Solutions i6800 Installation Supplement, Rev. C
Actuator Power Connections
The shift and throttle actuators for each engine are paired together
and connected with a shared CE20425 power harness. Each CE20425
harness includes two 4-pin power connections, one for shift and one
for the throttle. It is not important which connector is connected to
the shift actuator and which is connected to the throttle. Refer to
Figure 3-4.
PROPERLY SECURE ALL HARNESSES ON BOTH SIDES OF HARNESS
CONNECTORS AND SPLICES. IMPROPER STRAIN RELIEF CAN
RESULT IN MECHANICAL FAILURE OF THE CONNECTION OR, IN
SOME CASES, THE WATERTIGHTNESS OF THE CONNECTOR. LOCATE
ALL SPLICES AND CONNECTORS IN DRY AREAS.
1. Connect the 4-pin connectors to the mating connector on the
shift and throttle actuators.
2. Connect the black and green wires to ground.
3. Connect the red wire through a 25 amp circuit breaker to a
positive power source; preferably direct to the vessel’s batteries
or to a battery switch.
Actuator Ignition Connections
The actuator power harness CE20425 has a single white ignition
sensing (and CAN power) wire which must be connected to an ignition
source that is live when the corresponding engine is in the on position.
The white wire delivers the “wake” signal to each pair of actuators
and they will not function without the wire connected. As such the
integrity of the connection is critical to the safe operation of the
system. Please note the following:
• Whenever possible, make your splice connections in dry areas of
the vessel. If you must splice in a potentially wet area, always secure
the wires in a way that keeps the splice out of pooling water.
• Use sealed, heat-shrink butt splices, such as Molex Perma-Seal,
or a soldered connection with heat-shrink tubing. Always follow the
manufacturer’s installation instructions.
• Secure the wiring on both sides of the splice so that there is no
strain on the splice connection.
• Choose a route for the wires that minimizes exposure to water,
high temperatures, and mechanical damage.
On most vessels you will have one of two options for an ignition source:
a single ignition source wire, or you will have to splice into an existing
ignition wire.
3.3.3
3.3.4
WARNING

3-5
© 2013 SeaStar Solutions i6800 Installation Supplement, Rev. C
3.3.5 Shift Actuator Electrical Connections
1. To use the start-in-gear protection built into the actuator, intercept
the start wire between the ignition switch and the engine start
solenoid and connect the actuator switch leads as follows:
Yellow: Connect to ignition switch
Yellow w/red tracer: Connect to engine start solenoid
The following table lists the ignition start system wire colors
typically used by each manufacturer. This table serves as a
guide only, always consult manufacturer’s documentation for
correct wire identification.
Manufacturer Wire Colors
Yamaha Start circuit – brown
Suzuki Short the brown wires together
Evinrude Start circuit – yellow/red
Mercury Start circuit – yellow/red
Table 3-2. Start-in-Gear wire colors.
NOTICE
The polarity of the start-in-gear
protection wires is important. Make
the connections as described –
do not reverse the wires.
Figure 3-2.
Figure 3-3.
Option 1 – single ignition source
Option 2 – splice into an existing engine ignition wire
IGNITION
SOURCE TO ACTUATOR
MOLEX PERMA-SEAL BUTT SPLICE
P/N 0191640014 OR EQUIVALENT
(NOT INCLUDED)
IGNITION
SOURCE
TO ACTUATOR
TO ENGINE
MOLEX PERMA-SEAL STEP DOWN BUTT
SPLICE P/N 0191640043 OR EQUIVALENT
(NOT INCLUDED)
TWIST WIRES
TOGETHER

3-6 © 2013 SeaStar Solutions i6800 Installation Supplement, Rev. C
3.3.6 Throttle Actuator Electrical Connections
1. Cap and tie back the two yellow wires; these are unused for
throttle actuators.
2. Connect the round DeviceNet connector to the CAN2 network as
shown in Section 3.4.
3. Repeat steps 1 & 2 for other throttle actuator.
Figure 3-4. CE20425 power harness connection.
SHIFT
OTHER CONNECTIONS
OTHER CONNECTIONS
PORT
POWER
CAN2
THROTTLE
POWER
CE20425
FUSE PANEL
MAIN BATTERY
GROUND
RED
WHITE*
RED
WHITE*
RED AND BLACK ARE ACTUATOR POWER
WHITE AND GREEN ARE CAN POWER
*Older CE20425 used Orange and Brown for CAN Power.
GREEN*
BLACK
GREEN*
BLACK
CE20425
CAN2
SHIFT
OTHER CONNECTIONS
STARBOARD
POWER
CAN2
THROTTLE
OTHER CONNECTIONS
POWER
CAN2
25A BREAKER
IGNITION
SOURCE
25A BREAKER
2. If not using start-in-gear protection, cap and tie back the two
yellow wires.
3. Connect the round DeviceNet connector to the CAN2 network as
shown in Section 3.4.
4. Repeat steps 1-3 for other shift actuator.

3-7
© 2013 SeaStar Solutions i6800 Installation Supplement, Rev. C
Figure 3-5 and figure 3-6 show the CAN2 network wiring for single
and dual station applications. All tees must be secured using both
screw holes, and the cable drops at each tee must be appropriately
secured and strain-relieved to prevent any pull on the tees. See
figure 3-7 for proper tee installation example.
The CAN2 network must contain two, and only two, terminating
resistors. One terminator should be installed at each end of the
network backbone.
3.4 CAN2 Harness Connections
FAILURE TO SECURE HARNESS MAY RESULT IN HARNESS WEAR,
CAUSING LOSS OF THROTTLE CONTROL, PROPERTY DAMAGE,
PERSONAL INJURY AND/OR DEATH.
WARNING
Figure 3-5. CAN2 wiring diagram, single station, twin engine.
SHIFT/THROTTLE ACTUATORS
4 x NETWORK TEES CM10060
3'
PIGTAILS
3'
PIGTAIL CM20029
CM100XX
(Where XX is the length in feet required.
6', 12' and 20' lengths are included in the kit.)
MALE
TERMINATOR
CM10051
FEMALE
TERMINATOR
CM10052
CM10060 TEMPORARILY
INSTALLED
CONTROL
HEAD
CANtrak SETUP
TOOL EPSK1207
HATCH OR CONSOLE
MOUNTED COMPONENTS
DASH MOUNTED
COMPONENTS

3-8 © 2013 SeaStar Solutions i6800 Installation Supplement, Rev. C
Figure 3-6. CAN2 wiring diagram, dual station, single engine.
SHIFT/THROTTLE ACTUATORS
2 x NETWORK TEES CM10060
3'
PIGTAILS
PIGTAIL
CE42100*
MALE
TERMINATOR
CM10051
FEMALE
TERMINATOR
CM10052
MAIN STATION
CONTROL HEAD
PIGTAIL
SECOND STATION
CONTROL HEAD
HATCH OR CONSOLE
MOUNTED COMPONENTS
DASH MOUNTED
COMPONENTS
CM100XX
(Where XX is the length in feet required.
6', 12' and 20' lengths are included in the kit.)
* The CE42100 harness contains three flying leads with female bullet connectors.
These leads are not used in the i6800 system and should be left unconnected.
CE42100*
CM20029
TEMPORARILY
INSTALLED
CANtrak SETUP
TOOL EPSK1207
Table of contents
Other SeaSTAR Boating Equipment manuals
Popular Boating Equipment manuals by other brands

Garelick
Garelick 31800 Assembly instructions

Navman
Navman 2 Installation and operation manual

MAX PROP
MAX PROP Easy installation instructions

DAVIS
DAVIS Wheel-a-Weigh 1482 Standart instruction manual

POWERWINCH
POWERWINCH RC30 operating instructions

monster tower
monster tower HS1 Installation instructions and owner's manual