Sebo ET-1 User manual
OWNER’S MANUAL
For Household Use Only

2
ET-1 ET-2
Brush motor 175 Watts, 1.6 Amps 200 Watts, 1.8 Amps
Width 12 in. 15 in.
Weight 5.4 lbs. 5.7 lbs.
Brush roller Replaceable Replaceable
Brush drive Toothed belt with electronic Toothed belt with electronic
overload protection overload protection
TECHNICAL DETAILS
Technical Details 2
How To Contact SEBO 2
Important Safety Instructions 3
SEBO ET Power Head Product Features 4
SEBO Central Vac Wand 4
Identification of Parts 5
Assembly 5
Attaching the Power Head to the Telescopic Tube or Central Vac Wand 5
Attaching the Brush Clip Adapter to the Telescopic Tube 5
Attaching the Central Vac Adapter 5
Operating Instructions 6
Operating the Power Head Without Foot Switch 6
Operating the Power Head With Foot Switch 6
The Brush Height Adjustment Feature 6
Indicator Lights 6
Maintenance 7
Removing the Brush Roller 7
Cleaning the Brush Roller 7
Clog Removal 7
Clogs in the Airflow Pathway 7
Clogs in the Swivel Neck 7
Trouble-shooting Guide 8
ET-1 Power Head Without Foot Switch Schematic and Part Numbers 9
ET-1 Power Head With Foot Switch Schematic and Part Numbers 10
ET-2 Power Head Without Foot Switch Schematic and Part Numbers 11
ET-2 Power Head With Foot Switch Schematic and Part Numbers 12
TABLE OF CONTENTS
To contact SEBO in the United States of America:
SEBO America, LLC
Telephone: (800) 334-6614
Fax: (303) 792-9196
Website: www.sebo.us
To contact SEBO in Canada:
Floor Care Equipment, Ltd.
Telephone: (877) 258-5005
Fax: (800) 270-4807
Website: www.sebocanada.ca
HOW TO CONTACT SEBO
For Warranty coverage information please refer to your Warranty Card included with your SEBO power head.

3
1. Do not leave power head while plugged in. Unplug when
not in use and before servicing.
2. Do not use outdoors or on wet surfaces.
3. Do not use near small children or pets. Do not allow to
be used as a toy. Use of this product by children should
always be supervised by an adult.
4. Use only as described in this manual. Use only
manufacturer-recommended attachments.
5. If power head is not working as it should, has been
dropped, damaged, left outdoors, or dropped into water,
take it to a SEBO service center.
6. Do not plug in if switch is in the ON position.
7. Always carry the power head over steps and sills.
8. Do not handle power head with wet hands.
9. Do not put any object into openings. Do not use machine
with any openings blocked. Keep openings free of lint, hair,
and anything that may reduce air flow.
10. Do not remove any screws from power head.
11. Do not vacuum up anything that is burning or smoking,
such as cigarettes, matches, or hot ashes.
12. Turn off all machine controls before storing.
13. Use extra care when cleaning on stairs.
14. Machines can cause a fire when operated near
flammable vapors or materials. Do not operate this
power head near flammable fluids, dust or vapors or
vacuum up flammable or combustible liquids such as
gasoline.
IMPORTANT SAFETY INSTRUCTIONS
READ ALL INSTRUCTIONS BEFORE USING THIS MACHINE
!SAVE THESE INSTRUCTIONS.
15. Maintenance and repairs must be done by qualified
personnel.
16. Use only original SEBO replacement parts.
17. Do not use power head as a step.
18. Do not leave power head standing in one place with
machine turned on.
19. Keep hair, loose clothing, fingers, and all parts of body
away from power head openings and moving parts. Do
not place fingers or other body parts under power head
unless it is unplugged.
20. Do not place the power head over rug edges or fringe.
21. The brush motor has a manual reset electronic protec-
tor. If the brush roller is jammed, the power head will
shut down automatically. Turn the power head off and
unplug it before removing the obstruction. Once the
obstruction is removed you may plug it in and turn on
the power head.
22. Store the power head in a dry place at room temperature.
23. Use this power head only in combination with a SEBO
vacuum cleaner or a SEBO central vac adapter.
24. Do not connect power head to a malfunctioning or
damaged vacuum cleaner, central vac adapter or
central vac system.
WARNING: To reduce the risk of fire, electric shock, or injury:
4
SEBO ET POWER HEAD PRODUCT FEATURES
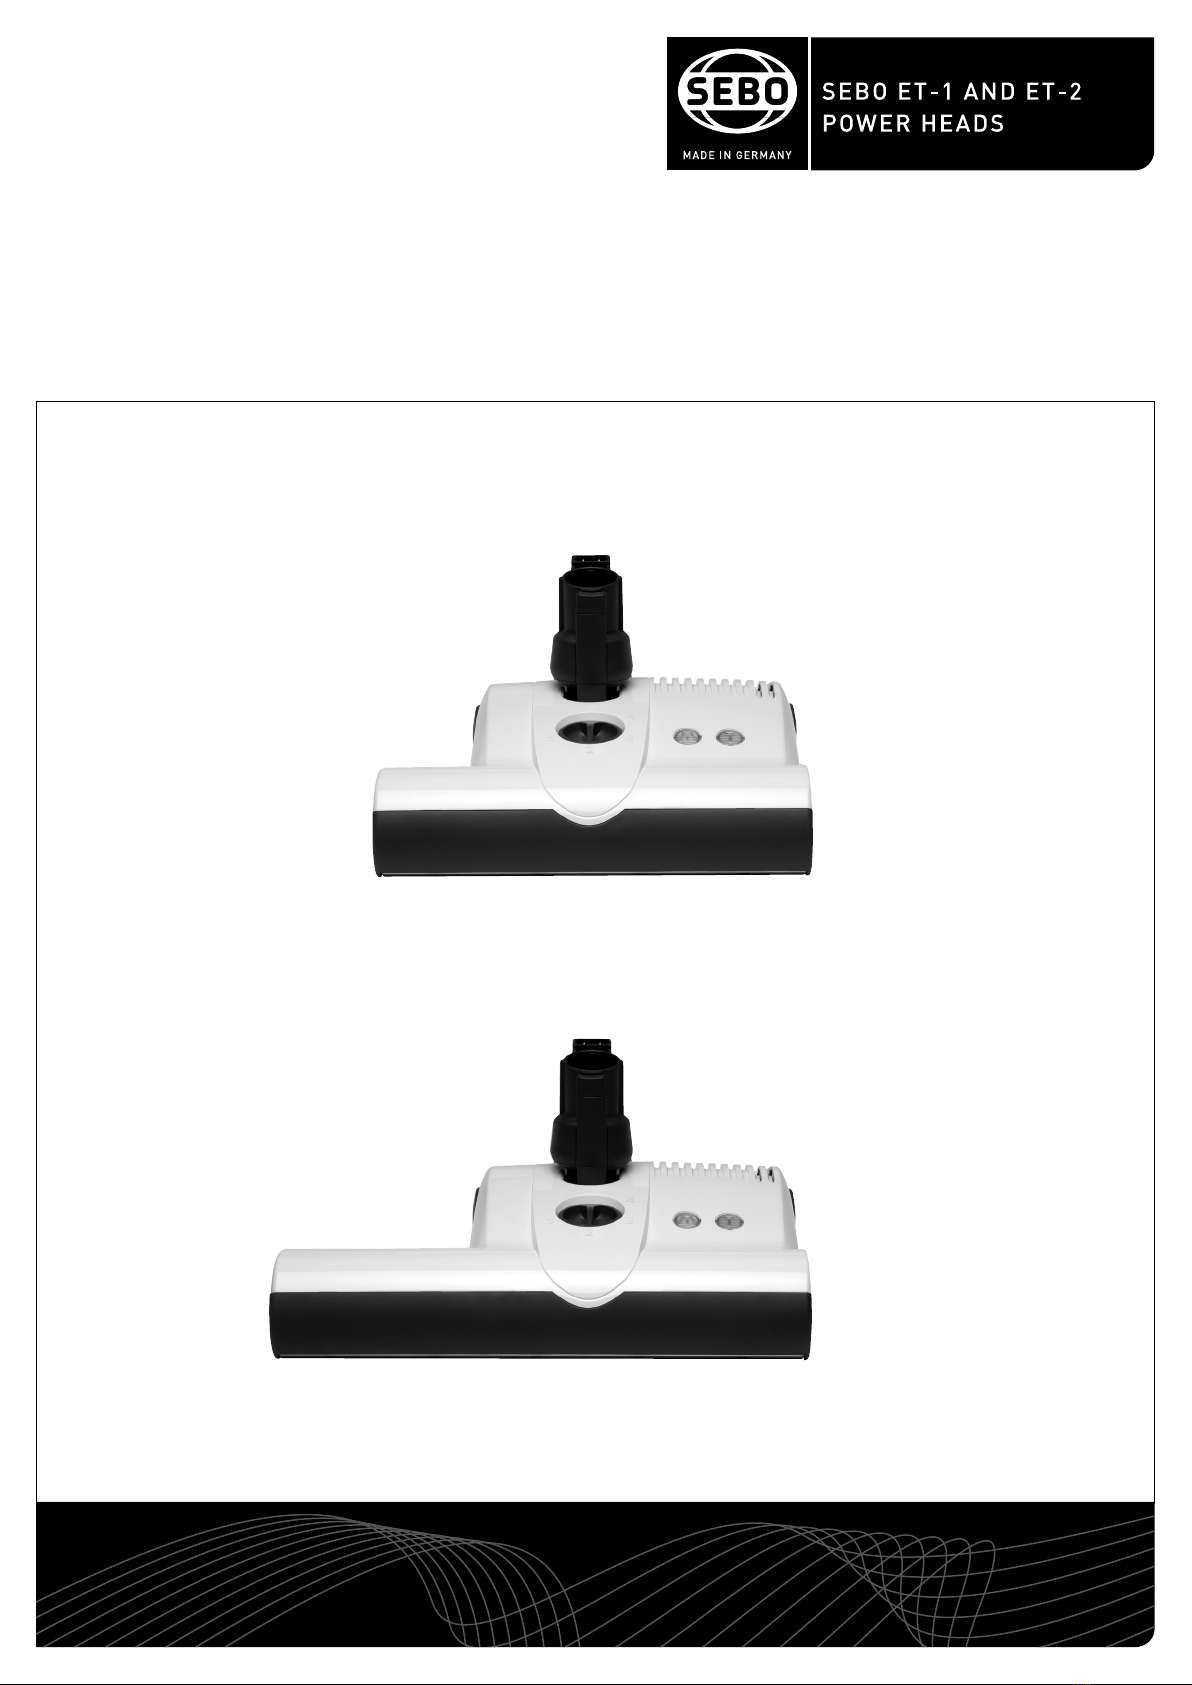
Your SEBO ET-1 and ET-2 Power Heads are designed for use with SEBO canister vacuum cleaners and central
vacuum units. Please note: The on/off foot switch is not available on some models.
The SEBO ET-1 (12 inches wide, 10
1⁄2-inch cleaning path) and ET-2 (14
3⁄4 inches wide, 13-inch cleaning
path) – This model comes in two
widths and has four-level manual
brush height adjustment. It aggres-
sively cleans carpets, but the brush
roller may be switched off by pressing
the green illuminated on/off switch on the power
head, or the switch located on the handle, so delicate
rugs and hard floors can be cleaned with straight
suction. Its amazing 180° steering ability provides
maneuverability around furniture, and the extension
side of the L-shaped head makes cleaning edges and
under counters easy.
Brush Obstruction Light & Auto Shut
Off – If an obstruction be-comes
jammed in the brush roller, a red
brush-warning light will quickly flash,
the brush roller will immediately stop
spinning and the vacuum will shut off.
The user should turn the power switch off, unplug the
machine, and immediately remove the obstruction. If
the user restarts the machine without removing the
obstruction, the power head will again shut off and the
red light will flash.
This prevents the belt from break-
ing and protects the motor and carpet from damage.
Incorrect Height Setting or Brush
Deterioration Light – To ensure opti-
mum cleaning at all times, a red
brush-warning light will illuminate, to
indicate when the brush height is set
too high for effective cleaning or when
the brush roller should be replaced due to excessive
wear.
Manual Height Adjustment - The ET power head brush
height may be adjusted for high carpet (dial setting 4)
and progressively lower to bare floor (dial setting 1). The
brush-warning light located on top of the power head
will illuminate red if the height setting is too high or if the
brush roller is worn. Dial down to the next number until
the red light turns off.
Manual and Automatic Brush Shut
Off – The ET power head can clean
delicate rugs or hard floors with
straight suction because the brush
roller can be manually switched off
by pressing the green illuminated
on/off switch on power heads
equipped with the foot switch. On
power heads without the foot
switch, the brush roller can be
switched off on the handle. Also,
the brush roller automatically
shuts off when the suction hose
from an attached vacuum is
removed from its housing port or
when the swivel neck of the power head is in its
upright-locked position.
Stationary Use - When the power head swivel neck is
in the upright-locked position, it is designed to shut
off the brush roller. The on/off light* illuminates yel-
low when in the upright locked position. The green
light will illuminate only in the operating position. An
operating power head should not stand stationary on
the floor for inappropriate periods of time.
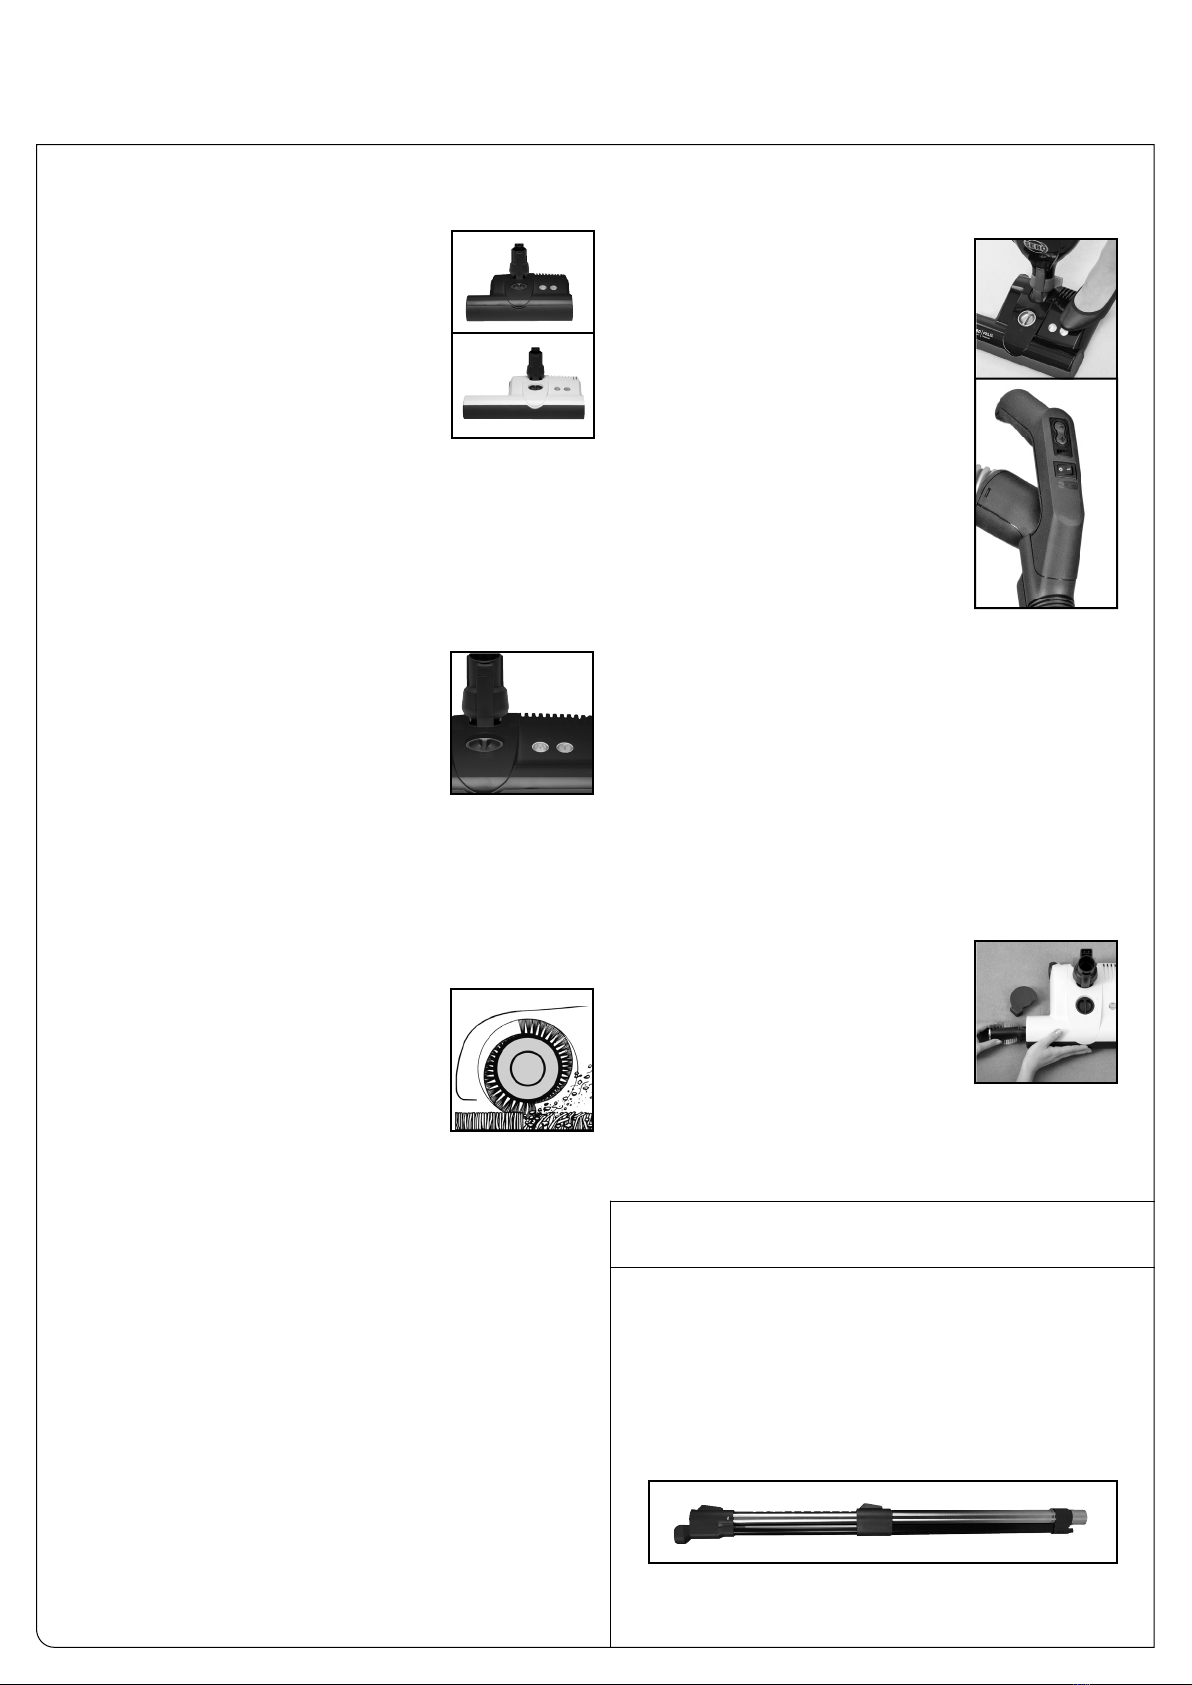
Easy Brush Removal and Cleaning – Cleaning hair or
other debris from the brush roller
or replacing it when its bristles are
worn is quick and easy, and no
tools are required! This feature
ensures consistently effective
brush agitation of the carpet pile.
Easy Maintenance – The clog removal door and
brush roller are easy to access on the power head.
CENTRAL VAC WAND
The optional SEBO Central Vac Wand, part
#6272CA, fits on SEBO ET-1 and ET-2 power
heads and can attach to most existing central
vacuum handle/hose units. The telescopic wand
can be adjusted from 24” to 37” in length to acco-
modate the correct operating height for individ-
ual users.
The wand is made of stainless steel and high-
quality plastic that is durable and reliable.

5
1. Power head
2. Brush height adjustment
3. Swivel neck
4. Connection plug
5. Brush obstruction light
6. On/off brush switch and power light for
models with foot switch
Brush power light for models without
foot switch
7. Brush roller end cap
8. Foot Pedal
9. Telescopic tube release button
10. Brush roller release button
IDENTIFICATION OF PARTS
Attaching the Power Head to the Telescopic Tube of your SEBO
Canister Vacuum or the Central Vac Wand - Figure 1
Insert the base of the telescopic tube (11) or central vac wand into the power head swivel
neck (3). Make sure that the connection tab (12) is properly aligned with the connection
plug (4) in the swivel neck.
Attaching the Brush Clip Adapter to the Telescopic Tube -
Figures 1 & 2
Step 1: Pull the telescopic tube at least 3 to 5 positions above the fully-lowered posi-
tion (figure 1). Press the adapter (14) over the telescopic tube (11) until it snaps on to
the tube. The adapter will lock into the indented lines on the tube.
Step 2: Lay the telescopic tube (11) with the adapter attached (14) on a stable surface
(e.g. a table) and press the brush clip (13) over the adapter (figure 2). The outer ridges
of the brush clip adapter hold the brush clip (13) in place.
Attaching the Central Vac Adapter - Figure 3
Step 1:
Locate the “stop groove”(16) inside the adapter (15).
Step 2:
Loosen the two screws (17) on the adapter (15), but do not remove. Insert the
wand into the tube of the adapter until it rests FIRMLY against the “stop groove” (16). The
tube MUST be fully inserted up to the “stop groove.” If necessary, place the adapter
against a soft stationary surface and use a RUBBER mallet to GENTLY tap the adapter onto
the tube until it rests against the “stop groove.” NOTE: The tube MUST be FULLY inserted.
Step 3:
Tighten the screws (17) but do not overtighten them.
ASSEMBLY
2
810 7
1
1
4
3
8
56
9
2
16
15
17
11
12
13 14
Figure 2
Figure 3
Figure 1
14
11
13
6
Operating The Power Head Without Foot Switch
- Figures 4, 5 & 6
A. The power head may be switched on by pressing the button on the handle of the telescop-
ic tube (figure 5). When the power head is switched on with the swivel neck (#3, figure 6) in
the upright locked position, the brush roller will not spin. To release the power head from the
upright locked position, press down on the foot pedal (#8, figure 6) and lower the swivel neck
into the normal operating position. The brush roller will then start spinning and the on/off
light on the power head will illuminate in green. The handle can be lowered to a horizontal
position useful for vacuuming under beds.
B. To switch from brushing action to straight suction for delicate floors, press the brush roller
on/off switch (#18, figure 5) on the handle of the telescopic tube. This will power off the brush
roller on the power head. The brush roller indicator light on the power head will turn off until
the on/off switch is turned on again.
Operating The Power Head With Foot Switch
- Figures 4 & 6
A. When the power head is switched on with the swivel neck (#3, figure 6) in the upright locked
position, the brush roller will not spin and the on/off light will illuminate in yellow. To release the
power head from the upright locked position, press down on the foot pedal (#8, figure 6) and
lower the swivel neck into the normal operating position. The brush roller will then start spin-
ning and the on/off light on the power head will illuminate in green. The handle can be lowered
to a horizontal position useful for vacuuming under beds.
B. To clean delicate or hard floor surfaces with straight suction only, the power head is
equipped with an on/off foot switch (#6, figure 4). When this switch is used to turn off the
brush roller, the green light will change to yellow, indicating to the user that the brush roller
is not turning. Pushing the button again will turn on the brush roller and the light will turn
green.
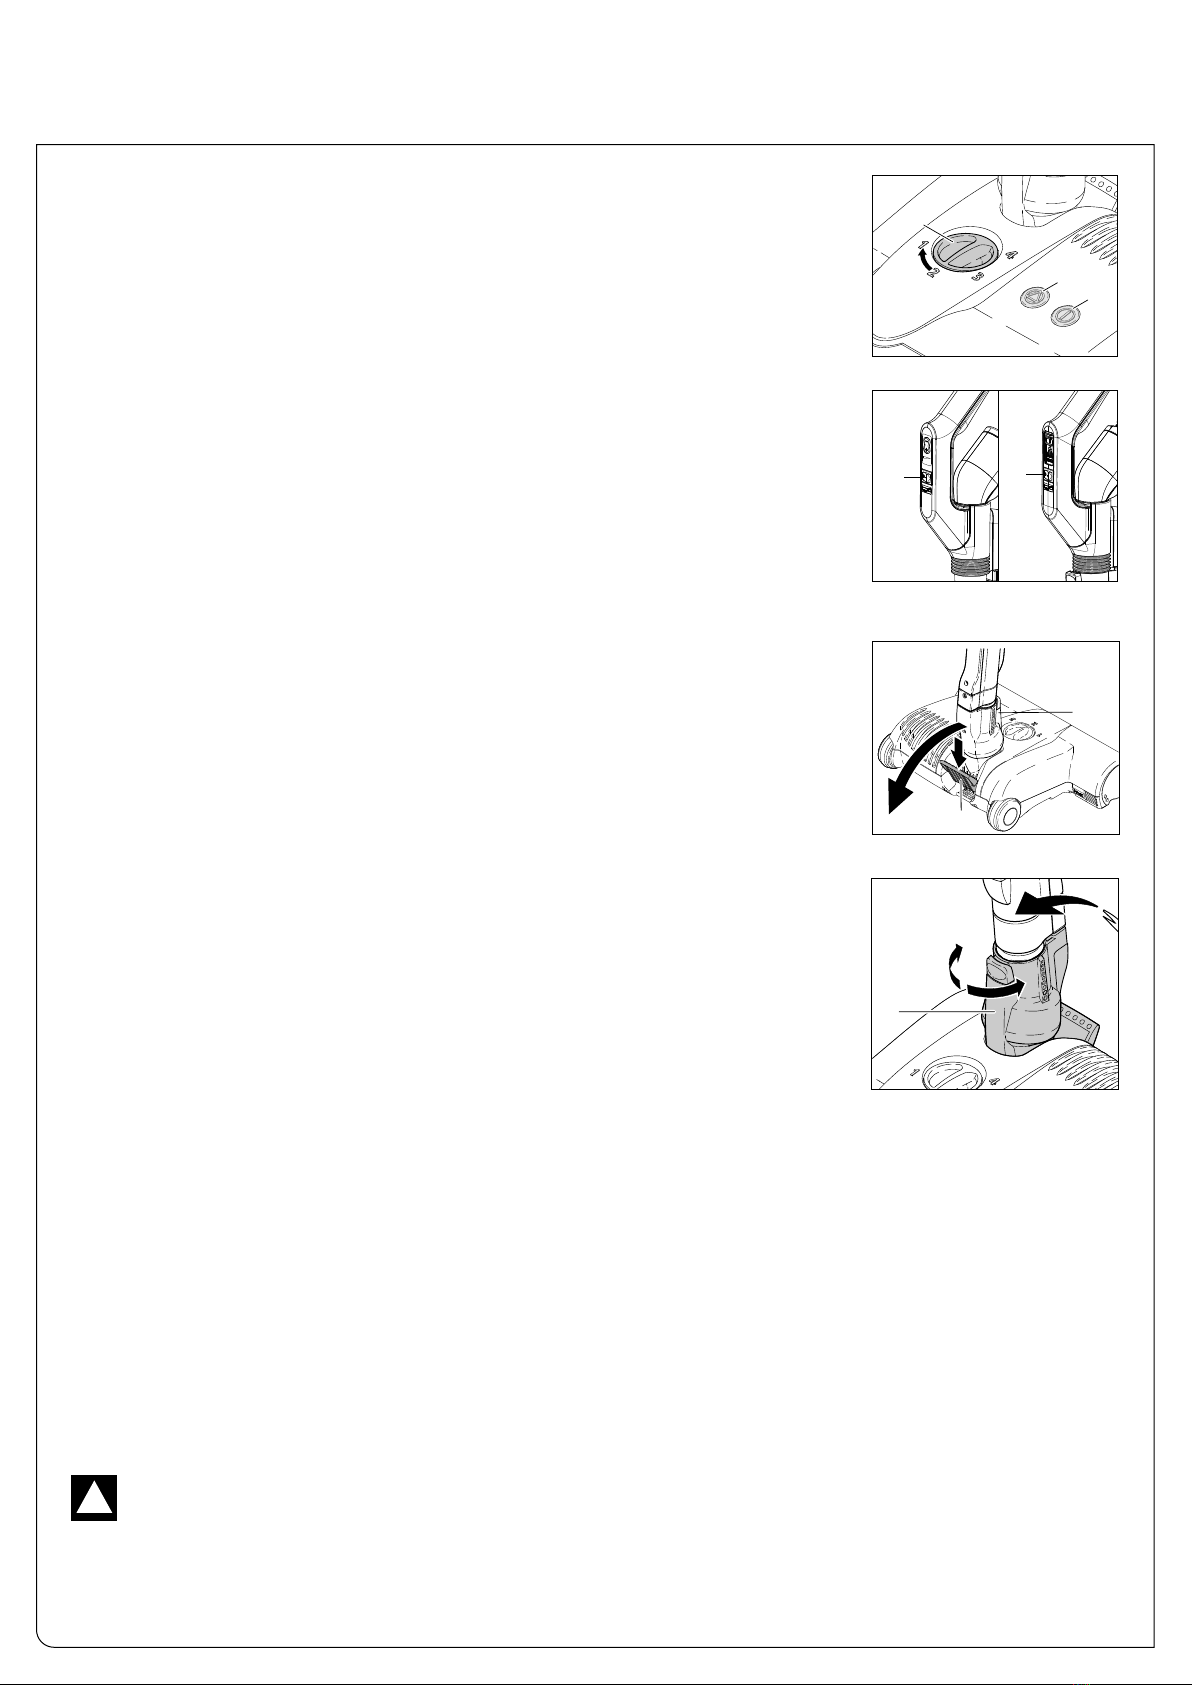
The Brush Height Adjustment Feature - Figure 4
To adjust the brush height, rotate the dial (2) for high carpet (dial setting 4) and progressively
lower (bare floor is dial setting 1). The brush obstruction light located on top of the power head
(5) will illuminate in red if the height setting is too high. Dial down to the next number until the
light is no longer illuminated. If the red light does not turn off, the brush roller may be worn.
Indicator Lights - Figures 4, 6 & 7
The use of a power head is recommended for the optimal cleaning of carpets. The rotating of
the swivel neck (figure 7) allows the power head to steer left and right.
By pushing the foot pedal (#8, figure 6) and lowering the swivel neck, you activate the power
head and the brush begins spinning. Failure to use the foot pedal will cause lasting damage
to the machine. The electronic brush control constantly monitors the status of the brush, com-
municating the status through the lights on top (figure 4).
Green Brush On/Off Light (6):Brush is on and spinning.
Yellow Brush On/Off Light (6)
(on foot switch models):The brush roller has been switched off and the vacuum is operating with straight suction only,
or when the swivel neck is in the upright locked position.
No Light (6)
(on non-foot switch models):The brush roller has been switched off and the vacuum is operating with straight suction only,
or when the swivel neck is in the upright locked position.
Red Brush Light (5):The brush is not fully engaged in the carpet. The height adjustment should be lowered. If the
height adjustment is at its lowest setting, the brush is worn and needs to be replaced.
Red Brush Light
Flashing (5):The brush is blocked. Turn off the power head, disconnect it from the power source, then
remove the blockage (see page 7).
WARNING! The quality, condition, coating, texture, age and manufacturing technique of all floor surfaces vary. Therefore,
power heads with rotating brushes, including your SEBO, may damage some floor coverings or surfaces. Some types of high-
gloss hardwood floors, cushion vinyl, berber carpets, long shag, and delicate or hand-woven carpets are particularly vulnerable to
damage by rotating brushes. When possible, consult the materials supplied by your flooring manufacturer for information on prop-
er upkeep and cleaning. To ensure that your new SEBO power head is compatible with your floor, please test the power head
on each type of flooring surface in a small inconspicuous area to determine if any damage occurs.
If damage occurs, stop using the power head immediately!
!
OPERATING INSTRUCTIONS
3
Figure 7
8
3
Figure 6
5
6
2
Figure 4
Figure 5 - on/off power
switch on handle
18
18
7
MAINTENANCE
20
Figure 9
Always disconnect power head from power source before removing any clogs!
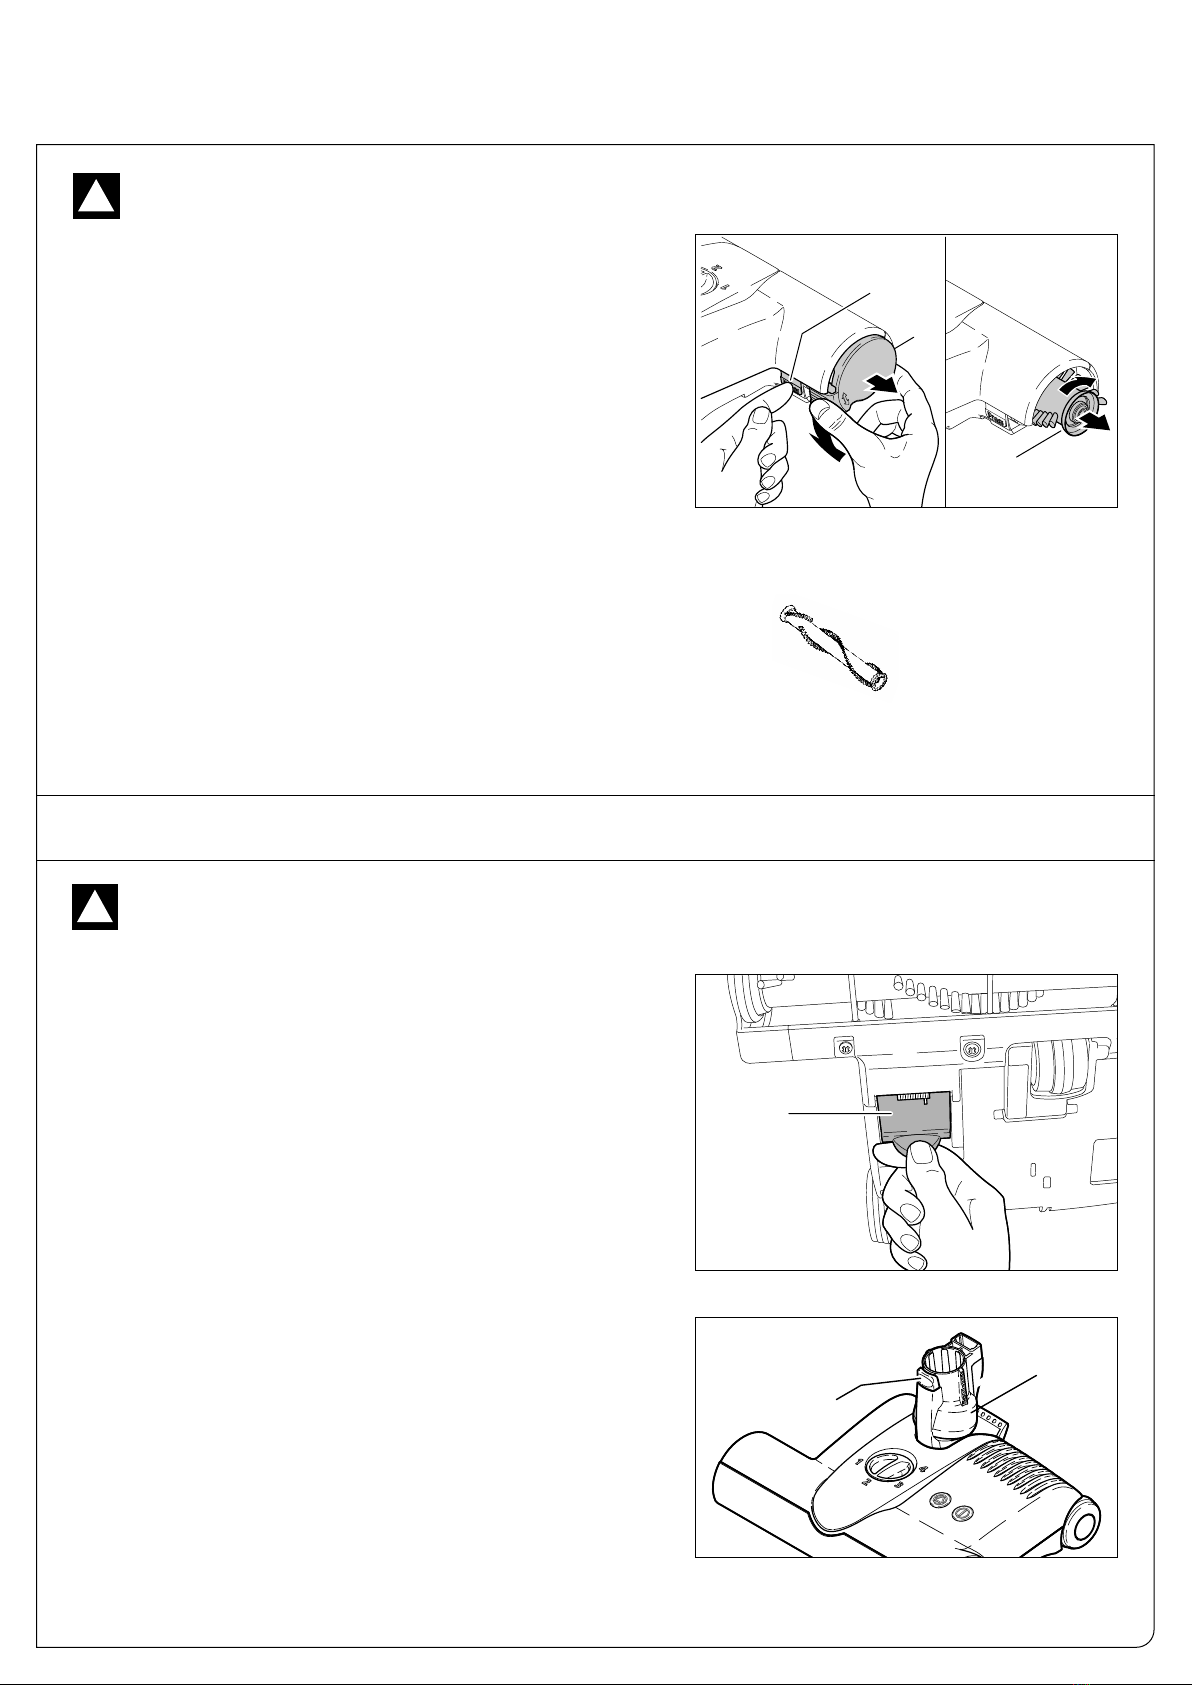
Removing the Brush Roller - Figure 8
To remove the brush roller, press the button marked “PRESS” (10)
and turn the brush roller end cap (7) downward. Turn the brush (19)
slightly to the right and pull it out. We recommend regular removal of
threads and hair which have wound around the brush roller.
7
10
19
Cleaning the Brush Roller
Disconnect power head from power source before attempting to
clean the brush.
The brush should be cleaned regularly. Fibers and hair can be pulled
out of the brush while manually rotating the roller, or the roller can
be removed from the power head to clean it.
Always disconnect power head from power source before dismantling any part of the machine!
!
Clogs in the Airflow Pathway - Figure 9
Many clogs can be removed by accessing the airflow pathway via the
orange colored access door (20) located on the underside of the power
head.
Clogs in the Swivel Neck - Figure 10
Check the swivel neck regularly for blockages. Do not open the
machine. To check for a clog in the swivel neck (3), remove the tele-
scopic tube by pressing the release button (9). Pull the tube out of the
swivel neck. Push the obstruction down the neck with a stick or long
screwdriver and remove it through the orange access door (#20, fig-
ure 9).
Figure 8
For clogs not in the power head, please refer to your canister vacuum
or central vac unit owner’s manual.
!
Brush Roller ET-1
12-inch
Part #5010AM
Brush Roller ET-2
15-inch
Part #2838AM
CLOG REMOVAL
3
9
Figure 10
8
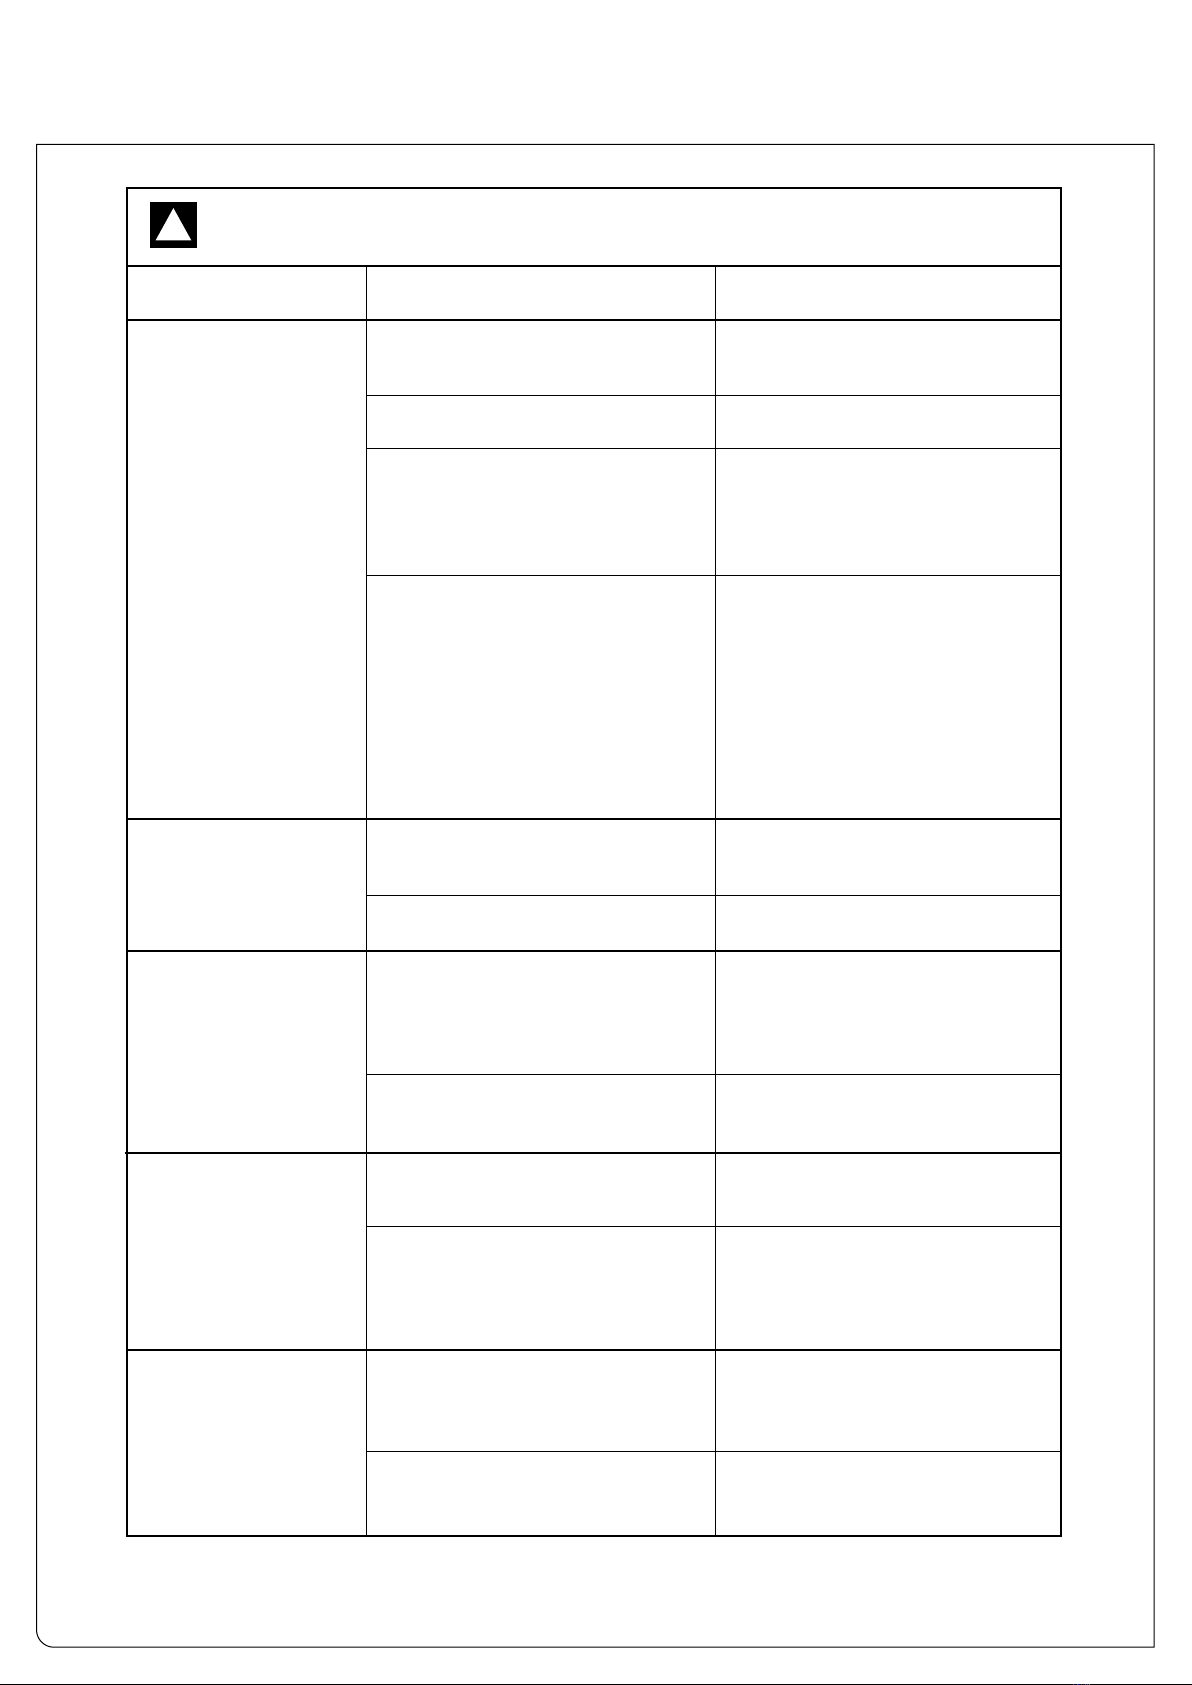
PROBLEM
Power head does
not turn on
Red brush-warning
light is on
No light is illuminated
(Models without foot
switch)
Yellow on/off light
is illuminated
(Models with foot
switch)
Red brush-warning
light is flashing and
brush stops spinning
Does not pick up
REASON
1. Telescopic tube not inserted
properly.
2. Not plugged into good outlet.
3. The internal switch in the
swivel neck is off because the
machine is in the upright locked
position.
4. Models without foot switch:
The on/off switch on the handle
of the telescopic tube is in the
off position.
4. Models with foot switch: The
on/off switch on the power head
is off.
1. Reduced brush action.
2. Brush worn.
1. The internal switch in the
swivel neck is off because the
handle is in the upright locked
position.
2. The brush roller on/off button
is switched off.
1. Jammed brush roller.
2. Overload shut down from
excessively deep but loose
carpet pile (e.g., long shag
carpet).
1. Telescopic tube of vacuum not
inserted properly into power
head.
2. Clog in airflow pathway or
swivel neck.
SOLUTION
1. See page 5.
2. Use another outlet.
3. Release the foot pedal and
lower the suction neck to
operating level. See page 6.
4. Models without foot switch:
Press the on/off switch on the
handle of the telescopic tube to
turn the power head on.
See figure 5, page 6.
4. Models with foot switch: Press
the power head brush on/off
switch. See figure 4, page 6.
1. Brush is not fully in contact with
the floor. Lower the height setting.
2. Replace brush. See page 7.
1. Release the foot pedal and
lower the suction neck to
operating level. See page 6.
2. Press the on/off switch. See
page 6.
1. Remove brush roller
obstruction. See page 7.
2. If carpet pile is too deep and
loose, then use a “shag rake”
attachment instead of the
ET-1 or ET-2 power head.
1. See page 5.
2. Remove clog. See page 7.
Always disconnect the power head before dismantling any part of the machine!
!
TROUBLE-SHOOTING GUIDE
9
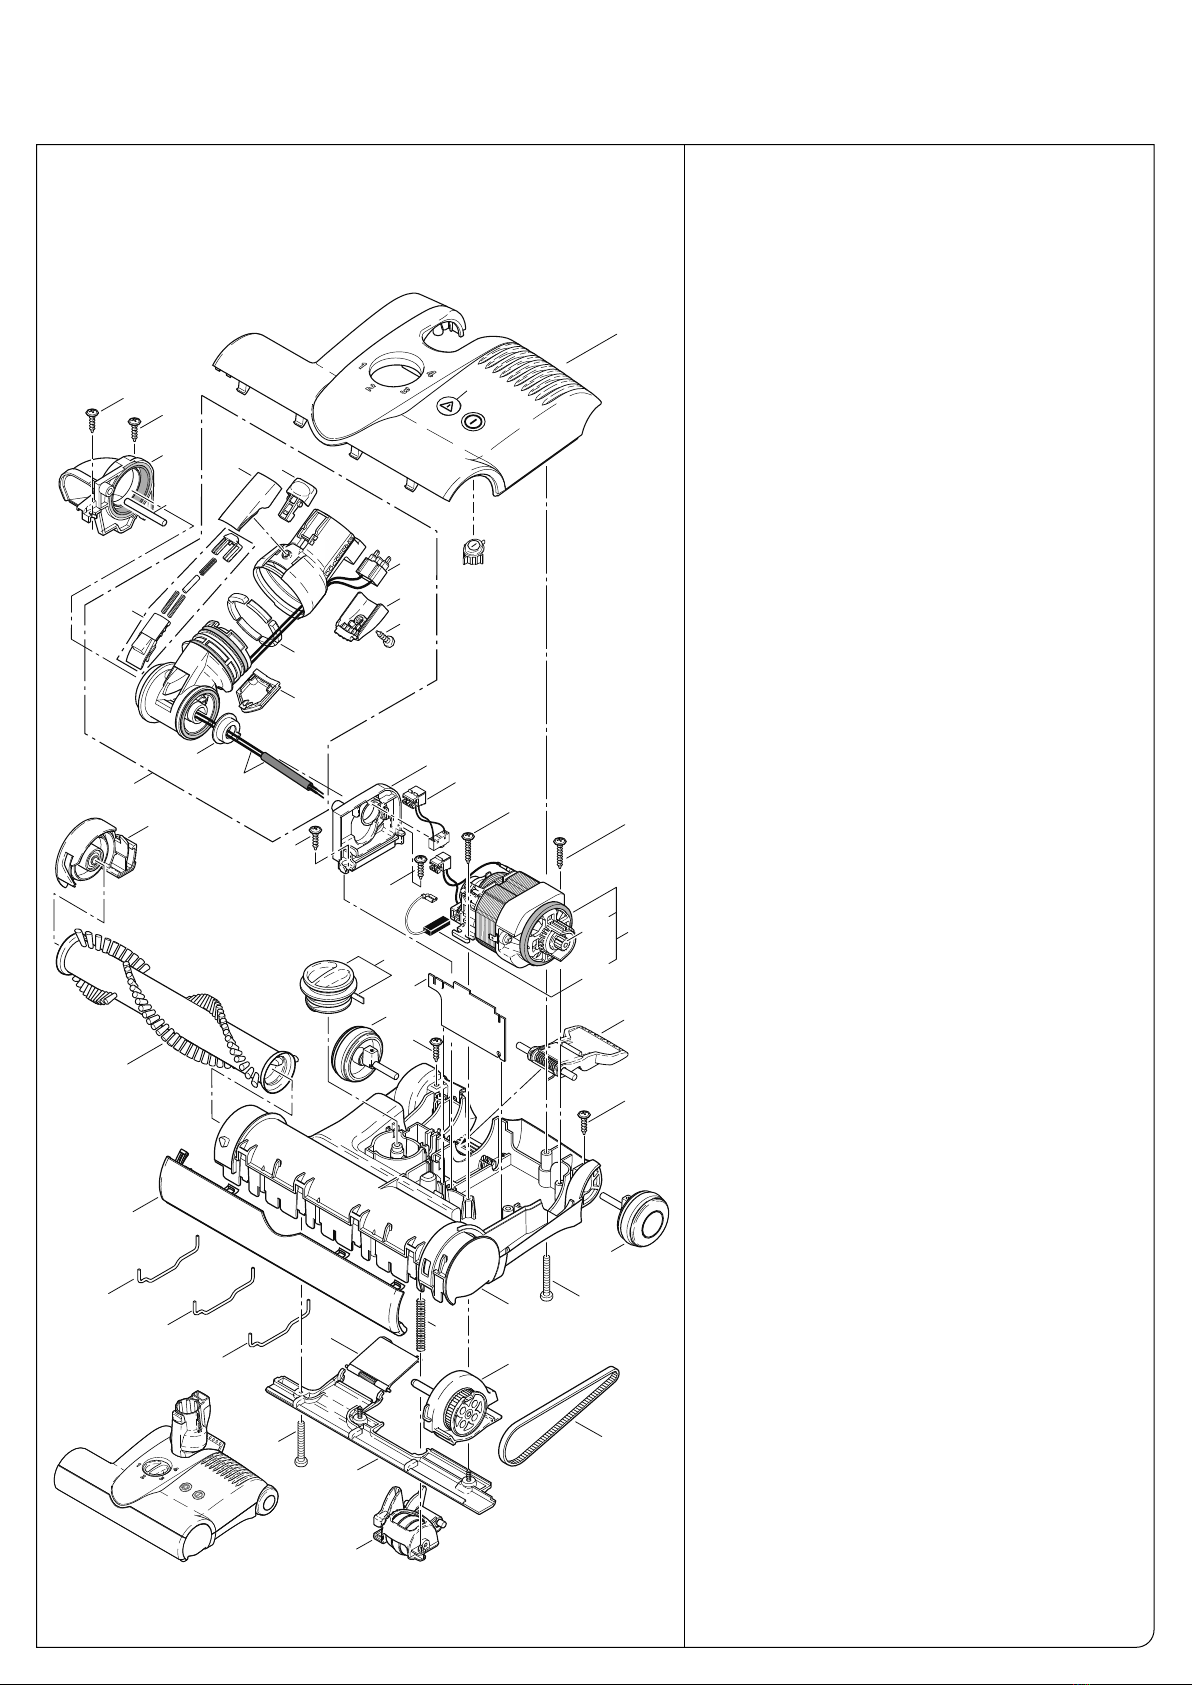
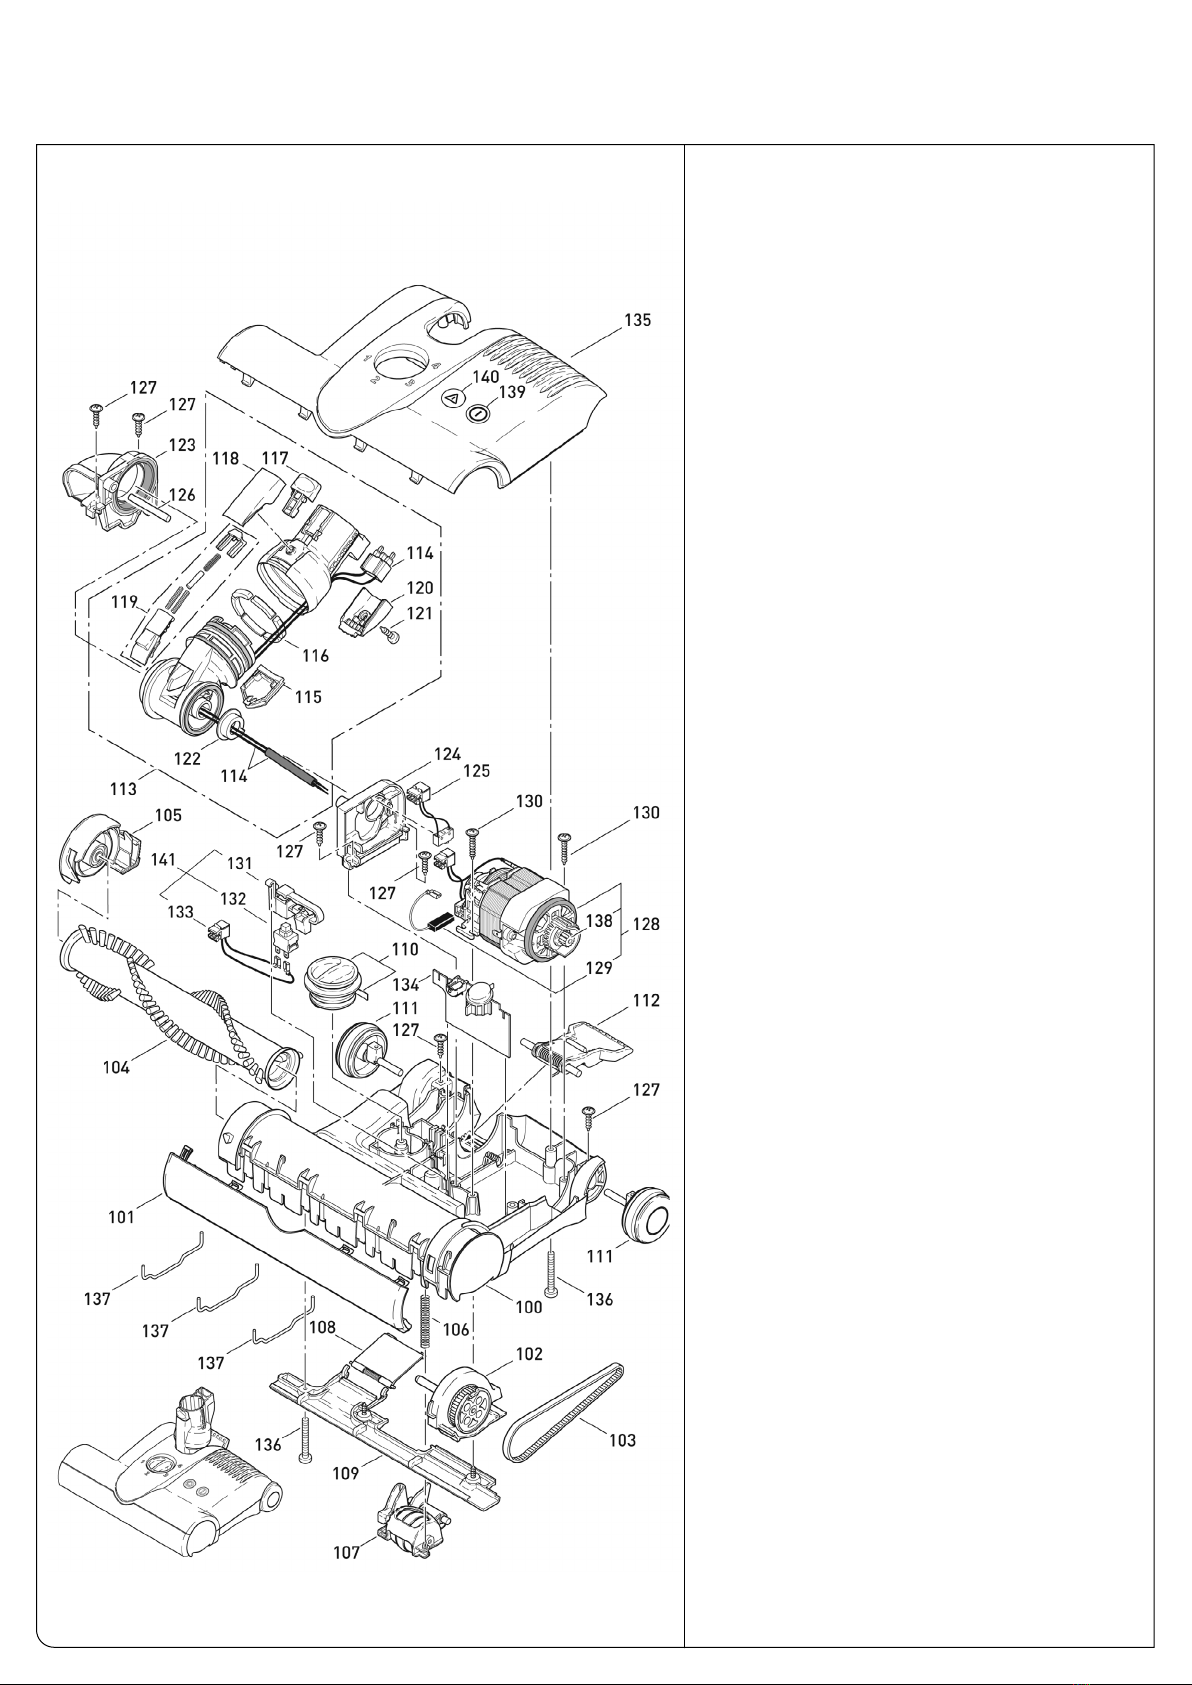
ET-1 POWER HEAD WITHOUT FOOT SWITCH SCHEMATIC AND PARTS LIST
137
132
136
127
127
123
126
118 117
120
114
121
116
115
119
124
125
130 130
114
122
127
105
113
135
128
129
127
110
131
112
127
111
127
104
101
134
108 106
133
134
134
133
109
107
102
100
111
103
ET-1: 12 inches
#9260AM ET-1 Arctic White Power Head
WITHOUT FOOT SWITCH
Pos. Part # Description
100 2324GS Chassis ET-1
101 2302GS Bumper, cpl.
102 2314GS Bearing block, left cpl.
103 2923 Belt 333 3M HTDII-6
104 5010AM Brush roller, cpl.
105 2313GS Bearing block, right cpl.
106 2929 Spring
107 2316GS Pile adjustment assembly, cpl.
108 2909VO Access door w/axle & spring
109 2304GS Rear bottom plate, cpl.
110 2931GS Pile adjustment knob, gray black
111 2306GS Wheel, cpl.
112 2937OR Foot pedal w/axle & spring
113 2307GS Swivel neck assembly, cpl.
114 0876ER Wiring for swivel neck
115 2947GS Cover, TS-neck
116 2950ER Segments, metal (6 pc. set), TS-neck
117 6480ER Release button/w leaf spring
118 2952GS Button cover
119 2945GS Swivel neck slide
120 2951GS Socket cover
121 01027 Screw F 3.9x9.5
122 2954 Swivel neck bearing
123 2311 Swivel neck support, right
124 2312 Swivel neck support, left
125 0880 Wiring swivel neck switch
126 2928 Axle
127 01021 Screw F 3.9x13
128 2973ER Brush motor, 175W w/pulley (129 & 138)
129 05141S Carbon brush set
130 01020 Screw F 3.9x21
131 2684ER Printed circuit board, V2 PCB
132 20337WEET Power head cover ET-1, white
133 0176 Screw AM 4x30
134 5402 Wire tire
135 2319 Motor pulley
136 20955 Lens left, w/o foot switch
137 2956 Brush light lens, right
#9261AM ET-1 Onyx (Black) Power Head
WITHOUT FOOT SWITCH Exception
110 2931SB Pile adjustment knob, silver
132 20337SWET Power head cover ET-1, black
#9274AM ET-1 Orange Power Head
WITHOUT FOOT SWITCH Exceptions
132 20337VOET Power head cover ET-1, orange
#9296AM ET-1 Red Power Head
WITHOUT FOOT SWITCH Exceptions
132 20337DRET Power head cover ET-1, red
#9988AM ET-1 Graphite Power Head
WITHOUT FOOT SWITCH Exceptions
110 2931SB Pile adjustment knob, silver
132 20337GSET Power head cover ET-1, graphite
ET-1 Power Head without Foot Switch
#9260AM ET-1 Arctic White
#9261AM ET-1 Onyx (Black)
#9274AM ET-1 Orange
#9296AM ET-1 Red
#9988AM ET-1 Graphite
110
ET-1 POWER HEAD WITH FOOT SWITCH SCHEMATIC AND PARTS LIST
ET-1 Power Head with Foot Switch
#9258AM ET-1 Arctic White
#9954AM ET-1 Arctic White
#9272AM ET-1 Orange
#9299AM ET-1 Red
#9951AM ET-1 Onyx (Black)
#9981AM ET-1 Graphite
ET-1: 12 inches
#9258AM & 9954AM ET-1 Arctic White Power Head
WITH FOOT SWITCH
Pos. Part # Description
100 2324GS Chassis ET-1
101 2302GS Bumper, cpl.
102 2314GS Bearing block, left cpl.
103 2923 Belt 333 3M HTDII-6
104 5010AM Brush roller, cpl.
105 2313GS Bearing block, right cpl.
106 2929 Spring
107 2316GS Pile adjustment assembly, cpl.
108 2909VO Access door w/axle & spring
109 2304GS Rear bottom plate, cpl.
110 2931GS Pile adjustment knob
111 2306GS Wheel, cpl.
112 2937OR Foot pedal w/axle & spring
113 2307GS Swivel neck assembly, cpl.
114 0876ER Wiring for swivel neck
115 2947GS Cover, TS-neck
116 2950ER Segments, metal (6 pc. set)
117 6480ER Release button/w leaf spring
118 2952GS Button cover
119 2945GS Swivel neck slide
120 2951GS Socket cover
121 01027 Screw F 3.9x9.5
122 2954 Swivel neck bearing
123 2311 Swivel neck support, right
124 2312 Swivel neck support, left
125 0880 Wiring swivel neck switch
126 2928 Axle
127 01021 Screw F 3.9x13
128 2973ER Brush motor, 175W
w/pulley (129 & 138))
129 05141S Carbon brush set
130 01020 Screw F 3.9x21
131 2958ER Lever w/leaf spring
132 05114 Single pole switch
133 0881 Wire
134 2684ER Printed circuit board
135 2326WEET Power head cover ET-1, white
136 0176 Screw AM 4x30
137 5402 Wire tire
138 2319 Motor pulley
139 2957 On/off button/lens, left
140 2956 Brush light lens, right
141 2959ER Switch assembly cpl. (131-133)
#9272AM ET-1 Orange Power Head WITH FOOT SWITCH
Exceptions
135 2326VOET Power head cover ET-1, orange
#9299AM ET-1 Red Power Head WITH FOOT SWITCH
Exceptions
135 2326DRET Power head cover ET-1, red
#9951AM ET-1 Onyx (Black) Power Head WITH FOOT
SWITCH Exceptions
110 2931SB Pile adjustment knob, silver
135 2326SWET Power head cover ET-1, black
#9981AM ET-1 Graphite Power Head WITH FOOT SWITCH
Exceptions
110 2931SB Pile adjustment knob, silver
135 2326GSET Power head cover ET-1, graphite

11
ET-2 POWER HEAD WITHOUT FOOT SWITCH SCHEMATIC AND PARTS LIST
112
127
130
128
100
104
101
136
111
134
110
105
135
130
125
124
127
127
111
127
106
136
4
109
102
108
107
138
137
138
138
129
139
141
127
127
123
126
118 117
120
114
121
116
115
119
114
122
113
140
ET-2: 15 inches
#9251AM ET-2 Onyx (Black) Power Head
WITHOUT FOOT SWITCH
Pos. Part # Description
100 2325GS Chassis ET-2
101 2303GS Bumper, cpl.
102 2314GS Bearing block, left cpl.
103 2923 Belt 333 3M HTDII-6
104 2838AM Brush roller, cpl.
105 2313GS Bearing block, right cpl.
106 2929 Spring
107 2316GS Pile adjustment assembly, cpl.
108 2909VO Access door w/axle & spring
109 2305GS Rear bottom plate, cpl.
110 2931SB Pile adjustment knob, silver
111 2306GS Wheel, cpl.
112 2937OR Foot pedal w/axle & spring
113 2307GS Swivel neck assembly, cpl.
114 0876ER Wiring for swivel neck
115 2947GS Cover, TS-neck
116 2950ER Segments, metal (6 pc. set)
117 6480ER Release button w/leaf spring
118 2952GS Button cover
119 2945GS Swivel neck slide
120 2951GS Socket cover
121 01027 Screw F 3.9x9.5
122 2954 Swivel neck bearing
123 2311 Swivel neck support, right
124 2312 Swivel neck support, left
125 0880 Wiring swivel neck switch
126 2928 Axle
127 01021 Screw F 3.9x13
128 2974ER Brush motor, 200W w/pulley (129 & 139)
129 05141S Carbon brush set
130 01020 Screw F 3.9x21
134 2689ER Printed circuit board
135 20345SWET Power head cover ET-2, black
136 0176 Screw AM 4x30
137 5401 Wire tire - outer
138 5402 Wire tire - inner
139 2319 Motor pulley
140 20955 Lens, left, w/o foot switch
141 2956 Brush light lens, right
ET-2 Power Head without Foot Switch
#9251AM ET-2 Onyx (Black)

12
ET-2 POWER HEAD WITH FOOT SWITCH SCHEMATIC AND PARTS LIST
ET-2 Power Head with Foot Switch
#9259AM ET-2 Arctic White
#9250AM ET-2 Red
#9958AM ET-2 Onyx (Black)
ET-2: 15 inches
#9259AM ET-2 White Power Head
WITH FOOT SWITCH Exceptions
Pos. Part # Description
100 2325GS Chassis ET-2
101 2303GS Bumper, cpl.
102 2314GS Bearing block, left cpl.
103 2923 Belt 333 3M HTDII-6
104 2838AM Brush roller, cpl.
105 2313GS Bearing block, right cpl.
106 2929 Spring
107 2316GS Pile adjustment
assembly, cpl.
108 2909VO Access door w/axle & spring
109 2305GS Rear bottom plate, cpl.
110 2931GS Pile adjustment knob, gray black
111 2306GS Wheel, cpl.
112 2937OR Foot pedal w/axle & spring
113 2307GS Swivel neck assembly, cpl.
114 0876ER Wiring for swivel neck
115 2947GS Cover, TS-neck
116 2950ER Segments, metal (6 pc. set)
117 6480ER Release button w/leaf spring
118 2952GS Button cover
119 2945GS Swivel neck slide
120 2951GS Socket cover
121 01027 Screw F 3.9x9.5
122 2954 Swivel neck bearing
123 2311 Swivel neck support, right
124 2312 Swivel neck support, left
125 0880 Wiring swivel neck switch
126 2928 Axle
127 01021 Screw F 3.9x13
128 2974ER Brush motor, 200W
w/pulley (129 & 139))
129 05141S Carbon brush set
130 01020 Screw F 3.9x21
131 2958ER Lever w/leaf spring
132 05114 Single pole switch
133 0881 Wire
134 2689ER Printed circuit board
135 2341WEET Power head cover ET-2, white
136 0176 Screw AM 4x30
137 5401 Wire tire - outer
138 5402 Wire tire - inner
139 2319 Motor pulley
140 2957 On/off button/lens, left
141 2956 Brush light lens, right
142 2959ER Switch assembly cpl. (131-133)
#9250AM ET-2 Red Power Head
WITH FOOT SWITCH Exceptions
135 2341DRET Power head cover ET-2, red
#9958AM ET-2 Onyx (Black) Power Head
WITH FOOT SWITCH Exceptions
110 2931SB Pile adjustment knob, silver
135 2341SWET Power head cover ET-2, black
Other manuals for ET-1
5
This manual suits for next models
1
Table of contents
Other Sebo Vacuum Cleaner manuals


Sebo
Sebo Airbelt K3 User manual

Sebo
Sebo AUTOMATIC X Series User manual

Sebo
Sebo Automatic X4 User manual

Sebo
Sebo Automatic X4 User manual

Sebo
Sebo Felix Premium User manual

Sebo
Sebo duo User manual

Sebo
Sebo AIRBELT D Series User manual

Sebo
Sebo AIRBELT K User manual

Sebo
Sebo Airbelt E User manual

Sebo
Sebo automatic X Series User manual


