Secant Cardio IIe User manual

SYSTEM VERSION 2.6xx
User’s guide

LIMITED WARRANTY .................................................................................................... 1
USE OF CARDIO............................................................................................................ 3
INTRODUCTION...........................................................................................................................................................3
IMPORTANT ................................................................................................................................................................3
PRESENTATION OF SYSTEM CARDIO.........................................................................................................................4
General ..................................................................................................................................................................4
Help .......................................................................................................................................................................4
LIGHTING ...................................................................................................................................................................5
SECURITY ...................................................................................................................................................................6
TEMPERATURE (HEATING/COOLING) .........................................................................................................................8
SCENES.......................................................................................................................................................................9
Modification of a scene........................................................................................................................................10
How to add new data to an already programmed scene......................................................................................11
Automatic activation of a scene...........................................................................................................................12
OUTLETS /APPLIANCES ............................................................................................................................................13
CURTAIN /SHUTTER .................................................................................................................................................14
S.O.S........................................................................................................................................................................15
PROGRAMMING .......................................................................................................... 16
LOG BOOK ................................................................................................................................................................18
FUNCTIONS (ON/OFF)................................................................................................................................................19
DATE AND TIME........................................................................................................................................................20
SCHEDULING ............................................................................................................................................................21
How to schedule...................................................................................................................................................21
LIGHT SCHEDULING ..................................................................................................................................................22
OUTLETS SCHEDULING .............................................................................................................................................24
ALARM SYSTEM SCHEDULING...................................................................................................................................25
TEMPERATURE SCHEDULING ....................................................................................................................................26
CURTAIN SCHEDULING .............................................................................................................................................27
DETERRENT SCHEDULING.........................................................................................................................................28
REMINDERS ..............................................................................................................................................................30
CONFIGURATION........................................................................................................ 31
CONFIGURATION METHOD ........................................................................................................................................31
Help .....................................................................................................................................................................31
Moves...................................................................................................................................................................32
Modification of a data .........................................................................................................................................32
LIGHT CONFIGURATION ............................................................................................................................................33
OUTLET CONFIGURATION .........................................................................................................................................34
CURTAIN CONFIGURATION .......................................................................................................................................36
CODES CONFIGURATION ...........................................................................................................................................37
DIGITAL KEYS CONFIGURATION................................................................................................................................38
DELAYS CONFIGURATION .........................................................................................................................................38
TELEPHONE CONFIGURATION ...................................................................................................................................39
ZONE NAMES/BEEP CONFIGURATION ........................................................................................................................40
CONTROL BY TELEPHONE........................................................................................ 41
ACCESS FROM INSIDE THE HOME ..............................................................................................................................41
ACCESS FROM OUTSIDE THE HOME ...........................................................................................................................41
EMERGENCY CALLS .................................................................................................................................................41
TELEPHONE OPERATION DIAGRAM ...........................................................................................................................42
RECOMMENDATIONS AND MAINTENANCE............................................................. 43
INDUSTRY CANADA WARNINGS............................................................................... 44

Limited warranty
1
Limited warranty
We appreciate your purchase of a SECANT Home Automation Inc. product. We take pride of
our products and they are manufactured according to strict quality standard. We feel confident
that in normal use they will provide you with satisfactory performance. However, should you
experience difficulty, you are protected under the provisions of this warranty.
SECANT Home Automation Inc. product provided under this purchase is a control device of the user’s
home facilities. Its successful use and operation is dependent on the skill of the operator of the device. It
is possible to incur faulty performance, such as poor lighting, false alarms or insufficient heating or air
conditioning by giving inappropriate commands or instructions to the control device. Accordingly, read
carefully all the instructions contained in this guide before operating this SECANT Home Automation Inc.
product.
THIS WARRANTY IS VALID FOR RESIDENTIAL USE ONLY
SECANT HOME AUTOMATION INC.DOES NOT WARRANT THAT THE FUNCTION CONTAINED IN THE
SOFTWARE/HARDWARE WILL MEET YOUR REQUIREMENTS OR THAT THE OPERATION OF THE SOFTWARE/HARDWARE
WILL BE UNINTERRUPTED OR ERROR FREE.HOWEVER,SECANT HOME AUTOMATION INC.WARRANTS THE
HARDWARE ON WHICH THE SOFTWARE IS FURNISHED TO BE FREE FROM DEFECTS IN MATERIAL AND WORKMANSHIP
UNDER NORMAL USE AND SERVICE FOR A PERIOD OF THREE (3) YEARS FROM THE DATE OF PURCHASE EXCEPT FOR
THE LCD/TOUCH SCREEN COMBINATION FOR WHICH THE PERIOD IS ONE (1) YEAR.REPLACEMENT PARTS,
FURNISHED IN CONNECTION WITH THIS WARRANTY SHALL BE WARRANTED FOR A PERIOD EQUAL TO THE UNEXPIRED
PORTION OF THE ORIGINAL EQUIPMENT WARRANTY.ALL SECANT HOME AUTOMATION INC.PRODUCTS ARE ONLY
WARRANTED TO THE ORIGINAL RETAIL PURCHASER.THIS WARRANTY BECOMES VOID IN THE EVENT SERIAL
NUMBERS ARE ALTERED,DEFACED OR REMOVED.
THE DEALER’S ORIGINAL DATED INVOICE SHOULD BE RETAINED AS PROOF OF PURCHASE AND MUST BE
PRESENTED,TOGETHER WITH THIS WARRANTY,TO THE INSTALLER WHEN THIS PRODUCT IS TO BE SERVICED
UNDER THE PROVISIONS OF THIS WARRANTY.SECANT HOME AUTOMATION INC WILL REPAIR OR REPLACE,WITH
ITS DISCRETION,THE PRODUCTS WHICH WILL HAVE BEEN FOUND DEFECTIVE AND RETURNED OVER ACCORDING TO
TERMS’OF THIS WARRANTY.THIS WARRANTY DOES NOT COVER THE COSTS OF DISPLACEMENT AS WELL AS THE
COSTS OF LABOR TO WITHDRAW AND REINSTALL ANY DEFECTIVE COMPONENT,THIS RESPONSIBILITY FALLS TO THE
INSTALLER.THE TRANSPORTATION CHARGES OF THE PRODUCT ARE THE RESPONSIBILITY OF THE OWNER.
THE WARRANTY SHALL APPLY TO SECANT HOME AUTOMATION INC.PRODUCTS PURCHASED FROM AN
AUTHORIZED DEALER,AGENT AND/OR REPRESENTATIVE.THIS WARRANTY SHALL NOT APPLY TO DAMAGE DUE TO
HANDLING,TRANSPORTATION,UNPACKING,INSTALLATION,ANY DEFECTS CAUSED OR REPAIRS REQUIRED AS A
RESULT OF NOT FOLLOWING THE INSTRUCTIONS IN THE USER’S MANUAL,REPAIR OR REPLACEMENT OF PARTS
SUPPLIED BY OTHER THAN SECANT HOME AUTOMATION INC.AUTHORIZED DEALERS,ANY MALFUNCTION OF
FAILURE CAUSED BY OR RESULTING FROM ABNORMAL ENVIRONMENTAL CONDITIONS,IMPROPER UNAUTHORIZED
SERVICE,IMPROPER MAINTENANCE,MODIFICATIONS OR REPAIR BY THE CONSUMER,ABUSE,MISUSE,NEGLECT,
ACCIDENT,FIRE,FLOOD,OR OTHER ACTS OF GOD,AND INCORRECT LINE VOLTAGE.THIS WARRANTY SHALL NOT
APPLY TO OTHER PRODUCTS NOT MANUFACTURED BY SECANT HOME AUTOMATION INC.SUCH AS ALARM
DEVICES,HEATING /COOLING SYSTEMS OR LIGHTING CONTROLS,THEIR INSTALLATION AND THEIR FUNCTIONING.
FOR ANY AND ALL AND ANY OF THOSE PRODUCTS,THE USER SHALL REFER TO THE WARRANTY OFFERED BY EACH
OF THEIR SPECIFIC MANUFACTURER.

Limited warranty
2
THE SOFTWARE,HARDWARE,AND DOCUMENTATION IS PROVIDED “AS IS”WITHOUT WARRANTY OF ANY KIND,
EITHER EXPRESS OR IMPLIED,BUT NOT LIMITED TO THE IMPLIED WARRANTIES OF MERCHANTABILITY AND FITNESS
FOR A PARTICULAR PURPOSE.SECANT HOME AUTOMATION INC.RESERVES THE RIGHT TO MAKE CHANGES IN
DESIGN OR TO MAKE ADDITIONS TO OR IMPROVEMENTS UPON ITS PRODUCTS WITHOUT INCURRING ANY OBLIGATION
TO INSTALL THE SAME ON PRODUCTS PREVIOUSLY MANUFACTURED.
NO LIABILITY FOR CONSEQUENTIAL DAMAGES.TO THE MAXIMUM EXTENT PERMITTED BY APPLICABLE LAW,IN NO
EVENT SHALL SECANT HOME AUTOMATION INC OR ITS SUPPLIERS BE LIABLE FOR ANY SPECIAL,INCIDENTAL,
INDIRECT,OR CONSEQUENTIAL DAMAGES WHATSOVER (INCLUDING,WITHOUT LIMITATION,DAMAGES FOR LOSS OF
BUSINESS PROFITS,BUSINESS INTERRUPTION,OR ANY OTHER PECUNIARY LOSS)ARISING OUT OF THE USE OF OR
INABILITY TO USE THE SOFTWARE PRODUCT AND ACCOMPANYING HARDWARE EVEN IF SECANT HOME
AUTOMATION INC HAS BEEN ADVISED OF THE POSSIBILITY OF SUCH DAMAGES BECAUSE SOME STATES AND
JURISDICTIONS DO NOT ALLOW THE EXCLUSION OR LIMITATION OF LIABILITY FOR CONSEQUENTIAL OR INCIDENTAL
DAMAGES,THE ABOVES LIMITATION MAY NOT APPLY TO YOU.
THE FOREGOING IS IN LIEU OF ALL OTHER WARRANTY EXPRESSED OR IMPLIED INCLUDING WARRANTIES OF
MERCHANTABILITY OR FITNESS FOR A PARTICULAR PURPOSE AND SECANT HOME AUTOMATION INC.NEITHER
ASSUMES NOR AUTHORIZES ANY PERSON TO ASSUME FOR IT ANY OTHER OBLIGATION OR LIABILITY IN CONNECTION
WITH THE SALE OR SERVICE OF ITS PRODUCTS.ACCORDINGLY,ADDITIONAL STATEMENTS IN ADVERTISING,
PRESENTATIONS,DEMONSTRATIONS OR ELSEWHERE,WHETHER VERBAL OR WRITTEN,DOES NOT CONSTITUTE
WARRANTIES BY SECANT HOME AUTOMATION INC.AND SHALL NOT BE RELLED UPON.
NO OTHER WARRANTIES.TO THE MAXIMUM EXTENT PERMITTED BY APPLICABLE LAW,SECANT HOME
AUTOMATION INC AND ITS SUPPLIERS DISCLAIM ALL OTHER WARRANTIES,EITHER EXPRESS OR IMPLIED,
INCLUDING,BUT NOT LIMITED TO,IMPLIED WARRANTIES OF MERCHANTABILITY AND FITNESS FOR A PARTICULAR
PURPOSE,WITH REGARD TO THE SOFTWARE PRODUCT AND ACCOMPANYING HARDWARE.THIS LIMITED WARRANTY
GIVES YOU SPECIFIC LEGAL RIGHTS YOU MAY HAVE OTHERS,WHICH VARY FROM STATE/JURISDICTION TO
STATE/JURISDICTION.THE PURCHASER MAY HAVE OTHER RIGHTS UNDER EXISTING STATE OR FEDERAL LAWS,AND
WHERE ANY TERMS OF THIS WARRANTY ARE PROHIBITED BY SUCH LAWS,THEY ARE DEEMED NULL AND VOID,BUT
THE REMAINDER OF THE WARRANTY SHALL REMAIN IN EFFECT.

Use of CARDIO
3
Use of CARDIO
Introduction
The CARDIO home automation system enables homeowners to better manage such basic functions as
heating/air conditioning, security, lighting and appliance control. Through the automation of some of these
functions, CARDIO also ensures a higher degree of comfort and peace of mind. Additionally, the efficient
management of heating/air conditioning and lighting brings tangible savings.
CARDIO has been designed to ensure an extremely user-friendly system. CARDIO can be controlled
both from inside the home (through its touch screen or from any inside telephone) as well as from any
location in the world. Your home, therefore, is always as close as the nearest telephone.
The commands used are easy to understand and are often identical to those used in well-known devices
such as thermostats and alarm systems.
CARDIO’s goal is therefore to help better manage the home environment. It works in the background to
enhance the home, to make it more efficient but also more comfortable.
Important
CARDIO’s touch screen offers user-friendly features unmatched by any mass produced electronic
system. A light touch is all that is necessary to turn on the screen and execute the commands.
!WARNING!: Never apply any hard or sharp objects to the screen to avoid possible
damage. As noted above, a light touch is sufficient.
To clean your CARDIO touch panel, we recommend using LCD cleanser that can be purchased at any
electronics store and a clean cloth. Get the cloth damp and then apply to the screen. Never splash the
screen and try to wipe out the liquid.
ATTENTION!: Never use windows or house cleanser with ammoniac and/or any others
commercial cleansers to clean the CARDIO screen. Also be caution to use a clean cloth
as tiny, hard particles trapped in the fibers can scratch the surface of your screen.

Use of CARDIO
4
Presentation of system CARDIO
CARDIO’s screen shuts down after being idle for one minute. It is easy to reactivate by pressing
anywhere on it and the basic screen as shown below will then appear. Besides giving information such as
date and time as well as operating status (current temperature, security, etc.), this particular screen
enables the user to directly control all of the basic functions that CARDIO manages. It also gives access
to the programming section.
MAIN MENU
General
The method of navigation is virtually identical in all the menus and functions of CARDIO. The buttons
particular to each function will be presented to you in their respective section.
Help
On all majors screens functions of the CARDIO system a HELP button gives a brief description of the
purpose of the screen and its operation.
Press to obtain assistance on the function in progress. Press to come back.
On the main screen, the help feature is “hidden”, just touch on the empty space on the right lower corner
of the screen to bring up the main page help menu.
Appliances
Security
Unlocked = disarmed
locked = armed Telephone
Recording mode
(Appears when programming scene only.)
Ambient
Temperature
Scenarios
Battery low
Date and time (7 seconds)
alternating with sunrise and
sunset time (3 seconds).
Lighting
Programming
Emergency
Curtain/Shutter
Fan
(Appears only when the heating/ventilating fan is on (if any)).
AC status (Appears when AC
failure, defective or unplugged
transformer.)
Temperature
Security
B= the alarm system
has been activated
with bypassed zones
M= There is an alarm
event requiring the
user attention.
A= a self-protection
technical area has
been activated.

Use of CARDIO
5
Lighting
Control groups of lights linked to CARDIO (ON/OFF, dim). Each group can be made up of many lights.
From the main menu press
The following screen appears:
Modification of the state of a lamp or a group of lamps:
Select a group of lights, the name turns black. By default, group 1 is picked by the system (GARDEN in
the above example).
The current dim level appears both in the box (60%) and on the quick dim column.
Press the quick dim column to adjust the dim to 80%
Press 5 times on + to adjust the dim to 85%
Dim will adjust automatically in the column and in the box
Repeat the above instructions to modify other groups of lights
Precise dim control
(+/- 1%) Acces to others
groups (if available)
Current dim value
Name of the light or group
(see configuration)
Exit to return to previous screen
Help
Quick dim control
(0, 20, 40, 60, 80
or 100%)

Use of CARDIO
6
Security
Controls the arming and disarming of the alarm system.
From the main menu press
The following screen appears:
Press to bypass zones if necessary.
The following screen appears
Name of the zones
Access to log book
Keypad to enter access code
To bypass one or
more zones

Use of CARDIO
7
To bypass zones, simply press the zones to be ignored (these zones are now crossed out)
Press to return to the preceding screen (zones are still crossed out)
To test the siren, press the button, the siren will start for 3 seconds.
Make sure that all zones are ready to disarm except for bypassed zones. The system cannot be armed as
long as zones are still open (open zones appears in left column). Once this column is blank the system is
ready to be armed.
Use the keypad to enter the access code; * asterisks appear in the upper corner of the screen to validate
each number entered. If the code utilized is not valid, the message “INVALID CODE OK” appears. Press
OK, then re-enter the valid code.
A beep indicates that the alarm system has been armed (except for the bypassed zones). Exit the house
within the time delay pre-programmed during installation.
To disarm the alarm system (a beep sounds for the duration of the entrance time delay) enter a valid
access code. Another beep will sound and the message “SECURITY DISARMED” shows that the alarm
system has been disarmed.
To disarm the alarm system, CARDIO automatically brings up the keypad shown on page 6, and waits for
the valid access code to be entered. If the code is invalid, the message “CODE INVALID OK” appears.
Press anywhere on the screen and re-enter the correct code.
NOTE:It is strongly recommended to test the correct operation of the security system on a regular
basis.

Use of CARDIO
8
Temperature (Heating/Cooling)
This feature controls temperatures for heating and, if available, air-conditioning. Temperature readings
are available either in Celsius or Fahrenheit (to be set in temperature configuration). CARDIO can also
control various kinds of heating systems: heat pump, HVAC, HVAC setback, heating setback or central
heating (to be defined at the time of installation).
From the main menu press
One of the following screens appears (depending of your hardware configuration)
NOTE: To obtain “economy” temperatures with a central heating system, use scenes (see next page).
Economy
temperature
settings
Activation of normal
heating mode
(temperature
individual
)
Central heating and Setback heating screen
Status
Cooling temperature
settings
Status
Access to others
g
rou
p
s
(
if available
)
Heating temperature
settings.
Mode selection: Heatin
g
, coolin
g
, auto or none.
Heat pump and HVAC screen
Fan on/off
(if available)

Use of CARDIO
9
Scenes
CARDIO can control many functions at a time (lighting, alarm system, temperature, outlets, etc.). For
instance, when leaving the house in the morning, simply press one button to arm the alarm system, lower
the temperature, turn lights off, etc..
From the main menu press
The following screen appears:
Press any of the ten keys to obtain the desired scene.
NOTE: The last scene called up will always take priority over any previous scene. For the case where a
scene includes alarm system information, refer to priority sequence, see NOTE p.11
Name of secnes
Modification of a scene
Access to others
scenes

Use of CARDIO
10
Modification of a scene.
Press
The message “CHOOSE SCENE TO BE MODIFIED” appears.
Press the scene to be programmed or modified.
The following screen appears:
NOTE: Please note that the maximum lines of all programmed scenes cannot exceed 800.
To change the automatic
activation of a scene
Delete the selected data
Used to add data to a
scene
To delete all data in the scene
To rename a scene
Used to add more data to a
scene
Data selection ba
r
Data already in the scene
(before the initial
programming, this screen
is blank)
Name of the scene
Buttons used to scroll
the data selection ba
r

Use of CARDIO
11
How to add new data to an already programmed scene
Press
The new screen which appears is identical to the main screen shown on page 4 except for the pictogram
now appearing in the upper section of the screen. This sign indicates that CARDIO is now in recording
mode and no longer in ‘direct control ‘ mode.
From this screen, it is possible to program data relative to lighting, alarm system, heating/cooling,
electrical outlets and functions (PROG functions yes-no)
NOTE: If a scene includes alarm system commands, it will ask for an access code to be entered (except
when using the quick arm code). At this time, if no code is entered, CARDIO will execute all commands
programmed in this particular scene except those related to the alarm system.
ATTENTION!: When arming the alarm system only, it is possible to skip this step (entering an
access code) if the access code entered while programming the scene was the ‘quick arm code ‘
(easy exit) see p.37. In this case only, when calling up this particular scene, commands will be
executed instantly without asking for an access code to be entered.
After a function has been programmed, press EXIT to return to the above screen and then press any
other function to be recorded (alarm, etc.)
Once all data has been entered, press
Icon showing that CARDIO is now in
programming mode

Use of CARDIO
12
Automatic activation of a scene
Press
The following screen appears:
Besides the touch screen, a scene can be called up automatically by external sources such as a
telephone or a button.
•X10 code: activation upon reception of a X10 code.
•Key: activation from an electronic key
•Zone: activation upon reception of an event related to the alarm system. Also includes the activation
of the scene when the telephone rings (TE) or the doorbell rings (DB).
•Time: activation of the scene at a preset time or at sunrise and sunset.
•Buttons: activation of the scene with a keypad buttons (3 max.) connected on the SECANT EZC.
•Conditions: it is also possible to add conditions in regards to the automatic activation of a scene.
The many conditions to choose from are: armed, disarmed, day, night, weekend, week, Sun, Mon,
Tues, Wed, Thu, Fri or Sat.

Use of CARDIO
13
Outlets / Appliances
From the main menu press
The following screen appears:
CARDIO can control appliances plugged into outlets previously identified in CARDIO (see configuring
p.34). Please note that outlet control is limited to ON/OFF commands only.
NOTE: The relays of CARDIO RY1, RY2 and RY3 are respectively controlled by the buttons Outlet#1,
Outlet#2 and Outlet#3 in the appliances screen.
ATTENTION!: Under no circumstances can an outlet be dimmed without seriously damaging
the appliance which is plugged into the outlet.
On/Off
commands
Current
outlet status
Name of the
appliance
plugged into
this outlet

Use of CARDIO
14
Curtain / shutter
From the main menu press
The following screen appears:
Modification of the position of a curtain:
Select a curtain, the name turns black. By default, curtain 1 is picked by the system (Curta1 in the above
example).
The current position level appears both in the box (60%) and on the quick position column.
Press the quick position column to adjust the position to 80%.
Press 5 times on “+” to adjust the position to 85%.
Position will adjust automatically in the column and in the box.
Repeat the above instructions to modify position of other curtain.
Precise position
control (+/- 1%)
Current position value
Name of the curtain
Quick position
control
(0, 20, 40, 60,
80 or 100%)

Use of CARDIO
15
S.O.S
CARDIO can send out emergency calls in case of emergency. See “Control by telephone” section for
more detail on these calls.
From the main menu press
The following screen appears:
Press any pictogram to send out an emergency message (police, medical or fire).

Programming
16
Programming
In addition to direct control of basic functions, the user is able to program all of these functions to respond
automatically on a weekly basis. This section also gives information regarding modifications to the system
configuration.
From the main menu press
The following screen appears:
Enter the programming code that has been programmed in the section Configuration (p.37). The default
code for the programming menu is 11111.

Programming
17
After a valid user code has been entered the following screens will appear:
PROGRAMMING MENU p.1
PROGRAMMING MENU p. 2
Security scheduling
Reminders
Temperature scheduling
Outlet schedulin
g
Deterrent scheduling
Light scheduling Curtain scheduling
Date and time settin
g
Configuration
Functions ON/OFF
Log book

Programming
18
Log book
Indicates the last 100 events related to the alarm system (break-in, fire, medical, overheating, freezing,
battery status, AC failure, access code).
From programming menu press
The following screen appears:
Date and time the event
occurred
Description or the event
Scrolling arrows
Other manuals for Cardio IIe
1
Table of contents
Popular Security System manuals by other brands
Detex
Detex EAX-3500 installation instructions

Arlo
Arlo Arlo Go quick start guide

Daniamant
Daniamant Dan MR3 Installation and maintenance instructions
Response
Response SL2 Installation & operating manual
INNOTEC
INNOTEC 100 Series Installation & operation instructions

SECO-LARM
SECO-LARM ENFORCER SD-7201GC-PEQ installation manual
HDL
HDL SB-CMS-PIR installation manual

Develco
Develco PBTZB-110 Technical manual
SimpliSafe
SimpliSafe Starter Package owner's manual

Yardgard
Yardgard YG03 Installation & operation instructions

SJE Rhombus
SJE Rhombus Tank Alert I installation instructions
ABB
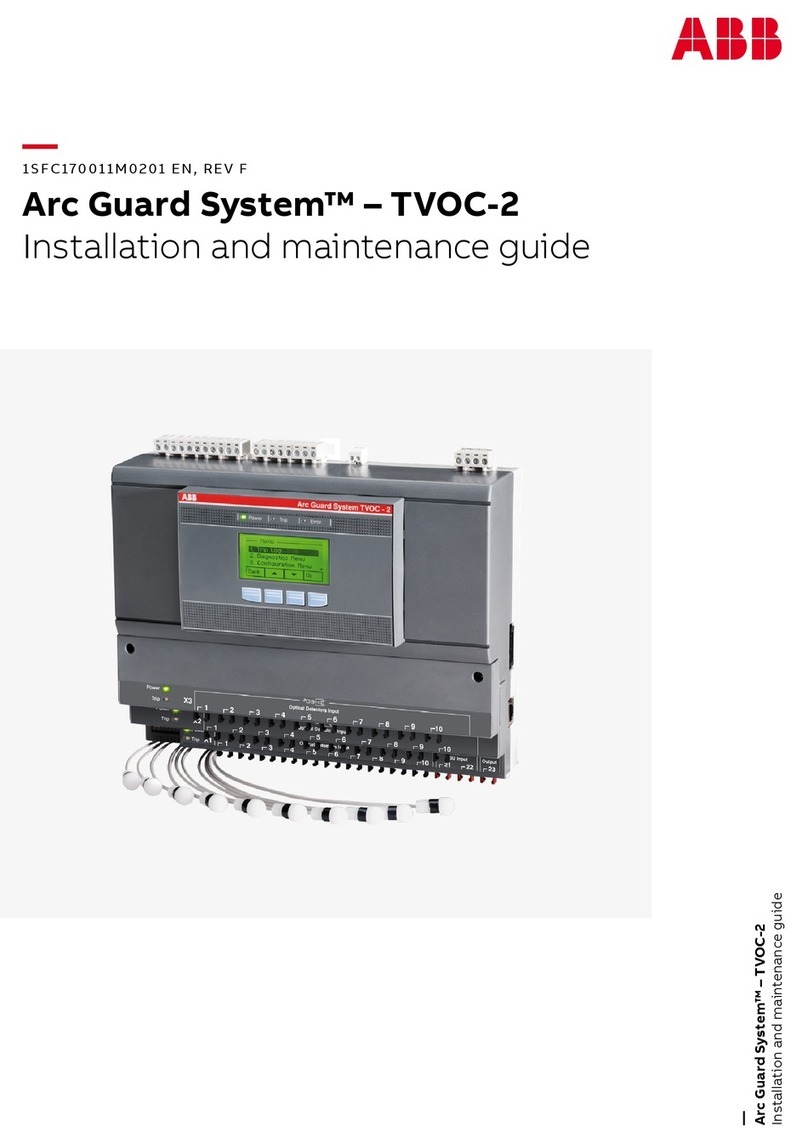
ABB Arc Guard System TVOC-2 Installation and maintenance guide
