manuals.online logo
Brands
  1. Home
  2. •
  3. Brands
  4. •
  5. Posey
  6. •
  7. Security System
  8. •
  9. Posey Sitter Elite User manual

Posey Sitter Elite User manual


FALLS MANAGEMENT
© 2014 Posey Company. All rights reserved.
Posey Company • 5635 Peck Road, Arcadia, CA 91006-0020 USA • www.posey.com
Phone: 1.800.447.6739 or 1.626.443.3143 • Fax: 1.800.767.3933 or 1.626.443.5014
M6249 REV B 010614
AA SIZE AA SIZE
OFF
ON
ANSI-15A IEC-LR6
Qty 4AA Alkaline
DELAY
MODE
TONE
VOLUM
RECOR
+
–
–
+
ON
OFF
Connect the sensor to the alarm by
plugging in the jack labeled “Sensor”.
1. Insert Batteries
2. Connect a Sensor
3. Turn Alarm On
4. Hold
5. Suspend
Slide battery
compartment
door open.
Insert four (4) new “AA” alkaline batteries as pictured
inside the battery compartment.
Note: The alarm will “chirp” about every 15 seconds
when new batteries are needed. Fresh alkaline batteries
have an estimated life of 30 days of daily use. Actual life
depends on alarm mode, tone, and volume you select.
DO NOT mix old and new batteries, or battery brands.
ALWAYS install four (4) fresh “AA” alkaline batteries of the
same brand. DO NOT use the alarm if there are any signs of
corrosion on the batteries or in the battery compartment.
With the sensor connected to the alarm, slide the power
switch on the back of the alarm to “ON”.
Note: If there is no sensor connected when the alarm is
on, the alarm will sound as a failsafe.
Note: The HOLD feature will not work unless a sensor
is plugged into the alarm. The HOLD feature allows 30
seconds to reposition the patient without the need to
turn the alarm off. Press the HOLD/SUSPEND button for 1
second. The HOLD/SUSPEND LED will begin flashing RED
at 3-second intervals. To take the alarm out of HOLD:
• Apply weight to sensor, or
• Press HOLD/SUSPEND button once.
Alarm will “beep” once to indicate monitoring has resumed.
NOTE: The SUSPEND feature will not work unless a sensor
is plugged into the alarm. The SUSPEND feature is indicated
when extended patient care is required. This feature allows
you additional time to perform that care without activating
the alarm. Press the HOLD/SUSPEND button for 3 seconds.
The HOLD/SUSPEND LED will begin flashing RED at ½
second intervals. To take the alarm out of SUSPEND:
• Apply weight to sensor, or
• Press HOLD/SUSPEND button once.
Alarm will “beep” once to indicate monitoring has resumed.
NURSE
CALL
SENSOR
9V
VOICE
&
TONE
TONE
MUTE
VOICE
NURSE CALL
MIC
HOLD
&
SUSPEND
HOLD/SUSPEND
VOICE
&
TONE
TONE
MUTE
VOICE
NURSE CALL
MIC
HOLD
&
SUSPEND
HOLD/SUSPEND
AA SIZE
AA SIZE
AA SIZE
AA SIZE
Qty 4AA Alkaline
ANSI-15AIEC-LRO
OFF
PRESS
Posey® Sitter Elite® Alarm Quick Start Guide
HOLD/SUSPEND
BUTTON
HOLD/SUSPEND
BUTTON
Posey Company • 5635 Peck Road, Arcadia, CA 91006-0020 USA • www.posey.com • Phone: 1.800.447.6739 or 1.626.443.3143 • Fax: 1.800.767.3933 or 1.626.443.5014
7. Tone Selection
8. Volume Selection
9. Setting a Time Delay
Press the TONE button until the tone
that you would like to use plays. Each
time you press the TONE button, the
selection changes and a two (2) second
sample of the tone is played. There are
5 tones to choose from. The last sample
played is the tone selected for use.
Press the VOLUME button to scroll
through the volume selections. Each
time you press the VOLUME button, the
selection changes and a two (2) second
sample of the volume is played. Continue
pressing the VOLUME button until you
hear the desired volume setting. The
last sample heard will be the volume
selected for use.
Move the delay switch to 0, 1 or 2
to change the time delay.
10. Record a Message The green light for Voice and Tone, Tone, Voice or the
red light for HOLD/SUSPEND must be flashing. Press
and hold down the RECORD button. Wait for the beep
before you begin speaking. Speak in a normal voice into
the microphone aperture labeled “MIC” on the top front
of the case. The recording will stop when you release the
button or when you have exceeded 10 seconds. You will
hear a second beep if you have exceeded the 10 second
time limit. This recorded message will play whenever a
voice mode is selected. The louder you speak into the
microphone, the louder the voice playback.
6. Alarm Mode Selection
Turn the alarm on.
Connect a sensor
with weight
applied. Open the
selection door to
display the option
buttons.
Turn the alarm on.
Connect a sensor
with weight
applied. Open the
selection door to
display the option
buttons.
Turn the alarm on.
Connect a sensor
with weight
applied. Open the
selection door to
display the option
buttons.
Turn the alarm
on. Open the
selection door
to display
the option
buttons.
Turn the alarm
on. Connect
a sensor with
weight applied.
Open the
selection door
to display the
option buttons.
Press the MODE selection button
until the LED light flashes green
above the mode you would like
to use.
TONE
TONE
0
1
2
TONE
0
1
2
TONE
0
1
2
TONE
0
1
2
TONE
TONE
TONE
TONE
MODE
BUTTON
TONE
BUTTON
VOLUME
BUTTON
DELAY
SWITCH
TONE
0
1
2
RECORD
BUTTON
After set up, ALWAYS test the alarm with the sensor before leaving the patient unattended. DO NOT use any alarm that does not
sound each time it is activated.

Other Posey Security System manuals

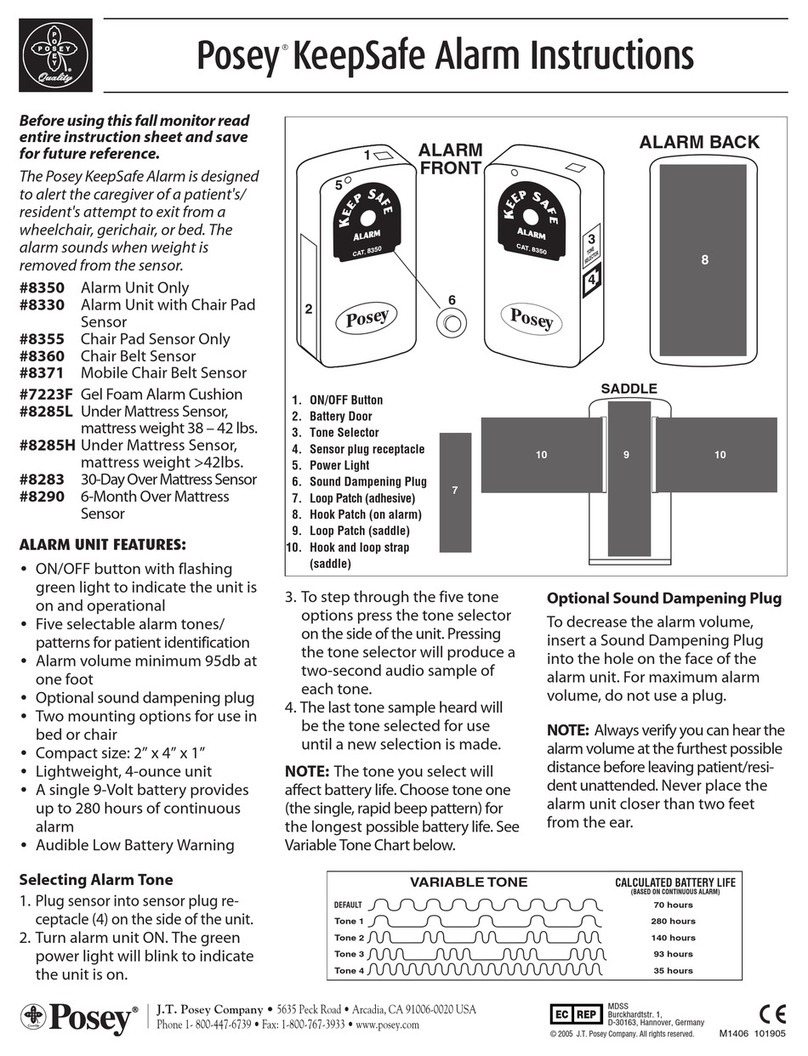
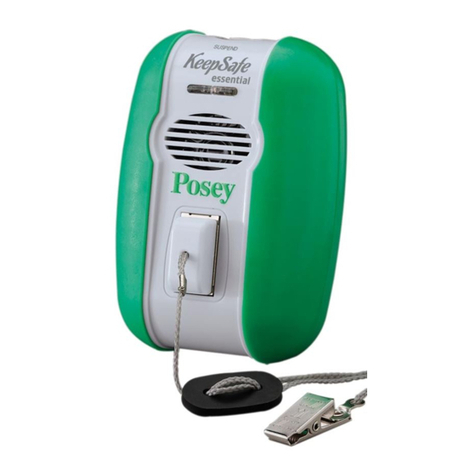
Posey KeepSafe Essential User manual

Posey

Posey KeepSafe Essential User manual

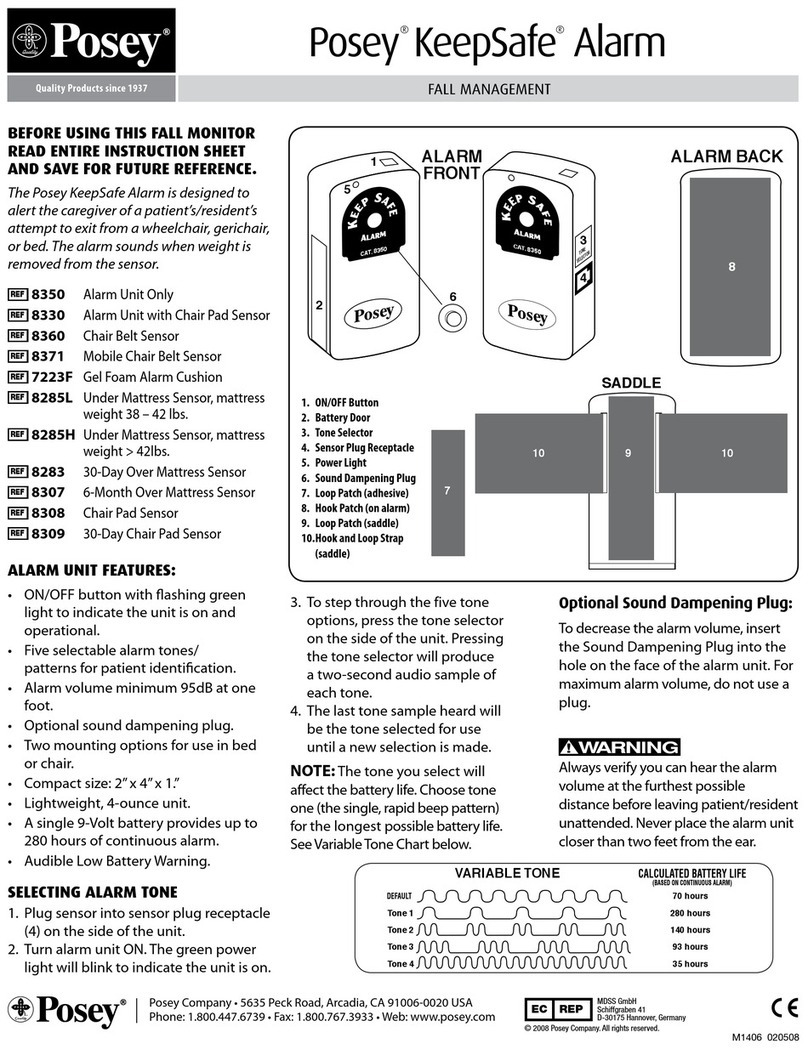
Posey KeepSafe User manual

Posey

Posey KeepSafe User manual

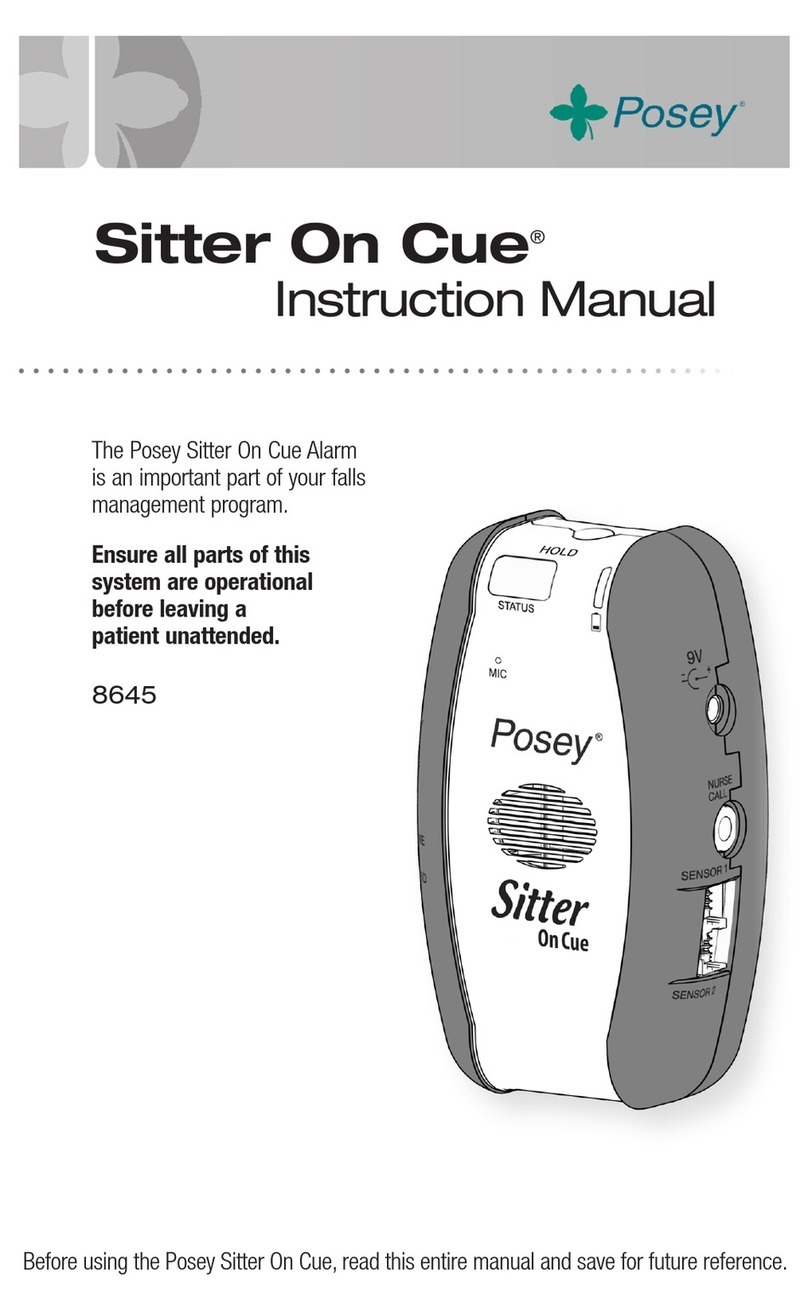
Posey Sitter On Cue User manual

Posey

Posey Sitter On Cue User manual

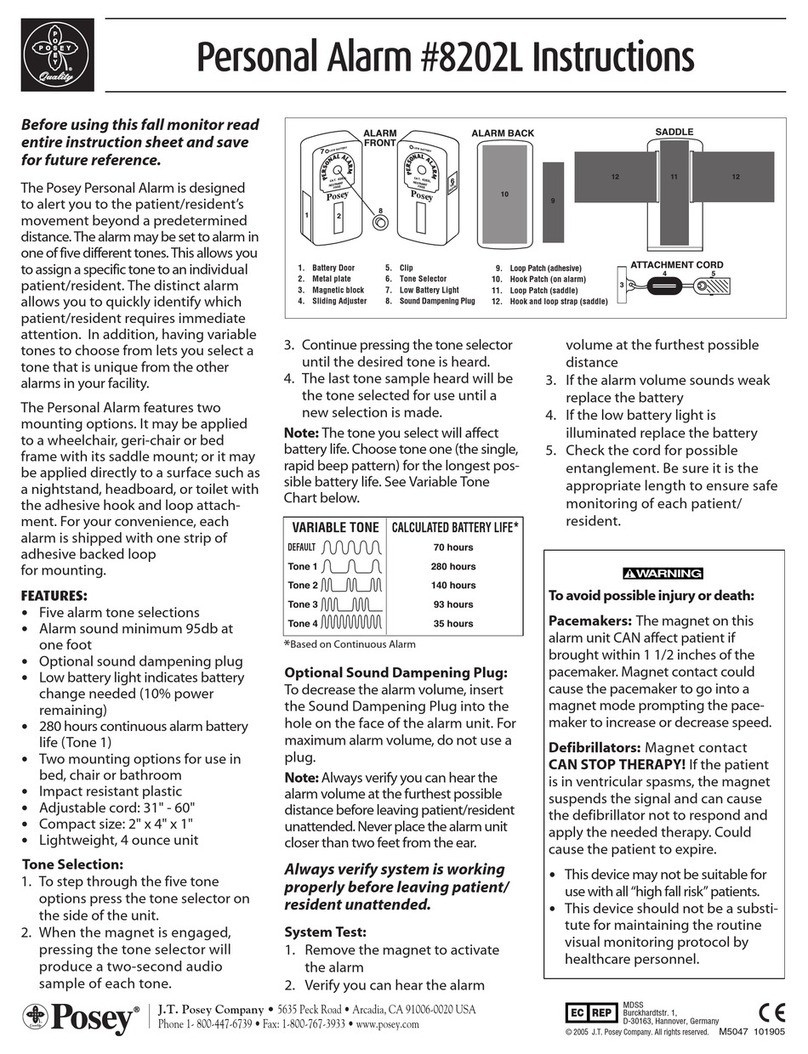
Posey Personal Alarm User manual

Posey

Posey Personal Alarm User manual

Posey KeepSafe User manual

Posey

Posey KeepSafe User manual

Popular Security System manuals by other brands

Indexa SA101 user manual

Indexa

Indexa SA101 user manual

DEXAPLAN WA 620 manual

DEXAPLAN

DEXAPLAN WA 620 manual

Sony DVP-NW50 - In-wall Dvd Player Installer manual

Sony

Sony DVP-NW50 - In-wall Dvd Player Installer manual

Lorex SG21FD3044-161 instruction manual

Lorex

Lorex SG21FD3044-161 instruction manual

Witura WT-1010C2 user manual

Witura

Witura WT-1010C2 user manual

Moore Industries SPA manual

Moore Industries

Moore Industries SPA manual

Patrol Hawk 2AKOIPHGW user manual

Patrol Hawk

Patrol Hawk 2AKOIPHGW user manual

Interlogix Simon XTi-5 Version 2 user guide

Interlogix

Interlogix Simon XTi-5 Version 2 user guide

Visonic POWERMAX - user guide

Visonic

Visonic POWERMAX - user guide

GFS Day Alarm Assembly instructions

GFS

GFS Day Alarm Assembly instructions

System Sensor L-Series Installation and maintenance instructions

System Sensor

System Sensor L-Series Installation and maintenance instructions

Adtech CLA 114 instruction manual

Adtech

Adtech CLA 114 instruction manual

Protector WA-11 operating instructions

Protector

Protector WA-11 operating instructions

myCam VPG-OAP1080KIT Installation and operating instructions

myCam

myCam VPG-OAP1080KIT Installation and operating instructions

Tervis ECHO 3000 quick start guide

Tervis

Tervis ECHO 3000 quick start guide

Patlite LU7-XE-R installation manual

Patlite

Patlite LU7-XE-R installation manual

Designed Security, Inc. ES300 installation instructions

Designed Security, Inc.

Designed Security, Inc. ES300 installation instructions

GE BA300 Commissioning instructions

GE

GE BA300 Commissioning instructions

manuals.online logo
manuals.online logoBrands
  • About & Mission
  • Contact us
  • Privacy Policy
  • Terms and Conditions

Copyright 2025 Manuals.Online. All Rights Reserved.