SECOLink LT5 User manual

Remote control LT5
Intruder alarm system User manual
GENERAL INFORMATION
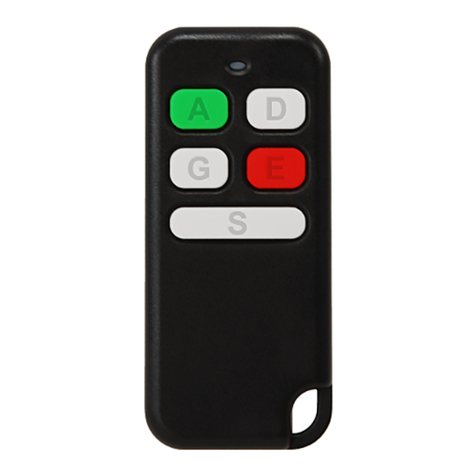
Button -thisbuttonisusedforarmingmodeselection.Armingmodesallignedbypriority:
1stposition =Away(color:Red);
2ndposition=Night(color:Blue);
3rdposition =Stay(color:Green);
4thposition =MaxAway(color:White).
Button - this button is used exclusively to disarm. If the system is signalling because of an alarm, the user will
turnoffthealarmalongwithdisarming.
Button -thisbuttonisusedtoclearanalarmwithasinglepressofthisbotton.
Button -thisbuttonisusedtotriggerapanicalarm.Pressthe buttontoavoidfalsepanicalarms.
LT5 buttons and are used for arming and disarming,while or buttonscanbeprogrammedforany task
(e.g. to control gates, to trigger a panic alarm). A button must be pressed as many times as needed until the
required color light that corresponds to arming mode or programmed command appears on LED. The
buttonisusedtosendaselectedarmingmodeorcommandtoareceiverandpressingitminimizesthepossibility
ofaccidentaltransmissions.Itisalsousedtoget status.
Remotecontrolunit(RCU)templatepreprogrammed(programmed)inthefactory:
system
Remote control LT5
ASSIGNING A REMOTE CONTROL UNIT (RCU) TO THE USER
ARMING
REMOVING AN ASSIGNED USER FROM RCU
Simultaneouslyholddownthebuttons
and .
1111
MainMenu MainMenu
Settings Settings
2222
2222
Settings Settings
Users Users
Users Users
Edit users Edit users
U01 User 01 U01 User 01
Controls Controls
NewRCU RemoveRCU
6666
Waiting... Waiting...
Done Message Done should appear on
keypad’s LCD screen when remote
control unit is enrolled succesfully.
Releasebuttons and .
Done Message Done should appear on
keypad's LCD when all remote control
unitareremovedfromtheuser.
Advance to the next user with keypad
keys or .
7
PQRS
7
PQRS
7
PQRS
7
PQRS
7
PQRS
7
PQRS
7
PQRS
7
PQRS
7
PQRS
7
PQRS
7
PQRS
Advance to the next user with keypad
keys or .
7
PQRS
7
PQRS
7
PQRS
7
PQRS
7
PQRS
7
PQRS
7
PQRS
7
PQRS
7
PQRS
7
PQRS
7
PQRS
In menu bar choose New RCU and press
button.ENTENTENTENTENTENTENTENTENTENTENT
ChooseNewRCUandpress .
ENTENTENTENTENTENTENTENTENTENTENT ChooseRemoveRCUandpress .
ENTENTENTENTENTENTENTENTENTENTENT
U01 User 01 U01 User 01
Name Name
User 01 User 01
1111
ArminginAwaymode:
Press the button while the
Red color light is visible on LED (it
will last ~3 sec after the button is
pressed) and wait for the system to
answer.
Press the button as many times as
needed until the Red color light appears
on LED and then release the button.
Red =Away
If the system is succesfully armed in Away mode the answer from the
system will be a long lasting Red color flash on LED.
RB
G
WR
B
GWDuration: ~3 sec
RRed(long: ~1 sec) = system is
armedinAwaymode
No flash = no answer from the
system!
Green (short: ~0,1sec) = battery
isgood
Red(short)=batteryislow
Answer from the
system
GR
G
R
R
Command sending and
battery status indication
Page 1

Remote control LT5
Intruder alarm system User manual
ARMING (CONTINUED)
DISARMING
ArminginNightmode:
ArminginStaymode:
Press the button while the
Blue color light is visible on LED
and wait for the system to answer.
Press the button while the
Green color light is visible on LED
and wait for the system to answer.
Press the button as many times as
needed until the Blue color light appears
on LED and then release the button.
Press the button as many times as
needed until the Green color light
appears on LED and then release the
button.
Green = Stay
Blue = Night
If the system is succesfully armed in Night mode the answer from the
system will be a long lasting Blue color flash on LED.
If the system is succesfully armed in Stay mode the answer from the
system will be a long lasting Green color flash on LED.
R
R
B
B
G
G
W
W
R
R
B
B
G
G
W
W
B
G
Blue (long) = system is armed
inNightmode
Green (long) = system is
armedinStaymode
No flash = no answer from the
system!
No flash = no answer from the
system!
Answer from the
system
Answer from the
system
G
G
B
G
B
G
ArminginMaxAwaymode:
Press the button while the
White color light is visible on LED
and wait for the system to answer.
Press the button while the
Green color light is visible on LED
and wait for the system to answer.
Press the button as many times as
needed until the White color light
appears on LED and then release the
button.
Press the button. The Green light
appears on LED.
White =Max Away
If the system is succesfully armed in Max Away mode the answer from
the system will be a long lasting White color flash on LED.
If the system is successfully disarmed the answer from the system will
be a short lasting Green color flash on LED.
RB
G
WR
B
GW
WWhite (long) = system is
armedinMaxAwaymode
No flash = no answer from the
system!
Answer from the
system
GWW
GGreen (short) = system is
disarmed.
No flash = no answer from the
system!
Answer from the
system
GG
G
G
Page 2

Remote control LT5
Intruder alarm system Installation manual
STATUS INQUIRY
ALARM CLEARING WITH BUTTON (SINGLE PRESS OPERATION)
TRIGGERING A PANIC ALARM WITH BUTTON. COMMAND SENDING BY PRESSING THE BUTTON
BATTERY REPLACEMENT
The answer from the system depends on system status (see picture).
Press the button.
GR
Red (short) = PGM output is turned Off
Red (long) = command is executed or PGM output is turned on
No flash = No answer from the system!
B
R
R
If the command is executed or PGM output is turned On, the answer from the system will be a long lasting Red
color flash. If the PGM output is turned Off, the answer from the system will be a short lasting Red color flash.
Green(short:~0,1sec)=batteryisgood
Red(short)=batteryislow
Answer from the
system
G?
G
R
Command sending and
battery status indication
Green (short: ~0,1 sec) = system is disarmed
Red (long: ~1 sec) = system is armed in Away mode
Blue (long) = system is armed in Night mode
Green (long) = system is armed in Stay mode
White (long) = system is armed in Max Away mode
No flash = No answer from the system!
B
R
G
W
G
Press the button while the
Red color light is visible on LED
and wait for the system to answer.
Only one command is assigned to
button in factory template. This is the
reason why only the Red color light will
be visible on LED.
If the panic alarm is succesfully triggered the answer from the system
will be a long lasting Red color flash on LED.
RRed (long) = panic alarm is
triggered
No flash = no answer from the
system!
Answer from the
system
GRR
Red =Panic
Green = Not Used
Blue = Not Used
White = Not Used
RB
G
WR
B
GW
Please act according to local laws. Don't throw away unusable alarm systems or its components along with household waste. This product’s
utilizationinEUstatesisregulatedbyEUdirective2002/96/EC
Remotecontrolunit’sbatterylifedependsontheenvironment,usage,andthespecificwirelessdevicesbeingused.Humidity,highorlowtemperatures,and
large swings in temperaturesmay all reduce the actual battery life.Remote control until will warn you about its discharged battery on LED. It will show the
batterystatusonLEDatatimewhenacommandwillbesenttoareceiver.
BATTERY REPLACEMENT
Insert the blade of a small
screwdriver between the remote
control unit plastic top and bottom
cover and slightly turn it.
Remove the screw that is holding
the electronic circuit board in place. Insert the blade of a small
screwdriver in place as it is shown in
picture and carefully remove the
electronic circuit board from plastic
housing.
Use an isolated stick and remove the old battery.
With a positive (+) end of a new battery facing UP,
insert the new battery as shown in picture.
New battery
2
1
Old battery
Press the button.
Page 3
Rev.12/09/16_KF
Other SECOLink Remote Control manuals
Popular Remote Control manuals by other brands

Pioneer
Pioneer CD-MR70/UC Servise manual
flame-tec
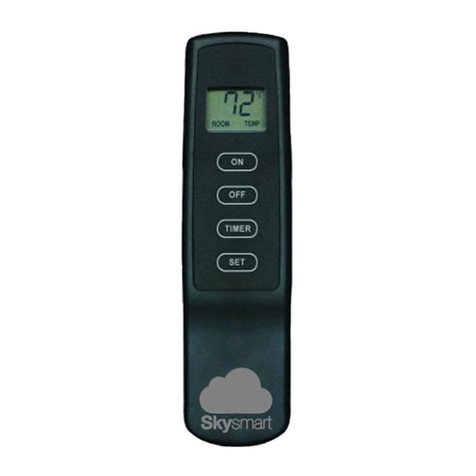
flame-tec SkySmart IF-BTSS Installation and operating instructions
Velleman
Velleman HQ POWER LEDA03RC user manual

Sony
Sony RM-KZ1 Specifications
Theben
Theben QuickSet plus installation manual

Control All Wireless
Control All Wireless 4DP2L0EFA installation instructions
