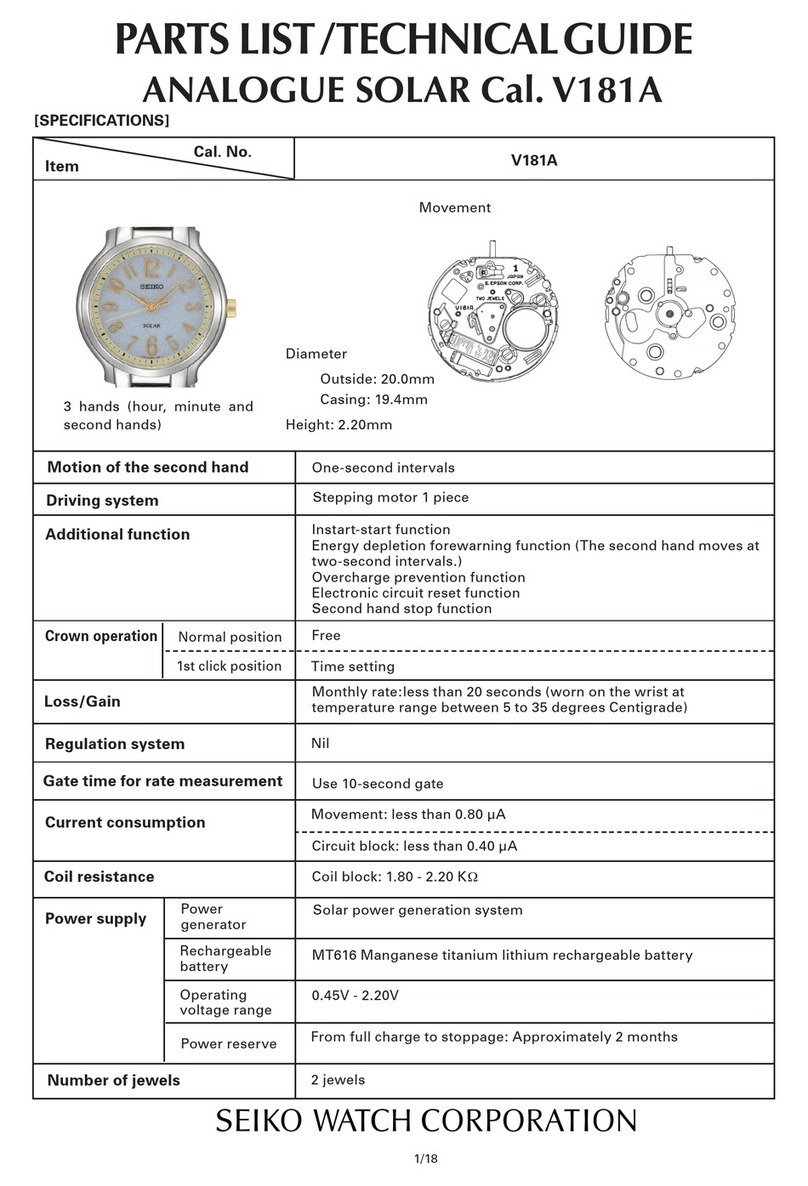
Seiko Essentials SSA346 User manual

54
✩Some models have a screw down crown instead of a standard crown.
•How to unlock the crown:
Unscrew the crown by turning it counterclockwise. Then, pull it out for time/calendar setting.
•How to lock the crown:
Push the crown back to the normal position. Then, turn it clockwise while pressing it until it
locks in place.
•When using the watch in water:
Before using the watch in water, make sure the crown is screwed in completely. Do not
operate the crown when the watch is wet or in water.
Calibre No.
■Calibre number of your watch
Please check the case back of your watch to find the calibre number inscribed on it,
and read the instructions pertaining to your watch calibre number. It is a 4-digit
number to the left of the hyphen mark.
MECHANICAL WATCHES : Cal. 4206, 4207, 4217, 7002, 7009, 7019, 4R15, 4R16, 4S15, 7S25, 7S26, 7S35, 7S36, 7S55
ANALOGUE QUARTZ WATCHES : All other calibres
Second hand
[DISPLAY AND HANDS]
Minute hand
Hour hand
Day
Crown
✩
Date
INSTRUCTIONS FOR ANALOGUE QUARTZ AND MECHANICAL WATCHES
Your watch is one of the following six types of analogue quartz and mechanical watches.
Before using your new watch, please read the instructions pertaining to your watch type; they
will help you to get the best out of the watch.
DThree hands without calendar
EThree hands with date calendar
FThree hands with
day and date calendar
ATwo hands without calendar
BTwo hands with date calendar
CTwo hands with
day and date calendar

76
Note: When setting the minute hand of a quartz watch, advance it to a few minutes ahead
of the time and then turn it back to the exact time.
●For models with date calendar
✩The date will change gradually between 9:00 P.M. and 4:00 A.M. (See note 1 on
calendar setting.) For some models, however, it will change instantly when the
hands pass the 12 o’clock marker at midnight.
1. Pull out the crown to the first click.
2. Turn the crown until the previous day’s date appears in the calendar frame.
3. Pull out the crown to the second click, and advance the hour and minute hands until the
desired date appears.
*If your watch has three hands, pull out the crown when the second hand is pointing to 12 o’clock.
4. Adjust the time by turning the crown in the desired direction.
5. Push the crown back in to the normal position.
*If your watch has three hands, push the crown back in to the normal position in accordance with a
time signal for “00” seconds.
TIME/CALENDAR SETTING FOR MODELS WITH CALENDAR
BE
■How to start a mechanical watch
●
Cal. 4206, 4207, 4217, 7002, 7009, 7019, 4R15, 4R16, 4S15, 7S25, 7S26, 7S35, 7S36, 7S55
To initially start your watch, swing it from side to side in a horizontal arc for about 30 seconds.
●Cal. 4206, 4207, 4217, 4S15
These watches can also be started by winding the crown.
Note: If the watch is worn daily, SEIKO’s automatic mechanism will wind the mainspring
automatically through normal wrist movements.
1. Pull out the crown all the way.
*If your watch has three hands, pull out the crown when the second hand is pointing to 12 o’clock.
2. Adjust the time by turning the crown in the desired direction.
3. Push the crown back in to the normal position.
*If your watch has three hands, push the crown back in to the normal position in accordance with a
time signal for “00” seconds.
A
TIME SETTING FOR MODELS WITHOUT CALENDAR
Set the time/calendar following the instruction pertaining to your watch type.
HOW TO USE THE WATCH
D

98
3 When setting the hour hand, check that AM/PM is correctly set. The watch is so
designed that the calendar changes once every 24 hours.
Turn the hands past the 12 o’clock marker to determine whether the time is set for the
A.M. or P.M. period. If the calendar changes, the time is set for the A.M. period. If it
does not change, the time is set for the P.M. period.
Loss/gain (monthly rate) is less than 15 seconds (20 seconds for some calibres) in the
normal temperature range (5°C ~ 35°C or 41°F ~ 95°F).
LOSS/GAIN OF THE ANALOGUE QUARTZ WATCH
Because the battery is inserted at the factory to check the function and performance of
the watch, its actual service life once in your possession may be less than the specified
period. When the battery expires, make sure to replace it as soon as possible to prevent
any malfunction. For battery replacement, we recommend that you contact an AUTHOR-
IZED SEIKO DEALER and request they only use a genuine SEIKO battery.
●Battery life indicator
If your analogue quartz watch has a second hand, the battery needs to be replaced
when you see the second hand moving in two-second increments instead of the normal
one-second increments. (Some calibres do not have this function.) The watch will,
however, remain accurate while the second hand is moving in two-second increments.
CHANGING BATTERY IN ANALOGUE QUARTZ WATCH
●For models with day and date calendar
CF
1. Pull out the crown to the first click.
2. Turn the crown until the previous day’s date appears in the calendar frame.
3. Turn the crown in the opposite direction until the desired language (bilingual) for the day
before the desired day appears in the calendar frame.
* For Cal. 7009 and 7019, push the crown back in to the normal position and then push it repeatedly
to set the day.
4. Pull out the crown to the second click, and advance the hour and minute hands until the
desired date and day appears.
* If your watch has three hands, pull out the crown when the second hand is pointing to 12 o’clock.
5. Adjust the time by turning the crown in the desired direction.
6. Push the crown back in to the normal position.
* If your watch has three hands, push the crown back in to the normal position in accordance with a
time signal for “00” seconds.
Notes on calendar setting:
1 Do not change the calendar between 9:00 P.M. and 4:00 A.M, as it may not change
properly. If it is necessary to set the calendar during that time period, first change the
time to any time outside those hours, set the calendar and then reset the correct time.
2 When the day shifts automatically to the next day, the other language will temporarily
appear.

1110
* Before using a water resistant 5, 10, 15 or 20
bar watch in water, make sure the crown is
pushed in completely.
Do not operate the crown when the watch is
wet or in water. If used in sea water, rinse the
watch in fresh water and dry it completely.
* When taking a shower while wearing a water
resistant 5 bar watch, or taking a bath while
wearing a water resistant 10, 15 or 20 bar
watch, make sure to observe the following:
• Do not operate the crown when the watch
is wet with soapy water or shampoo.
• If the watch is left in warm water, a slight
time loss or gain may be caused. This
condition, however, will be corrected when
the watch returns to normal temperature.
Your watch works with stable
accuracy in a temperature range of
5°C and 35°C (41°F and 95°F).
[for analogue quartz watches only]
Temperatures over 60°C or 140°F (50°C or 122°F
for some calibres) may cause battery leakage or
shorten the battery life.
Do not leave your watch in very low temperatures
below –10°C or +14°F (-5°C or +23°F for some
calibres) for a long time since the cold may cause
a slight time loss or gain.
However, the above conditions will be corrected
when the watch returns to normal temperature.
General light activities will not affect
your watch, but be careful not to drop
your watch or hit it against hard
surfaces, as this may cause damage.
NOTE:
Pressure in bar is a test pressure and should not
be considered as corresponding to an actual diving
depth since swimming movements tend to increase
the pressure at a given depth. Care should also
be taken when wearing and diving into water.
+60°C
-10°C
■SHOCKS & VIBRATION
■TEMPERATURE RANGE
●
Non-water resistance
If “WATER RESISTANT” is not
inscribed on the case back, your watch
is not water resistant, and care should
●
Water resistance (3 bar)
If “WATER RESISTANT” is
inscribed on the case back, your
watch is designed and
manufactured to withstand up to 3 bar, such as
accidental contact with splashes of water or rain,
but it is not designed for wearing while swimming
or diving.
●
Water resistance (5 bar)*
If “WATER RESISTANT 5 BAR”
is inscribed on the case back, your
watch is designed and manu-
factured to withstand up to 5 bar and is suitable
for wearing while swimming, yachting and taking
a shower.
■WATER RESISTANCE
●
Water resistance
(10 bar/15 bar/20 bar)*
If “WATER RESISTANT 10 BAR”,
“WATER RESISTANT 15 BAR” or
TO PRESERVE THE QUALITY OF YOUR WATCH
“WATER RESISTANT 20 BAR” is inscribed on the
case back, your watch is designed and
manufactured to withstand up to 10 bar/15 bar/20
bar, respectively, and is suitable for wearing while
taking a bath or shallow diving, but not for scuba
diving. We recommend that you wear a SEIKO
Diver’s watch while scuba diving.
be taken not to get it wet as water may damage the
movement. If the watch becomes wet, we suggest
that you have it checked by an AUTHORIZED SEIKO
DEALER or SERVICE CENTER.
5 bar WR
10/15/20
bar WR

12
The watch will be adversely affected
by strong magnetism. Keep the watch
away from close contact with magnetic
objects. (In the case of a quartz watch,
■MAGNETISM ■CHEMICALS
normal accuracy will return if the watch is moved
away from the magnetic field.)
■PERIODIC CHECK
It is recommended that the watch be
checked once every 2 to 3 years. Have
your watch checked by an
AUTHORIZED SEIKO DEALER or
■CARE OF CASE AND BRACELET
SERVICE CENTER to ensure that the case, crown,
gasket and crystal seal remain intact.
To prevent possible rusting of the case
and bracelet caused by dust, moisture
and perspiration, wipe them periodically
with a soft dry cloth.
■PRECAUTION REGARDING
CASE BACK PROTECTIVE FILM
If your watch has a protective
film and/or a sticker on the
case back, make sure to peel
them off before using your
watch. Otherwise, perspiration getting
under them may rust the case back.
NS
2 - 3
Years
Be careful not to expose the
watch to solvents (e.g., alcohol
and gasoline), mercury (e.g.,
from a broken thermometer),
cosmetic sprays, detergents, adhesives or
paints, as the case, bracelet, etc. may
become discolored, deteriorate or
damaged.

13
NS

14
15
5 bar WR
10/15/20
bar WR
+60°C
-10°C

16
17

18
19
4R16, 4R15,

20
21
4R16, 4R15,

1716

1918

2120

2322
+60°C
-10°C
5 bar WR
10/15/20
bar WR
!"#$%&' G !"#$%RNMNROM
!"#$%&'()*+,-./0
!"#$%&'()
!"#$%&"'()* +,-./$
!"#
G !"#$%R !"#$%&'()*
NMNROM !"#$%&'()*+
!"#$%&'()*+,-./0
!"#$%&'()*+,-./01
!"#$%&'()*+,-./01
!"#$%
!" #$%&'()"*+$,-$./0
!"#$%&'#()*+,-./#()
!"#$%&'(")*+,-./01
!"#$%&'()*
!"#$%&'(
!"#R=PR !"#
!"#$%&'
!SM !"#RM !"
!"#$%&'()*+,-./01
NM !"#$R !"#$%&'()
!"#$%&'()*+,-./0123
!"#
!"#$%&'()* +,-
!"#$%&'()*+,-.
!"#$%&'()*+,-.
!"#$%&'()
!"
!"#$%&'(
G
!"#$%&'()
t^qbo=obpfpq^kq !"#
!"#$%& '()*+
!"#$%&'()*+,-./("0
!"#$%&'()*+,-./012
!"#$%&'()*+,-./0123
!"#$%&'()*+,
!"#$%&'()
!"#$%&'()t^qbo
obpfpq^kq !"#$%&'
!"#$%&'()*#+
!"#$%t^qbo
=obpfpq^kq
NM=_^o t^qbo=obpfpq^kq
!"#$%t^qbo
obpfpq^kq
=R=_^o !"#$
!"#$%&R !"
!"#$%&'()#*
!"#$% !"&G
!"#
!"#$%&'()'*+,-./0 12
!"#$%&'()*+,-./0123
!"#$%&
NR=_^o t^qbo=obpfpq^kq=OM=_^o !
!"#$%&'()NMNROM !
!"#$%&'()*!+ !,!+ !-
!!"#$%#&'(%#)*
•
•

24
NS
2 - 3
!"#$%&' ()#*+,
!"#$%&'()*+,%
!"#$%&'()*+,-.
!"#$%&' ()*+,
!"#$%&'(
!"
!"#$%&'()*+,-
!"#$%&'()*"+,-
!"#$%& '()*(+*
!"#$%&'()*&+,-
!
!"#$%#&
!"#$%!&'()*+,-
!"#$%&'()*+,&
!"#$%&'()*+,-
!
!"
!"#$%&'()*+,-.
!"#$%&'()*+,-
!"#$%&'(")("*+
!"#$%&'()*+,-+
!"#$ %&'()*+,
!"#$%&'()*
!"#$%&'()*+,$-
!"#$%&'()*+,-.
!"#$%&'()*+,-.

1716
✩Certains modèles ont un remontoir vissable au lieu du remontoir de type standard.
Nº de calibre
• Pour libérer le remontoir:
Dévissez-le en le tournant dans le sens anti-horaire. Retirez-le ensuite pour le réglage heure/
calendrier.
• Pour bloquer le remontoir:
Repoussez-le en position normale. Vissez-le ensuite dans le sens horaire en y poussant
jusqu’à ce qu’il soit verrouillé.
• Lors de l’utilisation de la montre dans l’eau:
Avant d’utiliser la montre dans l’eau, vérifiez que le remontoir est complètement vissé.
N’actionnez jamais le remontoir pendant que la montre est mouillée ou dans l’eau.
Veuillez regarder le dos du boîtier de votre montre où est inscrit son numéro de
calibre et reportez-vous aux explications qui concernent le numéro de calibre de
votre montre. Il s’agit du numéro à 4 chiffres à la gauche du trait d’union.
MONTRE MECANIQUE : Cal. 4206, 4207, 4217, 7002, 7009, 7019, 4S15, 7S25, 7S26, 7S35, 7S36, 7S55
MONTRE QUARTZ ANALOGIQUE : Tous les autres calibres
■Numéro de calibre de votre montre
Trotteuse
[AFFICHAGE ET AIGUILLES]
Aiguille des minutes
Aiguille des heures
Jour
Remontoir
✩
Date
INSTRUCTIONS POUR LES MONTRES QUARTZ ANALOGIQUES ET MECANIQUES
Votre montre se classe dans un des six types de montres quartz analogiques et mécaniques
ci-après.
Avant d’utiliser votre nouvelle montre, veuillez lire les explications qui se rapportent au type
de la vôtre car elles vous aideront à en obtenir des performances parfaites.
A Deux aiguilles sans calendrier
B Deux aiguilles avec calendrier de date
C Deux aiguilles avec
calendrier de jour et date
D Trois aiguilles sans calendrier
E
Trois aiguilles avec calendrier de date
F Trois aiguilles avec
calendrier de jour et date

1918
■Mise en marche d’une montre mécanique
●Cal. 4206, 4207, 4217, 7002, 7009, 7019, 4S15, 7S25, 7S26, 7S35, 7S36, 7S55
Lors de la première mise en marche de la montre, faites-la osciller de part et d’autre selon
un arc horizontal pendant 30 secondes environ.
●Cal. 4206, 4207, 4217, 4S15
Ces montres peuvent aussi être mises en marche en tournant leur remontoir.
Remarque:
Si la montre est portée quotidiennement, le mécanisme automatique de SEIKO
se chargera de remonter automatiquement le ressort principal par le mouvement
normal du poignet.
1. Retirez à fond le remontoir.
* Si votre montre a trois aiguilles, retirez le remontoir à l’instant où la trotteuse indique 12 heures.
2. Ajustez l’heure en tournant le remontoir dans le sens approprié.
3. Repoussez le remontoir à sa position normale.
* Si votre montre a trois aiguilles, repoussez le remontoir à sa position normale en accord avec un
top horaire de “00” seconde.
REGLAGE DE L’HEURE POUR MODELES SANS CALENDRIER
Réglez l’heure/calendrier en suivant les instructions qui concernent le type de votre montre.
UTILISATION DE LA MONTRE
D
Remarque:
Lors du réglage de l’aiguille des minutes d’une montre à quartz, dépassez de
quelques minutes le moment souhaité puis revenez en arrière à la minute
exacte.
●Pour modèles à calendrier de la date
✩
La date change progressivement entre 9:00 du soir et 4:00 du matin. (Cf. la
Remarque 1 sur le réglage du calendrier) Cependant, sur certains modèles, la
date change en un instant quand les aiguilles passent le repère de 12 heures à
minuit.
1. Retirez le remontoir au premier déclic.
2. Tournez le remontoir jusqu’à ce que la date du jour précédent apparaisse dans le cadre
du calendrier.
3. Retirez le remontoir au second déclic et faites avancer les aiguilles des heures et des
minutes jusqu’à apparition de la date souhaitée.
* Si votre montre a trois aiguilles, retirez le remontoir quand la trotteuse indique 12 heures.
4. Ajustez l’heure en tournant le remontoir dans le sens approprié.
5. Repoussez le remontoir à sa position normale.
* Si votre montre a trois aiguilles, repoussez le remontoir à sa position normale en accord avec un
top horaire de “00” seconde.
REGLAGE DE L’HEURE/CALENDRIER POUR MODELES A CALENDRIER
BE
A

2120
●Pour modèles à calendrier du jour et de la date
CF
1. Retirez le remontoir au premier déclic.
2. Tournez le remontoir jusqu’à ce que la date du jour précédent apparaisse dans le cadre
du calendrier.
3. Tournez le remontoir dans le sens opposé jusqu’à ce que la langue voulue (indication
bilingue) pour le jour précédent le jour souhaité apparaisse dans le cadre du calendrier.
* Pour les Cal. 7009 et 7019, repoussez le remontoir à sa position normale, puis appuyez-y de façon
répétée pour régler le jour.
4. Retirez le remontoir au second déclic et faites avancer les aiguilles des heures et des
minutes jusqu’à ce qu’apparaissent la date et le jour souhaités.
* Si votre montre a trois aiguilles, retirez le remontoir quand la trotteuse indique 12 heures.
5. Ajustez l’heure en tournant le remontoir dans le sens approprié.
6. Repoussez le remontoir à sa position normale.
* Si votre montre a trois aiguilles, repoussez le remontoir à sa position normale en accord avec un
top horaire de “00” seconde.
Remarques sur le réglage du calendrier:
1 N’ajustez pas le calendrier entre 9:00 du soir et 4:00 du matin car il ne changerait pas
correctement. S’il est nécessaire de régler le calendrier pendant cette partie de jour,
passez d’abord à une tranche horaire en dehors de celle-là, ajustez le calendrier, puis
revenez à l’heure correcte.
2 Lorsque le jour change automatiquement au suivant, l’autre langue apparaît
temporairement.
CHANGEMENT DE PILE D’UNE MONTRE QUARTZ ANALOGIQUE
Comme la pile a été installée en usine pour vérifier le fonctionnement et les performances
de la montre, il se peut que l’autonomie de la pile, une fois la montre en votre possession,
soit plus courte que la durée spécifiée. Quand la pile est épuisée, veillez à la remplacer
le plus tôt possible pour éviter des erreurs. Pour remplacer la pile, nous recommandons
de contacter un CONCESSIONNAIRE SEIKO AGREE et de lui demander d’utiliser
uniquement une pile SEIKO d’origine.
3 Lors du réglage de l’aiguille des heures, vérifiez que AM/PM (matin/soir) est réglé correctement.
La montre est conçue de manière que le calendrier change une fois en 24 heures.
Faites tourner les aiguilles au-delà du repère de 12 heures pour savoir si l’heure est réglée pour
la période avant midi (AM) ou après midi (PM). Si le calendrier change, l’heure est réglée pour
l’avant midi (AM); si elle ne change pas, elle l’est pour l’après-midi (PM).
●Indicateur d’autonomie de la pile
Si votre montre quartz analogique est munie d’une trotteuse, sa pile devra être
remplacée quand vous constatez que la trotteuse se déplace à intervalle de deux
secondes au lieu de l’intervalle normal d’une seconde. (Certains calibres ne sont pas
dotés de cette fonction.) Cependant, la montre gardera toute sa précision pendant que
la trotteuse de déplace à intervalle de deux secondes.
GAIN/PERTE D’UNE MONTRE QUARTZ ANALOGIQUE
Le gain/perte (en moyenne mensuelle) est inférieur à 15 secondes (20 secondes pour
certains calibres) dans la plage des températures normales (de 5 à 35°C) (de 41 à 95°F).

2322
* Avant d’utiliser dans l’eau une montre étanche à 5,
10, 15 ou 20 bars, vérifiez que le remontoir est
repoussé à fond.
N’actionnez pas le remontoir quand la montre est
mouillée ou dans l’eau.
Si la montre a été utilisée dans de l’eau de mer,
rincez-la dans de l’eau douce et séchez-la
convenablement.
* Si vous prenez une douche avec une montre
étanche à 5 bars ou un bain avec une montre
étanche à 10, 15 ou 20 bars, veuillez observer ce
qui suit:
• N’actionnez pas le remontoir quand la montre
est mouillée avec de l’eau savonneuse ou du
shampoing.
• Si la montre est laissée dans de l’eau chaude,
un léger décalage horaire peut se produire.
Toutefois, il sera corrigé lorsque la montre
reviendra à une température normale.
REMARQUE:
La pression en bars est une pression d’essai et elle ne
doit pas être considérée comme correspondant à la
profondeur réelle de plongée car les mouvements en
plongée ont tendance à augmenter la pression à une
profondeur donnée. Des précautions doivent également
être prises lors de la plongée dans l’eau.
■TEMPERATURES
La montre fonctionne avec une grande
précision dans une plage de températures
allant de 5 à 35°C (41 à 95°F).
[Pour montres quartz analogiques]
Une température supérieure à 60°C ou 140°F
(supérieure à 50°C ou 122°F pour certains calibres)
risque de provoquer un suintement de la pile ou de
réduire son autonomie.
Ne laissez pas pendant longtemps la montre sous une
température inférieure à –10°C ou +14°F (inférieure à
–5°C ou +23°F pour certains calibres) car le froid peut
provoquer un léger décalage horaire, positif ou négatif.
Les situations ci-dessus disparaîtront en replaçant la
montre dans une température normale.
+60°C
-10°C
■CHOCS ET VIBRATION
De légères activités sportives
n’affecteront pas la montre. Toutefois,
on veillera à ne pas la laisser tomber
et à ne pas la cogner contre des
objets durs.
POUR PRESERVER LA QUALITE DE LA MONTRE
●
Montre non étanche
Si la mention “WATER RESISTANT”
ne figure pas sur le dos du boîtier, la
montre n’est pas étanche et l’on
veillera à ne pas la mouiller car l’eau endommagerait
son mouvement. Si la montre a été mouillée, il est
conseillé de la faire vérifier par un
CONCESSIONNAIRE ou un CENTRE DE SERVICE
SEIKO AUTORISE.
●
Etanchéité (3 bars)
Si la mention “WATER RESISTANT”
figure sur le dos du boîtier, la montre
a été conçue et fabriquée pour résister
jusqu’à 3 bars, comme lors des contacts accidentels
avec de l’eau, en cas d’éclaboussures ou de pluie,
mais elle ne convient ni pour la natation ni pour la
plongée.
●
Etanchéité (5 bars)*
Si “WATER RESISTANT 5 BAR”
est inscrit sur le dos du boîtier,
votre montre est conçue et
fabriquée pour résister jusqu’à 5 bars et elle
convient pour la natation, le yachting et pour
prendre une douche.
Si “WATER RESISTANT 10
BAR”, “WATER RESISTANT 15
●
Etanchéité
(10 bars/15 bars/20 bars)*
BAR” ou“WATER RESISTANT 20 BAR” est inscrit
sur le dos du boîtier, votre montre est conçue et
fabriquée pour résister jusqu’à 10/15/20 bars et
elle convient pour prendre un bain, pour la
plongée en eau peu profonde, mais pas pour la
plongée avec bonbonne (scuba). Pour ce genre
de plongée, nous recommandons l’emploi de la
montre de plongée SEIKO.
10/15/20
bar WR
5 bar WR
■ETANCHEITE

24
■MAGNETISME
Cette montre subira l’effet d’un
magnétisme puissant. Par conséquent,
ne l’approchez pas d’objets
magnétiques. (Dans le cas d’une
montre à quartz, celle-ci retrouvera sa précision
normale quand elle est éloignée du champ
magnétique.)
■VERIFICATION PERIODIQUE
Il est conseillé de faire vérifier la montre
tous les 2 à 3 ans. Confiez ce travail à
un CONCESSIONNAIRE ou un
CENTRE DE SERVICE SEIKO
AUTORISE pour être sûr que le boîtier, le remontoir,
le joint et le verre soient en bon état.
■SOIN DU BOITIER ET DU BRACELET
Pour éviter une oxydation éventuelle du
boîtier et du bracelet, causée par de la
poussière, de l’humidité et la
transpiration, frottez-les régulièrement à
l’aide d’un linge doux et sec.
■PRODUITS CHIMIQUES
Prenez garde à ne pas exposer
la montre à des solvants (tels
qu’alcool ou essence), à du
mercure (p.ex. d’un
thermomètre brisé), à des produits
cosmétiques en atomiseur, détergents,
adhésifs ou peintures car le boîtier, le
bracelet ou autres pièces pourraient en être
décolorés ou endommagés.
d’utiliser la montre car la transpiration qui
pourrait s’y inflitrer risquerait de provoquer
une oxydation du dos du boîtier.
■PRECAUTION A PROPOS DE
LA PELLICULE DE PROTEC-
TION A L’ARRIERE DU BOITIER
Si votre montre est munie d’une
pellicule et/ou d’un adhésif
protecteur sur le dos de son
boîtier, veillez à l’enlever avant
NS
This manual suits for next models
2
Table of contents
Languages:
Other Seiko Watch manuals

Seiko
Seiko SSJ013J1 User manual

Seiko
Seiko 9R66 User manual

Seiko
Seiko Pulsar 7T32 User manual

Seiko
Seiko 5K25 User manual

Seiko
Seiko 7B27 User manual

Seiko
Seiko Cal. V198 Installation manual

Seiko
Seiko 4205B Quick start guide

Seiko
Seiko Cal. V175 User manual

Seiko
Seiko 4F series Use and care manual

Seiko
Seiko PRESAGE SRPH78J1 User manual

Seiko
Seiko NH35 User manual

Seiko
Seiko V114A Quick start guide

Seiko
Seiko ASTRON Installation guide

Seiko
Seiko WIRED 5Y63 User manual

Seiko
Seiko 4R57 User manual

Seiko
Seiko V115A Quick start guide

Seiko
Seiko 6L35 User manual

Seiko
Seiko 8T67 User manual

Seiko
Seiko Prospex 7K32 User manual

Seiko
Seiko PROSPEX LANDMASTER SLA071 User manual