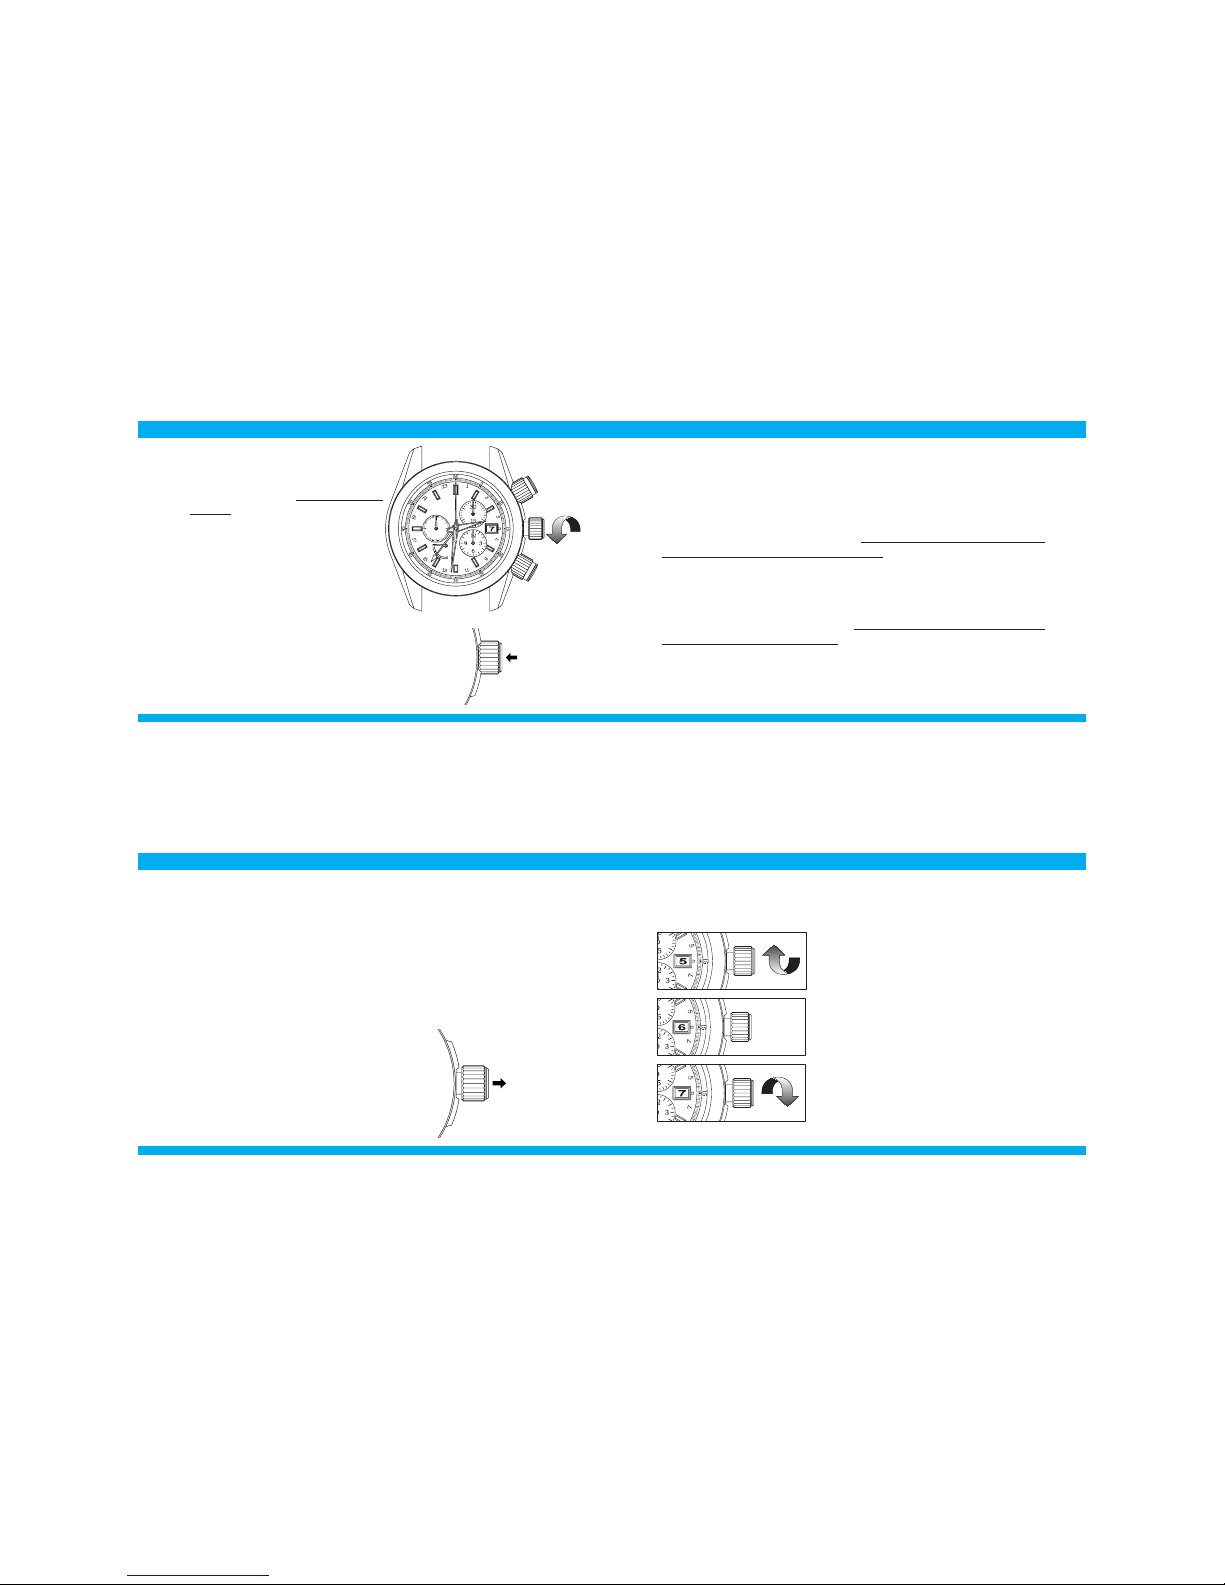
5. Upon completion of setting, make sure that the time indicated is correct, and then
push the crown back in. The setting procedure is now completed. Relock the crown.
Refer to "How to use the screw lock type crown" on page 57.
If you set the time during any time between 9:00 P.M. and 1:00 A.M., temporarily set the hour
hand back to 8:00 P.M., and then set the time.
Example 1
Hour hand and calendar: Area A (Japan)
24-hour hand: Area B (New York)
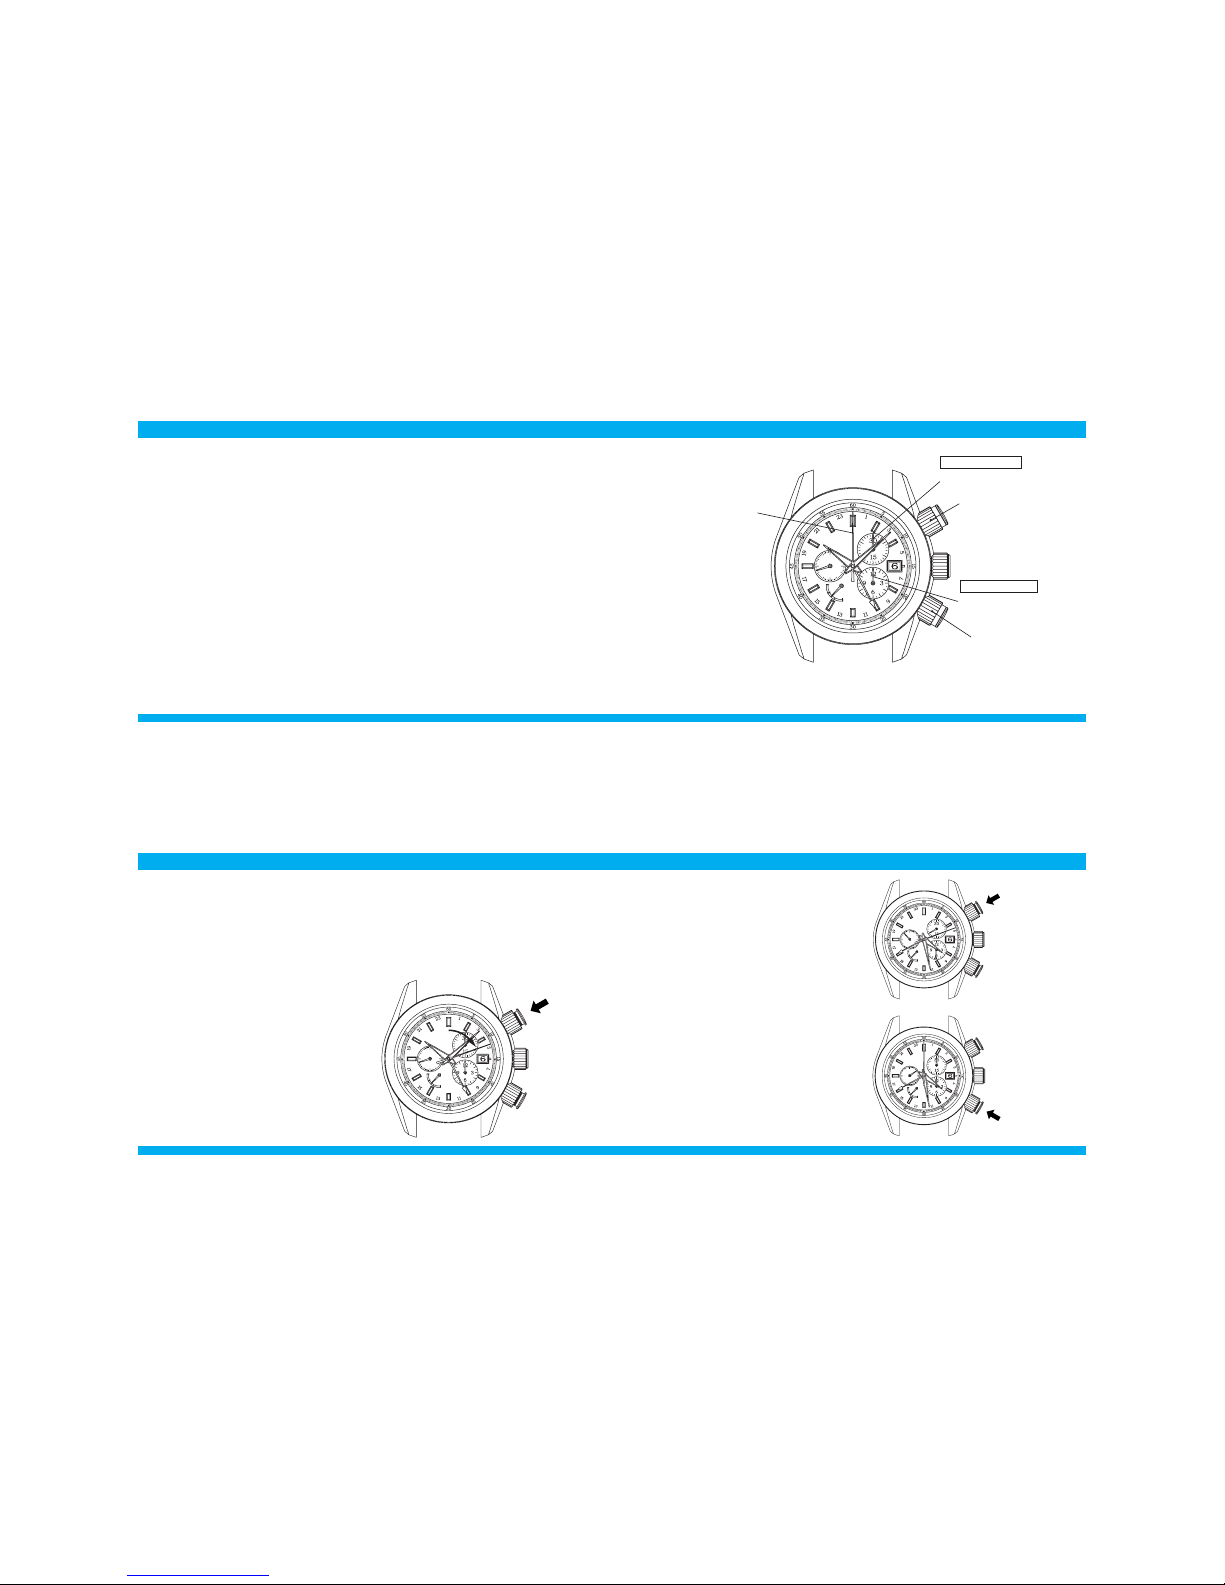
●Selectable display mode
With the time dierence adjustment function, the watch features a dual time display
which shows time in two dierent time zones. It oers two display modes which you
can select to suit your needs and preference.
Set the 24-hour hand rst, and then set the hour hand.
Example 2
Hour hand and calendar: Area B (New York)
24-hour hand: Area A (Japan)
Names of the cities Time difference from
Japan Time difference from
UTC Other cities
Paris ★ - 8 hours + 1 hour Rome ★ , Amsterdam ★
London ★ - 9 hours ± 0 Casablanca
Azores ★ - 10 hours - 1 hour
Rio de Janeiro ★ - 12hours - 3 hours
Caracas - 13 hours - 4 hours Santiago ★
New York ★ - 14 hours - 5 hours Washington★, Montreal★
Chicago ★ - 15 hours - 6 hours Mexico City ★
Denver ★ - 16 hours - 7 hours Edmonton ★
Los Angels ★ - 17 hours - 8 hours San Francisco ★
Anchorage ★ - 18 hours - 9 hours
Honolulu - 19 hours - 10 hours
Midway Islands - 20 hours - 11 hours
There are time zone differences based on time offsets from Coordinated Universal Time (UTC), which has
been internationally adopted. The world is divided into 24 time zones, and neighboring time zones have a
one-hour time difference, so that they correspond to the rotation of the earth which makes one full rotation
in 24 hours (1 day). In some regions of the world, daylight saving time is individually observed.
Daylight saving time is a system that advances the official local time by one hour during the summer to take
advantage of longer daylight hours.
●List of time zone differences in major regions of the world
The time differences and use of daylight saving time in each region are subject to change according
to the governments of the respective countries or regions.
Refer to "How to use the time dierence adjustment function" on page 72.
Names of the cities Time difference from
Japan Time difference from
UTC Other cities
Wellington ★ + 3 hours + 12 hours Fiji islands, Auckland ★
Nouméa + 2 hours + 11 hours Solomon Islands
Sydney ★ + 1 hours + 10 hours Guam, Khabarovsk ★
Tokyo ± 0 + 9 hours Seoul, Pingyang
Hong Kong - 1 hour + 8 hours Manila, Beijing, Singapore
Bangkok - 2 hours + 7 hours Jakarta
Dacca - 3 hours + 6 hours
Karachi - 4 hours + 5 hours Tashkend ★
Dubai - 5 hours + 4 hours
Moscow ★ - 6 hours + 3 hours Mecca, Nairobi
Cairo ★ - 7 hours + 2 hours Athens ★, Istanbul ★
Regions marked with ★ use daylight saving time (as of January, 2007).


 User manual")