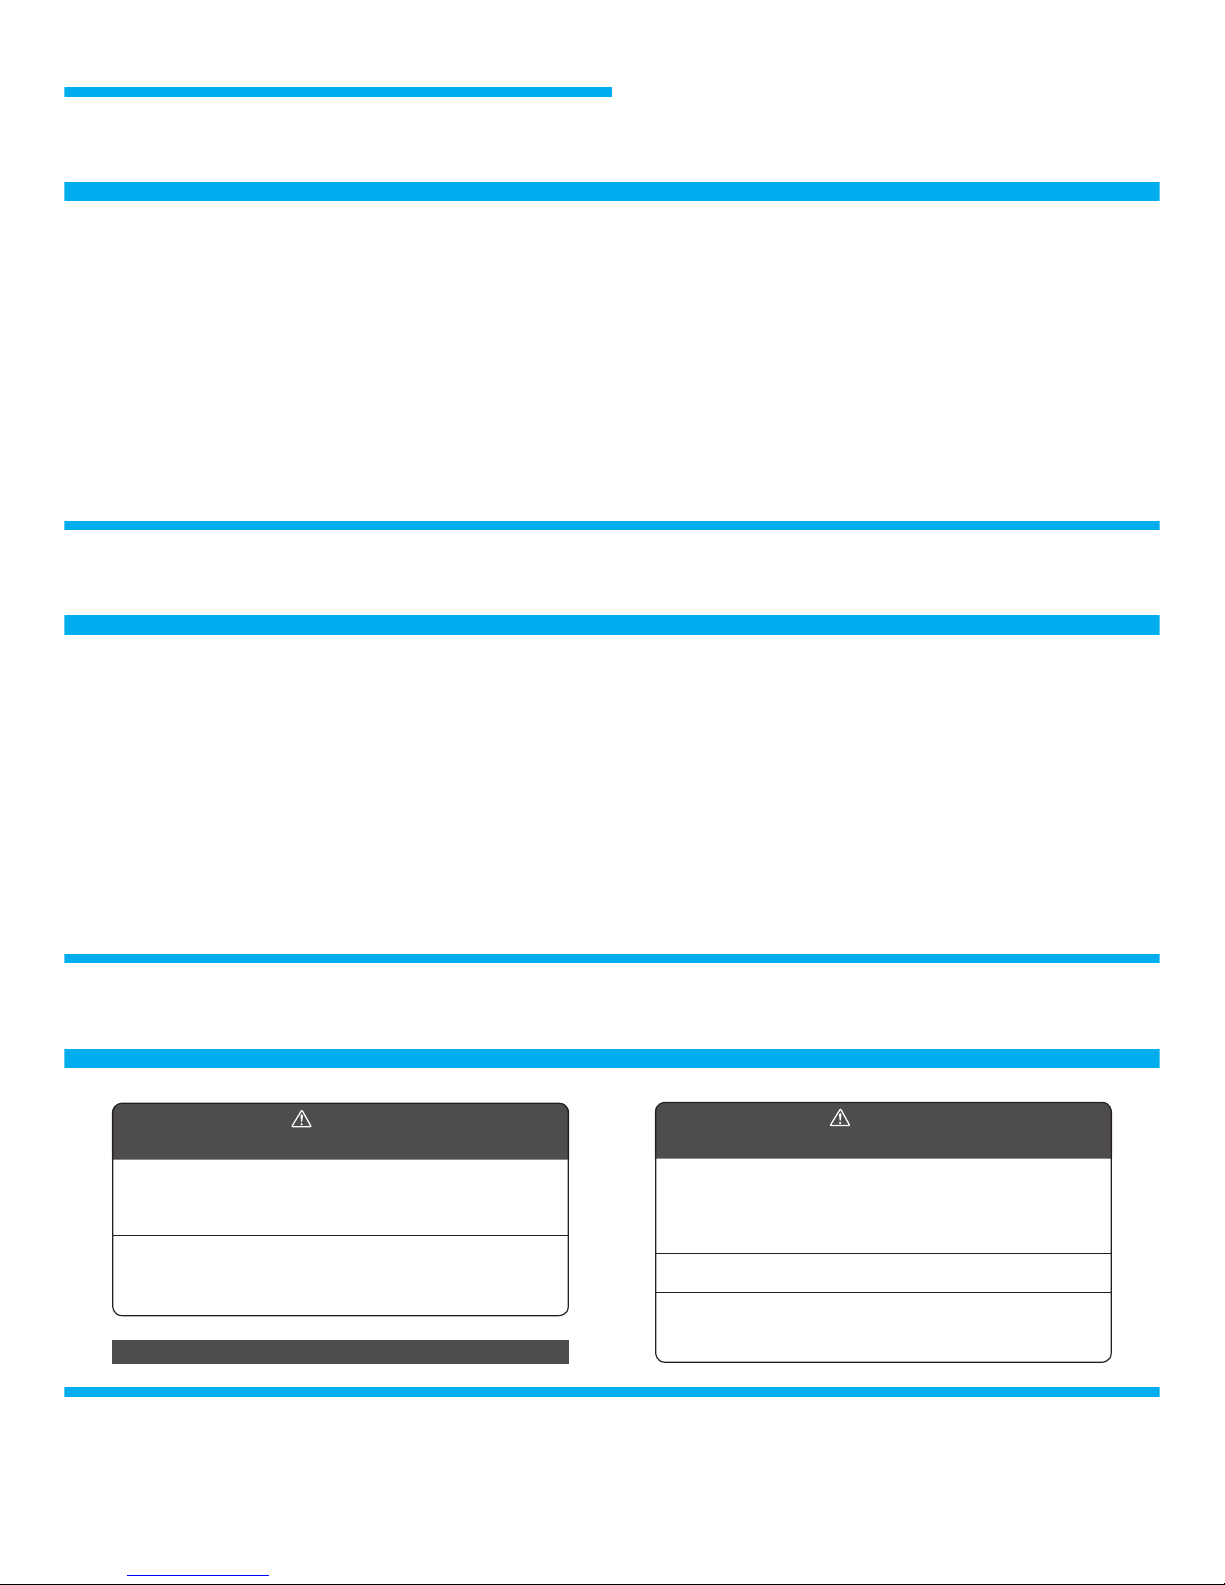
Seiko Grand Seiko SPRING DRIVE DIVERS 9R65 User manual

9R65
取扱説明書
INSTRUCTIONS
BS9R65GD-0805
本 社 〒 105- 8467 東京都港区芝浦 1 − 2 − 1
http://www.seiko-watch.co.jp/
9R65
取扱説明書
INSTRUCTIONS
目 次
■製品の特長
ぜんまいがほどける力を唯一の動力源としながら、クオーツ時計と同等の高精度を実現し
たスプリングドライブは、セイコー独自の機構です。ぜんまいの巻き上げは、自然な腕の
動きで巻き上がる自動巻機構にくわえて、始動時の巻き上げに便利な手巻機構をそなえて
います。持続時間は、ぜんまいを十分に巻き上げた状態で約72時間(約3日間)、ぜんま
いの巻き上げ状態(残量)がわかるパワーリザーブ表示が付いています。秒針は完全にな
めらかな動きをするスイープ運針です。
このたびはグランドセイコーをお買い上げいただき、ありがとう
ございました。SEIKO では、時計づくり 100 有余年の伝統と、
世界に誇る先進技術のすべてを注ぎ、製造・検査を実施して
おります。グランドセイコーの優れた性能を保つために、この
取扱説明書をよくお読みの上、末長くご愛用くださいますよう
お願い申し上げます。
この取扱説明書はお手もとに保管していただき、必要に応じて
ご覧ください。 ※ スプリングドライブ機構の詳細については、別冊の「スプリングドライブ・ハンドブック」を
お読みください。
※ スプリングドライブはぜんまいの力で動きます。パワーリザーブ表示を確認しながら、
十分に巻き上げてご使用ください。⇒ ■パワーリザーブ表示について P.22
この時計は、空気ボンベを使用する潜水向け仕様として、水深200メートルに十分に耐え
られる防水性を備えています。(ヘリウムガスを使用する「飽和潜水」には使用できません。)
● 200m 防水性能について
●スプリングドライブについて

46
■製品仕様
1. 基本機能・・・・・・ 3針(時・分・秒)、日付表示、パワーリザーブ表示
2. 水晶振動数・・・・ 32,768Hz
3. 精度・・・・・・・・・・ 平均月差±15秒以内(日差±1秒相当)
※気温5℃~35℃において腕に着けた場合
4. 作動温度範囲・・ -10℃~+60℃
※低温下(0℃以下)では、パワーリザーブ表示が1/6以上の
状態でご使用ください。
5. 駆動方式・・・・・・ ぜんまい巻<自動巻(手巻付き)>
6. 運針方式・・・・・・ スイープ運針
7. 持続時間・・・・・・ 約72時間(約3日間)
(パワーリザーブ表示がフル巻き上げの場合)
※使用環境により、持続時間が短くなる可能性があります。
8. 電子回路 ・・・・・・ 発振・分周・スプリングドライブ制御回路(C-MOS-IC):1個
9. 使用石数・・・・・・ 30石
※仕様は改良のため、予告なく変更することがあります。
48
49
■ POWER RESERVE INDICATOR ……………………………………………… 68
How to read the power reserve indicator ……………………………………… 69
■ TO SET THE DATE AND TIME ……………………………………………… 70
How to set the date and time ……………………………………………………… 70
Calendar adjustment ……………………………………………………………… 74
Tips for more accurate time setting……………………………………………… 76
■ TO PRESERVE THE QUALITY OF YOUR WATCH ……………………… 77
Performance and caliber of your watch ………………………………………… 78
LumiBrite …………………………………………………………………………… 79
Magnetic resistance (aect of magnetic eld) ………………………………… 80
Magnetized items that may aect watches ……………………………………… 81
Band ………………………………………………………………………………… 82
■ AFTER-SALE SERVICES ……………………………………………………… 84
Replacement parts ………………………………………………………………… 85
Inspection and adjustment by disassembly and cleaning (overhaul) ………… 86
■ TROUBLESHOOTING …………………………………………………………… 88
■ SPECIFICATIONS ……………………………………………………………… 92
CONTENTS
■ CHARACTERISTICS ………………………………………………………… 51
■ PRECAUTIONS FOR USE …………………………………………………… 52
■
PRECAUTIONS FOR DIVING (PLEASE MAKE SURE TO OBSERVE THE FOLLOWING.)
… 56
Before diving …………………………………………………………………… 56
While diving ……………………………………………………………………… 58
After diving ……………………………………………………………………… 59
■ NAMES OF THE PARTS AND THEIR FUNCTION …………………… 60
Basic mechanism ………………………………………………………………… 60
Screw lock type crown ………………………………………………………… 61
■ ROTATING BEZEL …………………………………………………………… 62
How to use the rotating bezel ………………………………………………… 63
■ HOW TO USE THE DIVER ADJUSTER ………………………………… 64
■ HOW TO WIND THE MAINSPRING ……………………………………… 66
Guide for winding state of the mainspring ………………………………… 66
How to manually wind the mainspring by turning the crown ……………… 67
50
51
■ CHARACTERISTICS
Spring Drive, the unique mechanism made available only by SEIKO technology, ensures quartz accuracy while using the unwinding power
of the mainspring as its sole power source.
In addition to the self-winding mechanism, which uses the natural motion of the wearer’s arm as a power source to wind its mainspring,
the watch is equipped with the manual winding mechanism, which is convenient to wind the mainspring when you start using the watch.
The watch keeps working for approximately 72 hours (three days) when the mainspring is fully wound.
The watch features the power reserve indicator to show the winding state of the mainspring (the amount of the remaining power).
The glide-motion second hand that moves around the dial in a perfectly smooth movement is one of the remarkable features of this watch.
Thank you for purchasing our Grand Seiko product. For
more than 100 years of timepiece making tradition and the
advancement of world-class technology, SEIKO has devoted
its efforts to watch manufacturing and inspections. In order
to maintain superior performance and proper and safe use of
the Grand Seiko, please read the instruction manual carefully
before use. We thank you in advance for long-time regular
use of our product.
Keep this manual handy for easy reference as necessary.
※
For the details of the Spring Drive mechanism, refer to the separate volume “Spring Drive Handbook”.
※ Spring Drive works by the power provided by the mainspring. Remember to check the
power reserve indicator and keep the mainspring of the watch suciently wound while using
the watch. ⇒ “POWER RESERVE INDICATOR” on page 68.
This watch is designed for diving using compressed air cylinder featuring a superior water resistance property to
withstand depths down to 200 meters. (The watch cannot be worn during saturation diving which uses helium gas.)
● 200-meter water resistance
● Spring Drive
52
53
■ PRECAUTIONS FOR USE
※
Immediately consult the retailer from whom the watch was purchased or SEIKO CUSTOMER SERVICE CENTER.
WARNING
To indicate the risks of serious consequences such as severe injuries unless the following safety regulations are strictly observed.
・Immediately stop wearing the watch in following cases.
○ If the watch body or band becomes edged by corrosion etc.
○ If the pins protrude from the band
・Keep the watch and accessories out of the reach of babies and children.
Care should be taken to prevent a baby or a child accidentally swallowing the
accessories.
If a baby or child swallows the battery or accessories, immediately consult a doctor,
as it will be harmful to the health of the baby or child.
・If you observe any allergic symptoms or skin irritation
Stop wearing the watch immediately and consult a specialist such as a dermatologist or an allergist.
・Other cautions
○ Do not disassemble or tamper with the watch.
○
Keep the watch out of the reach of babies and children. Extra care should be taken to avoid
risks of any injury or allergic rash or itching that may be caused when they touch the watch.
To indicate the risks of light injuries or material damages unless the following safety regulations are strictly observed.
CAUTIONS
・Avoid wearing or storing the watch in the following places.
○
Places where volatile agents (cosmetics such as polish remover, bug repellent, thinners etc.) are vaporizing
○
Places where the temperature drops below 5℃ or rises above 35℃ for a long time
○ Places of high humidity
○ Places aected by strong magnetism or static electricity
○ Dusty places ○ Places aected by strong vibrations

54
55
Never use the watch in saturation diving
using helium gas.
While diving, never operate the watch in any other
manner than set forth in the instruction manual.
WARNING
WARNING
CAUTION
Before using the diver’s watch, you have to be properly trained in
various types of diving and possess the requisite experience and skill
to dive safely. When diving, strictly abide by the rules of diving.
CAUTION
Do not turn or pull out the crown when the watch is wet.
※
Should blur or moisture occur inside the dial glass and persist for a long time, this
indicates poor waterproof capability. Consult the retailer from whom the watch
was purchased or SEIKO CUSTOMER SERVICE CENTER as soon as possible.
Water may get inside of the watch.
Do not leave moisture, sweat and dirt on the watch for a long time.
Do not wear the watch while taking a bath or a sauna.
CAUTION
Be aware of a risk that a water resistant watch may lessen its water
resistant performance because of deterioration of the adhesive on the
glass or gasket, or the development of rust on stainless steel.
Steam, soap or some components of a hot spring may accelerate the
deterioration of water resistant performance of the watch.
56
57
■
PRECAUTIONS FOR DIVING (PLEASE MAKE SURE TO OBSERVE THE FOLLOWING.)
● Before diving
Before diving, check the following:
1.The time is correctly set.
2.
The power reserve indicator shows the level of remaining
power not less than one-half. If the remaining power
shows less than one-half, manually wind the mainspring.
3.
The rotating bezel turns smoothly. (The bezel
rotation must not be too loose or too tight.)
⇒ ●
“How to read the power reserve indicator” page 69
⇒ ■
“HOW TO WIND THE MAINSPRING” page 66
⇒ ■ “ROTATING BEZEL” page 62
⇒ ■
“NAMES OF THE PARTS AND THEIR FUNCTIONS” page 60.
4.The crown is completely screwed in.
5. There are no visible cracks or scratches on the
dial glass or band.
6. The band is rmly attached to the watch (with
spring bars, clamp or other parts.)
⇒ ● “Screw lock type crown” page 61
1
2
3
4
5
6
CAUTION
If there are any malfunctions, contact the retailer from whom the watch was purchased or SEIKO CUSTIMER SERVICE CENTER.
58
59
● While diving ● After diving
Please observe the following cautions for use. Please follow the care instructions below after diving.
Rinse the watch in fresh water to wash out
all seawater to prevent rust from forming.
After rinsing the watch, wipe it
thoroughly dry.
Wear the watch in air (scuba) diving
within the water depth of 200 meters. Do not operate the crown when the
watch is in water.
Take care not to bump the watch against
hard objects such as rocks.
Bezel rotation may become slightly harder
in the water but this is not a malfunction.
60
61
L
0
1
2
:Crown at the locked position
:
Crown unlocked at the 0 position for
manual winding of the mainspring
:
First click position for date setting
:
Second click position for time setting
※ It is necessary to unlock the screw lock type crown before operating it.
※
In order to prevent any operational errors from occurring, once you have nished operating the crown, make sure to relock it.
The watch features a screw-lock mechanism that can securely lock the crown when it is not being operated in order to prevent any operational errors and to improve the water resistant property.
L 0 1 2
Conrmation line
CAUTION
When locking the crown, turn it slowly with care, ensuring that the screw is properly engaged.
Be careful not to forcibly push it in, as doing so may damage the screw hole in the case.
To unlock the crown
Turn the crown counterclockwise
(downward) to unscrew it. When you
see the red line, the crown can be operated.
To lock the crown
Tu r n t h e c rown cl o c k w i s e
(upward) while gently pressing
it in toward the watch body until it stops.
■ NAMES OF THE PARTS AND THEIR FUNCTION
※ The orientation and design of the display may vary depending on the model.
● Screw lock type crown
● Basic mechanism
Minute hand
Hour hand
Second hand
Power reserve indicator
Calendar
Crown
Rotating bezel
page 62page 68

62
63
By setting the rotating bezel beforehand, the elapsed time since the start of an event such as diving can be measured.
This watch has an one-way rotating bezel. As the evaluation of the remaining air in
your cylinder is based on the information of the elapsed time of the dive, the rotating
bezels for a diver’s watch is designed to rotate only counterclockwise, so that the
watch is prevented from displaying the elapsed time shorter than it actually is.
● How to use the rotating bezel
CAUTION
Make sure that you check the correct remaining amount of air in your cylinder before diving.
Use the display of the elapsed time by the rotating bezel only as a guide during diving.
CAUTION
The r ot at ing bezel is de sig n ed to rotate on ly
counterclockwise. Do not forcibly rotate it clockwise.
2.
Read the graduation on the rotating bezel to which the minute hand is pointing.
1.
At the start of the event, for which you want to measure the elapsed time (for example, when you
start diving), rotate the bezel so that the mark on the bezel is aligned with the minute hand.
Example:When you start diving at 10:10.
Align the
mark with
the minute hand
Read the graduation on the rotating bezel
to which the minute hand is pointing.
■ ROTATING BEZEL
Rotating direction of the bezel
Elapsed time
Start of the dive
After 15 minutes has elapsed
64
65
6. Close the clasp first (6-1 in the
illustration) and then, the flap
(6-2 in the illustration.)
4.Press the lock button.
7.
With the hand which is not wearing
the watch, adjust the length of the
slider so that the watch fits well
around your wrist.
Clasp
Lock button
7
Limit mark
(upper surface)
Slider
5
7
Buckle
4
6-1
6-2
5.
Lift up the clasp to release the buckle, and strap the watch on your wrist.
■ HOW TO USE THE DIVER ADJUSTER
The metal bracelet of this watch is equipped with a diver adjuster mechanism.
It is very useful when you wear the watch over a wet suit, as it allows you to
easily adjust the bracelet length.
2. Press the ap down further approximately
20°, and hold it there.
※ You may feel slight resistance, but doing this
requires only a light force.
Please do not push the ap down forcibly.
3.
Lightly pull the bracelet on the 6 o’clock side of
the watch along the curved line of the bracelet.
※
Again as the step 2 above, doing this requires only a
light force. Please do not pull the bracelet forcibly.
※
The slider can be pulled out approximately 30 mm. Be
careful not to pull it out beyond the limit mark inscribed
on it. (Refer to the illustration on the next page.)
Bracelet on the 6 o’clock
side of your watch
Bracelet on the 12 o’clock
side of your watch
Flap
1
2
3
1.Lift up the ap approximately 90° until it stands upright.
66
67
■ HOW TO WIND THE MAINSPRING
This watch is a self-winding watch equipped with a manual winding mechanism. When the watch
is worn on the wrist, the motion of your arm automatically winds the mainspring of the watch.
● How to manually wind the mainspring by turning the crown
In order to set the time and date after winding the mainspring
manually, do not relock the crown but continue the procedures.
⇒ ● “How to set the date and time” page 70
● Guide for winding state of the mainspring
Self-winding:
The mainspring of the watch is designed to be fully wound when it is
worn for twelve hours per day for three to ve consecutive days.
Manual winding: Five full rotations of the crown will provide the power
to run the watch for approximately ten hours.
⇒ ● “Screw lock type crown” page 61
1.Unlock the crown.
3.
Once you nish winding the mainspring,
make sure you relock the crown.
2. Slowly turn the crown clockwise (upward) to wind the mainspring
with extra care not to press it in. Wind the mainspring until the power
reserve indicator shows a full-wound state. Immediately, the second
hand starts moving.
⇒ ● “How to read the power reserve
indicator” page 69
Slowly turn
the crown.
※ Observe the power reserve indicator to check the amount of the remaining power.
⇒ ■ “POWER RESERVE INDICATOR” page 68
※ When first using the stopped watch, it is recommended that you manually wind the
mainspring by turning the crown.
CAUTION
※
The watch employs a device to prevent overwinding of the mainspring. Once the mainspring is fully wound,
the mainspring slips inside, disengaging the winding mechanism. When this happens, you can still turn the
crown without damaging the watch, however, please refrain from excessive operation of the mainspring.
68
69
Power
Reserve
Indicator
Winding state of
the mainspring
Fully wound Half wound Unwound
Number
of hours
the watch
can run
Approximately 72
hours (3 days)
Approximately 36
hours (1.5 days)
The watch either
stops or is running
down.
● How to read the power reserve indicator
※
Under a low-temperature condition (below 0ºC), always keep at least one-sixth of the power reserve shown by the power reserve indicator.
■ POWER RESERVE INDICATOR
Before removing the watch from your wrist,
observe the power reserve indicator to check
if the watch has stored enough power to keep
running until the next time you wear it. If
necessary, wind the mainspring. (To prevent
the watch from stopping, wind the mainspring to
store the excess power that will allow the watch
to run for extra time.)
※
The continuous operable time of the watch may vary depending on actual use conditions, such
as the number of hours you wear the watch or the extent of your movement while wearing it.
※
In a case where you wear the watch for a short period of time each day, observe the power reserve
indicator to check the level of the remaining power. If necessary, manually wind the mainspring.
Power reserve indicator
The power reserve indicator lets you know the winding state of the mainspring
(the amount of the remaining power).

70
71
■ TO SET THE DATE AND TIME
● How to set the date and time
2.Unlock the crown.
⇒ ● “Screw lock type crown” page 61
1.
Make sure that the mainspring is suciently wound and the watch is working.
4. Pull out the crown to the
first click. (The second hand
continues moving.)
Pull out the crown
to the rst click.
※ When setting the date and time, ensure that the watch is working.
3.
While the watch hands show any time between 9:00 PM and 1:00 AM, pull
out the crown to the second click, and turn it counterclockwise (downward)
to temporarily advance the hands to show any time after 1:00 AM.
※
This procedure is required to ensure the proper engagement of the calendar driving wheel.
※ Each time the hour hand makes two full rotations, the date is adjusted for one day.
While turning the crown, the moment the date changes is midnight. When setting
the hour hand, be sure that AM/PM is set correctly.
5. Turn the crown counterclockwise
(downward) to set the date to
the previous date.
※ Turning the crown clockwise (upward)
will not move the date.
Example: When you wish to set the date to the
sixth, set to the fth at this point.
72
73
6. Pull out the crown to the second
click when the second hand is
pointing at the “ 0 ” second
position. The second hand will
stop on the spot.
Pull out the crown
to the second click.
The second hand is pointing
at the “ 0 ” second position.
7.
Advance the time until the watch shows the date you
wish to set by turning the crown counterclockwise
(downward) and rotating the watch hands clockwise.
9. Push the crown back in simultaneously with
the time signal.
The settings are now completed.
Relock the crown.
⇒ ● “Screw lock type crown” page 61
Push the crown back
in simultaneously
with the time signal.
8.Next, set the time.
Slowly advance the minute hand to the
time you wish to set.
※
Each time the hour hand makes two full
rotations, the date is adjusted for one day.
While turning the crown, the moment the date
changes is midnight. When setting the hour
hand, be sure that AM/PM is set correctly.
※ Turn the crown slowly, checking that the hour
hand moves in one-hour increments.
74
75
● Calendar adjustment
The watch is designed to display the date from the 1st to 31st every month, so
that the manual calendar adjustment is required on the rst day after a month
that has less than 31 days: February, April, June, September and November.
1.
Make sure that the mainspring is suciently wound and the watch is working.
※ When setting the date and time, ensure that the watch is working.
4. Pull out the crown to the rst
click.
(The second hand continues
moving.)
Pull out the crown
to the rst click.
2.Unlock the crown.
⇒ ● “Screw lock type crown” page 61
3.
While the watch hands show any time between 9:00 PM and 1:00 AM, pull
out the crown to the second click, and turn it counterclockwise (downward)
to temporarily advance the hands to show any time after 1:00 AM.
※
This procedure is required to ensure the proper engagement of the calendar driving wheel.
※
Each time the hour hand makes two full rotations, the date is adjusted for one day. While turning the crown, the
moment the date changes is midnight. When setting the hour hand, be sure that AM/PM is set correctly.
5. Turn the crown counterclockwise
(downward) to set the date.
※ Turning the crown clockwise (upward)
will not move the date.
6.
Upon completion of the setting, push the crown back in.
The calendar adjustment is now completed.
Relock the crown.
⇒ ● “Screw lock type crown” page 61
Push the crown
back in.
76
77
● Tips for more accurate time setting
Keep in mind the following points in order to set the time more accurately.
・ Before setting the time, wind the mainspring suciently.
(Ensure that the power reserve indicator is showing a full-wound state.)
・ When starting to use a stopped watch, wind the mainspring suciently.
To set the time after that, wait for approximately 30 seconds after the
second hand starts to move, then pull the crown out to the second click.
・ The second hand will stop moving while the crown is at the second click
position. Try not to stop the second hand movement for longer than 30
minutes. If it is necessary to remain holding the crown at the second
click position for longer than 30 minutes, push the crown back in once,
and wait for at least 30 seconds after the second hand restarts moving,
and then pull out the crown to the second click again to resume time
setting.
■ TO PRESERVE THE QUALITY OF YOUR WATCH
The watch needs frequent attention.
・ Wipe away moisture, sweat or dirt frequently with a soft dry cloth.
To clean the clearances (around the metallic band, crown, case back or rotating
bezel), a soft toothbrush is convenient.
・ After soaking the watch in seawater, be sure to wash the watch in clean pure water
and wipe it dry carefully.
Turn the crown from time to time
・ In order to prevent corrosion of the crown, turn the crown from time to time.
・ The same practice should be applied to a screw lock type crown.
⇒ ● “Screw lock type crown” page 61

78
79
※
The above figures are examples. Both of them may be different from the figure on the case back of your watch.
Caliber Number
The number to identify
the type of your watch
Water
resistance
Magnetic
resistance
Refer to pages
80 and 81.
●Performance and caliber of your watch
The case back shows the caliber and performance of your watch
● LumiBrite
LumiBrite is a luminous paint that is completely harmless to human beings and natural environment, containing no
noxious materials such as radioactive substance. LumiBrite is a newly-developed luminous paint that absorbs the
light energy of the sunlight and lighting apparatus in a short time and stores it to emit light in the dark.
Please note, however, that, as LumiBrite emits the light it stores, the luminance level of the light decreases
gradually over time. The duration of the emitted light may also dier slightly depending on such factors as the
brightness of the place where the watch is exposed to light and the distance from the light source to the watch.
Environment
Indication of brightness (luminance)
Sunlight Fine weather 100,000 lux
Cloudy weather 10,000 lux
Indoor
(Window-side during daytime)
Fine weather more than 3,000 lux
Cloudy weather 1,000 to 3,000 lux
Rainy weather less than 1,000 lux
Lighting apparatus
(40-watt daylight uorescent light)
1m 1,000 lux
3m 500 lux (average room luminance)
4m 250 lux
<Reference data on the luminance>
80
81
・ Examples of common items that generate a magnetic field
● Magnetized items that may affect watches
・ Speaker of audio instruments, radios, ear-
phones, or mobile phone etc.
・ Magnetic clips ・ Magnetic accessories
・
Magnetic health equipments (such as magnetic
plasters, magnetic pillows, magnetic back belts etc.)
・ Magnetic door seal of
refrigerator or furniture
・ Magnetic buckle of handbags or purses
・
Grand Seiko Diver’s watches conform to the Magnetic Resistance Standard of JIS Class
1. The watch has magnetic resistance to maintain performance in most cases even where
it is brought close to (at least 5cm spaced from) equipment generating a magnetic field in
normal life. However, the movement parts are magnetized when they encounter a strong
magnetic field, thereby accuracy may go out of order. Pay attention so as not to bring the
watch close to equipments generating a strong magnetic field within 5cm.
● Magnetic resistance (affect of magnetic field)
Classication of JIS
antimagnetic watches
Certied level of
magnetic resistance
Indication of antimagnetism
(on the case back)
Antimagnetic quality
Class 1 4800A/m
The watch has magnetic resistance to maintain performance in
most cases where it is brought close to (at least 5cm spaced
from) equipment generating a magnetic eld in normal life.
・ If the accuracy exceeds the accuracy target range ( ± 15 seconds/month) during
normal usage due to magnetization, removal of magnetism and accuracy readjustment
works are charged regardless of the guarantee period.
Caution
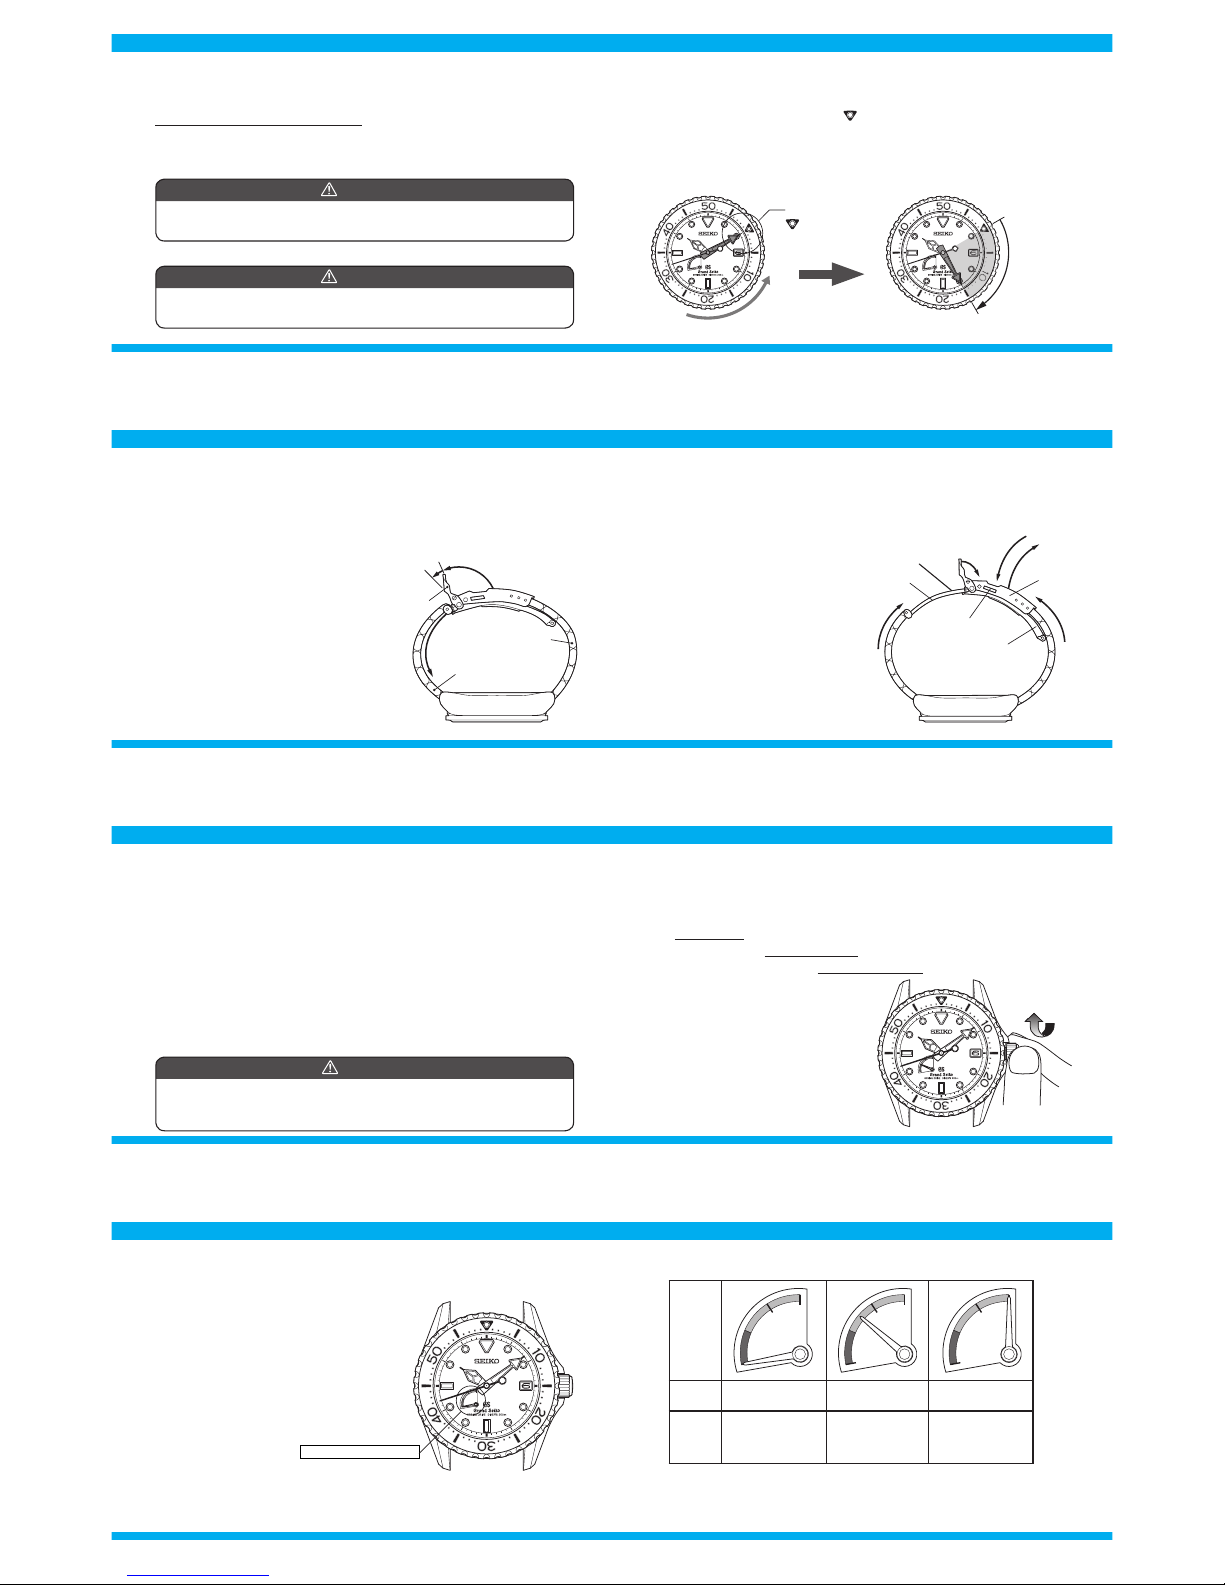
Keep the watch more than 5 cm away from magnetized products.
82
83
Notes on the length
of the band
Notes on skin
irritation and
allergy
Skin irritation caused by a band has various reasons such as allergy
to metals or leathers, or skin reactions against friction on dust or
the band itself.
Adjust the band with a little clearance with your wrist to
ensure proper airow. Make a room for one nger around
your wrist when you wear the watch.
● Band
The band touches the skin directly and becomes dirty with sweat or dust.
Therefore, lack of care may accelerate deterioration of the band or cause skin irritation
or stain on the sleeve edge. The watch requires a lot of attention for long usage.
Metallic band
・ Moisture, sweat or soil will cause rust even on a stainless steel band if they are
left for a long time.
・ Lack of care may cause a yellowish or gold stain on the lower sleeve edge of shirts.
・ Wipe o moisture, sweat or soil with a soft cloth as soon as possible
・ To clean the soil around the joint gaps of the band, wipe it out in water and then
brush it o with a soft toothbrush.
・ Even if the band is a titanium band, stainless steel with a superior strength may be
used for the pins and rust may occur on the stainless pins.
・ If rust becomes severe, the pins may stick out or come out of the band, causing the
watch to fall o. Or the clasp may become dicult to be unfastned.
・ Should the pins stick out of the band, it may cause injury. Immediately stop using
the watch and request repair.
Polyurethane band
・ A polyurethane band is susceptible to discoloration from light, and may be
deteriorated by solvent or atmospheric humidity.
・ Especially a translucent, white, or pale colored band easily adsorbs other colors,
resulting in color smears or discoloration.
・ Wash out dirt in water and clean it o with a dry cloth.
(Protect the watch body from water splashes by wrapping it up in plastic wrap etc.)
When the band becomes less exible or cracked, replace the band with a new one.
84
85
● Replacement parts
・ SEIKO makes it policy to usually keep a stock of spare parts for GRAND
SEIKO watches for 10 years. In principle, your watch can be reconditioned
within this period if used normally. (Replacement parts are those which
are essential to maintaining the functional integrity of the watch.)
・ The number of years that a watch is considered repairable may vary great-
ly depending on the conditions under which it was used, and normal ac-
curacy may not be achieved in some cases. We recommend, therefore, that
you consult the retailer from whom the watch was purchased when having
them repair your watch.
・ The case, dial, hands, glass and bracelet, or parts thereof may be replaced
with substitutes if the originals are not available.
・ If you have any questions, please contact SEIKO CUSTOMER SERVICE
CENTER.
■ AFTER-SALE SERVICES
・
Your Grand Seiko watch was strictly checked and completely adjusted at the factory
to ensure its high accuracy. However, if your watch gets out of order with the cor-
rect way of use as described in this instruction booklet within the guarantee period,
take your watch to the retailer from whom your watch was purchased together with
the certificate of guarantee. Repair and adjustment will be made without charge.
・
The guarantee period is one year from the date of purchase. For the movement only,
this guarantee period is extended to two years from the date of purchase. More de-
tailed guarantee coverage is provided in the certificate of guarantee.
・
For repair services after the guarantee period has expired or for any other in-
formation regarding the Grand Seiko, please contact the retailer from whom your
watch was purchased or SEIKO CUSTOMER SERVICE CENTER.

86
87
・ Inspection and adjustment by disassembly and cleaning (overhaul) of this
watch will be performed by SEIKO. When you take the watch to the re-
tailer from whom it was purchased, request that the watch be inspected
and overhauled by SEIKO.
・ We recommend that you have your watch checked by SEIKO every 3 to 4
years for long-time use of your watch.
・
The movement of this watch has a structure that consistent pressure is
applied on its power-transmitting wheels. To ensure these parts work
together properly, periodic inspection including cleaning of parts and
movement, oiling, adjustment of accuracy, functional check and replacement
of worn parts is needed.
Inspection and adjustment by disassembly and cleaning (overhaul) within 3
to 4 years from the date of purchase is highly recommended for long-time
use of your watch.
Contact the retailer from whom the watch was purchased for inspection
and adjustment by disassembly and cleaning (overhaul) of your watch.
Make sure that the gasket and push pin will be also replaced with new ones.
● Inspection and adjustment by disassembly and cleaning (overhaul)
CAUTION
Depending on the environment where a diver’s watch is used, its inner parts or movement as
well as its case or band may be aected. We recommend that you have your watch inspected
and adjusted by disassembly and cleaning (overhaul) regularly once every 3 to 4 years.
・ For any questions or concerns, contact SEIKO CUSTOMER SERVICE
CENTER.
88
89
Solutions
Reference pages
Turn the crown to wind the mainspring and reset the time. While you are
wearing the watch or when you take it o, check the remaining power shown by
the power reserve indicator and wind the mainspring if necessary.
Page 67
Page 70
Turn the crown to wind the mainspring and reset the time. If the watch is left at a temperature below
0 ºC, it may stop if the power reserve indicator is showing less than one-sixth of the power reserve.
Page 67
Return the watch to a normal temperature so that it works accurately as usual, and then reset the time. The watch has been
adjusted so that it works accurately when it is worn on your wrist under a normal temperature range between 5 ºC and 35 ºC.
Page 70
Correct this condition by moving and keeping the watch away from the magnetic source. If this
action does not correct the condition, contact the retailer from whom the watch was purchased.
Page 70
Page 80
Reset the time. If the watch does not return to its normal accuracy after
resetting the time, contact the retailer from whom the watch was purchased. Page 70
While turning the crown to set the time, the moment the date changes is
midnight. Reset the time making sure that AM/PM is set correctly. Page 70
■ TROUBLESHOOTING
Troubles Possible causes
Stoppage
of the
watch
The watch stops operating. The mainspring has not been wound.
The watch stops even though the power
reserve indicator is not showing “0.”
The watch has been left at a low temperature
(below 0ºC).
Wrong
display of
the time
and/or
date
The watch temporarily
gains or loses time.
The watch has been left at an extremely high
or low temperature.
The watch has been left close to an object
generating a strong magnetic eld.
You dropped the watch, hit it against a hard
surface or wore it while playing active sports.
The watch was exposed to strong vibrations.
The date changes during
daytime. AM/PM is not correctly set.
90
91
Solutions
Reference pages
Wear the watch for an extended period of time. Or turn the crown to wind
the mainspring. Page 66
It takes several seconds before the adjustment function starts working.
Set the time after the second hand moves for approximately 30 seconds to
set the time correctly.
Page 76
Contact the retailer from whom the watch was purchased. -
■ TROUBLESHOOTING
Troubles Possible causes
Power
reserve
Even though you wear the
watch every day,
the power reserve indicator
does not move up.
The watch is worn on your wrist only for a
short period of time, or the amount of arm
movement is small.
Others
Right after starting the
watch, it seems that the
second hand moves more
quickly than usual when
setting the time.
When starting the watch, it takes a little time
before the adjustment function starts working.
(This is not a malfunction.)
Bl u r on t h e d ia l gla ss
persists.
Small amount of water has got inside the
watch due to deterioration of the gasket, etc.
※
In the event of any other problem, please contact the retailer from whom the watch was purchased
or SEIKO CUSTOMER SERVICE CENTER.
92
■ SPECIFICATIONS
1. Features: 3 hands (hour, minute and second hands), Date display, Power reserve indicator
2. Frequency of crystal oscillator: 32,768 Hz
3. Loss/gain (monthly average): ± 15 seconds ( ± 1 second per day) (worn on your wrist at
normal temperature range between 5 ºC and 35 ºC)
4. Operational temperature range: between -10 ºC and +60 ºC
Under a low-temperature condition (below 0ºC), always keep
at least one sixth of the watch power shown by the power
reserve indicator.
5. Driving System: ・・ Mainspring (Self-winding type with manual winding function)
6. Hand movement: ・・ Glide-motion hands
7. Continuous operable time: Approx. 72 hours (Approx. 3 days) (I f the power reserve
indicator shows the power supplied by the mainspring is full
before starting the watch.)
※ Depending on conditions of use, the continuous operable time
may become shorter than the above.
8. IC (Integrated Circuit): Oscillator, frequency divider, and spring drive control circuit
(C-MOS-IC): 1 piece
9. Number of jewels: 30 jewels
※
The specications are subject to change without prior notice due to product improvements.
グランドセイコー専用フリーダイヤル
0120-302-617
本 社 〒 105-8467 東京都港区芝浦 1-2-1
http://www.seiko-watch.co.jp/
受付時間:月曜~金曜 9:30 ~ 21:00
土曜・日曜・祝日 9:30 ~ 17:30
お客様相談室
〒 100-0005 東京都千代田区丸の内 3-1-1 国際ビル
〒 550-0013 大阪市西区新町 1-4-24 大阪四ツ橋新町ビルディング
Other manuals for Grand Seiko SPRING DRIVE DIVERS 9R65
1
Table of contents
Other Seiko Watch manuals

Seiko
Seiko 6R20 User manual

Seiko
Seiko Conceptual SNE527P User manual

Seiko
Seiko 8R28 User manual

Seiko
Seiko 6138A User manual

Seiko
Seiko Kinetic 5M54 User manual

Seiko
Seiko 8R28 User manual

Seiko
Seiko 6M15 User manual

Seiko
Seiko Cal. 6T63 User manual

Seiko
Seiko SSJ015J User manual

Seiko
Seiko Cal. 4R15 User manual

Seiko
Seiko M-16 User manual

Seiko
Seiko H024 User manual

Seiko
Seiko KINETIC 9T82 User manual

Seiko
Seiko S149 User manual

Seiko
Seiko Grand Seiko 9S65 User manual

Seiko
Seiko 6G34 User manual

Seiko
Seiko Issey Miyake NE15 User manual

Seiko
Seiko 4S12 User manual

Seiko
Seiko 5D44A Installer manual

Seiko
Seiko ALBA W071 User manual