Seikosha MP-5300AI User manual

_ ,,_6
300
J)J
,,_1\
300pJ
0 \\\
t~
s
\\1\~ \\\
\l~\..
\\I\~1R\~PR\\\\1ER

WARNING
This equipment has beencertified to comply with thelimits for a Class 8
computingdevice, pursuant to Subpart
J
of Part IS of FCC Rules. Only
computers certified to comply with the Class 8 limitsmay be attached to
this printer.Operationwith noncertifiedcomputersislikelytoresult in
interference toradio and TV reception.
This equipment generates anduses radio frequency andif not installed
and used properly, that is,in strictaccordance with themanufacturer's
instructions, may cause interference toradio and television reception.It
has been testedand found to complywith thelimitsfora Class 8comput-
ingdevice in accordance with the specificationsin Subpart
J
of Part 15 of
FCC Rules,whichare designed toprovidereasonableprotectionagainst
guarantee that interference will notoccur in a particular installation.If
this equipment does cause interference toradio or television reception,
whichcanbe determined by turningthe equipment offand on,theuser is
encouraged totryto correct theinterference by one or more of the
followingmeasures:
• Reorient thereceiving antenna
• Relocatethe computerwith respect to thereceiver
• Move the computeraway fromthe receiver
• Plugthe computer into a different outletso thatcomputerandreceiver
are ondifferent branchcircuits.
Ifnecessary,theuser should consult the dealeroranexperienced r diol
television technicianfor additionalsuggestions. Theuser may findthe
following booklet prepared by the FederalCommunications Commission
helpful:
This booklet is availablefrom the U.S. Government Printing Office,
Washington,D.C.20402, Stock No.004-000-00345-4.
It isnecessary touse shielded interconnectcables to insure compliance with
FCC Class 8 limits for radio frequency emissions' .
IBM and18M-PC are registered trademarks of International8usiness
Machines Corporation.

SEIKOSHA reserves the right to change the contents as stated herein at any time
and without notice. Although every effort has been made to insure that the contents
as stated herein are complete and without error, SEIKOSHA cannot be responsible
for any damage that may occur should this not be the case. However, should any
errors be detected, SEIKOSHA would appreciate being informed of them.

SEIKOSHA CO.,LTD.
SYSTEM EGUIPMENT DIVISION
CONTENTS
MAIN FEATURES 1
SPECIFICATIONS 2
Printing Specifications 2
Other Specifications 4
Options (MP-1300 only) 4
PRINTER DESCRIPTION 5
Unpacking the Printer 5
Operator Controls and Indicators 6
Paper Loading Lever for Automatic Paper Loading 8
SETTING UP 9
Using Continuous Forms (Rear Feed) 9
Ribbon Cassette Installation 10
Using Cut Sheets 15
Using Continuous Forms (Bottom Feed) 19
More About the Printer 21
• Paper position 21
• Head adjustment lever 22
Connecting the Printer to a Computer 22
• Connecting the parallel interface 23
• Connecting the serial interface 24
INTRODUCTION TO PRINTER FEATURES FOR BEGINNERS 26
STEP 1.Character Width Selection 26
STEP 2. Double-Width Character 29
STEP 3. Superscripts and Subscripts 31
STEP 4. Underlining 32
STEP 5. Emphasized Printing 33
STEP 6. Double-Strike Printing 34
STEP 7. Page Length Setting 35
STEP 8. Horizontal Tab Setting 37
STEP 9. Margin Setting 39
STEP 10. Graphic Printing 41
MARGIN SETTING BY SWITCHES 44
SELF-TEST 45
AUTOMATIC PRINTING FUNCTION 45
INPUT DATA HEXADECIMAL DUMP 46
1. Home Position Detection Error 47
2. RAM Error ...........................•..................................................... 47
3. Abnormal Temperature Rise Error 47
PRINT HEAD PROTECTION ............................•..•..••.•....................... 48
DIP SWITCH SE1TING 49
2. DIP SWITCH BANK 2 51
CHARACTER MODE TRANSITION .................................................•• 52
PRINT MODE PRIORITIES .............................................•.............•.... 53
PRINT MODE SPECIFICATIONS 54
CONTROL CODES .......................................................................•.... 56
• Print Commands .................................................•..•...................... 56
• Character Mode Designations 64
• Emphasized Character 73
• Double-Strike Character ..........................................................•...... 74
• Double-width Character 75
• Graphic Mode ....•...........................................................•.............. 76
• Linefeed Pitch .....................................................................•.••..... 84
• Page Length ...................•............................•................................ 89
• Horizontal Tab 91
• Margin Setting ..............................................................•............... 92
• Underlining .........................................................................•..•..... 95
• Buffer Clear 95
• Back Space 96
• Home Positioning ...............•............•............................................. 97
• Skip-Over Perforation .................................•.................................. 97
• Paper-Out Detection ............................•.......•......•.......................... 99
• Reset........................................................................................... 99
• Printing Direction .....•....•..... 99
• International Characters .......................................•......................... 100
• Tab Initialization .............................•...•......................................... 102
• Deleting Data ................................................................•.............. 102
• Vertical Tab 102
• Printer Selection .........................•....•............................................. 105
• Download Characters (User-defined characters) 105

• Input Data Control 114
• Print Code Area Designation 116
• Immediate Printing 119
• CSF Control 120
• CR Code Control 121
• Print Postion Control 122
USING THE OPTIONAL CUT SHEET FEEDER 124
• Introduction to Using the CSF 124
• CSF Mode Setting 126
• Features That Change in the CSF Mode 127
• CSF Error Conditions 128
• Error Termination 128
• Performing the Self-Test in the CSF Mode 128
USING THE OPTIONAL COLOR UNIT (MP-1300 only) 129
Color Self-Test 129
Color DIP Switches 130
Control Codes 131
• 7-Color Selection 131
• Black and white selection •..•...•....••••......••.......•..••......•..•...•..•.•....... 132
• RGB Graphic Mode 133
• Ribbon Color Graphic Mode ····.136
CA UTIONS FO RUSE 138
TRO UBLESHOOTING ····139
APPENDIX A GLOSSARY ·······140
APPENDIX B DEFAULT SETTINGS 148
APPENDIX C PARALLEL INTERFACE 149
1. Input Connector 149
2. Signal Explanations 150
3. Electrical Conditions 151
4. Timing Chart 153
APPENDIX D SERIAL INTERFACE ··························154
1. Input Connector 154
2. Signal Explanations 156
3. Electrical Conditions 157
4. Handshake Protocol 157
5. Baud Rate (Data Transfer Rate) ·········158
6. Serial Data Frame 159
APPENDIX E CHARACTER SET TABLE 160
STANDARD CHARACTER SET ·····.·····.·········.··.· ·.·.·········· ..·.. 160
IBM CHARACTER SET 1 161
IBM CHARACTER SET 2 162
DOT-COLUMN WIDTH OF PROPORTIONAL CHARACTERS 163
APPENDIX F CONTROL CODE SUMMARY 166
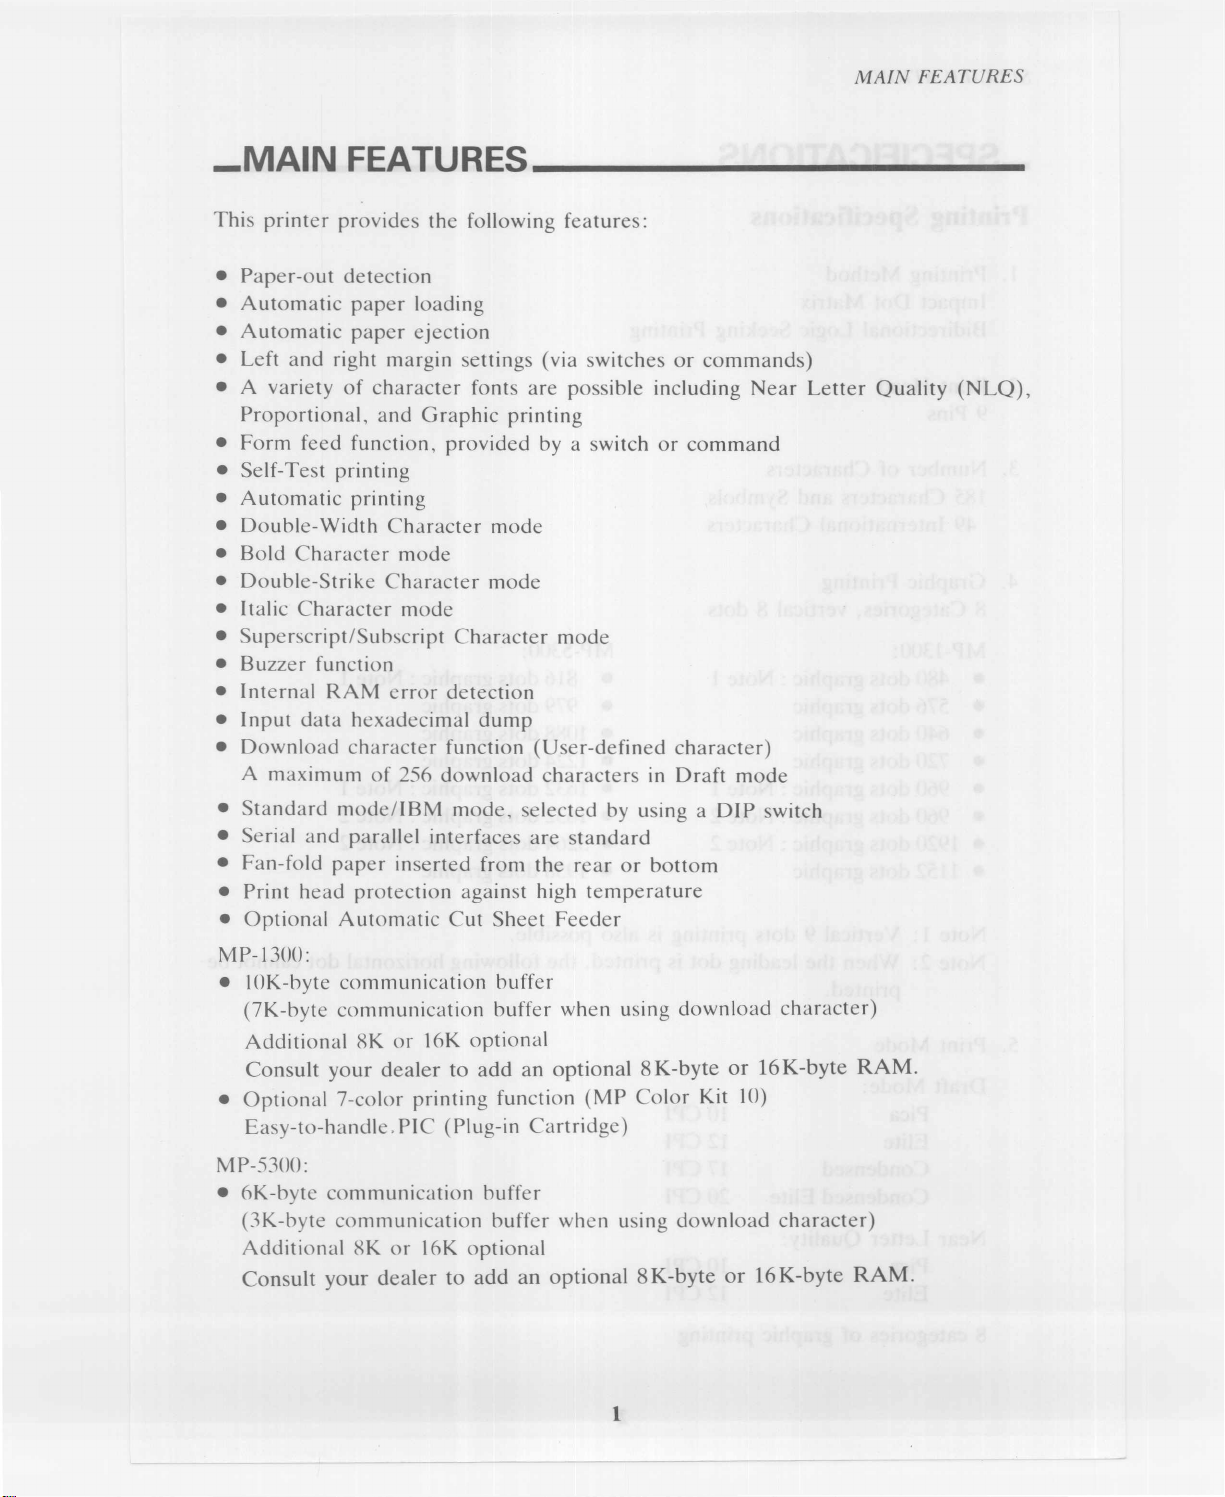
_MAIN FEATURES _
•Paper-out detection
•Automaticpaper loading
•Automaticpaperejection
•Leftand right margin settings (via switches or commands)
•A variety ofcharacter fonts arepossibleincluding Near Letter Quality (NLQ),
Proportional, and Graphic printing
•Form feed function,provided by a switchor command
•Self-Test printing
•Automaticprinting
• Double-Width Character mode
• Bold Character mode
• Double-Strike Character mode
• Italic Character mode
•Superscript/Subscript Character mode
• Buzzerfunction
• Internal RAMerror detection
• Input datahexadecimal dump
•Download character function(User-defined character)
Amaximum of 256 downloadcharactersin Draft mode
•Standardmode/IBM mode, selected by using a DIP switch
•Serialand parallel interfaces are standard
•Fan-fold paper inserted from therearor bottom
• Print head protectionagainst high temperature
•OptionalAutomatic Cut SheetFeeder
MP-1300:
• 10K-byte communication buffer
(7K-byte communication bufferwhen usingdownload character)
AdditionalRKor 16Koptional
Consult your dealer toadd an optional8K-byteor 16K-byte
RAM.
•Optional7-color printingfunction(MP Color Kit 10)
Easy-to-handle.PIC (Plug-in Cartridge)
MP-5300:
•6K-bytc communication buffer
(3K-byte communication bufferwhen usingdownloadcharacter)
AdditionalRKor 16Koptional
Consult your dealer to add an optional8K-byte or 16K-byte
RAM.

_SPECIFICATIONS _
I.
Printing Method
Impact Dot Matrix
Bidirectional Logic Seeking Printing
2. Print Head
9 Pins
3. Number of Characters
185 Characters and Symbols
49 International Characters
4. Graphic Printing
8 Categories, vertical8 dots
MP-1300:
• 480 dots graphic: Note 1
• 576 dots graphic
• 640 dots graphic
• 720 dots graphic
• 960 dots graphic: Note 1
• 960 dots graphic: Note 2
• 1920 dots graphic: Note 2
• 1152 dots graphic
MP-5300:
•816 dots graphic: Note 1
•979 dots graphic
•1088 dots graphic
•1224 dots graphic
•1632 dots graphic: Note 1
•1632 dots graphic: Note 2
•3264 dots graphic: Note 2
•1958 dots graphic
Note 1: Vertical 9 dots printing is also possible.
Note 2: Whentheleading dot is printed, the following horizontal dot cannot be
printed.
Draft Mode:
Pica
Elite
Condensed
Condensed Elite
10 CPI
12 CPI
17 CPI
20 CPI
Near Letter Quality:
Pica
Elite 10 CPI
12 CPI

Mixing anyof the above modes within a single lineis possible.
In
addition,this printer iscapableof Bold,Double-Width,Double-Strike,
Superscript/Subscript,Proportional,and Italic Character modes.
Cut sheet (A4,B5,letter,legal)
45 kg - 70 kg in Japan
14 lbs. - 21 lbs.in USA
53 g/m2-81 g/m2in Europe
Fan-fold paper(4"- 10")
45 kg - 70 kgin Japan
14 lbs. - 21 lbs.in USA
53 g/m2-81 g/m2in Europe
7. Multiple Copies
Non-carbon paper,40 g/m
2
[Draft modeOriginal plus 2 copies
NLQ modeOriginal plus4 copies Total thickness:
l'
Rear feed Original pIus2 copies 0.2mm orless
Bottom feed Original plus4copies 0.3 mm or less
8. Ribbon
• Black ribbon
• MP-1300 4-color ribbon:The optionalcolor unit isnecessary.
9. Throughput
• MP-1300: 147 lines/minutein Draft Picamode
• MP-5300:103 lines/minute in Draft Pica mode
10. LineFeed Pitch
Minimum of 1/216"
11.Line Feed Speed
30 lines/second
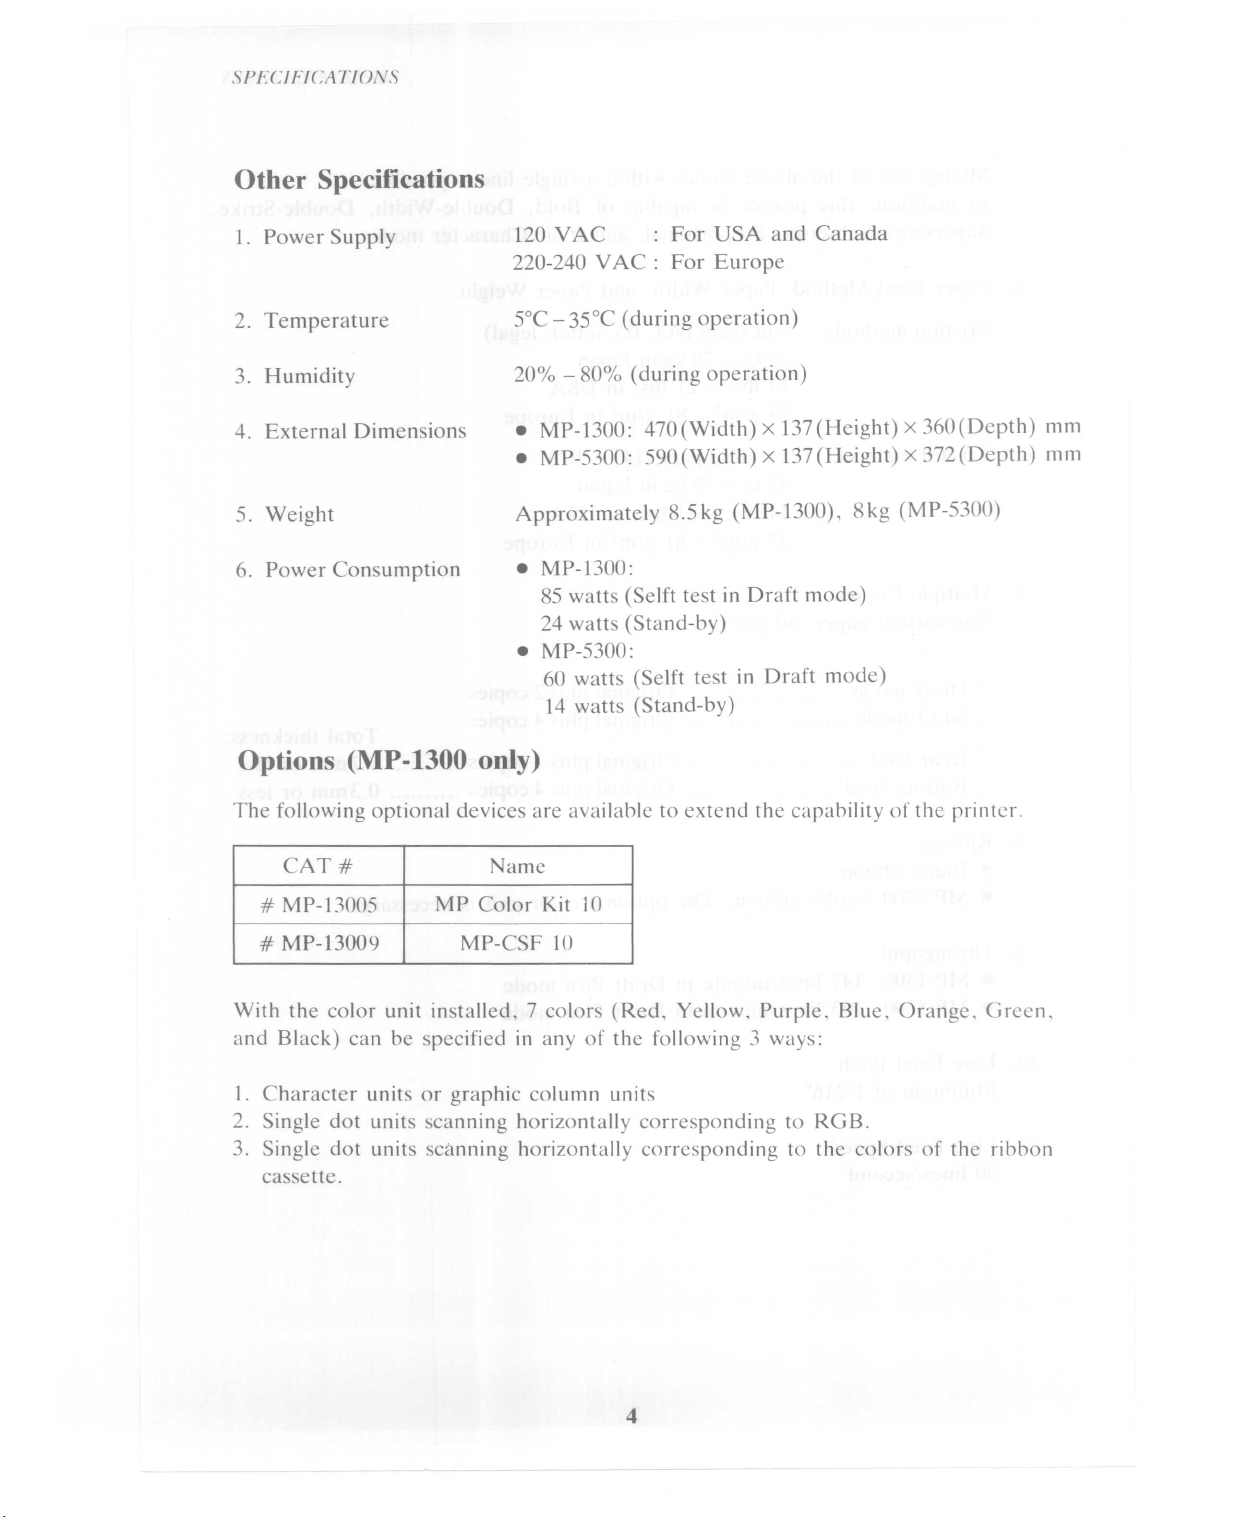
120 VAC For USA and Canada
220-240 VAC: For Europe
•MP-1300: 470 (Width) x 137 (Height) x360(Depth) mm
•MP-5300: 590(Width) x 137 (Height) x372 (Depth) mm
•MP-1300:
85 watts (Selft test in Draft mode)
24 watts (Stand-by)
•MP-5300:
60 watts (Selft test in Draft mode)
14 watts (Stand-by)
Options (MP-1300 only)
CAT# Name
# MP-13005 MP ColorKit 10
# MP-13009 MP-CSF 10
With the color unitinstalled, 7 colors (Red,Yellow, Purple,Blue, Orange,Green,
and Black) can be specified inany of the following 3 ways:
I. Character units or graphic column units
2.Single dot units scanninghorizontally corresponding to RGB.
3. Single dot units scanninghorizontally corresponding to the colors of the ribbon
cassette.

_PRINTER DESCRIPTION _
Unpacking the Printer
1.Printer
2. Ribbon Cassette (Black)
3.Tractor Unit
4. Printer Cover
5. Paper Rack
6. Paper Rack Support
7. Power Cord
8. Owner's Manual

PRINTER DESCRIPTION
Operator Controls and Indicators
It is important to become familiar with the printer before setting it up and using it.
~111111~111111mil
Paper Loading Lever
(Pin feed/Frictionfeed)
7.
8. FORM FEED Switch
4. ON-LINE Switch
6. NLQ Switch
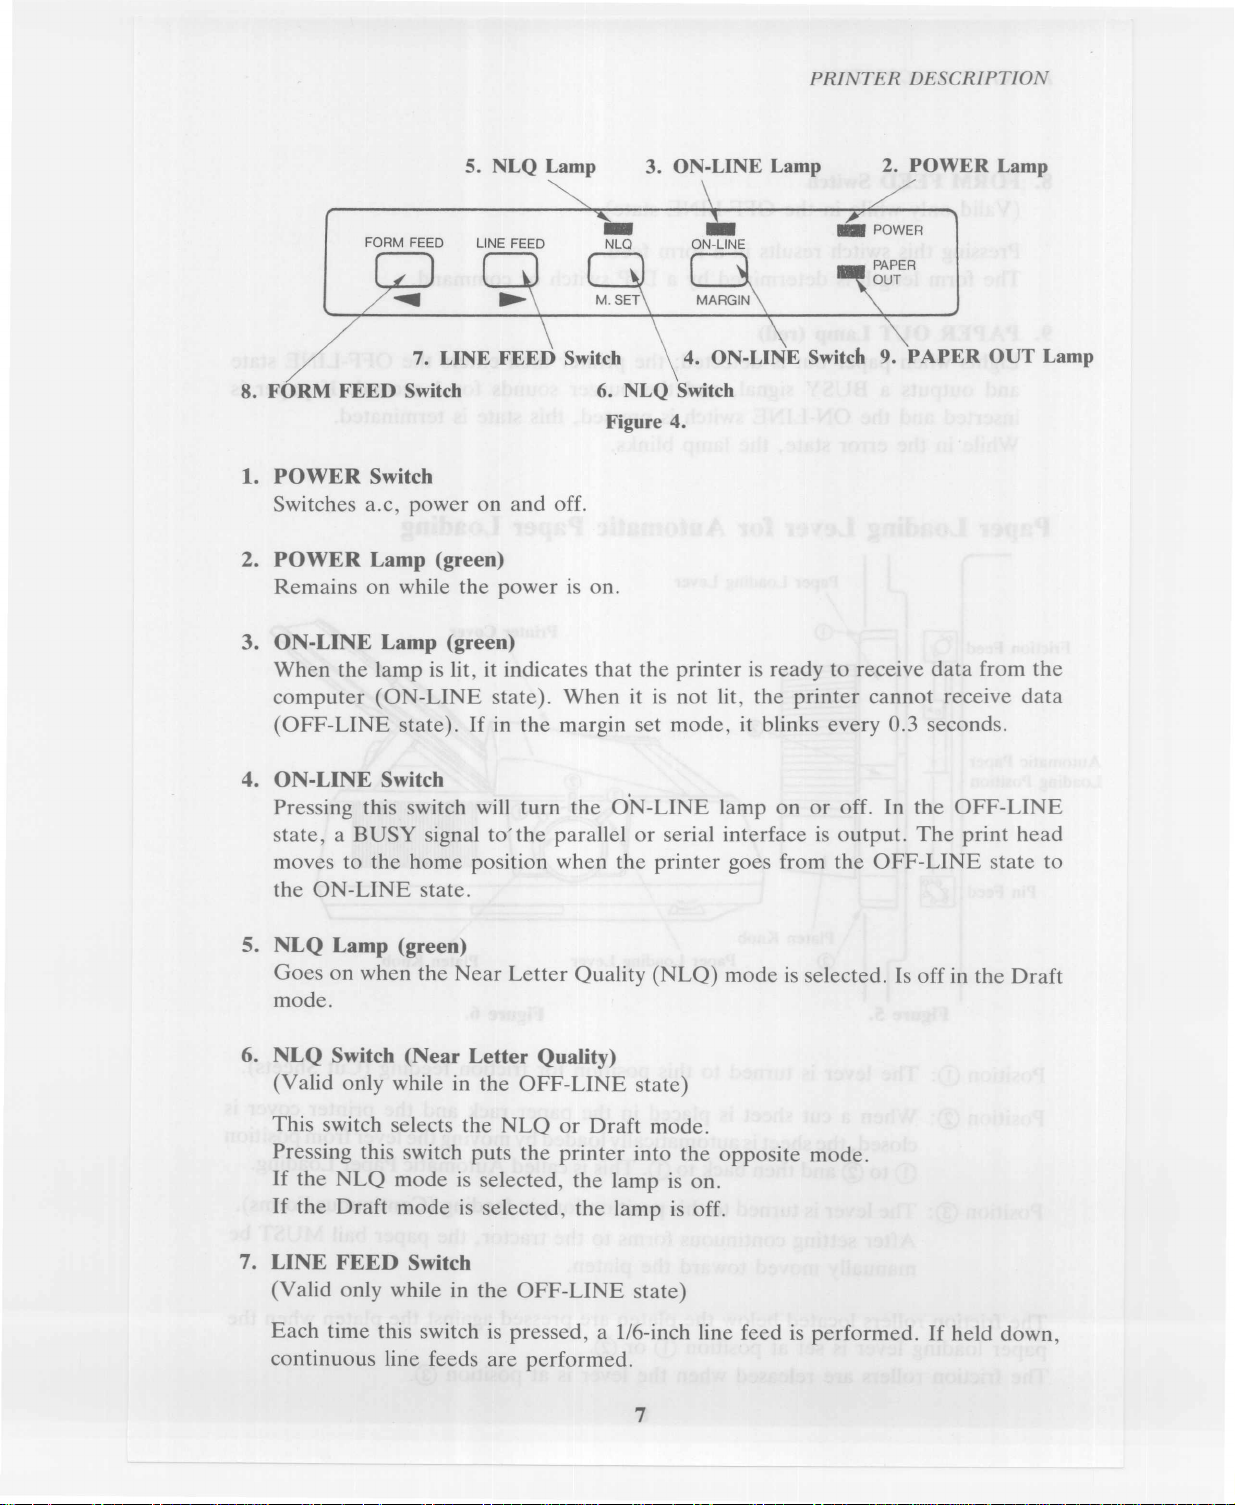
Figure 4.
1.POWER Switch
Switches a.c,power on and off.
2. POWER Lamp (green)
Remains on while the power ison.
3. ON-LINE Lamp (green)
When the lamp is lit,it indicates that the printer is ready to receive data from the
computer (ON-LINE state).When it is not lit,the printer cannot receive data
(OFF-LINE state). If in the margin set mode,it blinks every 0.3 seconds.
4. ON-LINE Switch
Pressing this switch will turn the o'N-LINE lamp on or off.
In
the OFF-LINE
state, a BUSY signal to'the parallel or serial interface is output.The print head
moves to the home position when the printer goes from the OFF-LINE state to
the ON-LINE state.
5. NLQ Lamp (green)
Goes on when the Near Letter Quality (NLQ) mode is selected. Is off in the Draft
mode.
6. NLQ Switch (Near Letter Quality)
(Valid only while in the OFF-LINE state)
This switch selects the NLQ or Draft mode.
Pressing this switch puts the printer into the opposite mode.
If the NLQ mode is selected, the lamp is on.
If the Draft mode is selected,the lamp is off.
7.
LINE FEED Switch
(Valid only while in the OFF-LINE state)
Each time this switch is pressed,a 1/6-inch line feed is performed. If held down,
continuous line feeds are performed.
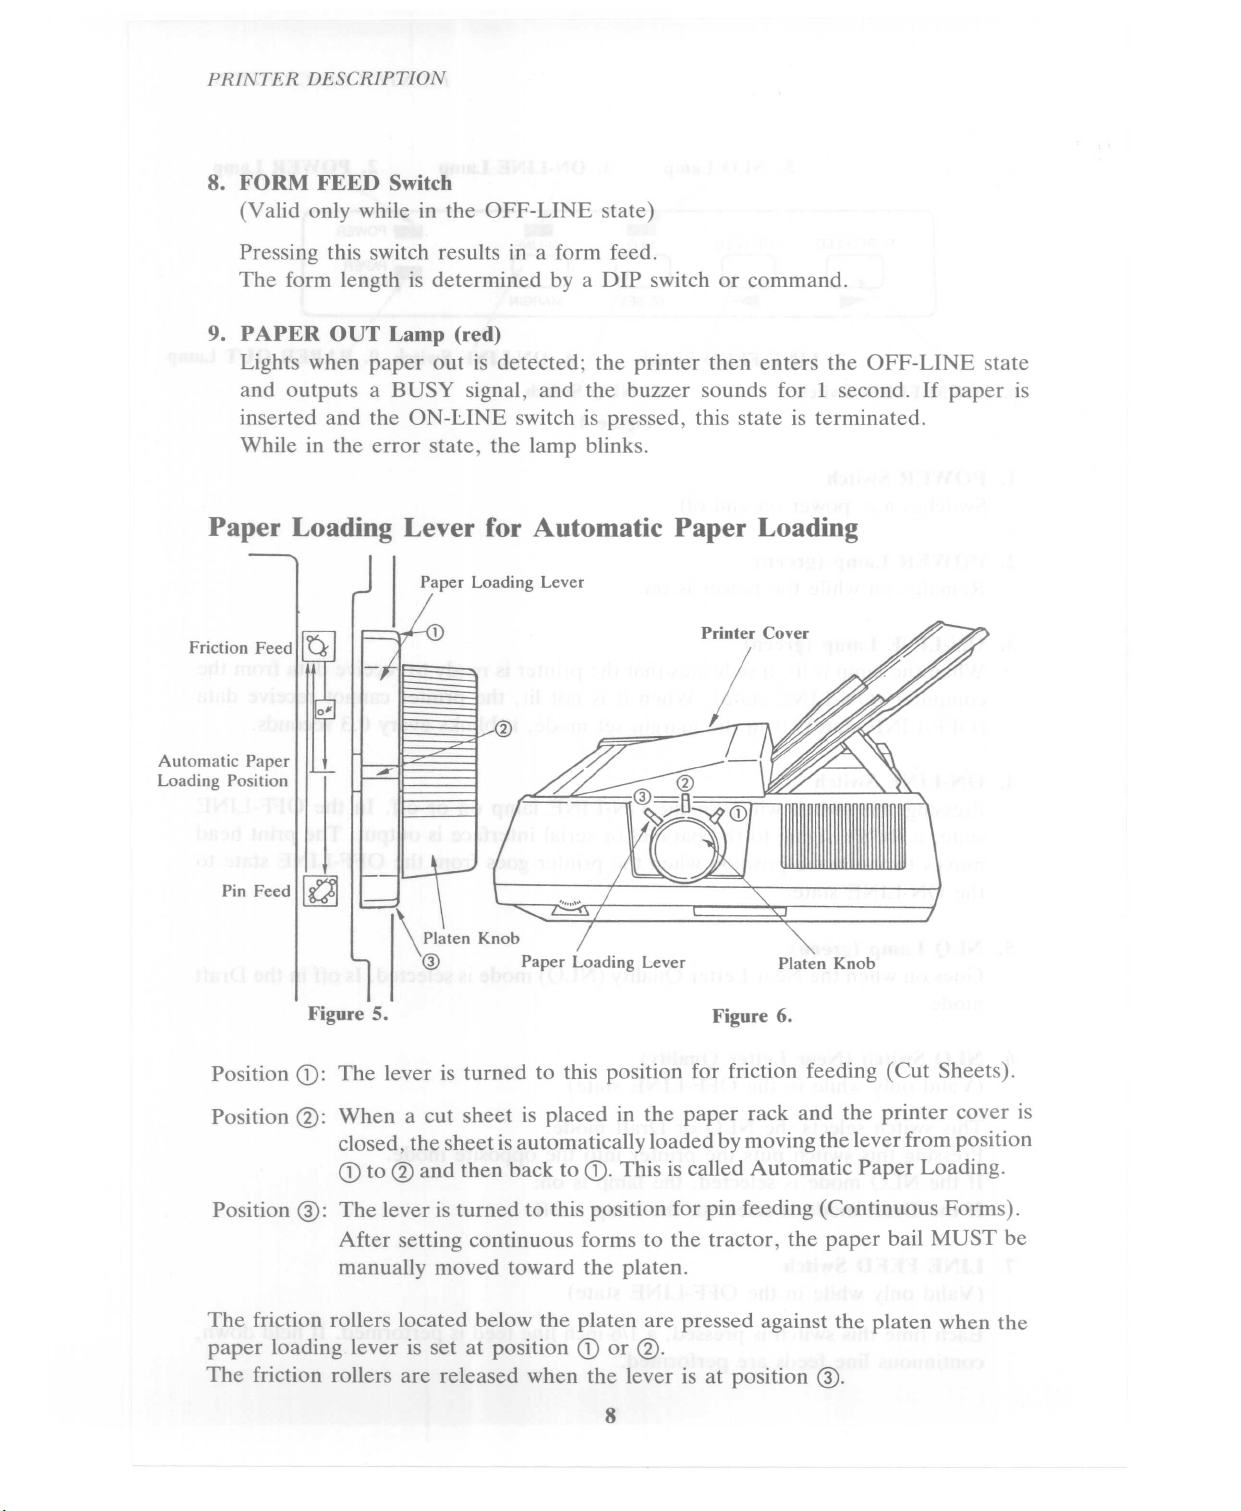
8. FORM FEED Switch
(Valid only while in the OFF-LINE state)
Pressing this switch results in a form feed.
The form length is determined bya DIP switch or command.
9. PAPER OUT Lamp (red)
Lights when paper out is detected;the printer then enters the OFF-LINE state
and outputs a BUSY signal,and the buzzer sounds for 1 second. If paper is
inserted and the ON-LINE switch is pressed,this state is terminated.
While in the error state,the lamp blinks.
Pin Feed ~
Automatic Paper
Loading Position
\ Platen Knob
o
Paper Loading Lever Platen Knob
Position
CD:
The lever is turned to this position for friction feeding (Cut Sheets).
Position
@:
When a cut sheet is placed in the paper rack and the printer cover is
closed, the sheet is automatically loaded by moving the lever from position
CD
to @and then back to
CD.
This is called Automatic Paper Loading.
Position
@:
The lever is turned to this position for pin feeding (Continuous Forms).
After setting continuous forms to the tractor, the paper bail MUST be
manually moved toward the platen.
The friction rollers located below the platen are pressed against the platen when the
paper loading lever is set at position
CD
or
@.
The friction rollers are released when the lever is at position
@.

_SETTING UP _
1. Do not plug the printer in yet.
2. Turn the paper rack support towards the back of the printer to flatten it out.
Figure
8.
9

4.Unpack the ribbon cassette and turn the ribbon feed knob in the direction of the
arrow to remove slack in the ribbon.
Note:
It is easier to insert the ribbon 'when the print head is at the home position
(extreme left).

6. Insert the ribbon between the ribbon guide and the print head,and position the
cassette so that the ribbon feed shaft in the printer is inserted into the hole under
the ribbon feed knob.
Ribbon Feed Knob
Figure 11.
7. Press gently on the cassette until you feel it snaps into place.
Twist the ribbon feed knob to tighten the ribbon.
8.Pull the paper loading lever to move the paper bail toward the front.
Figure
12.
Note:
Friction rollers below the platen are released when the paper loading lever is
at this position.
Failure to release the friction rollers may cause a paper jam.

Tractor Cover
Paper Bail
Printer Cover ~
/
Print Head
9. Manually feed the paper into the printer from the back until the paper appears
between the platen and the print head.
10. Open the tractor covers on the left and right.
Adjust the tractors so that the distance between them matches the holes in the
paper.
11.When the holes along both sides of the paper are matched up with the tractor
paper feed pins, close the tractor covers.
12. With your hand, push the paper bail toward the platen.
Do not use the paper loading lever to move the paper bail.
_ ~--=--_--=-.--_-_
---.==_
=0_0
==-=0_0
~=1_
This manual suits for next models
1
Other Seikosha Printer manuals


Popular Printer manuals by other brands


Magicard
Magicard Prima 2e instruction manual

Epson
Epson Stylus C40UX Service manual

Epson
Epson Stylus Pro 7880 ColorBurst Edition - Stylus Pro 7880... user guide

Canon
Canon imageCLASS D1320 Starter Guide

Star Micronics
Star Micronics futurePRNT TSP100 Hardware manual

Tally Dascom
Tally Dascom DT-210 user guide


