Selecline XB9018 User manual


Food Processor
INSTRUCTION MANUAL
Model: XB9018

IMPORTANT SAFEGUARDS
Before using the electrical appliance, the following
basic precautions should always be followed
including the following:
1. Read all instructions, and save it for future
reference.
2. Before use, check that the voltage of wall outlet
corresponds to the one shown on the rating plate.
3. If the supply cord is damaged it must be
replaced by the manufacturer or a authorized
service agent or a qualified technician in order to
avoid a hazard.
4.Do not let cord hang over edge of table or hot
surface.
5. Always disconnect the blender from the supply
if it is left unattended and before assembling,
disassembling or cleaning;
6.Do not operate the appliance for other than its
intended use.
7. This appliance can be used by children aged
from 8 years and above and persons with reduced
physical, sensory or mental capabilities or lack of

experience and knowledge if they have been given
supervision or instruction concerning use of the
appliance in a safe way and understand the hazards
involved. Children shall not play with the
appliance. Cleaning and user maintenance shall
not be made by children without supervision.
8.Children should be supervised to ensure that they
do not play with the appliance.
9. Do not allow children to use the blender without
supervision;
10. Keep hands and utensils out of the processor
bowl when in use.
11. Never use your fingers to push food down the
feed tube. Always use the Pusher.
12. Before removing the lid from the bowl from
the power unit, switch off the unit, wait until the
blades have come to a complete stop.
13. Do not use the scraper while the unit is still
running.
14. Be certain cover is securely locked into place
before operating appliance.
Do not attempt to defeat the cover interlock
mechanism.
15. Do not open the cover until blades stop.

16. The blades and disc are extremely sharp,
handle with care. Always hold the blade assembly
by the finger grip or stem, away from the cutting
edge, both when handling and cleaning.
17. Always remove the blade assembly before
pouring contents from bowl.
18. Do not use outdoors.
19. Save these instructions.
Know you appliance

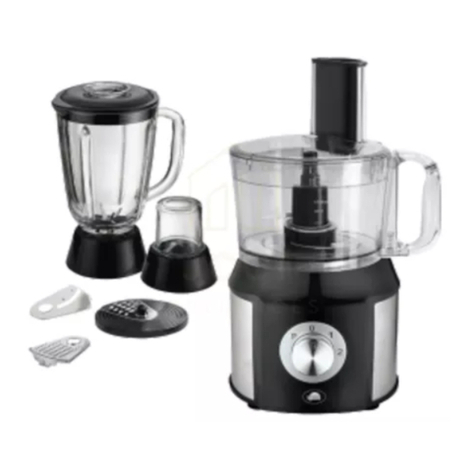
Food pusher: Use it to gently push the food into feeder to facilitate the processing of food.
Never use finger to press the food.
Feeder: Cut the food into small pieces and insert it through the feeder.
Lid: The lid must be locked before operating. Otherwise the appliance can not be
started. And never remove cover before the blade or disc comes to
completely stop.
Shredding Disc: For shredding of grates cheese, carrot, potato and foods of a similar texture.
Slicing Disc: For slicing potatoes, carrots and foods of a similar texture.
Disc holder: When shredding or slicing the disc must be properly fix to the holder before
operation.
Chopping Blade: Used for mincing the boneless meat, crushing the nuts, onion, garlic. But
never used for crushing hard food e.g. ice, coffee bean as this will damage the
blade.
Bowl: For containing the processed food.
Off/Pulse: Press it to terminate the operation. Depress to Pulse operation.
On: Press to begin the operation.
Motor Base: Main processor unit which should never be placed into water for cleaning.
Before using for the first time
Carefully unpack the food processor and remove any package material or label
or stickers. Handle the blades or disc with extreme care as they are sharp.
Wash the bowl and parts in warm soapy water and rinse well. See care and
cleaning section..
The bowl assembly should be firmly in place on motor base.
Safety lock system
This appliance is equipped with a safety lock system which will prevent the motor
starting without proper installation of the bowl and its lid.
To activate the system, you have to carry out the following:
Place the plastic bowl onto the motor base.
Turn the bowl anti-clockwise on the base until it clicks into position.
The lid must be fitted onto the bowl and turn it anti-clockwise until it clicks into
position
Please do not intend to damage the safety interlock mechanism. Stop using the
machine if the lid is damaged.

IMPORTANT: Do not attempt to defeat the cover interlock mechanism. This
appliance will be damaged and may cause injury if the interlock mechanism is
subjected to excessive force.
Using the food processor
The food processor can be used for mincing the meat, chopping the nut, shredding
or slicing the vegetables with the use of an appropriate attachment.
IMPORTANT INFORMATION
Maximum Capacity
Do not continuously operate more than 30 seconds at one time. Let the
appliance cool down for 3 minutes before start to operate the next
consecutive cycle.
The lid must be always in place when operating.
Do not use the bowl for storing beverages or foods.
Reference Table
Tool Food Max. Capacity Time _
Chopping Meat 300g 10-15 seconds
Cheese 250g Pulse gives control over
Vegetable, Fruit 400g texture, ideal for coarse
chopping.

Using the attachments
Chopping Blade
This blade is a versatile attachment for use in mincing the meat, cutting vegetables
in pieces and chopping nuts. The texture you get is determined by the length of
processing time. For coarser textures use the ‘pulse’ feature checking the
consistency regularly.
Chopping operation
1. Position the bowl in base (Fig 1) and turn it until locks
with the base as illustrated (Fig 2 & Fig 3).
2. Place the chopping blade attachment over the center
stem of the bowl on the food processor drive.
Always holding the stem of blade as blades is
extremely sharp. (Fig 4).
Always fit the bowl and attachment onto the
processor before adding ingredients.
3. Put the food inside the bowl.
4. Fit the lid onto the blow. Turn clockwise until it clicks
into position where the arrow on the lid aligns with the
indicator on the bowl. (Fig 5)
5. Plug in and switch on.
The processor won’t work if the bowl and lid are fitted
incorrectly.
6. Use the pulse (P) for short bursts. The pulse will
operate for as long as the control is held in position.
7. Reverse the above procedure to remove the lid,
attachments and bowl.
Always switch off and unplug before removing the lid.
Fig 1
Fig 2
Fig 3
Fig 4
Fig 5

hints
Meat
Make ‘mince’ by cutting meat into 2cm cubes, place into the bowl and operate for
approximately 10-15 seconds or until the desired texture is achieved. The longer
you run the machine the smoother the texture will be.
WARNINGS:
Never exceed maximum allowed capacity, the maximum weight of meat to be
processed must not exceed 300g at a time and running no longer than 30
seconds at one time.
Vegetables
Cut the vegetables into pieces approximately 2.5cm in size. Process foods having a
similar texture together e.g. harder vegetables like carrots and potatoes or softer
ones like mushrooms, tomatoes or cooked vegetables.
IMPORTANT
Your processor is not suitable for crushing or grinding hard foods e.g.
coffee beans, or converting granulated sugar to caster sugar.
When adding almond essence or flavouring to mixtures avoids contact
with the plastic as this may result in permanent marking.
Slicing or Shredding
to assemble the disc holder
Select the desired disc and fit into the disc holder with the cutting side uppermost.
Locate one end of the disc under the rim and press the other end into position. It will
only fit one way round (Fig 6). Reverse the above procedure to detach the disc.
Fig 6 Fig 7

Slicing or Shredding operation
a) Correctly position the bowl as illustrated above.
b) Place the Disc holder into the center of bowl (Fig 8)
and then fit the lid. Make sure the lid is locked before
operating.
c) Fill the tube with food and push down using the pusher.
Never attempt to force feed.
d) Pressing ON button to begin operation.
using the cutting discs
shredding disc
Cut pieces of food to fit the feed tube. Fill the tube almost to
the top and push down using the pusher with an even
pressure whilst the machine is running.
Longer shreds can be obtained by stacking pieces
horizontally in the feed tube e.g. carrot.
slicing disc
Cut pieces of food to fit the feed tube. Pack the food in an
upright position in the feed tube. Fill the tube almost to the
top and push down using the pusher with an even pressure
whilst the machine is running.
hints
Use fresh ingredients.
Don’t cut food up too small. Fill the feed tube fairly full,
this prevents food from slipping sideways during
processing.
When slicing or shredding: food placed upright comes
out shorter than food placed horizontally.
After using a cutting plate there will always be a small amount of waste on the
plate or in the food.
Do not allow food to build up to the underside of the plate - empty regularly.
Push food down the feed tube using an even pressure.
Fig 8
Fig 9

Care and Cleaning
Always switch off and unplug before cleaning.
Handle blades and cutting plates with care - they are extremely sharp.
Some foods may discolour the plastic. This is perfectly normal and won’t harm
the plastic or affect the flavour of your food. Rub with a cloth dipped in vegetable
oil to remove the discoloration.
power unit
Wipe with a damp cloth, then dry thoroughly. Ensure that the interlock area is
clear of food debris.
Don’t immerse the power unit in water.
Wrap excess cord around the bracket at the back of the appliance.
accessories
Wash by hand, then dry.
Parts are not dishwasher safe.
Alternatively they can be washed quickly with pulse function:
The pulse button allows you to clean the bowl and the blade easily,
rapidly and in complete safety.
Pour a little lukewarm water into the bowl.
Turn to pulse function for a few seconds.
Remove the bowl and rinse under running water.
Connection to Power
Before connecting, check that the voltage indicated on the appliance
corresponds with the main voltage in your home. If this is not the case, consult
your dealer and do not use.
This appliance may be fitted with a non-rewirable plug. If you need to change the
fuse in a non-rewirable plug, the fuse cover must be refitted. If the fuse cover is
lost or damaged, the plug must not be used until a replacement is obtained
(available from the appliance manufacturer).
If the plug has to be changed because it is not suitable for your socket, or
becomes damaged, it should be cut off and appropriate plug fitted following the
wiring instructions. The plug removed must be disposed of safely as insertion
into a mains socket is likely to cause an electrical hazard.
This equipment must be disconnected from the mains when not in use. Do not
allow this unit to be exposed to rain or moisture.

For your own safety read the following instructions carefully before
attempting to connect this unit to the mains.
You should only plug the appliance into a 220-240V AC, 50Hz supply. Connecting it
to other power sources may damage the appliance.
IMPORTANT
The colours of the wires in the mains lead of this appliance may not correspond with
the coloured markings identifying the terminals in your plug, proceed as follows:
The blue wire must be connected to the terminal marked with the letter N or
coloured black.
The brown wire must be connected to the terminal marked with the letter L or
coloured red.
If a 13 Amp (BS1363) fused plug is used it must be fitted with a 3A fuse conforming
to BS1362 and be ASTA approved.
If in doubt contact a qualified electrician
The wires in this mains lead are coloured in
accordance with the following code:
BLUE = NEUTRAL
BROWN = LIVE
Caution
To prevent electric shock disconnect from the
mains before removing the cover

Disposal Information
This marking indicates that this product should not be disposed with
other household wastes throughout the EU. To prevent possible harm
to the environment or human health from uncontrolled waste disposal,
recycle it responsibly to promote the sustainable reuse of material
resources. To return your used device, please use the return and
collection systems or contact the retailer where the product was purchased. They
can take this product for environmental safe recycling.
Guarantee
This product is guaranteed against manufacturing defects for a period of
1 year
This does not cover the product where the fault is due to misuse, abuse, use in
contravention of the instructions, or where the product has been the subject of
unauthorised modifications or alterations, or has been the subject of commercial
use
In the event of a problem with the product within the guarantee period please return
it to your nearest Argos store
If the item is shown to have had an inherent defect present at the time of sale, the
store will provide you with a replacement
Your statutory rights remain unaffected
Guarantor; Argos Ltd
489 – 499 Avebury Boulevard
Central Milton Keynes
MK9 2NW
docref 20110401


Table of contents
Popular Food Processor manuals by other brands

ESGE-Zauberstab
ESGE-Zauberstab P 200 Profi Instructions for use
Vollrath
Vollrath 40826 Operating and safety instructions

Proficook
Proficook PC-KM 1063 instruction manual

Beper
Beper BP.552 use instructions

ElectrIQ
ElectrIQ EIQFPPREM user manual
Hamilton Beach Professional
Hamilton Beach Professional B96 Operation Manual - Original Instructions
