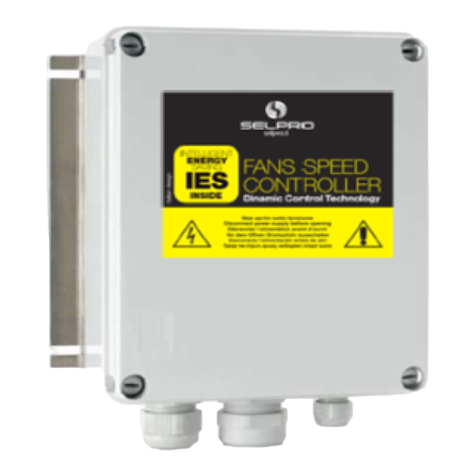
SELPRO ESY 1 User manual

ESY 1~
User Manual
Specialized
Vac stepless Controllers
for
single-phase Asynchronous Motors
on Axial Centrifugal Fans
ON
Ventilated Heat Exchangers
Drycoolers Air Cooled Condensers
FAN speed Control Solutions
3
YEAR
Global
Global
Warranty
Warranty

User Manual ESY-1 / rev. 9 15.01.2008 www.selproweb.com
1
LVD
EMC
WARNING ! HIGH LEAKAGE CURRENT First connect to Earth !
DO NOT touch the electrical parts of the circuit when the power supply is connected
under any circumstances
Safety Warnings
•We disclaim all responsibility for accident, loss or damage caused by the use of these appliances. These must be
correctly installed by qualified personnel in conformity with their intended use and, whenever needed, must undergo
correct maintenance which should be carried out while ensuring the safety of people, domestic animals and goods.
•Do NOT
tamper with or disassemble the regulator internal components; doing so will INVALIDATE THE
GUARANTEE and may cause unnecessary damage. The regulator does not contain components that can be repaired
by the user.
•The regulator must be SUITABLY AND EFFECTIVELY EARTHED by the installer, under his own responsibility,
according to the standards in force; earthing is essential for the EMC filter to operate correctly.
Precautions
•When receiving the goods, check that the packing is intact; in the event of any damage due to transportation, notify
the forwarding agent according to legal requirements.
•The regulator must be installed by qualified personnel who will connect the electric supply with GROUND
CONNECTION, attach the cables in their permanent positions and commission the plant.
•Incorrect installation of the ESY100 voltage regulator may cause damage to objects or people, so ensure the
instructions in this manual and all required security measures are read and followed carefully.
•Before supplying power to the unit, make sure that the regulator is correctly connected to the power supply and to
earth. Follow the instructions in this manual exactly and observe all safety measures in force.
•The user must be protected from the electric supply and the motor must be protected from possible overloads in
compliance with the standards in force. DO NOT touch any electrical parts of the circuit when the power supply is
connected under any circumstances.
•If the mains supply is "disturbed", which may be due to other electrical power components causing irregularities in
the supply (power contactors), it is recommended that supplementary SINGLE phase ‘SURGE ARRESTER’ filters
are installed directly on the regulator supply.
•Avoid repeatedly connecting and disconnecting the power supply to the regulator; a constant supply keeps the
regulator at working temperature and eliminates problems caused by condensate inside the protection case.
•Install the regulator out of direct sunlight, in order to protect the case from overheating. The appliance can operate at
environmental temperatures up to 50°C. Do NOT install it where this temperature may exceed, otherwise the
integrity of the regulator will be compromised, since the controller may make the user appliance operate at full load
(100%) with all consequent effects.
•The equipment must be placed vertically, in order to encourage heat dissipation and to ensure sufficient air
circulation in a free space measuring at least 150 mm above and below the regulator. If several regulators are to be
grouped together on a single electric board, please provide forced air circulation with a fan or with a sufficiently
powerful cooling unit.
Description of symbols in use in the present manual
! Attention !
Important information
Compliance with:
CE mark –Electromagnetic Emissions – Low Voltage Directives
Factory Default The highlighted characteristics are Factory STANDARD settings
PRODUCT end of life – WEEE directive
i

User Manual ESY-1 / rev. 9 15.01.2008 www.selproweb.com
2
Contents:
Safety Warnings ....................................................................................................................................................Errore. Il segnalibro non è definito.
Precautions.................................................................................................................................................................................................................. 1
Contents ...................................................................................................................................................................................................................... 2
1. ..
EC DIRECTIVES & TECHNICAL STANDARDS ...................................................................................................................................... 3
2. .. Mechanical Dimensions ESY-1 ...................................................................................................................................................................... 3
3. .. OPERATING MODES AND APPLICATIONS............................................................................................................................................ 4
4. .. TECHNICAL CHARACTERISTICS ESY-1 ................................................................................................................................................ 5
5. .. ELECTRICAL CONNECTIONS..............................................................................................................Errore. Il segnalibro non è definito.
5.1. Power Supply Connection (Terminal Block M1)........................................................................................................................................... 7
6. .. SIGNAL CONNECTIONS for the 4 CONFIGURATIONS (ALL-in-ONE)............................................................................................... 8
6.1. OM CONFIGURATION (STANDARD SELPRO)....................................................................................................................................... 8
6.2. OX Configuration (on request)....................................................................................................................................................................... 8
6.3. OV Configuration (on request)....................................................................................................................................................................... 9
6.4. OB Configuration (on request) ....................................................................................................................................................................... 9
7. .. Electrical connection for Slave Module/s ..................................................................................................................................................... 10
7.1. Connection of SLAVE modules, SV series (0-10Vdc power units)............................................................................................................. 10
7.2. Connecting ESY-1 to SLAVE-SV / 0-10 Vdc modules (Three-/Single-phase connection)........................................................................ 10
7.3. Connection of SLAVE modules, SP series (PWM power units) ................................................................................................................. 11
7.4. Connecting SLAVE-SP modules – Power supply in phase with the Master unit (network synchronization)......................................... 11
8. .. ESY-1: CONTROL & POWER CARD IN DETAIL, ALL-in-ONE version ............................................................................................ 12
8.1. ESY-1: CONTROL & POWER CARD IN DETAIL, SLAVE-ONE versions........................................................................................... 12
8.2. LED signals .................................................................................................................................................................................................... 13
8.3. Configuration and selection JUMPERS....................................................................................................................................................... 13
9. .. Set-up of operating LIMITS and PARAMETERS...................................................................................................................................... 14
9.1. Available regulations in the standard ESY-1 version (ALL-in-ONE)........................................................................................................ 14
9.2. How to set up the operating limits for the ALL-in-ONE version).............................................................................................................. 14
9.3. How to set up the operating limits for SLAVE-ONE modules (only SLAVE-SV version) ....................................................................... 15
9.4. Table showing the scale of values for setting up the ESY-1 regulation VAC Limits................................................................................. 15
9.5. Tables for the Set-Point selection: ................................................................................................................................................................ 16
9.5.1. Set-Point values, range 0-15 bar (Transducer 4-20 mA)........................................................................................................................... 16
9.5.2. Set-Point values, range 0-15 bar (Transducer 4-20 mA)........................................................................................................................... 16
9.5.3. Set Point values, range 0-25 bar (Transducer 4-20 mA)............................................................................................................................ 17
9.5.4. Set Point values, range 0-30 bar (Transducer 4-20 mA)............................................................................................................................ 17
9.5.5. Set-Point values, range 0-45 bar (Transducer 4-20 mA).......................................................................................................................... 18
9.5.6. Set Point values, range 0-30 bar (Transducer 0,5-4,5 Vdc) ....................................................................................................................... 18
9.5.7. Set-Point values, range 10°C to 60°C (NTC probe 10kohm@25°C)......................................................................................................... 19
9.6. Regulation with Double SET-Point (optional)............................................................................................................................................ 19
10. Function diagrams & Operating parameters in MASTER & SLAVE modes ........................................................................................ 20
10.1. ESY-1 MASTER mode................................................................................................................................................................................. 20
10.2. ESY-1 SLAVE mode .................................................................................................................................................................................... 20
11. ACCESSORIES............................................................................................................................................................................................ 21
11.1. Manual Remote Control Units..................................................................................................................Errore. Il segnalibro non è definito.
11.2. Pressure Transducer for 4-20 mA & 0-5 V................................................................................................................................................. 22
11.3 Temperature Probe NTC (10 kohm@25°C)............................................................................................Errore. Il segnalibro non è definito.
11.4 RGF-MEI(4) / UNIVERSAL input Expansion Module ..........................................................................Errore. Il segnalibro non è definito.
PRODUCT end of life
The device must be disposed of separately, according to the local authority
advice.

User Manual ESY-1 / rev. 9 15.01.2008 www.selproweb.com
3
LVD
EMC
1. EC DIRECTIVES & TECHNICAL STANDARDS
This series has been designed and manufactured for use in industrial environments, and complies therefore with the
following European Directives:
•Machine Directive 98/37 CE and following amendments
•Low Voltage Directive (LVD) 2006/95/EC
•EMC Directive 2004/108/EC
Thanks to its advanced technical solutions, the ESY100 series has obtained the CE mark in compliance with the EMC
(Electromagnetic Compatibility) directive 2004/108/EC also in household environment.
The essential requirements of the directive are satisfied by the conformity to the “generic standards” for industrial environments.
Directive Standard Code Description
98/37/CE EN 60204-1 Safety of machinery. Electrical equipment of machines.
73/23/CE EN60204-1 Safety of machinery. Electrical equipment of machines.
EN 50178 Electronic equipment for use in power installations.
89/336/CE EN 61000-3 Adjustable speed electrical power drive systems. Part 3: EMC
product standard including specific test methods.
All products have been tested in accordance with the procedures and test conditions laid down in the standards specified in the
product technical file.
Since these products are destined to be used not only as “stand alone” systems, but also as components of other machines or plants,
all compatibility tests to the standards have been performed under typical conditions of use.
In particular, the tests have been performed in a system consisting of a voltage controller RGM300, a control cable and relative
commands, a supply cable, a motor cable and a group of fans with an equivalent power to the value of the nominal current of the
controller, set to operate within specific VAC values for the single-phase regulation according to EMC requirements.
! WARNING !
The final specifications of the system or plant, in compliance with the EMC directive, are in any case
the responsibility of the installer, who must put the system into operation carefully, according to the
rules in force and following the information provided by the present manual.
2. Mechanical Dimensions ESY-1
Model A B C D E F Kg. ∅
∅∅
∅fastening holes
ESY 08 195 162 97 195 145 162 1.4 Kg ∅
∅∅
∅5
ESY 12 195 162 97 195 145 162 1.5 Kg ∅
∅∅
∅5
ESY 16 240 152 115 195 93 210 1.7 Kg ∅
∅∅
∅5
ESY 20 240 152 115 195 93 210 1.8 Kg ∅
∅∅
∅5
8 A / 12 A
16 A / 20 A

User Manual ESY-1 / rev. 9 15.01.2008 www.selproweb.com
4
Moduli SLAVE - SLAVE units
0 - 10 Vdc PWM
MAX n.5
POWER S PPLY
ALIMENTAZIONE
PE L1 N
NTC
0- 5Vdc 0-5Vdc 0-10Vdc
SEGNALI DI REGOLAZIONE / CONTROL SIGNALS
IN1
4-20mA
IN2 IN3
4-20mA NTC
SP1 SP2
P W M
O T SP2
0-10Vdc
IN4
0-10Vdc
for C ONDENSERs
2 Input CIRC ITs
OM mode
for DRY-Cooler
1 Input CIRC IT
°C (NTC)
f or Remore Controller
1 Input CIRC IT
BAR (mA-Vdc)
0-10Vdc
(default)
FANs
3. OPERATING MODES AND APPLICATIONS
The ESY1 devices are electronic analog regulators of single-phase AC voltage, which use the phase-cutting principle (Triac) in order
to vary the output active voltage applied to a resistive or inductive load.
When connected to asynchronous high-slip electric motors of fans or pumps, they control their rotational speed in order to maintain the
key parameter within desired values. On this purpose they have been projected and specialized for control applications on Air Cooled
Heat Exchangers, used in Air Conditioning, Refrigerating, Air Handling and Ventilation Systems.
The series is available in the following versions:
- ALL-in-ONE (multi-input), with 4 control inputs, 3 inputs for mA-Vdc-NTC sensors and 1 0-10Vdc control signal, for MASTER-
SLAVE operating modes.
- SLAVE-ONE, with 1 input for 0-10Vdc (Slave-SV) or PWM (Slave-SP) control signals, to be used as single regulation units or as
additional modules in order to share out the overall controlled power, only for SLAVE operating mode.
With the ALL-in-ONE mode, the selection of input signal and operating mode are performed automatically: the controller operates
through the presently active sensor/signal and there is NO need to use any selection or programming hardware device.
The regulator selects the currently ACTIVE control signal, according to the mode preset by the Jumpers.
It is possible to modify the factory settings during the installation procedure of the device, by moving the following JUMPERS:
J1, operating mode: DIRECT - the VAC output increases as the control signal value increases
REVERSE - the VAC output decreases as the control signal value increases
J2, VAC fans at Set Point: VAC/RMP = 100% with SP = MAX, the Set-P corresponds to the fans Max-speed
VAC/RPM = 0% with SP = MIN, the Set-P corresponds to the fans Min-speed
J3, operation of trimmer P2: MIN for the Min. AC voltage limit supplied to the connected motor;
(J1 for SLAVE-SV) Cut-Off for the AC voltage limit of the connected motor;
J4, output for Slave units control: with control signal for SLAVE-SV units, with 0-10Vdc input signal
with control signal for SLAVE-SP units, with PWM input signal
While the Proportional Band (Pb) values are already factory preset (see Table: Operating Parameters), the Set Point values are
determined through a couple of 13-position rotary switches: SP and SPadj., which are intended to be used quickly and easily even by
base users. The selection of the Set Point is immediate, and two LEDs (+ & -) will show the relationship between this desired value
and the signal value perceived through the presen
tly active sensor; the Set Point will be reached when both LEDs will be off.
In addition, there are LEDs indicating the selection of the First or Second Set Point (only for optional card with double Set Point), and
a LED showing the presence of power supply.
With the SLAVE-ONE version, two types of SLAVE units are available: SV (input 0-10Vdc), and SP (input PWM).
All ESY-1 units are equipped with:
–Complete galvanic separation between AC mains supply and control inputs;
–EMC mains filter with Residential, Commercial & Light Industrial limit (conformity with PDS systems), fit to
be used with equipment directly connected to the low voltage mains supply;
–Overvoltage protection on the mains supply;
–Short circuit protection on the connection of the control sensors/signals;
–Protection filters on control inputs
The ESY-1 series is available in the sizes 8A–12A–16A–20A, with single phase supply voltage 230V/50Hz, and it is housed in a
GW–Plast 120°C case with protection degree IP55 and high impact resistance, for out of doors installations (-20T50).
The controller can be used both in Condenser mode (pressure transducer) and in Dry-Cooler mode (temperature probe) without the
need of any further configuration or programming, with two operating SET-Points (selection of Set-Point 1 & 2), beside the Remote-
SLAVE Unit mode, when driven by an external controller generating a 0-10Vdc control signal.
60Hz applications: only with factory calibration
The regulator works correctly also with 60 Hz, but it is necessary to calibrate the output signal to 100% in order to optimize
the regulation and avoid pulse and beat frequencies.
.
i

User Manual ESY-1 / rev. 9 15.01.2008 www.selproweb.com
5
i
4. TECHNICAL CHARACTERISTICS ESY-1
POWER SUPPLY
Voltage
230V
AC
±
10
%
single phase – (on request
110V
AC
-
400V
AC)
Frequency
50Hz
standard
(60 Hz
only factory calibration)
Overvoltage Protection for installation Category
II
(
4 KV
)
OPERATING
PRINCIPLE
Electronic analog regulators of single-phase AC voltage, which use the phase-cutting principle (Triac) in order to vary the
output active voltage applied to a resistive or inductive load.
CURRENT
Rated
ESY 08
08 A
up to
50°C
environment; if over, decrease 0,4
A/°C
ESY 12
12 A
up to
50°C
environment; if over, decrease 0,6
A/°C
ESY 16
16 A
up to
50°C
environment; if over, decrease 0,8
A/°C
ESY 20
20 A
up to
50°C
environment; if over, decrease 1,0
A/°C
Starting current
(for loads upstream of the regulator)
ESY 08 16A
ESY 12 24A
ESY 16 32A
ESY 20 40A
Overload 200% of the rated current (max. 10” every 3’)
POWER Control Circuit 3VA
Thermally dissipated 1,3 W per supplied Ampere
OPERATING
CHARACTERISTICS
Master (Controller Mode)
(inputs IN1,IN2,IN3)
The output voltage varies in order to maintain the value measured by the
transducer within the proportional band (Pb = factory calibration)
Slave (Power Unit Mode)
(Input IN4)
The output voltage varies according to the 0-10 Vdc control signal applied to the
input IN4, according to the current configuration.
CONTROL
SIGNALS
AND
CONTACTS
ALL-in-ONE
standard
Config. 0M
Master (Controller)
IN 1
IN 2
IN 3
4-20 mA for 100 ohm (R)
4-20 mA for 100 ohm (R)
NTC 10kohm @ 25°C
Slave (Power Unit) IN 4 0-10Vdc for 10 kohm
On request
Config. 0X Master (Controller)
IN 1
IN 2
IN 3
4-20 mA for 100 ohm (R) ,
NTC 10 kohm @ 25°C
NTC 10 kohm @ 25°C
Slave (Power Unit) IN 4 0-10Vdc for 10 kohm
Config. 0V Master (Controller)
IN 1
IN 2
IN 3
0-5 Vdc
0-5 Vdc
NTC 10 kohm @ 25°C
Slave (Power Unit) IN 4 0-10Vdc for 10 kohm
Config. 0B Master (Contoller)
IN 1
IN 2
IN 3
4-20 mA for 100 ohm (R)
0-5 Vdc
NTC 10 kohm @ 25°C
Slave (Power Unit) IN 4 0-10Vdc for 10 kohm
Contact for Set-Point switching SP2: selection of Set Point 1 or Set Point 2 (option Double Set-Point )
SLAVE
ONE Standard
Config. SV Slave (Power Unit) IN 1 0-10Vdc for 10 kohm
Config. SP Slave (Power Unit) IN 1 PWM (PPM-Triac) control voltage 5V÷30V
OPERATING
PARAMETERS
Set-Point Regulation Easy adjustment with couple of 13-position rotary switches
Input type
4-20 mA
0 - 5 Vdc NTC 10K @ 25°C
Main Set Point (SP) 8÷18 mA 0,5 - 4,5 Vdc 10÷60 °C
Step Set Point adjustment (SPadj) 0,1 mA 0,04 Vdc 0,5 °C
Proportional Band (default) 2,5 mA 0,65 Vdc 7°C
Minimum/Cut-Off limit Adjustable from 0% to 70% of the output voltage
Maximum limit Adjustable from 100% to 0% of the output voltage
Acceleration time (default) 5”
Operating mode
DIRE
CT
(
DIR
)
VAC output increases as the input value increases)
REVERSE (REV) VAC output decreases as the input value increases)
AC voltage at Set Point Selection of
MAX
Vac
value – maximum fan speed
Selection of MIN Vac value – minimum fan speed
Lower VAC limit Selection of
Cut
-
Off
limit
(C-Off) o
Selection of MAX Vac Limit (MIN)
Slave Units AUX. control Selection for
Analog
0
-
10Vdc
signal (three / single phase supply)
Selection for logic PWM signal (same as the remote unit supply)
LED
SIGNALS
DL1 Power Supply O.K.
- Signal value is lower than Set-Point value ±30% of the Proportional Band (Pb)
+ Signal value is higher than Set-Point value
1 Set-Point 1 selection Available optional card with
Double Set-Point function
2 Set-Point 2 selection

User Manual ESY-1 / rev. 9 15.01.2008 www.selproweb.com
6
OUTPUT SIGNALS
Config. 0M
V1
Transducer voltage supply 22V (+10/-20%) max. 25mA
V2
Transducer voltage supply 22V (+10/-20%) max. 25mA
+ 10V
Transducer voltage supply 10,0V (±1%)
OUT
Output signal for slave unit: 0-10Vdc or PWM (MAX 5 modules)
Config. 0X
V1
Transducer voltage supply 22V (+10/-20%) max. 25mA
V2
Transducer voltage supply 22V (+10/-20%) max. 25mA
+ 10V
Transducer voltage supply 10,0V (±1%)
OUT
Output signal for slave unit: 0-10Vdc or PWM (MAX 5 modules)
Config. 0V
V1
Transducer voltage supply 5,0V (±1%)
V2
Transducer voltage supply 5,0V (±1%)
+ 10V
Transducer voltage supply 10,0V (±1%)
OUT
Output signal for slave unit: 0-10Vdc or PWM (MAX 5 modules)
Config.0B
V1
Transducer voltage supply 22V (+10/-20%) max. 25mA
V2
Transducer voltage supply 5,0V (±1%)
+ 10V
Transducer voltage supply 10,0V (±1%)
OUT
Output signal for slave unit: 0-10Vdc or PWM (MAX 5 modules)
Config.SV + 10V
Transducer voltage supply
OUT
Output signal for slave unit: PWM (MAX 5 modules)
PROTECTIONS
EMC mains filter Compliance 89/336
Conformity for devices that are directly connected to the low voltage mains
Overvoltage Protection Complying with EN 61000-4-5 : overvoltage category II (4 KV)
Control Input Protection Protection from electrical disturbances of the connection
Transducer Supply Protection Protection from short circuit of the transducer output supply
CASE
Materials GW-Plast 120°C (max. temperature 120°C) aluminium, fiberglass
Protection degree IP 55 (standard)
IP 00 (on request)
MAX Heatsink Temperature 60°C
Environmental Pollution Low Pollution
Fire Resistance D Category
INSULATION
Endurance of the insulation materials
against electrical stress Long
Control Circuits
Class
I
(use of protective earthing conductor)
2000 Vac
between grounding and voltage supplied components of the device
2500Vac
between control input and voltage supplied components of the device
4000 Vac
between control input and mains supplied components
WORK
ENVIRONMENT
Working Temperature
-
20 T 50
( from –20°C to + 50°C )
Storage Temperature
-
30 T 85
( from –30°C to + 85°C )
Vibrations Lower than 1G (9.8 m/s
2
)
Ageing Characteristics 60.000 hours
INSTALLATION Wall mounting ONLY in vertical position, with N° 4 holes
∅
∅∅
∅
5 mm, providing at least 10 mm insulation around the device
The device is suitable for the installation in class I, II, III equipments .

User Manual ESY-1 / rev. 9 15.01.2008 www.selproweb.com
7
5. ELECTRICAL CONNECTIONS
Connect the controller as shown in the figure below, paying attention to the following points.
5.1. Power Supply Connection (Terminal Block M1)
-Before supplying power to the unit, check carefully the power connection and the efficiency of EARTH
connection.
-Ensure that power conductors and EARTH CABLES have a cross section suitable to the connected load.
-Place a couple of fuses with suitable amperage upstream of the disconnector.
-Do NOT install the device in environments where ambient temperature may exceed the maximum values allowed (Tamb≤50°C).
-Mount the equipment vertically, in order to encourage heat dissipation and to ensure sufficient air circulation in a free space
measuring at least 150 mm above and below the regulator.
-If the mains supply is "disturbed", which may be due to other electrical power components causing irregularities in the supply, it is
recommended to install supplementary SINGLE phase ‘SURGE ARRESTER’ filters directly on the regulator supply.
-Do NOT alter or damage the identification stickers on the equipment.
-NEVER force the rotary switches beyond their mechanical end stops.
-The power cables (power supply and load), must be installed separately from the control cables, keeping the maximum possible
distance between the power and signal conductors.
-Do not mix power cables and signal cables in the same raceway. Where cables must cross one another, ensure they are at an
angle as near to 90° as possible to minimize interference.
WARNING : Use heat resistant cables, able to withstand a temperature rated at 90° or above.
SURGE ARRESTER : electric protection placed between the regulator supply and the earth, meant to protect the device from
transient overvoltage.
WARNING: Do NOT use differential switches with values lower than 100mA
-It is advisable to provide a by-pass switch in order to run the load even in case of disconnector failure (emergency by-pass). When
connecting the by-pass, it is necessary to keep the phase correspondence unaltered.

User Manual ESY-1 / rev. 9 15.01.2008 www.selproweb.com
8
1
2
100%
0%
=
6. SIGNAL CONNECTIONS for the 4 CONFIGURATIONS (ALL-in-ONE)
After checking carefully all power supply connections, connect the input signal/s and supply the card.
The output voltage varies from zero Vac to 230 Vac, according to the variation of the control signal.
For the connection of the control signal, use an ordinary twisted-pair cable in disturbance-free environments, while in presence
of environmental electromagnetic disturbances use a shielded twisted cable with the screen connected to earth, keeping it as far
away as possible from other power cables.
The function modes, both always available in the present series, can be:
-MASTER with Set-Point, using the inputs In1–In2–In3 (for 4-20mA, 0-5Vdc or NTC probe)
-SLAVE, using the input In4 ( for 0-10V control signal)
The controllers of the ESY-1/ALL-in-ONE series can be set in the following four (4) configurations, described below.
The OM configuration is standard SELPRO
6.1. OM CONFIGURATION (STANDARD SELPRO)
N°
Na
me
Function OM CONF.
1 V1
Output voltage
supply
22V (+10/-20%)
max. 25 mA
2 IN1
Transducer Input
N° 1 4-20 mA
3 GND
Ground GND
4 IN2
Transducer Input
N° 2 4-20 mA
5 V2
Output voltage
supply
22V (+10/-20%)
max. 25 mA
6 IN3
Transducer Input
N° 3
NTC 10kohm
@ 25°C
7 GND
Ground GND
8 IN4
Input N° 4 (only
SLAVE control) 0-10Vdc
9 +10V
Output voltage
supply 10,0V ±1%
10
OUT
“Slave” modules
control Output 0-10Vdc / PWM
11
GND
Ground GND
12
SP2
Set-Point 1& 2
selection Contact
Open = SP1
Closed = SP2
6.2. OX Configuration (on request)
N°
Name
Function OX CONF.
1 V1
Output voltage supply 22V (+10/-20%)
max. 25 mA
2 IN1
Transducer Input
N° 1 4-20 mA
3 GND
Ground GND
4 IN2
Transducer Input
N° 2
NTC 10kohm
@ 25°C
5 V2
Output voltage supply 22V (+10/-20%)
max. 25 mA
6 IN3
Transducer Input
N° 3
NTC 10kohm
@ 25°C
7 GND
Ground GND
8 IN4
Input N° 4 (only
SLAVE control) 0-10Vdc
9 +10V
Output voltage supply +10,0V ±1%
10
OUT
“Slave” modules
control Output 0-10Vdc / PWM
11
GND
Ground GND
12
SP2
Set-Point 1& 2
selection Contact
Open = SP1
Closed = SP2
100%
0%
=

User Manual ESY-1 / rev. 9 15.01.2008 www.selproweb.com
9
1
2
100%
0%
=
1
2
100%
0%
=
6.3. OV Configuration (on request)
N°
Name
Function OV CONF.
1 V1
Output voltage supply + 5,0V ±1%
2 IN1
Transducer Input
N° 1 0-5 Vdc
3 GND
Ground GND
4 IN2
Transducer Input
N° 2 0-5 Vdc
5 V2
Output voltage supply + 5,0V ±1%
6 IN3
Transducer Input
N° 3
NTC 10kohm
@ 25°C
7 GND
Ground GND
8 IN4
Input N° 4 (only
SLAVE control) 0-10Vdc
9 +10V
Output voltage supply +10,0V ±1%
10
OUT
“Slave” modules
control Output 0-10Vdc / PWM
11
GND
Ground GND
12
SP2
Set-Point 1& 2
selection Contact
Open = SP1
Closed = SP2
6.4. OB Configuration (on request)
N°
Name
Function OB CONF.
1 V1
Output voltage supply 22V (+10/-20%)
max. 25 mA
2 IN1
Transducer Input
N° 1 4-20 mA
3 GND
Ground GND
4 IN2
Transducer Input
N° 2 0-5 Vdc
5 V2
Uscita tensione
alimentazione + 5,0V ±1%
6 IN3
Transducer Input
N° 3
NTC 10kohm
@ 25°C
7 GND
Ground GND
8 IN4
Input N° 4 (only
SLAVE control) 0-10Vdc
9 +10V
Output voltage supply +10,0V ±1%
10
OUT
“Slave” modules
control Output 0-10Vdc / PWM
11
GND
Ground GND
12
SP2
Set-Point 1& 2
selection Contact
Open = SP1
Closed = SP2

User Manual ESY-1 / rev. 9 15.01.2008 www.selproweb.com
10
J4=0-10V
ESY
SV
ESY
SV
ESY
OM
7. Electrical connection for Slave Module/s
The controllers of the ESY-1 / ALL-in-ONE series include moreover the SLAVE-ONE power units, in the two following
versions:
-SLAVE-SV with input for 0-10Vdc control signal
-SLAVE-SP with input for PWM control signal
All the models of the series share the same technical characteristics and are available in different sizes:
8 A – 12 A – 16 A – 20 A, 230Vac/50Hz, all suitable for outdoor applications, in plastic case 120°C and protection degree
IP55.
Moreover, the SLAVE-SV control unit, with control input 0-10Vdc has an auxiliary output that allows to control further
SLAVE-SP units.
By using exclusively SLAVE-SV units, it is possible to share equally the total load on the three-phases (R-S-T), so as to prevent
the risk of overloading the electric line on just one phase (regulation performed by two or more controllers, which have the 0-
10Vdc control signal in common).
The SLAVE-SV modules do not
require the same supply phase for every module connected to the 0-10Vdc control signal
(network synchronization), which is instead needed when connecting SLAVE-SP units (PWM input).
7.1. Connection of SLAVE modules, SV series (0-10Vdc power units)
SLAVE – SV module: 0-10Vdc control signal Terminal block
N°
Name Function SV CONF.
1 IN
Control Input 0-10Vdc
2 GND
Ground GND
3 10V
Potentiometer
AUX. supply
10,0V
±1%
4 OUT -
Output signal (5/30V) for
“slave PWM” modules PWM
5 OUT +
7.2. Connecting ESY-1 to SLAVE-SV / 0-10 Vdc modules (Three-/Single-phase connection)

User Manual ESY-1 / rev. 9 15.01.2008 www.selproweb.com
11
J4=PWM
ESY
SP
ESY
SP
ESY
OM
7.3. Connection of SLAVE modules, SP series (PWM power units)
The SLAVE-SP unit allows the connection of the only PWM (PPM-Triac) control signal.
The input is optimized in order to be compatible with every device having a PWM control signal, from 5V to 30V.
All connected SLAVE-SP units require the same supply phase as the remote controller, which generates the PWM control
signal (network synchronization)
SLAVE – SP module: PWM control signal
7.4. Connecting SLAVE-SP modules – Power supply in phase with the Master unit (network synchronization)
Terminal block
1 PWM NON polarized input for
PWM control signal (from 5V
to 30V)
PWM
2 PWM

User Manual ESY-1 / rev. 9 15.01.2008 www.selproweb.com
12
Led
DL1
MAX OUT CUT-OFF
(MIN OUT)
SP -+
J1
J2
J3
Power supply
terminal block
J4
P1 P2 P3 P4
Control signals
terminal block
SPadj
Led
Led
Double Set-Point
optional card
SP1 SP1adj
SP2adj
SP2
1
2
Led
Led
P4P3
P6
P5
1
2
-+
Led
Led
J1
Power supply
terminal block
Control signals
terminal block
DL1
Power supply
terminal block
Control signals
terminal block
SLAVE-SV (0-10V)
SLAVE-SP (PWM)
8. ESY-1: CONTROL & POWER CARD IN DETAIL, ALL-in-ONE version
8.1. ESY-1: CONTROL & POWER CARD IN DETAIL, SLAVE-ONE versions
Jumper
& LED
Description ESY-1 / ALL-in-ONE
J1 DIRECT-REVERSE mode selection
J2 VAC Output at SET-POINT
J3 CUT-OFF / MIN OUT selection
J4 EXTRA-power control Output
DL1 Power supply O.K.
DL - Set-Point higher than sensor signal
DL + Set-Point lower than sensor signal
1 Set-Point 1 ON
2 Set-Point 2 ON
Jumper
Description ESY-1 / SLAVE-SV
J1 CUT-OFF / MIN OUT selection
DL1 Power supply O.K.

User Manual ESY-1 / rev. 9 15.01.2008 www.selproweb.com
13
230Vac
MAX out
80%
C T-Off
30%
SP
0%
100%
IN
Pb
OFF leds
(30% di Pb)
SP
OVER
SIGNAL
SP
NDER
SIGNAL
8.2. LED signals
The cards present LED signals, which point out the state and the operation of the controller. The LED signals of the
complete version ESY-1 / ALL-in-ONE are shown in the table below:
8.3. Configuration and selection JUMPERS
Before starting the set-up procedure for operating parameters and limits, it is necessary to determine the controller’s
operating modes by moving the configuration jumpers and modifying, when needed, the factory default settings.
(*J1 : symbol for configuration jumper in SLAVE-ONE version)
ATTENTION: With J2 in MAX position (Sp at MAX), the AC output voltage at Set Point is equal to the preset MAX Vac
limit value.
DL1
Green LED
Power supply O.K.
Green LED
SP higher than the signal value *
Green LED
SP lower than the signal value *
1
Green LED
Set-point 1 selection active
2
Green LED
Set-point 2 selection active
*±
±±
±30% of the Proportional Band (Pb)
Position Default Function Mode
J1
REV
DIR Regulation
characteristics
Reverse (REV)
DIR Direct (DIR)
J2
MAX
SP MAX AC output voltage at
Set-Point
MAX AC voltage to fans
MIN MIN AC voltage to fans
J3
(*J1)
CUT-OFF
CUT-OFF Type of regulation start
Start / Stop AC voltage
MIN MINIMUM rpm VAC limit
J4
PWM
0-10Vdc
Control for Extra-
power SLAVE SV or
SP units
PWM signal – SP unit
0-10 Vdc
0-10V signal – SV unit

User Manual ESY-1 / rev. 9 15.01.2008 www.selproweb.com
14
20% 30%
C T-OFF
SP
SP
adj.
(MIN-out)
20% 30%
100% 80%
9. Set-up of operating LIMITS and PARAMETERS
9.1. Available regulations in the standard ESY-1 version (ALL-in-ONE)
The ESY-1 controllers present two regulation Trimmers for setting up the operating limits (MIN out / Cut-Off and
MAX out), the automatic regulation performs the variations of fans speed, and a couple of 13-positions rotary
switches for setting up the SET-Point of reference with ease.
9.2. How to set up the operating limits for the ALL-in-ONE version
Before starting the set-up procedure for operating parameters, it is necessary to determine the AC voltage operating
limits, within which the automatic variation of speed takes place. The limits must be set up according to the procedures
described as follows:
MAX Vac
limit
It determines the value of maximum AC voltage to be supplied to
the fan in automatic operation (from 100% to 0%), in order to
limit the maximum airflow rate or the fan noise at MAX rpm.
It is factory preset at the maximum value of ‘10’, corresponding
to the 100% of the control value.
Set up of 'MAX out' voltage value:
1) move the Jumper J1 to ON 1(REV) position;
2) turn the trimmer MAX out from position ‘10’ up to the desired value of MAX AC
voltage limit;
3) turn the Jumper J1 back to the ON 2 position
- in automatic operation, the MAX- RPM% limit of output voltage supplied to the
load corresponds to the determined AC voltage limit.
Cut-Off
limit
It determines the value of minimum AC voltage to be supplied to
the fan in automatic operation (from 25% to 80%): the starting
voltage supplied to the fan is enough to give an adequate torque to
start the fan rotation.
Set up of 'CUT-OFF' voltage value:
1) move the Jumper J3 to ON 2 position;
2) turn the trimmer from ’1’ position up to the desired AC voltage value of MIN rpm;
3) turn the Jumper J3 back to the ON 1 position
- the regulation of the fan starts from the determined CUT-Off VAC value
MIN Vac
limit
It allows to set up manually the minimum AC output voltage
supplied to the fan, from 20% to 80%, and permits to check:
- the correct phase-cutting of the controller
- the Cut-OFF set up
Set up of 'MIN out' voltage value:
1) move the Jumper J3 to ON 2 position;
2) turn the trimmer from ’1’ position, until reaching the desired MIN rpm voltage
value
- At start up the fan operates at the determined minimum Ac voltage limit
MAX-out
AC voltage limit for MAX-RPM% threshold
CUT-OFF
(MIN-out)
AC voltage limit for Cut/Off or MIN-RPM% threshold
SP
Main Set-Point 1
(see following tables for position / value correspondence)
SP adj.
Set-Point 1 for an accurate adjustment of SP
( see following tables for position / value correspondence )

User Manual ESY-1 / rev. 9 15.01.2008 www.selproweb.com
15
10
5
7
6
4
3
2
1
MIN OUT
9
8
5
8
9
7
6
10
MAX OUT
4
3
2
110
5
7
6
4
3
2
1
CUT-Off
9
8
20% 30%
100% 80%
20% 30%
9.3. How to set up the operating limits for SLAVE-ONE modules (only SLAVE-SV version)
The following procedures allow to set up the AC voltage limits, within which the 0-10 Vdc control signal is automatically
controlled.
MIN Vac
limit
It allows to set up manually the minimum AC output voltage
supplied to the fan, from 20% to 90%, and permits to check:
- the correct phase-cutting of the controller
- the Cut-OFF set up
Set up of 'MIN VAC out' voltage value:
1) move the Jumper J3 in ON 1 position;
2) turn the trimmer from ’1’ position, until reaching the desired MIN rpm voltage
value; now the load is always supplied starting from the determined MAX AC
voltage limit
Cut-OFF
limit
It determines the value of minimum AC voltage to be
supplied to the fan in automatic operation (from 25% to
80%): this prevent the fan to be supplied with a lower AC
voltage, which would be not enough to give an adequate
torque for keeping the fan rotating.
Set up of 'CUT-OFF' AC voltage value:
1) move the Jumper J3 to ON 1 position;
2) turn the trimmer from ’1’ position, until reaching the desired MIN rpm
voltage value
3) turn the Jumper J3 back to the ON 2 position
now the load is supplied starting from the CUT-Off value
MAX Vac
limit
It determines the value of maximum AC voltage to be
supplied to the fan in automatic operation (from 100% to
20%), in order to limit the maximum airflow rate or the fan
noise at MAX rpm.
It is factory preset at the maximum value of ‘10’,
corresponding to the 100% of the control value.
Set up of 'MAX out' voltage value:
1) jumper the inputs IN and +10V: the AC voltage output is at 100%
2) turn the trimmer MAX out from position ‘10’ up to the desired value of MAX
AC voltage limit (ex.: 80%);
3) remove the jumper between IN and +10V : in automatic operation, the MAX
voltage limit supplied to the load corresponds to the determined AC output
voltage limit
9.4. Table showing the scale of values for setting up the ESY-1 regulation VAC Limits
Scale
(*) (*) (*) move the selection jumper in order to pass from
the Cut-Off limit to the MIN out limit; always
check the difference between VAC values, as shown
in the table below
Limit
ALL-in-ONE SLAVE-ONE
MAX C-OFF MIN MAX C-Off
(MIN)
1 0 40 60 55 45
2 70 65 85 80 60
3 100 90 110 120 90
4 130 115 135 160 115
5 160 135 150 190 135
6 185 150 160 210 150
7 205 160 170 215 165
8 215 170 180 220 175
9 225 180 190 225 185
10 230 185 190 230 190

User Manual ESY-1 / rev. 9 15.01.2008 www.selproweb.com
16
89
10
11
12
131
2
3
4
56
7
SP
+1
+2
+3
+4
+5
+6
-6
-5
-4
-3
-2 -1
SP
SPadj.
+/-
89
10
11
12
131
2
3
456
7
SP
+1
+2
+3
+4
+5
+6
SP
SPadj.
-6
-5
-4
-3
-2 -1
SP
SPadj.
89
10
11
12
131
2
3
456
7
SP
+1
+2
+3
+4
+5
+6
SP
SPadj.
-6
-5
-4
-3
-2 -1
SP
SPadj.
After selecting the operating modes and setting up the operating limits, it is necessary to determine the operating point of
the regulation: the SET-POINT, on the basis of the scales and ranges referring to the connected sensor (*).
The Set-Point is easily and quickly fixed through the couple of 13-position rotary switches, named as follows: SP
(main reference point for the regulation) and SPadj. (accurate adjustment of the operating point fixed with SP).
For the selection of the Set-Point values, refer to the following tables according to the ranges and to the types of sensors
in use.
(*) The controller ESY-1 operates automatically according to the sensor/signal currently connected or in use.
9.5. Tables for the Set-Point selection:
Set
Point =
The Set-Point value is the
result of
SP +/- SP adj.
9.5.1. Set-Point values, range 4-20 mA (Transducer 4-20 mA)
4-20mA
-6 -5 -4 -3 -2 -1 +1 +2 +3 +4 +5 +6
7,00 7,05 7,15 7,25 7,35 7,45
1
7,56 7,66 7,76 7,86 7,96 8,06 8,11
7,51 7,56 7,66 7,76 7,86 7,96
2 8,06 8,16 8,26 8,36 8,46 8,56 8,61
8,51 8,56 8,66 8,76 8,86 8,96
3 9,06 9,16 9,26 9,36 9,46 9,56 9,61
9,51 9,56 9,66 9,76 9,86 9,96
4 10,06 10,16 10,26 10,36 10,46 10,56 10,61
10,51 10,56 10,67 10,77 10,87 10,97
5 11,07 11,17 11,27 11,37 11,47 11,57 11,62
11,52 11,57 11,67 11,77 11,87 11,97
6 12,07 12,17 12,27 12,37 12,47 12,57 12,62
12,52 12,57 12,67 12,77 12,87 12,97
7 13,07 13,17 13,27 13,37 13,47 13,57 13,62
13,52 13,57 13,67 13,78 13,88 13,98
8 14,08 14,18 14,28 14,38 14,48 14,58 14,63
14,53 14,58 14,68 14,78 14,88 14,98
9 15,08 15,18 15,28 15,38 15,48 15,58 15,63
15,53 15,58 15,68 15,78 15,88 15,98
10 16,08 16,18 16,28 16,38 16,48 16,58 16,63
16,53 16,58 16,68 16,78 16,88 16,99
11 17,09 17,19 17,29 17,39 17,49 17,59 17,64
17,54 17,59 17,69 17,79 17,89 17,99
12 18,09 18,19 18,29 18,39 18,49 18,59 18,64
18,04 18,09 18,19 18,29 18,39 18,49
13
18,59 18,69 18,79 18,89 18,99 19,09 19,14
9.5.2.Set-Point values, range 0-15 bar (Transducer 4-20 mA)
0-15 bar
-6 -5 -4 -3 -2 -1 +1 +2 +3 +4 +5 +6
2,82 2,86 2,96 3,05 3,14 3,24
1
3,33 3,43 3,52 3,62 3,71 3,80 3,85
3,29 3,33 3,43 3,52 3,62 3,71
2 3,80 3,90 3,99 4,09 4,18 4,27 4,32
4,23 4,27 4,37 4,46 4,56 4,65
3 4,74 4,84 4,93 5,03 5,12 5,21 5,26
5,17 5,21 5,31 5,40 5,50 5,59
4 5,68 5,78 5,87 5,97 6,06 6,15 6,20
6,11 6,15 6,25 6,34 6,44 6,53
5 6,62 6,72 6,81 6,91 7,00 7,09 7,14
7,05 7,09 7,19 7,28 7,38 7,47
6 7,57 7,66 7,75 7,85 7,94 8,04 8,08
7,99 8,04 8,13 8,22 8,32 8,41
7 8,51 8,60 8,69 8,79 8,88 8,98 9,02
8,93 8,98 9,07 9,16 9,26 9,35
8 9,45 9,54 9,63 9,73 9,82 9,92 9,96
9,87 9,92 10,01 10,10 10,20 10,29
9 10,39 10,48 10,57 10,67 10,76 10,86 10,90
10,81 10,86 10,95 11,05 11,14 11,23
10 11,33 11,42 11,52 11,61 11,70 11,80 11,84
11,75 11,80 11,89 11,99 12,08 12,17
11 12,27 12,36 12,46 12,55 12,64 12,74 12,79

User Manual ESY-1 / rev. 9 15.01.2008 www.selproweb.com
17
89
10
11
12
131
2
3
456
7
SP
+1
+2
+3
+4
+5
+6
SP
SPadj.
-6
-5
-4
-3
-2 -1
SP
SPadj.
89
10
11
12
131
2
3
456
7
SP
+1
+2
+3
+4
+5
+6
SP
SPadj.
-6
-5
-4
-3
-2 -1
SP
SPadj.
12,69 12,74 12,83 12,93 13,02 13,11
12 13,21 13,30 13,40 13,49 13,58 13,68 13,73
13,16 13,21 13,30 13,40 13,49 13,58
13
13,68 13,77 13,87 13,96 14,05 14,15 14,20
9.5.3. Set Point values, range 0-25 bar (Transducer 4-20 mA)
0-25 bar
-6 -5 -4 -3 -2 -1 +1 +2 +3 +4 +5 +6
4,69 4,77 4,93 5,08 5,24 5,40
1
5,55 5,71 5,87 6,03 6,18 6,34 6,42
5,48 5,55 5,71 5,87 6,03 6,18
2 6,34 6,50 6,65 6,81 6,97 7,12 7,20
7,04 7,12 7,28 7,44 7,59 7,75
3 7,91 8,06 8,22 8,38 8,53 8,69 8,77
8,61 8,69 8,85 9,00 9,16 9,32
4 9,47 9,63 9,79 9,94 10,10 10,26 10,34
10,18 10,26 10,41 10,57 10,73 10,88
5 11,04 11,20 11,35 11,51 11,67 11,82 11,90
11,75 11,82 11,98 12,14 12,30 12,45
6 12,61 12,77 12,92 13,08 13,24 13,39 13,47
13,31 13,39 13,55 13,71 13,86 14,02
7 14,18 14,33 14,49 14,65 14,80 14,96 15,04
14,88 14,96 15,12 15,27 15,43 15,59
8 15,74 15,90 16,06 16,21 16,37 16,53 16,61
16,45 16,53 16,68 16,84 17,00 17,15
9 17,31 17,47 17,62 17,78 17,94 18,09 18,17
18,02 18,09 18,25 18,41 18,57 18,72
10 18,88 19,04 19,19 19,35 19,51 19,66 19,74
19,58 19,66 19,82 19,98 20,13 20,29
11 20,45 20,60 20,76 20,92 21,07 21,23 21,31
21,15 21,23 21,39 21,54 21,70 21,86
12 22,01 22,17 22,33 22,48 22,64 22,80 22,88
21,94 22,01 22,17 22,33 22,48 22,64
13
22,80 22,95 23,11 23,27 23,42 23,58 23,66
9.5.4. Set Point values, range 0-30 bar (Transducer 4-20 mA)
0-30 bar
-6 -5 -4 -3 -2 -1 +1 +2 +3 +4 +5 +6
5,63 5,73 5,91 6,10 6,29 6,48
1
6,67 6,85 7,04 7,23 7,42 7,61 7,70
6,57 6,67 6,85 7,04 7,23 7,42
2 7,61 7,79 7,98 8,17 8,36 8,55 8,64
8,45 8,55 8,74 8,92 9,11 9,30
3 9,49 9,68 9,86 10,05 10,24 10,43 10,52
10,33 10,43 10,62 10,80 10,99 11,18
4 11,37 11,56 11,74 11,93 12,12 12,31 12,40
12,21 12,31 12,50 12,69 12,87 13,06
5 13,25 13,44 13,63 13,81 14,00 14,19 14,28
14,10 14,19 14,38 14,57 14,75 14,94
6 15,13 15,32 15,51 15,69 15,88 16,07 16,17
15,98 16,07 16,26 16,45 16,64 16,82
7 17,01 17,20 17,39 17,58 17,76 17,95 18,05
17,86 17,95 18,14 18,33 18,52 18,70
8 18,89 19,08 19,27 19,46 19,64 19,83 19,93
19,74 19,83 20,02 20,21 20,40 20,59
9 20,77 20,96 21,15 21,34 21,53 21,71 21,81
21,62 21,71 21,90 22,09 22,28 22,47
10 22,65 22,84 23,03 23,22 23,41 23,59 23,69
23,50 23,59 23,78 23,97 24,16 24,35
11 24,54 24,72 24,91 25,10 25,29 25,48 25,57
25,38 25,48 25,66 25,85 26,04 26,23
12 26,42 26,60 26,79 26,98 27,17 27,36 27,45
26,32 26,42 26,60 26,79 26,98 27,17
13
27,36 27,55 27,73 27,92 28,11 28,30 28,39

User Manual ESY-1 / rev. 9 15.01.2008 www.selproweb.com
18
89
10
11
12
131
2
3
456
7
SP
+1
+2
+3
+4
+5
+6
SP
SPadj.
-6
-5
-4
-3
-2 -1
SP
SPadj.
89
10
11
12
131
2
3
456
7
SP
+1
+2
+3
+4
+5
+6
SP
SPadj.
-6
-5
-4
-3
-2 -1
SP
SPadj.
9.5.5. Set-Point values, range 0-45 bar (Transducer 4-20 mA)
0-45 bar
-6 -5 -4 -3 -2 -1 +1 +2 +3 +4 +5 +6
8,45 8,59 8,87 9,15 9,43 9,72
1
10,00 10,28 10,56 10,85 11,13 11,41 11,55
9,86 10,00 10,28 10,56 10,85 11,13
2 11,41 11,69 11,97 12,26 12,54 12,82 12,96
12,68 12,82 13,10 13,38 13,67 13,95
3 14,23 14,51 14,80 15,08 15,36 15,64 15,78
15,50 15,64 15,92 16,21 16,49 16,77
4 17,05 17,33 17,62 17,90 18,18 18,46 18,60
18,32 18,46 18,75 19,03 19,31 19,59
5 19,87 20,16 20,44 20,72 21,00 21,28 21,43
21,14 21,28 21,57 21,85 22,13 22,41
6 22,70 22,98 23,26 23,54 23,82 24,11 24,25
23,97 24,11 24,39 24,67 24,95 25,24
7 25,52 25,80 26,08 26,36 26,65 26,93 27,07
26,79 26,93 27,21 27,49 27,77 28,06
8 28,34 28,62 28,90 29,19 29,47 29,75 29,89
29,61 29,75 30,03 30,31 30,60 30,88
9 31,16 31,44 31,72 32,01 32,29 32,57 32,71
32,43 32,57 32,85 33,14 33,42 33,70
10 33,98 34,26 34,55 34,83 35,11 35,39 35,53
35,25 35,39 35,67 35,96 36,24 36,52
11 36,80 37,09 37,37 37,65 37,93 38,21 38,36
38,07 38,21 38,50 38,78 39,06 39,34
12 39,62 39,91 40,19 40,47 40,75 41,04 41,18
39,48 39,62 39,91 40,19 40,47 40,75
13
41,04 41,32 41,60 41,88 42,16 42,45 42,59
9.5.6. Set Point values, range 0-30 bar (Transducer 0,5-4,5 Vdc)
0-30 bar
-6 -5 -4 -3 -2 -1 +1 +2 +3 +4 +5 +6
3,10 3,22 3,47 3,71 3,96 4,20
1
4,45 4,69 4,94 5,18 5,43 5,67 5,79
4,32 4,45 4,69 4,94 5,18 5,43
2 5,67 5,92 6,16 6,41 6,65 6,89 7,02
6,77 6,89 7,14 7,38 7,63 7,87
3 8,12 8,36 8,61 8,85 9,10 9,34 9,47
9,22 9,34 9,59 9,83 10,08 10,32
4 10,57 10,81 11,06 11,30 11,55 11,79 11,91
11,67 11,79 12,04 12,28 12,53 12,77
5 13,02 13,26 13,51 13,75 14,00 14,24 14,36
14,12 14,24 14,49 14,73 14,97 15,22
6 15,46 15,71 15,95 16,20 16,44 16,69 16,81
16,57 16,69 16,93 17,18 17,42 17,67
7 17,91 18,16 18,40 18,65 18,89 19,14 19,26
19,01 19,14 19,38 19,63 19,87 20,12
8 20,36 20,61 20,85 21,10 21,34 21,59 21,71
21,46 21,59 21,83 22,08 22,32 22,56
9 22,81 23,05 23,30 23,54 23,79 24,03 24,16
23,91 24,03 24,28 24,52 24,77 25,01
10 25,26 25,50 25,75 25,99 26,24 26,48 26,60
26,36 26,48 26,73 26,97 27,22 27,46
11 27,71 27,95 28,20 28,44 28,69 28,93 29,05
28,81 28,93 29,18 29,42 29,67 29,91
12 30,15 30,40 30,64 30,89 31,13 31,38 31,50
30,03 30,15 30,40 30,64 30,89 31,13
13
31,38 31,62 31,87 32,11 32,36 32,60 32,73

User Manual ESY-1 / rev. 9 15.01.2008 www.selproweb.com
19
89
10
11
12
131
2
3
456
7
SP
+1
+2
+3
+4
+5
+6
SP
SPadj.
-6
-5
-4
-3
-2 -1
SP
SPadj.
Gnd
SP2
+10V
O T
5
8
9
7
6
10
4
3
2
1
9
10
5
8
7
6
4
3
2
1
C T-OFF
(MIN O T)
MAX O T
SP2
SP1
89
10
131
2
3
4
561
SP1
SP1
+1
+2
+3
+6- 6
-5
-4
-3
-2-1
SP1 adj .
7
89
10
131
2
3
4
562
SP2
SP2
+1
+2
+3
+6- 6
-5
-4
-3
-2-1
SP2 adj .
7
+4
+5
+4
+5
11
12
11
12
89
10
11
12
131
2
3
4
56
7
SP2
+1
+2
+3
+4
+5
+6
-6
-5
-4
-3
- 2 -1
SP2
SP2 adj.
+/-
Gnd
SP2
+10V
O T
89
10
11
12
131
2
3
4
56
7
SP1
+1
+2
+3
+4
+5
+6
-6
-5
-4
-3
- 2 -1
SP1
SP1 adj.
+/-
9.5.7. Set-Point values, range 10°C to 60°C (NTC probe 10kohm@25°C)
10-60 °C
-6 -5 -4 -3 -2 -1 +1 +2 +3 +4 +5 +6
2,00 2,50 3,00 3,50 4,00 4,50
1
5 5,50 6,00 6,50 7,00 7,50 8,00
7,00 7,50 8,00 8,50 9,00 9,50
2 10 10,50 11,00 11,50 12,00 12,50 13,00
12,00 12,50 13,00 13,50 14,00 14,50
3 15 15,50 16,00 16,50 17,00 17,50 18,00
17,00 17,50 18,00 18,50 19,00 19,50
4 20 20,50 21,00 21,50 22,00 22,50 23,00
22,00 22,50 23,00 23,50 24,00 24,50
5 25 25,50 26,00 26,50 27,00 27,50 28,00
27,00 27,50 28,00 28,50 29,00 29,50
6 30 30,50 31,00 31,50 32,00 32,50 33,00
32,00 32,50 33,00 33,50 34,00 34,50
7 35 35,50 36,00 36,50 37,00 37,50 38,00
37,00 37,50 38,00 38,50 39,00 39,50
8 40 40,50 41,00 41,50 42,00 42,50 43,00
42,00 42,50 43,00 43,50 44,00 44,50
9 45 45,50 46,00 46,50 47,00 47,50 48,00
47,00 47,50 48,00 48,50 49,00 49,50
10 50 50,50 51,00 51,50 52,00 52,50 53,00
52,00 52,50 53,00 53,50 54,00 54,50
11 55 55,50 56,00 56,50 57,00 57,50 58,00
57,00 57,50 58,00 58,50 59,00 59,50
12 60 60,50 61,00 61,50 62,00 62,50 63,00
62,00 62,50 63,00 63,50 64,00 64,50
13
65 65,50 66,00 66,50 67,00 67,50 68,00
9.6. Regulation with Double SET-Point (optional)
The controller ESY-1 has been designed to be connected to an optional card with the Double Set-Point function, which allows to
determine two operating points: SP1 & SP2. The inclusion of the optional card is factory preset and must be requested when placing
the order.
In order to select the CUT-OFF / MIN out and MAX out values, follow the indications given in the table above.
For the selection of Set-Point 1 & 2 use the input SP2 + GND on the terminal block, as indicated below.
MAX OUT
Maximum RPM/VAC limit
MIN OUT
Minimum RPM/VAC or Cut-Off limit
SP1
Main Set-Point 1
(see following tables for position / value correspondence)
SP1 adj.
Set-Point 1 accurate adjustment
(see following tables for position / value correspondence)
SP2
Set-Point 2
(see following tables for position / value correspondence)
SP2 adj.
Set-Point 2 accurate adjustment
(see following tables for position / value correspondence)
In order to pass from Set-Point 1 to Set-Point 2,it is necessary to close the preset contact between terminals.
SET-POINT 1 operation SET-POINT 2 operation
SP1
Set-Point 1 SP2
Set-Point 2
SP1 adj.
Set-Point 1
adjustment SP2 adj.
Set-Point 2
adjustment
Led 1
Led SP1 = ON Led 2
Led SP2 = ON
SP2
OPEN SP2
CLOSED
This manual suits for next models
4
Table of contents
Other SELPRO Controllers manuals
