manuals.online logo
Brands
  1. Home
  2. •
  3. Brands
  4. •
  5. Sena
  6. •
  7. Network Hardware
  8. •
  9. Sena HelloDevice Super SS100 User manual

Sena HelloDevice Super SS100 User manual

2. Log-in to serial console
1) Connect the RS232 serial cable
between your computer and
the serial port of the
HelloDevice SS100.
2) Slide Data/Console switch
to the Console side.
3) Run a terminal emulation program such as HyperTerminal and set up
the serial configuration parameters as follows:
Baud r ate = 9600, Dat a bi t s = 8, Par i t y = None,
St op bi t s = 1, Fl ow cont r ol = None
4) Press
ENTER
key at the terminal emulation program.
5) Enter the user name and password. Factory default settings of the
user name and password are both
admi n
.
Wel come t o SS- 100 Conf i gur at i on
---------------------------------------------------------------------
Consol e#1 ( Ser i al ) : Not Connect ed [ THI S]
Consol e#2 ( Tel net ) : Avai l abl e
Consol e#3 ( Tel net ) : Avai l abl e
Consol e#4 ( Tel net ) : Avai l abl e
---------------------------------------------------------------------
Pr ess Ent er
Logi n : admi n
Passwor d : *****
---------------------------------------------------------------------
Wel come t o SS- 100 conf i gur at i on page
Cur r ent t i me : 2002/ 06/ 18 10: 33: 13 F/ W REV. : v1. 0. 1
Ser i al No. : SS100_02070001 MAC Addr ess : 00- 01- 95- 04- 15- 0a
I P mode : DHCP I P Addr ess : 192. 168. 4. 6
---------------------------------------------------------------------
Consol e#1 ( Ser i al ) : Connect ed [ THI S]
Consol e#2 ( Tel net ) : Avai l abl e
Consol e#3 ( Tel net ) : Avai l abl e
Consol e#4 ( Tel net ) : Avai l abl e
---------------------------------------------------------------------
Sel ect menu
1. I P conf i gur at i on
2. Ser i al por t conf i gur at i on
3. SNMP conf i gur at i on
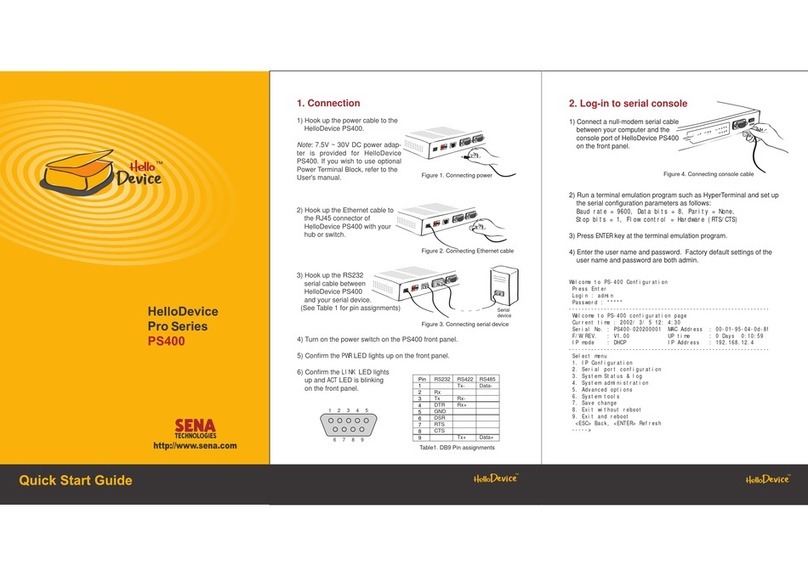
1. Connection
1) Hook up the Ethernet cable to
the RJ45 connector of the
HelloDevice SS100 with your
hub or switch.
2) Hook up the RS232 serial cable
between HelloDevice SS100 and
your serial device.
(See Table 1 for pin assignments)
3) Hook up the power to the
HelloDevice SS100.
4) Confirm the
Power
LED lights up.
5) Confirm the
Li nk
LED lights up
and
Act
LED is blinking.
6) Confirm the
Ready
LED lights up and then you can use the SS100.
Figure 1. Connecting Ethernet cable
Figure 4. Connecting console cable
Figure 2. Connecting serial device
Figure 3. Connecting power
1 2 3 4 5
6 7 8 9
Serial Device
Table1. DB9 Pin assignments
Pin
1
2
3
4
5
6
7
8
9
RS232
Rx
Tx
DTR
GND
DSR
RTS
CTS
RS422
Tx-
Rx-
Rx+
Tx+
RS485
Data-
Data+
SS100
HelloDevice
Super Series
Corporate
210 Yangjae-dong Seocho-gu
Seoul 137-130 Korea
[email protected]
Sales
phone +82.2.529.7024
[email protected]
Support
phone +82.2.573.5422
[email protected]
4. Serial port configuration
1) Select the menu
2. Serial port configuration
at the main menu.
2) Select the submenu
1. Host mode configuration
, and set up the host
mode parameters according to your application.
3) Select the submenu
2. UART configuration
, and set up the parameters
as same as those of your serial device.
4) Return to the main menu by pressing
ESC
key.
- - - - - - - - - - - - - - - - - - - - - - - - - - - - - - - - - - - - - - - - - - - - - - - - - - - - - - - - - - - - - - - - - - - - - - - - -
Ser i al conf i gur at i on
- - - - - - - - - - - - - - - - - - - - - - - - - - - - - - - - - - - - - - - - - - - - - - - - - - - - - - - - - - - - - - - - - - - - - - - - -
Por t # Mode Por t Des t i nat i on Type Set t i ngs Fl ow
1 TCP s 6000 N/ A RS232 9600- N- 8- 1 None
Sel ect por t . . . .
<ESC> Back, <ENTER> Ref r es h
- - - - - > 1
- - - - - - - - - - - - - - - - - - - - - - - - - - - - - - - - - - - - - - - - - - - - - - - - - - - - - - - - - - - - - - - - - - - - - - - - -
Ser i al conf i gur at i on - - > por t #1
- - - - - - - - - - - - - - - - - - - - - - - - - - - - - - - - - - - - - - - - - - - - - - - - - - - - - - - - - - - - - - - - - - - - - - - - -
1. Host mode conf i gur at i on
2. UART Conf i gur at i on
3. Cr ypt ogr aphy Conf i gur at i on
4. Opt i on
<ESC> Back, <ENTER> Ref r es h
----->
5. Apply changes
1) After finishing the serial port configuration, return to the main menu by
pressing
ESC
key several times.
2) Save changed values by selecting menu
8. Save changes
at the main
menu.
3) IP configuration change will be effective immediately after menu
8. Save
changes
is selected.
4) Other configuration change will be effective after rebooting the device by
selecting the menu
0. Exit and reboot
or pushing the Data/Console
switch to the Data side and back to the Console side.
5) Connect the RS232 serial cable between your serial device and the serial
port of the HelloDevice SS100.
6) Push the Data/Console switch to the Data side.
4. Sys t em St at us & l og
5. Sys t em admi ni st r at i on
6. Advanced opt i ons
7. Sys t em t ool s
8. Save changes
9. Exi t wi t hout r eboot
0. Exi t and r eboot
<ESC> Back, <ENTER> Ref r es h
----->
3. Assign IP address
Factory default IP mode setting of the SS100 is
DHCP
. If you are using
DHCP servers for your network environments, skip this chapter.
1) Select menu
1. I P Conf i gur at i on
at the main menu.
2) Select submenu
1. I P mode
. Change IP mode to
st at i c I P
.
3) Select submenu 2~4 to set IP configuration parameters according to
your network environment, i.e.
I P addr ess, Subnet mask, Def aul t
gat eway
.
4) Return to the main menu by pressing
ESC
key.
---------------------------------------------------------------------
I P conf i gur at i on
---------------------------------------------------------------------
Sel ect menu
1. I P mode : DHCP
<ESC> Back, <ENTER> Ref r es h
- - - - - > 1
Sel ect mode ( 1 = St at i c I P, 2 = DHCP, 3 = PPPoE)
- - - - - > 1
---------------------------------------------------------------------
I P conf i gur at i on
---------------------------------------------------------------------
Sel ect menu
1. I P mode : st at i c I P
2. I P addr ess : 192. 168. 4. 6
3. Subnet mask : 255. 255. 0. 0
4. Def aul t gat eway : 192. 168. 1. 1
5. Pr i mar y DNS : 211. 172. 129. 198
6. Secondar y DNS : 211. 172. 129. 199
<ESC> Back, <ENTER> Ref r es h
----->

Other Sena Network Hardware manuals

Sena PS100 User manual

Sena

Sena PS100 User manual

Sena HelloDevice LS100 User manual

Sena

Sena HelloDevice LS100 User manual

Sena NEMO10 User manual

Sena

Sena NEMO10 User manual

Sena Parani100 User manual

Sena

Sena Parani100 User manual

Sena HelloDevice Lite Series User manual

Sena

Sena HelloDevice Lite Series User manual

Sena HelloDevice Pro Series User manual

Sena

Sena HelloDevice Pro Series User manual

Popular Network Hardware manuals by other brands

Belden Grass Valley Python Plus user guide

Belden

Belden Grass Valley Python Plus user guide

Leonton CEG5-0602-SFP Hardware user manual

Leonton

Leonton CEG5-0602-SFP Hardware user manual

Appro NVR-6030 Installation & operation manual

Appro

Appro NVR-6030 Installation & operation manual

SITRONICS INTRACOM omniBAS installation manual

SITRONICS

SITRONICS INTRACOM omniBAS installation manual

NC-link NC-AP111 user manual

NC-link

NC-link NC-AP111 user manual

Acumen AiS installation manual

Acumen

Acumen AiS installation manual

Freescale Semiconductor MPC860T user manual

Freescale Semiconductor

Freescale Semiconductor MPC860T user manual

AXIOMTEK NA363R user manual

AXIOMTEK

AXIOMTEK NA363R user manual

CTC Union IMC-100-PD Quick installation guide

CTC Union

CTC Union IMC-100-PD Quick installation guide

Nexans Berk-Tek OneReach instruction manual

Nexans

Nexans Berk-Tek OneReach instruction manual

Teledyne Q-Lite Rugged user manual

Teledyne

Teledyne Q-Lite Rugged user manual

D-Link DNS-33 user manual

D-Link

D-Link DNS-33 user manual

Mitel Service Appliance 100 quick start guide

Mitel

Mitel Service Appliance 100 quick start guide

Dell EMC NX440 Setting Up Your System

Dell EMC

Dell EMC NX440 Setting Up Your System

Overland Storage NEO instructions

Overland Storage

Overland Storage NEO instructions

Balluff BNI IOW-560-W01-K022 Assembly instructions

Balluff

Balluff BNI IOW-560-W01-K022 Assembly instructions

Arcom ELAN-104NC Quick start manual

Arcom

Arcom ELAN-104NC Quick start manual

TechnoSpark Systems NMEA 2000 Wifi Replicator user manual

TechnoSpark Systems

TechnoSpark Systems NMEA 2000 Wifi Replicator user manual

manuals.online logo
manuals.online logoBrands
  • About & Mission
  • Contact us
  • Privacy Policy
  • Terms and Conditions

Copyright 2025 Manuals.Online. All Rights Reserved.