SenHaiX N61 User manual

MANUAL DE USUARIO
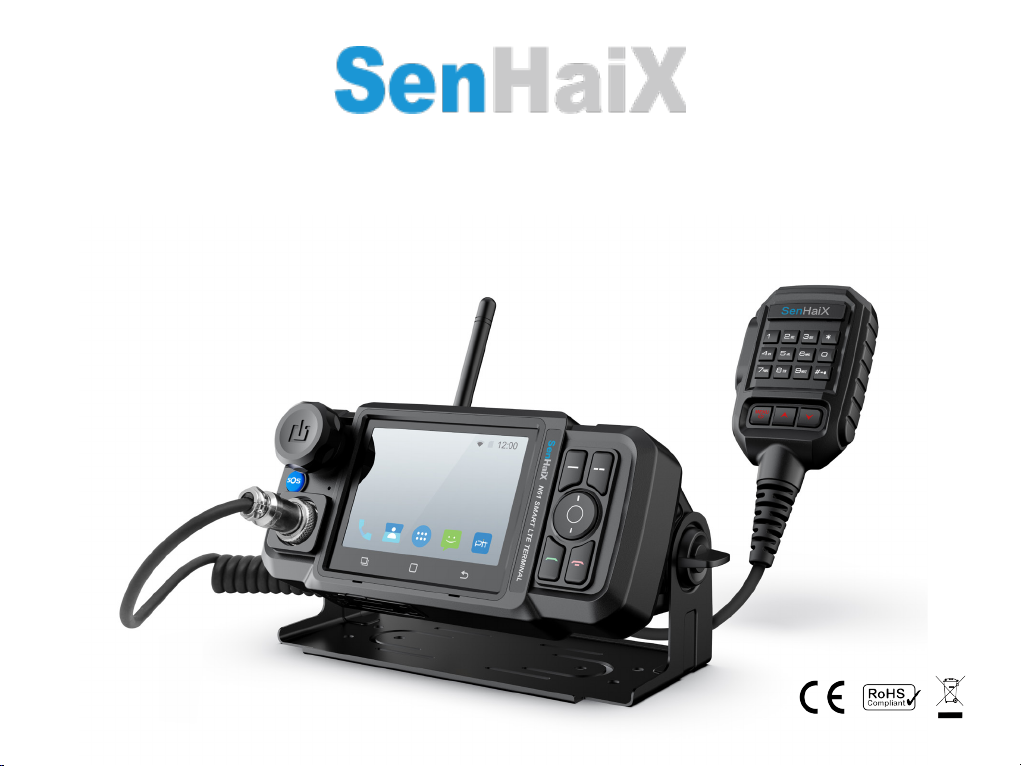
N61 SMART LTE TERMINAL

Eliminación de residuos. Directiva 2012/19/UE
Información sobre eliminación de residuos de equipos eléctricos y electrónicos (WEEE).
Este símbolo en el producto signica que los productos eléctricos y electrónicos utilizados no deben mezclarse con residuos domésticos. Para un
tratamiento, recuperación y reciclado adecuados, lleve este producto a puntos de recogida designados donde se aceptará gratuitamente.
La eliminación correcta de este producto ayudará a ahorrar recursos valiosos ya prevenir posibles efectos negativos sobre la salud humana y el medio
ambiente, que de otro modo podrían surgir de la manipulación inadecuada de los residuos.
Póngase en contacto con su autoridad local para obtener más información sobre el punto de recogida más cercano. Pueden aplicarse sanciones por la elimi-
nación incorrecta de estos residuos, de conformidad con su legislación nacional.
Estos símbolos en las baterías signican:
Pb = contiene más de 0,004 por ciento en peso de plomo
Cd = contiene más de 0,002 por ciento en peso de cadmio
Hg = contiene más de 0,0005 por ciento en peso de mercurio
También puede enviar el transceptor y la batería a nuestro almacén. Las tasas postales deben ser pagadas por el remitente.
Este aparato es conforme con la Directiva 2011/65/UE y sus modicaciones posteriores según la Directiva 2015/863/UE sobre restricciones en la utilización
de determinadas sustancias peligrosas en la fabricación de aparatos eléctricos y electrónicos
Estados de la Unión Europea de uso permitido:
AT BE BG HR CY CZ DK
EE FI FR DE EL HU IE
IT LV LT LU MT NL PL
PT RO SK SI ES SE UK

Prefacio
Gracias por adquirir este producto. Este manual incluye una descripción de las funciones y los procedimientos de uso
paso a paso.
Para evitar lesiones corporales o pérdidas materiales causadas por un funcionamiento incorrecto, lea atentamente el
manual del usuario antes de usarlo.

CONTENIDO
Packing list..................................................................................................................................................................................................................................5
Descripción del producto..................................................................................................................................................................................................5
Diseño del producto .........................................................................................................................................................................................................5
Micrófono de mano...........................................................................................................................................................................................................5
Instalación ..................................................................................................................................................................................................................................6
Instrucciones ....................................................................................................................................................................................................................6
Herramientas....................................................................................................................................................................................................................6
Partes ...............................................................................................................................................................................................................................6
Operaciones básicas.................................................................................................................................................................................................................6
Encender/apagar la radio .................................................................................................................................................................................................6
Ajustar el volumen ............................................................................................................................................................................................................6
Funciones del teclado.......................................................................................................................................................................................................7
Gestos ..............................................................................................................................................................................................................................7
Instalar SIM / tarjeta de memoria......................................................................................................................................................................................7
Especicaciones........................................................................................................................................................................................................................8
Cuidado y limpieza ....................................................................................................................................................................................................................8
Limpieza ...........................................................................................................................................................................................................................8
Guía de resolución de problemas............................................................................................................................................................................................9
Declaración de conformidad ..................................................................................................................................................................................................10

5
Packing list
Desembale con cuidado y verique que haya re-
cibido los siguientes artículos. Si falta algún ele-
mento o está dañado, contacte con su distribuidor.
Elemento Cantidad
Transceptor móvil 1
Abrazadera montaje 1
Tornillos abrazadera 2
Antena GPS 1
Antena 1
Micrófono de mano 1
Cable alimentación 1
NOTA
Accesorios opcionales: cargador de coche,
adaptador
Descripción del producto
Diseño del producto Micrófono de mano

6
Instalación
Instrucciones
Antes de instalar la radio en un vehículo, lea
atentamente las siguientes instrucciones:
• La radio debe funcionar únicamente con un
sistema eléctrico de tierra negativa de 13,6
V ± 15%. Asegúrese de vericar la polaridad
y el voltaje de la fuente de alimentación del
vehículo.
• Compruebe cuánto tiempo se extenderán
los tornillos desde la supercie inferior de
la radio. Taladre el oricio de montaje con
cuidado para evitar dañar
• el cableado del vehículo y otras partes.
• Conecte la antena y el cable de alimentación
a la radio antes de instalar la radio en el
soporte.
• Utilice únicamente la antena y el cable de
alimentación autorizados por la Compañía.
• Instale la radio con el soporte de montaje
suministrado por la Compañía para evitar
que la radio se aoje en caso de acciden-
tes. La radio suelta puede causar lesiones
corporales.
• Instale la radio en un lugar donde pueda
llegar cómodamente al panel frontal.
• Deje suciente espacio en la parte posterior
de la radio para el cableado.
• Asegúrese de usar el fusible con la misma
especicación para el cable de alimentación
de CC al reemplazarlo.
Herramientas
• Taladro eléctrico
• Destornillador de cruz
• Destornillador torx T20
Operaciones básicas
Encender / apagar el equipo
Para encender o apagar la radio, mantenga
pulsado el botón de encendido.
Ajustar el volumen
Para aumentar o disminuir el volumen, gire el
mando del volumen.
Partes
No. Descripción
1Micrófono de mano
2Cable del micrófono
3Antena
4 Tornillos abrazadera de montaje
5 Abrazadera de montaje
6 Antena GPS
7 Cable alimentación

7
Funciones del teclado
Tecla Función
OK Pulsar para conrmar / entrar en
la función seleccionada
Salir Volver a la pantalla anterior / Salir
de la función actual
Llamar/
PTT
Pulsar para hacer una llamada /
mantener pulsado para enviar un
mensaje de voz.
Soltar para dejar de enviar
Colgar /
Bloqueo
pantalla
Pulsar para colgar / apagar la
pantalla
Subir Pulsar para seleccionar el ele-
mento anterior del menú
Bajar Pulsar para seleccionar el si-
guiente elemento del menú
Gestos
Iconos, botones, menús, teclados virtuales y
otros elementos a través de gestos.
Toque: toque ligeramente la pantalla
una vez con el dedo
Pulsación larga: mantenga pulsado el
icono para acceder al modo de edición
o al menú emergente en las áreas de
escritorio, lista, etc.
Deslizar: toque y mantenga presionada
la pantalla ligeramente y deslice, el área
objetivo seguirá la dirección del dedo
Zoom con dos dedos: en algunos pro-
gramas, como imágenes, puede acercar
o alejar la pantalla con dos dedos
Arrastrar: mantenga presionado el
icono con el dedo y mueva el dedo para
arrastrar el icono.
Tocar dos veces: toca la pantalla dos
veces seguidas
Instalar SIM / tarjeta de memoria
1. Abra la tapa inferior de la tarjeta en la radio
2. Alinee la tarjeta SIM / de memoria con el zócalo
correspondiente e inserte.
NOTA
Apague de forma segura y luego retire la tar-
jeta de memoria; de lo contrario puede causar
problemas en el sistema.
8
Especicaciones
Bandas
TDD-LTE
Banda 38 / 40 /41
FDD-LTE
Banda 1 / 3 / 5 / 7 / 8 / 20
WCDMA
Banda 1/2/5/8
GSM/GPRS/EDGE
Banda 2 / 3 / 5 /8
Pantalla 3.5” 480x320
Pantalla táctil P
S.O. Android 7.0
CPU ARM Cortex-A53 Quad-
core processor (1.2GHz)
RAM 1 GB
ROM 8 GB
Slot MicroSD 1
Slot tarjeta SIM 1
Tensión nominal 12-36V DC
Altavoz 4 W
Color Negro
Antena
Antena GSM exterior
conexión SMA
Antena GPS exterior
conexión SMA
Antena BT / WiFi incor-
porada
Cuidado y limpieza
Para garantizar un rendimiento óptimo y una larga
vida útil del producto, siga estos consejos.
•No perfore ni raspe el producto.
•Mantenga el producto alejado de sustancias
que puedan corroer los circuitos.
•No sujete el producto por la antena o el
cable del auricular.
•Cierre la tapa del conector de accesorios de
audio cuando no utilice ningún accesorio.
Limpieza
PRECAUCIÓN
Apague el equipo antes de limpiarlo
•Limpie con regularidad el polvo y las partí-
culas nas de la supercie del producto y la
pieza de carga con un paño limpio y seco
que no suelte pelusa o un cepillo.
•Use un limpiador neutro y una tela no tejida
para limpiar las teclas, los botones y la car-
casa frontal después de un uso prolongado.
No use preparación química tales como
quitamanchas, alcohol, aerosoles o prepa-
raciones de aceite, para evitar daños en la
supercie de la carcasa.
•Asegúrese de que el producto esté comple-
tamente seco antes de usarlo.
WiFi 2.4 GHz IEEE802.11
b/g/n
Bluetooth V4.0 / V3.0/ V2.1
GPS GPS (AGPS)/GLONASS/
BDS
USB USB 2.0
Tipo SIM Standard
Dimensiones 170 x 80 x 85 mm
(no incluye antena)
Peso 380 grs.

9
Guía de resolución de problemas
Problema Análisis Solución
La radio no se enciende El cable de alimentación puede estar desconectado o no
conectado de forma correcte a la toma de corriente.
Conecte correctamente el cable de alimentación y asegú-
rese de que la conexión sea segura.
Durante la recepción, la voz
es débil o intermitente.
El nivel de volumen puede ser bajo. Aumente el volumen.
La intensidad de la señal de comunicación puede ser débil. Asegúrese de que el terminal esté dentro de la cobertura
de la red.
Es posible que el altavoz esté bloqueado. Limpia la supercie del altavoz.
No puede usar el teclado
Es posible que el teclado no funcione temporalmente. Reinicie el equipo
El teclado está roto. Póngase en contacto con el distribuidor para obtener
servicio al cliente.
La pantalla LCD no muestra
ninguna información.
El micrófono de mano de la radio no está bien conectado Retire y vuelva a colocar el micrófono de mano
La pantalla está rota Póngase en contacto con el distribuidor para obtener
servicio al cliente.
El GPS no funciona
La antena GPS no está conectada correctamente. Properly connect the GPS antenna
Es posible que se encuentre en una posición desfavorable
donde la señal del GPS sea demasiado débil para recibirla.
Muévase a un área abierta y plana, reinicie la radio y vuelva
a intentarlo.
El terminal no se conecta a la
red móvil.
La tarjeta SIM no funciona correctamente o está fuera de
servicio.
Asegúrese de que la tarjeta SIM esté activada y funcione
correctamente.
La red móvil no está habilitada para la tarjeta SIM Comuníquese con el operador para habilitar la red móvil
La intensidad de la señal de comunicación puede ser débil. Asegúrese de que el terminal esté dentro de la cobertura
de la red
Tanto la red celular como la WLAN están encendidas, pero
la conexión WLAN es inestable. Apague la WLAN.
El terminal no detecta la
tarjeta SIM
Es posible que la tarjeta SIM no esté instalada correcta-
mente. Retire y vuelva a colocar la tarjeta SIM.
La tarjeta SIM puede sufrir un mal contacto causado por
contactos metálicos sucios o dañados. Limpie los contactos metálicos.

DECLARACION UE DE CONFORMIDAD
FALCON RADIO & ACCESSORIES SUPPLY, S.L. CIF: B-60565314.
C/ Vallespir, nº 13. Polígono Industrial Fontsanta.
08970 Sant Joan Despí - Barcelona (ESPAÑA).
Tel: (+34) 934 579 710 - www.telecomfalcon.com
Descripción del producto:
Equipo: TERMINAL MÓVIL PoC, GSM, 3G, 4G/LTE
CON DISPLAY DE 3,5”
Marca: SENHAIX
Modelo: SPTT-N61
Fabricante: Fujian Senhaix Electronic Technology Co., Ltd.
Fabricado en: China
El equipo indicado cumple con las disposiciones de la Directiva Europea
2014/53/UE del Parlamento Europeo y del consejo de 16 de abril de 2014 relativa a la
armonización de las legislaciones de los Estados miembros sobre la
comercialización de equipos radioeléctricos, transpuesta a la legislación española
mediante el Real Decreto 188/2016 y por la que se deroga la Directiva 1999/05/CE.
Las normas que garantizan la presunción de la conformidad con esta Directiva son:
EN 62368-1:2014+A11:2017
EN 62311:2008
EN 50665:2017
ETSI EN 301 489-1 V2.2.3: 2019-11
ETSI EN 301 489-17 V3.2.4: 2020-09
ETSI EN 301 489-19 V2.1.1: 2019-04
ETSI EN 301 489-52 V1.1.2:2020-12(Draft)
EN 55032:2015/A11:2020
EN IEC 61000-3-2:2019
EN 61000-3-3:2013/A1:2019
EN 55035:2017/A11:2020
ETSI EN 300 328 V2.2.2 (2019-07)
ETSI EN 303 413 V1.1.1 2017-06
ETSI EN 301 511 V12.5.1: 2017-03
EN 301 908-1 V13.1.1(2019-11)
EN 301 908-2 V13.1.1(2020-06)
ETSI EN 301 908-1 V13.1.1(2019-11)
ETSI EN 301 908-13 V13.1.1(2019-11)
El organismo notificado 1177 “TIMCO Engineering, Inc”ha expedido el Certificado
de Examen UE de Tipo nº: E-1177-210817.
Sant Joan Despí-Barcelona (España), a 19 de Noviembre de 2021
Xavier Falcón Vilaplana & Lluís Falcón Vilaplana, Administradores
FALCON RADIO & A.S., S.L.

CERTIFICADO DE GARANTÍA
FALCON RADIO & A.S., S.L.
CIF: B-60565314 C/ Vallespir, nº 13. Polígono Industrial Fontsanta. 08970 Sant Joan Despí. Barcelona (España).
Tfno: +34 93 457 97 10. www.telecomfalcon.com
Marca del aparato:
Modelo:
Nº serie:
Nombre del comprador:
Dirección:
Sello y nombre del establecimiento
vendedor:
Población:
Código postal:
Provincia:
Teléfono:
Fecha de compra:
ADVERTENCIA: La garantía es válida siempre y cuando esté total y debidamente cumplimentada de forma legible
y clara, presente el sello y nombre del establecimiento vendedor y tenga adjuntada la factura de compra del
aparato.
GARANTIA DE COMPRA:
La garantía incluye todos los derechos que tiene el consumidor o usuario de acuerdo con lo dispuesto en el Real
Decreto Legislativo 1/2007 de 16 de noviembre por el que se aprueba el texto refundido de la Ley General para la
Defensa de los Consumidores y Usuarios. Estas condiciones de garantía son independientes de los derechos que
tiene el consumidor o usuario frente al vendedor derivado del contrato de compra-venta del aparato.
Este aparato está garantizado por un periodo de 2 años, a reparar sin cargo cualquier avería o defecto siempre que
el mismo sea debido a un problema de fabricación o a un componente defectuoso que suponga un mal
funcionamiento del aparato.
La garantía es única e intransferible, no pudiendo ser emitida de nuevo ni en original ni en copia. La sustitución por
avería del aparato, cualquier accesorio o pieza del mismo no implicará prórroga de la garantía. En caso de que el
aparato sea reemplazado por otro nuevo, el plazo dispondrá siempre como mínimo de un periodo de 6 meses de
garantía desde la entrega, pero en ningún caso empieza un periodo nuevo de 2 años.
La garantía cubre la sustitución y reposición gratuita de todas las piezas que presenten defectos en los materiales y
componentes empleados en la fabricación y/o montaje del aparato.
La comprobación de los accesorios es responsabilidad del cliente final en el momento de la compra del aparato.
La garantía no cubre las baterías recargables aunque éstas formen parte del aparato debido a que se consideran
material fungible. Su posible defecto debe de ser comunicado en un plazo máximo de QUINCE DIAS contados a
partir de la fecha de compra del aparato.
La garantía no cubre las posibles averías causadas por accidentes, instalación y uso inadecuado, uso de accesorios
no originales o incompatibles, conexión a una tensión distinta a la especificada, ni reclamaciones debidas al
deterioro en el aspecto exterior por el uso normal o reparaciones o manipulaciones realizadas por personal ajeno
al Servicio Técnico.
La garantía quedará anulada en aparatos y accesorios en los que el número de serie haya sido modificado o se
presente ilegible.
La garantía también quedará anulada por cualquier actualización de firmware realizada por personal no autorizado,
modificación de rango de frecuencias así como cualquier daño en el transistor de potencia.
Para condiciones de garantía es necesario entregar en el establecimiento vendedor o en el Servicio Técnico el
aparato averiado junto con sus accesorios y los siguientes documentos:
1. Factura de compra o ticket original.
2. Descripción de la avería o defectos encontrados.
Le recomendamos que guarde la factura o ticket de compra del aparato durante su periodo de garantía.

1
USER MANUAL
N61 SMART LTE TERMINAL

2
Waste disposal. Directive 2012/19 / EU
Information on waste disposal of electrical and electronic equipment (WEEE).
This symbol on the product means that the electrical and electronic products used must not be mixed with household waste. For proper treatment,
recovery and recycling, take this product to designated collection points where it will be accepted for free.
The correct disposal of this product will help save valuable resources and prevent possible negative eects on human health and the environment,
which could otherwise arise from the improper handling of waste..
Contact your local authority for more information about the nearest collection point. Sanctions may be applied for the incorrect disposal of this waste, in accor-
dance with its national legislation.
These symbols on the batteries mean:
Pb = contains more than 0.004 percent by weight of lead
Cd = contains more than 0.002 percent by weight of cadmium
Hg = contains more than 0.0005 percent by weight of mercury
You can also send the transceiver and the battery to our warehouse. Postal fees must be paid by the sender.
This device complies with Directive 2011/65/EU and its subsequent modications according to Directive 2015/863/EU on restrictions on the use of
modications of hazardous substances in the manufacture of electrical and electronic equipment.
European Union states of permitted use:
AT BE BG HR CY CZ DK
EE FI FR DE EL HU IE
IT LV LT LU MT NL PL
PT RO SK SI ES SE UK

3
Preface
Thank you for purchasing this product. This manual includes a description of the
functions and step-by-step procedures for use.
To avoid bodily injury or property loss caused by incorrect operation, please carefully read
the user manual before use.

4
CONTENTS
Packing list..................................................................................................................................................................................................................................5
Product Overview.......................................................................................................................................................................................................................5
Product layout...................................................................................................................................................................................................................5
Palm microphone..............................................................................................................................................................................................................5
Installation ..................................................................................................................................................................................................................................6
Instructions .......................................................................................................................................................................................................................6
Tools .................................................................................................................................................................................................................................6
Parts .................................................................................................................................................................................................................................6
Basic operations ........................................................................................................................................................................................................................6
Turning the radio On or O ...............................................................................................................................................................................................6
Adjusting the volume ........................................................................................................................................................................................................6
Keypad functions..............................................................................................................................................................................................................7
Operation gesture.............................................................................................................................................................................................................7
Install SIM / Memory card.................................................................................................................................................................................................7
Technical specications............................................................................................................................................................................................................8
Care and cleaning......................................................................................................................................................................................................................8
Product care .....................................................................................................................................................................................................................8
Troubleshooting .........................................................................................................................................................................................................................9
Declaration of conformity .......................................................................................................................................................................................................11

5
Contents
1
Contents
Packing List
Product Overview
Product Layout
Installation
Instructions
Tools
Parts
Basic Operations
Turning the Radio On or Off
Adjusting the Volume
Keypad Functions
Operation Gesture
Install SIM / Memory Card
Technical Specifications
Care and Cleaning
Product Care
Product Cleaning
Troubleshooting
1
2
2
2
3
3
3
3
3
3
3
4
4
4
5
5
5
5
6
Packing List
Item Quantity (PCS)
Mobile Radio
Palm Microphone 1
1
Mountin Bracket
1
1
2Mounting Bracket Screw
GPS Antenna
Antenna
Optional Accessories: Car Charge, Adaptor
1
1
Product Overview
Product Layout
Mobile Radio
Power On/Off
Volume Knob
Microphone
Jack
SOS
MIC
USB Port
Audio Port GSM Antenna
Speaker GPS Antenna Power Connector
Screen
Exit
Keypad
MENUHOME
Palm Microphone
Microphone
Belt Clip
2
NOTE:
Please unpack carefully and check that you have
received the following items. If any item is missing or
damaged, please contact your dealer.
Power Cord
SIM / TF Card
PTT Key
Exit
Microphone
Keypad
MENU
UP
DOWN
SOS

6
Installation
Instructions
Tools
Electric drill
Cross head screwdriver
T20 torx screwdriver
Parts
2
1
NO. Part Name
Palm Microphone
Palm Microphone Cord
3 Antenna
4 Mounting Bracket Screws
5 Mounting Bracket
6 GPS Antenna
7 Power Cord
1
3
2
4
5
7
Black: Cathode
Blue: ACC
Red: Anode
6
Basic Operations
Turning the Radio On or Off
To turn the radio on or off, long press the
Power Knob.
Adjusting the Volume
To increase or decrease the volume, Rotate the
Volume Knob
3
Keypad Functions
Exit Key
UP
DOWN
Dialing/PTT Hand Up
Screen Lock
OK
Exit Key
UP
DOWN
Dialing / PTT
Hang Up /
Screen Lock
OK
Key Function
Short press to confirm/Enter
selected function
Return to previous screen/Exit
current function
Short press to make a call/Long
press to send voice message,
release to stop sending
Short press to hang up/turn off
screen
Short press to select the last
item in the menu
Short press to select the next
item in the menu
Operation Gesture
Double tap: Tap the screen twice in
succession.
Two-finger zoom: In some programs such
as pictures, you can zoom in or out with
two fingers on the screen
Swipe: Tap and hold the screen lightly and
slide, the target area will follow the direc-
tion of the finger.
Long press: Press and hold the icom to
enter e di t mode or p op-up men u on the
desktop, list, etc areas.
Tap: Lightly touch the screen once with
your finger.
Operate icons, buttons, menus, virtual keyboards
and other items through gestures.
Drag: Hold down the icon with your finger
and move your finger to drag the icon.
Install SIM / Memory Card
1. Open the bottom card cover of the two way
radio
2.Align the SIM/memory card with the corre-
sponding socket and insert
Please safely uninstall or shut down and
then remove the memory card, Otherwise
it may cause system problems.
4
Before installing the radio in a vehicle, read the fol-
lowing instructions carefully:
The radio must work with a 13.6V±15% nega-
tive ground electrical system only. Ensure to
check the polarity and voltage of the vehicle
power supply.
Check how long the screws will extend from
the bottom surface of the radio. Drill the
mounting hole cautiously to avoid damage to
the vehicle wiring and other parts.
Connect the antenna and power cord to the
radio before you install the radio in the brack-
et. Use the antenna and power cord autho-
rized by the Company only.
Insta ll the ra dio wit h the mounting bra cket
supplied by the Company to avoid radio
lo ose ne ss in c ase of ac cid en ts. Th e loo se
radio may cause bodily injury.
Install the radio in a location where you can
reach the front panel conveniently.
Keep sufficient clearance at the back of the
radio for wiring.
Be sure to use the fuse with the same specifi-
cation for the DC power cord upon replace-
ment.
NOTE:

7
Installation
Instructions
Tools
Electric drill
Cross head screwdriver
T20 torx screwdriver
Parts
2
1
NO. Part Name
Palm Microphone
Palm Microphone Cord
3 Antenna
4 Mounting Bracket Screws
5 Mounting Bracket
6 GPS Antenna
7 Power Cord
1
3
2
4
5
7
Black: Cathode
Blue: ACC
Red: Anode
6
Basic Operations
Turning the Radio On or Off
To turn the radio on or off, long press the
Power Knob.
Adjusting the Volume
To increase or decrease the volume, Rotate the
Volume Knob
3
Keypad Functions
Exit Key
UP
DOWN
Dialing/PTT Hand Up
Screen Lock
OK
Exit Key
UP
DOWN
Dialing / PTT
Hang Up /
Screen Lock
OK
Key Function
Short press to confirm/Enter
selected function
Return to previous screen/Exit
current function
Short press to make a call/Long
press to send voice message,
release to stop sending
Short press to hang up/turn off
screen
Short press to select the last
item in the menu
Short press to select the next
item in the menu
Operation Gesture
Double tap: Tap the screen twice in
succession.
Two-finger zoom: In some programs such
as pictures, you can zoom in or out with
two fingers on the screen
Swipe: Tap and hold the screen lightly and
slide, the target area will follow the direc-
tion of the finger.
Long press: Press and hold the icom to
enter e di t mode or p op-up men u on the
desktop, list, etc areas.
Tap: Lightly touch the screen once with
your finger.
Operate icons, buttons, menus, virtual keyboards
and other items through gestures.
Drag: Hold down the icon with your finger
and move your finger to drag the icon.
Install SIM / Memory Card
1. Open the bottom card cover of the two way
radio
2.Align the SIM/memory card with the corre-
sponding socket and insert
Please safely uninstall or shut down and
then remove the memory card, Otherwise
it may cause system problems.
4
Before installing the radio in a vehicle, read the fol-
lowing instructions carefully:
The radio must work with a 13.6V±15% nega-
tive ground electrical system only. Ensure to
check the polarity and voltage of the vehicle
power supply.
Check how long the screws will extend from
the bottom surface of the radio. Drill the
mounting hole cautiously to avoid damage to
the vehicle wiring and other parts.
Connect the antenna and power cord to the
radio before you install the radio in the brack-
et. Use the antenna and power cord autho-
rized by the Company only.
Insta ll the ra dio wit h the mounting bra cket
supplied by the Company to avoid radio
lo ose ne ss in c ase of ac cid en ts. Th e loo se
radio may cause bodily injury.
Install the radio in a location where you can
reach the front panel conveniently.
Keep sufficient clearance at the back of the
radio for wiring.
Be sure to use the fuse with the same specifi-
cation for the DC power cord upon replace-
ment.
NOTE:

8
To guarantee optimal performance as well as a long
service life of the product, please follow these tips.
Technical Specifications
Including
Dimension
Weight
Screen Size
Touch LCD Screen
Color
Antenna
WiFi
Bluetooth
GPS
USB
SIM Type
Function Key
Knob Switch
Mobile Radio,
External Antenna,
Keys, Mounting Bracket Kit
Hand Microphone
170x80x85mm
(excluding antenna)
380g
3.5 inches, 480x320
Support
Black
GPS antenna with external
antenna
BT/WiFi antenna is built-in
FPC antenna
IEEE802.11 b/g/n
Support
GPS/AGPS
Support, USB 2.0
Standard sim card
SOS, OK, Exit, UP, Down,
Dialing, Hang up
Power on/off, Volume adjust
Care and Cleaning
Product Care
Do not pierce or scrape the product.
Keep the product far away from substances
that can corrode the circuitry.
Clean up the dust and fine particles on the
product surface and charging piece with a clean
and dry lintfree cloth or a brush regularly.
Use neutral cleanser and a non-woven fabric to
clean the keys, knobs, and front case after
long-time use. Do not use chemical preparation
such as stain removers, alcohol, sprays or oil
preparations, so as to avoid surface case
damage.
Do not hold the product by the antenna or
earpiece cable.
Close the audio accessory connector cover
when no accessory is in use.
ProductCleaning
Turn the product off before cleaning.
Make sure the product is completely dry before
use.
5
Troubleshooting
You cannot turn the radio on.
Phenomena Analysis Solution
The power cord may be disconnected or not securely
connected to the outlet.
Properly connect the power cord and ensure secure
connection.
You cannot use the keys.
The keypad may not work temporarily.
The keypad is broken.
Restart the radio.
Contact the dealer or our Company for customer service.
The LCD does not display
any information.
The palm microphone of the transmitting radio is not
connected properly. Remove and reattach the palm microphone.
The display is broken. Contact the dealer or our Company for customer service.
The GPS does not work.
The GPS antenna is not connected properly. Properly connect the GPS antenna.
You may be in an unfavourable position where the GPS
signal is too weak to receive.
Move to an open and flat area, restart the radio, and try
again.
During receiving, the voice is
weak or intermittent.
The volume level may be low.
The communication signal strength may be weak.
The speaker may be blocked.
Increase the volume.
Make sure the terminal is within the network coverage.
Clean the surface of the speaker.
6
Caution:
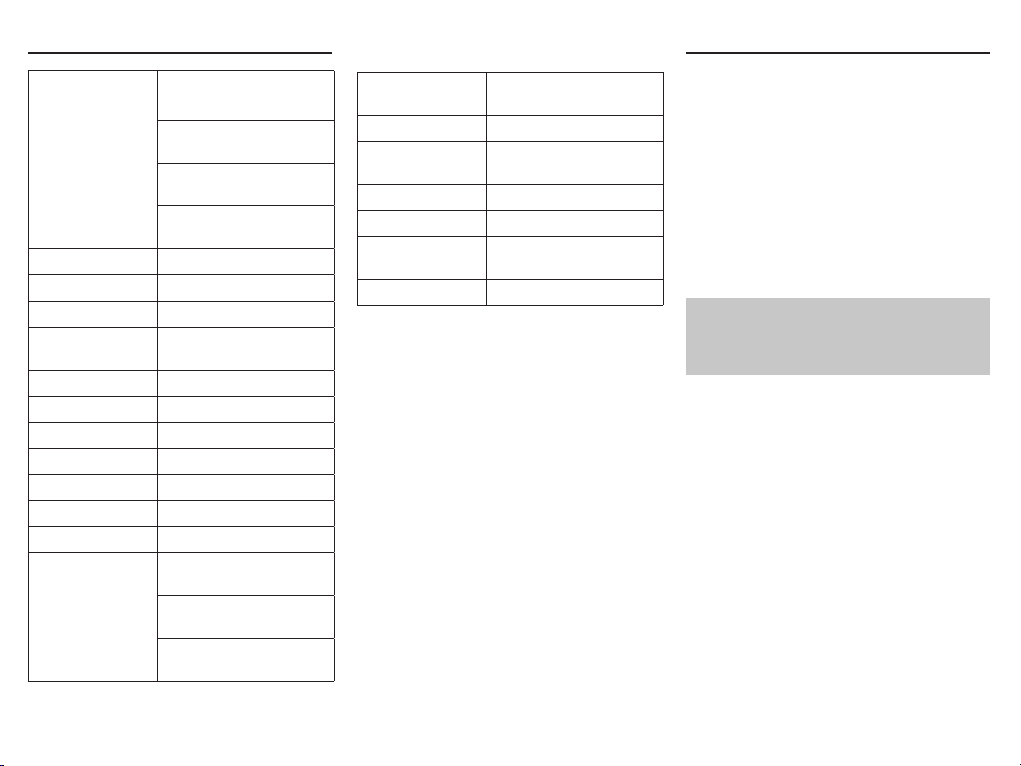
Specications
Bands
TDD-LTE
Bands 38 / 40 /41
FDD-LTE
Bands 1 / 3 / 5 / 7 / 8 / 20
WCDMA
Bands1/2/5/8
GSM/GPRS/EDGE
Bands 2 / 3 / 5 /8
Display 3.5” 480x320
Touch screen P
O.S. Android 7.0
CPU ARM Cortex-A53 Quad-
core processor (1.2GHz)
RAM 1 GB
ROM 8 GB
Slot MicroSD 1
Slot SIM card 1
Operating voltage 12-36V DC
Speaker 4 W
Color Black
Antenna
GSM: SMA connection
GPS: SMA connection
Built-in BT / WiFi antenna
WiFi 2.4 GHz IEEE802.11
b/g/n
Bluetooth V4.0 / V3.0/ V2.1
GPS GPS (AGPS)/GLONASS/
BDS
USB USB 2.0
SIM type Standard
Dimensions 170 x 80 x 85 mm
(w/o antenna)
Weight 380 grs.
Table of contents
Languages:


