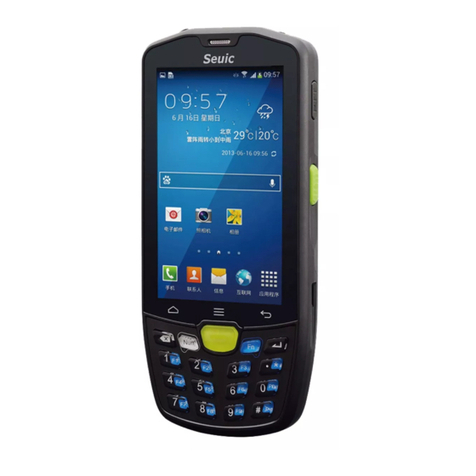
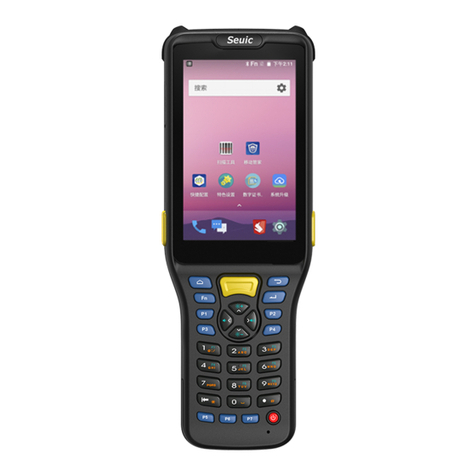
Seuic AutoID 9HC Instruction manual

Jiangsu SEUIC Technology Co., Ltd AUTOID 9/9HC SERIES USER GUIDE
AUTOID9/9HC Handheld Terminal
Quick User Guide Manual
SEUIC Technology
Welcome To Use AUTOID 9/9HC Series

Jiangsu SEUIC Technology Co., Ltd AUTOID 9/9HC SERIES USER GUIDE
Contents
Guidelines............................................................................................................................3
Laser Scanning Engine Guidelines...............................................错误!未定义书签。
Safety Guidelines..........................................................................错误!未定义书签。
Maitainance Guidelines................................................................................................3
Introduction ofAppearance .................................................................................................3
Keyboard ..............................................................................................错误!未定义书签。
Quick Use Guide ..................................................................................错误!未定义书签。
Initial Use.......................................................................................错误!未定义书签。
Power On.......................................................................................错误!未定义书签。
Power Off.......................................................................................错误!未定义书签。
Restart...........................................................................................错误!未定义书签。
Install SIM Card............................................................................................................7
Install SD Card.............................................................................................................7
Install Battery.................................................................................错误!未定义书签。
Remove Battery.............................................................................错误!未定义书签。
About Charging.....................................................................................错误!未定义书签。
Charging Time...............................................................................错误!未定义书签。
Charging Temperature...................................................................错误!未定义书签。
Battery Powered............................................................................错误!未定义书签。
Battery Use Guidelines ..............................................................................................12
LED Indicator Light.....................................................................................................12
Main Screen..........................................................................................错误!未定义书签。
Status Bar Icon..............................................................................错误!未定义书签。
Setettings..............................................................................................错误!未定义书签。
WIFI............................................................................................................................14
Mobile netwotks.............................................................................错误!未定义书签。
Bluetooth.......................................................................................错误!未定义书签。
Data usage....................................................................................错误!未定义书签。
More ..............................................................................................错误!未定义书签。
Airplane mode........................................................................错误!未定义书签。
VPN.....................................................................................................................29
NFC.....................................................................................................................29
Tethering&portable hotspot....................................................错误!未定义书签。
Prohibit drop-down menu..............................................................错误!未定义书签。
Gloves mode.................................................................................错误!未定义书签。
Fn StickyKey...............................................................................................................33
Shielded first virtual key ..............................................................错误!未定义书签。
Shielded second virtual key ........................................................错误!未定义书签。
Sound............................................................................................错误!未定义书签。
Display...........................................................................................错误!未定义书签。
Storage..........................................................................................错误!未定义书签。

Jiangsu SEUIC Technology Co., Ltd AUTOID 9/9HC SERIES USER GUIDE
Battery...........................................................................................错误!未定义书签。
Apps ..............................................................................................错误!未定义书签。
Location access.............................................................................错误!未定义书签。
Security..........................................................................................错误!未定义书签。
Language & input..........................................................................错误!未定义书签。
Backup & reset ............................................................................错误!未定义书签。
Add account ..................................................................................错误!未定义书签。
Data & time....................................................................................错误!未定义书签。
Accessibility...................................................................................错误!未定义书签。
Developper options .......................................................................错误!未定义书签。
About phone..................................................................................错误!未定义书签。
Scan tool...............................................................................................错误!未定义书签。
APK import............................................................................................错误!未定义书签。
System update......................................................................................错误!未定义书签。
Mobile Butler.........................................................................................错误!未定义书签。
Troubleshooting....................................................................................错误!未定义书签。

Jiangsu SEUIC Technology Co., Ltd AUTOID 9/9HC SERIES USER GUIDE
3
Guidelines
Laser scanning engine guidelines
Laser radiation: Users are prohibited to look straightly at a laser beam .
Safety Guidelines
Please use specified battery& charger from SEUIC , or it may cause battery leakage , overheat , burst and
on fire .
Please don‟t use un-normal charger , or it will case electrical shock ,smoking and damage to charger
Please don‟t use the damaged charger or it will cause fire and electric shock
Please don‟t disassemble or refit charger , or it will cause personal injury , electric shock , fire and
damage to charger .
Please grip charger when pull out plug , it will cause electric shock , fire and damage to wires if pull
power line
Please use soft cloth to clean device , battery and charger
Please don‟t use alcohol , diluent or benzene and other solutions to clean device
Maintenance Guidelines
This product has waterproof and dustproof functions, but still please avoid operating under the
conditions of extremely high temperature, extremely low temperature or wet environment. Please
check the temperature and humidity standard in our product datasheet.
To push hard on the screen maybe damage the screen. Please don‟t click on the screen by touch pen
to avoid scratch or damage of screen. When clean the screen, please spray a little of commercial
LCD screen cleaner into the soft cloth to gently wipe. Don‟t directly spray cleaner into screen.
Please do not use any chemical cleaner to wipe the LCD screen.
Keep scanning window clean without stain and do not use sharp objects to scratch.
If do not use this product for a long time, please be sure to download the data and save to the

Jiangsu SEUIC Technology Co., Ltd AUTOID 9/9HC SERIES USER GUIDE
4
computer , remove the battery. Please pack and stock the device and battery separately.
Both battery and stand-by battery need much time to recharge when you use the device at the first
time or reuse the device after long-time stock.
Please write down the status of malfunction and contact engineers immediately when your device has
malfunction.
Introduction of appearance
Keyboard
In AUTOID 9/9HC there are 22 keys in keyboard +2 side keys+ 1 PTT key ; 3 buttons in touch panel
( Home , Back , Menu) .
Key/Button guide:
Button
Main function
Function introduction
Home
Click to return desktop
Long time click could open latest used
apps list
Menu
Click to open current desktop menu
Back
Click could return to previous screen or
quit App.
At input screen, click could close screen
keypad
Scan button
Normally to be used as scanning key to scan
barcodes. In camera screen,to be used as
photo taking function
Side scan button
Normally to be used as scanning key to scan
barcodes. In camera screen,to be used as
photo taking function
PTT
Talkback function,press it for talkback
function

Jiangsu SEUIC Technology Co., Ltd AUTOID 9/9HC SERIES USER GUIDE
5
Num lock button
To be used for digital input
Fn lock button
To be used for Fn input mode locking
Lock screen
button
Touch screen not operated after lock screen
been locked with screen displaying
Enter button
Confirm
Direction button:
up
Direction button:
down
Direction button:
left
Direction button:
right
Delete button
0
0 key and symbol
It‟s F10 key under Fn mode
.
.button
It‟s * key under Fn mode
#
# button
It‟s flashlight key under Fn mode
1
Number key1 and symbol
It‟s F1 key under Fn mode
2
Number key 2,A.B.C,
It‟s F2 key under Fn mode

Jiangsu SEUIC Technology Co., Ltd AUTOID 9/9HC SERIES USER GUIDE
6
3
Number key 3,D.E.F
It‟s F3 key under Fn mode
4
Number key 4,G.H.I,
It‟s F4 key under Fn mode
5
Number key 5,J.K.L,
It‟s F5 key under Fn mode
6
Number key 6,M.N.O,
It‟s F6 key under Fn mode
7
Number key 7,P.Q.R.S
It‟s F7 key under Fn mode
8
Number key 8,T.U.V
It‟s F8 key under Fn mode
9
Number key 9,W.X.Y.Z
It‟s F9 key under Fn mode
Quick Use Guide
Initial use
Insert battery and close the battery cover, press power key few second to turn on the device. The
device will enter into sleep mode when press power button while system in working condition; the
system will wake up and lighten screen when press power button while the device in sleep state.
Power on
Please press power key to start the device. Under deep sleep mode, press power key to wake up
system. If battery installed, please make sure battery cover already been covered correctly.
Power off
When device is open, but not under sleep status, press power key for 2 seconds, the shutdown

Jiangsu SEUIC Technology Co., Ltd AUTOID 9/9HC SERIES USER GUIDE
7
interface will appear, then select “power off “ to power off the device.
Restart
When device is open, but not under sleep status, press power key for 2 seconds , the restart interface
will appear, then select “restart”to restart the device.
Install SIM Card
Install SIM card as below instructions:
Insert SIM as following indicated direction
Install SD Card
Install SD card as below instructions::
Insert SD card as following indicated direction(microSD or microSDHC).

Jiangsu SEUIC Technology Co., Ltd AUTOID 9/9HC SERIES USER GUIDE
8
Notes:1. PSAM card is not supported currently
2This device doesn‟t support hot plug and must be reset after plugging card.
Install Battery
Please follow the below steps when install battery:
1. One hand holds device , the other hand turns toggle switch to unlocked side(right side )
2. Remove the battery cover;
3. Insert battery into battery compartment at appropriate angle
4. Ensure the battery well contact with battery pins and press down the battery

Jiangsu SEUIC Technology Co., Ltd AUTOID 9/9HC SERIES USER GUIDE
9
5. Pull up the battery locker and ensure battery to be locked well;
6. Put battery cover back on the cover locking slot then press slightly to lock it
7. Then press down slightly to lock the cover;
8. Turn toggle switch to the locking side(left side)

Jiangsu SEUIC Technology Co., Ltd AUTOID 9/9HC SERIES USER GUIDE
10
During device transportation or long time not use it, please remove the battery
from device and save it independently with the device.
Note:Any impropriate battery using method would effect battery using life.
Remove battery
Remove battery as following steps:
1. Push the toggle switch to the unlock side(right side);
2. Remove the battery cover;
3.Pull down the battery locker to loose the battery;

Jiangsu SEUIC Technology Co., Ltd AUTOID 9/9HC SERIES USER GUIDE
11
4. Uninstall battery
About charging
Because main battery only has small amount of power to be used for only testing purpose when
leaving the factory; it must be charged before using when you receive the device. After installing main
battery, please connect the device to the power adapter for charging. AUTOID 9/9HC series could
also be charged through optional accessory of cradle .
Charging time
Battery:it need about four hours for the first charging through charging power adaptor, red LED
indicator means charging; the LED indicator becomes green means battery been fully charged.
Charging temperature
Best charging temperature is 180C~250C。

Jiangsu SEUIC Technology Co., Ltd AUTOID 9/9HC SERIES USER GUIDE
12
If temperature blow-100C or over 550C the battery would not be chargable.
Battery Powered
If open wireless network services or data acquisition program, the battery power will be much lost, so
if don‟t use these function, please be sure to close off them to save the battery power.
In order to avoid working inconvenience due to battery power shortage, we suggest that you prepare
a main battery with full power or device connection with external power supply.
Notice:If you don’t use device for long time,please charge device for every two month at
least(to ensure backup battery will not be over-discharged).
Notifications about battery usage
If battery power been used out and connect with charger, it‟s normally that the device
could not be powered on at once. Please power on the device to use after a period
charging time.
Main battery is rechargeable battery, but if the device stand-by time dropped too much,
please change a new battery.
Please charging the battery at appropriate temperature range
When battery power in short status, device would appear low battery power indication. If
battery power too low, the device would automatically been powered off.
LED indicator light
LED light on the left side of upper right show battery power and charging status with different color.
1、Without connection of USB, charging adapter and plug, red light flashing means low battery (red light will be bright
when system in sleep mode), please charge in time;
2、Connect USB , charging adapter and plug, red light means battery is under charging ;
3、Connect USB, charging adapter and plug,green light means full charging .
If LED light on the right side of the upper right twinkles blue(in breathing twinkling status) it means
there is unread message, please check the message in time.
During barcode scanning, the LED indicators in the left side of device upper right position and the one
in the right side of device upper left position become red and flashing once means scanning the target
barcode successfully; otherwise it means failed to capture the barcode.
Remark:When the device under charging, the blue indicator light will not be lighted.

Jiangsu SEUIC Technology Co., Ltd AUTOID 9/9HC SERIES USER GUIDE
13
Main Screen
AUTOID 9/9HC devices totally have five home screens, sliding screen to the left or right
to switch each screen . In the applications showing on the screen , click any application icon
to open this application .
①Status Bar :showing messages and status icon
②Display Area:be used for placing application icon , desktop files ,
small tools
③Shortcut Action Bar: click it then enter into the corresponding application
④Application Tray:click it to check all applications
Status Bar Icon
Status Bar Icon and Notification Bar Icon are in Status Bar at the top of the screen ,
displaying device status information and notification , as follows .
Icon
Explanation
Icon
Explanation
Detected the available
WLAN network
Signal strength
Connected WLAN network
No SIM card
①
②
③
④

Jiangsu SEUIC Technology Co., Ltd AUTOID 9/9HC SERIES USER GUIDE
14
Already opened portable
WLAN
Mobile network is connected
Silent mode
Airplane mode
Vibrate mode
Opened scanning
Missed calls
Battery charging
New messages
Battery with full charging
Captured screenshot
Low battery
Clock
Multi-notification icon , beyond
display range
Preparing microSD card
Inserted earphone
Bluetooth
GPS is positioning
Uploading data
Downloading data
USB debugging
USB connect
Settings
Wi-Fi
Search this icon:
->settings
->wireless and network
->WLAN
Max range of wireless network access is 450 inches/about 150m(2.4G) or 300
inches/about 100m(5G) .( Notice : Industrial AP , open area ) .If need use the Wi-Fi in the
device , you must be connected to wirelessAP or Hot spot.
Notice:The availability and coverage of Wi-Fi signal depends on quantity of devices,
physical performance, and other objects signals penetrated.
Open Wi-Fi and connect to the wireless network

Jiangsu SEUIC Technology Co., Ltd AUTOID 9/9HC SERIES USER GUIDE
15
1. Click WLAN button to open Wi-Fi. Automatic scanning can use wireless network.
2. Then network name and security settings of the all scanned Wi-Fi networks will be
listed (open networks or encrypted networks).
3. Please click one the Wi-Fi networks to do connection . When you choose the open
network , it will automatically connect this network. If you choose the encrypted network,
please input the corresponding password then do connection .
1. WLAN frequency band settings(Advanced WLAN(press Menu ) —>WLAN frequency
band) ,click only using 5GHz/2.4GHz frequency band ,only can search AP with
5GHz/2.4GHz frequency band .
Open it to search network
Click it to connect network

Jiangsu SEUIC Technology Co., Ltd AUTOID 9/9HC SERIES USER GUIDE
16
2. You can set Wi-Fi roaming trigger、roam delta、roam period by yourself according to
your detailed demands through advanced settings(in Wi-Fi searching interface ,press Menu
key —> Advanced).
(1)Roaming trigger :When signal value of the connected AP is lower than the set
threshold , roaming mechanism will be triggered , like the picturing showing , roaming
trigger is set as -65dBm,the roaming will be trigged if it‟s lower than -65dBm.
(2)Roam delta:When the difference between of two AP reaches the set value,

Jiangsu SEUIC Technology Co., Ltd AUTOID 9/9HC SERIES USER GUIDE
17
roaming will start , and connect to the AP with better signal value , if the difference between
of two AP is more than 5dBm as follow(also need reach roaming trigger standard), then it
can roam normally.
(3)Roam period:The time interval of last roaming and this roaming reaches the set
interval,it will happen to roam , it will roam when the time interval exceeds 20s as follow , or
it will not happen . This operation will prevent frequent roaming.
6.Wi-Fi status information , you can check Wi-Fi relevant information through Wi-Fi
status information ,click Refresh stats,like:Wi-Fi state、connected AP、signal value、MAC
address etc.,as shown in the figures;
7.Wi-Fi reset default ,click it , WLAN roaming trigger , roam delta and roam period
can back to the default. As the picture showing ,Wi-Fi will be automatically closed after
clicking this item , Wi-Fi will be back to the default after restarting.

Jiangsu SEUIC Technology Co., Ltd AUTOID 9/9HC SERIES USER GUIDE
18
Notice:When device connects to the wireless network ,status bar will display Wi-Fi icon
( ) and approximate signal strength (light strip).If you click the current wireless
network ,it will display Wi-Fi network name , status , speed , signal strength ,security and IP
address.
If you want to remove the wireless network settings on device , please click the
connected AP for long time , please choose “forget network”, this operation will cancel this
AP ,like the picture showing :

Jiangsu SEUIC Technology Co., Ltd AUTOID 9/9HC SERIES USER GUIDE
19
Notice:
Reopen Wi-Fi, if device connects the previous connected wireless network with
encryption, no need to input corresponding password again. Wi-Fi networks can search
automatically for themselves , no need do extra steps to connect Wi-Fi network .
Connect to other Wi-Fi networks
1.In Wi-Fi selection interface , please touch refresh button ,new searching Wi-Fi
networks will be displayed in Wi-Fi network lists.
2.Clcik other Wi-Fi network , device will be connected to this network .
Mobile Networks
Look for this icon:
->Settings
->More
->Mobile networks
1)Open Data enabled ,it will create the statistics related to the mobile data traffic
costs .
2)Data roaming:after opening ,enter into roaming environment , data communication
will be directly switched to the roaming status .
This manual suits for next models
1
Table of contents
Other Seuic Touch Terminal manuals

