manuals.online logo
Brands
  1. Home
  2. •
  3. Brands
  4. •
  5. Sennheiser
  6. •
  7. Receiver
  8. •
  9. Sennheiser EM 1031-U User manual

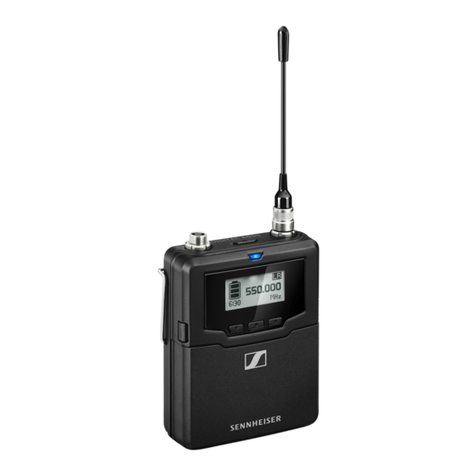
Sennheiser EM 1031-U User manual

EM 1031-U
GEBRAUCHSANLEITUNG
INSTRUCTIONS FOR USE
NOTICE D‘EMPLOI
ISTRUZIONI PER L‘USO
INSTRUCCIONES PARA EL USO
GEBRUIKSAANWIJZING
EM 1031-U, BDA 9/98 06.11.2001, 9:22 Uhr1
2
Deutsch
English
Español....................................................................................................... 3
Français
Italiano
Nederlands ............................................................................................... 21
EM 1031-U, BDA 9/98 06.11.2001, 9:22 Uhr2
3
Sie haben eine gute Wahl getroffen. Mit diesem Empfänger haben Sie ein
Produkt erworben, mit dem Sie professionell arbeiten können.
AuchdiesesSennheiser-ProduktwirdSielangeJahre durch Zuverlässigkeit,
Wirtschaftlichkeit und einfache Bedienung überzeugen. Dafür garantiert
Sennheiser mit seinem guten Namen und seiner in mehr als 50 Jahren
erworbenen Kompetenz als Hersteller hochwertiger elektroakustischer
Produkte "Made in Germany".
Thank you for choosing Sennheiser! You have made an excellent choice.
The EM 1031-U receiver has been designed for professional work. It will
giveyou reliable operationovermany years. AllofSennheiser´s professional
expertise and more than fifty years of experience have gone into the
creation of this state-of-the-art product.
¡Ha hecho usted una elección perfecta! Con este receptor ha adquirido un
producto con el cual puede trabajar como un profesional.
También este producto Sennheiser le convencerá durante largos años por
su fiabilidad, su rentabilidad y su manejo sencillísimo. Se lo garantiza
Sennheiser con su excelente renombre y la experiencia adquirida en más
de 50 años como fabricante de magníficos productos electroacústicos
„made in Germany“.
EM 1031-U, BDA 9/98 06.11.2001, 9:22 Uhr3
4
P
P....... Netzschalter
C....... Kanalwahlschalter
L1....... Anzeige des HF-Pegels (RF = Radio Frequency)
L2....... Anzeige des aktiven Diversity-Kanals
L3....... Anzeige des Tonsignalpegels (AF = Audio Frequency)
P....... ON/OFF switch
C....... channel selector switch
L1....... RF level indicator (RF = radio frequency)
L2....... LED indicator showing the active diversity channel
L3....... AF level indicator (AF = audio frequency)
P....... interruptor
C....... conmutación de canal
L1....... indicación del nivel A. F. (RF = Radio Frequency)
L2....... indicación del canal "diversity" activo
L3....... indicaciòndel nivel de la señalacústica (AF= Audio Frequency)
L1L3CL2
EM 1031-U, BDA 9/98 06.11.2001, 9:22 Uhr4
5
ANT.(B) ...... Antenneneingang Bfür Diversity-Betrieb (BNC)
B1...... NF-Ausgang unsymmetrisch 6,3 mm ø Klinke (Line)
B2...... NF-Ausgang symmetrisch, XLR-3
V...... Einstellung NF-Ausgangspegel (wirkt auf beide Ausgänge)
D...... Anschlußbuchse für die Stromversorgung (Steckernetzteil)
ANT.(A) ...... Antenneneingang Afür Diversity-Betrieb (BNC)
ANT.(B) ...... antenna socket Bfor diversity operation (BNC)
B1...... AF output, unbalanced, 1/4” (6.3 mm) jack (line level)
B2...... AF output, balanced, XLR-3M
V...... volume control (for both outputs)
D...... DC input socket for connecting the plug-in mains unit
ANT.(A) ...... antenna socket Afor diversity operation (BNC)
ANT.(B) ...... entrada de antena Bpara funcionamiento "diversity" (BNC)
B1...... salida B.F. asimétrica jack de 6,3 mm ø (Line)
B2...... salida B.F. simétrica XLR-3
V...... regulación nivel de salida B.F. (acciona sobre ambas salidas)
D...... casquillodeconecciónparalaalimentación(alimentaciónaconectar)
ANT.(A) ...... entrada de antena Apara funcionamiento "diversity" (BNC)
ANT.(B) ANT.(A)
B1B2V D
EM 1031-U, BDA 9/98 06.11.2001, 9:22 Uhr5
6
Leistungsfähiger und kompakter True-Diversity-Empfänger mit hohem
Bedienungskomfort. Passend zum Handsender BF 1081-U und zum
Taschensender BF 1083-U.
• Störungsfreier Betrieb durch True-Diversity-Technik
• Wirksame Rauschunterdrückung und hohe Dynamik durch
HiDyn plus und ASC (Automatic Squelch Control)
• Vorbereitet für den Einbau in 19" Rack, 1 HE
• Universeller Betrieb durch Steckernetzteil oder am
12 V-KFZ-Netz.
• Umschaltbar auf 16 Empfangsfrequenzen
Compact, powerful and easy-to-operate true diversity receiver. For use
with the BF 1081-U hand-held transmitter or the BF 1083-U pocket
transmitter.
• True diversity receiver ensures reliable operation
• HiDyn plus noise reduction system and ASC
(Automatic Squelch Control) for excellent dynamic range
• Suitable for 19” rack installation, 1 U high
• Power supply via supplied plug-in mains unit or external 12 V DC
• Switchable to 16 frequencies
Receptor „True Diversity“, muy potente y compacto, de manejo muy
sencillo. Se utiliza junto con el transmisor manual BF 1081-U y el
transmisor de petaca BF 1083-U.
• Funcionamientosin perturbaciones graciasa la técnica„True Diversity“
• Supresión efectiva de ruidos y excelente margen dinámico gracias al
HiDyn plus y ASC (Automatic Squelch Control)
• Listo para el montaje en el bastidor de 19", 1 HE
• Funcionamiento universal con el bloque de alimentación o con
alimentación de 12 V de la batería del automóvil
• Conmutable a 16 frecuencias de recepción
BF 1081-U
BF 1083-U
EM 1031-U
Produktbeschreibung / Product specifications /
Descripción del producto
EM 1031-U, BDA 9/98 06.11.2001, 9:22 Uhr6
7
D
An der Buchse Dwird die Versorgungsleitung vom Steckernetzteil
eingesteckt.
DieZuleitungvomNetzteil wird - wie abgebildet - durch die Zugentlastung
auf der Rückseite des Empfängers geführt.
Sowird verhindert, daß die Stromversorgung unabsichtlich herausgezogen
wird.Auchbeim Einbau im Rack sollten sie diese Zugentlastung unbedingt
nutzen, damit durch Vibrationen beim Transport der Stecker nicht
herausrutschen kann.
Plug the cable of the mains unit into socket Don the receiver´s back panel.
Thread the cable through the cable grip as shown on the above illustration.
The cable grip prevents the connector from being pulled off by accident.
You should also use it when you mount the receiver into a rack so that the
plug cannot come off due to vibrations during transport.
El cable de alimentación se conecta al casquillo D.
Como se indica en la figura, el cable del bloque de alimentación se pasará
a través de la argolla de contratracción que hay al dorso del receptor.
Con ello se impide que, inadvertidamente, pueda desconectarse la
alimentaciónde corriente. Este dispositivo de contratracción debe utilizarse
también al efectuar el montaje en el bastidor, para evitar que debido a las
vibraciones durante el transporte el enchufe pueda soltarse.
Stromversorgung und Zugentlastung / Power supply and cable grip /
Dispositivo de contratracción
EM 1031-U, BDA 9/98 06.11.2001, 9:22 Uhr7
8
Antennen anschließen / Connecting the antennae / Conectar las antenas
A(B) A(A)
Auf die Antennenbuchsen ANT.(A) und ANT.(B) werden die beiden
Teleskopantennen aufgesteckt. Antennenstäbe ganz ausziehen!
Wichtig: Für den Diversity-Betrieb (siehe auch Seite 14)
müssen beide Antennen angeschlossen sein!
Über den Betrieb mit abgesetzten Antennen (z.B. bei Festeinbau des
Empfängers im Rack) informiert Sie Ihr Sennheiser-Fachhändler. Er
liefert auch entsprechendes Zubehör.
Connect the two telescopic antennae to the BNC sockets ANT.(A) and
ANT.(B). Make sure that the antennae are extended to full length.
N.B.: For diversity operation both antennae
must be connected (see page 14).
Your Sennheiser distributor will be more than happy to provide you with
information on operation with remote antennae (e.g. for permanent
installation in a rack) and to supply you with the accessories required.
Las dos antenas telescópicas se conectan a los casquillos ANT.(A) y ANT.(B).
Sacar las antenas completamente.
Importante: Para el funcionamiento „Diversity“ (ver la página 14)
es necesario que ambas antenas estén conectadas.
Su agente Sennheiser le informará sobre el funcionamiento con antenas
remotas (p.ej. cuando el receptor se ha montado fijo en el bastidor). Le
suministrará también los accesorios correspondientes.
EM 1031-U, BDA 9/98 06.11.2001, 9:22 Uhr8
9
NF-Ausgänge / AF outputs / Salidas B.F.
B1B2V
NF-Anschlußbuchse B2: Symmetrischer Ausgang XLR-3
NF-Anschlußbuchse B1: Unsymmetrischer Ausgang 6,3 mm ø Klinke
Hinweis: Nur jeweils einen Ausgang benutzen!
Mit dem Regler Vwird der Ausgangspegel an den Buchsen
B1und B2 eingestellt.
AF output B2: balanced XLR-3M socket
AF output B1: unbalanced, 6.3 mm (1/4”) ø jack socket
N.B.: Use only one output.
Volume control Vadjusts the AF output level at both sockets B1and B2.
Casquillo de conexión B.F. B2: salida simétrica XLR-3
Casquillo de conexión B.F. B1: salida asimétrica, jack de 6,3 mm ø
Nota: ¡utilizar sólo una salida a la vez!
El nivel de salida en los casquillos B1y B2se ajusta con el regulador V.
EM 1031-U, BDA 9/98 06.11.2001, 9:22 Uhr9
10
Stimmt die Spannungsangabe auf dem Netzteil mit der vorhandenen
Netzspannung überein ?
Erst dann:
Steckernetzteil einstecken und EM 1031-U mit Schalter Peinschalten. Die
rote LED leuchtet - das Gerät ist betriebsbereit.
First make sure that the voltage given on the plug-in mains unit matches
the mains voltage used.
Then:
Plug the mains unit into a wall socket and switch on the EM 1031-U with
switch P. The red LED will light up - the receiver is ready for operation.
¿El voltaje indicado en el bloque de alimentación corresponde al voltaje de
la red?
Entonces:
Enchufar el bloque de alimentación y conectar el EM 1031-U con el
interruptor P.
Einschalten / Switching on the receiver / Puesta en marcha
P
LED: Power
EM 1031-U, BDA 9/98 06.11.2001, 9:22 Uhr10
11
Kanalumschaltung / Channel selection / Commutatión de canal
C
Sind mehrere Anlagen gleichzeitig in Betrieb, so muß die Übertragung auf
unterschiedlichen Kanälen erfolgen. Hierzu wird der jeweilige
Empfangskanal mit dem Schalter Causgewählt.
Die Frequenzen der Kanäle sind rechts auf der Frontplatte angegeben.
Hinweis: Sender BF 1081-U, BF 1083-U und Empfänger EM 1031-U
müssen jeweils auf den gleichen Kanal eingestellt sein!
Sind viele Anlagen (auch anderer Hersteller) gleichzeitig in Betrieb, ist
nicht auszuschließen, daß diese sich gegenseitig stören. Über mögliche
Abhilfen informiert Sie die HF-Anwenderbroschüre von Sennheiser, die
Ihnen Ihr Fachhändler gern beschafft. Sie vermittelt in verständlicher
Formalles Wissenwerte über Hochfrequenz-Übertragungstechnik, speziell
auch über den gleichzeitigen Betrieb vieler Anlagen.
If you are using several systems simultaneously, you have to use different
channels for each system. Use switch Cto select the required frequency.
The channel frequencies are listed on the front panel.
N.B.: The BF 1081-U or BF 1083-U transmitter and the
EM 1031-U receiver must be set to the same frequency!
If a large number of systems (also from other manufacturers) are being
operated at the same time, they might interfere with one another. You will
find remedial action against such interference in the Sennheiser RF Plan-
ning Brochure available at your specialist dealer. This brochure contains
much valuable and readily comprehensible information on radio frequency
transmission, and also covers the simultaneous use of several systems.
Si varios equipos funcionan simultáneamente, la transmisión deberá
efectuarse por canales diferentes. Con el interruptor Cse elegirá el canal
de recepción respectivo.
Las frecuencias de los canales se indican a la derecha, en la placa frontal.
Nota: Los transmisores BF 1081-U y BF 1083-U y el receptor
EM 1031-U deben estar sintonizados en el mismo canal.
Si hay muchos equipos (incluso de otros fabricantes) que funcionan
simultáneamente, pueden surgir mutuas perturbaciones. Para remediar
esta situación cosulte el folleto HF redactado por Sennheiser, que le podrá
suministrar su concesionario. Allí se dan claras indicaciones sobre la
técnicade transmisión de alta frecuencia,ytambién sobre el funcionamiento
simultáneo de varios equipos.
EM 1031-U, BDA 9/98 06.11.2001, 9:22 Uhr11
12
Die 7 LEDs der HF-Anzeige L1zeigen in 5-dB-Schritten die HF-Leistung
an, mit der der Sender empfangen wird. Leuchten weniger als 3 grüne
LEDs, so ist der Empfang nicht mehr optimal.
Aufstellung des Empfängers wechseln oder Antennen absetzen
(siehe auch "Fehlercheckliste").
Hinweis: Der Empfänger EM 1031-U hat eine automatische
Rauschsperre ASC (Automatic Squelch Control),
die beim Unterschreiten einer festgelegten
HF-Leistung bzw. bei zu hohem Rauschen den
Empfänger stummschaltet.
The RF level is displayed by an LED meter L1which allows you to estimate
the RF power with which a transmitted signal is received. If less than 3
green LEDs are lit, reception will become noisy.
Change the receiver´s position or use remote antennae
(see also “Fault finding”).
N.B.: The EM 1031-U is fitted with an automatic squelch
control (ASC) which mutes the receiver when the
RF power falls below a certain value to prevent
the reception becoming too noisy.
Los 7 LED de la indicación HF L1señalan aproximadamente la potencia
HF que se recibirá del transmisor. Si se iluminan menos de 3 LED verdes,
es señal de que la recepción no es perfecta y puede haber leves ruidos.
Colocar el receptor en otro sitio o bajar las antenas
(ver también la „Lista de localización de averías“)
Nota: El receptor EM 1031-U cuenta con bloqueo automático
de ruidos ASC (Automatic Squelch Control) que provoca
que el receptor pase a funcionamiento silencioso cuando
no se alcanza determinada potencia de AF, o cuando
hay ruidos excesivos.
HF-Pegel / RF level display / Nivel A.F.
L1
EM 1031-U, BDA 9/98 06.11.2001, 9:22 Uhr12
13
Die LED-Kette der NF-Anzeige L3 zeigt die Stärke des ankommenden
NF-Pegels an. Die gelbe LED sollte beim Besprechen des Mikrofons
gelegentlich leuchten. Leuchtet die rote LED, ist der Pegel zu hoch
(Übersteuerung) und muß am Sender abgesenkt werden.
Am Sender BF 1081-U oder BF 1083-U wird hierzu die Empfindlichkeit
mit dem Schalter (LO/HI) von "HIGH" auf "LOW" umgeschaltet.
The AF level is displayed by an LED meter L3which indicates the strength
of the audio signal received. When you speak into the microphone, the
yellow LED should occasionally light up. If the red LED lights up, the AF
level is too high (overmodulation).
Reduce the AF level by setting the sensitivity switch (LO/HI) on the
BF 1081-U or BF 1083-U transmitters from “HIGH” to “LOW”.
Los ocho diodos luminosos de la indicación B.F. L3señalan la intensidad
del nivel B.F. recibido. El LED amarillo debe iluminarse ocasionalmente
cuando se habla en el micrófono. Si el LED rojo se ilumina, el nivel está
demasiado alto (sobremodulación) y debe ser disminuido en el transmisor.
A tal fin, en el transmisor BF 1081-U o BF 1083-U, con el interruptor
(LO/HI) se conmutará la sensibilidad de „HIGH“ a „LOW“.
L3
Anzeige des NF-Pegels / AF level display / Indicación del nivel B.F.
EM 1031-U, BDA 9/98 06.11.2001, 9:22 Uhr13
14
Der Empfänger EM 1031-U enthält zwei getrennte Eingangsteile für die
Antennen A und B. Auf das jeweils stärker empfangene Signal wird
automatisch umgeschaltet und dieses zur Aufbereitung weitergeleitet.
Das Funktionsprinzip wird als "Diversity-Betrieb" bezeichnet. Es hilft,
"Feldstärkelöcher" auszugleichen und kann einen Gewinn beim Stör-/
Nutzsignalverhältnis von bis zu 26 dB bringen, die Betriebssicherheit
erhöht sich circa um den Faktor 20.
L2zeigt den empfangenen Diversity-Kanal an.
The EM 1031-U receiver has two separate input sections for antennae A
and B and automatically switches to whichever antenna signal is stronger.
This principle is called diversity operation. It helps to compensate for
"field strength gaps" and increases the signal-to-noise ratio by up to 26 dB.
Thus, reliability is increased by a factor of about 20.
L2indicates the active diversity channel.
El receptor EM 1031-U cuenta con dos secciones de salida separadas para
las antenas A y B; conmuta automáticamente a la señal de antena más
fuerte.
Este principio de funcionamiento se denomina „Diversity“. Ayuda a
compensar los „vacíos de intensidad del campo“ y con ello puede
obtenerse una ganancia de hasta 26 dB en la relación señal parasitaria/útil.
Además, la seguridad de funcionamiento es 20 veces mayor,
aproximadamente.
L2indica el canal „Diversity“ activado.
Diversity - Anzeige des Empfangskanals / Diversity channel indicator /
"Diversity" - indicación del canal de recepción
L2
EM 1031-U, BDA 9/98 06.11.2001, 9:22 Uhr14
15
햲beide Montagewinkel und 2 Empfänger zusammenschieben und ...
햳gemeinsam in das Rack einsetzen.
Statt eines zweiten Empfängers EM 1031-U können Sie auch ein
Leergehäuse GA 1031-CC verwenden, in das Sie z.B. Anschlußbuchsen
oder Schalter einbauen können.
햲Slide the supplied rack mount adaptors and two receivers together as
illustrated.
햳The systems can now be bolted into the rack.
Instead of a second EM 1031-U receiver you can also use a GA 1031-CC
empty housing, a GA 1031-AM empty housing with antenna sockets on
the front panel, or an ASP 1081 empty housing with built-in passive
antenna splitter for multi-channel systems.
햲Juntar los dos ángulos de montaje y los dos receptores;
햳introducirlos juntos en el bastidor.
En lugar de un receptor EM 1031-U adicional puede emplearse también
unacarcasavacía GA-1031, en la cual pueden incorporarse, p.ej., casquillos
de conexión o interruptores.
Montage im 19"-Rack / Installation in a 19" rack / Montaje en el bastidor 19"
햲햳
EM 1031-U, BDA 9/98 06.11.2001, 9:22 Uhr15
16
Fehlercheckliste / Fault finding / Lista de localización de averías
Fehler mögliche Ursache
Keine Funktion: Stromversorgung unterbrochen, Stecker-
netzteil in der Steckdose? Steckernetzteil
und EM 1031-U richtig verbunden?
Kein Empfang: Sender nicht eingeschaltet, Sender auf
anderem Kanal, Empfangsantennen
nicht eingesteckt, Verbindung bei abge-
setzten Antennen unterbrochen.
Ton verzerrt, rote Sender übersteuert, dort die Empfindlich-
AF-Anzeige-LED leuchtet: keit absenken, oder Eingangsverstärker
des nachgeschalteten Mixers übersteuert
Absenkung am Mixer benutzen oder
mit Pegelregler V(Rückseite) nachsteuern.
Kein Ton, RF-Anzeige
arbeitet einwandfrei, AF-An- Durch starke Störsignale falsche Anzeige.
zeige fehlt bei Modulation: Anderen Empfangskanal wählen!
Fault Possible cause
No function at all: No power supply, check mains connection
and connection between receiver and plug-
in mains unit. Is the wall socket switched on?
No reception: Transmitter switched off or set to different
channel, receiver antennae not inserted or
connectionto remote antennae interrupted.
Sound distorted, Transmitter overmodulated, reduce its
red AF level LED is lit: sensitivity. If the red LED is not lit: input
amplifier of mixing console overmodulated,
reduce AF level on the console or on the re-
ceiver (with control Von receiver´s back panel)
No sound, RF display is Indication error caused by strong inter-
working, but no AF display: ference.Choosedifferentreceiver channel!
Avería Posible causa
El aparato no funciona: ¿Alimentacióninterrumpida,bloquedealimen-
tación conectado? Bloque de alimentación y
EM 1031-U correctamente conectados?
No hay recepción; El transmisor no está conectado o funciona
ruidos y silbidos: en otro canal; las antenas de recepción no
están conectadas; conexión interrumpida
por antenas remotas
Perturbaciones del Sobremodulacióneneltransmisor;disminuir
sonido; el LED rojo allí la sensibilidad, o sobremodulación del
de la indicación amplificador de entrada del mezclador post-
AF se ilumina: conectado. Utilizar la disminución en el
mezclador o ajustarla con el regulador de
nivel Val dorso del aparato.
No hay sonido; indicación RF Debido a fuerte señal de fallo,
funciona correctamente; no hay la indicación está equivocada.
indicación AF para modulación: Elegir otro canal de recepción.
EM 1031-U, BDA 9/98 06.11.2001, 9:22 Uhr16
17
Technische Daten / Technical data / Características técnicas
Empfänger 2 Kanal Diversity, Superhet
Empfangsfrequenz 16KanäleumschaltbarimUHF-Bereich
Empfindlichkeit <5µV/100dB Geräuschspannungsabstand
Modulation / Deemphasis FM / 50 µs
Nennhub / Spitzenhub ±40 / 56 kHz
Ausgang symm. XLR-3 5 V einstellbar an 1000 Ω
Ausgang unsym., 6,3 mm ø 2,5 V einstellbar an 1000 Ω
Rauschunterdrückungssystem HiDyn plus
Geräuschspannungsabstand 116 dB (A)
Klirrfaktor < 1 % bei 1 kHz und Nennhub
Übertragungsbereich 40 - 20000 Hz
Rauschsperre intern auf 1,5 µV eingestellt
Automatic Squelch Control < 80 dB Geräuschspannungsabstand
Abmessungen in mm / Gewicht 213 x 145 x 44 / 700 g
Steckernetzteil 120 / 230 / 240 V AC ±10 %
Lieferumfang 1 Empfänger EM 1031-U
1 Montagewinkel-Set
2 Einsteck-Teleskopantennen
Receiver type 2-channel true diversity superheterodyne
Receiver frequencies 16 switchable UHF channels
Sensitivity < 5 µV / 100 dB signal-to-noise ratio
Modulation/de-emphasis FM / 50 µs
Nominal/peak deviation ±40 / 56 kHz
Balanced output (XLR-3) 5 V, adjustable at 1000 Ω
Unbalanced output (1/4” jack) 2.5 V, adjustable at 1000 Ω
Noise reduction HiDyn plus
Signal-to-noise ratio 116 dB (A)
THD < 1 % at 1 kHz and nominal deviation
Frequency response 40 - 20,000 Hz
Squelch internally set to 1.5 µV
Automatic squelch control < 80 dB signal-to-noise ratio
Dimension in mm / weight 213 x 145 x 44 / 700 g
Plug-in mains unit 120 / 230 / 240 V AC ±10
Supply schedule 1 EM 1031-U receiver
1 pair of rack mount adaptors
2 plug-in telescopic antennae
receptor 2 canal "diversity", Superhet
frecuencia de recepción 16 canales conmutables en la gama UHF
sensibilidad < 5 µV / 100 dB relación señal/ruido
Modulación / deacentuación FM 50 µs
desplazamiento nominal / máximo ±40 kHz / ±56 kHz
salida simétrica XLR-3 5 V ajustable a 1000 Ω
salida asimétrica, jack de 6,3 mm ø 2,5 V ajustable a 1000 Ω
supresión de ruidos HiDyn plus
relación señal/ruido 116 dB(A)
factor de distorsión no lineal < 1% a 1 kHz y desplazamiento nominal
gama de transmisión 40 - 20000 Hz
filtro de ruidos ajustado internamente a 1,5 µV
Automatic Squelch Control < 80 dB relación señal/ruido
dimensiones en mm / peso 213 x 145 x 44 / 700 g
alimentación a conectar 120 / 230 / 240 V AC ±10%
suministro 1 receptor EM 1031-U
1 juego de ángulos de montaje
2 antenas telescópicas a conectar
EM 1031-U, BDA 9/98 06.11.2001, 9:22 Uhr17
18
Systemkomponenten / System components / Componentes
BF 1083-U
NG 1031
120
UK
BF 1081-U
MKE 2-1053 DA 1083 K
GA 1031 CC GA 1031 AM
MKE 40-1053
STH 1051
EM 1031-U
EM 1031-U, BDA 9/98 06.11.2001, 9:22 Uhr18
19
GA 1031-CC (Art.Nr. 04253) Leergehäuse, am Platz eines Empfän-
gers beim Einbau im Rack
GA 1031-AM (Art.Nr. 04254) LeergehäusemitherausgezogenemAn-
tennenanschluß zur Frontseite
GZA 1036-9 (Art.Nr. 02332) Antenne für abgesetzten Betrieb
A 12-UHF (Art.Nr. 04156) Antenne für abgesetzten Betrieb
(externe Speisung erforderlich)
GZL 1019 A5 (Art.Nr. 02325) BNC/BNC -Antennenkabel 5 m
GZL 1019 A10 (Art.Nr. 02326) BNC/BNC -Antennenkabel 10 m
NG 1031 (Art.Nr. 04361) Netzgerät, Betrieb an 230 V
NG 1031-UK (Art.Nr. 04362) Netzgerät, Betrieb an 240 V
NG 1031-120 (Art.Nr. 04363) Netzgerät, Betrieb an 120 V
GA 1031-CC Cat. no. 04253 Empty housing, can be used instead of
a receiver for installation in a 19” rack
GA 1031-AM Cat. no. 04254 Empty housing with antenna
sockets on the front panel
GZA 1036-9 Cat. no. 02332 Remote groundplane antenna
A 12-UHF Cat. no. 04156 Remote log-aperiodic antenna
(requires external power supply)
GZL 1019 A5 Cat. no. 02325 BNC/BNC antenna cable, 5 m
GZL 1019 A10 Cat. no. 02326 BNC/BNC antenna cable, 10 m
NG 1031 Cat. no. 04361 Plug-in mains unit for 230 V
NG 1031-UK Cat. no. 04362 Plug-in mains unit for UK operation
NG 1031-120 Cat. no. 04363 Plug-in mains unit for US operation
GA 1031-CC (Art. no. 04253) Carcasa vacía, insertable en lugar de un
receptor para montaje en bastidor
GA 1031-AM (Art. no. 04254) Carcasa vacía con conexión para
antena desplegada en la cara frontal
GZA 1036-9 (Art. no. 02332) Antenapara funcionamientoadistancia
A 12-UHF (Art. no. 04156) Antenaparafuncionamiento a distancia
Es necesaria la alimentación externa
GZL 1019 A5 (Art. no. 02325) Cable para antena BNC/BNC, 5 m
GZL 1019 A10 (Art. no. 02326) Cable para antena BNC/BNC, 10 m
NG 1031 (Art. no. 04361)
Alimentaciónparatensióndelaredde230V
NG 1031-UK (Art. no. 04362)
Alimentaciónparatensióndelaredde240V
NG 1031-120 (Art. no. 04363)
Alimentaciónparatensióndelaredde120V
Zubehör / Accessories / Accesorios
EM 1031-U, BDA 9/98 06.11.2001, 9:22 Uhr19
20
WichtigeEinbauhinweise für den Empfänger / Important notes for installing
the receiver / Instrucciones de montaje importantes p. el receptor
Zwangsentlüftung bei Festeinbau
Bei Empfängern, die fest in Pulte oder Rahmen eingebaut werden, ist
unbedingt für ausreichende Zwangsentlüftung zu sorgen. Die Luft soll um
das Gehäuse herum zirkulieren können.
Ausreichende Belüftung im Rack
Werden mehrere Empfänger EM 1031-U gemeinsam im Rack betrieben,
muß für ausreichende Lüftung/Kühlung gesorgt werden.
Forced ventilation for permanent installations
If you want to install the receiver permanently in a desk or a rack you must
ensure that there is sufficient forced ventilation. The air must be able to
circulate around the housing.
Sufficient ventilation in the rack
If you are operating several EM 1031-U receivers in a rack you must
ensure that there is sufficient ventilation/cooling.
Ventilación forzada en caso de montaje fijo
Cuando se trata de receptores que deben montarse fijamente en el pupitre
o en el bastidor, es indispensable dejar suficiente ventilación forzada, para
que el aire pueda circular libremente alrededor de la carcasa.
Ventilación suficiente en cremallera
Si hay arios receptores EM 1031-U que deben funcionar conjuntamente
en cremallera, es necesario proveer ventilación/refrigeración suficiente.
EM 1031-U, BDA 9/98 06.11.2001, 9:23 Uhr20

Other manuals for EM 1031-U

1

Other Sennheiser Receiver manuals

Sennheiser EK 2020-D User manual

Sennheiser

Sennheiser EK 2020-D User manual

Sennheiser ew 100 G4 series User manual

Sennheiser

Sennheiser ew 100 G4 series User manual

Sennheiser Infraport HDI 302 User manual

Sennheiser

Sennheiser Infraport HDI 302 User manual

Sennheiser EM 3731-II - ANNEXE 583 User manual

Sennheiser

Sennheiser EM 3731-II - ANNEXE 583 User manual

Sennheiser EK 1039 - User manual

Sennheiser

Sennheiser EK 1039 - User manual

Sennheiser EM 500 G3 User manual

Sennheiser

Sennheiser EM 500 G3 User manual

Sennheiser EM 550 G2 User manual

Sennheiser

Sennheiser EM 550 G2 User manual

Sennheiser EK 1038 User manual

Sennheiser

Sennheiser EK 1038 User manual

Sennheiser HDI 830 User manual

Sennheiser

Sennheiser HDI 830 User manual

Sennheiser EK 2020-D-II Instruction manual

Sennheiser

Sennheiser EK 2020-D-II Instruction manual

Sennheiser EM 3031-U User manual

Sennheiser

Sennheiser EM 3031-U User manual

Sennheiser EK 1039-DW User manual

Sennheiser

Sennheiser EK 1039-DW User manual

Sennheiser H 200 Instruction manual

Sennheiser

Sennheiser H 200 Instruction manual

Sennheiser EK 2020-D-II User manual

Sennheiser

Sennheiser EK 2020-D-II User manual

Sennheiser EK 2012 User manual

Sennheiser

Sennheiser EK 2012 User manual

Sennheiser HDE 300-7 User manual

Sennheiser

Sennheiser HDE 300-7 User manual

Sennheiser 500 Series User manual

Sennheiser

Sennheiser 500 Series User manual

Sennheiser SENNSIS 2020-D User manual

Sennheiser

Sennheiser SENNSIS 2020-D User manual

Sennheiser EKI 1029-PLL32 Dimensions

Sennheiser

Sennheiser EKI 1029-PLL32 Dimensions

Sennheiser EM 2000 - 01-09 User manual

Sennheiser

Sennheiser EM 2000 - 01-09 User manual

Sennheiser HDE 300-6 User manual

Sennheiser

Sennheiser HDE 300-6 User manual

Sennheiser SZI 1029 Dimensions

Sennheiser

Sennheiser SZI 1029 Dimensions

Sennheiser EM 2000 Instruction manual

Sennheiser

Sennheiser EM 2000 Instruction manual

Sennheiser EK 1039 - User manual

Sennheiser

Sennheiser EK 1039 - User manual

Popular Receiver manuals by other brands

Denon AVR-684 operating instructions

Denon

Denon AVR-684 operating instructions

Harman Kardon 730 owner's manual

Harman Kardon

Harman Kardon 730 owner's manual

CAME RKLT-WL manual

CAME

CAME RKLT-WL manual

Communications Specialties Pure Digital Fiberlink 7231 user manual

Communications Specialties

Communications Specialties Pure Digital Fiberlink 7231 user manual

CopterX CX-CT3A instruction manual

CopterX

CopterX CX-CT3A instruction manual

AMG AMG3788BERN-DR-CWDMn/m instruction manual

AMG

AMG AMG3788BERN-DR-CWDMn/m instruction manual

steute RF Rx SW868 TCP/IP Mounting and wiring instructions

steute

steute RF Rx SW868 TCP/IP Mounting and wiring instructions

Pyle Pro Pyle Pro PTVT790A owner's manual

Pyle Pro

Pyle Pro Pyle Pro PTVT790A owner's manual

Sirius Satellite Radio Starmate ST1 user guide

Sirius Satellite Radio

Sirius Satellite Radio Starmate ST1 user guide

Onkyo TX-DS838 instruction manual

Onkyo

Onkyo TX-DS838 instruction manual

Marmitek Powermid XS user manual

Marmitek

Marmitek Powermid XS user manual

Sony STR-DH720HP installation guide

Sony

Sony STR-DH720HP installation guide

Steren AVS-950 instruction manual

Steren

Steren AVS-950 instruction manual

Sony STR-KG800 Service manual

Sony

Sony STR-KG800 Service manual

Philips HTS3110MKI/75 Service manual

Philips

Philips HTS3110MKI/75 Service manual

NESTLE 26032001 user manual

NESTLE

NESTLE 26032001 user manual

RadioLink R8XM instruction manual

RadioLink

RadioLink R8XM instruction manual

DEGEN DE301 operating instructions

DEGEN

DEGEN DE301 operating instructions

manuals.online logo
manuals.online logoBrands
  • About & Mission
  • Contact us
  • Privacy Policy
  • Terms and Conditions

Copyright 2025 Manuals.Online. All Rights Reserved.