Sensit CO User manual

InstructionManualForModelsSENSITCO,SENSITCO/O2,
SENSITCO/O2withAIRFREECOCALCULATIONS
SENSIT®CO
#I0SCO 0100 INSTRUCTION MANUAL 9/09 V1
Approved UL913, For Class 1,
Division 1, Groups C & D
hazardous locations when used
with alkaline or NiMH batteries.
7WA6
C
L
A
S
S
I
F
I
E
D
Read and understand
instructions before use.
Warning:
To prevent ignition
of flammable or
combustible
atmospheres,
disconnect power
before servicing.
For more information contact:
SENSITTECHNOLOGIES
851 Transport Drive
Valparaiso, IN 46383
Phone: (219) 465-2700
Fax: (219) 465-2701
Order Line: (888) 473-6748
www.gasleaksensors.com
WARRANTY
Your SENSIT®CO iswarrantedtobefreefromdefectsin mate-
rials and workmanship for a period of two years after purchase
(excluding calibration and batteries). If within the warranty pe-
riod,yourinstrumentshouldbecome inoperative from such de-
fects, the unit will be repaired or replaced at our option. This
warrantycoversnormaluse and does not cover damage which
occursinshipmentor failure which results from alteration, tam-
pering, accident, misuse, abuse, neglect or improper mainte-
nance. Proof of purchase may be required before warranty is
rendered. Units out of warranty will be repaired for a service
charge. Internalrepairormaintenancemust be completed by a
SENSITTECHNOLOGIESauthorized technician. Violation will
voidwarranty.Units must be returned postpaid, insuredand to
the attentionofthe Service Dept. for warranty or repair.
This warranty gives you specific legal rights and you may have
other rights which vary from state to state.
SENSITTECHNOLOGIES
851 Transport Drive
Valparaiso, IN 46383
Phone:(219) 465-2700
Fax:(219)465-2701

CONTENTS
Page# 1 Parts andAccessories
2 GeneralDescription
3 ProductFeatures / Specifications
6 BatteryInstallation
7 OperationandUse
10 CalibrationCheck
11 Menu/MenuOperations
19 Calibration
Back Warranty
1 2
ACCESSORIES
Standard Accessories (Included)
A0152 Hard Carrying Case
AJ0SCO705-100 HotAir Probe
PHXG0350 Wrist Strap
I0SCO0100 Instruction Manual
P014015 3”C” Alkaline Batteries
Optional Accessories and Standard Replacement Parts
A0156 Water/Particle Filter
P014409-1 4’ Tubing & Luer Fitting for Hot Air Probe
CJ0SCO705 Calibration Kit
CM0139-100 Calibration Gas Cylinder
AJN02021 IR Printer
AJN02033-PCIS PC Interface & Software
CSC00100 Smart-Cal Automatic Calibration Station
GENERALDESCRIPTION
The Sensit®CO isahand held carbon monoxide analyzer.The
basemodelis designed to provide part-per-million (ppm) read-
ingsoflevelsofCOwithinarangeof0-2000ppm.
Theinstrumentisavailable withanoptionaloxygensensorwhich
provides the percent of oxygen in air within a range of 0-25%
volume.Additionally,anAir-FreeCO feature is available onthe
CO/O2 version. With this optional feature, the instrument will
calculatetheelevated levels of COrelatedtoincreasingoxygen
levels detected in appliance flue gas emissions. This informa-
tion is presented in PPM as “CF” on the display.
All model options can be specified at the time of ordering or
basemodelscanbeupgradedby the factory or authorized ser-
vicecenterwiththe required hardware and software additions.
Thesensorsareelectrochemical,whichcanbefieldcalibrated.
Thesensorshave arenewablefilterwhichreduces cross-sensi-
tivity and are economical to replace. By using the supplied hot
air probe the instrument can evaluate CO and O2 levels from
appliancefluesorvents.
TheSensitCOmodelscanalsobeusedasapersonalmonitor.
Thedefaultfactoryalarmsetpointforcarbonmonoxideis35ppm.
TheoptionalO2sensordefault factory alarm set points are less
than19.6%or greater than 23.5%. The display must beinview
todeterminethe detected CO and O2 levels.

34
PRODUCT FEATURES continued from page 3
SPECIFICATIONS
PRODUCT FEATURES
ZERO/SAVE
BUTTON
MENU BUTTON
POWER
BUTTON
HOTAIR PROBE
BATTERY
COMPARTMENT
DISPLAY
WATER/
PARTICLE
FILTER
IR COMUNICATION
WARNINGLED’s
Sensit®CO instruments are constructed of high impact ABS
plastic to withstand the rigors of field use. Incorporated in the
handgrip area is thebattery compartment.
AllSensit®CO instrumentsmodels operateon“C”type alkaline
batteriesorNiMH(nickelmetalhydride)batteries. The approved
batteriesare,PROCELLMN1400Alkalineorequivalentand the
PANASONICHHR300CHNiMHbatteryor equivalent.
The two line LCD continually updates PPM CO levels for the
basemodel, percent oxygenlevelisaddedfor theCO/O2model
and PPM “CF” is included for the CO/O2/air-free CO model.
Regardlessofthe model, all instruments display all datasimul-
taneously on the LCD when in the work display.
All models use a rotary vein pump to draw in the air samples.
Flow block, low battery power and sensor failure alert will ap-
pearontheLCDasneeded.
Warningsystemsfortheoperatorconsist of one audible alarm,
omitting a tone from the speaker on the back of the instrument
andtwovisualindicatorsonthefront. One is a red flashing LED
alarm light, the other is a flashing gas or optional oxygen read-
ing on the LCD when the instrument detects readings at the
alarm set point. All alarms indicate simultaneously unless the
operatorchoosesto use the audible alarm mute feature.
Aninfrared communication window islocated on the right side
topermitdownloading of calibration data, data saved by the
(Continued on page 5)
Power Supply: 3 “C” Alkaline Batteries
Sensor: Long Life Electrochemical
Range: 0-2000ppm CO, 0-25% Oxygen for O2 model
Alarm: 35ppm CO, < 19.5% or > 23.5% Oxygen for O2 model
Alarm Range: 0-300ppm CO, 17.5% - 20.5% (low) for O2 model
WarmUp: Less than 30 seconds
Response Time: 90% of reading < 60 sec.
Duty Cycle: Preset at 60 Minutes, User Adjustable
Battery Life: Approx. 30 Hours
Size: 3.5” x 12” x 1.6” (89 x 305 x 40 mm)
Weight: 1.3 lbs. (590 g), 1.55 lbs (703g) with Hot Air Probe
Probe Length: 11 Inches (27.64 cm)
Tube Length: 4 Feet (121.92cm)
HotAir Probe: 700° F (371.11 celsius) @ 5 Minutes

operatorand communicationwiththeSmart-Cal CalibrationSta-
tionandPCI2scomputerinterface.
Thereare3 operational button pads on thefrontofall models
usedforthefollowing features.
POWER/MUTE BUTTON (A): Turns the instrument ON/OFF,
mutes audible alarm, exit menu items.
MENUBUTTON (B): Entercustomermenu.
SAVE/ZERO BUTTON(C): Savedatatoon-boardmemory,
manual zero of all sensors, scrolling in
menuoptions.
PRODUCT FEATURES continued from page 4
Battery replacement is necessary when thedisplay reads BAT
LOW,anaudiblealarmsoundsandthegreenreadyLEDflashes.
WhenBAT LOW isdisplayed, theinstrumenthasapproximately
30minutes of useful operation time prior to shut off.
CAUTION: Always change batteries in an environment
free of combustible gases.
Removethebatterysleevecoverbydepressingthelockingtab
onthefront of thehandlewitha coin or flatobjectandpulling the
handle away from the top or display area of the instrument.
Place 3 approved batteries into the battery holder. For best
resultsholdthe battery compartment so that it lays inyourright
hand. With your left hand install the battery that goes toward
the front first. The battery that is in contact with the rear spring
secondandfinally insert the thirdbatteryinthecenter by forcing
thesecondbatterysuchthatthespringcompressesandallows
the batteries to go into place. If you do not use your right hand
toholdthebottomofthebatterycompartmentthebatteriescan
come out.
Observethe polaritymarkingson theinsideof thebatteryholder.
Improper installation will cause the instrument not to operate.
Replace the battery sleeve and allow the locking tab to snap
into position.
Checktobesure the handle is securetotheinstrumentbodyby
gently pulling the handle away.The handle will remain firmly in
place if a proper connection is made.
BATTERYINSTALLATION/REPLACEMENT
6
5

7 8
(Continued on page 7)
CAUTION: Always start your Sensit®CO in a gas free
environment to insure a proper zero.
1. Pushthe POWER/MUTE BUTTON (A). The following start-
upsequence will be displayed.
a.Product nameandmodelversionnumber
b.System check for proper pump and battery strength
c.Date and time
d.Serialnumber
e. Warm-up countdown, 10 seconds
f. “Autozero”zeroingallsensors(COstandard, O2 optional)
g.Workdisplay(willvarydependingonmodelversion)
2. If the display fails to illuminate or BAT LOW is shown on the
display,replace the batteries.There is roominthecarryingcase
to keep an extra set.
3. If a sensor is past the intended calibration cycle, CAL DUE
will appear during the start-up sequence. Calibrate the instru-
ment before placing it in service. If calibration is unsuccessful,
removetheinstrumentfromserviceand consult the factory.
4. If the instrument detects an inoperable sensor an ERROR
message will flash during the warm-up. The display will also
show “FAIL”. Remove the instrument from service and contact
thefactory.
OPERATION AND USE continued from page 7
5. Prior to use, test a running instrument and hot air probe for
air leakage.Air leaks can cause diluted samples, provide inac-
curatereadingsandinvalidtests.
First, block the inlet of the instrument with your finger for ap-
proximately 5 seconds. The display should read “FLOW
BLOCKED” andawarning beep willsoundifall seals areintact.
This is a pass. However, if the flow block signals are not given,
thisisafailureandtheinstrumentshouldberemovedfromser-
vice.Pleaseconsult the factory for repair.
Ifthe instrumentpasses,attach thehotair probe(#AJ0SCO705-
100)totheinstrument.The connection need only be finger tight
andrequiresapproximately1/4turnof the fitting. Next block the
end of the probe. Within 10 seconds the display should read
“FLOWBLOCKED”andtheaudiblewarningwillsound.‘Thisis
apass.However,iftheflowblocksignalsarenotgiven,thisisa
failure and the probe should be removed from service. Please
consultthefactory for repair.
CAUTION: Do not handle the steel portion of any hot
air probe during or too soon after sampling. It will be-
come hot and retain heat and burns may occur!
6. Whensamplingortestingareaswithelevatedtemperatures
such as an appliance vent or flues, always attach and use the
supplied hot air probe (#AJ0SCO705-100). Failure to use the
approvedprobecanresultininaccuratereadingsordamageto
theinstrumentand may void the warranty.
OPERATIONANDUSE

9(continued on page 8)
OPERATION AND USE continued from page 8
10
7. For models with the optional Air-Free CO calculation, the
datawillappearontheLCDintheform of PPM next to the “CF”
designator. This calculation will only be presented when the
oxygenlevelhas dropped to 18.9% or less whilesamplingflue
gas emissions.
NOTE:AirFreeCOlevelsorCFreadingsarecalculatedbythe
instrumentbased on COandO2levels detected duringfluegas
sampling.
8. To disable or enable the audible alarm, press and release
thePOWER/MUTEBUTTON(A).
9.Tosaveanydisplayed readings,pressand releasetheSAVE/
ZERO BUTTON (C). The data saved can be viewed or down-
loadedlater. Printoutsare possible using the optional IR printer
(#AJN02021).SeeMenuoperationforcomplete instructions.
10. When used in low light conditions, an automatic backlight
will illuminate the display.
11. Toturntheinstrument off,pressandholdthePOWER/MUTE
BUTTON (A) for approximately 5 seconds until “Power Down”
appearsonthe display.
To verify the accuracy of Sensit®CO, it must be exposed to a
knownconcentrationoftestgasthatwilltestany sensor combi-
nationincludedinyourparticular model.
Any sensor that does not meet the specifications listed in this
manual may require calibration or repair. A calibration check
does not update the calibration due date. Full calibration is
requiredtoupdate these times.
A calibration past due message will appear during warm-up if
calibrationhasnotbeenperformedperyourinstrumentsetting.
Anytime it is suspected the Sensit®CO is not working properly,
checkcalibration.
CALIBRATIONCHECK
CARBON MONOXIDE SYMPTOM CHART
Level (ppm) Effects
0 Desired level
9 Acceptable level in a living space*
50 Maximum concentration for
continuous exposure in any 8 hour period
400 Frontal headaches in 1 to 2 hours, life
threatening after 3 hours
800 Nausea and convulsions, death within 2 hr.
1,600 Nausea within 20 min., death within 1 hr. **
12,800 Death within 1-3 minutes**
* Always consider outdoor ambient conditions
** Health effects can vary significantly based on age,
sex, weight and overall health.

11 12
(continued on page 12)
MENU
Sensit®COmodelshaveseveralcategorieswithintheUserMenu:
PRINT MENU: Print session log (saved data), cal log (calibra-
tion data), access Smart-Cal communication.
CALIBRATION: Calibrate CO sensor and access Smart-Cal
communication.
POWER OFF: Set the automatic shut off timer in minutes.
SET CLOCK: Set date and time.
SHOW CAL LOG: Display last valid calibration data.
SHOWSESLOG: Displaysavedsensor reading datawith cor-
respondingdateandtime.
BUMPTEST: Performautomatictestforresponse to minimum
of 80% of 100 ppm CO calibration gas within 45 seconds.
SMART-CAL: Access automatic Smart-Cal communication.
O2 TEST: A 20 second test to confirm depletion of the O2
readingswhenexposedto the proper gas, such as 100% meth-
ane (only on models with optional oxygen sensors installed).
MENUOPERATION
1. PRINT MENU
Fromtheworkingdisplay access the menu by pressing & hold-
ingtheMENU BUTTON (B)untilthetop line ofthedisplayreads
USERMENU.ThebottomlinewillreadPRINTMENU.Press&
MENU OPERATION continued from page 11
releasetheMENUBUTTON (B) once to enter the menu.
Prepare the optional IR printer.Aim the IR window (on the right
side of the instrument) at the IR window on the printer.
Press & release the SAVE/ZERO BUTTON (C) to scroll to the
itemyouwanttoprint.Press&releasetheMENUBUTTON(B)
toprint thatitem.To exitthismenu, press&release thePOWER/
MUTE BUTTON (A) until the instrument returns to the working
display.
2. CALIBRATION
SeeCalibrationsectionon page 19.
3. POWER OFF
Fromtheworkingdisplay access the menu by pressing & hold-
ingthe MENUBUTTON(B) untilthetoplinereadsUSERMENU
andthebottomline will read PRINT MENU.
Press&releasetheSAVE/ZEROBUTTON(C) until the bottom
line displays POWER OFF. Press & release the MENU BUT-
TON(B) once to enter the menu.
Press & release the MENU BUTTON (B) to decrease the min-
utesuntilautomatic shut-offor press&releasetheSAVE/ZERO
BUTTON(C)toincreasetheminutes.
NOTE: Setting this number to “O” will set the instrument to run
continuouslyfor as long as the battery power will permit.Press
(continued on page 13)

& release the POWER/MUTE BUTTON (A) to save the selec-
tion. To exit this menu, press & release the POWER/MUTE
BUTTON(A) once more.
4. SET CLOCK
From the working display access the menu by pressing and
holding the MENU BUTTON (B) until the top line reads USER
MENU and the bottom reads PRINT MENU. Press & release
theSAVE/ZEROBUTTON(C)until thebottomlinedisplays SET
CLOCK.Press&release the MENU BUTTON (B) once toenter
themenu.
The day will be the section flashing on the display. To change
thissection,press& release the MENU BUTTON (B)foradjust-
ments. Press & release the SAVE/ZERO BUTTON (C) to ad-
vance to the next section (month, year or time).
Press & release the POWER/MUTE BUTTON (A) to save the
selection.Toexitthismenu, press &releasethePOWER MUTE
BUTTON(A).
5. SHOW / PRINT a CALIBRATION LOG
To Show a Calibration Log
Fromtheworkingdisplaypress& hold the MENU BUTTON (B)
until the top line reads USER MENU, the bottom line reads
PRINTMENU.
Press&release the SAVE/ZERO BUTTON(C)to scroll until the
bottomlinereadsSHOWCALLOG. Press & release theMENU
BUTTON(B)oncetoenterthemenu.
MENU OPERATION continued from page 12
13 14
Calibration data will be displayed. The sensor which was cali-
brated will appear on the top line and the date of the last suc-
cessful calibration will appear on the bottom line.
Press&releasethe SAVE/ZERO BUTTON(C) to scrolltoview
thenextavailablesensor calibration data.Afterviewingthecali-
bration data for the last sensor, the next scroll will return the
display to the USER MENU. To exit this menu, press & release
thePOWER/MUTEBUTTON (A).
To Print a Calibration Log
Fromtheworkingdisplay,press& hold the MENU BUTTON(B)
until the top line reads USER MENU, the bottom line reads
PRINTMENU. Press &releasetheMENU BUTTON (B)onceto
enterthemenu.Press& release the SAVE/ZEROBUTTON(C)
to scroll until the bottom line reads CAL LOG.
Prepare the optional IR printer.Aim the IR window on the right
side of the instrument at the IR printer. Press & release the
MENU BUTTON (B) to print the log. To exit this menu, press &
release the POWER/MUTE BUTTON (A) to return to working
display.
6. SHOW / PRINT a SESSION LOG
To Show a Session Log
Fromtheworkingdisplay,press& hold the MENU BUTTON(B)
until the top line reads USER MENU and the bottom line reads
PRINTMENU.
MENU OPERATION continued from page 13
(continued on page 14) (Continued on page 15)

(continued on page 16) (Continued on page 17)
Press&release the SAVE/ZERO BUTTON(C)to scroll until the
bottomlinereads SHOW SES LOG.Press&releasetheMENU
BUTTON(B)oncetoenterthemenu.
SESSION1willbedisplayed.Thisisthemostrecentdatasaved.
Press & release the SAVE/ZERO BUTTON (C) to scroll to the
sessionnumberyouwant to view.
Press & release the MENU BUTTON (B) once to enter that
session’s recorded day, month and time. Press & release the
MENUBUTTON(B) once again to access the gasreadingsfor
that session.
Press&releasethe SAVE/ZERO BUTTON(C) to scrolltoview
theindividual gasreadingssaved.Press &releasethe POWER/
MUTEBUTTON(A)oncetoaccess a differentsession number.
Press & release the SAVE/ZERO BUTTON (C) to scroll to a
newsessionnumber.Thestandardnumber of available stored
sessions is factory set at 6 but is factory adjustable up to 100.
To exit thismenu,press& release thePOWER/MUTEBUTTON
(A) to return to the working display.
To Print a Session Log
Fromtheworkingdisplay,press& hold the MENU BUTTON(B)
until the top line reads USER MENU and the bottom line reads
PRINTMENU.
Press&releasetheMENUBUTTON(B)oncetoenterthismenu,
SESSION LOG will be displayed.
MENU OPERATION continued from page 14 MENU OPERATION continued from page 15
15 16
Prepare the optional IR printer.Aim the IR window, on the right
side of the instrument, at the IR printer. Press & release the
MENUBUTTON(B) to print the log.
Press & release the POWER/MUTE BUTTON (A) to return to
theworkingdisplay.
7. BUMP TEST
Fromtheworkingdisplay,press& hold the MENU BUTTON(B)
untilthetoplinereadsUSERMENUandbottomlinereadsPRINT
MENU.
Press&release the SAVE/ZERO BUTTON(C)to scroll until the
bottom line reads BUMPTEST.
Preparethe appropriatecertifiedgasmixture foryourinstrument
model (see proper gas mixtures listed in the Calibration sec-
tion).
Applythegas to the instrument and press & releasetheMENU
BUTTON(B) to startthe BUMPTEST.Thedisplaywill show the
gasvaluebeingtestedon the top line with registered gas value
and a 45-60 second countdown on the bottom line. The instru-
ment will automatically check the function of the CO sensor.
Ifsensor tested readsatleast80% of thevalueofthe gas,within
thetimeperiodrequired, thedisplaywillflashBUMPTESTPASS
beforereturningto the USER MENU automatically.Press& re-
leasethePOWER/MUTEBUTTON (A) to exit and return to the
workingdisplay.

If any sensor fails, the display will show BUMP TEST FAILED.
This means that calibration is required. If calibration is unsuc-
cessful,removetheinstrumentfromservice.
Consultthefactoryintheeventofanyfailure.To exit this menu,
press & release the POWER/MUTE BUTTON (A) to return to
theworkingdisplay.
8.SMART-CAL
Fromtheworkingdisplay,press& hold the MENU BUTTON(B)
until the top line reads USER MENU and the bottom line reads
PRINT MENU. Press & release the SAVE/ZERO BUTTON (C)
to scroll until the bottom line reads SMART CAL.
Placetheinstrument intothecradleonthe left sideoftheSmart-
CalCalibrationStation.Attach the tubing from the station to the
instrument. Press & release the MENU BUTTON (B), the dis-
play will show SMART CAL communicating.
Press & release the CALIBRATE button on the Smart -Cal and
calibrationwill beginautomatically.Ifsuccessful, CALIBRATION
PASSED will show on display.
Ifunsuccessful, CALIBRATIONFAILEDwillshow.Let theinstru-
mentclearandrepeat the calibration process. If the instrument
will not pass, remove the instrument from service. Consult the
factoryintheevent of any failure.
(Continued on page 18)
MENU OPERATION continued from page 16 MENU OPERATION continued from page 17
17 18
Alternative methods to enter the Smart-Cal menu are:
1. Enter the USER MENU. Press & release the MENU
BUTTON(B)oncetoenterthe PRINT menu.
Press & release the SAVE/ZERO BUTTON (C), to scroll
until the bottom line reads SMART-CAL. Press & release
theMENUBUTTON(B)oncetobeginSmart-Cal
communication.
2. From the working display, press & hold the POWER/
MUTEBUTTON(A)for2-3seconds.Thedisplaywillread
SMARTCALcommunicating.
9. O2 TEST
Fromtheworkingdisplaypress& hold the MENU BUTTON (B)
until the top line reads USER MENU and the bottom line reads
PRINT MENU. Press & release the SAVE/ZERO BUTTON (C)
to scroll until the bottom line reads O2 TEST.
Applyrecommendedgas mixture voidofoxygen,such as 100%
Methaneor 100%Nitrogenandpress&releasetheMENUBUT-
TON (B) to start the test.A 20 second countdown will begin.
Ifthe sensor showsproperdepletion within thisperiod,PASSED
will flash on the display. Press & release the POWER/MUTE
BUTTON(A) to return to theworkingdisplay.
(Continued on page 19)

19 20
MENU OPERATION continued from page 18
IftheO2 sensordoesnotrespondproperly withinthe20second
test,FAILED will appear onthedisplay.Removethe instrument
fromservice.Consultthe factory in the event of any failure.
Press & release the POWER/MUTE BUTTON (A) to return to
theworkingdisplay.
Calibrationistheprocessofsettingthereadingsof the sensors
inthe instrumenttoequalthe valueofcertifiedcalibration gases.
Priortocalibration, allow theinstrumenttooperate for 5minutes
in a clean air environment and conduct a manual zero of the
instrumentusing the SAVE/ZERO(C)button.
NOTE: Using calibration kits other than recommended by
SENSIT TECHNOLOGIES may cause inaccurate readings.
Repairs are required if any sensor fails to calibrate. Con-
sult SENSIT TECHNOLOGIES for details.
NOTE: When calibrating, the numbers shown on the dis-
play represent the numbers seen by the microprocessor
and should not be confused with actual gas readings.
These readings will update every 5 seconds during cali-
bration.
CALIBRATION
CALIBRATION continued from page 19
The following instructions pertain to manual calibration of the
Sensit CO models. If you are using the automatic Smart-Cal
Calibration Station, the procedure is different. See the Smart-
Cal sections of this manual (page 22) or consult the Smart-Cal
instructionmanual.
CARBONMONOXIDE (CO)CALIBRATION (100PPMCO/AIR)
Fromtheworkingdisplaypress& hold the MENU BUTTON (B)
until the top line reads USER MENU.
Press & release the SAVE/ZERO BUTTON (C) once. The bot-
tomlinewillread CALIBRATION.
Press&releasetheMENUBUTTON (B) once. The bottom line
willreadCO 100ppm.Apply100ppmCO/Aircalibration gas and
press&releasetheMENU BUTTON (B) to start CO calibration.
When the reading is satisfactory, the display will flash DATA
SAVED indicating that calibration is complete for that sensor.
ThedateforCALPAST DUE is automatically reset for that sen-
sor as well.
Scroll with the SAVE/ZERO BUTTON (C) if you need to cali-
brate another sensor. When finished, remove and shut off the
gas supply. Press & release the POWER/MUTE BUTTON (A)
to return to the working display.
(Continued on page 20) (Continued on page 21)

21 (Continued on page 17
CALIBRATION continued from page 21
22
CALIBRATION continued from page 20
OXYGENSENSOR TEST
To determine if the O2 sensor is working properly, verify the
sensorsreactionby exposing it to a calibrationgasvoid of oxy-
gen, such as 100% methane or 100% nitrogen.
Fromtheworkingdisplaypress& hold the MENU BUTTON (B)
until the top line reads USER MENU. Scroll with SAVE/ZERO
BUTTON(C) until the bottom line readsO2TEST.
Apply proper gas and press & release the MENU BUTTON (B)
to start the test.A 20 second countdown will begin. If the sen-
sorshows proper depletionwithinthisperiod, PASSEDwillflash
on the display. Press & release the POWER/MUTE BUTTON
(A) to return to the working display.
IftheO2 sensordoesnotrespondproperly withinthe20second
test, FAILED will appear on the display.
Consult the factory in the event of any failure. Press & release
the POWER/MUTE BUTTON (A) to return to the working dis-
play.
NOTE: A calibration failure is indicated on the display by
BAD CAL. Re-calibration should be attempted. Any instru-
ment that does not accept calibration should be taken out
ofservice.Please contact SENSIT TECHNOLOGIES forany
needed repairs.
USINGTHE SMART-CALCALIBRATION STATION
Fromtheworkingdisplaypress& hold the MENU BUTTON (B)
until the top line reads USER MENU. Scroll with SAVE/ZERO
BUTTON(C)untilthebottomline reads SMART CAL.
Placetheinstrument intothecradleonthe left sideoftheSmart-
CalCalibrationStation.Attach the tubing from the station to the
instrument. Press & release the MENU BUTTON (B), the dis-
play will show SMART CAL communicating. Press & release
the CALIBRATE Button on the Smart-Cal and calibration will
beginautomatically.
If successful, CALIBRATION PASSED will be displayed on the
instrument. If unsuccessful, CALIBRATION FAILED will show.
Let the instrument clear and repeat the calibration process. If
the instrument will not pass, remove the instrument from ser-
vice.Consultthe factory in the event ofanyfailure.
Alternativemethodsto enter the Smart Cal menuare:
1.Enter the USERMENU.Press & releasetheMENU BUTTON
(B) once to enter the PRINT menu. Press & release the SAVE/
ZEROBUTTON(C)toscroll until the bottom line reads SMART
CAL. Press & release the MENU BUTTON (B) once to begin
SmartCalcommunication.
2. From the working display, press & hold the POWER/MUTE
BUTTON(A) for2-3seconds. ThedisplaywillreadSMARTCAL
communicating. Please see the Smart-Cal Calibration Station
instructionmanualforadditional information.
Other manuals for CO
3
This manual suits for next models
1
Table of contents
Other Sensit Measuring Instrument manuals
Sensit
Sensit ULTRA-TRAC APL Programming manual
Sensit
Sensit HCN User manual
Sensit
Sensit HXG-3 Programming manual

Sensit
Sensit CO User manual

Sensit
Sensit GOLD 100 User manual
Sensit
Sensit P100 User manual
Sensit
Sensit PTS350A User manual
Sensit
Sensit GOLD G2 User manual

Sensit
Sensit HCN User manual
Sensit
Sensit P400 User manual
Popular Measuring Instrument manuals by other brands
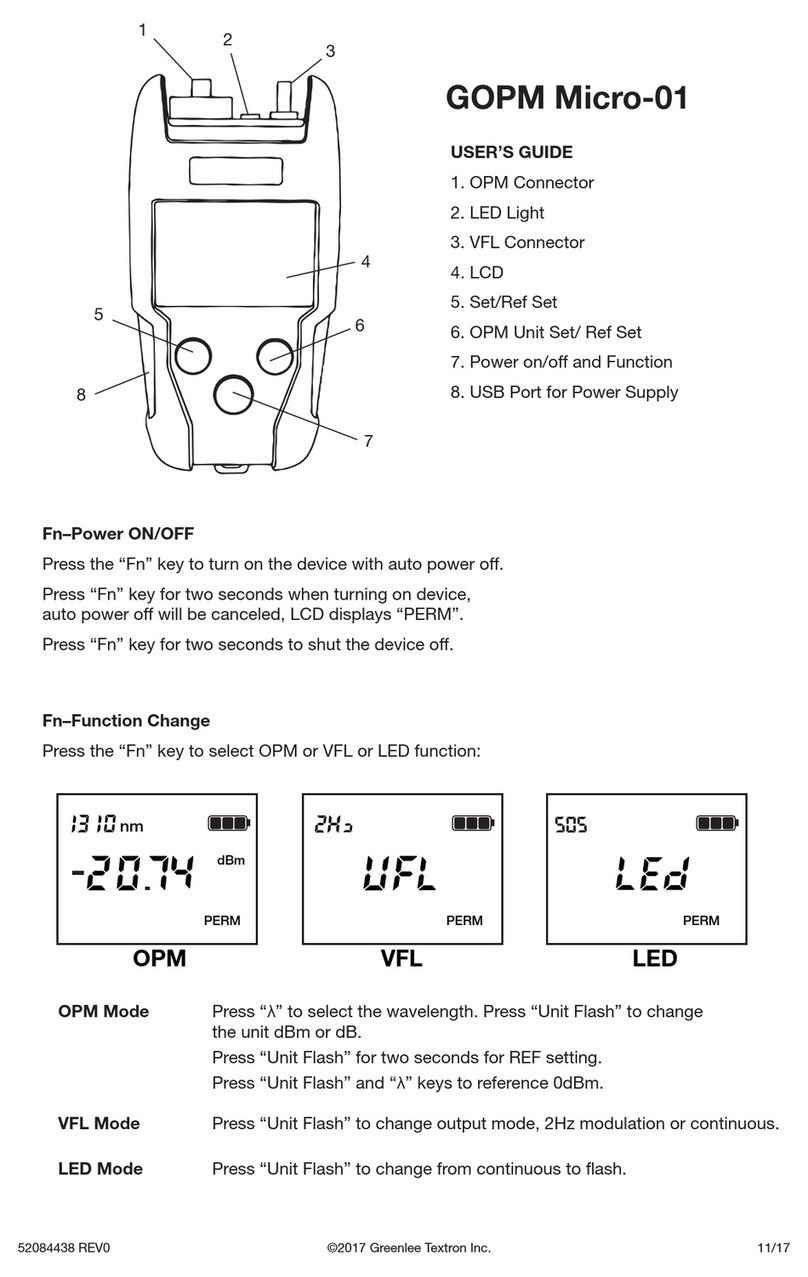
Greenlee
Greenlee GOPM Micro-01 user guide
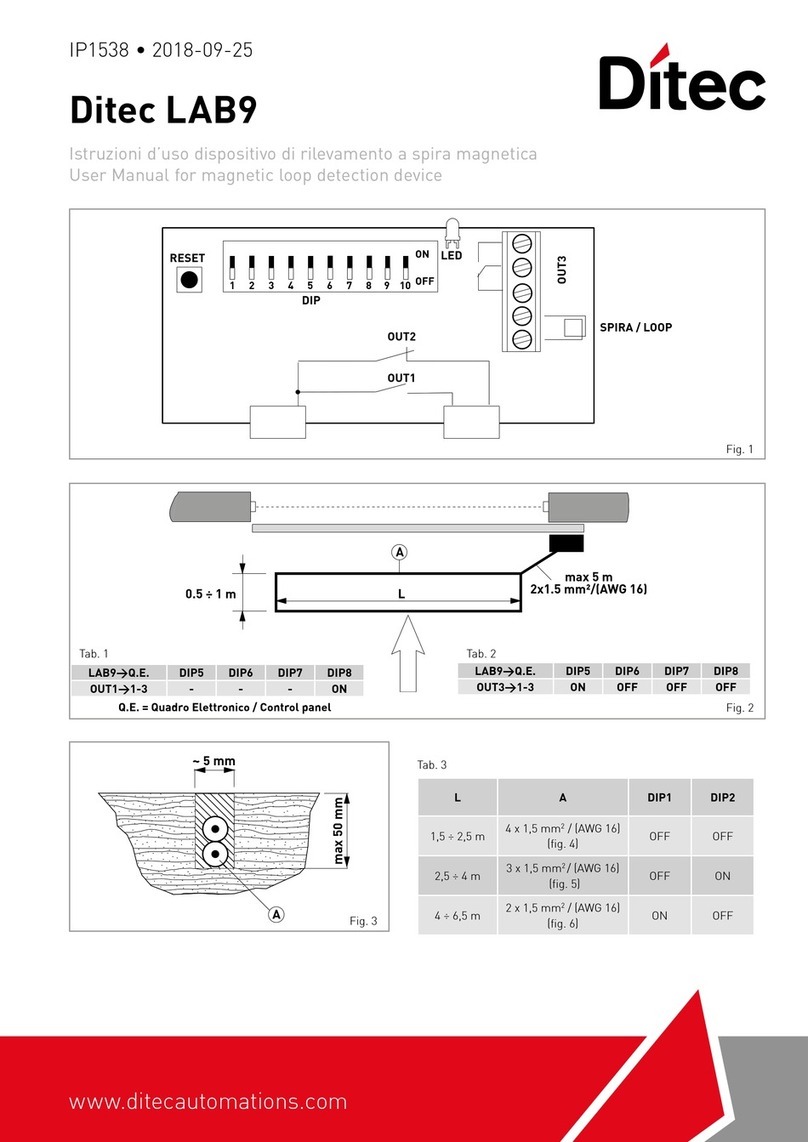
DITEC
DITEC Lab9 user manual

TechnipFMC
TechnipFMC Smith Meter PRIME 4 Installation and operation manual

Rigol
Rigol RSA3045 quick guide

PCB Piezotronics
PCB Piezotronics IMI SENSORS 601A31 Installation and operating manual

Kamstrup
Kamstrup MULTICAL 61 Installation and user guide


