Sensit HCN User manual
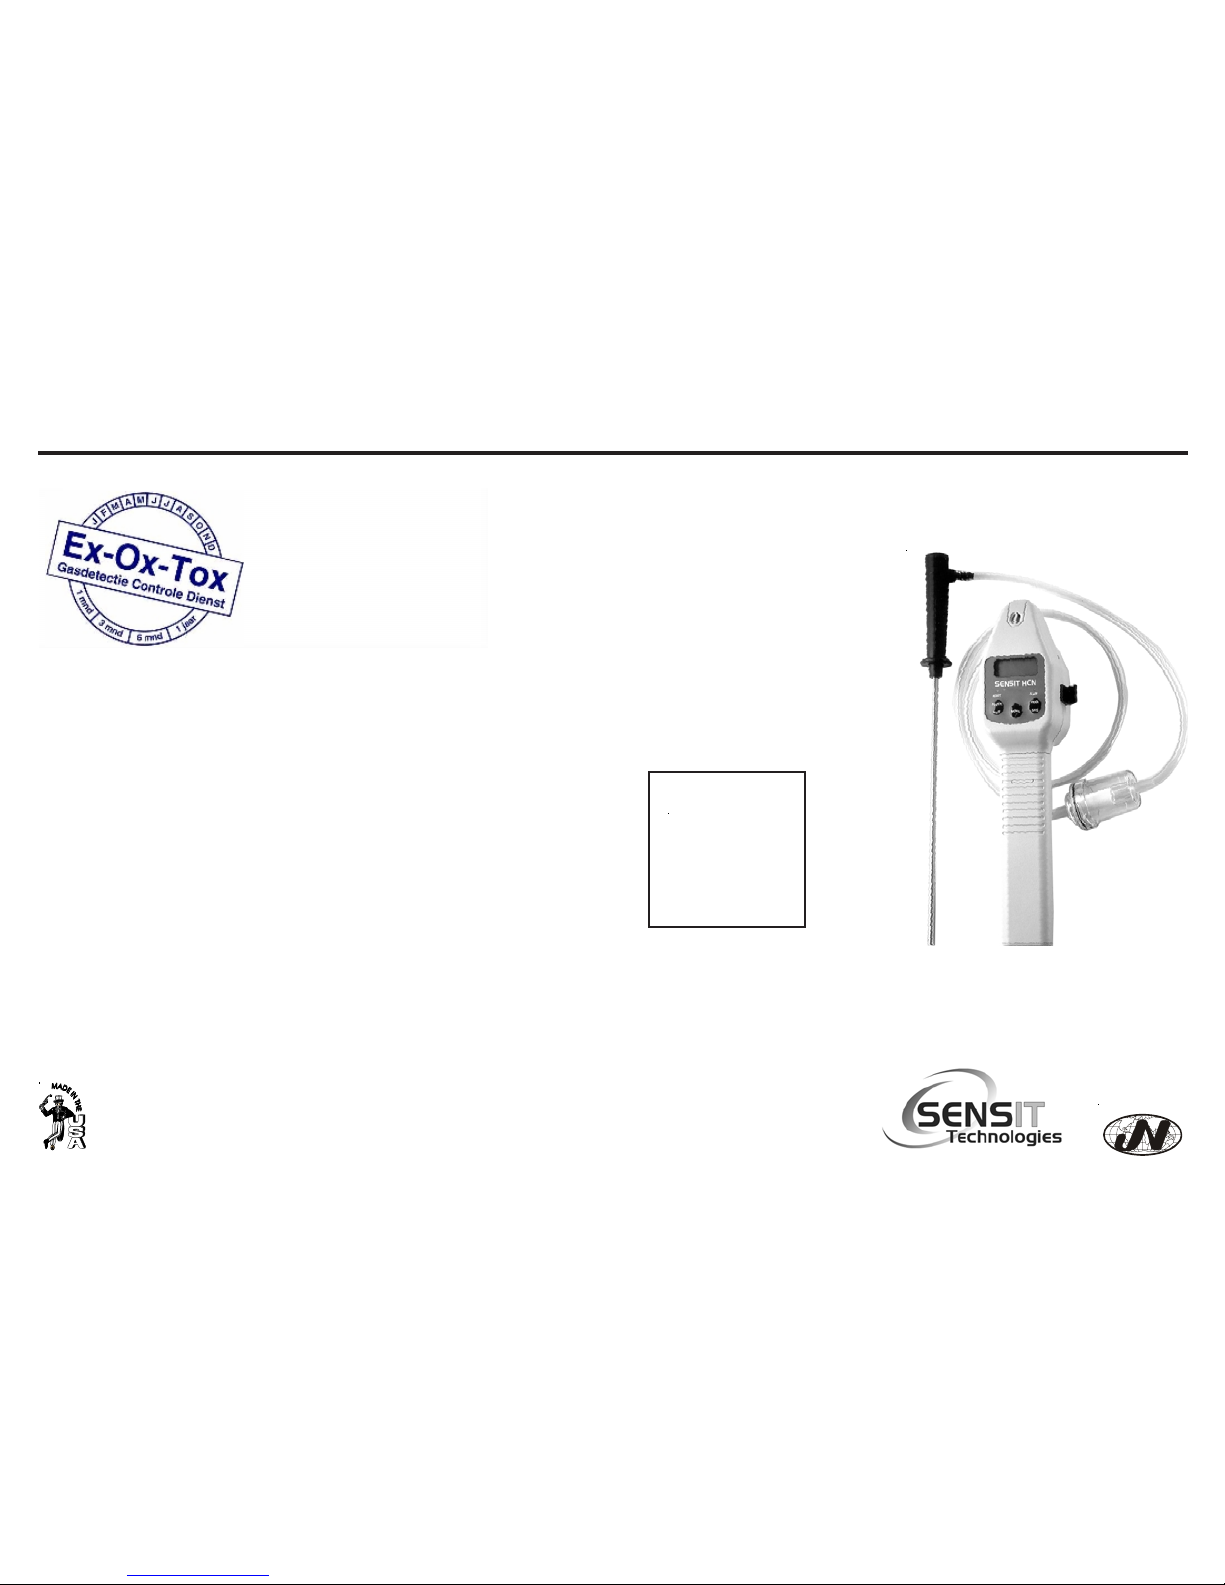
Hydrogen Cyanide Analyzer
InstructionManual
ModelHCN
SENSIT®HCN
9/08 NB V1
Read and understand
instructions before use.
Warning:
To prevent ignition
of flammable or
combustible
atmospheres,
disconnect power
before servicing.
G
A
S
D
E
T
E
C
T
I
O
N
P
R
O
D
U
C
T
S
Ex-Ox-Tox Gasdetectie
Westerdreef 5V
2152 CS Nieuw-Vennep
Telefoon: 0252 620885
E-mail: [email protected]l
Website: www.exoxtox.nl
CONTENTS
Page # 1 Specifications
2 Product Features
2 Parts and Accessories
4 General Description
5 Battery Installation
6 Operation and Use
9 Calibration Check
10 Menu
12 Bump Test
15 Calibration
17 Warranty
1
Power Supply: 3 “C” alkaline batteries
Sensor: Long Life Electrochemical
Range: 0-100 ppm HCN
0-2000 ppm CO*
Alarm: Preset 5 ppm HCN
Preset 50 ppm CO*
Alarm Range: 1-10 ppm HCN
1-300 ppm CO*
Warm Up: Approx. 1 minute
Response Time: 90% of reading < 60 sec.
DutyCycle: 60 Minutes
BatteryLife: Approx. 30 Hours
Size: 3.5” x 12” x 1.6” (89 x 305 x 40 mm)
Weight: 1.1 lbs. (500 g)
Probe Length: 9 inches
Tube Length: 5 feet
HotAir Probe: 700° F @ 5 Minutes
SPECIFICATIONS
2
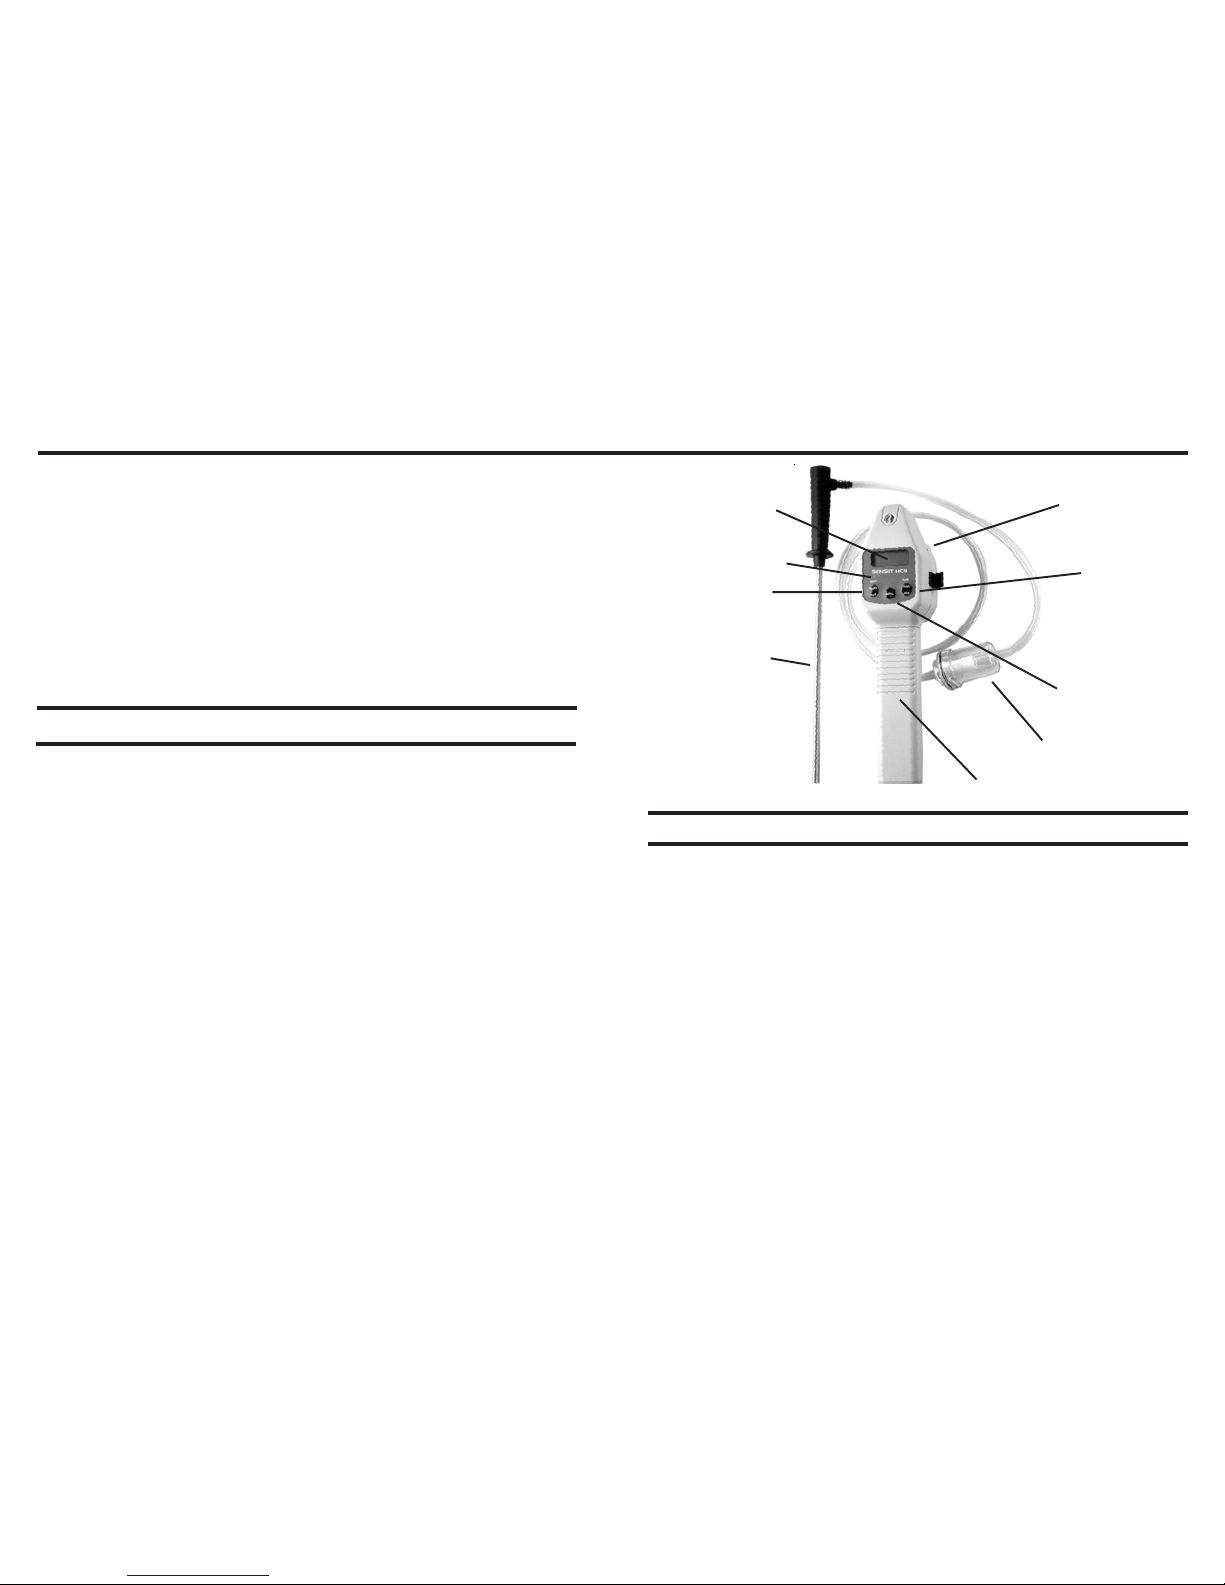
PRODUCT FEATURES
ACCESSORIES
Standard Replacement Parts
CO Sensor PCO0111-SN
Tubing, 5 feet PT7050144
Water/Particle Filter A0156
Hard Carrying Case A0152
Flue Probe AJN02023
Accessories
Calibration Kit HCN CSSHCN0595
Calibration Gas HCN C0188-HCN/N
Calibration Kit HCN/CO CSSHCNCO0597
Printer AJN02021
External Filter Assembly ASHCN0134
CSSHCNCO0597
Calibration Gas HCN/CO
ZERO/SAVE
BUTTON
MENU BUTTON
POWER
BUTTON
HOTAIR PROBE
BATTERY
COMPARTMENT
DISPLAY
WATER/
PARTICLE
FILTER
IRLED
WARNINGLED’s
Sensit®HCN
* Optional

3
PRODUCT FEATURES continued from page 2
Sensit®HCNinstrumentisconstructedofhighimpactABSplas-
tic to withstand the rigors of field use.
Incorporatedinthe handgriparea isthebattery compartment.
Sensit®HCN requires 3 “C” type alkaline batteries. Duracell
MN1400BK provideapproximately 30hours ofuse.
The alarm can be easily heard with the speaker located in the
back of the instrument.
An infrared Port is located on the right side to allow the
Sensit®HCNinstrumentto downloadcalibrationdata andread-
ings the operator has elected to save to the instrument’s on-
boardmemory.
A two line display continually updates gas concentrations and
internalfunctionssuchas airflowblockand batterypower. LEDs
below the display indicate READY orALARM conditions.
There are 3 operational button pads on the front of the
Sensit®HCNinstrument.
POWER/MUTE(A): Operatespower andmute features.
MENU(B): Operates a user menu tocalibrate,
download and set the clock.
SAVE/ZERO(C): Activatesthesave feature andperformsa
manual zeroing of the sensors.
Pressing any button will produce a click sound.
4
GENERALDESCRIPTION
TheSensit®HCNisanadvancedstate-of-the-artHydrogenCya-
nide (HCN) gas analyzer designed to provide part per million
readingsfrom 0-100ppm. TheSensit®HCN iscapable ofper-
forming ambient as well as hot or smoldering air samples with
itshot airprobe andpowerful rotaryvane pump.
TheSensit®HCNisequippedwithan advancedlonglifeelectro-
chemical sensor that can be field calibrated and has a low re-
placement cost. Arenewable filter eliminates cross sensitivity
to many gases.
TheSensit®HCNmayalsobeusedasapersonalmonitor.There
is an alarm at 5ppm. The display must be in view to determine
gasconcentrations.
TheSensit®HCNmaybeequippedwithanoptionalcarbonmon-
oxide sensor (CO) to simultaneously monitor from 0-2000ppm
CO

5
BATTERYINSTALLATION/REPLACEMENT
Battery replacement is necessary when thedisplay reads BAT
LOW,anaudiblealarmsoundsandthegreenreadyLEDflashes.
WhenBAT LOW isdisplayed,theinstrument hasapproximately
30minutes of useful operationtime prior toshut off.
CAUTION: Always change batteries in an environment
free of combustible gases.
Removethe batterysleeve coverby depressingthe lockingtab
onthefront ofthehandle withacoinorflat objectandpulling the
handle away from the top or display area of the instrument.
Place 3 approved batteries into the battery holder. For best
resultshold thebatterycompartment sothat itlays inyour right
hand. With your left hand install the battery that goes toward
the front first. The battery that is in contact with the rear spring
secondand finallyinsertthe thirdbatteryin thecenterby forcing
thesecond batterysuch thatthe springcompresses andallows
the batteries to go into place. If you do not use your right hand
tohold thebottom ofthe batterycompartment thebatteries can
come out.
Observethepolaritymarkings ontheinsideofthe batteryholder.
Improper installation will cause the instrument not to operate.
Replace the battery sleeve and allow the locking tab to snap
into position.
Checkto besurethe handleis securetothe instrumentbody by
gently pulling the handle away. The handle will remain firmly in
place if a proper connection is made.
6
(Continued on page 7)
1. Push the POWER/MUTE (A) button to initiate operation. A
beepwill beheard duringany buttonactivation.
CAUTION: Always start your Sensit®HCN in a gas free
environment to insure a proper zero.
2. Ifthe displayfailsto illuminateor“BATLOW”isshownon the
display, replaceor recharge thebatteries. There is roomin the
carrying case to keep an extra set of alkaline batteries.
3. Uponsuccessful start-up,the pumpwillstart andthe display
will illuminate. The instrument will then display:
a.Productname andsoftwareversion.
b.System check for proper pump and battery
operation.
c.Date and time.
d.SerialNumber.
e.Display “CALPAST DUE” only when calibration is
overdue.
f. Warm-upcountdownfor 10seconds.
g.Display“AUTOZERO” indicatingthe zeroingof all
sensors.
h.Any sensor that is completely inoperable during start
up will be indicated by “FAIL” on the display in the
locationwhere readingswould normallybe located.
TheGREEN READYLIGHT willnot illuminate
indicatingthe instrumentrequires service.
OPERATIONANDUSE

7(continued on page 8)
OPERATION AND USE continued from page 6
4. Prior to use, use your finger to block the inlet of the instru-
mentfor 4-5seconds. Thedisplay willread “FLOWBLOCKED”
if all seals are intact. During pump flow block, a beep will occur
every 2 seconds until the pump restarts and adequate flow is
present.
CAUTION: Always operate this instrument with Filter
Kit or the High Temperature Probe installed. This will pre-
vent water or debris from damaging the internal pump.
5. When testing areas with elevated temperatures always at-
tach the optional hot air probe assembly. Attach the probe by
twistingtheconnector oftheprobeontothe matchingadapterat
theend of the instrument
These connections need only be finger tight. It is necessary to
use a particle filter when performing flue testing. The use of an
unapprovedprobe assemblymayvoid thewarranty.
CAUTION: Do not handle the steel portion of any hot
air probe after use as burns may occur!
8
OPERATION AND USE continued from page 7
6.Todisable theaudiblealarm pressand releasethe POWER/
MUTE(A)button. ToenablethealarmpressthePOWER/MUTE
(A)button again.
7. At any time the operator may save the readings on the dis-
play by pressing the SAVE/ZERO (C) button. This will save all
readingsfordownload atalater time. Thememoryis factoryset
tostore 6events. Thiscan beadjusted from1-15 atthe factory.
Themost recentsave isfirst during download.
8. Following department procedures move to the areas where
gas readings are suspected or must be tested. Use necessary
accessories to draw samples from areas not accessible with
theinstrument itself,suchasconfinedspaces. Duringsampling
therespective readingsmaychange.Audibleandvisual alarms
willactivate when thepreset limits arereached.
9. When being used in dark areas an automatic backlight will
illuminate the display.
10. To turn instrument off, push and hold the POWER/MUTE
(A) button for 5-6 seconds until “POWER DOWN” appears on
the display.

9
Toverify the accuracyof Sensit®HCN,itmustbe exposedto a
knownconcentration oftest gasthat willtest anysensorcombi-
nation included in your particular model. Any sensor that does
not meet the specifications listed in this manual may require
calibration or repair. A calibration check does not update the
calibrationdue date. Fullcalibrationisrequiredto updatethese
times.
Acalibration pastduemessage willilluminateduringwarm-upif
calibrationhas notbeenperformed peryour companyspecified
interval. Anytime it is suspected the Sensit®HCN is not work-
ingproperly, checkcalibration.
CALIBRATIONCHECK
10
(continued on page 11
MENU
The Sensit®HCN has several user adjustable features in the
USERMENU. Theseinclude:
PRINT MENU:Printing session, calibration, Bar Hole Test logs
andaccessing Smart-CalAutomatic CalibrationStation.
CALIBRATION:Calibrate HCN and/or CO and access Smart-
CalAutomatic CalibrationStation.
POWER OFF:Set the automatic shut off timer in minutes.
SET CLOCK:Setdate andtime.
SHOW CAL LOG:Display last calibration of all gasses.
SHOW SES LOG:Displaysaved gas readingdata withdate
and time.
BUMP TEST:Perform automatic test for response to minimum
of 80% of calibrated gas value within 45 seconds.
SMART-CAL:Accessautomatic calibrationstation.
O2 TEST
PRINTMENU
From the working display access the menu by pressing and
holding the MENU (B) button until the top line of the display
reads USER MENU. The bottom line will read PRINT MENU.
Press the MENU (B) button to access the PRINT MENU op-
tions.Use theSAVE/ZERO (C)buttonto selectthe CALLOG or
SESSIONLOG option.
Atthis timepreparethe printer.Aimthe IRLED onthe rightside
of the instrument to the IR receptor on the printer. Press the
MENU(B) buttontoprint thedata.Pressing thePOWER/MUTE
(A)buttonwill reenter theUSER MENU.

11 (continued on page 12)
MENU continued from page 10
Use the SAVE/ZERO (C) button at this time to scroll to another
menufunctionasindicated bythetoplinereading USERMENU.
Pressing the POWER/MUTE (A) button will return the instru-
ment to the working (gas readings) display.
POWER OFF
From the working display access the menu by pressing and
holding the MENU (B) button until the top line of the display
reads USER MENU. Press and release the SAVE/ZERO (C)
button until the bottom line displays POWER OFF. Press the
MENU (B) button. Use the SAVE/ZERO (C) button to increase
the number of minutes of run time and the MENU (B) button to
reducethem. Settingthe timer to0 willcause theunit toalways
remain on.After adjusting the number, press and release the
POWER/MUTE(A)buttontosavetheadjustment.UsetheSAVE/
ZERO (C) button at this time to scroll to another menu function
asindicated bythe topline reading USERMENU. Pressingthe
POWER/MUTE(A)button willreturnthe instrumenttothe work-
ing(gas readings)display.
SETCLOCK
From the working display access the menu by pressing and
holding the MENU (B) button until the top line of the display
reads USER MENU. Press and release the SAVE/ZERO (C)
button until the bottom line displays SET CLOCK. Press the
MENU (B) button. The day will flash upon entering the SET
CLOCK option. The SAVE/ZERO (C) button advances to the
next item and the MENU (B) button changes the flashing item.
All settings are based on US time and date settings using a 24
hour clock.
12
(Continued on page 13)
MENU continued from page 11
AfteradjustingallnumberspressandreleasethePOWER/MUTE
(A) button to save the adjustment. Use the SAVE/ZERO (C)
buttonto scrollto anothermenufunction asindicated bythe top
line reading USER MENU. Pressing the POWER/MUTE (A)
button will return the instrument to the working (gas readings)
display.
SHOW CAL LOG
From the working display access the menu by pressing and
holding the POWER/MUTE (A) button until the top line of the
displayreadsUSERMENU. PressandreleasetheSAVE/ZERO
(C)buttonuntil thebottomlinedisplays SHOW CALLOG.Press
theMENU (B)button. At thistimeone ofthe gasesand thelast
calibrationdate willbe displayed.Use theSAVE/ZERO (C)but-
ton to review all other calibrations dates and their respective
gases.After review of the last available gas the instrument will
automatically return to the user menu as indicated by the top
line reading USER MENU. Pressing the POWER/MUTE (A)
button will return the instrument to the working (gas readings)
display.
SHOW SES LOG
From the working display access the menu by pressing and
holding the MENU (B) button until the top line of the display
reads USER MENU. Press and release the SAVE/ZERO (C)
button until the bottom line displays SHOW SES LOG. Press
theMENU(B) button. Usethe SAVE/ZERO (C) buttonto scroll
to the saved session you wish to review. SESSION 1 is the
mostrecent datasaved.

13
MENU continued from page 12
Pressing the MENU (B) button will display the date and time of
that session. Pressing the MENU (B) button again will display
thegas reading.Pressing theSAVE/ZERO(C)button willallow
youto scrollthrough allother gasreadings. Pressthe POWER/
MUTE (A) button to return to SESSION (No.) and pressing the
SAVE/ZERO (C) button will allow you to review all previously
saved SESSION’s by date. Press the MENU (B) button to re-
view the gas data. Pressing the POWER/MUTE (A) button 3
timeswillreturn youtothe USERMENU.Pressingthe POWER/
MUTE(A) buttononce morereturns youto theworking display.
The number of stored session log saves is factory set at 6. It
canstore upto 16 bychanging factorysettings (contactfactory
forinstructions).
BUMPTEST
From the working display access the menu by pressing and
holding the MENU (B) button until the top line of the display
reads USER MENU. Press and release the SAVE/ZERO (C)
button until the bottom line displays BUMP TEST. Prepare
100ppmCO forapplicationto theinstrument.Attachthe hoseto
theinlet connection. Turnon thegas. Press theMENU (B)but-
ton. EACH GAS must read 80% of calibrated value within 45
seconds. The readings are on the left and the timer is on the
right side of the display. If the instrument passes, the display
will read BUMP TEST PASSES and a beep will sound. If the
instrumentfails,the display willread BUMPTESTFAILEDand
abeepwillsound.AttheendofanybumptestpressthePOWER/
MUTE (A) button to return to the working display.
(Continued on page 14) 14
SMART-CAL
From the working display access the menu by pressing and
holding the POWER/MUTE (A) button until the top line of the
displayreadsUSERMENU. PressandreleasetheSAVE/ZERO
(C) button until the bottom line displays SMART CAL. Place
the instrument into the cradle provided on the left side of the
Smart-CalCalibration Station.Attachthetubing fromthestation
to the inlet side of the instrument. Press the center button. The
displaywill show“SMART CAL Communicating”and thepump
will turn off. Select the test from the Smart-Call Station to be
performed. At the end of the test the instrument will beep 3
times and display PASS or FAIL. Retry the test if necessary by
pressingtheproperbuttonon theSmart-CalStationagain.Press
the left button to return the working display, remove the tubing
andreturninstrumentto serviceorsendinstrument totheproper
placefor repairper company procedures.
SHORTCUT TO ACCESS SMART-CAL: Place theinstrument
intothe cradleprovidedon theleftsideofthe Smart-Calcalibra-
tionStation.Attach thetubingfrom thestationto theinlet sideof
the instrument. While in the working display press the power
button for 2-3 seconds and release. The display will show
“SMART CAL Communicating” and the pump will turn off. Per-
form all tests as described in the SMART CAL section.
MENU continued from page 13

15 (Continued on page 16
CALIBRATION
From the menu options, it is possible to calibrate the sensor in
the Sensit®HCN instrument. Calibration is the process of set-
tingthe readingsofthe instrumentto certifiedcalibration gases.
When calibrating, the numbers shown on the display rep-
resent the numbers seen by the microprocessor. These
readings should not be confused with actual gas readings.
Prior to any calibration, power the instrument in a gas free
environment. Allow 5 minutes of additional warm-up time and
manuallyzerotheinstrumentusing theSAVE/ZERO(C)button.
STEP 1
From the working display access the menu by pressing and
holding the MENU (B) button until the top line of the display
reads USER MENU. Press and release the SAVE/ZERO (C)
buttonuntil thebottom linedisplaysCALIBRATION. Press the
MENU(B). The toplinewill nowread CALIBRATION.
HYDROGENCYANIDE(HCN)CALIBRATION (HCN 10PPM)
To calibrate HCN, push the MENU (B) when the top line reads
CALIBRATION andthe bottomline readsHCN10 PPM. Imme-
diately apply 10 ppm HCN.
When the reading is satisfactory, the display will read DATA
SAVED indicating calibration is complete. The date for CAL
PAST DUE is automatically reset at this point. Pressing the
POWER/MUTE(A)button willreturnthe instrumenttothe work-
ing(gas readings) display. Removethe gas.
CALIBRATION continued from page 15
CARBONMONOXIDE (CO) CALIBRATION(CO - 100PPM)
To calibrate CO, push the MENU (B) when the top line reads
CALIBRATION andthebottom linereads CO100 PPM. Imme-
diatelyapply 100 ppmCO (balanceair).
When the reading is satisfactory, the display will read DATA
SAVED indicating calibration is complete. The date for CAL
PAST DUE is automatically reset at this point. Pressing the
POWER/MUTE(A)button willreturnthe instrumenttothe work-
ing(gas readings) display. Remove thegas.
NOTE:Improper calibration is indicated by “Bad Cal” when
save is attempted. Calibration will be based on the last
successfulcalibration. Recalibration is recommended. The
calibration due date will not be updated until successful
calibration has occurred. Any instrument that does not
calibrate requires service. Contact SENSIT Technologies
for details.
CAUTION: Using calibration kits other than the recom-
mended kit may cause inaccurate readings. Repairs are
required if any sensor fails to calibrate. Contact manufac-
turer for details.
16

17
WARRANTY
Your Sensit®HCN is warrantedto befree fromdefectsin mate-
rials and workmanship for a period of two years after purchase
(excluding calibration and batteries). If within the warranty pe-
riod,your instrumentshould become inoperativefrom suchde-
fects, the unit will be repaired or replaced at our option. This
warrantycovers normaluse and doesnot coverdamage which
occursin shipmentor failure whichresults fromalteration, tam-
pering, accident, misuse, abuse, neglect or improper mainte-
nance. Proof of purchase may be required before warranty is
rendered. Units out of warranty will be repaired for a service
charge. Internalrepair ormaintenance mustbecompleted bya
JAndN authorizedtechnician. Violationwillvoidwarranty.Units
must be returned postpaid, insured and to the attention of the
ServiceDept. forwarrantyor repair.
This warranty gives you specific legal rights and you may have
other rights which vary from state to state.
Ex-Ox-Tox Gasdetectie
Westerdreef 5V
2152 CS Nieuw-Vennep
Telefoon: 0252 620885
E-mail: [email protected]l
Website: www.exoxtox.nl
Other manuals for HCN
1
Table of contents
Other Sensit Measuring Instrument manuals

Sensit
Sensit P100 User manual

Sensit
Sensit HXG-3 Programming manual

Sensit
Sensit P400 User manual

Sensit
Sensit CO User manual

Sensit
Sensit HCN User manual

Sensit
Sensit CO User manual

Sensit
Sensit GOLD 100 User manual

Sensit
Sensit ULTRA-TRAC APL Programming manual

Sensit
Sensit CO User manual

Sensit
Sensit GOLD G2 User manual

Popular Measuring Instrument manuals by other brands

Greenlee
Greenlee GOPM Micro-01 user guide

DITEC
DITEC Lab9 user manual

TechnipFMC
TechnipFMC Smith Meter PRIME 4 Installation and operation manual

Rigol
Rigol RSA3045 quick guide

PCB Piezotronics
PCB Piezotronics IMI SENSORS 601A31 Installation and operating manual

Kamstrup
Kamstrup MULTICAL 61 Installation and user guide


