Seura STRM - 42. 2 User manual
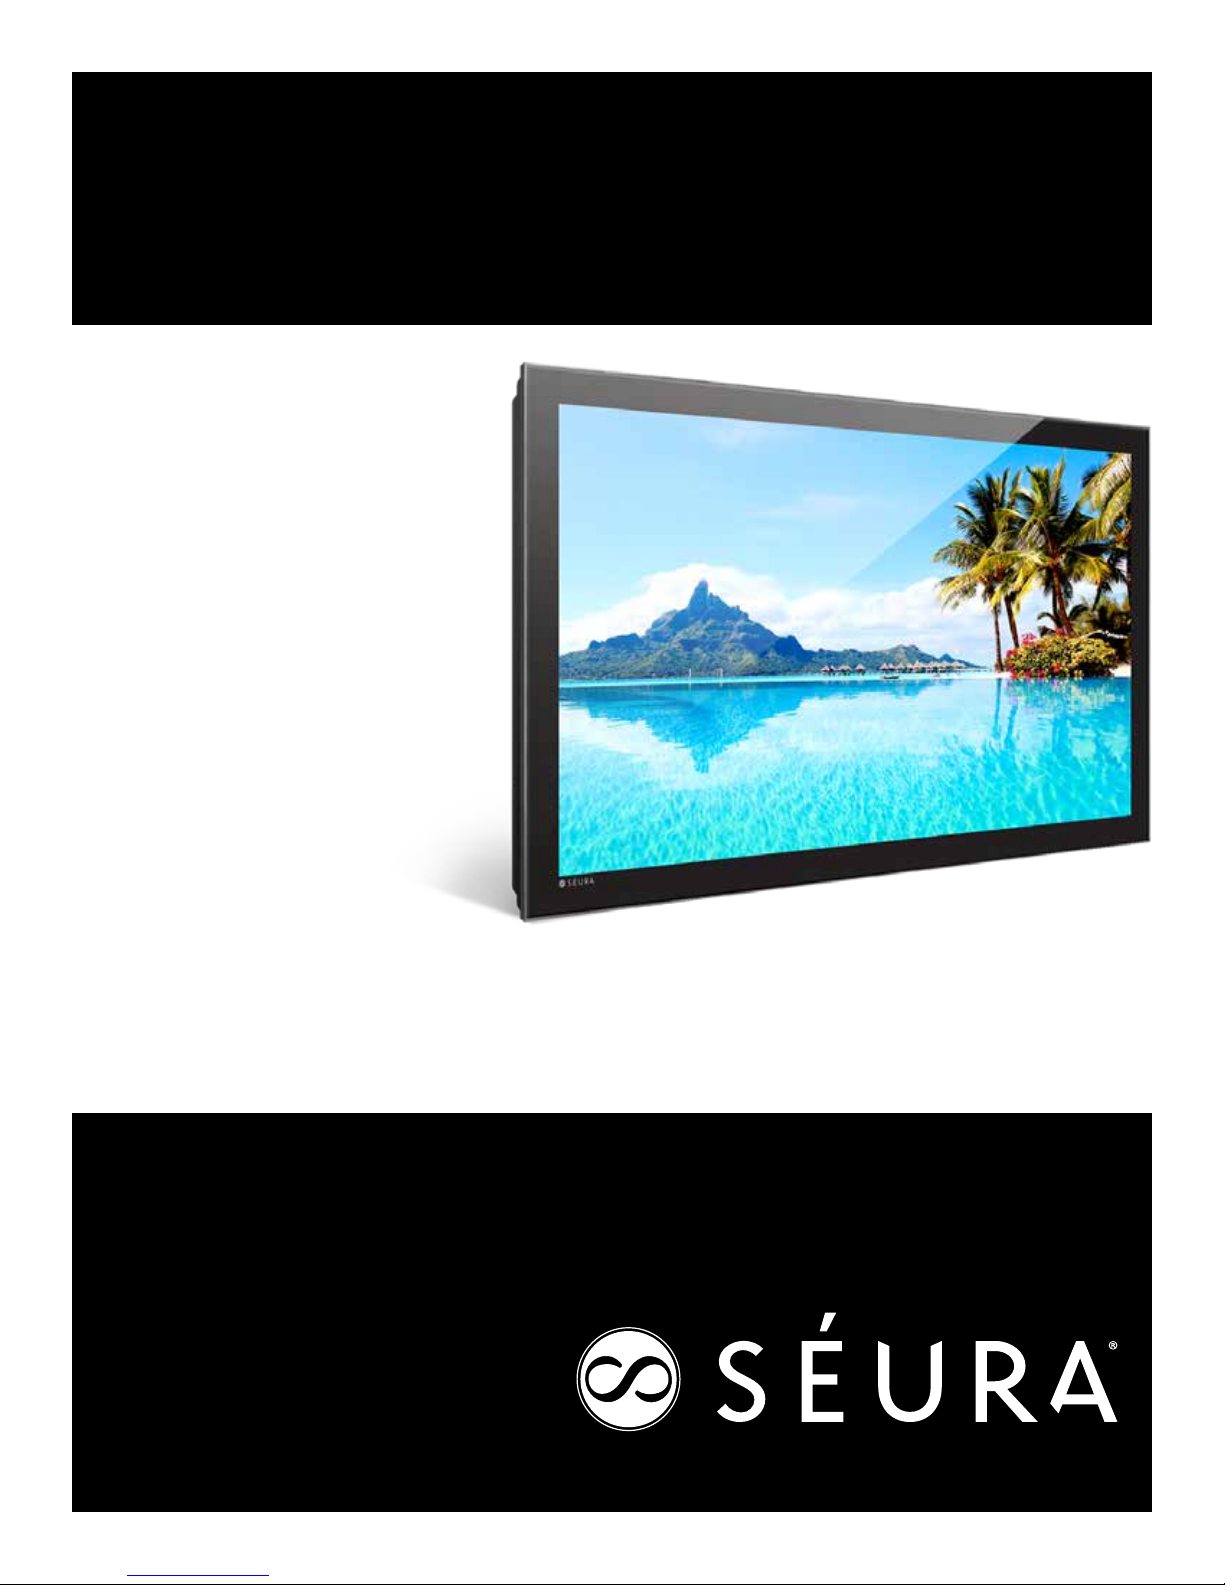
STRM-42.2 | STRM-47.2 | STRM-55.2
USER MANUAL
Storm™Outdoor Television
TV SIZES 42"47"55"
www.seura.com
2
A warning that an apparatus with class I
construction shall be connected to a MAINS
socket outlet with a protective earthing
connection
Un avertissement qu’un appareil de
construction de CLASSE I doit être connecte à
un socle du réseau d’alimentation muni d’une
connexion à la terre de protection.
WARNING
To prevent injury, this apparatus must
be securely attached to the oor/wall in
accordance with the installation instructions.
ATTENTION
Pour éviter tout accident, cet appareil doit
être fixe de façon sure au sol ou au mur
conformément aux instructions d’installation.
Where the MAINS plug or an appliance
coupler is used as the disconnect device,
the disconnect device shall remain readily
operable;
Lorsque la prise du RESEAU
D’ALIMENTATION ou une prise placée sur
l’appareil est utilisée comme dispositif de
déconnexion, ce dispositif doit demeure
aisément accessible;
Important Safety Precautions
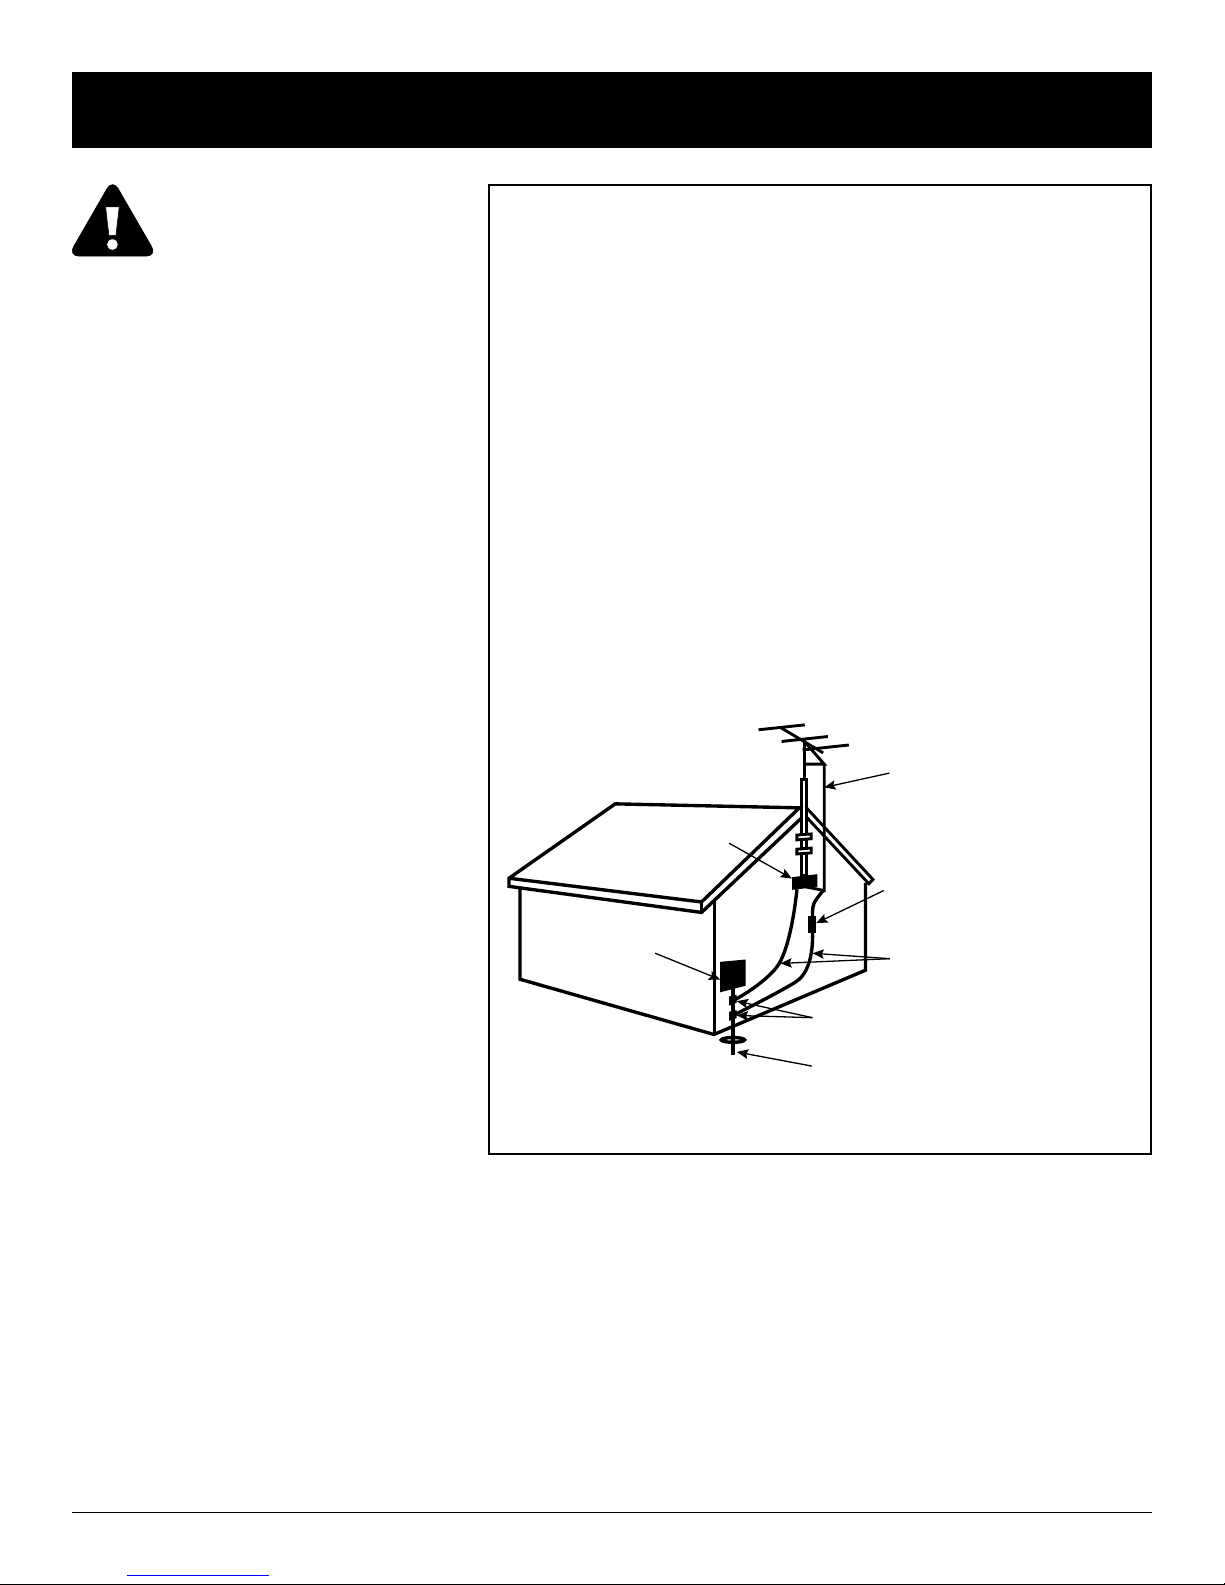
If an outside antenna is connected to the television equipment, be sure
the antenna system is grounded so as to provide some protection against
voltage surges and built-up static charges. Section 810 of the National
Electrical Code provides information with respect to proper grounding of the
mast and supporting structure, grounding of the lead-in wire to an antenna
discharge unit, size of grounding conductors, location of antenna discharge
unit, connection to grounding electrodes, and requirements for the grounding
electrode.
Si une antenne extérieure est reliée à l’équipement de télévision, s’assurer que le
système d’antenne est mis à la terre de façon à fournir une protection contre les
surtensions et les charges statiques accumulées. L’article 810 du Code national
de l’électricité fournit de l’information par rapport à la terre correcte du mât et
du support, mise à la terre du fil conducteur à une unité de décharge d’antenne,
la taille des conducteurs de mise à la terre, l’emplacement du dispositif de
décharge d’antenne, la connexion aux électrodes de mise à la terre, et les
exigences concernant les électrodes de mise à la terre.
EXAMPLE OF ANTENNA GROUNDING AS PER NATIONAL ELECTRICAL CODE
EXEMPLE D’ANTENNE À LA TERRE COMME LE NATIONAL ELECTRICAL CODE
NEC - NATIONAL ELECTRICAL CODE
The apparatus shall not be exposed to dripping or splashing and no objects lled with liquids, such as vases, shall be
placed on the apparatus.
Le mode d’emploi doit stipuler que l’appareil ne doit pas être expose à des égouttements d’eau ou des éclaboussures et de
plus qu’aucun objet rempli de liquide tel que des vases ne doit être place sur l’appareil.
To reduce the risk of re or electric shock, do not expose the inside of this apparatus to rain or moisture. The inside of
this apparatus shall not be exposed to dripping or splashing.
Pour réduire le risque d’incendie ou de choc électrique, ne pas exposer l’intérieur de cet appareil à la pluie ou à l’humidité.
L’intérieur de cet appareil ne doit pas être exposé à des gouttes ou des éclaboussures.
WARNINGS
Warnings
ANTENNA LEAD-IN WIRE
ANTENNE FIL
ANTENNA DISCHARGE UNIT
L'UNITÉ DE DÉCHARGE D'ANTENNE
GROUND CLAMP
TERRE PINCE DE
MASSE
ELECTRIC SERVICE
EQUIPMENT
ÉQUIPEMENT DE
SERVICE ÉLECTRIQUE
GROUNDING CONDUCTORS
MISE À LA TERRE DES CONDUCTEURS
GROUND CLAMPS
TERRE PINCES DE MASSE
POWER SERVICE GROUNDING ELECTRODE SYSTEM
SERVICE DE LA PUISSANCE DU SYSTÈME
D'ÉLECTRODES DE MISE À LA TERRE

3
1) Read these instructions.
2) Keep these instructions.
3) Heed all warnings.
4) Follow all instructions.
5) Do not use this apparatus near water.
6) Clean only with a dry cloth.
7) Do not block any of the ventilation openings. Install in accordance with the manufacturer’s instructions.
8) Do not install near any heat sources such as radiators, heat registers, stoves, or other apparatus (including ampliers)
that produce heat.
9) Do not defeat the safety purpose of the polarized or grounding type plug. A polarized plug has two blades with
one wider than the other. A grounding type plug has two blades and a third grounding prong. The wide blade or the
third prong is provided for your safety. When the provided plug does not t into your outlet, consult an electrician for
replacement of the obsolete outlet.
10) Protect the power cord from being walked on or pinched particularly at plugs, convenience receptacles, and the
point where they exit from the apparatus.
11) Only use the attachments/accessories specied by the manufacturer.
Consignes de sécurité importantes
1 ) Lisez ces instructions.
2) Conservez ces instructions.
3 ) Respectez tous les avertissements.
4 ) Suivez toutes les instructions.
5 ) Ne pas utiliser cet appareil près de l’eau.
6) Nettoyez uniquement avec un chiffon sec.
7) Ne pas bloquer les ouvertures de ventilation . Installer conformément aux instructions du fabricant.
8 ) Ne pas installer près de sources de chaleur telles que des radiateurs , registres de chaleur , poêles ou autres appareils
(incluant les amplificateurs) qui produisent de la chaleur.
9 ) Ne pas contourner le dispositif de sécurité de la fiche polarisée ou mise à la terre . Une fiche polarisée possède deux
lames dont une plus large que l’autre . Une fiche de terre a deux lames et une troisième broche de mise à la terre . La lame
large ou la troisième broche sont fournies pour votre sécurité . Si la fiche fournie ne rentre pas dans votre prise, consultez un
électricien pour remplacer la prise obsolète.
10 ) Protégez le cordon d’alimentation ne soit piétiné ou pincé, en particulier au niveau des fiches , des prises de courant , et
le point de sortie de l’appareil.
11) Utilisez uniquement les fixations / accessoires spécifiés par le fabricant.
Important Safety Instructions

4
Warnings
Please keep this manual for future reference.
Information in this manual is subject to change without prior notice.
FCC Information
This equipment has been tested and found to comply with limits for a class B digital device, pursuant to Part 15 of the FCC Rules. These limits
are designed to provide reasonable protection against harmful interference in a residential installation.
This equipment generates, uses, and radiates radio frequency energy and, if not installed and used in accordance with the instructions, may
cause harmful interference to radio communications.
There is no guarantee that interference will not occur in a particular installation. If this equipment causes unacceptable interference to
radio and television reception, which can be determined by turning the equipment off and on, the user is encouraged to try to correct the
interference by one or more of the following measures.
• Reorient or relocate the receiving antenna.
• Increase the separation between the equipment and receiver.
• Connect the equipment into an outlet on a circuit different from that to which the receiver is connected.
Consult the dealer or an experienced Radio/TV technician for additional help.
WARNINGS
To reduce the risk of re, electrical shock and other injuries, keep these safety precautions in mind when
installing, using, and maintaining your Outdoor Television. The socket-outlet should be installed near the
equipment and be easily accessible. The TV should be connected to a grounded GFCI protected main socket
outlet.
WARNING: If you manipulate against the recommended usage, serious injury or death to user may result.
To protect against electric shock, do not immerse the power cord, power
plug, or product in water or other liquid.
Do not overload AC outlets or extension cords. Overloading can cause
re or electric shock.
Close adult supervision is necessary when any product is used by or near
children.
Do not operate any product with a damaged cord or plug or operate it
after the appliance malfunctions or has been damaged in any manner.
Do not use the product close to any heat sources such as radiators, heat
registers, stoves, or other products that produce heat.
Do not let the power cord come in contact with hot surfaces.
If you notice any smoke or scorched smell near the product, unplug
power cord and refer to qualied personnel for service and/or repair.
Do not use or place any combustible or ammable substances near the
product.
To electrically disconnect the product, turn OFF the product, then remove
the electrical power plug from the outlet.
Do not place heavy articles on or step on the product.
Do not place the product on an unstable cart, stand, tripod or table.
Do not use this product for other than intended use.
This Séura product is intended for use indoors and outdoors.
This product is water resistant. Do not immerse this product in water.
For added safety during a lighting storm, or when this product is left
unattended and unused for long periods of time, unplug it from the wall
outlet and disconnect the antenna.
Specications of this product are subject to unannounced changes; this manual may thus not reect the current technical status.
5
Avertissements
S’il vous plaît garder ce manuel pour référence future.
Les informations contenues dans ce manuel sont sujettes à modification sans préavis.
Informations de la FCC
Cet équipement a été testé et déclaré conforme aux limites d’un appareil numérique de classe B , conformément à la partie 15 des règles de la
FCC. Ces limites sont conçues pour fournir une protection raisonnable contre les interférences nuisibles dans une installation résidentielle.
Cet équipement génère , utilise et rayonne de l’énergie radiofréquence et , s’il n’est pas installé et utilisé conformément aux instructions, peut causer
des interférences nuisibles aux communications radio.
Il n’y a aucune garantie que des interférences ne se produiront pas dans une installation particulière. Si cet équipement provoque des interférences
inacceptables pour la radio et la télévision, ce qui peut être déterminé en mettant l’équipement hors tension, l’utilisateur est encouragé à essayer de
corriger l’interférence par une ou plusieurs des mesures suivantes.
• Réorienter ou déplacer l’antenne de réception.
• Augmenter la distance entre l’équipement et le récepteur.
• Connecter l’équipement à une sortie sur un circuit différent de celui sur lequel le récepteur est branché.
Consulter le revendeur ou un technicien radio / TV expérimenté pour de l’aide supplémentaire.
AVERTISSEMENTS
Pour réduire le risque d’incendie, de choc électrique et d’autres blessures, garder ces consignes de sécurité à
l’esprit lors de l’installation, l’utilisation et l’entretien de votre télévision en plein air. La prise de courant doit être
installée près de l’équipement et être facilement accessible. Le téléviseur doit être relié à une prise de courant
avec terre protégé par disjoncteur différentiel.
Attention: Si vous manipulez contre l’utilisation recommandée, des blessures graves ou la mort à l’utilisateur
peuvent en résulter.
Pour protéger contre les chocs électriques , ne pas immerger le cordon
d’alimentation , cordon d’alimentation , ou un produit dans l’eau ou tout
autre liquide.
Ne surchargez pas les prises de courant ou les rallonges. Une surcharge
peut causer un incendie ou un choc électrique.
Surveillance d’un adulte est nécessaire lorsque tout appareil est utilisé par
ou près des enfants.
Ne pas utiliser un produit avec un cordon ou une fiche détériorés fonctionner
après un mauvais fonctionnement de l’appareil ou a été endommagé d’une
manière quelconque.
Ne pas utiliser le produit à proximité de sources de chaleur telles que des
radiateurs , registres de chaleur , poêles ou autres produits qui produisent
de la chaleur.
Ne laissez pas le cordon d’alimentation entrer en contact avec des surfaces
chaudes.
Si vous remarquez de la fumée ou une odeur brûlée près du produit ,
débranchez le cordon d’alimentation et de vous référer à un personnel
qualifié pour l’entretien et / ou réparation.
Ne pas utiliser ou placer des matières combustibles ou inflammables à
proximité du produit.
Pour débrancher électriquement le produit , éteignez le produit , puis retirez
la fiche d’alimentation électrique de la prise.
Ne placez pas lourds articles ou étape sur le produit.
Ne pas placer le produit sur un chariot, un support, un trépied ou une table.
Ne pas utiliser ce produit pour d’autres fins que celles prévues.
Ce produit seura est destiné à un usage intérieur et extérieur.
Ce produit est résistant à l’eau. Ne pas immerger le produit dans l’eau.
Pour plus de sécurité lors d’une tempête d’éclairage , ou quand le produit
est laissé sans surveillance et inutilisé pendant de longues périodes de
temps , débranchez-le de la prise murale et déconnectez l’antenne.
Spécifications de ce produit sont sujettes à modifications sans préavis; ce manuel ne peut donc pas tenir compte de l’état de la technique actuelle.
This manual suits for next models
8
Table of contents
Other Seura TV manuals

Seura
Seura Hydra IWT-19.6 User manual

Seura
Seura Full Sun Series UB4-50 Operating and safety instructions

Seura
Seura ENT3-55 User manual

Seura
Seura DSM-10.4 User manual

Seura
Seura Hydra HY-19. 5 User manual

Seura
Seura 10 User manual

Seura
Seura STRM-42.3-UB User manual

Seura
Seura Shade Series 2 SHD2-43 Operating and safety instructions

Seura
Seura SHD1-55 User manual

Seura
Seura 10.5 User manual


