SATA QUICKPORT PRO LAN
ENGLISH
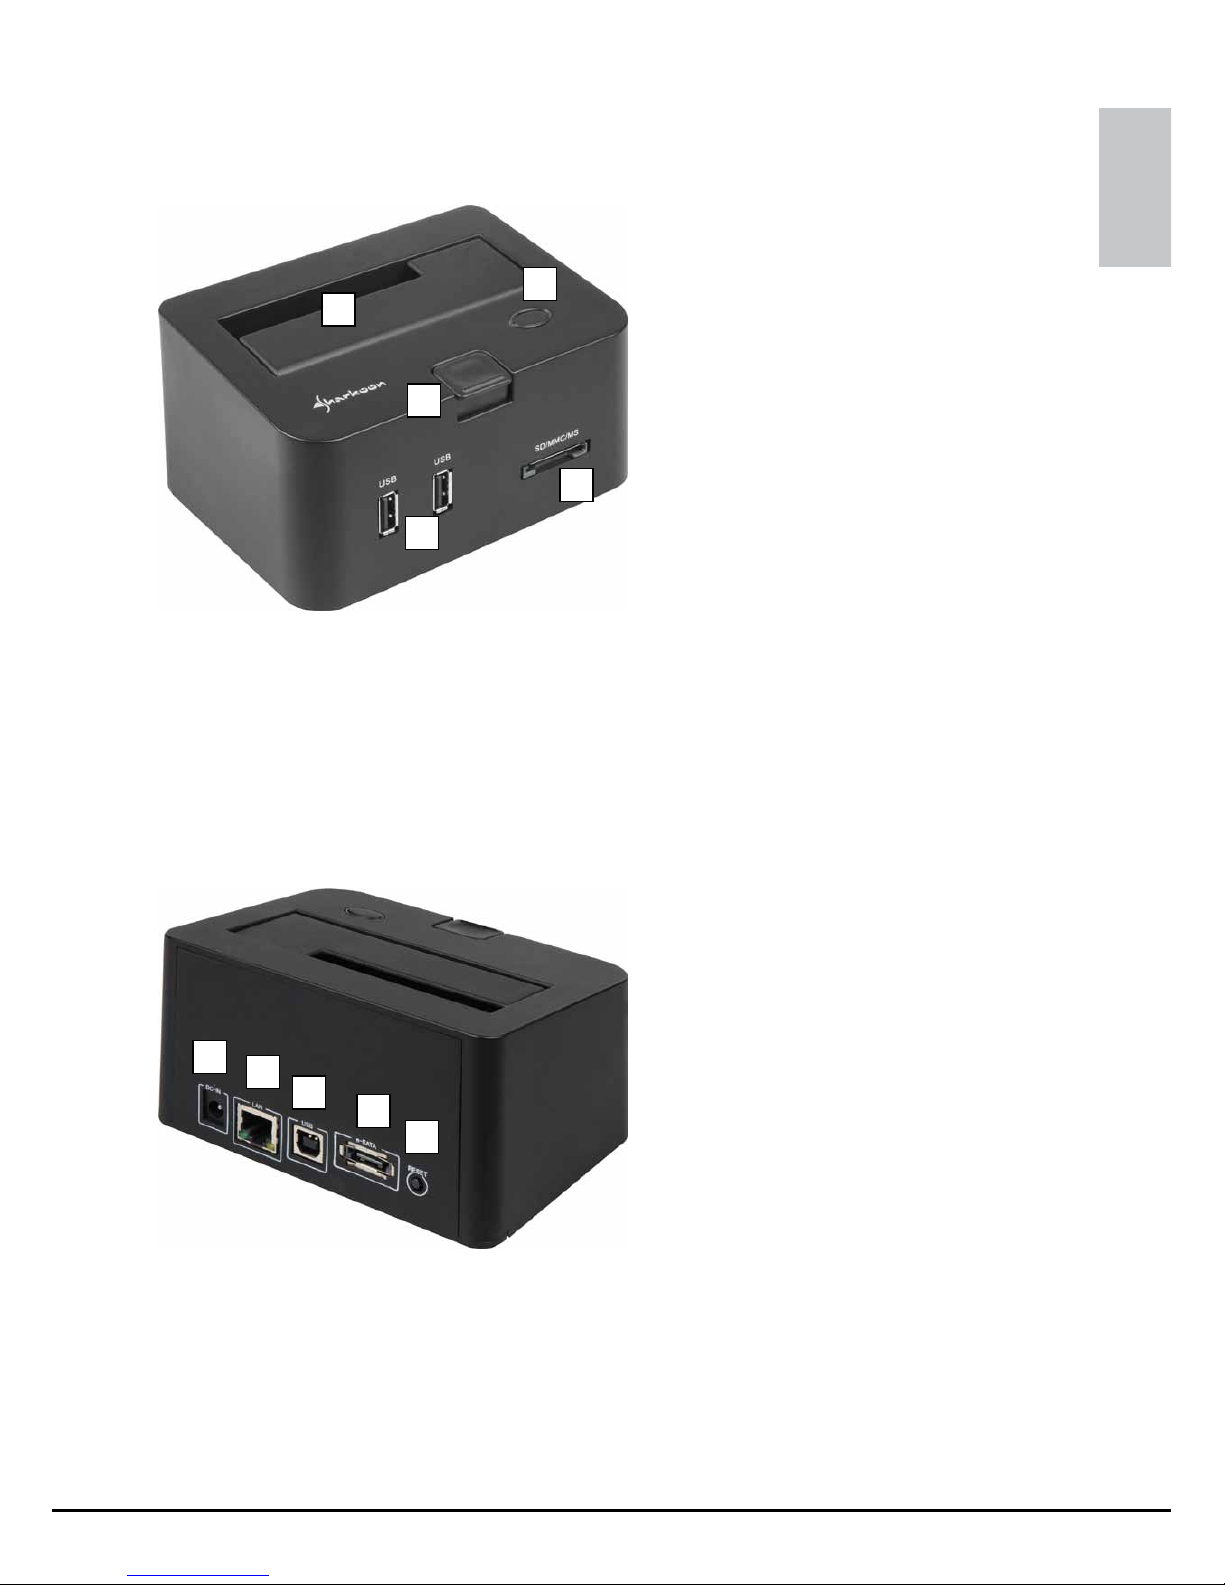
4. Getting started
4.1 Hardware installation
Note:
Hard disk drive, card reader and USB front hub are accessed via
USB while only the HDD may be addressed over eSATA. This
means that after connecting the device to your PC over USB and
eSATA the HDD will be accessed via eSATA while the card reader
and the USB front hub are addressed over USB.
Using the SATA QuickPort Pro LAN in your network means that
it can not be connected over eSATA or USB to a PC simultane-
ously.
Therefore we suggest you to decide how you intend to use the
device in advance to avoid further problems.
4.1.1 Local usage
1. Connect the included USB and eSATA cable to the according
connectors of the SATA QuickPort Pro LAN and your PC.
2. Connect the included power adapter to the SATA QuickPort
Pro LAN and a wall outlet.
3. Slide a 2.5“ or 3.5“ SATA HDD into the HDD slot of the
device.
4. Insert a compatible memory card into the card reader and
connect a maximum of two USB devices with the USB front
hub of the SATA QuickPort Pro LAN.
5. Switch on the device.
6. Your operating system will automatically recognize the
connected devices.