manuals.online logo
Brands
  1. Home
  2. •
  3. Brands
  4. •
  5. Philips
  6. •
  7. Docking Station
  8. •
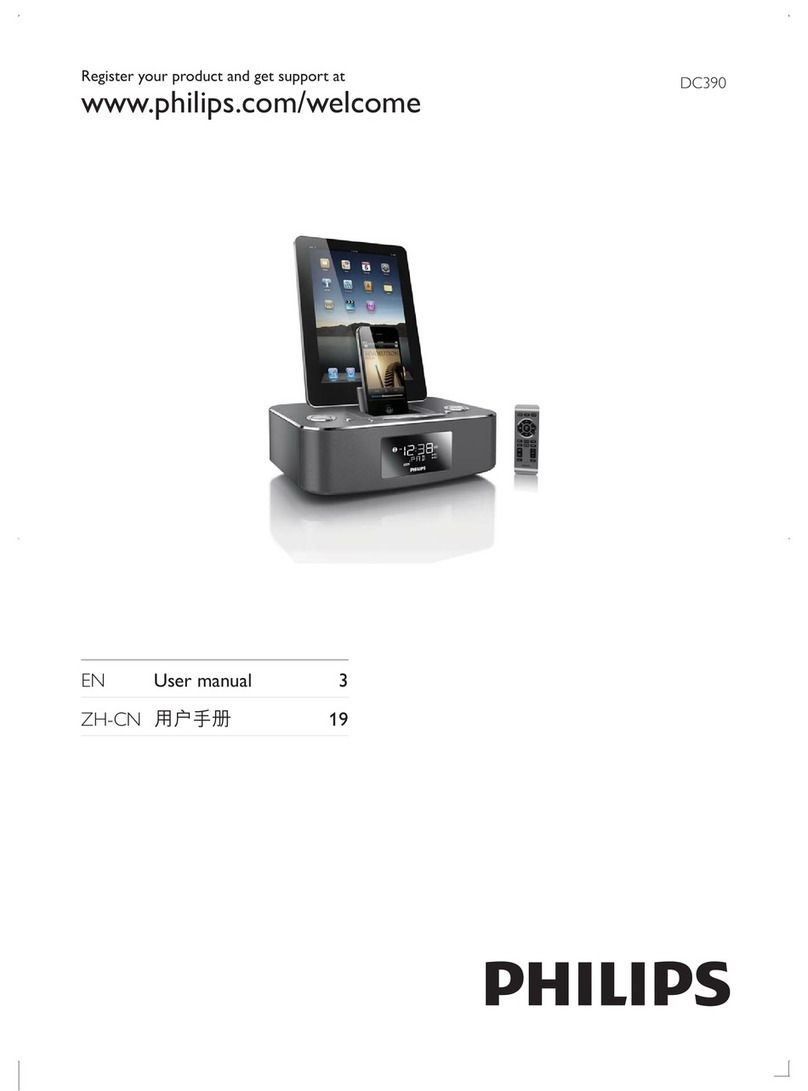
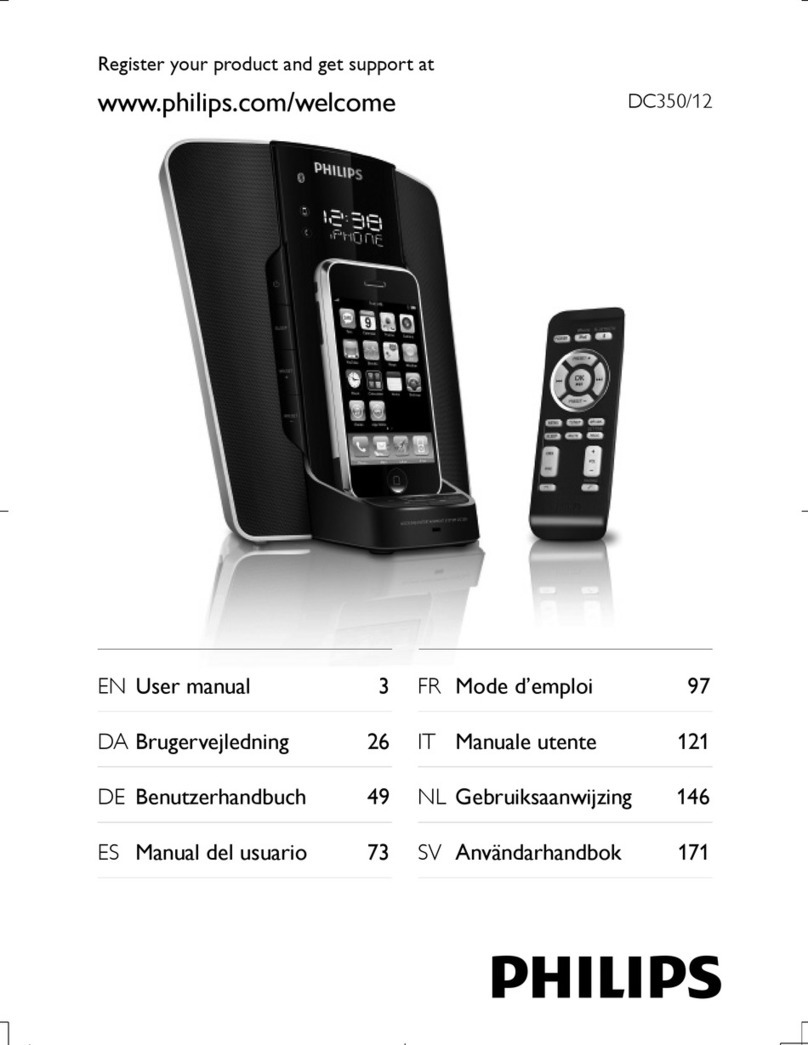
  9. Philips DC200 User manual

Philips DC200 User manual

Register your product and get support at
www.philips.com/welcome
ENGLISH
Step
A
Connect the supplied mains adapter to the
set's 9V DC jack and the plug into a wall outlet.
Step
B
How to set the Clock & Alarm time
Press and hold SET TIME or 1 ALM/2 ALM
until the hour digits flash.
Press and hold ∞
§to adjust time.
Press SET TIME or 1 ALM/2 ALM to confirm.
Repeat the steps 2-3 to complete all the
other time items setting.
Selecting the Alarm mode
4. Press
∞
§/SOURCE repeatedly to select
your desired alarm mode.
For Nature sound mode, press ALBUM/PRESET
-/+ 1/2to select your desired nature sound track.
Helpful hints:
If you have selected TUNER alarm mode, make
sure you have properly tuned to a station before
turning off the set (See Tuning to radio station).
If you have selected iPod/USB alarm mode,
make sure you have connected the compatible
iPod player or USB device, or the buzzer mode
will be selected automatically.
3 ways to switch off the alarm
Either press briefly: POWER 2or REPEAT
ALARM/BRIGHTNESS CONTROL.
Press 1 ALM or 2 ALM.
Step
C
Tuning to radio station
Press SOURCE once or more to switch on
the radio.
Press ∞
§repeatedly to tune to your
station.
•
1.
2.
3.
•
•
–
–
•
•
1.
2.
To store a preset, press PROG to activate the
programming, and then press ALBUM/PRESET
-/+ 1/2to select a desired preset number, and
then press PROG again to confirm.
To store preset radio stations automatically, press
and hold PROG for more than two seconds.
Step
D
Playing Apple iPod using DC200
Remove the top cover of dock.
Snap the correct adaptor (supplied) into the
dock to provide a snug fit for the iPod player.
The indication on the adaptor’s back fits
specific iPod player.
3. Snap the compatible iPod into the dock
connector.
4. Press SOURCE repeatedly to select the iPod
mode.
The connected player will play automatically.
Helpful hints:
By using the buttons ( 2;,
∞
,
§
and
VOLUME ) on the DC200, the following iPod
playback features are available: Play/Pause,
selecting next/previous track, fast forwarding/
rewinding and changing volume.
Refer to the user manual supplied for detailed
descriptions of “Compatible portable player”,
“Selecting the correct dock adaptor” and the
important notes for dock operation.
Step
E
Playing a USB mass storage device
Make sure that your DC200 is being powered
by AC mains.
Press SOURCE repeatedly to select the USB
mode.
Plug a compatible USB mass storage device to
DC200’s USB port marked .
Playback will start automatically.
•
•
1.
2.
•
•
–
–
1.
2.
3.
➜
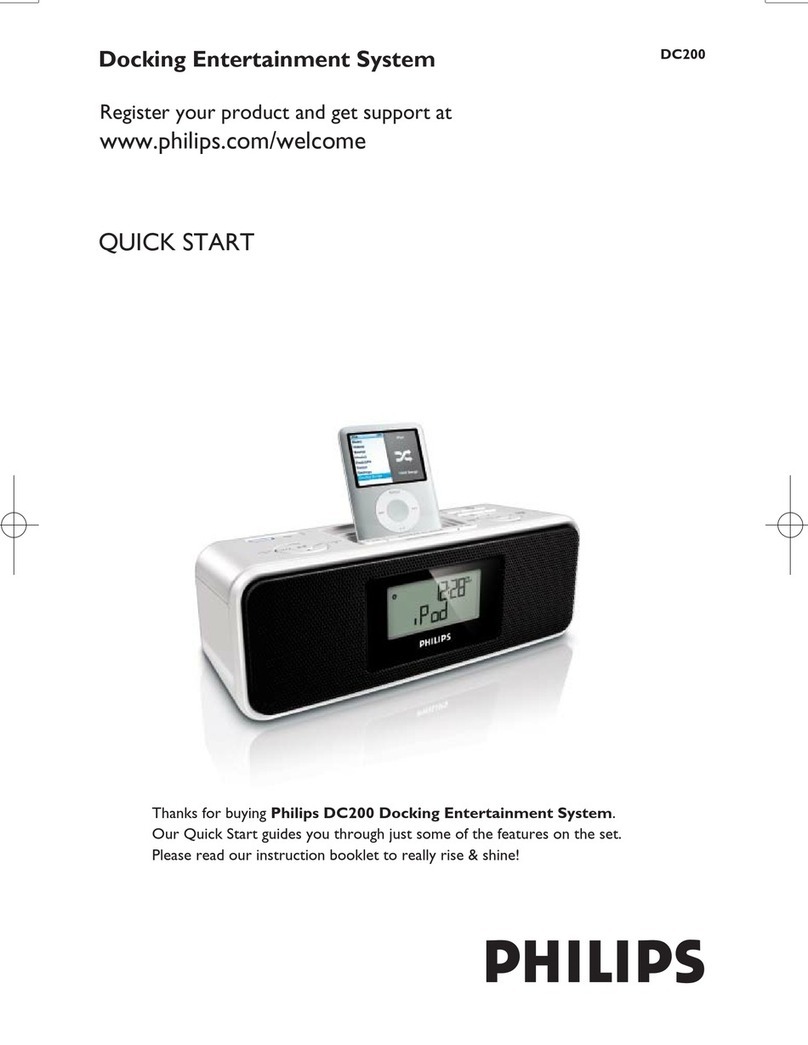
Docking Entertainment System DC200
QUICK START
MISE EN SERVICE RAPIDE
INICIO RÁPIDO
SCHNELLSTART
SNELSTART
AVVIVO RAPIDO
Thanks for buying Philips DC200 Docking Entertainment System.
Our Quick Start guides you through just some of the features on the set.
Please read our instruction booklet to really rise & shine!
DC9V
A
B1, B3
3
C2
C1, D4, E2
3
D1, D2, D3
E3
B2, B4, C2
FRANÇAIS
Étape A
Branchez l'adaptateur secteur fourni sur la
prise 9V DC de l'appareil et la fiche sur une
prise murale.
Étape B
Comment régler l'heure de l'horloge et de
l'alarme ?
Maintenez le bouton SET TIME ou 1 ALM/2
ALM enfoncé jusqu'à ce que les chiffres des
heures clignotent.
Maintenez le bouton ∞
§enfoncé pour
régler l'heure.
Appuyez sur SET TIME ou 1 ALM/2 ALM
pour confirmer.
Répétez les étapes 2-3 pour régler les autres
éléments de l'heure.
Sélection du mode d'alarme
4. Appuyez à plusieurs reprises sur ∞
§/
SOURCE pour sélectionner le mode d'alarme
de votre choix.
• En
mode Sons de la nature, appuyez sur ALBUM/
PRESET -/+ 1/2pour sélectionner la piste de
sons de la nature souhaitée.
Conseils :
Si vous avez sélectionné le mode d'alarme TUNER,
assurez-vous que l'appareil est réglé sur une station
avant de l'éteindre.
Si vous avez sélectionné le mode d'alarme iPod/USB,
assurez-vous que vous avez connecté l'iPod ou le
périphérique USB compatible. Dans le cas contraire,
le mode Buzzer sera sélectionné automatiquement.
3 méthodes pour éteindre l'alarme
Appuyez brièvement sur : POWER 2ou
REPEAT ALARM/BRIGHTNESS CONTROL.
Appuyez sur 1 ALM ou 2 ALM.
Étape C
Réglage des stations de radio
Appuyez une ou plusieurs fois sur SOURCE
pour allumer la radio.
Appuyez à plusieurs reprises sur ∞
§pour
sélectionner une station de radio.
Pour mettre manuellement une présélection
en mémoire, appuyez sur PROG pour
activer la programmation, puis appuyez sur
ALBUM/PRESET -/+
1/2
pour sélectionner
le numéro de présélection de votre choix et
enfin, appuyez de nouveau sur PROG pour
confirmer.
•
1.
2.
3.
•
–
–
•
•
1.
2.
•
Pour mettre automatiquement une
présélection en mémoire, maintenez le
bouton PROG enfoncé pendant plus de deux
secondes.
Étape D
Lecture d'un iPod Apple à l'aide du DC200
Retirez le couvercle de la station d'accueil.
Branchez l'adaptateur approprié (fourni) sur la
station d'accueil pour recevoir l'iPod.
• L'indication à l'arrière de l'adaptateur renvoie à
un type d'iPod précis.
3. Placez l'iPod compatible sur le connecteur de
la station d'accueil.
4. Appuyez plusieurs fois sur SOURCE pour
sélectionner le mode iPod.
La lecture démarre automatiquement sur le
lecteur connecté.
Conseils:
Les boutons ( 2;,
∞
,
§
et VOLUME ) du
DC200 permettent d'accéder aux fonctions de
lecture suivantes: lecture/pause, sélection de
la piste suivante/précédente, avance et retour
rapides, réglage du volume.
Reportez-vous au manuel d'utilisation fourni
pour obtenir des descriptions détaillées sur
les lecteurs portables compatibles et sur la
sélection de l'adaptateur pour station d'accueil
adéquat, ainsi que des remarques importantes
relatives au fonctionnement de la station
d'accueil.
Étape
E
Lecture du contenu d'un périphérique de
stockage de masse USB
Assurez-vous que le DC200 est alimenté par le
secteur.
Appuyez plusieurs fois sur SOURCE pour
sélectionner le mode USB.
Branchez un périphérique de stockage de
masse compatible USB sur le port USB du
DC200, indiqué par .
La lecture commencera automatiquement.
•
1.
2.
•
–
–
1.
2.
3.
➜
ESPAÑOL
Paso A
Conecte el adaptador de red suministrado al
conector 9V DC del dispositivo, y enchufe el
otro extremo a la toma de pared.
Paso B
Cómo ajustar la hora del reloj y la alarma
Mantenga pulsado SET TIME o 1 ALM/2
ALM hasta que los dígitos de la hora
parpadeen.
Mantenga pulsado ∞
§para ajustar la hora.
Pulse SET TIME o 1 ALM/2 ALM para
confirmar.
Repita los pasos 2 y 3 para completar el resto
de la configuración de los elementos de la
hora.
Selección del modo de alarma
4. Pulse varias veces ∞
§/SOURCE para
seleccionar el modo de alarma que desee.
•
En el modo de sonido natural, pulse ALBUM/
PRESET -/+ 1/2para seleccionar la pista del
sonido natural que desee.
Consejos útiles:
Si ha seleccionado el sintonizador como modo
de alarma, asegúrese de haber sintonizado
correctamente una emisora antes de apagar el
equipo.
Si ha seleccionado el iPod/USB como modo de
alarma, asegúrese de conectar el reproductor iPod
o el dispositivo USB compatible. En caso contrario,
se seleccionará automáticamente el zumbador
.
La alarma puede apagarse de tres formas
Pulse brevemente: POWER 2o REPEAT
ALARM/BRIGHTNESS CONTROL.
Pulse 1 ALM o 2 ALM.
Paso C
Sintonización de emisoras de radio
Pulse SOURCE una o más veces para
encender la radio.
Pulse varias veces ∞
§para sintonizar la
emisora.
Si desea almacenar una presintonía
manualmente, pulse PROG para activar la
programación, pulse
ALBUM/PRESET -/+
1/
2
para seleccionar un número de presintonía
y, a continuación, vuelva a pulsar PROG para
confirmar.
•
1.
2.
3.
•
–
–
•
•
1.
2.
•
Si desea almacenar emisoras de radio
presintonizadas automáticamente, mantenga
pulsado PROG durante más de dos segundos.
Paso D
Reproducción del iPod de Apple mediante
el DC200
Quite la tapa superior de la base.
Inserte el adaptador adecuado (incluido) en la
base para que el reproductor iPod se ajuste
correctamente.
• La indicación de la parte posterior del
adaptador marca el reproductor iPod
determinado.
3. Inserte el iPod compatible en el conector de
base.
4. Pulse varias veces SOURCE para seleccionar
el modo iPod.
El reproductor conectado comenzará la
reproducción automáticamente.
Consejos útiles:
Los botones (2;,
∞
,
§
y VOLUME)
del DC200 le permiten tener acceso a las
siguientes funciones de reproducción del
iPod: reproducción/pausa, selección de la
pista anterior o siguiente, avance y retroceso
rápidos y cambio de volumen.
Consulte el manual de usuario que se
proporciona para obtener una descripción más
detallada del reproductor portátil compatible,
de la selección del adaptador de base
correcto y de las notas importantes sobre el
funcionamiento de la base.
Paso E
Reproducción de un dispositivo de
almacenamiento masivo USB
Asegúrese de que el DC200 esté conectado a
una fuente de alimentación de CA.
Pulse varias veces SOURCE para seleccionar
el modo USB.
Conecte un dispositivo de almacenamiento
masivo USB compatible al puerto USB del
DC200 marcado con .
La reproducción empezará
automáticamente.
•
1.
2.
•
–
–
1.
2.
3.
➜
DC200_QSG.indd 1DC200_QSG.indd 1 2008-01-11 4:53:59 PM2008-01-11 4:53:59 PM
DEUTSCH
Schritt A
Schließen Sie den mitgelieferten Netzadapter
an den 9V-DC-Eingang des Geräts an, und
schließen Sie ihn an eine Wandsteckdose an.
Schritt B
Einstellen von Uhr- und Weckzeit
Halten Sie die Taste SET TIME oder 1
ALM/2 ALM gedrückt, bis die Ziffern der
Stundenangabe blinken.
Halten Sie die Taste ∞
§gedrückt, um die
Uhrzeit anzupassen.
Drücken Sie zum Bestätigen die Taste SET TIME
oder 1 ALM/2 ALM.
Wiederholen Sie die Schritte 2-3, um alle
weiteren Zeiteinstellungen vorzunehmen.
Weckmodus auswählen
4. Sie wiederholt die Taste ∞
§/SOURCE, um
den gewünschten Weckmodus auszuwählen.
Für den Naturgeräusche-Modus drücken Sie die
Taste ALBUM/PRESET -/+ 1/2, um den
gewünschten Naturgeräusche-Titel auszuwählen.
Nützliche Tipps:
Bei Auswahl des Radiomodus (TUNER) müssen
Sie vor dem Ausschalten des Geräts einen Sender
auswählen.
Bei Auswahl des iPod/USB-Weckmodus müssen
Sie eine kompatible Quelle (iPod-Player oder USB-
Gerät) angeschlossen haben. Ansonsten wird
automatisch der Summermodus ausgewählt
.
Es gibt 3 Möglichkeiten, den Weckruf zu
deaktivieren
Drücken Sie wahlweise auf: POWER 2oder
REPEAT ALARM/BRIGHTNESS CONTROL.
Drücken Sie die Taste 1 ALM oder 2 ALM.
Schritt C
Einstellen des Radiosenders
Drücken Sie einmal oder mehrmals die Taste
•
1.
2.
3.
•
•
–
–
•
•
1.
SOURCE, um das Radio einzuschalten.
Drücken Sie wiederholt die Taste ∞
§, um
einen Radiosender einzustellen.
Um eine Voreinstellung manuell zu speichern,
drücken Sie die Taste PROG, um die
Programmierung zu aktivieren. Drücken Sie
dann die Taste
ALBUM/PRESET -/+
1/2
,
um die gewünschte Voreinstellungsnummer zu
wählen. Drücken Sie anschließend nochmals
die Taste PROG zum Bestätigen.
Zum automatischen Speichern von
voreingestellten Radiosendern halten Sie die
Taste PROG länger als zwei Sekunden gedrückt.
Schritt D
Wiedergabe des Apple iPod über das DC200
Entfernen Sie die Abdeckung des Docks.
Setzen Sie den passenden Adapter (im Lieferumfang
enthalten) in das Dock ein, so dass für den iPod ein
guter Sitz gewährleistet ist.
Sie finden Informationen zu kompatiblen iPod-
Playern auf der Rückseite des Adapters.
3. Setzen Sie Ihren kompatiblen iPod in den
entsprechenden Dock-Anschluss ein.
4. Drücken Sie wiederholt die Taste SOURCE,
um den iPod-Modus auszuwählen.
Der angeschlossene Player beginnt automatisch
mit der Wiedergabe.
Nützliche Tipps:
Durch Drücken der Tasten ( 2;,
∞
,
§
und
VOLUME) auf dem DC200 sind die folgenden
iPod-Wiedergabefunktionen verfügbar:
Play/Pause, Auswahl des nächsten/vorherigen
Titels, schneller Vor- und Rücklauf und
Lautstärkeeinstellung.
Ausführliche Informationen finden Sie im
Benutzerhandbuch in den Abschnitten
"Kompatible tragbare Player", "Auswählen
des richtigen Dock-Adapters" sowie in den
wichtigen Hinweisen zum Dock-Betrieb.
2.
•
•
1.
2.
•
•
–
–
Schritt E
Wiedergabe von einem USB-
Massenspeichergerät
Vergewissern Sie sich, dass Ihr DC200 an die
Stromversorgung angeschlossen ist.
Drücken Sie wiederholt die Taste SOURCE,
um den USB-Modus auszuwählen.
Schließen Sie an den USB-Anschluss des
DC200 mit der Markierung ein
kompatibles USB-Massenspeichergerät an.
Die Wiedergabe beginnt automatisch.
NEDERLANDS
Stap A
Sluit de meegeleverde netvoedingadapter aan
op de 9V DC-ingang van het apparaat en steek
de stekker in een stopcontact.
Stap B
De klok- en alarmtijd instellen
Houd SET TIME of 1 ALM/2 ALM
ingedrukt tot de uurcijfers knipperen.
Houd ∞
§ingedrukt om de tijd aan te passen.
Druk op SET TIME of 1 ALM/2 ALM om te
bevestigen.
Herhaal de stappen 2 en 3 om het instellen
van alle andere tijditems te voltooien.
De alarmmodus selecteren
4. Druk herhaaldelijk op ∞
§/SOURCE om
de gewenste alarmmodus te selecteren.
• Voor de modus met natuurlijke geluiden
drukt u op
ALBUM/PRESET -/+ 1/2
om de
gewenste track met natuurlijke geluiden te
selecteren.
Handige tips:
Als u de TUNER-alarmmodus hebt geselecteerd,
zorg er dan voor dat de radio is afgestemd op een
station voor u het apparaat uitschakelt.
Als u de iPod/USB-alarmmodus hebt geselecteerd,
zorg er dan voor dat u de compatibele iPod-speler
of het USB-apparaat hebt aangesloten, anders wordt
automatisch de zoemermodus geselecteerd
.
3 manieren om het alarm uit te schakelen
Druk kort op de volgende knoppen: POWER 2
of REPEAT ALARM/BRIGHTNESS CONTROL.
Druk op 1 ALM of 2 ALM.
Stap C
Afstemmen op een radiostation
Druk een of meerdere keren op SOURCE
om de radio in te schakelen.
1.
2.
3.
➜
•
1.
2.
3.
•
–
–
•
•
1.
Druk herhaaldelijk op ∞
§om af te
stemmen op het gewenste station.
Als u een voorkeurstation handmatig
wilt opslaan, drukt u op PROG om het
programmeren te activeren en op
ALBUM/
PRESET -/+
1/2
om het gewenste nummer
van het voorkeurstation te selecteren. Druk
vervolgens nogmaals op PROG om te
bevestigen.
Als u voorkeurstations automatisch wilt
opslaan, houdt u PROG langer dan twee
seconden ingedrukt.
Stap D
De Apple iPod afspelen met behulp van de
DC200
Verwijder het bovenste paneel van het station.
Klik de juiste adapter (meegeleverd) in het
station zodat de iPod-speler goed past.
• Op de achterkant van de adapter wordt
aangegeven met welke iPod-speler de adapter
kan worden gebruikt.
3. Klik de compatibele iPod vast in de
stationsaansluiting.
4. Druk herhaaldelijk op SOURCE om de iPod-
modus te selecteren.
De aangesloten speler begint automatisch met
afspelen.
Handige tips:
Met de knoppen (2;,
∞
,
§
en VOLUME) op
de DC200 kunt u de volgende afspeelfuncties
bedienen: afspelen/onderbreken, volgende/
vorige track selecteren, snel vooruit/achteruit
zoeken en volume.
Raadpleeg voor uitgebreide beschrijvingen
de gedeelten "Compatibele draagbare speler"
en "De juiste stationsadapter selecteren" in
de meegeleverde gebruikershandleiding. Hier
vindt u tevens belangrijke informatie over de
bediening van het station.
Stap E
Muziek afspelen vanaf een USB-apparaat
voor massaopslag
Zorg ervoor dat de DC200 is aangesloten op
een stopcontact.
Druk herhaaldelijk op SOURCE om de USB-
modus te selecteren.
Sluit een compatibel USB-apparaat voor
massaopslag aan op de USB-poort van de
DC200 met de markering .
Het afspelen gaat automatisch van start.
2.
•
•
1.
2.
•
–
–
1.
2.
3.
➜
ITALIANO
Passaggio A
Collegare un'estremità dell'adattatore di
alimentazione in dotazione allo spinotto da 9
V CC dell'apparecchio e l'altra estremità alla
presa a muro.
Passaggio B
Come impostare l'orologio e la sveglia
Tenere premuto SET TIME o 1 ALM/2
ALM fino a che le cifre delle ore lampeggiano.
Tenere premuto ∞
§per regolare l'ora.
Premere SET TIME o 1 ALM/2 ALM per
confermare.
Ripetere i passaggi 2-3 per completare
l'impostazione delle altre voci relative
all'orario.
Selezione della modalità sveglia
4. Premere ripetutamente ∞
§/SOURCE per
selezionare la modalità di sveglia desiderata.
•
Per la modalità suoni della natura, premere
ALBUM/PRESET -/+ 1/2per selezionare il
brano di suoni della natura preferito.
Suggerimenti:
Se è stata selezionata la modalità TUNER
(SINTONIZZATORE), verificare di essersi
sintonizzati su una stazione radio prima di spegnere
il dispositivo.
Se è stata selezionata la modalità iPod/USB,
assicurarsi di aver collegato un lettore iPod o un
dispositivo USB compatibile; in caso contrario verrà
selezionata automaticamente la modalità cicalino
.
3 modalità di spegnimento della sveglia
Premere brevemente: POWER 2oppure
REPEAT ALARM/BRIGHTNESS CONTROL.
Premere 1 ALM o 2 ALM.
Passaggio C
Sintonizzazione delle stazioni radio
Premere una o più volte SOURCE per
attivare la radio.
Premere ripetutamente ∞
§per sintonizzarsi
sulla stazione desiderata.
Per salvare una stazione preimpostata, premere
PROG per attivare la programmazione,
quindi
ALBUM/PRESET -/+
1/2
per
scegliere il numero preimpostato desiderato.
Successivamente premere nuovamente PROG
per confermare.
•
1.
2.
3.
•
–
–
•
•
1.
2.
•
Per salvare le stazioni radio preimpostate
automaticamente, tenere premuto PROG per
più di due secondi.
Passaggio D
Riproduzione dei file di un Apple iPod
tramite DC200
Rimuovere il rivestimento superiore della base
dock.
Inserire l'adattatore corretto (in dotazione)
nella base dock per collegare saldamente il
lettore iPod.
• Le indicazioni sul retro dell'adattatore
mostrano la compatibilità con i lettori iPod.
3. Inserire il lettore iPod compatibile nel
connettore dock.
4. Premere più volte SOURCE per selezionare
la modalità iPod.
Il lettore collegato inizia la riproduzione
automaticamente.
Suggerimenti:
Utilizzando i pulsanti (2;,
∞
,
§
e VOLUME)
del sistema DC200, sono disponibili le seguenti
funzioni: riproduci/pausa, selezione del brano
precedente/successivo, avanti/indietro veloce e
modifica delle impostazioni del volume.
Per ulteriori informazioni sui lettori portatili
compatibili, su come scegliere l'adattatore
dock corretto e altre importanti informazioni
sul funzionamento della base dock, consultare
il manuale dell'utente.
Passaggio E
Riproduzione di una periferica di
memorizzazione di massa USB
Assicurarsi che il dispositivo DC200 sia
alimentato da prese CA.
Premere più volte SOURCE per selezionare
la modalità USB.
Collegare una periferica di memorizzazione
USB compatibile alla porta USB del
sistema DC200.
Se la riproduzione non si avvia
automaticamente.
•
1.
2.
•
–
–
1.
2.
3.
➜
DC 9V
A
B1, B3
3
C2
C1, D4, E2
3
D1, D2, D3
E3
B2, B4, C2
Meet Philips at the Internet
http://www.philips.com
DC200
Printed in China PDCC-LL/ZC-0802
DC200_QSG.indd 2DC200_QSG.indd 2 2008-01-11 4:54:08 PM2008-01-11 4:54:08 PM

Other manuals for DC200

4

This manual suits for next models

1

Other Philips Docking Station manuals

Philips DC190 User manual

Philips

Philips DC190 User manual

Philips DCM129/93 User manual

Philips

Philips DCM129/93 User manual

Philips AZD208/79 User manual

Philips

Philips AZD208/79 User manual

Philips DC290 User manual

Philips

Philips DC290 User manual

Philips Fidelio AS851 User manual

Philips

Philips Fidelio AS851 User manual

Philips AJ300D - AJ Clock Radio User manual

Philips

Philips AJ300D - AJ Clock Radio User manual

Philips DC276 User manual

Philips

Philips DC276 User manual

Philips Fidelio DCM5090/10 User manual

Philips

Philips Fidelio DCM5090/10 User manual

Philips DC190/12 User manual

Philips

Philips DC190/12 User manual

Philips DS9 User manual

Philips

Philips DS9 User manual

Philips DCM230/55 User manual

Philips

Philips DCM230/55 User manual

Philips DC190 User manual

Philips

Philips DC190 User manual

Philips AD 620 User manual

Philips

Philips AD 620 User manual

Philips LFH9120 User manual

Philips

Philips LFH9120 User manual

Philips DS1600 User manual

Philips

Philips DS1600 User manual

Philips DCM109/79 User manual

Philips

Philips DCM109/79 User manual

Philips DCM230 User manual

Philips

Philips DCM230 User manual

Philips AJ300D/37B User manual

Philips

Philips AJ300D/37B User manual

Philips ORD7100R User manual

Philips

Philips ORD7100R User manual

Philips AD712/12 User manual

Philips

Philips AD712/12 User manual

Philips Fidelio DCM5090/10 User manual

Philips

Philips Fidelio DCM5090/10 User manual

Philips DS1400 Product information sheet

Philips

Philips DS1400 Product information sheet

Philips WAC3500D User manual

Philips

Philips WAC3500D User manual

Philips DC200 User manual

Philips

Philips DC200 User manual

Popular Docking Station manuals by other brands

Havis DS-PAN-211 owner's manual

Havis

Havis DS-PAN-211 owner's manual

Inateck fd2002 instruction manual

Inateck

Inateck fd2002 instruction manual

Yamaha PDX 30 - Portable Speakers With Digital Player... owner's manual

Yamaha

Yamaha PDX 30 - Portable Speakers With Digital Player... owner's manual

Basalte EVE Plus 0131-CC installation manual

Basalte

Basalte EVE Plus 0131-CC installation manual

Honeywell IQ Express Reference manual

Honeywell

Honeywell IQ Express Reference manual

iLive IT188B instruction manual

iLive

iLive IT188B instruction manual

Innovative Technology ITR-155iP operating manual

Innovative Technology

Innovative Technology ITR-155iP operating manual

Dell Latitude C/Port II APR System information guide

Dell

Dell Latitude C/Port II APR System information guide

UGREEN CM615 user guide

UGREEN

UGREEN CM615 user guide

iHome iH55 user manual

iHome

iHome iH55 user manual

HP A7E32AA Quickspecs

HP

HP A7E32AA Quickspecs

Curtis IP2604 Specification sheet

Curtis

Curtis IP2604 Specification sheet

Denon ASD-3W - Digital Player Docking Station owner's manual

Denon

Denon ASD-3W - Digital Player Docking Station owner's manual

Curtis iP220UK user guide

Curtis

Curtis iP220UK user guide

Lenovo ThinkPad OneLink+ Dock user guide

Lenovo

Lenovo ThinkPad OneLink+ Dock user guide

Hama 53106 user manual

Hama

Hama 53106 user manual

Teac iTB400 i-TALLBOY user manual

Teac

Teac iTB400 i-TALLBOY user manual

Goobay 71825 user manual

Goobay

Goobay 71825 user manual

manuals.online logo
manuals.online logoBrands
  • About & Mission
  • Contact us
  • Privacy Policy
  • Terms and Conditions

Copyright 2025 Manuals.Online. All Rights Reserved.