Sharp CR19M10 User manual

1
POWERVOLCHVIDEOAUDIO
IN
MENU
COLORTELEVISION
LOPERATION MANUAL L
MODEL
CR19M10
A
s an
E
NERGY
S
TAR
®
P
artner, SHARP has determined that this product meets the
E
NERGY
S
TAR
®
guidelines for energy efficiency.
E
NERGY
S
TAR
®
is a
U.S.
registered
trademark.
7321 GJ
CONTENTS
PAGE
•IMPORTANT INFORMATION....................... 2
• BeforeOperatingYour Television ...... 2~ 3
• Supplied Accessories ................................... 3
• Antenna Connections ....................... 3~ 4
• Quick Reference Control Operation.............. 5
• EZ SETUP during First Use.......................... 6
• Demo Mode .................................................. 7
• Accessing the MAIN MENU screen
without Remote Control ................................ 7
• Language...................................................... 8
• Sleep Timer .................................................. 8
PAGE
• Video Adjust ................................................. 9
• Closed Caption ........................................... 10
• Energy Save ............................................... 11
• Set Up........................................... 12 ~ 15
EZ Setup ................................................. 12
Channel Setting......................... 13 ~ 15
Blue Screen............................................. 15
• Using the Video andAudio Input Jacks ...... 16
• Before Calling for Service ........................... 17
• Specifications ............................................. 18
• Limited Warranty......................................... 19
01-04 CR19M10 [E].p65e 17/5/01, 6:17 pm1

2
EnergyefficiencyisbecomingincreasinglyimportanttoconsumersbothintheUSandinCanada.ENERGY
STAR is a US registered trademark to indicate that a product meets its guidelines for energy efficiency.
WHAT IS ENERGY STAR ®
TVs and VCRs use energy both when they are on and when they are off. North Americans spend more
than$1 billion a yearon energy consumedbyTVs and VCRs whenthey are notin use. The new ENERGY
STAR ®modelswillreduce that energy“leakage” by up to 75percent. Ultimately,thiswill mean more than
$500 million a year in energy savings for consumers.
The energy savings will help reduce the burning of fossil fuels and the related carbon dioxide pollution
that contributes to global warming. If every North American family replaced their TVs and VCRs with
ENERGY STAR ®models, it would reduce carbon dioxide emissions by five million tons every year —
equivalent to eliminating the pollution from more than one million cars.
By using ENERGY STAR ®products, you will save money on your electric bills and use less energy. That
makes good economic sense and it’s good for our environment.
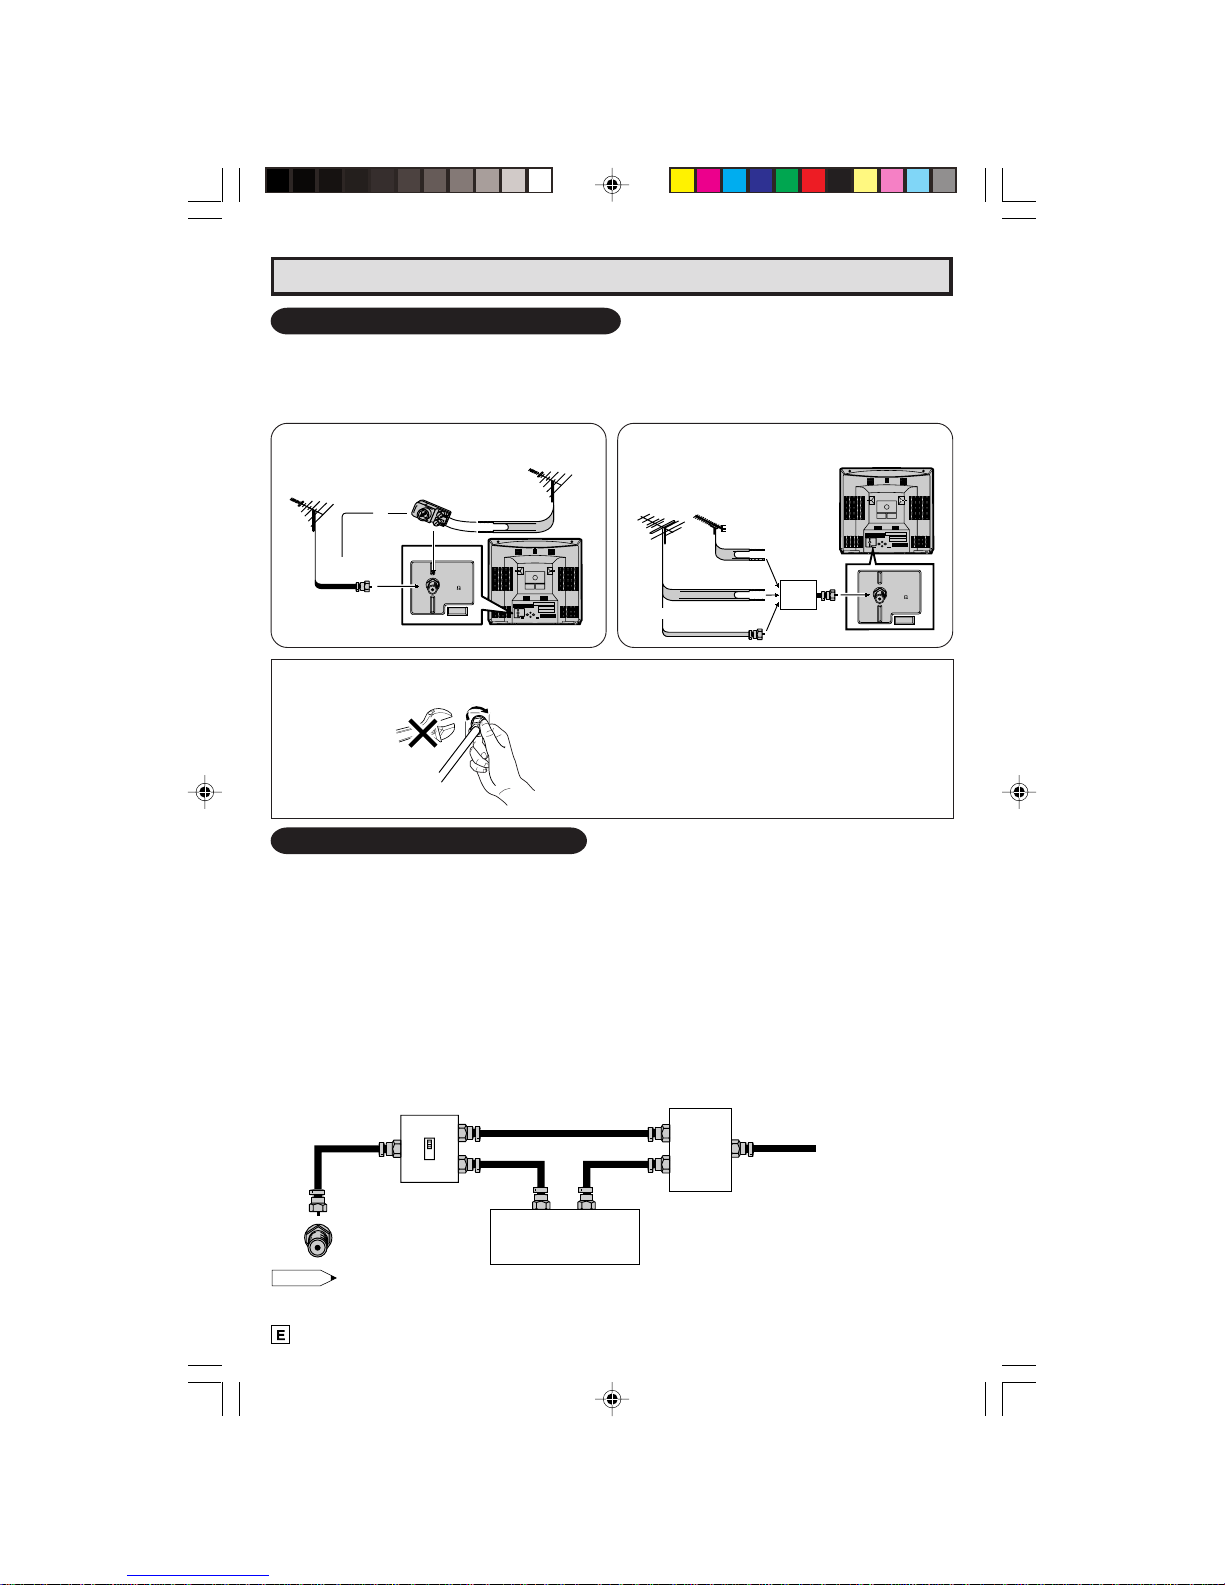
Location
• Fornormaloperation,yourTVshouldbelocatedinanareaof the room where cool adequate ventilation
is provided. Do not place the back of the television set in a place where free airflow will be restricted.
• Any magnetic force may disturb the color picture. Make sure that magnets, electric clocks, toys using
magnets or any other magnetic substance, such as iron are kept well away from the TV set.
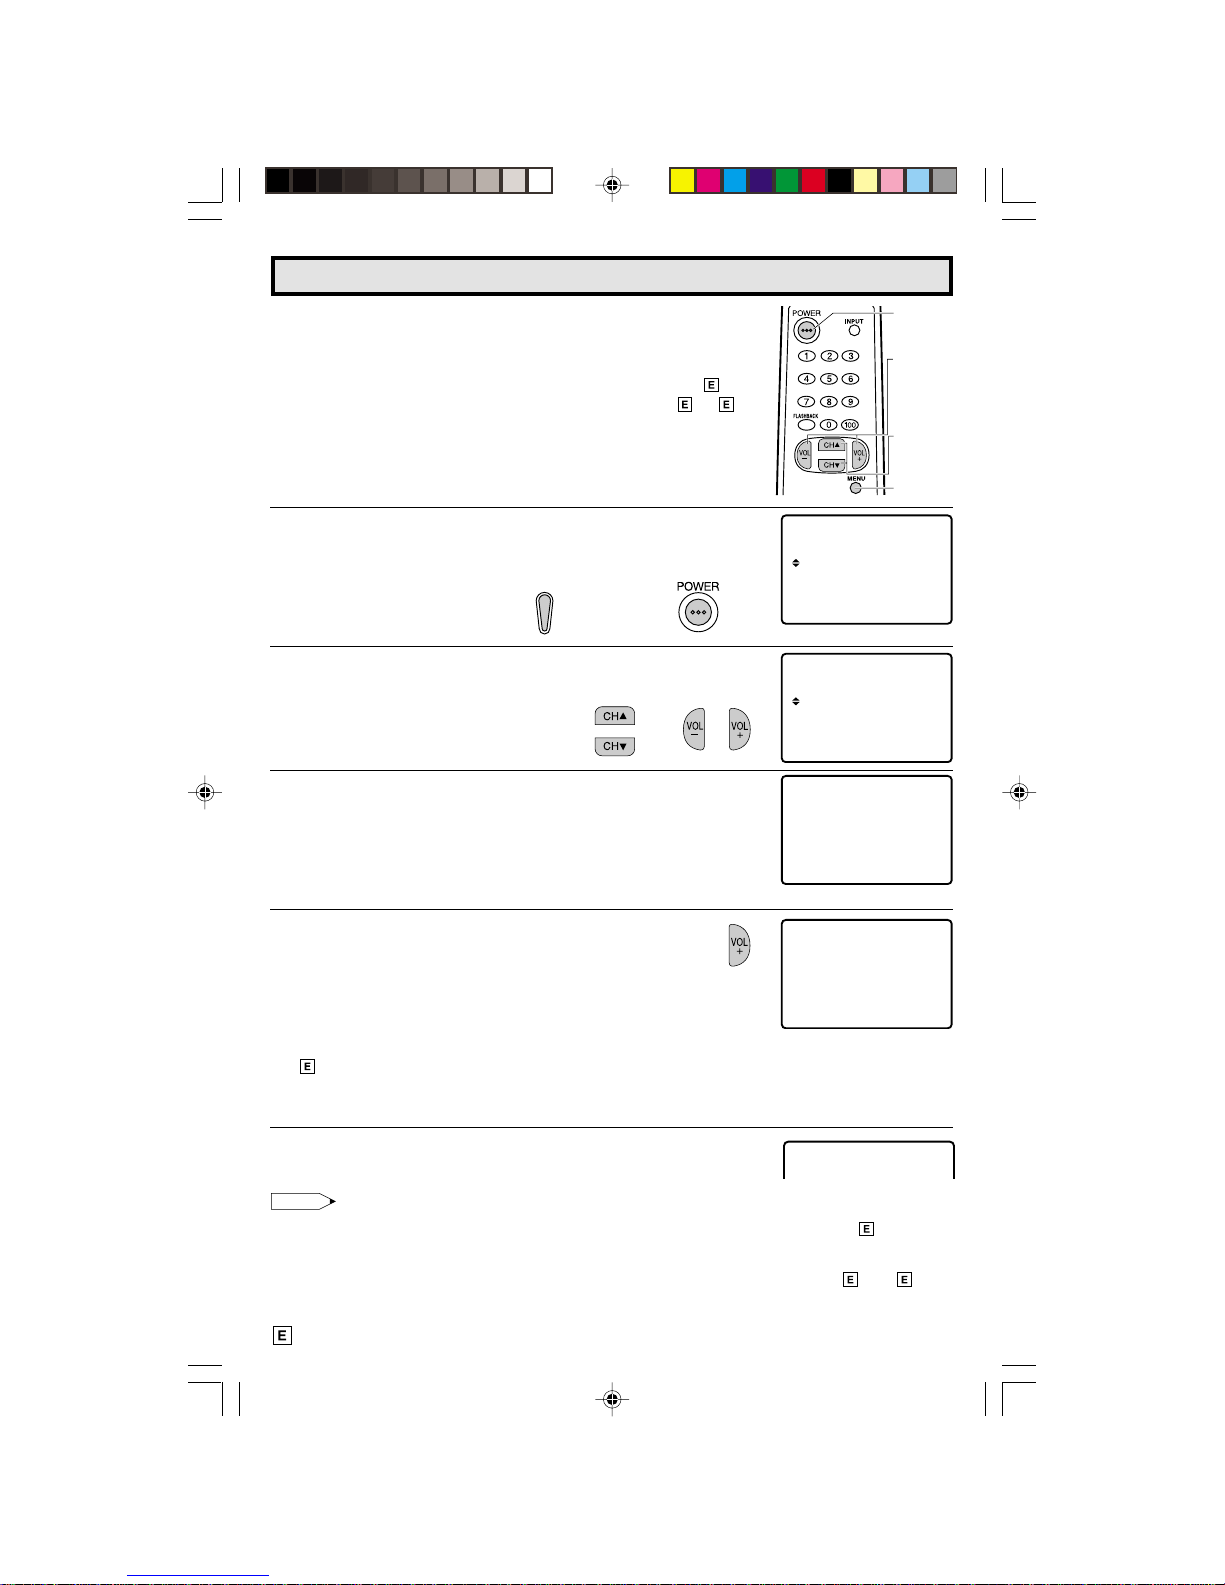
Power
Your TVoperates on 120 Volts, 60 Hz (normalhousehold current) and has a polarized plug. Ifyou are
unable to insert the plug fully into the outlet, try reversing the plug. Should it fail to fit, contact an
electrician. Do not defeat the safety feature of the polarized plug.
CAUTION:
TOPREVENTELECTRICSHOCK,MATCHWIDEBLADEOF
PLUG TO WIDE SLOT, FULLYINSERT.
Note:
• If the set will not be used for a long period, such as during a vacation, unplug the set from the wall
outlet to economize power. (If the TV set is plugged in, a slight current still flows, even with the
POWER BUTTON in the OFF position.)
• Lines and other noise may appear in TV broadcast images when an FM tuner or radio is located near
the TV and both radio and TV broadcasts are being received. Should such noise appear, turn off
either the TV or the radio.
• If you are listening to an AM broadcast, turn the TV off. AM broadcast signals may not be received
due to interference from the TV.
Before Operating Your Television
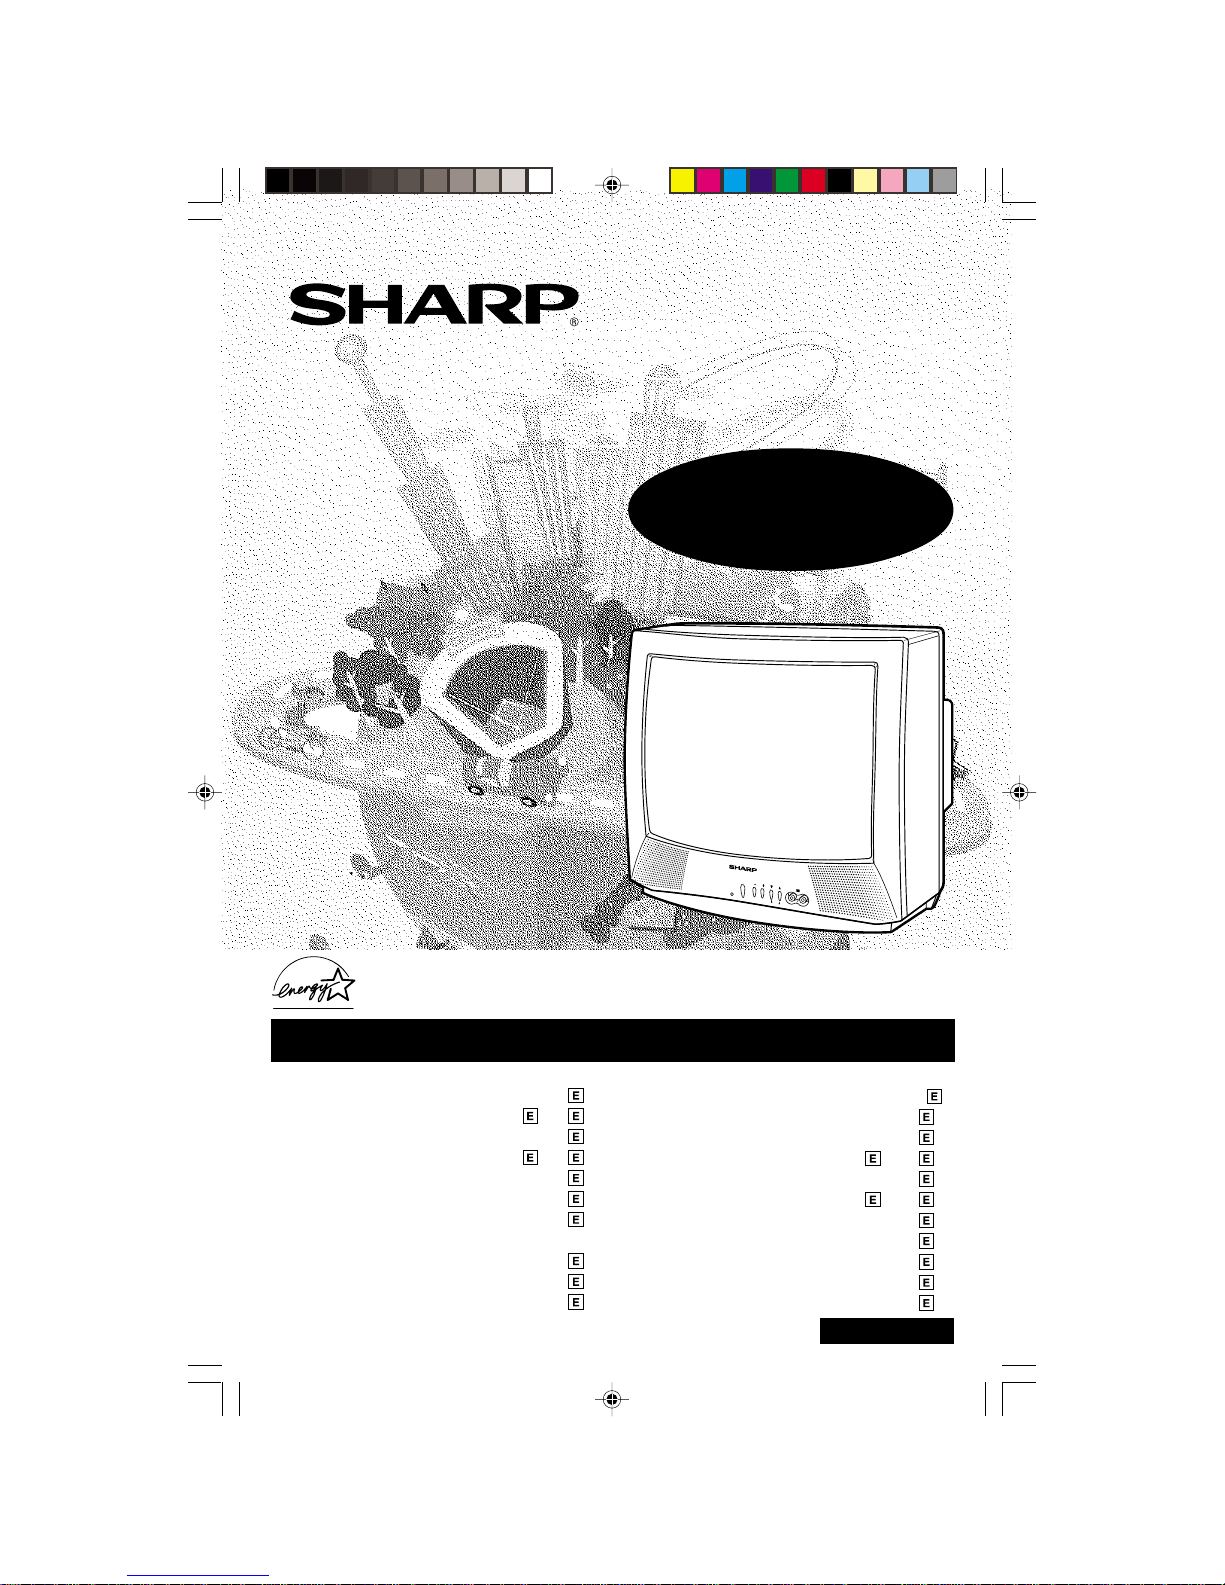
Welcometothe SHARP Family. Wearepleased that you are now the owner ofa SHARP ColorTelevision
– built for outstanding quality, reliability and performance.
Every SHARP Color Television set is tuned and adjusted for proper color and sound, and has passed
throughthemoststringentqualitycontroltestsat the factory.WehavepreparedthisOPERATIONMANUAL
so that you may adjust the picture and color to your personal viewing preference.
We sincerely hope that you receive the greatest satisfaction and enjoyment from your new SHARP Color
Television set for years to come.
Please read these instructions carefully, and keep them handy for your future reference.
IMPORTANT INFORMATION
WARNING: TO REDUCE THE RISK OF FIRE OR ELECTRIC SHOCK, DO NOT
EXPOSE THIS APPLIANCE TO WET LOCATIONS.
Model No.:
Serial No.:
IMPORTANT
To aid reporting in case of loss or theft, please record the TV’s
modeland serial numbersin the space provided.Thenumbers
are located at the rear of the TV.
01-04 CR19M10 [E].p65e 17/5/01, 6:17 pm2

3
CAUTION:
DO NOT PLACE THIS PRODUCT ON AN UNSTABLE CART, STAND,
TRIPOD, BRACKET, OR TABLE. THE PRODUCT MAY FALL CAUSING
SERIOUS PERSONAL INJURY AND SERIOUS DAMAGE TO THE
PRODUCT.USEONLYWITHACART,STAND,TRIPOD,BRACKET,OR
TABLE RECOMMENDED BY THE MANUFACTURER OR SOLD WITH
THE PRODUCT. FOLLOW THE MANUFACTURER’S INSTRUCTIONS
WHEN INSTALLING THE PRODUCT AND USE MOUNTING
ACCESSORIES RECOMMENDED BY THE MANUFACTURER.
A PRODUCT AND CART COMBINATION SHOULD BE MOVED WITH
CARE.QUICKSTOPS,EXCESSIVEFORCE,ANDUNEVENSURFACES
MAY CAUSE THE PRODUCT AND CART COMBINATION TO
OVERTURN.
Antenna Connections
1. A75 ohm system is generally a round cable with F-
type connector that can easily be attached to a
terminal without tools (not supplied).
2. A 300 ohm system is a flat “twin-lead” cable that
can be attached to a 75 ohm terminal through a
300-75 ohm ADAPTOR (not supplied).
Antennas
• The antenna requirements for good color television reception are more important than those for
black & white television reception. For this reason, a good quality outdoor antenna is strongly
recommended.
The following is a brief explanation of the type of connections that are provided with the various
antenna systems:
F-type connector
75-ohm coaxial cable (round)
300-ohm twin-lead cable (flat)
TV
Before OperatingYour Television (Continued)
Battery
Cover
Pull up
Supplied Accessories
Size AA
Dry Batteries
Infrared Remote Control/Part Number
RRMCG1324CESA
LBefore using the television, prepare the Remote Control
To use the remote control, insert batteries first.
Insert the batteries
•With your thumbnail, pull up the slit as indicated by the arrow to remove the back cover. Insert two
batteries (size “AA”). Be sure to match the battery e/dterminals with the e/dmarks inside the
compartment.
01-04 CR19M10 [E].p65e 17/5/01, 6:17 pm3

4
OUT
A
IN
B
ANT/CABLE
75
75-ohm
coaxial cable
300-ohm
twin-lead
VHF/UHF ANTENNA
VHF/UHF ANTENNA
REAR OF TV
300/75-ohm
ADAPTOR
(Not supplied)
or
300-ohm
twin-lead
300-ohm
twin-lead
75-ohm coaxial
cable
IN OUT
VHF
ANTENNA
UHF
ANTENNA
COMBINER
(not supplied)
or
REAR OF TV
ANT/CABLE
75
A. Combination VHF/UHF Antennas
OUTDOOR ANTENNA CONNECTION
• Use one of the following two diagrams if you connect an outdoor antenna.
A: Using a VHF/UHF combination outdoor antenna.
B: Using separate VHF and/or UHF outdoor antenna.
• Connect an outdoor antenna cable lead-in to the COAXIAL CABLE CONNECTOR on the rear of the
TV set.
CABLE TV (CATV) CONNECTION
• A 75 ohm coaxial cable connector is built into the set for easy hookup. When connecting the 75 ohm
coaxial cable to the set, screw the 75 ohm cable to the COAXIAL CABLE CONNECTOR.
• Some cable TV companies offer “premium pay channels”. Since the signals of these premium pay
channels are scrambled, a cable TV converter/descrambler is generally provided to the subscriber
by the cable TV company. This converter/descrambler is necessary for normal viewing of the scrambled
channels. (Set your TV on channel 3 or 4. Typically one of these channels is used. If this is unknown,
consult your cable TV company.) For more specific instructions on installing cable TV, consult your
cable TV company. One possible method of utilizing the converter/descrambler provided by your
cable TV company is explained below.
Please note: RF switch equipped with position A/B (not provided) is required.
“A” position on the RF switch (not supplied) : You can view all unscrambled channels using the TV’s
channel keys.
“B” position on the RF switch (not supplied) : You can view the scrambled channels via the converter/
descrambler using the converter’s channel keys.
Note:
• Consult your SHARP Dealer or Service Center for the type of splitter, RF switch or combiner that
might be required.
B. Separate VHF/UHF Antenna
Cable TV converter/
descrambler
(not supplied)
Two-set
signal
splitter
(not
supplied)
Cable TV Line
RF switch (not supplied)
OUT IN
Antenna Connections (Continued)
F-type connector should be finger tightened only
F-type connector
75-ohm coaxial cable
When connecting the RF cable to the TV set, do
not tighten F-type connector with tools.
If not, it may cause damage to your TV set.
(The breaking of Internal circuit, etc.)
01-04 CR19M10 [E].p65e 24/5/01, 12:12 PM4

5
TV
?
C
H
>
–
V
O
L
+
POWER VIDEO IN AUDIO
?
C
H
>
–
V
O
L
+
POWER
MENU
MENU
Infrared Transmitter Window
INPUT
Press →Switch to external video input
mode.
Press again →Switch to TV mode.
See page 16.
CHANNEL UP/DOWN
(8) Selects next higher channel.
(9) Selects next lower channel.
•Seepages 13~ 15for channel
presetting.
•Moves the “”mark of the MENU
screen.
MENU
Press →Accesses MAIN MENU.
Press again →Exits MAIN MENU.
DISPLAY
Press→Displaysreceiving channel for
four seconds.
Press again →Removes display.
•Temporarily displays receiving
channel when in Closed Caption
mode.
Basic Remote Control Functions
Quick Reference Control Operation
LLocation of Controls
Front Panel
Quick Reference Control Operation
CHANNEL UP/DOWN –MENU
(8) Selects next higher channel.
(9) Selects next lower channel.
•Press both at the same time to
access the MAIN MENU screen.
VOLUME UP/DOWN
(+) Increases sound.
(–) Decreases sound.
POWER
Press →On.
Press again →Off.
REMOTE KEYPAD
Accesses any channel from keypad.
FLASHBACK
Returns to previous channel.
VOLUME UP/DOWN
(+) Increases sound.
(–) Decreases sound.
•In menu mode, changes or selects
the TV adjustments.
MUTE
Press →Mutes sound.
Press again →Restores sound.
•CLOSED CAPTION appears when
sound is muted.
VIDEO/AUDIO IN TERMINALS
SENSOR AREA FOR
REMOTE CONTROL
POWER
Press →On.
Press again →Off.
05-06 CR19M10 [E].p65e 17/5/01, 6:17 pm5

6
FR NCAIS
ENGL I SH
ESPAÑOL
LANGUAGSELECT E
A
SE ECT :CH8/9
VO
L
SE :TL+–/
FR NCAIS
ENGL I SH
ESPAÑOL
LANGUAGSELECT E
A
SE ECT :CH8/9
VO
L
SE :TL+–/
OR CABLE .
TSART SETUP?ZE
ANTENNCONNECT A
YE :VOL+
VOL–
S
NO :
AU
18
TO RGGAMM I NORP
WA I TPLE EAS
VOL–
TSOP:
2
POWER
(Remote Control)
POWER
CHANNEL
UP (8)/
DOWN (9)
MENU
VOLUME
(+)/(–)
(On the Set)
(EZ SETUP mode)
LWhen you turn on the TV for the first time, it will automatically
memorize the broadcast channels.
Please perform the following instructions before you pressing
the power button.
(1) Insert the batteries into the remote control. (See page 3)
(2) Connect the antenna cable to the TV set. (See page 3 ~ 4)
(3) Plug in the AC POWER cord to the wall outlet.
1Press the
POWER
button on the TV set or on the Remote Control
to turn on the TV. The SELECT LANGUAGE mode will be
displayed.
2Press
CH UP (
8
)
or
DOWN (
9
)
to select “ENGLISH”, “SPANISH
(ESPAÑOL)”or “FRENCH (FRANÇAIS)”. Then press
VOL (+)
or
(–)
to SET LANGUAGE.
3Press
VOL (+)
or
(–)
to access EZ SETUP mode.
4Press
VOL (+)
.
The tuner will automatically search for the
broadcast and cable TV channels. (The CH No.
will automatically increase when it appears.)
If you want to stop the EZ SETUP process once it
hasstarted, press
VOL (–)
and it will be cancelled.
If you want to SETUP again, please refer to page
12 on SETUP.
To cancel EZ SETUP
Press
VOL (–)
.
5Once EZ SETUP is completed, the lowest channel number
memorized will be displayed.
Note:
•If EZ SETUP does not memorize all the channels in your region, please refer to page 13 for more
information on manually memorizing the channels using CHANNEL SETTING.
•It may be difficult to PRESET when the broadcast signals are weak, the channel cycle frequency is
incorrect or frequency jamming is occuring around the area. Please refer to pages 13 ~ 15 for
more information on manually memorizing the channels using CHANNEL SETTING.
EZ SETUP during First Use
(SELECT LANGUAGE mode)
→
05-06 CR19M10 [E].p65e 17/5/01, 6:17 pm6

7
?
C
H
>
MENU
(On the Set)
Demo Mode
•To quickly learn more about the TV set, press and hold for more than
three seconds both
CH UP (
88
88
8
)
and
DOWN (
99
99
9
)
on the TV set. TheTV
set will go into DEMO mode and briefly explain the various features.
•To cancel DEMO mode, again press both
CH UP (
88
88
8
)
and
DOWN (
99
99
9
)
on the TV set.
Example:
DEMO mode display
Accessingthe MAIN MENU screen without Remote Control
•IfyoumisplacedyourRemoteControlyoucanstillaccessmostsettings
via the MAIN MENU screen when you press both
CH UP (
88
88
8
)
and
DOWN (
99
99
9
)
on the TV set.
•SomefeaturesofyourTVsetwillnot be accessible withouttheRemote
Control. If you lost your Remote Control, contact a Sharp Service
Center for a replacement.
C
F
o
r
m
o
e
m
SHARP
SHARP
P
M
ri
o
n
dd
uc
t
s
s
?
C
H
>
MENU
(On the Set)
CHANNEL
UP (
88
88
8
)/DOWN (
99
99
9
)
buttons
CHANNEL
UP (
88
88
8
)/DOWN (
99
99
9
)
buttons
07-09 CR19M10 [E].p65e 17/5/01, 6:18 pm7

8
SL EP TIMER
SET UP
E
V I DEO ADJUST
CAPT IONCLOSED
ENERGY SAVE
SL EP TIMER
SET UP
E
V I DEO ADJUST
CAPT IONCLOSED
ENERGY SAVE
SL EP TIMER
SET UP
E
V I DEO ADJUST
CAPT IONCLOSED
ENERGY SAVE
FR NCA I S
ENGL I SH
ESPAÑOL
LANGUAGE
A
FR NCA I S
ENGL I SH
ESPAÑOL
IDIOMA
A
BL E SCREENU
LANGUAGE
INGCH SETT
SL EP TIMERE120 RE AIMN
LThe language for the ON SCREEN DISPLAY can be set to ENGLISH, SPANISH or FRENCH.
LSetting the ON SCREEN DISPLAY Language.
1Press
MENU
to access MAIN MENU screen.
2Press
CH UP (
8
)
or
DOWN (
9
)
to move the “ ” mark to “SET UP”.
3Press
VOL (+)
or
(–)
to access SET UPmode, then press
CH UP (
8
)
or
DOWN (
9
)
to move the “ ” mark to “LANGUAGE”.
4Press
VOL (+)
or
(–)
to access LANGUAGE change mode.
5Press
CH UP (
8
)
or
DOWN (
9
)
to select “ENGLISH”, “SPANISH
(ESPAÑOL)”or “FRENCH (FRANÇAIS)”.
6Press
MENU
to exit.
Sleep Timer
LYou can preset your Television to turn off automatically in increments of 30, 60, 90 or 120
minutes.
1Press
MENU
to access MAIN MENU screen.
2Press
VOL (+)
or
(–)
to access sleep timer mode.
3Press
VOL (+)
or
(–)
to set a sleep time of 30, 60, 90 or 120 minutes.
4Press
MENU
to exit.
Note:
•
To turn off the Sleep Timer, repeat the above SLEEP TIMER steps and select “– ––REMAIN”during step 3.
•While SLEEP TIMER is active, the time remaining will be briefly displayed on-screen at regular intervals or
when the remote’s Display key is pressed.
(MAIN MENU screen)
→
Language
(LANGUAGE change mode)
(MAIN MENU screen)
→
(SET UP mode)
(TIMER SET mode)
→
07-09 CR19M10 [E].p65e 17/5/01, 6:18 pm8

9
SL EP TIMER
SET UP
E
V I DEO ADJUST
CAPT IONCLOSED
ENERGY SAVE
ICTURE
–+
P50
TV
ICTURE
–+
P50
Description of Adjustment Items
1Press
MENU
to access MAIN MENU screen.
2Press
CH UP (
8
)
or
DOWN (
9
)
to move the “ ” mark to “VIDEO
ADJUST”.
3Press
VOL (+)
or
(–)
to access PICTURE adjust mode.
4Press
CH UP (
8
)
or
DOWN (
9
)
to select the desired mode.
(Refer to the diagram below.)
5Press
VOL (+)
or
(–)
to adjust the setting.
6Repeat steps 4to 5to adjust other settings.
7Press
MENU
to exit.
(PICTURE adjust mode)
→
VOL UP (+)
increase contrast
VOL DOWN (–)
decrease contrast
(MAIN MENU screen)
Video Adjust
VOLUME
(+)/(–)
CHANNEL
UP (8)/
DOWN (9)
MENU
PICTURE TINT COLOR
SHARP
FAVORITE COLOR
RESET
: CH DOWN (9)
: CH UP (8)
BRIGHT
Selected VOL UP (+) button VOL DOWN (–) button
item
PICTURE To increase contrast To decrease contrast
TINT To make skin tones greenish To make skin tones purplish
COLOR To increase color intensity To decrease color intensity
BRIGHT To increase brightness To decrease brightness
SHARP To increase sharpness To decrease sharpness
FAVORITE To choose a RED, BLUE or STANDARD COLOR TONE.
COLOR
RESET To return all adjustments to factory preset levels.
07-09 CR19M10 [E].p65e 17/5/01, 6:18 pm9

10
CAPT IONCLOSED
MODE : CAP
DATA :CH 1
TION
CAPT IONCLOSED
MODE : CAP
DATA :CH 1
TION
CAPT IONCLOSED
MODE : CAP
DATA :CH 1
TION
CAPTION
TEXT
OFF
CH 1
CH 2
→
SL EP TIMER
SET UP
E
V I DEO ADJUST
CAPT IONCLOSED
ENERGY SAVE
LHOW TO SET CLOSED CAPTION
•Your TV isequippedwith an internalClosed Caption decoder.“Closed
Caption”isasystemwhichallowsyoutoviewconversations,narration,
and sound effects in TV programs and home videos as subscript on
your TV screen as shown on the right.
•Not all the programs and videos will offer closed caption. Please look
for the “ ” symbol to ensure that captions will be shown.
•Closed Caption broadcast can be viewed in two modes: CAPTION
andTEXT.For each mode, twochannels are available, CH1andCH2:
The [CAPTION] mode subscripts dialogues and commentaries of TV
dramas and news programs while allowing clear view of the picture.
The [TEXT] mode displays over the picture other various information
(such as TV program schedule, weather forecast, etc.) that is
independent of the TV programs.
1Press
MENU
to access MAIN MENU screen.
2Press
CHUP (
8
)
or
DOWN (
9
)
tomovethe “ ”markto“CLOSED
CAPTION”.
3Press
VOL (+)
or
(–)
to access CLOSED CAPTION setting mode.
4Press
CH UP (
8
)
or
DOWN (
9
)
to move the “ ” mark to either
“MODE”or “DATA”.
5Press
VOL (+)
or
(–)
to change the CLOSED CAPTION setting.
6Press
MENU
to exit.
Note:
•If a broadcast has CLOSED CAPTION and the
MUTE
button is pressed, the set enters [CAPTION]
mode automatically. Pressing
MUTE
again will return the set to its previous condition.
•Closed Caption may malfunction (white blocks, strange characters, etc.) if signal conditions are poor
or if there are problems at the broadcast source. This does not necessarily indicate a problem with
yourTV.
•If any button is pressed to call up the ON SCREEN DISPLAY while viewing a CLOSED CAPTION
broadcast, the closed captions will disappear momentarily.
•When viewing in TEXTmode, if no TEXTbroadcast is being received, for some programs the screen
may become dark and blank. Should this occur, set the Closed Caption mode to “OFF”.
(MAIN MENU screen)
(CLOSED CAPTION setting mode)
MODE : DATA :
Closed Caption
VOLUME
(+)/(–)
CHANNEL
UP (8)/
DOWN (9)
MENU
10-13 CR19M10 [E].p65e 17/5/01, 6:18 pm10

11
→
SL EP TIMER
SET UP
E
V I DEO ADJUST
CAPT IONCLOSED
ENERGY SAVE
:OFF
EN REGYSAVE
:ON
EN REGYSAVE
Energy Save
1Press
MENU
to access MAIN MENU screen.
2Press
CH UP (
8
)
or
DOWN (
9
)
to move the “ ” mark to
“ENERGY SAVE”.
3Press
VOL (+)
or
(–)
to access ENERGY SAVE select mode.
4Press
VOL (+)
or
(–)
to select “ON”.
5Press
MENU
to exit.
VOLUME
(+)/(–)
CHANNEL
UP (8)/
DOWN (9)
MENU
(MAIN MENU screen)
(ENERGY SAVE select mode)
LThis feature lets you lower the power consumption of your TV
set which in turn saves you money and minimizes the impact on
the environment. When this feature is turned on, it reduces the
brightness of the TV to a level that consumes approximately 20
percent less energy than when the feature is turned off.
The reduction in brightness will be less noticeable under low
room lighting conditions.
10-13 CR19M10 [E].p65e 17/5/01, 6:18 pm11

12
LA
BL E NSCREE
NGUAGE
U
CH SETT I NG
AI /CABLER
EZ SETUP
CH SEARCH
CH MEMORY
AU
18
TO RGGAMM I NORP
WA I TPLE EAS
VOL–
TSOP:
2
SL EP TIMER
SET UP
E
V I DEO ADJUST
CAPT IONCLOSED
ENERGY SAVE
OR CABLE .
TSART SETUP?ZE
ANTENNCONNECT A
YE :VOL+
VOL–
S
NO :
Set Up
LEZ SETUP
By operating the channel preset functions, you can preset your
TV to the desired channels for viewing.
1Press
MENU
to access MAIN MENU screen.
2Press
CH UP (
8
)
or
DOWN (
9
)
to move the “ ” mark to “SET
UP”.
3Press
VOL (+)
or
(–)
to access SET UP mode, then press
CH UP
(
8
)
or
DOWN (
9
)
to move the “ ” mark to “CH SETTING”.
4Press
VOL (+)
or
(–)
to access CH SETTING mode.
5Press
VOL (+)
or
(–)
to access EZ SETUP mode.
6Press
VOL (+)
.
The tuner will automatically search for the
broadcastingand cableTV channels.(The CHNo.
will automatically increase when it appears.)
If you want to stop the EZ SETUP process once it
has started, press
VOL (–)
. Search will be
canceled.
To cancel EZ SETUP
Press
VOL (–)
.
7Once EZ SETUP is completed, the lowest channel number
memorized will be displayed.
(MAIN MENU screen)
(SET UP mode)
→
VOLUME
(+)/(–)
CHANNEL
UP (8)/
DOWN (9)
MENU
REMOTE
KEYPAD
(EZ SETUP mode)
(CH SETTING mode)
→
10-13 CR19M10 [E].p65e 17/5/01, 6:18 pm12

13
LA
BL E NSCREE
NGUAGE
U
CH SETT I NG
AI
ABLE STD
R
AI /CABLER
CABLE HRCCABLE IRCC
→
→
AIR CABLE STD CABLE HRC CABLE IRC
AI /CABLER
EZ SETUP
CH SEARCH
CH MEMORY
SL EP TIMER
SET UP
E
V I DEO ADJUST
CAPT IONCLOSED
ENERGY SAVE
AI /CABLER
EZ SETUP
CH SEARCH
CH MEMORY
Set Up (Continued)
LCHANNEL SETTING
If EZ SETUP does not memorize all the channels in your region, follow the instructions below
to manually memorize the channel.
1Press
MENU
to access MAIN MENU screen.
2Press
CH UP (
8
)
or
DOWN (
9
)
to move the “ ” mark to “SET
UP”.
3Press
VOL (+)
or
(–)
to access SET UP mode.
4Press
CH UP (
8
)
or
DOWN (
9
)
to move the “ ” mark to “CH
SETTING”.
5Press
VOL (+)
or
(–)
to access CH SETTING mode.
6Press
CH UP (
8
)
or
DOWN (
9
)
to move the “ ” mark to the
“AIR/CABLE”, then press
VOL (+)
or
(–)
to access AIR/CABLE
mode.
7Press
CH UP (
8
)
or
DOWN (
9
)
to move the “ ” mark to the
desired mode.
8Press
MENU
to exit.
Note:
•Receivable channels of your TV set are:
AIR channels: CABLE channels:
VHF: 2 through 13. 1 (HRC and IRC mode only)
UHF: 14 through 69. 2 through 125 (STD, HRC and IRC)
(AIR/CABLE select mode)
(MAIN MENU screen)
(SET UP mode)
(AIR/CABLE mode)
(CH SETTING mode)
→
10-13 CR19M10 [E].p65e 17/5/01, 6:18 pm13

14
AI /CABLER
EZ SETUP
CH SEARCH
CH MEMORY
2
AR +T:
TO –P:
AIR
CH SEARCH
ST
S
1
AI /CABLER
EZ SETUP
CH SEARCH
CH MEMORY
Set Up (Continued)
→
(START)
(STOP)
or
LSaving broadcast TV channels into memory.
1.1 Press
MENU
to access MAIN MENU
screen, then press
CH UP (
8
)
or
DOWN
(
9
)
to move the “ ” mark to “SET UP”.
1.2 Press
VOL (+)
or
(–)
to access SET UP
mode, then press
CH UP (
8
)
or
DOWN
(
9
)
to move the “ ” mark to “CH
SETTING”.
1.3 Press
VOL (+)
or
(–)
to access CH
SETTING mode.
1.4 Press
CH UP (
8
)
or
DOWN (
9
)
to move
the“”mark to“CH SEARCH”,then press
VOL (+)
or
(–)
to access CH SEARCH
mode.
START
2.1 Press
VOL (+)
. The tuner will search
throughall available channels in your area
and add them into the TV’s memory.
STOP
2.2 Press
VOL (–)
. CH SEARCH will stop at
the current channel and will not add any
higher channels.
2.3 Press
MENU
to exit.
Note:
•If you press
VOL (+)
again while in the CH SEARCH mode, auto-program will start again, and the
previously memorized channels will be lost.
LAdding weak or additional channels or erasing unwanted channels from TV memory.
1.1 Press
MENU
to access MAIN MENU
screen, then press
CH UP (
8
)
or
DOWN
(
9
)
to move the “ ” mark to “SET UP”.
1.2 Press
VOL (+)
or
(–)
to access SET UP
mode, then press
CH UP (
8
)
or
DOWN
(
9
)
to move the “ ” mark to “CH
SETTING”.
1.3 Press
VOL (+)
or
(–)
to access CH
SETTING mode, then press
CH UP (
8
)
or
DOWN (
9
)
to move the “ ” mark to “CH
MEMORY”.
2.1 Press
VOL (+)
or
(–)
to access CH
MEMORY.
2.2 Use
CH UP (
8
)
or
DOWN (
9
)
or
REMOTE
KEYPAD
to select each desired channel
to add or erase.
2.3 Press
VOL (+)
to add achannel to theTV’s
memory or press
VOL (–)
to erase a
channel from the TV’s memory.
(CH SETTING mode)
(CH SETTING mode)
→
→
→
(CH SEARCH mode)
→
→
14-16 CR19M10 [E].p65e 17/5/01, 6:18 pm14

15
LANG GUA E
BL E NSCREEU
CH SETT I NG
:OFF
BL EUSCREEN
:ON
BL EUSCREEN
LBLUE SCREEN
Automatically turns the screen blue if a broadcast signal is not
received.
1Press
MENU
to access MAIN MENU screen.
2Press
CH UP (
8
)
or
DOWN (
9
)
to move the “ ” mark to “SET
UP”.
3Press
VOL (+)
or
(–)
to access SET UP mode.
4Press
VOL (+)
or
(–)
to access BLUE SCREEN select mode.
5Press
VOL (+)
or
(–)
to select “ON”.
6Press
MENU
to exit.
Note:
•Poor reception due to weak signals, or too much noise might activate the BLUE SCREEN function
despite the presence of a broadcast signal. To continue watching TV under these conditions, switch
the BLUE SCREEN “OFF”.
•While VCR input mode is selected, the BLUE SCREEN will not be shown on your TV even if the
BLUE SCREEN is turned on.
→(MAIN MENU screen)
Set Up (Continued)
(SET UP mode)
(BLUE SCREEN select mode)
SL EP TIMER
SET UP
E
V I DEO ADJUST
CAPT IONCLOSED
ENERGY SAVE
D+:
AIR
CHMEMORY
ADTO
2
1
E–:
AIR
CH MEMORY
ESTO AR
21
VOL (+)
To add channel 12
to the TV memory
VOL (–)
To erase channel 12
from the TV memory
2.4 Press
MENU
to exit.
(CH MEMORY
memorized channel)
(CH MEMORY
unmemorized channel)
VOLUME
(+)/(–)
CHANNEL
UP (8)/
DOWN (9)
MENU
14-16 CR19M10 [E].p65e 17/5/01, 6:18 pm15

16
AIR
or
CABLE
INPUT
(Front)
To AUDIO OUTPUT
To VIDEO OUTPUT
(Front connection
terminals of TV)
VCR
CAMCORDER
TV GAME
DVD
FWDREV
VIDEO IN AUDIO
Using the Video and Audio Input Jacks
LConnecting video equipment for playback of video material.
• When the television is connected to video equipment as shown below, the material being played
back on the video equipment can be seen on the television screen.
Connecting video device equipped with video output terminals.
CONNECTIONS
LTo watch video material playback.
• Press the Remote’s
INPUT
button to select the VIDEO INPUT mode for the video equipment you
wish to play.
• The external VIDEO INPUT mode will change as follows each time the
INPUT
button is pressed.
• INPUT mode can be selected by pressing either the
CH UP (
8
)
on the TV remote control when the
TV is set to the highest channel stored in memory, or by pressing the
CH DOWN (
9
)
when it is set to
the lowest channel.
Note:
• When connecting video or audio equipment to the television, be sure that the power is turned off in
order to prevent damage to either the television or the equipment being connected.
• It is the intent of SHARP that this product be used in full compliance with the copyright law and that
prior permission be obtained from copyright owners whenever necessary.
• For detailed information on the connection and use of auxiliary equipment, refer to the instruction
manuals of the equipment being used.
• The connection cords can be obtained from your local video store.
VIDEO EQUIPMENT
14-16 CR19M10 [E].p65e 25/5/01, 2:08 pm16

17
Note:
•Whenviewing in TEXTmode, if noTEXTbroadcastisbeing received,
the screen may become dark and blank. Should this occur, set the
Closed Caption mode to “OFF”.
Before Calling for Service
Check these items and see if you can correct the trouble with a slight adjustment of the controls.
(Dark and Blank Picture)
QUICK SERVICE
CHECK LIST
POSSIBLE REMEDY
Try a new channel, if OK, then
there is possible station trouble.
Is TV plugged in?
Power at outlet?
Is TV’s POWER button on?
Is antenna connected to terminal
on the back of the set?
If outside antenna is being used,
check for broken wire.
Check for local interference or
external electrical noise.
Turn off with POWER button and
then turn it on after about a
minute.
Adjust COLOR control.
Adjust PICTURE control.
Check external Video/Audio
products: look for loose/broken
connection leads.
(Refer to page 16)
Check batteries of Remote
Control.
Change Closed Caption mode to
“OFF”/ Energy Save mode to
“OFF”.
Unplug the TV and plug it in again
after two minutes.
XXXXX XX X XXXXXXXXX
XXXXX XX X XX XXXX XXX
XXXXXXX X XXXXXXXXX
XXXXXXXX XXXXXXXXX
XXXXXXX X XX XXXXXXX
XXXXXXXXXXXXXXXX X
XXXXXXX X XXXXXXXXX
XXXXXXXX XXXXXXXX X
XXXXXXXXXXXXXXXX X
XXXXXXX X XXXXXXXXX
XXXXXXX X XX XXXXXX X
X X XXXXX X XXXXXXXXX
XXXXXXX X XXXXXX XX X
PROBLEM
No Playback of VCR and Disc
Player
No Picture or Sound from
External Video/Audio Products
Remote Control Doesn’t Work
Bars on Screen
Picture Distorted
Picture Rolls Vertically
No Color
Poor Reception on Some
Channels
Weak Picture
Lines or Streaks in Picture
Ghosts in Picture
Picture Blurred
Sound OK, Picture Poor
Picture OK, Sound Poor
No Picture or Sound
Dark and Blank Picture
External Electrical Noise
Interfering with TV’s Operation
17-20[Bk] CR19M10 [E].p65e 17/5/01, 6:19 pm17

18
Specifications
MODEL CR19M10
Receiving System NTSC
Reception Channels
AIR VHF 2-13 ch
UHF 14-69 ch
CATV 1-125 ch
Channel Tuning 181-channel Reception PLL tuning system
Antenna Input Impedance VHF/UHF 75 ohm Unbalanced
Screen Size 19˝ Diagonally Measured
Terminals Audio/Video input x 1 (Front x 1)
Sound Output 1.0 W (RMS) x 1
Power Source AC 120 V, 60 Hz
Power Consumption 69 W
Dimensions 1927/64˝ (W) x 1731/32˝ (H) x 187/8˝ (D)
[493 mm (W) x 456 mm (H) x 479 mm (D)]
Weight (approx.) 37.5 lbs. (17.0 kg)
• Design and specifications are subject to change without notice.
17-20[Bk] CR19M10 [E].p65e 21/5/01, 5:41 pm18

19
Sharp Electronics of Canada Ltd. (hereinafter called “Sharp”) gives the following express warranty to the
first consumer purchaser for this Sharp brand product, when shipped in its original container and sold or
distributed in Canada by Sharp or by an Authorized Sharp Dealer:
Sharp warrants that this product is free, under normal use and maintenance, from any defects in material
and workmanship. If any such defects should be found in this product within the applicable warranty period,
Sharp shall, at its option, repair or replace the product as specified herein.
This warranty shall not apply to:
(a) Any defects caused or repairs required as a result of abusive operation, negligence, accident, improper
installation or inappropriate use as outlined in the owner’s manual.
(b) Any Sharp product tampered with, modified, adjusted or repaired by any party other than Sharp,
Sharp’s Authorized Service Centers or Sharp’s Authorized Servicing Dealers.
(c) Damage caused or repairs required as a result of the use with items not specified or approved by Sharp,
including but not limited to head cleaning tapes and chemical cleaning agents.
(d) Any replacement of accessories, glassware, consumable or peripheral items required through normal
use of the product including but not limited to earphones, remote controls, AC adapters, batteries,
temperature probe, stylus, trays, filters, belts, ribbons, cables and paper.
(e) Any cosmetic damage to the surface or exterior that has been defaced or caused by normal wear and tear.
(f) Any damage caused by external or environmental conditions, including but no limited to transmission
line/power line voltage or liquid spillage.
(g) Any product received without appropriate model, serial number and CSA/CUL markings.
(h) Any products used for rental or commercial purposes.
(i) Any installation, setup and/or programming charges.
Should this Sharp product fail to operate during the warranty period, warranty service may be obtained
upon delivery of the Sharp product together with proof of purchase and a copy of this LIMITED WARRANTY
statement to an Authorized Sharp Service Center or an Authorized Sharp Servicing Dealer. In home
warranty service may be provided at Sharp’s discretion on any Sharp television with the screen size of 27”
or larger and on any Sharp Over The Range Microwave Oven.
This warranty constitutes the entire express warranty granted by Sharp and no other dealer, service center
or their agent or employee is authorized to extend, enlarge or transfer this warranty on behalf of Sharp.
To the extent the law permits, Sharp disclaims any and all liability for direct or indirect damages or losses
or for any incidental, special or consequential damages or loss of profits resulting from a defect in material
or workmanship relating to the product, including damages for the loss of time or use of this Sharp product
or the loss of information. The purchaser will be responsible for any removal, reinstallation, transportation
and insurance costs incurred. Correction of defects, in the manner and period of time described herein,
constitute complete fulfillment of all obligations and responsibilities of Sharp to the purchaser with respect
to the product and shall constitute full satisfaction of all claims, whether based on contract, negligence,
strict liability or otherwise.
WARRANTY PERIODS
Colour Television 1 year (picture tube 1 additional years)
LCD Projector 1 year (bulb 90 days)
LCD TV 1 year
Video Cassette Recorder 1 year
Camcorder 1 year
TV/VCR Combo 1 year (picture tube 1 additional years)
Audio Products 1 year
Microwave Oven
2 years (magnetron 3 additional years for part only)
Vacuum Cleaner 1 year
DVD Player 1 year
LIMITED WARRANTY
To obtain the name and address of the nearest Authorized Sharp Service Center or Dealer, please contact:
SHARP ELECTRONICS OF CANADA LTD.
SHARP ELECTRONICS OF CANADA LTD
335 Britannia Road East
Mississauga, Ontario
L4Z 1W9
(905) 568-7140 or 1-(877) SHARP-CC
Web site: www.sharp.ca
Consumer Electronics Products
Congratulations on your purchase!
VALID IN CANADA ONLY
17-20[Bk] CR19M10 [E].p65e 31/5/01, 12:14 PM19

20
Printed in Mexico
TINS-7321GJZZ
01P07-MSP
SHARP ELECTRONICS OF CANADA LTD.
335 BRITANNIA ROAD EAST, MISSISSAUGA, ONTARIO L4Z 1W9
SHARP CORPORATION
17-20[Bk] CR19M10 [E].p65e 17/5/01, 6:19 pm20
Table of contents
Languages:
Other Sharp CRT TV manuals

Sharp
Sharp PN-L602B User manual

Sharp
Sharp DV-5432S User manual

Sharp
Sharp DV-6345S User manual

Sharp
Sharp 14R2F User manual

Sharp
Sharp VT-3700S Assembly instructions

Sharp
Sharp 37AM-12H User manual

Sharp
Sharp DV-5407S User manual

Sharp
Sharp 32R-S480 User manual

Sharp
Sharp 54DS-03S User manual

Sharp
Sharp 37GT-25H User manual

Sharp
Sharp 37ET-35H User manual

Sharp
Sharp EL-330TB User manual

Sharp
Sharp 54GT-25 User manual

Sharp
Sharp DV-5407S User manual

Sharp
Sharp 51DS-02H User manual

Sharp
Sharp 54GT-25S User manual

Sharp
Sharp 36UF5/6 User manual

Sharp
Sharp CR13M10 User manual

Sharp
Sharp 27F640 User manual

Sharp
Sharp 37FM-11H User manual