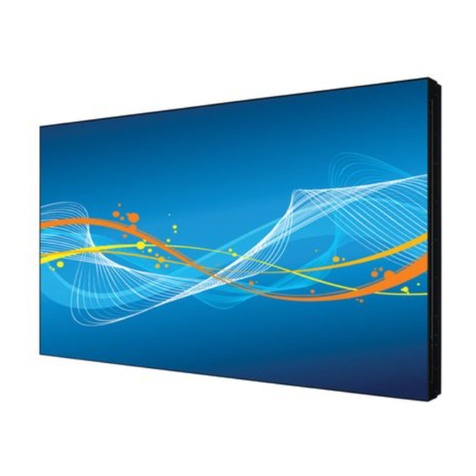
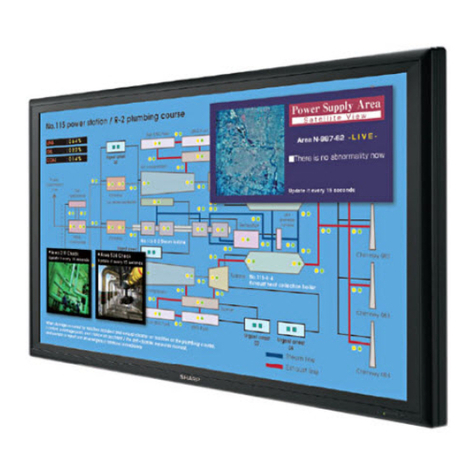
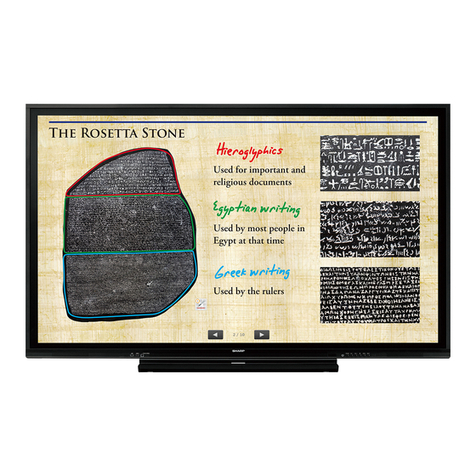
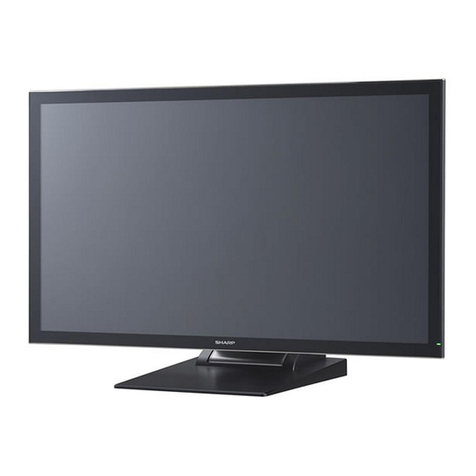
Sharp PN-T321 User guide

SETUP MANUAL
Read the manuals in the “Manual” folder of the provided CD-ROM. (Adobe Reader is required to view the manuals.)
•OperationManual(PNT321_manual_English.pdf)
•USBFlashDriveMediaToolOperationManual(PNT321_usb_English.pdf)
PN-T321
LCD MONITOR
IMPORTANT:
Toaidreportingincaseoflossortheft,pleaserecordthe
product’smodelandserialnumbersinthespaceprovided.
Thenumbersarelocatedintherearoftheproduct.
ModelNo.:
SerialNo.:
U.S.A.ONLY
ProductsthathaveearnedtheENERGYSTAR®aredesignedtoprotecttheenvironmentthrough
superiorenergyefciency.
0QP0000000078(1)

WARNING: TOREDUCETHERISKOFFIREORELECTRICSHOCK,DONOTEXPOSETHISPRODUCT
TORAINORMOISTURE.
RISKOFELECTRIC
SHOCK
DONOTOPEN
CAUTION
CAUTION: TOREDUCETHERISKOFELECTRIC
SHOCK,DONOTREMOVECOVER.
NOUSER-SERVICEABLEPARTS
INSIDE.
REFERSERVICINGTOQUALIFIED
SERVICEPERSONNEL.
Thelightningashwitharrowheadsymbol,within
anequilateraltriangle,isintendedtoalertthe
usertothepresenceofuninsulated“dangerous
voltage”withintheproduct’senclosurethatmay
beofsufcientmagnitudetoconstituteariskof
electricshocktopersons.
Theexclamationpointwithinatriangleis
intendedtoalerttheusertothepresenceof
importantoperatingandmaintenance(servicing)
instructionsintheliteratureaccompanyingthe
product.
WARNING:
FCCRegulationsstatethatanyunauthorizedchangesormodicationstothisequipmentnotexpresslyapprovedbythe
manufacturercouldvoidtheuser’sauthoritytooperatethisequipment.
NOTE:
ThisequipmenthasbeentestedandfoundtocomplywiththelimitsforClassAdigitaldevice,pursuanttoPart15ofthe
FCCRules.Theselimitsaredesignedtoprovidereasonableprotectionagainstharmfulinterferencewhentheequipment
isoperatedinacommercialenvironment.Thisequipmentgenerates,uses,andcanradiateradiofrequencyenergyand,if
notinstalledandusedinaccordancewiththeinstructionmanual,maycauseharmfulinterferencetoradiocommunications.
Operationofthisequipmentinaresidentialareaislikelytocauseharmfulinterferenceinwhichcasetheuserwillberequired
tocorrecttheinterferenceathisownexpense.
U.S.A.ONLY
DEAR SHARP CUSTOMER
ThankyouforyourpurchaseofaSHARPLCDproduct.Toensuresafetyandmanyyearsoftrouble-freeoperationofyour
product,pleasereadtheSafetyPrecautionscarefullybeforeusingthisproduct.
IMPORTANT INFORMATION

Electricityisusedtoperformmanyusefulfunctions,butitcanalsocausepersonalinjuriesandpropertydamageifimproperly
handled.Thisproducthasbeenengineeredandmanufacturedwiththehighestpriorityonsafety.However,improperusecan
resultinelectricshockand/orre.Inordertopreventpotentialdanger,pleaseobservethefollowinginstructionswheninstalling,
operatingandcleaningtheproduct.ToensureyoursafetyandprolongtheservicelifeofyourLCDproduct,pleasereadthe
followingprecautionscarefullybeforeusingtheproduct.
1. Readinstructions—Alloperatinginstructionsmustbereadandunderstoodbeforetheproductisoperated.
2. Keepthismanualinasafeplace—Thesesafetyandoperatinginstructionsmustbekeptinasafeplaceforfuture
reference.
3. Observewarnings—Allwarningsontheproductandintheinstructionsmustbeobservedclosely.
4. Followinstructions—Alloperatinginstructionsmustbefollowed.
5. Cleaning—UnplugthepowercordfromtheACoutletbeforecleaningtheproduct.Useadryclothtocleantheproduct.Do
notuseliquidcleanersoraerosolcleaners.
6. Attachments—Donotuseattachmentsnotrecommendedbythemanufacturer.Useofinadequateattachmentscanresult
inaccidents.
7. Waterandmoisture—Donotusetheproductnearwater.Donotinstalltheproductinaplacewherewatermaysplashonto
it.Becarefulofequipmentwhichdrainswatersuchasanair-conditioner.
8. Ventilation—Theventsandotheropeningsinthecabinetaredesignedforventilation.
Donotcoverorblocktheseventsandopeningssinceinsufcientventilationcancauseoverheatingand/orshortenthelife
oftheproduct.Donotplacetheproductonasofa,rugorothersimilarsurface,sincetheycanblockventilationopenings.
Donotplacetheproductinanenclosedplacesuchasabookcaseorrack,unlessproperventilationisprovidedorthe
manufacturer’sinstructionsarefollowed.
9. Powercordprotection—Thepowercordsmustberoutedproperlytopreventpeoplefromsteppingonthemorobjectsfrom
restingonthem.
10. Thescreenusedinthisproductismadeofglass.Therefore,itcanbreakwhentheproductisdroppedorappliedwith
impact.Becarefulnottobeinjuredbybrokenglasspiecesincasethescreenbreaks.
11. Overloading—DonotoverloadACoutletsorextensioncords.Overloadingcancausereorelectricshock.
12. Enteringofobjectsandliquids—Neverinsertanobjectintotheproductthroughventsoropenings.Highvoltageowsin
theproduct,andinsertinganobjectcancauseelectricshockand/orshortinternalparts.
Forthesamereason,donotspillwaterorliquidontheproduct.
13. Servicing—Donotattempttoservicetheproductyourself.Removingcoverscanexposeyoutohighvoltageandother
dangerousconditions.Requestaqualiedservicepersontoperformservicing.
14. Repair—Ifanyofthefollowingconditionsoccurs,unplugthepowercordfromtheACoutlet,andrequestaqualiedservice
person to perform repairs.
a. Whenthepowercordorplugisdamaged.
b. Whenaliquidwasspilledontheproductorwhenobjectshavefallenintotheproduct.
c. Whentheproducthasbeenexposedtorainorwater.
d. Whentheproductdoesnotoperateproperlyasdescribedintheoperatinginstructions.
Donottouchthecontrolsotherthanthosedescribedintheoperatinginstructions.Improperadjustmentofcontrols
notdescribedintheinstructionscancausedamage,whichoftenrequiresextensiveadjustmentworkbyaqualied
technician.
e. Whentheproducthasbeendroppedordamaged.
f. Whentheproductdisplaysanabnormalcondition.Anynoticeableabnormalityintheproductindicatesthattheproduct
needsservicing.
15. Replacementparts—Incasetheproductneedsreplacementparts,makesurethattheservicepersonusesreplacement
partsspeciedbythemanufacturer,orthosewiththesamecharacteristicsandperformanceastheoriginalparts.Useof
unauthorizedpartscanresultinre,electricshockand/orotherdanger.
16. Safetychecks—Uponcompletionofserviceorrepairwork,requesttheservicetechniciantoperformsafetychecksto
ensurethattheproductisinproperoperatingcondition.
17. Wallmounting—Whenmountingtheproductonawall,besuretoinstalltheproductaccordingtothemethod
recommendedbythemanufacturer.
18. Heatsources—Keeptheproductawayfromheatsourcessuchasradiators,heaters,stovesandotherheat-generating
products(includingampliers).
19. Batteries—Incorrectuseofbatteriesmaycausethebatteriestoburstorignite.Aleakybatterymaycorrodetheequipment,
dirtyyourhandsorspoilyourclothing.Inordertoavoidtheseproblems,makesuretoobservetheprecautionsbelow:
•Installthebatterieswithdueattentiontotheplus(+)andminus(-)sidesofthebatteriesaccordingtotheinstructionsinthe
compartment.
•Replaceanexhaustedbatterywithanewonepromptly.
•Donotshorttheterminals.
•Donotthrowintowaterorre.Donotdisassemble.
•Usethespeciedbatteriesonly.
•Ifyouwillnotusetheremotecontrolforalongtime,removethebatteries.
•Ifleakedbatteryuidgetsonyourskinorclothing,rinseimmediatelyandthoroughly.Ifitgetsintoyoureye,batheyour
eyewellratherthanrubbingandseekmedicaltreatmentimmediately.Leakedbatteryuidthatgetsintoyoureyeoryour
clothingmaycauseaskinirritationordamageyoureye.
Storelithiumbatteriesoutsidethereachofsmallchildren.Intheeventthatabatteryisswallowed,seektheadviceofa
physicianimmediately.
SAFETY PRECAUTIONS


20. Usageofthemonitormustnotbeaccompaniedbyfatalrisksordangersthat,couldleaddirectlytodeath,personalinjury,
severephysicaldamageorotherloss,includingnuclearreactioncontrolinnuclearfacility,medicallifesupportsystem,and
missilelaunchcontrolinaweaponsystem.
21. Donotstayincontactwiththepartsoftheproductthatbecomehotforlongperiodsoftime.Doingsomayresultin
low-temperature burns.
WARNING:
ThisisaclassAproduct.Inadomesticenvironmentthisproductmaycauseradiointerferenceinwhichcasetheusermaybe
requiredtotakeadequatecountermeasures.
Ifamonitorisnotpositionedinasufcientlystablelocation,itcanbepotentiallyhazardousduetofalling.Manyinjuries,
particularlytochildren,canbeavoidedbytakingsimpleprecautionssuchas:
•Usingxingdeviceslikewallmountbracketsrecommendedbythemanufacturer.
•Onlyusingfurniturethatcansafelysupportthemonitor.
•Ensuringthemonitorisnotoverhangingtheedgeofthesupportingfurniture.
•Notplacingthemonitorontallfurniture(forexample,cupboardsorbookcases)withoutanchoringboththefurnitureandthe
monitor to a suitable support.
•Notstandingthemonitorsonclothorothermaterialsplacedbetweenthemonitorandsupportingfurniture.
•Educatingchildrenaboutthedangersofclimbingonfurnituretoreachthemonitororitscontrols.
Especially for child safety
-Don’tallowchildrentoclimbonorplaywiththemonitor.
-Don’tplacethemonitoronfurniturethatcaneasilybeusedassteps,suchasachestofdrawers.
-Rememberthatchildrencanbecomeexcitedwhilewatchingaprogram,especiallyona“largerthanlife”monitor.Care
shouldbetakentoplaceorinstallthemonitorwhereitcannotbepushed,pulledover,orknockeddown.
-Careshouldbetakentorouteallcordsandcablesconnectedtothemonitorsothattheycannotbepulledorgrabbedby
curiouschildren.
SAFETY INSTRUCTION
-Donotusethemonitorwherethereisalotofdust,where
humidityishigh,orwherethemonitormaycomeintocontact
withoilorsteam,asthiscouldleadtore.
-Ensurethatthemonitordoesnotcomeintocontactwith
waterorotheruids.Ensurethatnoobjectssuchaspaper
clipsorpinsenterthemonitorasthiscouldleadtoreor
electricshock.
-Donotplacethemonitorontopofunstableobjectsorin
unsafeplaces.Donotallowthemonitortoreceivestrong
shocksortostronglyvibrate.Causingthemonitortofallor
toppleovermaydamageit.
-Donotusethemonitornearheatingequipmentorinplaces
wherethereislikelihoodofhightemperature,asthismay
leadtogenerationofexcessiveheatandoutbreakofre.
-Donotusethemonitorinplaceswhereitmaybeexposedto
directsunlight.
-TheACoutletshallbeinstalledneartheequipmentandshall
beeasilyaccessible.
The Power Cord
-Useonlythepowercordsuppliedwiththemonitor.
-Donotdamagethepowercordnorplaceheavyobjectson
it,stretchitoroverbendit.Also,donotaddextensioncords.
Damagetothecordmayresultinreorelectricshock.
-Donotusethepowercordwithapowertap.
Addinganextensioncordmayleadtoreasaresultof
overheating.
-Donotremoveorinsertthepowerplugwithwethands.
Doingsocouldresultinelectricshock.
-Unplugthepowercordifitisnotusedforalongtime.
-Donotattempttorepairthepowercordifitisbroken
ormalfunctioning.Refertheservicingtotheservice
representative.

• Thisproductisforuseindoors.
• Consultyourdealerbeforeinstalling,removingormoving
the monitor.
• AmountingbracketcompliantwithVESAspecications
isrequired.DonotuseanyscrewholesotherthanVESA
holes for installation.
• ToattachaVESA-compliantmountingbracket,useM6
screwsthatare5/16inch(8mm)to3/8inch(10mm)
longerthanthethicknessofthemountingbracket.
• Whenmovingthemonitor,donotplaceyourhandonthe
screen.Thismaycauseproductdamage,failure,orinjury.
• Installthemonitorwiththesurfaceperpendiculartoalevel
surface.Ifyoutiltthemonitor,donottiltmorethan20°up
or down.
• Mountingthemonitoronthewallrequiresspecialexpertise
andtheworkmustbeperformedbyanauthorizedSHARP
dealer.Youshouldneverattempttoperformanyofthis
workyourself.Ourcompanywillbearnoresponsibility
foraccidentsorinjuriescausedbyimpropermountingor
mishandling.
• Thismonitorshouldbeusedatanambienttemperature
between32°F(0°C)and104°F(40°C).Provide
enoughspacearoundthemonitortopreventheatfrom
accumulatinginside.
For the monitor in horizontal orientation
7-7/8 [20]
Unit: inch [cm]
2 [5]
2
[5]
2
[5]
1-7/16 [3.5]
1-13/16 [4.5]
For the monitor in vertical orientation
Unit: inch [cm]
2 [5]
2
[5]
2
[5]
7-7/8 [20]
• Ifitisdifficulttoprovidesufficientspaceforanyreason
suchastheinstallationofthemonitorinsideahousing,or
iftheambienttemperaturemaybeoutsideoftherange
of32°F(0°C)to104°F(40°C),installafanortakeother
measurestokeeptheambienttemperaturewithinthe
requiredrange.
• Temperatureconditionmaychangewhenusingthedisplay
togetherwiththeoptionalequipmentsrecommendedby
SHARP.Insuchcases,pleasecheckthetemperature
conditionspeciedbytheoptionalequipments.
• Adheretothefollowingwheninstallingthemonitorinits
verticalorientation.Failingtoadheretothefollowingmay
causemalfunctions.
-InstallthemonitorsuchthatthepowerLEDislocatedon
the bottom side.
- Mount so that the markonthebackpointsup.
-SettheTHERMALSENSORSETTINGintheSETUP
menutoPORTRAIT.(OperationManual)
• Donotblockanyventilationopenings.Ifthetemperature
insidethemonitorrises,thiscouldleadtoamalfunction.
• Aftermounting,pleasecarefullyensurethemonitoris
secure,andnotabletocomeloosefromthewallormount.
• Donotplacethemonitoronadevicewhichgeneratesheat.
• Usethesuppliedverticalstickerwhenyouinstallthe
monitorinverticalorientation.
Operation panel
Logo
-
Becarefulnottocovertheremotecontrolsensoror
buttons.
• Besuretouseawall-mountbracketdesignedor
designatedformountingthemonitor.
• Thismonitorisdesignedtobeinstalledonaconcretewall
orpillar.Reinforcedworkmightbenecessaryforsome
materialssuchasplaster/thinplasticboard/woodbefore
startinginstallation.
Thismonitorandbracketmustbeinstalledonawallwhich
canendureatleast4timesormoretheweightofthe
monitor.Installbythemostsuitablemethodforthematerial
andthestructure.
MOUNTING PRECAUTIONS

Supplied Components
Ifanycomponentshouldbemissing,pleasecontactyourdealer.
LiquidCrystalDisplayMonitor:1
Remotecontrolunit:1
(Batterypreinstalled)
Cableclamp:1
Powercord
Conversioncable(forAVcomponent):1
(green/blue/red)
* SharpCorporationholdsauthorshiprightstotheUtilityDiskprogram.Donotreproduceitwithoutpermission.
* Forenvironmentalprotection!
Donotdisposeofbatteriesinhouseholdwaste.Followthedisposalinstructionsforyourarea.
Conversioncable(forAVvideo):1
(red/white/yellow)
CD-ROM(UtilityDiskforWindows):1
SetupManual(thismanual):1
Verticalsticker(Operationpanel):1
Verticalsticker(Logo):1
USBashdrivecover:1
USBashdrivecoverscrew:1
CoverSharplogo:1
PlacethisstickerontotheSHARP
logotocoverthelogo.
TIPS
• Connecttheaudiousedineachinputmodetotheaudioinputterminalsbelow.
Input mode Audio input terminal
D-SUB,DVI-D PCaudioinputterminal
COMPONENT,VIDEO AVaudioinputterminal
HDMI PC/AVHDMIinputterminal,PCaudioinputterminal*
USB -
* IfaudiowillnotbeinputbyHDMIcable.
• Insertthepowercodethroughtheclawatthebottomofthemonitor(leftsideofthemonitoriforientedvertically).
For the monitor in horizontal orientation For the monitor in vertical orientation
•
HDMI,theHDMIlogoandHigh-DenitionMultimediaInterfacearetrademarksorregisteredtrademarksofHDMILicensingLLC.
PC/AV HDMI input terminal
PC/AV DVI-D input terminal
PC D-sub input terminal
PC audio input terminal
AV COMPONENT input terminal *
AV video/AV audio input terminal *
Audio output terminal
RS-232C input terminal
USB port
AC input
terminal
Power cord
(Supplied)
For power outlet
* Connect with the provided conversion cable.
Caution
• Besuretoturnoffthemainpowerswitchanddisconnecttheplugfromthepoweroutletbeforeconnecting/disconnecting
cables.Also,readthemanualoftheequipmenttobeconnected.
• Becarefulnottoconfusetheinputterminalwiththeoutputterminalwhenconnectingcables.Accidentallyreversingcables
connectedtotheinputandoutputterminalsmaycausemalfunctionsandtheotherproblems.
Connections

Setting the USB ash drive cover
Batteriesandaninsulationsheetarepreinstalledintheremotecontrolatthefactory.Beforeusingtheremotecontrol,besureto
remove the insulation sheet.
Insulation sheet
Pull out
Preparing the Remote Control Unit
1. Insert the USB ash drive into the USB port.
USB port
2. Attach the USB ash drive cover and secure with the provided screw.
Inserttheclaw(1)intothemonitor,andwhilepressinginthedirectionof(2),inserttheclaw(3)intothemonitor.
(2)
(3)
(3)
(1)
Screw
(black)
USB flash drive cover
TIPS
• IftheUSBashdrivewillbeattached,useaUSBashdrivewithdimensionsnogreaterthan3-1/8inch(80mm)(L)×15/16
inch(25mm)(W)×7/16inch(12mm)(H).
• ToremovetheUSBashdrivecover,reversetheprocedure.Usingexcessiveforcemaybreaktheclaws.Exercisecaution.
Caution
• Donottouchanyscrewsotherthantheblackscrew.

Turning Power On/Off
Caution
• TurnonthemonitorrstbeforeturningonthePCor
playbackdevice.
Turning on the main power
Main power switch
Caution
• Themainpowermustbeturnedon/offwiththemainpower
switch.Donotconnect/disconnectthepowercordorturn
thebreakeron/offwhilethemainpowerswitchison.
• WhenswitchingthemainpowerswitchorthePOWER
buttonoffandbackon,alwayswaitforatleast5seconds.
• Foracompleteelectricaldisconnection,pulloutthemain
plug.
Turning power on/off
PressthePOWERbuttonorPOWERswitchtoturnthepower
ON/OFF.Whenthemainpowerisoff,thepowercannotbe
turnedonwiththePOWERbutton.
Power LED
• StatusofthepowerLED
Status Status of the monitor
Greenlit Poweron
Orangelit Poweroff(Standbymode)
Greenashing Inputsignalwaitingmode
(DVI-DorD-SUB)
Caution
• WhenswitchingthemainpowerswitchorthePOWER
buttonoffandbackon,alwayswaitforatleast5seconds.
Ashortintervalmayresultinamalfunction.
Other manuals for PN-T321
3
Table of contents
Other Sharp Monitor manuals

Sharp
Sharp T19D1-H - LL - 19" LCD Monitor User manual

Sharp
Sharp PN-Y325 User guide

Sharp
Sharp PN-L862B User manual

Sharp
Sharp LL-173C User manual

Sharp
Sharp LL-P202V User manual

Sharp
Sharp Aquos LB-T462U User manual

Sharp
Sharp PN-E421 User manual

Sharp
Sharp PN-L862B User guide

Sharp
Sharp PN-S655 User manual

Sharp
Sharp LL-T1610W User manual

Sharp
Sharp PN-HE751 User manual

Sharp
Sharp PN-L401C User guide

Sharp
Sharp Smart Board Service manual

Sharp
Sharp PN-HS501 User manual

Sharp
Sharp PN-L703WA User manual

Sharp
Sharp LL-T15G1 User manual

Sharp
Sharp PN-R703 User guide

Sharp
Sharp PN-70SC3 User guide

Sharp
Sharp AQUOS LB-1085 User manual

Sharp
Sharp PN-C703B User manual