Sharp YO-515 User manual

ELECTRONIC ORGANIZER
OPERATION MANUAL
Instrucciones abreviadas en español
YO-515
CONTENTS
Using the Organizer for the First Time .................................................. 1
When Abnormal Conditions Cause a Malfunction ................................. 1
Auto Power Off Function ...................................................................... 1
Backlight .............................................................................................. 1
Adjusting the LCD Contrast .................................................................. 2
Turning the “beep” On and Off .............................................................. 2
Selecting the Guidance Language ......................................................... 2
Part Names ................................................................................................. 3
Display Symbols ......................................................................................... 4
Entering Characters .................................................................................... 4
Note on the Description of the MENU Key Operations ................................ 5
Notes for the Built-in Calendar and the Time .............................................. 5
Clock Mode ................................................................................................ 6
Telephone Mode ......................................................................................... 8
Calendar Mode ........................................................................................... 9
Schedule Mode ........................................................................................... 9
To Do Mode .............................................................................................. 12
Memo Mode ............................................................................................. 12
Expense Mode .......................................................................................... 13
Anniversary Mode .................................................................................... 14
Checking the Memory Storage ................................................................. 15
Freeing Up Memory .................................................................................. 15
Recalling the Listings ............................................................................... 15
Editing the Listings ................................................................................... 17
Deleting the Listings ................................................................................. 17
Calculator Mode ....................................................................................... 18
Conversion Mode ..................................................................................... 19
Secret Function ........................................................................................ 21
Battery Replacement ................................................................................ 23
Specifications ........................................................................................... 24
Instrucciones abreviadas en español ...................................................... S-1
YO-515 (E0426E)

NOTICE
•SHARP strongly recommends that separate permanent written records be kept of all important data. Data may be lost or altered in virtually any
electronic memory product under certain circumstances. Therefore, SHARP assumes no responsibility for data lost or otherwise rendered
unusable whether as a result of improper use, repairs, defects, battery replacement, use after the specified battery life has expired, or any other
cause.
•SHARP assumes no responsibility, directly or indirectly, for financial losses or claims from third persons resulting from the use of this product
and any of its functions, such as stolen credit card numbers, the loss of or alteration of stored data, etc.
•This Organizer is not designed to transfer/receive e-mails by using the E-mail addresses you will store.
•The information provided in this manual is subject to change without notice.
•All company and/or product names are trademarks and/or registered trademarks of their respective manufacturers.
CAUTIONS
•Do not carry the Organizer in the back pocket of slacks or trousers.
•Do not drop the Organizer or apply excessive force to it.
•Do not subject the Organizer to extreme temperatures.
•Since this product is not waterproof, do not use it or store it where fluids can splash onto it. Raindrops, water spray, juice, coffee, steam,
perspiration, etc. will also cause malfunction.
•Clean only with a soft, dry cloth.
•Use only a SHARP approved service facility.
YO-515 (E0426E)

1
Using the Organizer for the First Time
Be sure to perform the following operations before using the Organizer for
the first time.
(1) Installing the batteries
1. Set the battery replacement switch on
the bottom of the Organizer to
REPLACE BATTERIES.
2. Slide off the operating batteries cover.
3. Insert the two batteries on the top of
the ribbon tab, as shown in the
diagram.
4. Replace the operating batteries cover.
5. Set the battery replacement switch to
NORMAL OPERATION.
(2) Initializing the Organizer
1. Press the RESET switch while holding down
ON
. Release the RESET switch and then
release
ON
.
“CLEAR ALL DATA OK(Y/N)?” is displayed.
• Press the RESET switch with a ball-point pen
or similar object. Do not use an object with a
breakable or sharp tip.
• Under certain conditions the message may
appear as “Data has been impaired! Press [Y]
to CLEAR ALL memory”. Proceed to the next
step in either case.
2. Press
Y
to initialize the memory of the Organizer.
3. Select the desired language. Press
NEXT
to move to the next language
screen, then press
PREV
to move to
the previous language screen.
For example, press
2
to select English.
• Then the Home Clock is displayed. Proceed to set the date and time of
the clock. (Refer to page 6.)
When Abnormal Conditions Cause a Malfunction
If the Organizer is subjected to strong, extraneous electrical noises or
shocks during use, an abnormal condition may occur in which no keys
(including
ON
and
OFF
) will respond. If this happens, press the RESET
switch.
Noises or shocks may erase some or all of the Organizer’s memory.
Auto Power Off Function
When none of the keys has been pressed for approximately 7 minutes, the
Organizer automatically turns the power off to save the batteries. (The
actual time may vary depending upon the condition of use.) Press
ON
to
resume operation.
Backlight
The Organizer is provided a built-in Backlight, which allows you to view the
display and use the Organizer even in low-light conditions.
Pressing
BackLight
once illuminates the display for as long as you
continue to use the Organizer, until you have not typed any key for 15
seconds.
• To turn the Backlight off, press
BackLight
again.
<
LANGUAGES
>
1 DEUTSCH
4 FRANÇAIS
2 ENGLISH
3 ESPAÑOL
YO-515 (E0426E)

2
•The Backlight may remain on for less than 15 seconds or it may not
function if the battery level is very low.
★The backlight turns off automatically if you carry out the following
operations with the Organizer.
•Storing any listings in the Organizer
•Deleting any listings from the Organizer
•Marking any completed TO DO listings as done with
•Freeing up memory
•Exchanging data with a personal computer
★Do not use the Backlight unnecessarily.
•Since the Backlight drains power from the operating batteries,
excessive use of the Backlight will significantly reduce the life of your
batteries.
•Do not continue using the Organizer after it has automatically turned
itself off while the backlight was being used. Even if it can be turned
on again, the clock time will be incorrect and other functions may not
work properly until the batteries are replaced.
Adjusting the LCD Contrast
1. Press
MENU
2
to select “2 CONTRAST”.
2. Press or to darken or lighten
the display.
•The amount of contrast changes
continuously while either or
is held down.
3. Press
C•CE
after adjusting the contrast.
<
CONTRAST
>
–DARK
–LIGHT
Turning the “beep” On and Off
While “ ” is displayed, a “beep”will sound when a key is pressed. To turn
the “beep”on and off, press
2nd
(
2nd
). The “beep”will not
sound when “ ” is turned off.
Selecting the Guidance Language
The Organizer can give messages and guidance during operation in seven
different languages.
<Example>
Change the guidance language from English to Italian.
1. Press
MENU
NEXT
3
to select “3 LANGUAGES”.
2. Press
NEXT
1
to to select “1 ITALIANO”.
All messages and guidance will now appear in Italian.
•In this manual explanations are based on a guidance language set to
English.
YO-515 (E0426E)

3
Part Names
q Display
w MENU key
e Power ON/OFF key
r PC-LINK key (PC SYNC)
t RESET switch
y Clear/Clear entry key
u MODE keys
i Cursor movement keys
o SEARCH keys
!0 Option port (COMPUTER LINK)
In this manual the keys are represented by symbols, for
example:
→
&
: Indicates the & key.
→
7
: Indicates the numeric 7 key.
→
SCHEDULE
: Mode key with only one
function.
The key : These keys are used to select capital
(uppercase) or small (lowercase)
letters or to access the symbols above
the number key and “
:
”and “
;
”.
While holding down , press the
desired key to be entered.
Numbers, letters and space for operation are shown in
italic and bold.
1
2
3
4
6
5
7
8
9
;
YO-515 (E0426E)

4
Entering Characters
1.Moving the Cursor
The cursor ( _ , or ) can be moved by pressing (or holding down)
, , , or .
2.Entering Characters
(1) Entering letters and numbers
The cursor ( _ , or ) indicates the position to enter a character or
number. After initializing the Organizer, the default setting for entering
letters will be capital (uppercase) letters. To enter small (lowercase) letters,
turn “CAPS”off by pressing
CAPS
.
(2) Entering graphic symbols and special characters
Press
SMBL
to display the symbol entry mode, allowing a total of 140
symbols and characters to be selected. To select the symbol display
containing the desired symbol/special character, press
NEXT
(or ) or
PREV
(or ), then press the corresponding number.
•The first display is determined by your previous choice. The 10 most
recently used symbols/special characters are stored and displayed on
this display.
Press
SMBL
to exit the symbol entry mode.
You can also enter the following symbols/special characters by pressing
and an appropriate key (q) or directly from the numeric keys (w)
located next to the LCD display:
q&, , (, $, /, ^ , !, @, #, )
w÷, ×, –, +, =, ±, %
•You cannot enter “았앙 ”symbol.
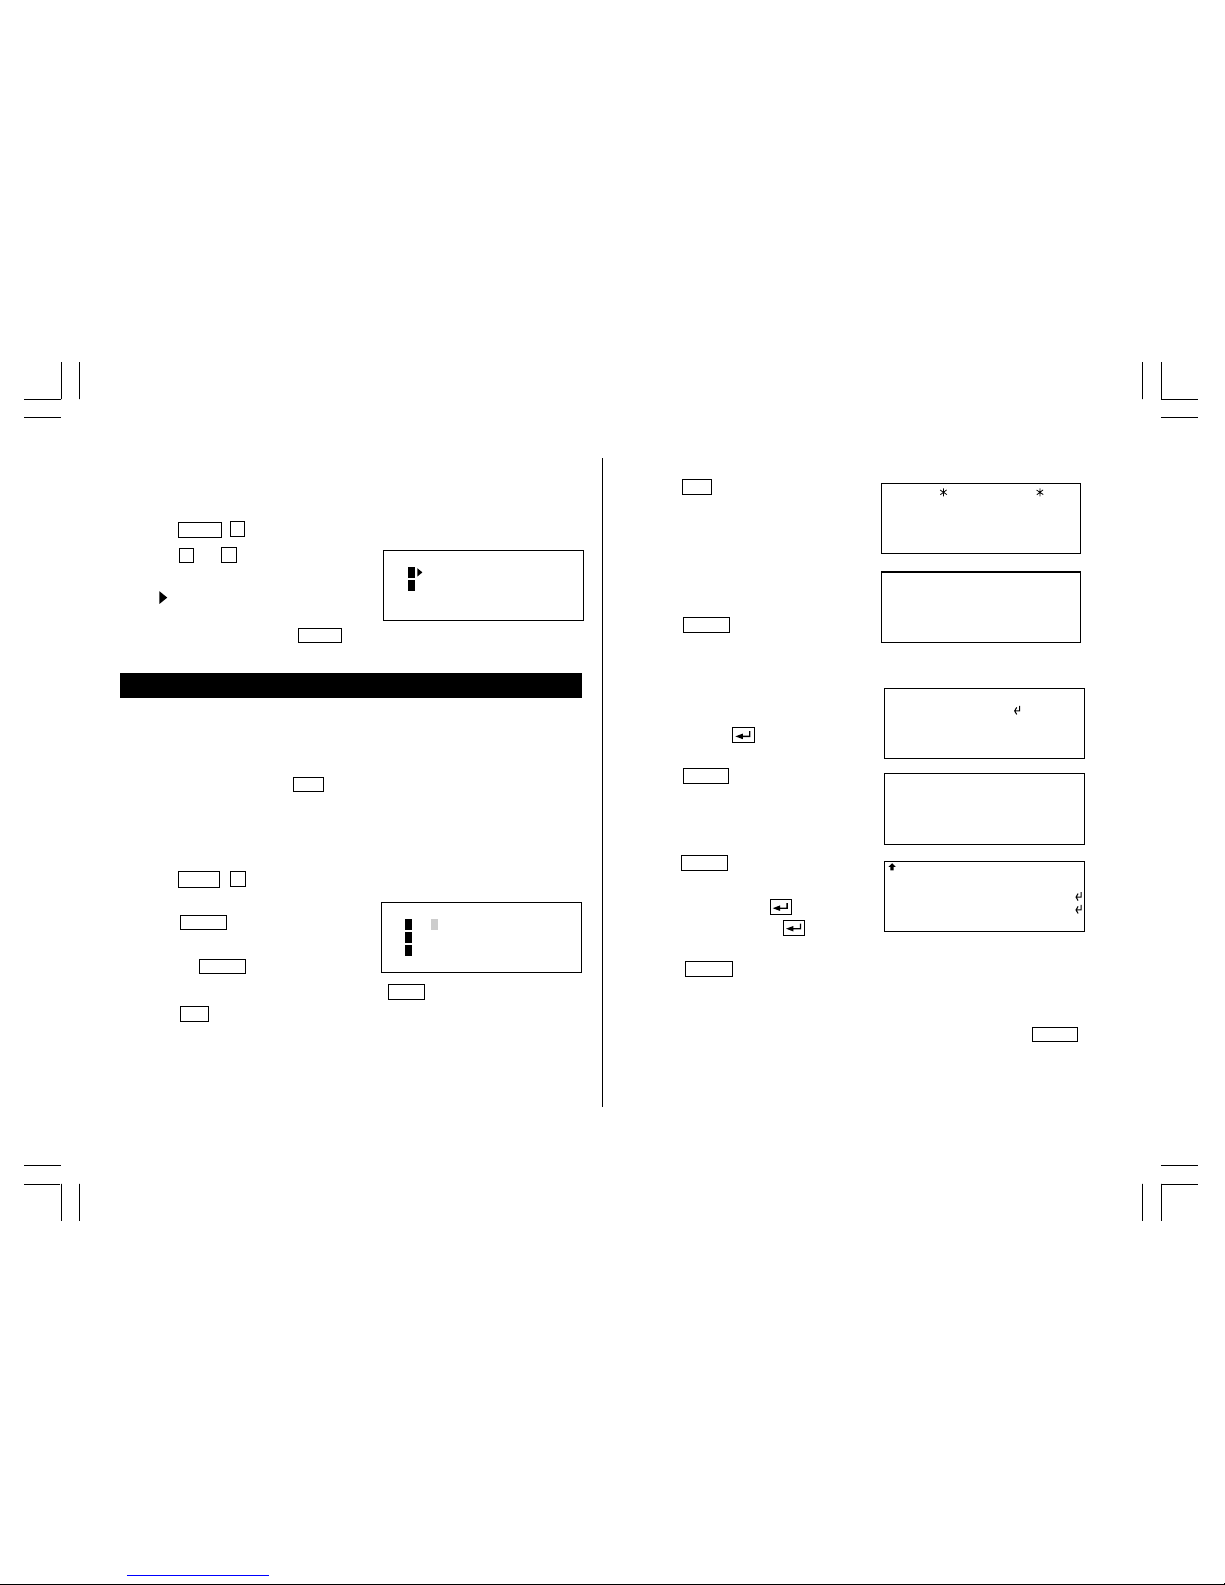
Display Symbols
:A“beep”will sound when a key is pressed.
:The schedule alarm will sound.
CAPS
:Capital (uppercase) letters will be entered. To enter small
(lowercase) letters, turn “CAPS”off by pressing
CAPS
.
EDIT
:The listing on the display can be edited.
2nd
:Indicates that
2nd
has been pressed.
:More information exists above the current display. (Press .)
:More information exists below the current display. (Press .)
S
:Secret function is in effect. (Secret listings cannot be recalled
without a password.)
:Indicates that the recalled listing is secret.
BATT
:Indicates that the operating battery level is low.
•In the display examples of this manual, only the symbols necessary for
explanation will be shown.
NOTES:
•The symbol “ ” shown by setting the LCD contrast to DARK is not
used in this product.
•The “ ” mark indicates the alarm sound for the scheduled listings is
turned on.
YO-515 (E0426E)

5
(3) Entering non-English characters
Press
2nd
followed by the corresponding keys.
Enter “Ä”, “ü’, “é” and “ô” in MEMO mode, for example.
Press
MEMO
2nd
¨
A
CAPS
2nd
¨
u
2nd
`
e
2nd
^
o
• “ç” is entered by pressing
2nd
ç
. Non-English characters can also
be entered as symbols.
3.Making Corrections
(1) Inserting characters
Press
INS
to change the cursor from “ ” (replace) to “ ” (insert).
Press
INS
again to change the cursor from “ ” to “ ”.
(2) Deleting characters
Press
DEL
to delete the character at the cursor position.
Press
BS
to delete the character to the left of the cursor.
•
DEL
and
BS
will not operate in some cases such as when you input
the time in Schedule mode or you are in Calculator mode. In these
cases, press
C•CE
and reenter.
•Press
C•CE
to clear all characters on the current display.
Note on the Description of the MENU Key Operations
This Organizer offers a variety of functions which you choose from the
menus (see the following table).
To switch or scroll the menu screens displayed by pressing
MENU
, press
NEXT
(or ) to move to the next screen, or
PREV
(or ) to move to
the previous screen.
Menu See page...
Checking the Memory Storage 15
Adjusting the LCD Contrast 2
Deleting the Listings 17
Designating the File Names 8
Selecting the Date Format 8
Selecting the Weekly Format 9
Freeing Up Memory 15
Selecting the Guidance Language 2
Notes for the Built-in Calendar and the Time
•Calendar, Schedule, Expense, and Clock modes allow you to enter the
desired date and time between Jan. 1, 1901 and Dec. 31, 2099.
•If an attempt is made to store an invalid time or date, you cannot move
the cursor to date entering, or store the time and date by pressing
ENTER
. Enter the correct value and press
ENTER
again.
Äüéô–
YO-515 (E0426E)

6
Clock Mode
The Organizer has both Home and World clocks. The display switches
between Home and World clock each time
CLOCK
is pressed.
Home clock World clock
“(+ 5:00)”indicates the time difference from the Home city.
1.Setting the Home Clock
(1) Setting and changing the Home city
Set your local city as the Home city by selecting its zone number.
Zone numbers are based on the distance of the zones from the international
date line (zone number zero). For example, there is a 13-hour difference
between the date line and London (London is 13 hours behind), so the zone
number for London is 13. Honolulu is 23 hours behind the date line, so its
zone number is 23.
The names and zone numbers of 27 cities are stored in the Organizer's
memory. (See the following table.)
1. Press
CLOCK
once or twice to display the Home clock.
2. Press
2nd
EDIT
.
•The zone number is displayed on the right side.
3. Press
NEXT
or
PREV
to display the desired city which corresponds
to your local zone from the cities stored in the Organizer.
(2) Setting the Clock
<Example>
Set the date and time to April 12, 2001, 10:05 PM (or 22:05).
1. Press
CLOCK
once or twice to display the Home clock.
2. Press
2nd
EDIT
.
•The cursor will flash.
3. Press
12 24
to select the 12-hour
or 24-hour clock.
•The display switches between the two clocks each time
12 24
is
pressed. AM or PM is displayed for the 12-hour clock (default).
(Note: 12:00PM: noon, 12:00AM: midnight)
4. Enter the hour and minutes.
1005
PM
(For the 24-hour clock, press 2205)
(Enter 2 digits each for both hour and minutes.)
Zone Display City Zone Display City
No. No.
0 10 MOW MOSCOW
1 AKL AUCKLAND 11 CAI CAIRO
2 NOU NOUMEA 12 PAR PARIS
3 SYD SYDNEY 13 LON LONDON
3.3 ADL ADELAIDE 14
4 TYO TOKYO 15
5 HKG HONG KONG 16 RIO RIO DE JANEIRO
6 BKK BANGKOK 17 CCS CARACAS
6.3 RGN YANGON 18 NYC NEW YORK
7 DAC DHAKA 19 CHI CHICAGO
7.3 DEL NEW DELHI 20 DEN DENVER
8 KHI KARACHI 21 LA LOS ANGELES
8.3 KBL KABUL 22 ANC ANCHORAGE
9 DXB DUBAI 23 HNL HONOLULU
9.3 THR TEHRAN 24 MID MIDWAY
N C
MON JAN 1,2001
12:00
AM
LON (+ 5:00)
MON JAN 1,2001
5:00
AM
Day of the week/
Month/Day/Year
World
city
Time Time
Day of the week/
Month/Day/Year
Home
city
4. Press
ENTER
to set the Home city.
•Zone numbers 0, 14, and 15 have no city name on the display.
N C
[
18.0
]
MON JAN 1,2001
12:00
AM
YO-515 (E0426E)

7
5. Enter the month, day, and year.
04122001
Use to skip entering a number that needs no change.
6. Press ENTER . The clock starts from 0 second.
2.Using the World Clock
Changing the city for the World clock
1. Press
CLOCK
once or twice to display the World clock.
2. Press
2nd
EDIT
.
3. Press
NEXT
or
PREV
to display the city which corresponds to the
desired zone.
4. Press ENTER .
3.Registering a City Name not Found in the List
If you want to set the city for the World clock to Rome, for example (Rome
belongs to zone number 12, but is not included in the city list):
1. Press
CLOCK
once or twice to display the World clock.
2. Press
2nd
EDIT
.
3. Press
NEXT
(or
PREV
) to set the zone number to 12.
(Initially the city is “PAR”(PARIS).)
4. Enter the city name (up to 8 characters).
ROME
5. Press
ENTER
to store the new name.
•To register a city name for the Home clock, first display the Home clock
then press
2nd
EDIT
and press to move the cursor to the city
name line.
•Only one changed city name can be stored in each of the Home and
World clocks.
•Each changed name is stored until you next change the zone number.
4.Setting Daylight Saving Time/Summer Time
If DST (daylight saving time/summer time) is used, the local time is
advanced one hour during the summer. Both the Home clock and World
clock can be set for DST as follows:
(1) Home clock
1. Press
CLOCK
once or twice to display the Home clock.
2. Press
2nd
EDIT
.
3. Enter the correct daylight saving time/summer time.
4. Press
2nd
ENTER
to set the time as DST.
A “ ” appears on the display and DST is now set.
(2) World clock
1. Press
CLOCK
once or twice to display the World clock.
2. Press
2nd
EDIT
.
3. Press
2nd
ENTER
.
A “ ” appears on the display and DST is now set. Setting DST in the
World clock automatically sets the time one hour ahead.
•When DST is set for one World city, it is used for all cities displayed in
the World clock.
•DST can be set independently in either the Home or the World clock.
(3) Clearing DST
To clear DST, follow steps 1 to 4 for Home clock, or follow steps 1 through
3 for World clock.
The “ ” disappears.
YO-515 (E0426E)

8
5. Selecting the Date Format
The date format can be switched between MONTH/DAY/YEAR and
DAY.MONTH.YEAR.
1. Press
MENU
5
to select “5 DATE FORMAT”.
2. Press
1
or
2
to select “MONTH/
DAY/YEAR”or “DAY.MONTH.YEAR”.
•A “ ” mark moves to your selection
and you return to the mode in which
you were before pressing
MENU
.
Telephone Mode
In Telephone mode, a listing consists of 4 entries: name, number, E-mail
address, and postal address.
Further, Telephone listings provide 3 files (TEL1, TEL2, TEL3). The files are
cycled each time you press
TEL
. You can switch them for convenience
by keeping business, private and other listings separate.
1.Designating the File Names
You can change each file name in up to 10 characters long as follows:
1. Press
MENU
4
to select “4 TEL FILE NAME”.
2. Enter the new name for TEL1, then
press
ENTER
.
•You can skip changing a file name by
pressing
ENTER
.
•To cancel entering the file names, press
C•CE
twice.
3. Press
TEL
to check the new file name(s).
<
TEL FILE NAME
>
1
[
TEL 1
]
2
[
TEL 2
]
3
[
TEL 3
]
Johns, Pat–
Johns, Pat
F 265–1234–
201–265–5600
07430–2135, U.S.A.–
201–265–5600
Box G, Sharp Plaza,
johns–[email protected]
Mahwah, New Jersey,
Johns, Pat
johns–[email protected]
201–265–5600
–
2.Storing the Telephone Listings
1. Press
TEL
to display the TEL1 entry
prompt.
2. Enter the name. For example,
Johns, Pat
3. Press
ENTER
.
The number entry prompt is
displayed.
4. Enter the phone and fax numbers.
For example,
201-265-5600
F 265-1234
5. Press
ENTER
, then enter the E-mail
address. For example,
6. Press
ENTER
, then enter the
address. For example,
Box G, Sharp Plaza,
Mahwah, New Jersey,
07430-2135, U.S.A.
7. Press
ENTER
.
“STORED!”will be displayed briefly, then the listing will be displayed.
The telephone listing is now stored.
•To skip entering the number, E-mail address, or address, press
ENTER
when “NUMBER?”, “E-MAIL?”, or “ADDRESS?”is displayed. However,
the name entry cannot be skipped.
TEL 1
NAME?
<
DATE FORMAT
>
1 MONTH/DA / EAR
2 DA .MONTH. EAR
YO-515 (E0426E)

9
•To enter the next telephone listing, continue to enter in the same manner.
•The Telephone listings are stored in alphabetical order.
See also ...
Recalling the Listings ................ 15 Checking the Memory Storage .. 15
Editing the Listings .................... 17 Entering Characters .................... 4
Deleting the Listings .................. 17
Calendar Mode
1.Controlling the Monthly Calendar Display
The Organizer has a 5-line display and 4 weeks of a month and day of the
week can be displayed. Use the following keys to control the display status.
NEXT
PREV
: displays the following or previous month.
•Hold down either of these keys for rapid recall.
:
moves the cursor or scrolls the calendar up or down one week.
1. Press
CALENDAR
to display the
Calendar mode.
•“ ”indicates the 5th or 6th week of
the month is hidden below. To display
the 5th or 6th week, press until
the cursor scrolls into the next screen.
2. Press
NEXT
(or
PREV
) to display the calendar for the next (or
previous) month.
•When you reset the Organizer, the calendar defaults to Jan. 1, 2001.
2.Selecting the Weekly Format
The weekly format can be switched between SUN-SAT and MON-SUN.
1. Press
CALENDAR
to display the Calendar mode screen.
2. Press
MENU
NEXT
1
to select “1 WEEKLY FORMAT”.
3. Press
1
or
2
to select “SUN-SAT”or “MON-SUN”.
•A “ ” mark moves to your selection and you return to the mode in
which you were before pressing
MENU
.
3.Returning the Calendar to the Current Date
Press 2nd
CALENDAR
in Calendar mode.
•The current monthly calendar will be displayed, and the current date will
flash.
See also ...
Recalling the Listings ................ 15
Schedule Mode
A schedule listing consists of 3 entries: date, time, and detail. In the date
entry, 4 digits can be entered for the year and 2 digits each for the month,
day, hour, and minute.
1.Storing the Schedule Listings
There are 3 ways to enter the desired date:
(1) Enter the desired date in Calendar mode
(2) Enter the desired date with NEXT (or
PREV
)
(3) Enter the desired date directly
After the date has been entered, the entry of time and detail is the same for
all 3 ways.
8
9
10
11
12
13
14
15
16
17
18
19
20
21
22
23
24
25
26
27
28
S M T W T F S2001
APR
1
2
3
4
5
6
7
Year
Month Day of the
week
YO-515 (E0426E)

10
(1) Enter the desired date in Calendar mode
<Example>
Enter the following data.
“Lunch with Tom” from 11:30 AM to 1:00 PM on June 24,
2001.
1. Press
2nd
CALENDAR
in Calendar mode to display the calendar for
the current date (For example, April 12, 2001).
2. Press
NEXT
NEXT
to move the cursor to June
24, 2001.
3. Press
SCHEDULE
to change to the
Schedule mode.
Time entry prompt for June 24, 2001 is
displayed.
4. Enter the starting and ending time.
1130
AM
01
PM
(For the 24-hour clock, press 1130 13 .)
“DESCRIPTION?” is displayed.
• “:00” will be entered automatically.
• You can enter schedule details without the ending time. Press
ENTER
(or ) after entering the starting time to display the “DESCRIPTION?”
prompt.
• You can also enter schedule details without a specified time, except
details starting with a number. Skip entering time and start to enter
letters for the details as described in step 5.
• The hour and minute should each consist of 2 digits.
• The time can be set using either the 12-hour or 24-hour format. When
you move the cursor to the next entry field, the time is displayed in the
format selected in the Clock mode.
• If an attempt is made to store an invalid time, you cannot move the
cursor to the next entry field. Enter the correct time and follow the next
procedure.
5. Enter the schedule detail.
Lunch with Tom
6. Press
ENTER
to store the listing.
7. Now, press
CALENDAR
to check if the
listing is stored in the memory.
• Notice the tag ( ) on the right of “24”. It indicates a scheduled item for
that date:
(2) Enter the desired date with
NEXT
(or
PREV
)
This is a convenient way of entering a nearby date. Press
NEXT
(or
PREV
) and change the display day by day until the desired date appears.
<Example>
Enter a schedule listing on April 17, 2001.
1. Press
SCHEDULE
to display the Schedule mode screen.
2. Press
2nd
SCHEDULE
to display the time entry prompt for the current
date (For example, April 12, 2001).
3. Press
NEXT
repeatedly until the time entry prompt for April 17, 2001
appears. Enter the time and detail following the procedure for “(1) Enter
the desired date in Calendar mode” (from step 4) on this page.
Schedule items beginning in the morning or schedule
items without a specified time
Anniversary items
Schedule items beginning in the afternoon
SUN JUN 24,2001
TIME?
SUN JUN 24,2001
Lunch with Tom–
11:30AM~ 1:00PM
S M T T F S2001
JUN
3
4
5
6
7
8
9
10
11
12
13
14
15
16
17
18
19
20
21
22
23
24
25
26
27
28
29
30
YO-515 (E0426E)

11
(3) Enter the desired date directly
When the date is not close to the currently displayed date, the following
method is more convenient than the previous 2 ways.
<Example>
Enter a schedule listing on June 26, 2002.
1. Press
SCHEDULE
C•CE
to display
the date entry prompt.
2. Enter the date.
06262002
3. Press
ENTER
.
The time entry prompt for June 26, 2002 is displayed. Enter the time and
detail following the procedure for “(1) Enter the desired date in Calendar
mode”from step 4 on page 10.
•If an attempt is made to store an invalid date, you cannot move to the
time entry prompt. Enter the correct date and follow the next procedure.
2.Schedule Alarm
Schedule alarm sounds for approximately 20 seconds when the time set for
a schedule listing is reached. Once a schedule item has been selected for
the alarm and the alarm has been turned on, the alarm will sound
automatically and the relevant item will be displayed even if the Organizer
has been turned off. The alarm can also be set to sound for secret items
without displaying the item.
<Example>
Set an alarm for June 22, 2001 (Meeting at 10:00AM -
11:00AM).
1. Press
SCHEDULE
and enter the date, time, and schedule detail.
2. Press
2nd
ALARM
to set the alarm
and press
ENTER
to store.
A “ ” is displayed on the left of the
starting time for the scheduled item,
and an alarm sound mark (“ ”) is displayed on the left of the display.
•You cannot set the schedule alarm to the listings with no time entry.
MM/DD/YYYY
DAY :12
MONTH :04
YEAR :2001
•You can set an alarm while you are entering or editing the schedule item.
When you press
2nd
ALARM
while “ ” is displayed, the alarm will be
canceled and “ ” will disappear from the display.
•If the alarm time you attempt to enter has already passed, the message
“ALARM TIME ELAPSED!”appears briefly. Enter the correct alarm time.
•After the alarm sounds, “ ” will disappear and the scheduled item will
remain in the memory without “ ”.
•Even if “ ” is turned off and the scheduled alarm time has passed,
“ ” will not disappear from the display.
•The schedule alarm may not sound if the time for a schedule listing
arrives while you are exchanging data with a personal computer.
•Press
C•CE
to stop the alarm sound.
Turn the alarm sound on and off
Pressing
2nd
after the alarm setting, turns off the alarm sound while
keeping the schedule alarm turned on.
•A “ ” disappears, and the alarm sound is set to off.
•Press
2nd
to set the alarm sound to on again, so that the “ ” is
displayed.
•Setting the alarm sound (“ ” mark status) does not affect the setting of
the schedule alarm (“ ” mark status) to each schedule listing.
•The schedule alarm set for the schedule listing will sound when the “ ”
is turned on and the time for each listing is reached. You cannot classify
or declassify each listing.
See also ...
Recalling the Listings ................ 15 Checking the Memory Storage .. 15
Editing the Listings .................... 17 Entering Characters .................... 4
Deleting the Listings .................. 17
FRI JUN 22,2001
Meeting
10:00AM~11:00AM
YO-515 (E0426E)

12
To Do Mode
1.Storing the Listings
1. Press TO DO to display the To Do
entry prompt.
2. Enter the description. For example,
Call Frank about a sales meeting
3. Press
ENTER
.
4. Enter the priority. For example,
2
5. Press
ENTER
to store it in the
memory.
•Press
C•CE
twice to cancel the entry.
•The priority can be set by any number 0-9 or letter A-Z or just left blank
by pressing
ENTER
. Lowercase letters entered without
CAPS
pressed
will be changed to the uppercase letters.
•Order of priority is from 0-9, A-Z, then space.
2.Checking off Completed Items
1. Press TO DO to display the To Do entry prompt.
2. Press
ENTER
to enter the index mode.
3. Press and to select the item.
4. Press to mark it as done.
•“SORTING...”is displayed briefly and items marked with “ ” are given
the lowest priority and listed at the end of the list.
•You can also check off the item by recalling each listing and pressing
.
TO DO
DESCRIPTION?
Call Frank about a s
PRIORITY:2
•To restore the checked off item, recall the listing to be restored, press
2nd
EDIT
to enter the edit mode, and then enter the priority.
See also ...
Recalling the Listings ................ 15 Checking the Memory Storage .. 15
Editing the Listings .................... 17 Entering Characters .................... 4
Deleting the Listings .................. 17
Memo Mode
1.Storing the Memo Listings
1. Press
MEMO
to display the Memo
entry prompt.
2. Enter the title. For example,
Xmas presents list
3. Press
ENTER
.
4. Enter the details. For example,
Sweater for Jill
Ring for Mother
5. Press
ENTER
to store it in the
memory.
•The Memo listings are stored in alphabetical order.
See also ...
Recalling the Listings ................ 15 Checking the Memory Storage .. 15
Editing the Listings .................... 17 Entering Characters .................... 4
Deleting the Listings .................. 17
MEMO
TITLE?
Xmas presents list
Ring for Mother–
Sweater for Jill
YO-515 (E0426E)

13
Expense Mode
1.Creating the Expense Records
<Example>
The date is April 5, 2001.
You bought flight tickets for a business trip for $1,200.
1. Press EXPENSE to enter the Expense
mode.
•The month and the day must be
entered using 2 digits and the year
using 4 digits. For single digit months or days, enter “0”before the
single digit.
•The date can be changed by pressing either or .
2. Enter the expense date and press
ENTER
.
04052001
ENTER
3. Enter the expense amount and press
ENTER
.
1200
ENTER
•Numerical values can be input in up to 10 digits including 2 decimal
places.
4. Enter the memo.
Flight tickets for inspection abroad
5. Press
ENTER
to store it in the
memory.
•Press
C•CE
once or twice to return to the date entry prompt.
•The description field can be skipped by pressing
ENTER
.
EXPENSE
M/D/Y= 4/12/2001
DATE?
2.Expense Summaries
Expense summaries are a collection of records stored in Expense mode.
You can recall them for a specific day or a certain period.
(1) Summarizing an expense report for a specific day
<Example>
Specify the date, April 5, 2001.
1. Press EXPENSE to enter the Expense mode.
2. Press
2nd
EXPENSE to enter the
Expense report mode.
3. Press
1
to select “1 DAILY”.
•The current date will be displayed.
4. Enter the desired date.
04052001
5. Press
ENTER
.
•Press
ENTER
to return to the date
entry prompt, when you wish to check
another daily report.
(2) Summarizing a report for a certain period
<Example>
Starting date: April 1, 2001
Ending date: April 30, 2001
1. Press EXPENSE to enter the Expense mode.
2. Press
2nd
EXPENSE to enter the Expense report mode.
3. Press
2
to select “2 PERIOD”.
4. Enter the starting and ending time.
04012001
ENTER
04302001
THU APR 5,2001
Flight tickets for i
1,200.00
nspection abroad–
1 DAILY
2 PERIOD
<
EXPENSE REPORT
>
DATE :APR 5,2001
–DAILY–
1,200.00
YO-515 (E0426E)

14
5. Press
ENTER
.
•Press
ENTER
to return to the date
entry prompt.
•If the integer section in the calculation
result exceeds 12 digits, “, , , . ”is
displayed.
See also ...
Recalling the Listings ................ 15 Checking the Memory Storage .. 15
Editing the Listings .................... 17 Entering Characters .................... 4
Deleting the Listings .................. 17
Anniversary Mode
In Anniversary mode, you can specify the month and date (such as
wedding anniversaries and birthdays), or month, week, and day of the week
(such as Mother’s Day (second Sunday in May)).
Once a date is stored as an anniversary, the date will be an anniversary for
every year from 1901 to 2099.
Anniversaries are marked with a tag ( ) in the center right of the date (See
page 10) in the monthly calendar.
1.Storing the Anniversary Listings
<Example 1>
Enter the following data.
“Nancy’s Birthday”on February 12th.
1. Press ANN to enter the Anniversary mode.
2. Press
1
to select “1 MONTH/DAY”to
enter the date entry prompt.
FROM :APR 1,2001
–PERIOD–
1,415.25
TO :APR 30,2001
3. Enter the date and press
ENTER
(or
).
0212
ENTER
•If an attempt is made to store an
invalid date, you cannot move to the description entry prompt. Enter the
correct date and follow the next procedure.
4. Enter the description of the anniver-
sary.
Nancy’s Birthday
5. Press
ENTER
to store it in the memory.
<Example 2>
Register Mother's Day (second Sunday in May).
1. Press ANN to enter the Anniversary mode.
2. Press
2
to select “2 MONTH/WEEK”to display the date entry mode.
3. Enter the month, week, and day of the
week.
05 2 0
4. Press
ENTER
, and then enter the
description of the anniversary.
ENTER
Mother's Day
5. Press
ENTER
to store it in the memory.
See also ...
Recalling the Listings ................ 15 Checking the Memory Storage .. 15
Editing the Listings .................... 17 Entering Characters .................... 4
Deleting the Listings .................. 17
–ANN–
M=MONTH D=DAY
M/D=– /
–ANN–
DESCRIPTION?
FEB 12
–ANN–
Nancy's Birthday–
FEB 12
3: 4:T 5:F 6:S
D=DAY 0:S 1:M 2:T
–ANN–
M=MONTH = EEK
M/ /D=05/2/0
–ANN–
Mother's Day–
MAY EEK 2 SUN
YO-515 (E0426E)

15
TEL 3 : 6
TEL 2 : 31
TEL 1 : 76
0% 100%
Recalling the Listings
1.Notes for Recalling the Listings
•Perform searching the listings in each mode other than Clock, Calculator,
and Conversion modes.
•The direct, keyword, and index searches are not case sensitive.
•When the symbol “ ” or “ ” is displayed, more information exists.
Pressing or scrolls up or down one line.
•When there are no more (or relevant) listings to be recalled or to be
searched, “NOT FOUND!”is displayed briefly and the display returns to
the entry prompt.
2.Sequential Search
Recalls the listings in order in each mode.
To begin searching in Anniversary mode, press ANN to enter the
Anniversary mode and then press
1
(or
2
) to select the searching type.
Press
NEXT
(or
PREV
) to recall the listings in forward (or reverse)
order. Hold down either of these keys for rapid recall.
Schedule listings
•When nothing has been entered for that day, only the time entry prompt
is displayed.
•Press
2nd
SCHEDULE
in Schedule mode to recall the scheduled
listings for the current day. Then press
NEXT
repeatedly to check if any
other listings are scheduled for the current day.
•Press
2nd
NEXT
(or
2nd
PREV
) in Schedule mode repeatedly to
recall the listings skipping empty dates. Press
C•CE
C•CE
, then press
2nd
NEXT
(or
2nd
PREV
) to display the first (or last) listing in
chronological order. After the last (or first) listing in chronological order
has been found, “NOT FOUND!”is displayed briefly.
Checking the Memory Storage
1. Press
MENU
1
to select “1 CHECK
MEMORY”.
The number of listings stored in TEL1,
TEL2 and TEL3 files is displayed.
2. Press
NEXT
again to display the number of listings stored in
SCHEDULE, ANN1, and ANN2 files.
3. Press
NEXT
again to display the number of listings stored in MEMO,
EXPENSE, and TO DO files.
4. Press
C•CE
to return to the mode in which you were before pressing
MENU
.
•When the amount of memory used approaches “100%”, delete
unnecessary data to make enough space to store new listings.
•Since the same memory is used for all the modes other than the
Calculator and Conversion modes, the number of listings that can be
stored in each of these modes will vary depending on the situation of
each mode.
Freeing Up Memory
Deleting or modifying data during operation can produce unnecessary
space in the memory of the Organizer. Delete unnecessary space and free
up memory, when the Organizer displays “MEMORY FULL!”.
1. Press
MENU
NEXT .
2. Press
2
to start freeing up memory.
•“WORKING...”is displayed indicating that the memory is being freed up.
YO-515 (E0426E)

16
3.Direct Search
Recalls the listings by the first character(s) of the name (or the contents) in
Telephone, Schedule, To Do, or Memo mode.
1. Enter the first character(s) of the desired name (or the contents) in each
mode.
2. Press
NEXT
(or
PREV
).
•The search in Schedule mode begins from the currently displayed date in
forward (or reverse) order.
•If the desired listing in Telephone or Memo mode is not found, the
subsequent listing in sequential order will be displayed.
•Each time
NEXT
(or
PREV
) is pressed, sequential search will be
performed.
4.Keyword Search
Recalls the listings by a word contained in the desired listing in Telephone,
Schedule, To Do, or Memo mode.
<Example>
Recall the listings containing the word “Sharp”in the TEL1 file.
1. Press
TEL
to display the TEL1 file.
2. Enter the word.
Sharp
3. Press
2nd
NEXT
.
•Each time
2nd
NEXT
are pressed,
subsequent listings containing the
word “Sharp”will be displayed.
5.Index Search
Recall the listings in Telephone, Schedule, To Do, Memo, Expense, or
Anniversary mode. The listings recalled are listed one for each line on the
display. To enter the index mode, press
ENTER
when the entry prompt or
listing is displayed. In the Expense mode, press
C•CE
ENTER
to enter
the index mode when the entry prompt is displayed.
Johns, Pat
F 265–1234
201–265–5600
Box G, Sharp Plaza,
johns–[email protected]
<Example>
Display the Index in the Telephone mode.
1. Press
TEL
to display the Telephone
mode screen.
2. Press
ENTER
to enter the index
mode.
•The index of the Telephone listing is
displayed.
•Up to five listings are displayed at a time.
•To display the first listing beginning with a particular character in the
Telephone, or Memo mode, press the desired character key. If there is no
listing for that character, the first subsequent listing will be displayed.
•Pressing
NEXT
and
PREV
scrolls the page forward and backward. To
see the whole listings press and to select the desired listing, and
press
ENTER
. Next, press
ENTER
again to enter the index mode.
6.Date Search
Recalls the listings by the date in Calendar, Schedule, or Expense mode.
(1) Calendar or Schedule listings
<Example>
Recall the calendar or schedule for December 25, 2001.
1. Press
CALENDAR
or
SCHEDULE
.
2. Press
C•CE
to display the date entry
prompt.
3. Press
C•CE
and enter the month,
day, and year.
12252001
To make a correction, move the cursor with or , or press
C•CE
to clear the displayed date.
•To enter a single-digit month or day, enter zero and the digit.
TEL 1
NAME?
Shingo Nakahara
Robert, Smith
Tom Robert
Stevenson Dug
Johns, Pat
YEAR :2001
MONTH :04
DAY :12
MM/DD/YYYY
YO-515 (E0426E)

17
4. Press
ENTER
.
The specified calendar or schedule will be displayed.
(2) Expense listings
Press
C•CE
in the Expense entry prompt, then enter the date and press
NEXT
(or
PREV
).
7.Other Search in Calendar Mode
Recalling the scheduled item from the Calendar mode
The scheduled date is displayed with the tag ( ) on the right of the date
number.
1. Press
CALENDAR
to display the Calendar mode.
•Pressing
2nd
CALENDAR
displays the current date.
2. Press the cursor movement keys ( ,,,) to move to the
date with a tag.
3. Press
SCHEDULE
to display the schedule contents.
Editing the Listings
1.Editing the Listings
1. Recall a listing in the desired mode.
2. Press
2nd
EDIT
.
•The edit mode is entered and the cursor flashes.
3. Modify the data as desired.
4. Press
ENTER
to store it in the memory.
•In the index display, press
ENTER
to display the desired listing, and
press
2nd
EDIT
. You cannot enter the edit mode in the index display.
2.Creating a New Listing
Pressing
2nd
ENTER
instead in step 4 in the above section, “1. Editing
the Listings”, creates a new listing without deleting the previously stored
listing.
This operation is useful when you enter a new listing whose contents are
the same as or similar to the previously stored listing.
Deleting the Listings
1.Deleting One Listing
1. Recall the listing to be deleted.
2. Press
DEL
.
“DELETE? Y/N”will appear.
3. Press
Y
to delete the currently displayed listing.
•To cancel the deletion operation, press
N
.
•You can also delete individual listing on the index display.
In the index mode, press or to select the listing you want to
delete, and press
DEL
and
Y
.
2.Deleting All of the Listings in Each Mode
(1) Deleting all of the listings in each mode
If all of the listings for Telephone, Schedule, To Do, Memo, Expense, or
Anniversary mode are not necessary any more, you can delete them all at
once.
<Example>
Delete all listings in the TEL1 files.
1. Press
MENU
3to select “3 DATA DELETION”.
2. Press
1
to select “1 TEL”.
3. Press
1
to select “1 TEL1”.
“DELETE? Y/N”is displayed.
•After performing step 1, press the following keys in other modes:
SCHEDULE:
2
1
ANN1:
2
2
ANN2:
2
3
MEMO:
3
EXPENSE:
4
YO-515 (E0426E)

18
TO DO (ALL):
NEXT
1
1
TO DO (DONE):
NEXT
1
2
•When the Secret function is on, “SECRET ON MODE”is displayed and
the file cannot be deleted. In this case, turn the Secret function off (page
21) and repeat the above procedure.
4. Press
Y
.
•To cancel the deletion operation, press
N
.
•All of the listings (including secret listings) in the selected mode will be
deleted all at once.
(2) Deleting all of the scheduled listings for an entire month
1. Press
CALENDAR
to recall the calendar for the desired month.
2. Press
DEL
. “DELETE? Y/N”will appear.
3. Press
Y
to delete all of the schedule listings for the currently
displayed month.
•To cancel the deletion operation, press
N
.
•Although all of the schedule listings for the month are deleted,
anniversaries are still retained.
(3) Deleting the password and secret listings
(Refer to page 21, “Secret Function”on registering the password and
turning the Secret function on and off.)
The password and all secret listings can be deleted at the same time.
1. Press
MENU
3
to select “3 DATA DELETION”.
2. Press
NEXT
2
to select “2 SECRET DATA”.
“ALL SECRET DATA DELETE? Y/N”is displayed.
3. Press
Y
.
•To cancel the deletion operation, press
N
.
•“DELETED!”is displayed briefly and the password and all secret listings
are deleted.
Calculator Mode
The Organizer’s built-in calculator can perform the 4 arithmetic calculations
in up to 12 digits.
Calculator mode is selected by
pressing
CALC/CONV
once or twice.
Each time you press this key, the display
switches between Calculator and
Conversion modes.
Before performing any calculation, press
C•CE
twice to clear the display.
•An error occurs when the integer section of the calculation result
exceeds 12 digits, if the memory exceeds 12 digits, or a number is
divided by zero. (“-E-”is displayed.)
Press
C•CE
to cancel the error.
CALC
0.
Example Operation Display
(–24+2) ÷4= –24
+
2 4
=
*1–5.5
34 + 57 =
45 + 57 =
68 ×25 =
68 ×40 =
34
+
57 =The second figure (57)
45 =becomes the constant.
(Subtraction and division are
performed in the same way as above.)
68 25 =The first figure (68)
40 =becomes the constant.
91.
102.
1,700.
2,720.
20.
25.
220.
400.
What is 10% of 200?
What percentage is 9
of 36?
200 + (200 ×10 %) =
500 –(500 ×20 %) =
200 10
%
9 36
%
200
+
10
%
500 –20
%
YO-515 (E0426E)
Table of contents
Other Sharp Organizer manuals

Sharp
Sharp EL-6060 User manual

Sharp
Sharp EL-6710S User manual

Sharp
Sharp OZ-5500 User manual

Sharp
Sharp Wizard OZ-590A User manual

Sharp
Sharp YO-310 User manual

Sharp
Sharp YO-300 User manual

Sharp
Sharp Wizard OZ-590A User manual

Sharp
Sharp ZQ-190 User manual

Sharp
Sharp EL-6850 User manual

Sharp
Sharp YO-480 User manual