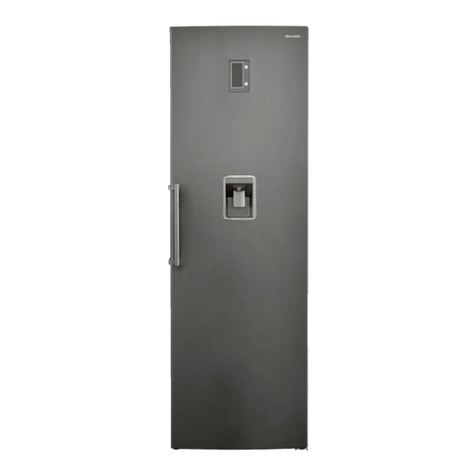
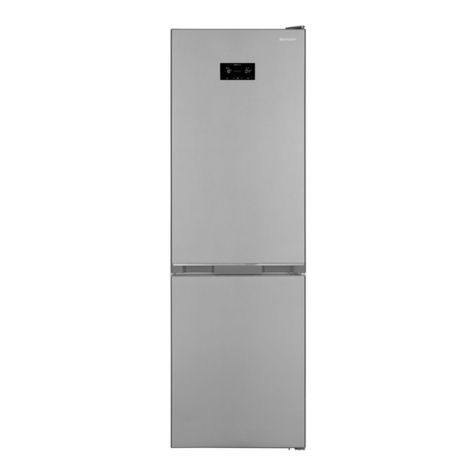
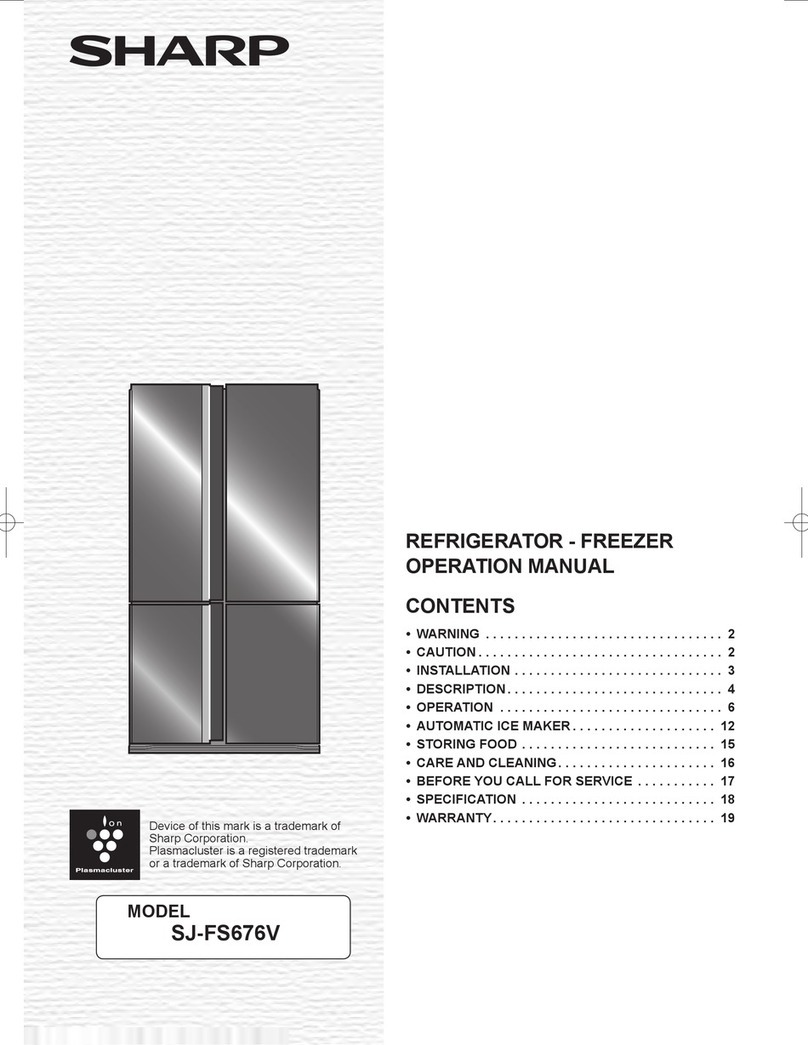
Sharp SJ-WX830A User manual

Refrigerator-Freezer
Operation manual .............EN-1–EN-22
)ULJRUL¿FR&RQJHODGRU
0DQXDOGHPDQHMR .............ES-1 – ES-22
5HIULJHUDWHXU&RQJHODWHXU
0RGHG¶HPSORL ...............FR-1–FR-22
)ULJRUt¿FR&RQJHODGRU
)XQFLRQDPHQWRPDQXDO .........PT-1–PT-22
ȌȣȖİȚȠȀĮIJĮȥȣțIJȘȢ
ǼȖȤİȚȡȚįȚȠȜİȚIJȠȣȡȖȚĮȢ......... EL-1–EL-22
.KOVFKUDQNPLW7LHINKOIDFK
%HGLHQXQJVDQOHLWXQJ. . . . . . . . . . DE-1 – DE-22
.RHONDVW9ULH]HU
*HEUXLNVDDQZLM]LQJ. . . . . . . . . . . . NL-1 – NL-22
&KáRG]LDUNR=DPUDĪDUND
,QVWUXNFMDREVáXJL ............. PL-1–PL-22
+ĦWĘV]HNUpQ\)DJ\DV]Wy
Használati utasítás ............HU-1–HU-22
)ULJLGHU&RQJHODWRU
0DQXDOGHXWLOL]DUH . . . . . . . . . . . .RO-1 – RO-22
&KODGQLþND0UD]iN
1iYRGNREVOX]H ..............&6±&6
&KODGQLþND0UD]QLþND
1iYRGQDREVOXKX ............SK-1–SK-22
âDOG\WXYDVâDOGLNOLV
(NVSORDWDYLPRLQVWUXNFLMD ......LT-1–LT-22
/HGXVVNDSLV±6DOGƝWƗMNDPHUD
5RNDVJUƗPDWD. . . . . . . . . . . . . . . . . /9±/9
.OPLN6JDYNOPLN
.DVXWXVMXKHQG. . . . . . . . . . . . . . . . .ET-1 – ET-22
+ODGLOQLN=DPU]RYDOQLN
3ULURþQLN]QDYRGLOL]DGHORYDQMH . SL-1 – SL-22
ɏɨɥɨɞɢɥɶɧɢɤɆɨɪɨɡɢɥɶɧɢɤ
ȱɧɫɬɪɭɤɰɿɹɡɟɤɫɩɥɭɚɬɚɰɿʀ ......UK-1–UK-22
ɏɥɚɞɢɥɧɢɤ±Ɏɪɢɡɟɪ
Ɋɴɤɨɜɨɞɫɬɜɨɡɚɪɚɛɨɬɚ. . . . . . . .BG-1 – BG-22
“Plasmacluster” and “Device of a cluster
of grapes” are trademarks of Sharp
Corporation.
“Plasmacluster” et “Device of a cluster of
grapes” sont des marques commerciales de
Sharp Corporation.
SJ-WX830A
SJ-SX830A
SJ-PX830A

I
PT &RQWH~GRV
• Informações de segurança..................................... PT-1
• Indicador da temperatura ........................................PT-2
• Instalação ................................................................PT-3
• Descrição ................................................................PT-4
• Armazenar alimentos ..............................................PT-5
• Painel de controlo....................................................PT-6
• Modos principais .....................................................PT-7
• Compartimento com várias temperaturas .............PT-10
• 'H¿QLo}HVDGLFLRQDLV.............................................PT-12
• Máquina de gelo automática .................................PT-14
• Dispensador de água
<Apenas para SJ-WX830A>
........PT-17
• Cuidados e limpeza...............................................PT-19
• Antes de ligar à assistência técnica ......................PT-20
• FICHA do produto .................................................PT-22
HU 7DUWDORPMHJ\]pN
• Biztonsági tájékoztató ........................................... HU-1
• +ĘPpUVpNOHWNLMHO]Ę ................................................ HU-2
• Üzembe helyezés................................................... HU-3
• Leírás ..................................................................... HU-4
• Ételtárolás .............................................................. HU-5
• .H]HOĘSDQHO............................................................ HU-6
• )Ę]HPPyGRN....................................................... HU-7
• 7|EEKĘPpUVpNOHWĦUpV]....................................... HU-10
• További beállítások .............................................. HU-12
• $XWRPDWLNXVMpJNRFNDNpV]tWĘ .............................. HU-14
• Vízadagoló <Csak az SJ-WX830A modellen>..... HU-17
• Karbantartás és tisztítás....................................... HU-19
• $V]HUYL]KtYiVDHOĘWW ........................................... HU-20
• Termék adatlap .................................................... HU-22
NL ,QKRXG
• Veiligheidsinformatie ...............................................NL-1
• Temperatuurindicator ..............................................NL-2
• Installatie .................................................................NL-3
• Omschrijving............................................................NL-4
• Opslag van voedsel.................................................NL-5
• Bedieningspaneel....................................................NL-6
• Hoofdmodi ...............................................................NL-7
• Multitemperatuur ruimte ........................................NL-10
• Aanvullende instellingen........................................NL-12
• Automatische ijsmaker ..........................................NL-14
• Waterdispenser <alleen voor SJ-WX830A>..........NL-17
• Onderhoud en reiniging.........................................NL-19
• Voordat u de servicedienst belt.............................NL-20
• 3URGXFW¿FKH ..........................................................NL-22
ES ËQGLFH
• Información de seguridad....................................... ES-1
• Indicador de temperatura ........................................ES-2
• Instalación ...............................................................ES-3
• Descripción..............................................................ES-4
• Almacenamiento de alimentos ................................ES-5
• Panel de control ......................................................ES-6
• Modos principales ...................................................ES-7
• Espacio multitemperatura......................................ES-10
• Ajustes adicionales................................................ES-12
• Dispensador automático de hielo..........................ES-14
• Dispensador de agua
<Solo para el modelo SJ-WX830A>..............
ES-17
• Cuidado y limpieza................................................ES-19
• Antes de llamar al servicio técnico........................ES-20
• Ficha del producto.................................................ES-22
EN &RQWHQWV
• Safety information ................................................. EN-1
• Indicator of temperature ......................................... EN-2
• Installation .............................................................. EN-3
• Description ............................................................. EN-4
• Storing food ............................................................ EN-5
• Control panel .......................................................... EN-6
• Main modes............................................................ EN-7
• Multi temperature room ........................................ EN-10
• Additional settings ................................................ EN-12
• Automatic ice maker............................................. EN-14
• Water dispenser <Only for SJ-WX830A>............. EN-17
• Care and cleaning ................................................ EN-19
• Before you call for service.................................... EN-20
• Product FICHE ..................................................... EN-22
DE Inhalt
• Sicherheitshinweise................................................ DE-1
• Temperaturanzeige ................................................ DE-2
• Aufstellung.............................................................. DE-3
• Beschreibung ......................................................... DE-4
• Aufbewahrung von Lebensmitteln.......................... DE-5
• Bedienfeld .............................................................. DE-6
• Hauptmodi .............................................................. DE-7
• Multi-Temperaturfach ........................................... DE-10
• Zusätzliche Einstellungen..................................... DE-12
• $XWRPDWLVFKH(LVZUIHOPDVFKLQH......................... DE-14
• :DVVHUVSHQGHU1XUIU6-:;$! ............... DE-17
• Wartung und Reinigung........................................ DE-19
• Ehe Sie sich an den Kundendienst wenden......... DE-20
• Produktdatenblatt ................................................. DE-22
EL ȆİȡȚİȤȩȝİȞĮ
• ȆȜȘȡȠijȠȡȓİȢĮıijȐȜİȚĮȢ......................................... EL-1
• DzȞįİȚȟȘșİȡȝȠțȡĮıȓĮȢ ............................................EL-2
• ǼȖțĮIJȐıIJĮıȘ...........................................................EL-3
• ȆİȡȚȖȡĮijȒ ...............................................................EL-4
• ȈȣȞIJȒȡȘıȘIJȡȠijȓȝȦȞ...............................................EL-5
• ȆȓȞĮțĮȢİȜȑȖȤȠȣ......................................................EL-6
• ȀȪȡȚİȢȜİȚIJȠȣȡȖȓİȢ ...................................................EL-7
• ĬȐȜĮȝȠȢʌȠȜȜĮʌȜȫȞșİȡȝȠțȡĮıȚȫȞ....................EL-10
• ǼʌȚʌȡȩıșİIJİȢȡȣșȝȓıİȚȢ .......................................EL-12
• ǹȣIJȩȝĮIJȘȝȘȤĮȞȒʌȐȖȠȣ.......................................EL-14
• ǺȡȪıȘȞİȡȠȪȂȩȞȠȖȚĮIJȠ6-:;$!............. EL-17
• ĭȡȠȞIJȓįĮțĮȚțĮșĮȡȚıȝȩȢ......................................EL-19
• ȆȡȚȞțĮȜȑıİIJİȖȚĮıȑȡȕȚȢ.......................................EL-20
• ǻǼȁȉǿȅʌȡȠȧȩȞIJȠȢ................................................ EL-22
RO &XSULQV
• ,QIRUPD܊LLSULYLQGVLJXUDQ܊D .................................... RO-1
• ,QGLFDWRUXOGHWHPSHUDWXUă .....................................RO-2
• Instalarea................................................................RO-3
• Descrierea .............................................................. RO-4
• 3ăVWUDUHDDOLPHQWHORU .............................................RO-5
• 3DQRXOGHFRPDQGă ...............................................RO-6
• Moduri principale .................................................... RO-7
• Compartimentul cu temperaturi multiple............... RO-10
• 6HWăULVXSOLPHQWDUH ..............................................RO-12
• $SDUDWXOGHJKHD܊ăDXWRPDW .................................RO-14
• 'R]DWRUXOGHDSă'RDUSHQWUX6-:;$! .....RO-17
• ÌQJULMLUHD܈LFXUă܊DUHD............................................RO-19
• Înainte de a solicita depanarea ............................RO-20
• ),܇ĂSURGXV .........................................................RO-22
FR 7DEOHGHVPDWLqUHV
• Information de sécurité........................................... FR-1
• Indicateur de température .......................................FR-2
• Installation ...............................................................FR-3
• Description ..............................................................FR-4
• Conservation des aliments ......................................FR-5
• Panneau de contrôle ...............................................FR-6
• Modes principaux ....................................................FR-7
• Compartiment multi-température...........................FR-10
• Paramètres additionnels........................................FR-12
• Machine à glaçons automatique............................FR-14
• Distributeurs d'eau
<Uniquement pour le SJ-WX830A>
.......FR-17
• Entretien et nettoyage ...........................................FR-19
• Avant d'appeler le service après vente..................FR-20
• Fiche du produit.....................................................FR-22
PL 6SLVWUHĞFL
• ,QIRUPDFMHGRW\F]ąFHEH]SLHF]HĔVWZD................... PL-1
• :VNDĨQLNWHPSHUDWXU\.............................................PL-2
• Instalacja .................................................................PL-3
• Opis .........................................................................PL-4
• 3U]HFKRZ\ZDQLHĪ\ZQRĞFL......................................PL-5
• Panel sterowania.....................................................PL-6
• *áyZQHWU\E\SUDF\..................................................PL-7
• Komora o zmiennej temperaturze .........................PL-10
• Dodatkowe ustawienia .......................................... PL-12
• Automatyczna kostkarka do lodu ..........................PL-14
• Dozownik wody <Tylko w modelu SJ-WX830A>... PL-17
• Konserwacja i czyszczenie.................................... PL-19
• =DQLP]JáRVLV]XVWHUNĊ..........................................PL-20
• Karta produktu.......................................................PL-22
II
ET 6LVXNRUG
• Ohutusteave ........................................................... ET-1
• Temperatuurinäidik..................................................ET-2
• Paigaldamine...........................................................ET-3
• Kirjeldus...................................................................ET-4
• Toidu säilitamine .....................................................ET-5
• Juhtpaneel...............................................................ET-6
• 3}KLUHåLLPLG.............................................................ET-7
• Mitmetemperatuuriline sektsioon...........................ET-10
• Lisaseaded ............................................................ET-12
• Automaatne jäävalmistaja .....................................ET-14
• Veeväljuti <ainult mudelil SJ-WX830A> ................ET-17
• Puhastamine ja hooldamine ..................................ET-19
• Enne teenindusse helistamist................................ET-20
• Toote andmeleht ...................................................ET-22
&6 Obsah
• %H]SHþQRVWQtSRN\Q\ ............................................ CS-1
• Indikátor teploty ...................................................... CS-2
• Instalace ................................................................. CS-3
• Popis ...................................................................... CS-4
• 8ORåHQtSRWUDYLQ ..................................................... CS-5
• Ovládací panel ....................................................... CS-6
• +ODYQtUHåLP\.......................................................... CS-7
• Prostor s volitelnou teplotou ................................. CS-10
• Další nastavení..................................................... CS-12
• Automatický výrobník ledu ................................... CS-14
• 'iYNRYDþYRG\SRX]H6-:;$! ................. CS-17
• 3pþHDþLãWČQt....................................................... CS-19
• 1Hå]DYROiWHGRVHUYLVX ....................................... CS-20
• ,1)250$ý1Ë/,67YêURENX ................................ CS-22
SL 9VHELQD
• Varnostne informacije..............................................SL-1
• Indikator temperature ..............................................SL-2
• Namestitev .............................................................. SL-3
• Opis .........................................................................SL-4
• Shranjevanje hrane .................................................SL-5
• 1DG]RUQDSORãþD .....................................................SL-6
• *ODYQLQDþLQL............................................................SL-7
• 3URVWRU]YHþWHPSHUDWXUDPL .................................SL-10
• Dodatne nastavitve................................................SL-12
• Samodejni izdelovalec ledu...................................SL-14
• Dozirnik vode <samo za SJ-WX830A> .................SL-17
• 1HJDLQþLãþHQMH ....................................................SL-19
• 3UHGHQSRNOLþHWHVHUYLV .........................................SL-20
• Podatkovna kartica izdelka.................................... SL-22
SK Obsah
• %H]SHþQRVWQpSRN\Q\ ............................................ SK-1
• 8ND]RYDWHĐWHSORW\...................................................SK-2
• Inštalácia .................................................................SK-3
• Popis .......................................................................SK-4
• 8ORåHQLHSRWUDYtQ ....................................................SK-5
• Ovládací panel ........................................................SK-6
• +ODYQpUHåLP\..........................................................SK-7
• 3ULHVWRUVYROLWHĐQRXWHSORWRX.................................SK-10
• ĆDOãLHQDVWDYHQLD ..................................................SK-12
• $XWRPDWLFNêYêUREQtNĐDGX ....................................SK-14
• Výdaj chladenej pitnej vody
<len pre SJ-WX830A>
....SK-17
• 6WDURVWOLYRVĢDþLVWHQLH ..........................................SK-20
• Skôr ako zavoláte do servisu ................................SK-20
• ,QIRUPDþQêOLVWYêURENX..........................................SK-22
UK Ɂɦɿɫɬ
• ȱɧɮɨɪɦɚɰɿɹɳɨɞɨɛɟɡɩɟɤɢ................................... UK-1
• ȱɧɞɢɤɚɬɨɪɬɟɦɩɟɪɚɬɭɪɢ......................................... UK-2
• ȼɫɬɚɧɨɜɥɟɧɧɹ........................................................ UK-3
• Ɉɩɢɫ....................................................................... UK-4
• Ɂɛɟɪɿɝɚɧɧɹɩɪɨɞɭɤɬɿɜ ............................................ UK-5
• ɉɚɧɟɥɶɤɟɪɭɜɚɧɧɹ................................................. UK-6
• Ɉɫɧɨɜɧɿɪɟɠɢɦɢ .................................................... UK-7
• Ȼɚɝɚɬɨɬɟɦɩɟɪɚɬɭɪɧɚɤɚɦɟɪɚ.............................. UK-10
• Ⱦɨɞɚɬɤɨɜɿɧɚɥɚɲɬɭɜɚɧɧɹ.................................... UK-12
• Ⱥɜɬɨɦɚɬɢɱɧɢɣɥɶɨɞɨɝɟɧɟɪɚɬɨɪ ......................... UK-14
• ȾɨɡɚɬɨɪɜɨɞɢɌɿɥɶɤɢɞɥɹ6-:;$! ........... UK-17
• Ⱦɨɝɥɹɞɿɱɢɳɟɧɧɹ................................................ UK-19
• ɉɟɪɲɧɿɠɡɜɟɪɬɚɬɢɫɹɩɨɨɛɫɥɭɝɨɜɭɜɚɧɧɹ.......... UK-20
• ɉɨɹɫɧɟɧɧɹɞɨɩɚɫɩɨɪɬɧɨʀɬɚɛɥɢɱɤɢɜɢɪɨɛɭ...... UK-22
LT 7XULQ\V
• Saugos informacija................................................. LT-1
• 7HPSHUDWnjURVLQGLNDWRULXV....................................... LT-2
• ƲUHQJLPDV................................................................. LT-3
• Aprašymas .............................................................. LT-4
• Maisto laikymas....................................................... LT-5
• Valdymo skydelis..................................................... LT-6
• 3DJULQGLQLDLUHåLPDL ................................................. LT-7
• 6NLUWLQJRVWHPSHUDWnjURVNDPHUD ........................... LT-10
• Papildomi nustatymai ............................................ LT-12
• $XWRPDWLQLVOHGRNXEHOLǐJDPLQLPRƳWDLVDV............ LT-14
• Vandens dalytuvas <tik SJ-WX830A>................... LT-17
• 3ULHåLnjUDLUYDO\PDV ............................................... LT-19
• 3ULHãNUHLSLDQWLVƳWHFKQLQLRDSWDUQDYLPRFHQWUą .... LT-20
• *DPLQLRYDUGLQLǐSDUDPHWUǐOHQWHOơ ...................... LT-22
/9 6DWXUDUƗGƯWƗMV
• 'URãƯEDVLQIRUPƗFLMD........................................... LV-1
• 7HPSHUDWnjUDVLQGLNDWRUV......................................LV-2
• 8]VWƗGƯãDQD.........................................................LV-3
• Apraksts...............................................................LV-4
• 3ƗUWLNDVX]JODEƗãDQD ..........................................LV-5
• 9DGƯEDVSDQHOLV...................................................LV-6
• *DOYHQLHUHåƯPL....................................................LV-7
• 9DLUƗNXWHPSHUDWnjUXWHOSD .................................LV-10
• 3DSLOGLHVWDWƯMXPL ................................................LV-12
• $XWRPƗWLVNDLVOHGXVSDJDWDYRWƗMV .....................LV-14
• NjGHQVSDGHYHVLHUƯFH
<tikai modelim SJ-WX830A> .....
LV-17
• $SNRSHXQWƯUƯãDQD ............................................LV-19
• 3LUPVVD]LQƗWLHVDUNOLHQWXGLHQHVWX ..................LV-20
• 6SHFLƗOƗ]ƯPH....................................................LV-22
BG ɋɴɞɴɪɠɚɧɢɟ
• ɂɧɮɨɪɦɚɰɢɹɡɚɛɟɡɨɩɚɫɧɨɫɬ................................................ BG-1
• Ɍɟɦɩɟɪɚɬɭɪɟɧɢɧɞɢɤɚɬɨɪ.......................................................BG-2
• Ɇɨɧɬɚɠ....................................................................................BG-3
• Ɉɩɢɫɚɧɢɟ.................................................................................BG-4
• ɋɴɯɪɚɧɟɧɢɟɧɚɯɪɚɧɚ.............................................................BG-5
• ɉɚɧɟɥɡɚɭɩɪɚɜɥɟɧɢɟ.............................................................BG-6
• Ɉɫɧɨɜɧɢɪɟɠɢɦɢɧɚɪɚɛɨɬɚ...................................................BG-7
• Ɇɭɥɬɢɬɟɦɩɟɪɚɬɭɪɧɨɨɬɞɟɥɟɧɢɟ ..........................................BG-10
• Ⱦɨɩɴɥɧɢɬɟɥɧɢɧɚɫɬɪɨɣɤɢ.....................................................BG-12
• Ⱥɜɬɨɦɚɬɢɱɟɧɥɟɞɨɝɟɧɟɪɚɬɨɪ...............................................BG-14
• Ⱦɢɫɩɟɧɫɴɪɡɚɜɨɞɚɟɞɢɧɫɬɜɟɧɨɡɚɦɨɞɟɥ6-:;$!..BG-17
• Ƚɪɢɠɢɢɩɨɱɢɫɬɜɚɧɟ..............................................................BG-20
• ɉɪɟɞɢɞɚɩɨɬɴɪɫɢɬɟɩɨɦɨɳɡɚɪɟɦɨɧɬɢɨɛɫɥɭɠɜɚɧɟ.......BG-20
• ɉɪɨɞɭɤɬɨɜɮɢɲ.....................................................................BG-22

EN-1
Thank you very much for buying this SHARP product. Before using your SHARP
refrigerator, please read this operation manual to ensure that you gain the maximum
EHQH¿WIURPLW
• This refrigerator is intended for making ice cubes, refrigerating and freezing food.
• This refrigerator is for household use only, with ambient temperature indicated in
WKHWDEOH7KHFOLPDWHFODVVLVVSHFL¿HGRQWKHUDWLQJSODWH
The refrigerator is fully functional at the ambient temperature range of the indicated
climate class. If the refrigerator is used at colder temperatures, the refrigerator will
not be damaged up to a temperature of +5°C.
• The refrigerator should not be subjected to temperatures of -10°C or below for a
long period of time.
Refrigerant
7KLVUHIULJHUDWRUFRQWDLQVÀDPPDEOHUHIULJHUDQW5D
LVREXWDQHDQGLQVXODWLRQEORZLQJJDVF\FORSHQWDQH
Observe the following rules to prevent ignition and
explosion.
ŶDo not allow any pointed objects to have contact with
the refrigeration system. The refrigeration system
behind and inside the refrigerator contains refrigerant.
ŶDo not use mechanical devices or other means to
DFFHOHUDWHWKHGHIURVWLQJSURFHVV7KLVUHIULJHUDWRUKDV
adopted automatic defrosting system.)
ŶDo not use electrical appliances inside the refrigerator.
ŶDo not block the space around the refrigerator.
Ŷ'RQRWXVHÀDPPDEOHVSUD\VVXFKDVVSUD\SDLQWQHDU
the refrigerator.
Ŷ'RQRWVWRUHÀDPPDEOHVSUD\VVXFKDVVSUD\SDLQWLQ
the refrigerator.
ŶIn the case of failure of the refrigeration system, do not
WRXFKWKHZDOOVRFNHWDQGXVHRSHQÀDPHV
Open the window and let out the air from the room. Then
ask a service agent approved by SHARP for service.
3RZHUFRUG3OXJ6RFNHW
Read carefully the following rules to prevent electric
VKRFNRU¿UH
ŶMake sure to protect the power cord from being
damaged during installation or moving. If the power
plug or cord is loose, do not insert the power plug.
ŶDo not place multiple portable socket-outlets or portable
power supplies at the rear of the refrigerator.
Ŷ&RQQHFWWKHSRZHUSOXJLQWRWKHZDOOVRFNHW¿UPO\DQG
directly. Do not use an extension cord or adapter plug.
ŶConnect the power plug to the socket with the required
rated voltage.
ŶConnect the earth pin to the earth terminal properly.
ŶDo not touch the power plug with wet hands.
ŶDisconnect from the main electricity supply by removing
the main plug from the socket.
Do not remove by pulling the power cord.
Ŷ'XVWGHSRVLWHGRQWKHSRZHUSOXJPD\FDXVH¿UH
:LSHLWRႇFDUHIXOO\
ŶPull out the plug if the refrigerator is not used for a long
time.
Ŷ,IWKHÀH[LEOHVXSSO\FRUGLVGDPDJHGLWPXVW
be replaced by a service agent approved by
SHARP in order to avoid a hazard.
Installation
ŶDo not install the refrigerator in a damp or wet location.
It may cause the damage to the insulation or electrical
leak. Dew may also appear on the outer cabinet and it
causes rust.
Ŷ7KHUHIULJHUDWRUVKRXOGEHLQVWDOOHGÀDWO\DQG¿UPO\RQ
WKHÀRRU
In use
Ŷ'RQRWVWRUHYRODWLOHDQGÀDPPDEOHPDWHULDOVVXFK
as ether, petrol, propane gas, aerosol cans, adhesive
agents and pure alcohol etc. These materials are easy
to explode.
ŶDo not store temperature-sensitive products such as
pharmaceutical products in the refrigerator.
There are high risks of changes in product quality .
ŶDo not attempt to change or modify this refrigerator.
7KLVPD\UHVXOWLQ¿UHHOHFWULFVKRFNRULQMXU\
ŶDo not place any object on the top of refrigerator.
If the object falls down from the top, it may cause injury.
Ŷ'RQRWWRXFKWKHPDFKLQHU\SDUWVXSSHUVHFWLRQRI
the ice storage box) of the automatic ice maker. Bodily
injury may occur as result when the ice tray turns.
ŶDo not hit the glass doors hard.
2QO\IRU6-:;$6-6;$
Otherwise, they may break and cause physical injury.
ŶDo not touch the dispenser door when it is rotating. If
\RXFDWFK\RXU¿QJHUVLQWKHGRRULWPD\FDXVHLQMXU\
2QO\IRU6-:;$
ŶThis appliance can be used by children
aged from 8 years or above and persons
with reduced physical, sensory or mental
capabilities or lack of experience and
knowledge if they have been given
supervision or instruction concerning use of
the appliance in a safe way or understanding
the hazards involved. Children shall not
play with the appliance. Cleaning and user
maintenance shall not be done by children
without supervision.
Children aged from 3 to 8 years are allowed to
load and unload refrigerating appliances.
&OLPDWH
FODVV $FFHSWDEOHUDQJHRI
ambient temperature
SN +10°C to 32°C
N +16°C to 32°C
ST +16°C to 38°C
T +16°C to 43°C
Safety information
Warning This means that there are high risks of death or serious injury.
&DXWLRQ This means that there are high risks of material damage or personal injury.
&DXWLRQ )LUHPDUNVPHDQVWKLVUHIULJHUDWRUKDVULVNRI¿UHDFFLGHQW
Warning
+RXVHKROGXVHRQO\

EN-2
&DUHDQG&OHDQLQJ
Ŷ8QSOXJWKHUHIULJHUDWRU¿UVWWRSUHYHQWHOHFWULFVKRFN
ŶDo not splash water directly on the outer cabinet or the
interior. This may lead to rusting and deterioration of
the electrical insulation.
Trouble
ŶIf you smell something burning, pull out the power plug
immediately. Then ask a service agent approved by
SHARP for service.
ŶIn case of gas leak, ventilate the area by opening
window. Do not touch the refrigerator or the power
socket.
Disposal
ŶEnsure that the refrigerator presents no danger to
FKLOGUHQZKLOHEHLQJVWRUHGXQWLOGLVSRVDOHJUHPRYH
the magnetic door seals to prevent child entrapment.)
ŶThis refrigerator should be disposed appropriately.
Take the refrigerator to a professional recycling plant
IRUÀDPPDEOHUHIULJHUDQWDQGLQVXODWLRQEORZLQJJDVHV
Transportation
ŶWhen you install or move your refrigerator, use curing
PDWWRSURWHFWWKHÀRRUIURPEHLQJGDPDJHG
ŶCarry the refrigerator by holding the handles located on
the rear and bottom side. If you lift up the refrigerator
improperly, it may cause injury.
Caution
rear bottom
In use
ŶDo not touch food or metal containers in the freezer
compartment with wet hands. This may cause frostbite.
It is exactly the same when multi temperature room is
set at -8°C or -18°C.
ŶDo not place bottled drinks and cans in the freezer
compartment.
It is exactly the same when multi temperature room is
set at -8°C or -18°C.
ŶDo not use other than potable water to make ice cubes.
ŶDo not open or close the door when somebody put
a hand near the door. There is a risk that the other
SHRSOHPD\FDWFKWKHLU¿QJHUVLQWKHGRRU
ŶDo not put oversized object in the pockets of the door.
If the object falls down from the pockets, it may cause
injury.
ŶMake sure to handle the glass shelves with care to
install or uninstall. If you drop the glass shelves, it may
break or cause injury.
Safety information
Indicator of temperature
This refrigerator is provided with an indicator of temperature in the refrigerator compartment to allow you to control the
average temperature in the coldest zone.
&ROGHVW]RQH
The symbol indicates the
coldest zone in the refrigerator
FRPSDUWPHQW7KHGRRUSRFNHW
positioned at the same height isn’t
the coldest zone.)
6\PERO
&KHFNLQJWKHWHPSHUDWXUHLQWKHFROGHVW]RQH
You can carry out regular checks to ensure the
temperature in the coldest zone is correct and, if
necessary, adjust the refrigerator temp. control.
To maintain a correct temperature inside the appliance,
check that the indicator of temperature is always
BLUE. If the indicator of temperature turns WHITE,
the temperature is too high; in this case, increase the
refrigerator temp. control setting and wait for 6 hours
before checking the indicator of temperature again.
BLUE
Correct settings
WHITE
Temperature too high, adjust the
refrigerator temp. control.
Note
• The internal temperature of the refrigerator depends on
various factors such as the ambient temperature of the
room, the amount of food stored and the frequency of
door opening.
• When fresh food has been introduced or the door
has been left open for some time, it is normal for the
indicator of temperature to turn WHITE.

EN-3
1Keep adequate ventilation space around the
refrigerator.
• The picture shows the minimum required space
for installing the refrigerator. The measurement
condition of energy consumption is conducted
XQGHUDGLႇHUHQWVSDFHGLPHQVLRQ
• By keeping greater space, the refrigerator may
consume a less amount of power consumption.
• If use the refrigerator in the smaller space
dimension than pictured above, it may cause
temperature rise in the unit, loud noise and failure.
2YHUDOOVSDFHUHTXLUHGLQXVH
Installation Free standing type
2Use the two front the adjustable feet to place the
UHIULJHUDWRUÀDWO\DQG¿UPO\RQWKHÀRRU
$GMXVWDEOHIRRW
3Use the adjustable feet when right and left doors are
not properly aligned.
Note
• Place your refrigerator to access the plug.
• Keep your refrigerator out of direct sunlight and do not
place next to heat generating appliance.
• Do not place your refrigerator directly on the ground.
Insert suitable stand such as wooden board under the
refrigerator.
• When you insert the power plug with the door opened,
door alarm sounds but it is normal. This sound stops
after closing the door.
• Do not push the refrigerator against the wall.
The wall surrounding the refrigerator may get dirty
RUGLVFRORUHGEHFDXVHRIWKHDLUÀRZFDXVHGE\KHDW
radiation.
)RXUFDVWHUVDUHORFDWHGRQWKHERWWRP
of the refrigerator
• The casters allow the refrigerator to
move back and forth.
%HIRUHXVLQJ\RXUUHIULJHUDWRU
• Clean the inside parts with a cloth soaked in warm
water.
• ,I\RXXVHVRDS\ZDWHUWRFOHDQZLSHLWRႇWKRURXJKO\
with water.
1028mm 846mm
90mm
60mm 50mm
When the left door are
raised. When the right door are
raised.
Lower the foot
at right side. Lower the foot
at left side.
• Turn the adjustable feet until the opposite foot is
VOLJKWO\RႇIURPWKHJURXQG
&DVWHUV
4Connect the appliance via a correctly installed socket.
b
a
SJ-WX830A,
SJ-SX830A SJ-PX830A
a 1440mm 1432mm
b 1330mm 1330mm

EN-4
1. 'RRUSRFNHW
6-:;$ SFV
6-6;$6-3;$ SFV
2. Refrigerator shelfSFV
3. )L[HGVKHOI
4. 9HJHWDEOHFDVH
0RLVWXUHFRYHULVLQVWDOOHGRQWKHULJKWVLGHRQO\
This cover works for storing food with high-moisture
freshly.
5. (JJKROGHU
6. )UHVKFDVH
7. :DWHUWDQN,FHPDNHU
8. 'LVSHQVHUWDQN
2QO\IRU6-:;$!
9. &DVH
10. 6WDLQOHVVVWHHOWUD\
11. ,FHVWRUDJHER[
To prevent damage to the ice storage box, do not
make ice in the ice storage box or pour oil into it.
12. Freezer shelf
13. )UHH]HUFDVH
14. Light
15. 3ODVPDFOXVWHULQGLFDWRU
16. +\EULGFRROLQJSDQHO
The panel cools the refrigerator compartment
indirectly from the rear. In this way, food is cooled
JHQWO\ZLWKRXWEHLQJH[SRVHGWRFROGDLUÀRZ
Description
17. &RQWUROSDQHO
18. :DWHUGLVSHQVHU
2QO\IRU6-:;$!
,I\RXZLVKWRVWRUHODUJHLWHPVZLWKLQ\RXU
refrigerator
• You may remove any shelves or any pockets numbered
1,2,4,5,6,7,9,10,11,12,13 in the picture above.
• &RROLQJSHUIRUPDQFHLVQRWLQÀXHQFHGHYHQLI\RXXVH
the refrigerator in the above situation.
0RLVWXUHFRYHU8QUHPRYDEOH
Cover
SJ-SX830A
SJ-PX830A
SJ-WX830A
18
17
1
1
7
5
1
4
6
8
11
12
9
10
2
1416
1514
14 143
13
)L[HGVKHOI 9HJHWDEOHFDVH
)
Door Alarm
• The door alarm sounds when the door* is left open.
• The door alarm sounds in 1 minute after opening the
GRRUDQGDJDLQDIWHUPLQXWHRQFHLQHDFKFDVH
• If the door* is left open for approx. 3 minutes, the alarm
sounds continuously.
• The alarm stops after closing all the door.
*Only refrigerator door and left freezer door.)
Deodorizing unit
• Deodorizing catalyst is installed on the routes of cold air.
No operation and cleaning are required.

EN-5
Storing food
Multi temperature room
You can choose from four kinds of temperature
zones. See “Multi temperature room” about how
to select the temperature zone.
Temperature zone Mode Storing food
Refrigerating Drinks, Daily dish
Dessert etc.
Fresh Meat, Fish
Daily product etc.
Soft freezing Meat, Fish etc.
Freezing Frozen food
Soft freezing
This mode is suitable for storing food without freezing solid.
You may cut easily even if the food is big.
,IWKHIRRGLVKDUGWRFXWOHDYHLWIRU¿YHWR¿IWHHQPLQXWHV
on a cooking board then try again.
Please note that this mode is not designed for long-term
storage of frozen food.
Stored food should be used within 1 week.
Advice for preventing dew or
frost inside the refrigerator
• Keep the door securely closed. If the food falls down,
it may cause a gap between the cabinet and the door.
Move it back to the shelf or the pocket.
• Stored items should be packed or sealed with such as
food containers or plastic wraps.
Advice for storing food
• Evenly place the food on the
shelves to allow the cooling air
WRFLUFXODWHHႈFLHQWO\
• Hot food should be cooled
before storing. Storing hot food
increases the temperature in
the unit and the risk of food
spoilage.
• Opening the door for long
SHULRGVFDQFDXVHDVLJQL¿FDQW
increase of the temperature
in the compartments of the
appliance.
• Do not block the outlet and
inlet of the cool air circulating
circuit with food or containers;
otherwise the food is not be
evenly cooled throughout the
refrigerator.
• Do not place food directly in
front of cold air outlet. This
may lead to the food freezing.
• Ensure that the food is of the freshest possible quality
to maximize the storage life of perishable food. The
following is a general guide to help promote longer food
storage.
• Food has a limited storage life. Make sure not to exceed
use-by date indicated by manufacturer.
Refrigerator
)UXLW9HJHWDEOHV
• Fruit and vegetables should be loosely
enclosed in a plastic material e.g. wrap,
EDJVGRQRWVHDODQGSODFHGLQWKHYHJHWDEOHFDVHWR
minimize moisture loss.
• )UXLWVDQGYHJHWDEOHVZKLFKDUHHDVLO\HႇHFWHGE\ORZ
temperature should be stored in a cool place except for
the refrigerator.
'DLU\3URGXFWV(JJV
• Most dairy products have their best-before date on
the outer packaging which informs the recommended
temperature and storage life of the food.
• Eggs should be stored in the egg holder.
0HDWV)LVK3RXOWU\
• Place on a plate or a dish and cover with paper or
plastic wrap.
• )RUODUJHUFXWVRIPHDW¿VKRUSRXOWU\SODFHWRWKHUHDU
of the shelves.
• Ensure all food is wrapped securely or placed in an
airtight container.
• )UHVKIRRGVHFXUHO\ZUDSSHGVKRXOGEHVWRUHGLQ
OLPLWHGWLPHWRSUHYHQWVSRLODJHDQGEDGO\DႇHFWLQJRWKHU
stored foods.
)UXLWV9HJHWDEOHV
Eggs )UXLWV
9HJHWDEOHV
0HDW)LVK
3RXOWU\HWF
Vegetables are improper
in these cases.
They may be frozen.
Freezer
• Freeze small quantities of food at a time in
order to freeze them quickly.
• Food should be properly sealed or covered tightly.
• Place food in the freezer evenly.
• Label bags or containers to keep an inventory of
freezing food.
IN
OUT

EN-6
Control panel
&RPSDUWPHQWVHOHFWNH\
6HOHFWNH\
Press to select ON/OFF of each mode or temperature setting.
Temperature rise sign
Will indicate the rise of inside temperature
caused by power failure or some other
malfunction.
6HHWKHQH[WSDJH
7HPSHUDWXUHGLVSOD\
For indicating preset temperature or
ON/OFF of each mode.
(QWHUNH\
For entering the setting.
Icons
$OOPRGHVDUH³2))´E\DGHIDXOWVHWWLQJ
0DLQPRGHV
(QHUJ\VDYLQJ 9DFDWLRQPRGH
Express Freezing 3ODVPDFOXVWHU
,FHPDNLQJ ,FHWUD\FOHDQLQJ
0XOWLWHPSHUDWXUHURRPDVVLVWLQJPRGHV
([SUHVVFRRO ([WUDFRRO
'HIURVWIRRG &RROGRZQ
$GGLWLRQDOVHWWLQJV
:DWHUGLVSHQVHUORFN
2QO\IRU6-:;$!
'RRUDODUPRႇ
6RXQGRႇ
&RQWUROSDQHOORFN
$WWKHWLPHRIUHSRZHUGLVWULEXWLRQ
• When there is a power failure during the operation of
express freezing or ice tray cleaning, the operation is
stopped.
• See “Multi temperature room” about the assisting mode.
• The other settings are the same as before the power
failure.
To light up the control panel
Press the enter key.
The control panel shows the preset temperature of each
compartment and the operating icons.
$OOLFRQVGRQRWWXUQRQEHFDXVHDOOPRGHVDUH³2))´
by a default setting.)
*
< Standby display >
* The temperature is not indicated on the display while
one of assisting modes in operation.
Temperature display changes variously.
Note
• Press the keys with your bare hand to operate.
Operation with wet hand is invalid.
• Operation is not accepted while the door* is opened.
2QO\UHIULJHUDWRUGRRU
• When there is no operation for 1 minute, the display
automatically returns to the standby display. Thus if
there is no operation for another 1 minute the display
WXUQVRႇ
• Every time you open the door*, the control panel lights
up to show the current setting.
2QO\UHIULJHUDWRUGRRUDQGOHIWIUHH]HUGRRU

EN-7
Main modes
Controlling temperature
• The refrigerator controls its temperature automatically.
You can set the preset temperature as below.
• See “Multi temperature room” about the preset
temperature of multi temperature room.
Refrigerator
• Default setting is 3°C.
• You can adjust between 0°C and 6°C in step of 1°C.
3URFHGXUH 'LVSOD\
1
Press enter key.
2
Select the
compartment. Current setting
The compartments change in the order shown as on
the picture by pressing this key.
→→→
3Decrease Increase
Set the temperature.
4
Press enter key.
Freezer
• Default setting is -18°C.
• You can adjust between -13°C and -21°C in step of 1°C.
3URFHGXUH 'LVSOD\
1
Press enter key.
2
Select the
compartment. Current setting
The compartments change in the order shown as on
the picture by pressing this key.
→→→
$GYDQFHGVHWWLQJ
• You can adjust the temperature in steps of 0.5°C in the
following way at procedure 3.
E.g. Refrigerator
3URFHGXUH 'LVSOD\
3Increase
Decrease
Set the temperature.
• The temperature that indicated on the control panel
is not the exact temperature inside.
• 7KHLQWHUQDOWHPSHUDWXUHVFRXOGEHDႇHFWHGE\VXFK
factors as the location of the refrigerator, ambient
temperature and the frequency of door opening.
Temperature rise sign
If the inside temperature becomes as follows, this sign
lights up.
5HIULJHUDWRUPRUHWKDQ&
)UHH]HUPRUHWKDQ&
• Check the quality of food before you eat.
• This sign may light up at start of power supply.
7KLVVLJQWXUQVRႇE\RSHQLQJRUFORVLQJWKHGRRURI
lighted compartment of compartment select key when
this sign is ON.
3
or
Decrease Increase
Set the temperature.
4
Press enter key.
Set the
temperature
again.
Note
'HFUHDVH ,QFUHDVH

EN-8
Main modes
Energy saving
• Use this mode to switch the appliance to energy-saving
operation.
+RZWRRSHUDWH
3URFHGXUH 'LVSOD\
1
Press enter key.
2
Press icon. Current setting
7KLVLQGLFDWLRQVKRZV2))
3
Press icon again. The setting is changed.
• ON / OFF switches in the order by pressing the icon.
4
Press enter key.
• While this mode is operating, the temperature inside
of the refrigerator and freezer compartment becomes
higher than the normal operation as follows. The
displayed temperature is not be changed.
Under “Energy
saving” mode
Freezer Refrigerator
Approx. 2°C plus Approx. 1°C plus
:KHQWKHWHPSHUDWXUHLVVHWDW)&5&
• Cancel this mode if you feel the beverages are not
cooled enough or ice making takes longer time.
Note
• 7KHHႈFLHQF\RISRZHUVDYLQJGHSHQGVRQWKH
XVDJHHQYLURQPHQWFRQWUROOLQJWHPSHUDWXUHDPELHQW
temperature, frequency of opening the doors, amount of
food).
Vacation mode
• Use this mode when going on a trip or leaving the house
for a long time.
• The temperature inside the refrigerator compartment is
adjusted to approx. 10°C.
+RZWRRSHUDWH
3URFHGXUH 'LVSOD\
1
Press enter key.
2
Press icon. Current setting
7KLVLQGLFDWLRQVKRZV2))
3
Press icon again. The setting is changed.
• ON / OFF switches in the order by pressing the icon.
4
Press enter key.
Note
• Food storage period in the refrigerator compartment
becomes approx. 1/2-1/3 of normal operation.
Use this mode only when there is no perishable food.
• Temperature of refrigerator compartment cannot be
PRGL¿HG³&´LVLQGLFDWHGRQWKHGLVSOD\
< Standby display >
Tips for saving energy
• Install the refrigerator in a well-ventilated area and keep
the space to ventilate.
• Keep your refrigerator out of direct sunlight and do not
place it next to heat generating appliance.
• Avoid opening the door as much as possible.
• Hot food should be cooled before storing.
• Place the food evenly on the shelves to allow the cool
DLUWRFLUFXODWHHႈFLHQWO\
• The amount of energy consumption of this model is
measured as shown in the picture below.
90mm 50mm
300mm300mm

EN-9
Main modes
Plasmacluster
The ionizer inside your refrigerator releases clusters of
ions which are collective masses of positive and negative
ions, into the refrigerator compartment.
These ion clusters inactivate airborne mold fungus.
+RZWRRSHUDWH
3URFHGXUH 'LVSOD\
1
Press enter key.
2
Press icon. Current setting
7KLVLQGLFDWLRQVKRZV2))
3
Press icon again. The setting is changed.
• ON / OFF switches in the order by pressing the
icon.
4
Press enter key.
Note
• There may be a slight odor in the refrigerator. This is the
smell of ozone generated by the ionizer. The amount
of ozone is minimum and quickly decomposes in the
refrigerator.
Express freezing
7KLVPRGHLVWRIUHH]HIRRGTXLFNO\QRWWRORVHLWVÀDYRU
Most moisture inside the food freeze between -1°C - -5°C.
It is important to accelerate the freezing speed to reach
-5°C for making high-quality frozen food.
+RZWRRSHUDWH
3URFHGXUH 'LVSOD\
1Put the food.
2
Press enter key.
3
Press icon. Current setting
7KLVLQGLFDWLRQVKRZV2))
4
Press icon again. The setting is changed.
• ON / OFF switches in the order by pressing the
icon.
5
Press enter key.
([SUHVV)UHH]LQJHQGVDXWRPDWLFDOO\LQDSSUR[a
hours. 7KHLFRQWXUQVRႇ
Note
• Large food cannot be frozen in a single operation.
• Express Freezing may require more than 4 hours when
the operation overlaps with defrosting of the cooling unit.
The operation starts after defrosting is completed.
• Avoid opening the door as much as possible during
operation of this mode.
• The operating sound may become louder than usual
while this mode is ON but it is normal.
Tips for the best freezing
• Pack foods into freezer bags or put them in sealed
containers to avoid freezer burn which is a dry spot on
foods.
To help foods freeze faster, pack them in thin layers.
• /D\WKHPÀDWLQWRWKHIUHH]HUFDVHXQGHUWKHLFHVWRUDJH
box.
• If you wish to freeze large items, you may remove the
freezer case and spread them out on the freezer shelf.
PROG
fungus
7KHLQGLFDWRUEOXHLQ
the refrigerator turns on.

EN-10
Multi temperature room
<RXFDQFKRRVHIURPIRXUNLQGVRIWHPSHUDWXUH]RQHV&&&&
7KLVURRPKDVIRXUGLႇHUHQWDVVLVWLQJPRGHV
Temperature zone
• Default setting is -18°C.
• See “Storing food” about suitable food for each
temperature zone.
+RZWRVHOHFW
3URFHGXUH 'LVSOD\
1
Press enter key.
2
Select the
compartment. Current setting
The compartments change in the order shown as on
the picture by pressing this key.
→→→
3
or
Select
temperature zone. Temperature zones change in
the order shown as below by
pressing 5HYHUVH
4
Press enter key.
Assisting modes
• See the next page about operation procedure.
• All assisting modes end automatically.
The temperature is set at 0°C or 3°C automatically.
6HHWKHQH[WSDJH
• The mode of express cool, extra cool, defrost food and
cool down can not be in operation at the same time.
0RGH Feature
(ႇHFW1RWH
7KLVPRGHLVWRFRROEHYHUDJHVRU
IRRGTXLFNO\
([SUHVVFRRO
7KLVPRGHLVWRFRROEHYHUDJHVRU
IRRGWRLFHFROG
([WUDFRRO Food with high-moisture may freeze.
7KLVPRGHLVWRGHIURVWIUR]HQIRRG
'HIURVWIRRG This mode is very convenient to defrost
food slowly.
Make sure not to defrost perishable
IRRGFRPSOHWHO\WRNHHSLWVÀDYRURU
nutrient.
&RROGRZQ
7KLVPRGHLVWRFRROGRZQKRWIRRG
• When you want to cool down high-
WHPSHUDWXUHÀXLGIRRGPDNHVXUHWR
keep it tightly covered or use an airtight
container.
Otherwise it may cause burn injury.
• Do not store the container which the
temperature of its outer surface is 60°C
or higher. Multi temperature room case
may become deformed by that heat.
Note
• Avoid opening the door as much as possible during the
operation.
• All assisting modes stop in the event of a power failure.
The temperature is set to the ending temperature of
each mode after recovery from the power failure.
Notes for multi temperature room
• Move all food to other compartment when you want to
use the assisting modes.
• Wait 30 minutes at least after changing temperature
]RQH&RU&). The temperature of multi
temperature room is not changed immediately.
• Do not put salt-containing food on the stainless tray
directly. Stainless tray may rust.
• Food with strong smell should be wrapped or stored in
airtight container tightly. Otherwise the strong smell may
be spreading to other compartment.
Note
• The temperature that indicated on the control panel is
not the exact temperature inside.
• All temperature zones are unadjustable.
• When multi temperature room set at -18°C, its
temperature varies depending on the setting of
freezer.
• 7KHLQWHUQDOWHPSHUDWXUHVFRXOGEHDႇHFWHGE\VXFK
factors as the location of the refrigerator, ambient
temperature and the frequency of door opening.

EN-11
Multi temperature room Assisting modes
7RVHOHFWPRGH
21 3
Press enter key. Select multi temperature room. Assisting mode icons turn on.
Move to procedure 4
of each mode.
Express cool
3URFHGXUH 'LVSOD\
4
Press icon. Current setting
7KLVLQGLFDWLRQVKRZV2))
5
Press icon again. The setting is changed.
• ON / OFF switches in the order by pressing the icon.
6
Press enter key.
Operating time Approx. 60 minutes
7HPSHUDWXUHVHWWLQJLQVLGH
DIWHUFRPSOHWLRQRIWKLVPRGH &
Extra cool
3URFHGXUH 'LVSOD\
4
Press icon. Current setting
7KLVLQGLFDWLRQVKRZV2))
5
Press icon again. The setting is changed.
• ON / OFF switches in the order by pressing the icon.
6
Press enter key.
Operating time Approx. 60 minutes
7HPSHUDWXUHVHWWLQJLQVLGH
DIWHUFRPSOHWLRQRIWKLVPRGH &
*1
*1
Defrost food
3URFHGXUH 'LVSOD\
4
Press icon. Current setting
7KLVLQGLFDWLRQVKRZV2))
5
Press icon again. The setting is changed.
• ON / OFF switches in the order by pressing the icon.
6
Press enter key.
Operating time Approx. 6 hours
7HPSHUDWXUHVHWWLQJLQVLGH
DIWHUFRPSOHWLRQRIWKLVPRGH &
Cool down
3URFHGXUH 'LVSOD\
4
Press icon. Current setting
7KLVLQGLFDWLRQVKRZV2))
5
Press icon again. The setting is changed.
• ON / OFF switches in the order by pressing the icon.
6
Press enter key.
Operating time
$SSUR[aPLQXWHV
7HPSHUDWXUHVHWWLQJLQVLGH
DIWHUFRPSOHWLRQRIWKLVPRGH &
It takes longer time to complete when the operation overlaps with defrosting of the cooling unit because this mode
starts after defrosting is completed.
The temperature setting after cancellation is the same.
*1
*2
*2
*2
*1
*2
*1
*2
Put the food.

EN-12
2
1
Additional settings
7RVHOHFWPRGH
$SSOLFDEOHPRGHV :DWHUGLVSHQVHUORFN
2QO\IRU6-:;$!
'RRUDODUPRႇPRGH
6RXQGRႇPRGH
&RQWUROSDQHOORFN
Press enter key. Hold enter key and press select
key until the buzzer sounds.
6HOHFWHGLFRQÀDVKHV
7KHLFRQVFKDQJHLQWKHRUGHU
shown above by pressing
5HYHUVH
Water dispenser lock
• Use this mode to prevent the water dispenser from
being used unintentionally by children or others.
3URFHGXUH 'LVSOD\
3
or
or
Select icon.
4
Press enter key. Current setting
5
or
or
• ON / OFF switches in the order by pressing select
key.
6
Press enter key to set mode ON.
Door alarm off
• Use this mode to switch the door alarm to OFF.
• Use this mode to switch the dispenser door alarm to
OFF.
3URFHGXUH 'LVSOD\
3
or
or
Select icon.
4
Press enter key. Current setting
5
or
or
• ON / OFF switches in the order by pressing select
key.
6
Press enter key to set mode ON.
Sound off
• Use this mode to switch the sound of control panel and
the ending sound of ice tray cleaning to “OFF”.
3URFHGXUH 'LVSOD\
3
or
or
Select icon.
4
Press enter key. Current setting
5
or
or
• ON / OFF switches in the order by pressing select
key.
6
Press enter key to set mode ON.
2QO\IRU6-:;$!

EN-13
Additional settings
Control panel lock
• Use this mode to prevent the control panel from being
used unintentionally by children or others.
3URFHGXUH 'LVSOD\
3
or
or
Select icon.
4
Press enter key. Current setting
5
or
or
• ON / OFF switches in the order by pressing select
key.
6
Press enter key to set mode ON.
+RZWRFDQFHOFRQWUROSDQHOORFN
3URFHGXUH 'LVSOD\
1
Touch enter key for 3 seconds or more.
2
or
or
Select OFF.
3
Press enter key to set mode OFF.

EN-14
Automatic ice maker
:DWHUWDQN
&DSDFLW\$SSUR[/
Upper limit temperature
RIZDWHU&
Description
,FHWUD\
Ice tray is located at
the upper section in the
back.
8QUHPRYDEOH
,FHVWRUDJHER[
When you pull the ice
storage box, it leans
slightly and ice cubes
come to the front part of
the box.
Stored ice cube volume
0D[LPXP
Normal size ice
$SSUR[SFV
Large size ice
$SSUR[SFV
Shovel
+RZLFHFXEHVDUHPDGH
Water supply
• Water is sent from the
water tank to the ice tray.
Ice making
• Ice cubes are made.
SLHFHVDWRQHWLPH
• The number of ice cubes
per cycle may
sometimes
change.
Releasing
• Ice tray rotates to
release the ice cubes
and returns to “Water
supply”.
• The ice tray doesn’t
rotates when the ice
storage box is full.
<Refrigerator>
Water tank
Pump
Pipe
Detection
lever
Ice tray
Ice storage
box
<Freezer>
'HWHFWLRQOHYHU
The volume of ice cubes are
checked periodically by this lever.
The volume of ice cubes may
decrease if they are not smoothed.
$ERXWKDOIWKHYROXPH
Detection
lever
Full volume
Ice making
You can choose 2 sizes as shown below.
0RGH ,FRQ 5HTXLUHGWLPHIRU
HDFKLFHPDNLQJ
1RUPDOLFH Approx. 2 hours
/DUJHLFH Approx. 3.5 hours
Note
• The ice making time as shown above is only a rough
indication at the ambient temperature of 30°C,
temperature adjustment set to the initial setting
UHIULJHUDWRU&IUHH]HU&(QHUJ\VDYLQJ
WXUQHGRႇDQGZLWKQRRSHQLQJRUFORVLQJRIWKHGRRUV
+RZWRRSHUDWH
• $OOWKHLFHPDNLQJPRGHVDUH2))E\DGHIDXOW
setting.
3URFHGXUH 'LVSOD\
1
Press enter key.
2
Press icon. Current setting
7KLVLQGLFDWLRQVKRZV2))
3
Press icon again. Current setting
7KLVLQGLFDWLRQ
shows normal ice.)
• The size of ice cube switches in the order by
pressing the icon.
→ →
4
Press enter key.
The setting is
changed.
Noise-prevention sheet
To turn down the dropping sound of ice cubes.
Do not throw away this sheet.

EN-15
Note
• ,WWDNHVDSSUR[LPDWHO\KRXUVWRPDNHWKH¿UVWVHWRILFH
cubes.
• )RUK\JLHQLFUHDVRQVUH¿OOWKHZDWHURQFHDZHHNHYHQ
if water remains in the tank.
• Remove the water tank regularly and wash it with water.
• When you leave the tank empty, it may sometimes make
a groaning noise but this is normal.
• Do not place the shovel or food on top of the ice cubes.
This may cause the automatic ice maker to malfunction
GDPDJHRIWKHGHWHFWLRQOHYHUHWFRUWKHFDVHQRW
being able to be pulled out. Set the shovel at the
designated location.
Shovel
'HWHFWLRQOHYHU
Shovel
• Large size ice may not be made when the water level of
the water tank is low even if large ice mode is selected.
:KLWHLQLFHFXEHVDQGÀRDWLQJVXEVWDQFH
• The minerals contained in water may solidify and whiten
as water freezes. Minerals turn into a state which is
insoluble once it freezes, so melting the ice cubes will
OHDYHRQO\ZKLWHÀRDWLQJVXEVWDQFHEXWWKLVLVQRUPDO
• This is more likely to happen when you use hard water
HJ7KHKDUGQHVVRIWKHZDWHULVPJ/RUPRUH
,FHPDNLQJWDNHVORQJHUZKHQ
• The room temperature is high.
• Less cooling operation, e.g. in winter.
• Many food products are stored.
• Refrigerator is defrosting of the cooling unit.
• The door is frequently opened.
• When you restart the ice making operation.
• Energy saving mode is in operation.
,FHPDNLQJULJKWDIWHUFKDQJLQJWKHPRGH
• The batch of ice cubes made right after changing the
RSHUDWLQJPRGHGRHVQRWUHÀHFWWKHFKDQJHLQVL]H
This is because there are still half-made ice cubes left
in the ice tray when switching to the changed mode.
,FHFXEHVRIWKHQGEDWFKRUODWHUUHÀHFWVWKHPRGH
change.
3URWUXVLRQVRILFHFXEHV
7KHUHDUHVRPHVOLWVLQWKHLFHWUD\
• Therefore, the ice cubes have protrusions that caused
by these slits.
• The protrusions may be pointed. Be careful when putting
the ice cube directly in your mouth.
Automatic ice maker
How to use
Before using
• Wash the water tank and the ice storage box.
• Use ice tray cleaning mode to clean the ice tray and the
SLSH7KHUHPD\EHRGRURUGLUWZLWKLQWKHDXWRPDWLFLFH
maker.)
3URFHGXUH
1 3RXUZDWHULQWRWKHZDWHUWDQNDQGVHWWKHZDWHU
WDQN
Note
• Step
'RQRWXVHRWKHUWKDQSRWDEOHZDWHUMXLFHWHD
soda and sports drink etc.) They may dirty the
inside of the ice maker and lead to break down.
• Step
'RQRWWLOWWKHZDWHUWDQN2WKHUZLVHZDWHU
may spill when you carry it.
• Step
,QVHUWWKHZDWHUWDQNVHFXUHO\,FHFXEHVDUH
not be made unless the tank is inserted fully.
,FHFXEHVDUHPDGHDXWRPDWLFDOO\
2 7DNHRXWLFHFXEHV
• 2 types of ice cube are made at the same time.
&XEH 0XOWLIDFHWHGVKDSH
• Ice cubes piled up at the back of the ice storage box.
Spread them out to the front part to make more ice
cubes.
+RZWRDVVHPEOHRUGLVDVVHPEOHZDWHUWDQN
12
• The picture above shows how to assemble the tank.
Disassembly is in an opposite way.
/DWFK
Warning
)LOOZLWKSRWDEOHZDWHURQO\
2
3
4
1
5
3RWDEOHZDWHU
Limit line of
ZDWHU
/DWFK
,FHWUD\
Slit
Protrusion

EN-16
Automatic ice maker
Canceling Ice making
• Use this mode during night time or winter time.
• You can use the ice storage box as a freezer case.
+RZWRRSHUDWH
3URFHGXUH 'LVSOD\
1
Press enter key.
2
Press icon. Current setting
7KLVLQGLFDWLRQVKRZV1RUPDOLFHLV
ON.)
3
Press icon again.
Press icon again. The setting is changed.
• The size of ice cube switches in the order by
pressing the icon.
→ →
4
Press enter key.
5Empty the water tank.
Dry it thoroughly and set into the original position.
$IWHUFDQFHOLQJWKHLFHPDNLQJ
• Even after canceling the ice making mode, the ice tray
and the detection lever operates because the ice maker
conducts the ice releasing once.
• Wait 5 hours after canceling the ice making to put food
in the ice storage box.
To start operation again
• Refer to “,FHPDNLQJ”.
Empty
Ice tray cleaning
• This mode is for cleaning the ice tray and the pipe.
• :KHQXVHWKLVPRGH%HIRUHPDNLQJLFHIRUWKH¿UVW
time or when the refrigerator has not been used for a
long time.
• The water is supplied from the water tank to the ice tray
forcibly.
• The water discharge amount at one cleaning will be
100mL.
However, when large ice mode is set as on, the water
discharge will be 230mL.
Preparation
• Pour water into the water tank and set it.
• Empty the ice storage box.
+RZWRRSHUDWH
3URFHGXUH 'LVSOD\
1
Press enter key.
2
Press icon. Current setting
7KLVLQGLFDWLRQVKRZV2))
3
Press icon again. The setting is changed.
• ON/ OFF switches in the order by pressing the icon.
4
3UHVVHQWHUNH\,FHWUD\FOHDQLQJVWDUWV
• It takes approximately 40 sec.
Do not pull out the ice storage box during the
operation.
Cleaning in
progress
→
→
Finish
5Follow steps 3 to 4 again.
6Press enter key to complete. Empty the water in the
ice storage box.
Dry it thoroughly and set it into the original position.
Note
• The setting of ice making returns to previous state after
the cleaning is completed once.

EN-17
Water dispenser 2QO\IRU6-:;$!
Description
Dispenser door
• Touch the sensor to open the dispenser door.
7KHGLVSHQVHUGRRUFORVHVDXWRPDWLFDOO\LQDIHZ
minutes.)
When you want to close the dispenser door, touch the
sensor until the sound starts.
• The dispenser door alarm sounds before closing.
<RXFDQFDQFHOWKHDODUPE\³'RRUDODUP2))´PRGH
• Touch the sensor or open the refrigerator door or freezer
GRRUOHIWWRSURORQJWKHRSHQLQJWLPHRIWKHGLVSHQVHU
door.
,IREMHFWVRU\RXUKDQGLVFDXJKWLQWKHGLVSHQVHU
GRRUZKLOHWKHGLVSHQVHUGRRULVURWDWLQJ
• The dispenser door stops halfway.
7KHGLVSHQVHUGRRUFORVHVDXWRPDWLFDOO\DIWHUDZKLOH
Touch the sensor to open the dispenser door again.)
,IWKHPRWLRQRIWKHGLVSHQVHUGRRUVWRSVEHFDXVHRI
DSRZHUIDLOXUH
• The dispenser door closes automatically after recovery
from power failure.
Locking the dispenser door
Use this mode to prevent the water dispenser from being
used unintentionally by children or others.
6HH³$GGLWLRQDOVHWWLQJV´
'LVSHQVHUGRRU
open
Lever
7UD\
'LVSHQVHUGRRU
Sensor
How to use
Before using
Remove the dispenser tank and wash it.
6HH³&OHDQLQJWKHGLVSHQVHUWDQN´DERXWKRZWRUHPRYHLW
3URFHGXUH
1 3RXUWKHZDWHULQWRWKHGLVSHQVHUWDQN
Note
• Make sure to install the dispenser tank before pouring
water.
• Make sure to close the cap. Otherwise, water may spill
when the door is opened or closed.
• Do not use other than potable water. If other liquid such
as juice is used, it may cause a failure.
• Upper limit temperature of the water is 50°C.
2 3RXUZDWHULQWRDJODVV
Touch the sensor to open the
dispenser door.
Push the lever with the glass.
:DWHULVSRXUHG
Pull the glass.
:DWHULVVWRSSHG
Touch the sensor to close
the dispenser door until the
sound starts.
7KHGLVSHQVHUGRRUFORVHV
automatically even if you do
not touch the sensor.)
Note
• Hold your glass beneath the dispenser for a few
seconds after use, to catch all the dripping. Some
dripping may come down after using the dispenser.
'ULSSLQJPD\LQFUHDVHHVSHFLDOO\DIWHUUH¿OOLQJZDWHUWR
the empty dispenser tank.)
• )RUK\JLHQLFUHDVRQVUH¿OOWKHZDWHULQ
the dispenser tank approximately once a
week. Push the lever and let out all water
in the dispenser tank.
• Throw away the water in the tray
frequently. Otherwise water may
RYHUÀRZ
• If the water dispenser is not used for an
extended period of time, clean and dry
the dispenser tank thoroughly
and attach it to the original position.
• Do not put a glass or objects on the tray.
Warning
)LOOZLWKSRWDEOHZDWHURQO\
1
3
2
'LVSHQVHUWDQN
3RWDEOHZDWHU
&DS
Limit line of water
/
1
2
3
1
Lever
Sensor
'LVSHQVHUGRRU
7UD\
5HIULJHUDWRUGRRURSHQ
'LVSHQVHUWDQN
Warning
• 'RQRWRSHQWKHGLVSHQVHUGRRUIRUFLEO\
• 'RQRWWRXFKWKHGLVSHQVHUGRRUZKHQLWLV
rotating.
The sensor is hidden
from view.
This manual suits for next models
2
Table of contents
Languages:
Other Sharp Refrigerator manuals

Sharp
Sharp SJ-F72PC-BE User manual

Sharp
Sharp SJ-25P User manual

Sharp
Sharp SJ-PT555R User manual

Sharp
Sharp SJ-C19E-MS User manual

Sharp
Sharp SJ-FP624V User manual

Sharp
Sharp SJ-X300 User manual

Sharp
Sharp SJ-BA20IEXAC-EU User manual

Sharp
Sharp SJ-F72PC User manual

Sharp
Sharp SJ-308N User manual

Sharp
Sharp SJ-F886WG User manual

Sharp
Sharp SJ-D220M User manual

Sharp
Sharp SJ-FBB05DTXWD-EU User manual

Sharp
Sharp SJ-40J-GY User manual

Sharp
Sharp SJ-S2212E2W-EU User manual

Sharp
Sharp SJ-FSD910 Installation manual

Sharp
Sharp SJ-44L-WH1 User manual

Sharp
Sharp SJ-T640R User manual

Sharp
Sharp SJ-25P User manual

Sharp
Sharp SJ-15T-H2 User manual

Sharp
Sharp SJ-25P User manual