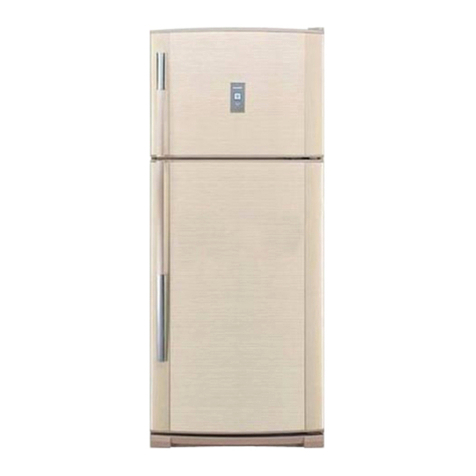
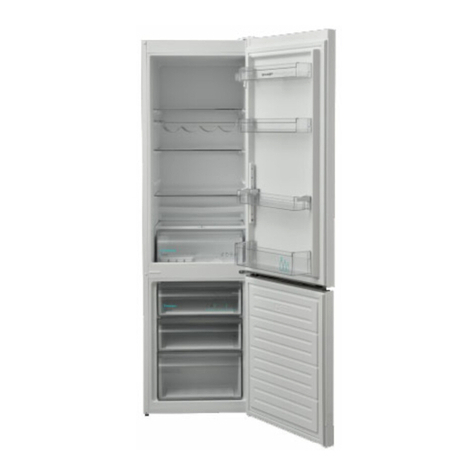
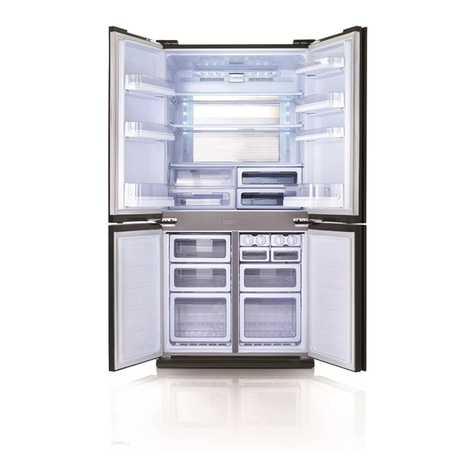
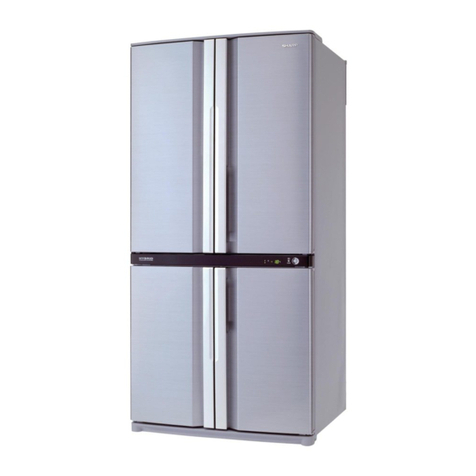
Sharp SJB1255GS Specification sheet

Refrigerator: Model SJB1255GS
OPERATION MANUAL
& INSTALLATION INSTRUCTIONS
REFRIGERATOR
MODEL : SJB1255GS
January 25, 2022
CONSUMER LIMITED WARRANTY.......................... 3
IMPORTANT SAFETY INSTRUCTIONS......................... 4
INSTALLATION INSTRUCTIONS............................. 7
APPEARANCE OVERVIEW .................................. 11
USER INTERFACE ..........................................12
DAILY USE ..................................................13
CARE AND CLEANING ......................................15
TROUBLE SHOOTING ......................................16

2
CUSTOMER ASSISTANCE UNITED STATES ONLY
REGISTER YOUR PRODUCT
Registering your new product is easy and offers benets that help you get the most
out of your Sharp product including:
9Convenience: Ifyoueverneedwarrantysupport,yourproductinformationisalreadyonle.
9Communication:StayuptodatewithimportantnoticationsandspecialoffersfromSHARP.
9Support: Quickly access support content including Owner’s Manuals, FAQ’s,
How-toVideos,andmuchmore.
3 EASY WAYS TO REGISTER TODAY!
PRODUCT SUPPORT
If you have questions about the setup or operation of your product, please refer to
the corresponding section within this manual.
Additionally, visit www.sharpusa.com/support to access exclusive content about your
product including:
ÆFAQ’s and How-To Videos
ÆFind or Request Service
ÆPurchase an Extended Warranty
ÆDownloads including the Installation Guide, Spec Sheet, and Owner’s Manual
CONTACT US
If at any time you have questions or comments concerning your SHARP product,
please contact the SHARP Customer Assistance Center. We are available to
assist you through multiple contact methods for your convenience:
Scan this QR Code on your mobile device Visit http://www.sharpusa.com/register
ONLINE
Visit our sites to
learn more about
your product at
sharpusa.com and
sbl.sharpusa.com
See the Contact Us section on our sites U.S. | www.sharpusa.com/support Contact a Sharp Advisor on the phone
Contact a Sharp Advisor on the phone
CALL US
US 800-BE-SHARP
800-237-4277
Mon-Fri: 7am-7pm CST
Sat-Sun: 9am-7pm CST
CALL US
US 800-BE-SHARP
800-237-4277
Mon-Fri: 7am-7pm CST
Sat-Sun: 9am-7pm CST
EMAIL
Available 24/7
US: sharpusa.com
CHAT ONLINE
Mon-Fri: 7am-7pm CST
Sat-Sun: 9am-7pm CST
SCAN
Use the camera or
QR code scanning
application on your
mobile device

3
CONSUMER LIMITED WARRANTY
SHARP ELECTRONICS CORPORATION ("Sharp") warrants to the rst consumer purchaser that this Sharp brand product (the
"Product"), when shipped in its original container, will be free from defective workmanship and materials, and agrees that it will,
at its option, either repair the defect or replace the defective Product or part thereof with a new or remanufactured equivalent at no
charge to the purchaser for parts or labor for the period(s) set forth below.
This warranty does not apply to any cosmetic or appearance items of the Product nor to the additional excluded item(s) set forth below
nor to any Product the exterior of which has been damaged or defaced, which has been subjected to misuse, abnormal service or
handling, or which has been altered or modied in design or construction. In order to enforce the rights under this limited warranty,
the purchaser should follow the steps set forth below and provide proof of purchase to the servicer.
The limited warranty described herein is in addition to whatever implied warranties may be granted to purchasers by law. ALL
IMPLIED WARRANTIES INCLUDING THE WARRANTIES OF MERCHANTABILITY AND FITNESS FOR USE ARE
LIMITED TO THE PERIOD(S) FROM THE DATE OF PURCHASE SET FORTH BELOW. Some states do not allow limitations
on how long an implied warranty lasts, so the above limitation may not apply to you.
Neither the sales personnel of the seller nor any other person is authorized to make any warranties other than those described herein,
or to extend the duration of any warranties beyond the time period described above on behalf of Sharp. The warranties described
herein should be the sole and exclusive warranties granted by Sharp and should be the sole and exclusive remedy available to the
purchaser. Correction of defects, in the manner and for the period of time described herein, should constitute complete fulllment of
all liabilities and responsibilities of Sharp to the purchaser with respect to the Product, and should constitute full satisfaction of all
claims, whether based on contract, negligence, strict liability or otherwise. In no event should Sharp be liable, or in any way responsible,
for any damages or defects in the Product which were caused by repairs or attempted repairs performed by anyone other than a Sharp
authorized servicer. Nor should Sharp be liable or in any way responsible for any incidental or consequential economic or property
damage. Some states do not allow the exclusion of incidental or consequential damages, so the above exclusion may not apply to you.
THIS LIMITED WARRANTY IS VALID ONLY IN THE FIFTY (50) UNITED STATES, THE DISTRICT OF COLUMBIA AND
PUERTO RICO.
Product model number &
description:
SJB1255GS, Refrigerator/Freezer
Warranty period for this product: One (1) year parts and labor, including in-home service.
Five (5) years parts and labor, for sealed system (condenser, dryer, connecting tube and
evaporator) and compressor, including in-home service.
Additional item(s) excluded from
warranty coverage:
• Commercial, non-residential, or use inconsistent with published installation and product
operational instructions.
• Light bulbs.
• Any food or medicine loss due to refrigerator or freezer product failures.
• In home instruction on how to use your product.
What to do to obtain service: In-home service eligibility is calculated from date of purchase. Service can be arranged by
calling 1-800-BE-SHARP. Be sure to have Proof of Purchase, Model, and Serial Number
available.
TO OBTAIN SUPPLY, ACCESSORY OR PRODUCT INFORMATION, CALL 1-800-BE-SHARP or visit www.sharpusa.com.
SAVE THE PROOF OF PURCHASE AS IT IS NEEDED SHOULD YOUR REFRIGERATOR/FREEZER EVER REQUIRE
WARRANTY SERVICE.

4
IMPORTANT SAFETY INSTRUCTIONS
MEANING OF SAFETY WARNING
SYMBOLS
PROHIBIT
This is a prohibition symbol. Any incompliance with
instructions marked with this symbol may result in damage
to the product or endanger the personal safety of the user.
WARNING
This is a warning symbol. It is required to operate in strict
observance of instructions marked with this symbol; or
otherwise damage to the product or personal injury may be
caused.
CAUTION
This is a cautioning symbol. Instructions marked with this
symbol require special caution. Insufcient caution may result
in slight or moderate injury, or damage to the product.
State of California Proposition 65 Warnings:
WARNING: This product contains one or more chemicals
known to the State of California to cause cancer.
WARNING: This product contains one or more chemicals
known to the State of California to cause birth defects or
other reproductive harm.
SAFETY WARNINGS
WARNING
RISK OF FIRE/FLAMMABLE MATERIALS
• This appliance is intended to be used in household and similar
applications such as staff kitchen areas in shops, ofces and
other working environments; farm houses and by clients in
hotels, motels and other residential type environments; bed
and breakfast type environments; catering and similar non-
retail applications.
• This appliance is not intended for use by persons (including
children) with reduced physical, sensory or capabilities, or
lack of experience and knowledge, unless they been given
supervision or instruction concerning use of the appliance
by a person responsible for their safety. Children should be
supervised to ensure that they do not play with the appliance.
• If the supply cord is damaged, it must be replaced by the
manufacturer, its service agent or similarly qualied persons
in order to avoid a hazard.
• Do not store explosive substances such as aerosol cans with
ammable propellant in this appliance.
• The appliance has to be unplugged after use and before
carrying out user maintenance on the appliance.
• Do not use extension cords or ungrounded (two prong)
adapters.
• The refrigerator must be disconnected from the source
of electrical supply before attempting the installation of
a cc esso r y.
• The appliance is intended to be used as is. Do not alter the
specications by enhancing any applications of the appliance.
WARNING
• Keep ventilation openings, in the appliance enclosure or in
the built-in structure, clear of obstruction.
• Do not use mechanical devices or other means to accelerate
the defrosting process, other than those recommended by
the manufacturer.
• Do not damage the refrigerant circuit.
• Do not use electrical appliances inside the food storage
compartments of the appliance, unless they are of the type
recommended by the manufacturer.
• Please recycle the refrigerator according to local regulators
for it use ammable blowing gas and refrigerant.
• When positioning the appliance, ensure the supply cord is
not trapped or damaged.
• Do not locate multiple portable socket-outlets or portable
power supplies at the rear of the appliance.
DANGER
Risk of child entrapment. Before you throw away your
refrigerator or freezer:
• Take off the doors.
• Leave the shelves in place so that children may not easily
climb inside.
• To prevent a child from being entrapped, keep out of reach
of children and not in the vicinity of freezer (or refrigerator).
Refrigerant and cyclopentane foaming material used for the
appliance are ammable. Therefore, when the appliance is
scrapped, it shall be kept away from any re source and be
recovered by a special recovering company with corresponding
qualication other than be disposed by combustion, so as to
prevent damage to the environment or any other harm.
Children should be supervised to ensure that they do not play
with the appliance.
This appliance can be used by children aged from 8 years and
above and persons with reduce physical sensory or mental
capabilities or lack of experience and knowledge if they have
been given supervision or instruction concerning use of the
appliance in a safe way and understand the hazards involved.
Children shall not play with the appliance. Cleaning and user
maintenance shall not be made by children without supervision.
Children aged from 3 to 8 years are not allowed to load and
unload refrigerating appliances.
5
IMPORTANT SAFETY INSTRUCTIONS
FOOD SAFETY
To avoid contamination of food, please respect the following
instructions:
• Opening the door for long periods can cause a signicant
increase of the temperature in the compartments of the
appliance.
• Clean regularly surfaces that can come in contact with food
and accessible drainage systems.
• Clean water tanks if they have not been used for 48 hours;
ush the water system connected to a water supply if water
has not been drawn for 5 days.
• Store raw meat and fish in suitable containers in the
refrigerator, so that it is not in contact with or drip onto
other food.
• If the refrigerating appliance is left empty for long periods,
switch off, defrost, clean, dry and leave the door open to
prevent mold developing within the appliance.
WARNING
• To avoid a hazard due to instability of the appliance, it must
be xed in accordance with the instructions.
• Connect to potable water supply only. (Suitable for ice
making machine.)
ELECTRICITY RELATED WARNINGS
• Do not pull the power cord when pulling the power plug of
the refrigerator. Please rmly grasp the plug and pull it out
from the socket directly.
• To ensure safe use, do not damage the power cord or use the
power cord when it is damaged or worn.
WARNING
• Please use a dedicated power socket and the power socket
shall not be shared with other electrical appliances. The
power plug should be rmly contacted with the socket or
else res might be caused.
• Please ensure that the grounding electrode of the power
socket is equipped with a reliable grounding line.
• In case of leakage of gas and other ammable gases, please
turn off the valve of the leaking gas and then open the doors
and windows Do not unplug the refrigerator and other
electrical appliances considering that spark may cause a re.
PROHIBIT
• Do not use electrical appliances on the top of the
appliance, unless they are of the type recommended
by the manufacturer.
WARNINGS FOR USING
PROHIBIT
• Do not arbitrarily disassemble or reconstruct the
refrigerator, nor damage the refrigerant circuit;
maintenance of the appliance must be conducted by a
specialist
• Damaged power cord must be replaced by the
manufacturer, its maintenance department or related
professionals in order to avoid danger.
• Do not allow any child to get into or climb the
refrigerator; otherwise suffocation or falling injury of
the child may be caused.
WARNING
• The gaps between refrigerator doors and between doors
and refrigerator body are small, be noted not to put your
hand in these areas to prevent from squeezing the nger.
Please be gentle when close the refrigerator door to avoid
falling articles.
• Do not pick foods or containers with wet hands in the
freezing chamber when the refrigerator is running,
especially metal containers in order to avoid frostbite.
DANGER
• Do not place heavy objects on the top of the refrigerator
considering that objects may fall when close or open the
door, and accidental injuries might be caused.
• Please pull out the plug in case of power failure or cleaning.
Do not connect the refrigerator to power supply within
ve minutes to prevent damages to the compressor due to
successive starts.
WARNINGS FOR PLACEMENT OF
ITEMS
WARNING
• Do not put flammable, explosive, volatile and highly
corrosive items in the refrigerator to prevent damages to
the product or re accidents.
• Do not place ammable items near the refrigerator to
avoid res.
• The refrigerator is intended for household use, such as
storage of foods; it shall not be used for other purposes,
such as storage of blood, drugs or biological products, etc.
• Do not store beer, beverage or other uid contained in
bottles or enclosed containers in the freezing chamber of the
refrigerator; or otherwise the bottles or enclosed containers
may crack due to freezing to cause damages.

6
IMPORTANT SAFETY INSTRUCTIONS
WARNINGS FOR ENERGY
1. Refrigerating appliances might not operate consistently
(possibility of defrosting of contents or temperature
becoming too warm in the frozen food compartment) when
sited for an extended period of time below the cold end of the
range of temperatures for which the refrigerating appliance
is designed.
2. The fact that effervescent drinks should not be stored in
food freezer compartments or cabinets or in low-temperature
compartments or cabinets, and that some products such as
water ices should not be consumed too cold;
3. The need to not exceed the storage time(s) recommended by
the food manufacturers for any kind of food and particularly
for commercially quick-frozen food in food-freezer and
frozen-food storage compartments or cabinets;
4. The precautions necessary to prevent an undue rise in
the temperature of the frozen food while defrosting the
refrigerating appliance, such as wrapping the frozen food in
several layers of newspaper.
5. The fact that a rise in temperature of the frozen food during
manual defrosting, maintenance or cleaning could shorten
the storage life.
6. The necessity that, for doors or lids tted with locks and
keys, the keys be kept out of the reach of children and not in
the vicinity of the refrigerating appliance, in order to prevent
children from being locked inside.
WARNINGS FOR DISPOSAL
PROHIBIT
Refrigerant and cyclopentane foaming material used for the
refrigerator are ammable. Therefore, when the refrigerator
is recycled, it shall be kept away from any re source and be
recovered by a special recovering company with corresponding
qualication other than be disposed by combustion, so as to
prevent damage to the environment or any other harm.
WARNING
• When the refrigerator is recycled, disassemble the doors,
and remove gasket of door and shelves; put the doors and
shelves in a proper place, so as to prevent trapping of any
child.
• When the refrigerator is recycled, cut the connection cable,
and discard it, to prevent any future misuse of the appliance.
Correct Disposal of this product
This marking indicates that this product
should not be disposed with other
household wastes. To prevent possible
harm to the environment or human health
from uncontrolled waste disposal, recycle
it responsibly to promote the sustainable
reuse of material resources. To return your
used device, please use the return and
collection systems or contact the retailer where the product was
purchased. They can take this product for environmental safe
recycling.
WARNING
WARNING: Cancer and Reproductive Harm -
www.P65Warnings.ca.gov

7
INSTALLATION INSTRUCTIONS
SPACE REQUIREMENT
DIMENSIONS SIZE (IN)
A23.6
B27. 0
C72.8
DMin. 2.0
EMin. 2.0
FMin. 2.0
G37.8
H38.6
Depth without door is 24.4"
F
F F

8
INSTALLATION INSTRUCTIONS
INSTALLATION LOCATION
• This refrigerator is designed for indoor, household use only.
• Keep away from heat and avoid direct sunlight or places near
a heat source, such as an oven or a radiator.
• Do not place the refrigerator in moist or watery places to
prevent rust or reduction of insulating effect to affect the
electrical insulation properties of the refrigerator.
• The refrigerator is placed in a dry and well-ventilated indoor
place.
• The ground shall be at, and sturdy (rotate the adjustable leg
left or right to adjust for leveling if unstable.)
• The temperature of the location ranges from a minimum of
55°F to a maximum of 110°F. However, for better energy
usage and superior cooling, the temperature is preferred to
be between 60°F and 90°F.
• For proper air circulation and electric connections, allow a
2" clearance on each side and behind the refrigerator. Allow
a 2" clearance at top of the refrigerator.
• Spare enough space for convenient opening of the doors and
drawers, especially when the refrigerator is installed next to
a xed wall to allow the door to swing open.
ELECTRICAL CONNECTION
Before plugging in, ensure that the voltage and frequency shown
on the rating plate correspond to your domestic power supply.
The appliance must be grounded. The power supply cable plug
is provided with a contact for this purpose. If the domestic
power supply socket is not grounded, connect the appliance
to a separate ground in compliance with current regulations,
consulting a qualied electrician.
The manufacturer declines all responsibility if the above safety
precautions are not observed.
This appliance complies with the E.E.C. Directives.
DOOR REVERSIBILITY
Before reversing the door, please be prepared below tools and
material: phillips head screwdriver, socket wrench, wrench and
components included in the poly bag:
Left Door Hinge
Cover x 1
Left Aid-Closer on
Upper Door x 1
Left Aid-Closer on
Lower Door x 1
TOOLS TO PREPARE
Phillips Head
Screwdriver
Socket Wrench Wrench
1. Unscrew top hinge cover and disconnect connector of door
switch.
2. Unscrew top hinge with screwdriver or ¼” socket wrench
and remove the upper door.
3. Remove the pin with a wrench or 3/8” socket wrench and
ip the hinge bracket. Then ret the pin to the hinge bracket.
Unscrew Screw

9
4. Move door switch from right hinge cover to left hinge cover
in accessary bag.
Right Hinge Cover Left Hinge Cover
5. Move top left cover to right side.
6. Take off the upper door, take out the screw from the middle
hinge by cross screwdriver or ¼” socket wrench, then take
off the lower door.
7. Unscrew bottom hinge with 3/8” socket wrench
8. Unscrew and remove the bottom hinge pin with wrench or
3/8” socket wrench, turn the bracket over and ret it.
Unscrew Screw
9. Ret the bracket tting the bottom hinge pin on the left side.
Replace both adjustable feet.
10. Remove aid-closers from bottom of upper and lower doors
with screwdriver.
Then take new aid-closers from accessory bag and install
them to the left side.
11. Move the hinge hole covers from left side to right side. Place
the lower door, ip and ret the middle hinge (that you
removed on step 6).
12. Ret upper door, please ensure the door is align with the
cabinet to make sure door gasket is sealed to the cabinet
tightly. Then connect the door with the cabinet by tightening
the screw to the top hinge with a screwdriver or socket
wrench.
INSTALLATION INSTRUCTIONS

10
INSTALLATION INSTRUCTIONS
13. Replace top hinge cover. Before screw the cover, connect
terminals of door switch.
If you only want to dissemble door follow steps 1-3 for
disassembly.
LEVELLING THE UNIT
To do this adjust the two leveling feet at front of the unit.
If the unit is not level, the doors and magnetic seal alignments
will not be covered properly.
Lengthen Shorten
HOW TO REMOVE SHELVES
To remove the removable shelf: First, lift up the rear end of shelf,
and then pull the shelf out.

11
APPEARANCE OVERVIEW
Wine Rack (supplied)

12
USER INTERFACE
BUTTONS & TEMPERATURE SETTING
MODE
Press [MODE] to select [ECO] Mode or [FREEZE BOOST]
Mode, and please wait until the ash turns to continuous light,
then the Mold is selected successfully.
The default mode is Normal Mode. If not, press [MODE] until
[ECO] & [FREEZE BOOST] unlighted.
Under Normal Mode, you can set the temperature of Refrigerator
and Freezer compartment.
ZONE
Under Normal Mode, press [ZONE] to select either Refrigerator
or Freezer to which you plan to adjust the temperature.
TEMP
Under Normal Mode, press [TEMP] to adjust the temperature
of Refrigerator or Freezer compartment.
Press [TEMP] and hold longer than 3 seconds to switch between
Fahrenheit and Celsius.
The setting temperature of Freezer and Refrigerator compartment
cycles as follows.
REFRIGERATOR TEMPERATURES
35˚F
2˚C
41˚F
5˚C
45˚F
7˚C
39˚F
4˚C
43˚F
6˚C
47˚F
8˚COF
(OFF)
FREEZER
7˚F
-14˚C
0˚F
-18˚C
3˚F
-16˚C
-4˚F
-20˚C
5˚F
-15˚C
-2˚F
-19˚C
1˚F
-17˚C
-6˚F
-21˚C
-8˚F
-22˚C
DISPLAY AND LIGHT
1 It will light when ECO Mode is selected by button [MODE].
2 It will light when Freeze Boost Mode is selected by button
[MODE].
3 It shows setting temperature of Refrigerator or Freezer
compartment in Fahrenheit or Celsius.
4 It will light when the Freezer compartment is selected by
button [ZONE].
5 It will light when the Refrigerator compartment is selected
by button [ZONE].
OPTIONAL MODES
ECO MODE
In this mode, the temperature of fridge and freezer is
automatically set at 41˚F and 0˚F. The temperature of two
compartments are not adjustable. The appliance runs at low
energy consumption.
Selected by pressing [Mode] button 1 time.
FREEZE BOOST
In this mode, the temperature of freezer is automatically set at
-13˚F. The temperature in freezer will be reduced rapidly.
If you plan to freeze a large number of food in one time, select
FREEZE BOOST mode 24 hours ahead.
In this mode, the temperature of fridge is still adjustable. The
appliance will go back to previous running mode automatically
after 50 hours.
Selected by pressing [Mode] button 2 times
VACATION MODE
Use VACATION MODE to switch off fridge compartment while
freezer continues operating to save energy on your vacation.
Selected by pressing Mode button 3 times.
DEMO MODE
Enter: press and hold [TEMP] for 5 seconds until a beep.
In this mode, no cooling, but user interface and light are
functional.
Exit: Unplug from power outlet.
Compressor does not operate in Demo Mode
DOOR OPEN ALARM
If door keeps open longer than 60 seconds, alarm will rise
automatically. Close the door immediately to save energy.
1 2 3 4 5
SETTING PANEL
1 2 3 4 5

13
DAILY USE
DAILY USE
FREEZING FRESH FOOD
• The freezer compartment is suitable for freezing fresh food
and storing frozen and deep-frozen food for a long time.
• Place the fresh food to be frozen in the bottom compartment.
• The maximum amount of food that can be frozen in 24 hours
is specied on the rating plate.
• The freezing process lasts 24 hours: during this period do
not add other to be frozen.
STORING FROZEN FOOD
When rst starting-up or after a period out of use, before putting
the product in the compartment, let the appliance run at least 2
hours on the higher settings.
IMPORTANT! In the event of accidental defrosting, for
example, the power has been off for longer than the value shown
in the technical characteristics chart under "rising time", the
defrost food must be consumed quickly or cooked immediately
and then re-frozen (after cooked).
THAWING
Deep-frozen or frozen food, prior to be used, can be thawed in
the freezer compartment or at room temperature, depending on
the time available for this operation.
Small pieces may even be cooked still frozen, directly from the
freezer. In this case, cooking will take longer.
HELPFUL HINTS AND TIPS
HINTS FOR FREEZING
To help you make the most of the freezing process, here are
some important hints:
• The maximum quantity of food which can be frozen in 24
hours is shown on the rating plate.
• The freezing process takes 24 hours. No further food to be
frozen should be added during this period.
• Only freeze top quality, fresh and thoroughly cleaned foods.
• Prepare food in small portions to enable it to be rapidly and
completely frozen and to make it possible subsequently to
thaw only the quantity required.
• Wrap up the food in aluminium foil or polythene and make
sure that the packages are airtight.
• Do not allow fresh, unfrozen food to touch food which is
already frozen, thus avoiding a rise in temperature of the later.
• Lean foods store better and longer than fatty ones. Salt reduces
the storage life of food.
• Water ices, if consumed immediately after removal from
the freezer compartment, can possibly cause the skin to be
freeze burnt.
• It is advisable to show the freezing in date on each individual
pack to enable you removal from the freezer compartment,
can possible cause the skin to be freeze burnt.
• It is advisable to show the freezing in date on each individual
pack to enable you to keep tab of the storage time.
HINTS FOR STORAGE OF FROZEN FOOD
To obtain the best performance from this appliance, you should:
• Make sure that the commercially frozen foods were
adequately stored by the retailer.
• Be sure that frozen foods are transferred from the food store
to the freezer in the shortest possible time.
• Not open the door frequently or leave it open longer than
absolutely necessary.
• Once defrosted, food deteriorates rapidly and cannot be
refrozen.
• Do not exceed the storage period indicated by the food
manufacture.
• Do not store warm food or evaporating liquids in the
refrigerator.
• Do cover or wrap the food, particularly if it has a strong
avour.
HINTS FOR REFRIGERATION
Useful hints:
• Make (all types): wrap in polythene bags and place on the
glass shelves above the vegetable drawer.
• For safety, store in this way only one or two days at the most.
• Cooked foods, cold dishes, etc.: these should be covered and
may be placed on any shelf.
• Fruit and vegetables should be thoroughly cleaned and placed
in the special drawer(s) provided.
• Butter and cheese should be placed in special airtight
containers or wrapped in aluminum foil or polythene bags
to exclude as much air as possible.
• Milk bottle should have a cap and should be stored in the
balconies on the door.
• Bananas, potatoes, onions and garlic, if not packed, must not
be kept in the fridge.
FRESH ZONE TEMPERATURE CONTROL
• Temperature of the fresh can be adjusted according to the
type of storage food.
• Push the knob upward from the bottom, temperature in the
fresh zone will be gradually decreased.
• When the knob is placed at the "CRISPER" position, the fresh
zone can be functioned as a crisper zone and maintain the
appropriate temperature and humidity for fruits and vegetable.
• When the knob is placed at the "CHILLER" function, it is
suitable for short-term storage of sh or other fresh food. The
food will keep fresh but not frozen, which makes it the best
choice for storing fresh food.

14
DAILY USE
• Tips: When you choose "CHILLER" function, it is
recommended to set the refrigerator temperature below 39˚F
and preserved lead-time no more than 3 days, in order to keep
the best freshness.
ERROR CODES
If there is fault, the display will show ERROR codes.
ERROR
CODES AREAS WITH FAULT
E0 Signal transmission between control board and
main board. Probably defects of harness (wire and
connectors), main board or control board
E1 Temperature sensor of fridge compartment
E2 Temperature sensor of freezer compartment
E3 Defrost temperature sensor in freezer
compartment
E4 Fan motor in evaporator room of freezer
comportment
E5 Defrost heater or the fuse connected with heater
When ERROR codes appear, call 1-800-BE-SHARP.

15
CARE AND CLEANING
FIRST USE
CLEANING THE INTERIOR
Before using the appliance for the rst time, wash the interior
and all internal accessories with lukewarm water and some
neutral soap to remove the typical smell of brand new product,
then dry thoroughly.
IMPORTANT! Do not use detergents or abrasive powders,
these will damage the nish.
CLEANING
For hygienic reasons the appliance interior, including interior
accessories, should be cleaned regularly.
CAUTION
The appliance may not be connected to the mains during
cleaning. Danger of electrical shock! Before cleaning, switch
the appliance off and disconnect the power supply or switch
off or turn out the circuit breaker or fuse.
Never clean the appliance with a steam cleaner. Moisture could
accumulate in electrical components, danger of electrical
shock! Hot vapors can lead to the damage of plastic parts.
The appliance must be dry before it is placed back into service.
IMPORTANT! Ethereal oils and organic solvents can damage
plastic parts, e.g. lemon juice or the juice from orange peel,
butyric acid, cleanser that contain acetic acid.
• Do not allow such substance to come into contact with the
appliance parts.
• Do not use any abrasive cleaners.
• Remove the food from the freezer. Store them in a cool place,
well covered.
• Switch the appliance off and unplug or switch off or turn out
the circuit breaker of fuse.
• Clean the appliance and the interior accessories with cloth
and lukewarm water. After cleaning, wipe with fresh water
and rub dry.
• After everything is dry, place appliance back into service.
REPLACE THE LAMP
The internal light is a LED type. To replace the lamp, contact
1-800-BE-SHARP.

16
TROUBLE SHOOTING
CAUTION
Before troubleshooting, disconnect the power supply. Only a qualied electrician of competent person must do the trouble shooting
that is not in this manual.
IMPORTANT! There are some sounds during normal use (compressor, refrigerant circulation).
PROBLEM POSSIBLE CAUSE SOLUTION
Appliance does not work
AC Cord is not plugged in or is loose Insert AC Cord
Fuse has blown or is defective Check fuse, replace if necessary
Electrical Outlet is defective Electrical outlet or circuit breaker malfunctions
are to be corrected by an electrician
Appliance freezes or cools
too much
Temperature is set too cold or the appliance runs
at FREEZE BOOST modes
Refer to the Temperature Setting section
The food is not frozen enough
Temperature is not properly adjusted Refer to the Temperature Setting section
A large quantity of warm food was placed in the
appliance within the last 24 hours
Turn the temperature regulation to colder setting
temporarily
The appliance is near a heat source Refer to the Installation Location section
Heavy build up of frost on the
door seal
Door seal in not airtight Carefully warm the leaking section of the door
seal with a hair dryer (on a cool setting). At the
same time, shape the warmed door seal by hand
such that it sits correctly.
Unusual noise
Appliance is not level Re-adjust the feet
The appliance is touching the wall or other objects Move the appliance slightly
A component, e.g. a pipe on the rear of the
appliance is touching another part of the appliance
or the wall
If necessary, carefully bend the component out
of the way
Side panel is hot Condenser is inside the panel It's normal
If the malfunction shows again, contact the Sharp customer support (1-800-BE-SHARP) to dispatch a service technician.
Please record your model number and serial number below.
Model number ________________________________________________
Serial number _________________________________________________
SHARP ELECTRONICS CORPORATION • 100 Paragon Drive •Montvale, New Jersey 07645 •USA
Table of contents
Other Sharp Refrigerator manuals

Sharp
Sharp SJ-C15E-MS User manual

Sharp
Sharp SJ-F320V User manual

Sharp
Sharp SJ-F79PS-SL User manual

Sharp
Sharp SJ-BB10IMXI2-EU User manual

Sharp
Sharp SJ-273T User manual

Sharp
Sharp SJ-BA21IMXW1-EU User manual

Sharp
Sharp SJ-BA20DHXIC-EU User manual

Sharp
Sharp SJ-47L-A2 User manual

Sharp
Sharp SJ-P43N-SL User manual

Sharp
Sharp SJ-BA20IEXIE-EU User manual

Sharp
Sharp SJ-P58M-GY User manual

Sharp
Sharp SJ-FP92V User manual

Sharp
Sharp SJ-P68M User manual

Sharp
Sharp SJ-P58M-BE User manual

Sharp
Sharp SJ-PD63S User manual

Sharp
Sharp SJ-LF300E00X-EN User manual

Sharp
Sharp SJ-LC31CHXIF-EN User manual

Sharp
Sharp SJ-BA32DHXIE-EU User manual

Sharp
Sharp SJ-T2435E0W-EU User manual

Sharp
Sharp SJ-XG690G User manual