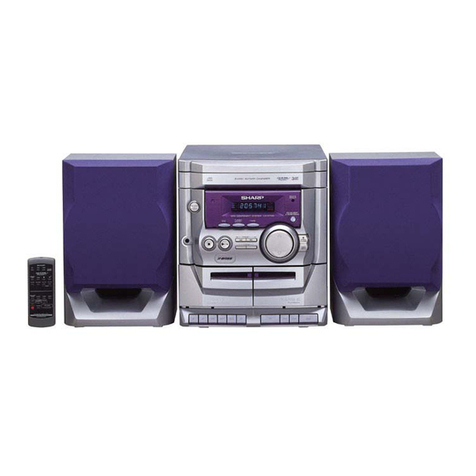
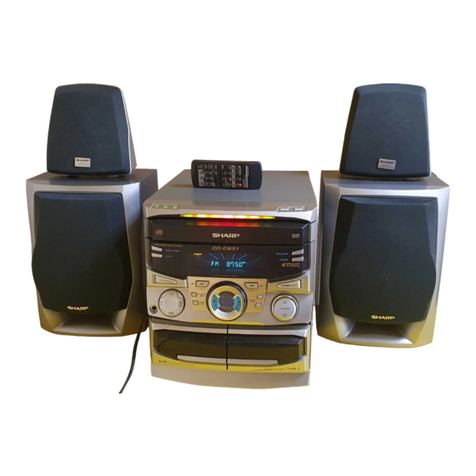
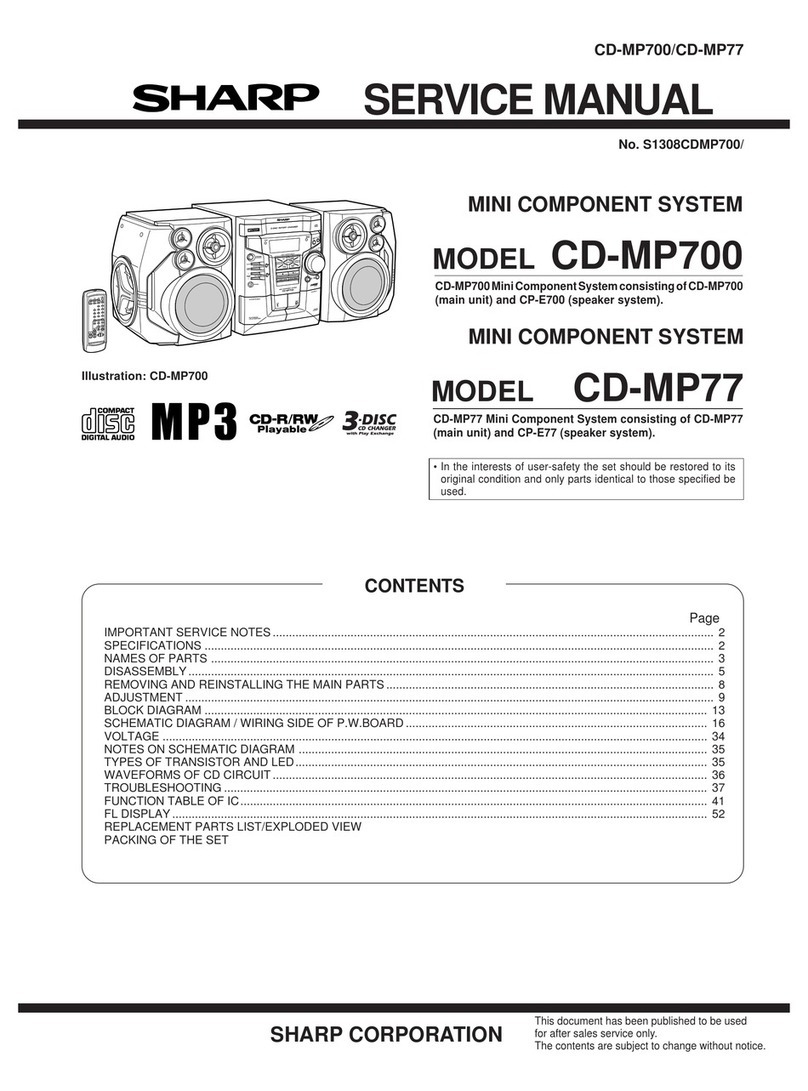
Sharp XL-G5000V User manual

XL-G5000V/XL-G5000V(S)
SERVICE MANUAL
No. XXXXXXXXXXXXX
VIDEO CD MICRO SYSTEM
XL-G5000V
XL-G5000V(S)
MODEL
SHARP CORPORATION
CONTENTS
This document has been published to be used
for after sales service only.
The contents are subject to change without notice.
PRECAUTIONS FOR USING LEAD-FREE SOLDER
CHAPTER 1. GENERAL DESCRIPTION
[1] SPECIFICATIONS ......................................... 1-1
[2] NAMES OF PARTS........................................ 1-1
CHAPTER 2. ADJUSTMENTS
[1] ADJUSTMENT............................................... 2-1
[2] TEST MODE.................................................. 2-3
[3] Standard Specification of Stereo System
Error Message Display Contents ................... 2-5
CHAPTER 3. MECHANICAL DESCRIPTION
[1] REMOVING AND REINSTALLING THE
MAIN PARTS ................................................. 4-1
[2] DISASSEMBLY.............................................. 3-3
CHAPTER 4. DIAGRAMS
[1] BLOCK DIAGRAM......................................... 5-1
CHAPTER 5. CIRCUIT DESCRIPTION
[1] WAVEFORMS OF CD CIRCUIT.................... 6-1
[2] VOLTAGE......................................................5-2
CHAPTER 6. CIRCUIT SCHEMATICS AND PARTS
LAYOUT
[1] NOTES ON SCHEMATIC DIAGRAM............7-1
[2] TYPES OF TRANSISTOR AND LED............6-1
[3] WIRING SIDE OF PWB/SCHEMATIC DIA-
GRAM............................................................6-2
CHAPTER 7. FLOWCHART
[1] TROUBLESHOOTING ..................................8-1
CHAPTER 8. OTHERS
[1] FUNCTION TABLE OF IC .............................8-1
[2] FL DISPLAY ................................................8-11
CHAPTER 9. ACTIVE SUBWOOFER DIAGRAM
[1] WIRING SIDE OF PWB/SCHEMATIC DIA-
GRAM........................................................... 9-1
Parts Guide
XL-G5000V Video CD Micro System consisting of XL-G5000V
(main unit) and CP-G5000V (front speaker).
XL-G5000V(S) Video CD Micro System consisting of XL-G5000V(S)
(main unit) and CP-G5000V (front speaker).
•
In the interests of user-safety the set should be restored to its original
condition and only parts identical to those specified be used.
XL-G5000V
XL-G5000V(S)
*XL-G5000V(S) is silver color of XL-G5000V
SPEAKER SYSTEM
CP-G5000
CP-G5000(S)
MODEL
CP-G5000 Speaker System consisting of CP-SW5000
(Active unit) and GBOXSA052AWM1 (surround speaker).
CP-G5000(S) Speaker System consisting of CP-SW5000(S)
(Active unit) and GBOXSA066AWM1 (surround speaker).
NTSC/PAL

XL-G5000V/XL-G5000V(S)
– i –
SAFETY PRECAUTION FOR SERVICE MANUAL
Precaution to be taken when replacing and servicing the Laser Pickup.
The AEL (Accessible Emission Level) of Laser Power Output for this model is specified to be lower than Class 1 Requirements.
However, the following precautions must be observed during servicing to protect your eyes against exposure to the Laser beam.
1. When the cabinet has been removed, the power is turned on without a compact disc, and the Pickup is on a position outer than the
lead-in position, the Laser will light for several seconds to detect a disc. Do not look into the Pickup Lens.
2. The Laser Power Output of the Pickup inside the unit and replacement service parts have already been adjusted prior to shipping.
3. No adjustment to the Laser Power should be attempted when replacing or servicing the Pickup.
4. Under no circumstances look directly into the Pickup Lens at any time.
5. CAUTION - Use of controls or adjustments, or performance of procedures other than those specified herein may result in
hazardous radiation exposure.
VOLTAGE SELECTION
Before operating the unit on mains, check the preset voltage. If the voltage is different from your local voltage, adjust the voltage
as follows.
Turn the selector with a screwdriver until the appropriate voltage number appears in the window (110V,127V,220V or 230V -
240V AC).
AC POWER SUPPLY CORD AND AC PLUG ADAPTOR
QACCE0015AW00
QACCA0008AW00
QPLGA0003AWZZ QPLGA0004AWZZ

XL-G5000V/XL-G5000V(S)
AudioXL-HP404VService ManualXLHP404VMarketE
PRECAUTIONS FOR USING LEAD-FREE SOLDER
1. Employing lead-free solder
"VCD PWB" of this model employs lead-free solder. The LF symbol indicates lead-free solder, and is attached on the PWB and
service manuals. The alphabetical character following LF shows the type of lead-free solder.
Example:
Indicates lead-free solder of tin, silver and copper.
2. Using lead-free wire solder
When fixing the PWB soldered with the lead-free solder, apply lead-free wire solder. Repairing with conventional lead wire solder
may cause damage or accident due to cracks.
As the melting point of lead-free solder (Sn-Ag-Cu) is higher than the lead wire solder by 40 C, we recommend you to use a
dedicated soldering bit, if you are not familiar with how to obtain lead-free wire solder or soldering bit, contact our service station
or service branch in your area.
3. Soldering
As the melting point of lead-free solder (Sn-Ag-Cu) is about 220 C which is higher than the conventional lead solder by 40 C,
and as it has poor solder wettability, you may be apt to keep the soldering bit in contact with the PWB for extended period of
time. However, Since the land may be peeled off or the maximum heat-resistance temperature of parts may be exceeded,
remove the bit from the PWB as soon as you confirm the steady soldering condition.
Lead-free solder contains more tin, and the end of the soldering bit may be easily corrected. Make sure to turn on and off the
power of the bit as required.
If a different type of solder stays on the tip of the soldering bit, it is alloyed with lead-free solder. Clean the bit after every use
of it.
When the tip of the soldering bit is blackened during use, file it with steel wool or fine sandpaper.
Be careful when replacing parts with polarity indication on the PWB silk.
Lead-free wire solder for servicing
Ref No. DescriptionParts No.
PWB-D 92LPWB5619VCDS VCD

XL-G5000V/XL-G5000V(S)
1 – 1
AudioXL-G5000VService ManualXL-G5000VMarketE
CHAPTER 1. GENERAL DESCRIPTION
[1] SPECIFICATIONS
FOR A COMPLETE DESCRIPTION OF THE OPERATION OF THIS UNIT, PLEASE REFER
TO THE OPERATION MANUAL.
XL-G5000V
■
General
Power source AC 110/127/220/230 - 240 V, 50/60Hz
Power consumption 90 W
Dimensions Width : 185 mm (7-1/4")
Height : 260 mm (10-1/4")
Depth : 307 mm (12")
Weight 6.4 kg (14.1 lbs.)
■
Amplifier
Output power Front speakers:
MPO: 256 W (128 W + 128 W) (10% T.H.D.)
RMS: 130 W (65 W + 65 W) (10% T.H.D.)
RMS: 122 W (81 W +81 W) (1% T.H.D.)
Output terminals
Input terminals
Surround speakers:
MPO:128 W (64 W + 64 W) (10% T.H.D.)
RMS: 70 W (35 W + 35 W) (10% T.H.D.)
RMS: 60 W (30 W +30 W) (1% T.H.D.)
Speakers: 6 ohms
Headphones: 16 - 50 ohms (recommended:
32 ohms)
Subwoofer pre-output (audio signal):
200 mV/10 k ohms at 70 Hz
Video out: 1Vp-p (75ohms)
Video/auxiliary (audio signal):
500 mV/47 k ohms
Microphone 1/2: 1 mV/600 ohms
■
Video CD
Video output format PAL/NTSC
■
CD player
Type 5-disc multi-play compact disc player
Signal readout Non-contact, 3-beam semiconductor laser
pickup
D/A converter 1-bit D/A converter
Frequency response 20 - 20,000 Hz
Dynamic range 90 dB (1 kHz)
■
Tuner
Frequency range FM: 88.0 - 108.0 MHz
AM: 531 - 1,602 kHz
■
Cassette deck
Frequency response 50 - 14,000 Hz (normal tape)
Signal/noise ratio 50 dB (recording/playback)
Wow and flutter 0.3 % (WRMS)
Type 2-way type speaker system
5 cm (2") tweeter
13 cm (5-1/8") woofer
Maximum input power
130 W
Rated input power 65 W
Impedance 8 ohms
Dimensions
Weight 3.0 kg (6.6 lbs.)/each
CP-G5000 (Front Speaker)
Width : 165 mm (6-1/2")
Height : 260 mm (10-1/4")
Depth : 231mm (9-15/16")
GBOXSA052AWM1 (Surround Speaker)
CP-SW5000 (Subwoofer)
Type
Maximum input power
70 W
Rated input power 35 W
Impedance 16 ohms
Dimensions
Weight 2.5 kg (5.5 lbs.)/each
Width : 120 mm (4-3/4")
Height : 260 mm (10-1/4")
Depth : 227mm (8-15/16")
Width : 320 mm (12-5/8")
Height : 260 mm (10-1/4")
Depth : 394mm (15-1/2")
Specifications for this model are subject to change without prior notice.
MPO: 340 W (170W+170W)(10%T.H.D.)
RMS: 200 W (100 W + 100 W) (10% T.H.D.)
RMS: 140 W (70 W +70 W) (0.9% T.H.D.)
Full-range speaker system
8 cm (3 1/8") woofer (x2)
Power source AC 110/127/220/230 - 240 V, 50/60 Hz
Power consumption 90 W
Output power
Input terminals Subwoofer input (audio signal):
200 mV / 10 k ohms at 70 Hz
Speaker type 20 cm (7-7/8") woofer
Impedance 6 ohms
Dimensions
Weight 11.8 kg (26.0 lbs.)
XL-G5000V/XL-G5000V(S)
1 – 2
[2] NAMES OF PARTS
■Front panel
1. Disc Trays
2. Timer Indicator
3. On/Stand-by Button
4. Clock/Timer Button
5. Video CD Skip or Previous, CD/MP3 Disc Track Down or
Fast Reverse, Tape Fast Wind, Tuner Preset Down,
Time Down Button
6. Tape Reverse Play Button
7. Tape Reverse Mode Select Button
8. Cassette Compartment
9. Headphone Socket
10. Disc Tray Open/Close Button
11. Disc Number Select Buttons
12. Disc Direct Play Button
13. Illumination Light
14. Volume Control
15. Video CD Skip or Next, CD/MP3 Disc Track Up or
Fast Forward, Tape Fast Wind, Tuner Preset Up,
Time Up Button
16. Memory/Set Button
17. Equaliser Mode Select Button
18. Extra Bass/Demo Mode Button
19. Video CD Play or Repeat or Select or Resume,
CD/MP3 Disc Play or Repeat,
Tape Forward Play Button
20. Video CD Stop or Return,
CD/MP3 Disc/Tape Stop Button
21. Microphone Level Control
22. Microphone Socket 1
23. Microphone Socket 2
24. Video CD Playback Control Button
25. Video CD On Screen Display On/Off Button
26. Video CD Digest/Time Search Button
27. Video CD/CD/MP3 Disc Button
28. Tuner (Band) Button
29. Tape Button
30. Video/Auxiliary Button
31. Tape Record Pause Button
32. Tuning Up Button
33. Tuning Down Button
1
11
12
15
16
17
18
19
20
10
2
3
4
23
22
21
9
5
6
7
8
29
30
32
33
31
24
25 27
2826
14
13
■Display
1. Disc Number Indicators
2. Disc Play Indicator
3. Disc Pause Indicator
4. Memory Indicator
5. Disc Repeat Play Indicator
6. Video CD Indicator
7. CD Indicator
8. MP3 Disc Indicator
9. Extra Bass Indicator
10. Sleep Indicator
11. Tape Record Indicator
12. Timer Play Indicator
13. Timer Recording Indicator
14. Tape Reverse Play Indicator
15. Tape Forward Play Indicator
16. Tape Reverse Mode Indicator
17. Karaoke Mode Indicator
18. FM Stereo Mode Indicator
19. Daily Timer Indicator
20. FM Stereo Receiving Indicator
976 8321 4 5
12 13
1110
1614 15
1918 2017

XL-G5000V/XL-G5000V(S)
1 – 3
■Rear panel
■
Front Speaker
1. Woofer
2. Tweeter
3. Bass Reflex Duct
■
Surround Speaker
1. Full-range Speaker
■
Active Subwoofer
1. Bass Reflex Duct
2. Subwoofer Unit
3. Speaker light up dimmer switch
4. Power Switch
5. Volume Control
6. Crossover Frequency Control
7. Cooling Fan
8. AC Power Lead
9. AC Voltage Selector
10. Subwoofer Input Socket
3
1
1
2
5
6
3
9
10 4
7
2
1
8
Cooling fan:
This product is equipped with a cooling
fan inside, which begins to run once the
power is on for better heat radiation.
RATED SPEAKER IMPEDANCE:
8 OHMS MIN. 16 OHMS MIN.
RIGHT
SPEAKERS
LEFT
FRONT SURROUND
RIGHT LEFT
12
3
1
5
4
8
10
11
9
7
6
2
1. Video Output Socket
2. Cooling Fan
3. AC Voltage Selector
4. Front Speaker Terminals
5. AC Power Lead
6. FM 75 Ohms Aerial Terminal
7. FM Aerial Earth Terminal
8. AM Loop Aerial Socket
9. Video/Auxiliary (Audio Signal) Input Sockets
10. Span Selector Switch
11. Subwoofer Pre-output Socket
12. Surround Speaker Terminal

XL-G5000V/XL-G5000V(S)
1 – 4
■Remote control
1. Remote Control Transmitter
2. Disc Number Select Buttons
3. Video CD Skip or Previous, CD/MP3 Disc Track Down or
Fast Reverse, Tape Fast Wind, Tuner Preset Down,
Time Down Button
4. Volume Up and Down Buttons
5. Disc Direct Search Buttons
6. Equaliser Mode Select Button
7. MP3 Disc Display Button
8. Video CD On Screen Display On/Off Button
9. Video CD Bookmark Button
10. Video CD Digest/Time Search Button
11. On/Stand-by Button
12. Video CD/CD/MP3 Disc Button
13. Tuner (Band) Button
14. Tape Button
15. Video/Auxiliary Button
16. Video CD Skip or Next, CD/MP3 Disc Track Up or
Fast Forward, Tape Fast Wind, Tuner Preset Up,
Time Up Button
17. Clock/Timer Button
18. PAL/NTSC Select Button
19. Disc Random Button
20. Disc Clear/Dimmer Button
21. Video CD Stop or Return,
CD/MP3 Disc Stop Button
22. Tape Reverse Play Button
23. Tape Stop Button
24. Memory/Set Button
25. Disc Pause Button
26. Video CD Play or Repeat or Select or Resume,
CD/MP3 Disc Play or Repeat Button
27. Tape Forward Play Button
28. Tape Record Pause Button
29. Extra Bass Button
30. Video CD Auto/On Button
31. Video CD Playback Control Auto/Off Button
32. Echo Level Up and Down Buttons
33. Karaoke Mode Button
1
2
5
6
3
4
14
15
16
18
17
12
13
11
7
8
9
10
29
30
31
33
32
19 24
25
27
28
20
21
22
23
26

XL-G5000V/XL-G5000V(S)
2 – 1
CHAPTER 2. ADJUSTMENTS
[1] ADJUSTMENT
1. MECHANISM SECTION
•Driving Force Check
•Torque Check
2. TUNER SECTION
fL: Low-range frequency
fH: High-range frequency
•AM IF/RF
Signal generator: 400 Hz, 30%, AM modulated
•FM RF
Signal generator: 1 kHz, 40 kHz dev., FM modulated
•FM IF
Signal generator: 10.7MHz FM modulated
•Tape Speed
Torque Meter Specified Value
Play: TW-2111 Over 80 g
Torque Meter Specified Value
Play: TW-2111 30 to 80 g.cm
Fast forward: TW-2231 70 to 180 g.cm
Rewind: TW-2231 70 to 180 g.cm
Test Stage Frequency Frequency
Display Setting/
Adjusting
Parts
Instrument
Connection
AM IF 450 kHz 1,602 kHz T351 *1
AM Band
Coverage — 531 kHz (fL): T306
1.1 ± 0.1 V *2
AM Tracking 990 kHz 990 kHz (fL): T303 *1
*1. Input: Antenna Output: TP302
*2. Input: Antenna Output: TP301
Test Stage Frequency Frequency
Display Setting/
Adjusting
Point
Instrument
Connection
FM OSC — 87.50 kHz T301 (fL):
1.3 ± 0.1 V *1
FM RF 98.00 MHz
(10-30 dB) 98.00 MHz L312 *2
*1. Input: Antenna Output: TP301
*2. Input: Antenna Output: Speaker terminal
Test Stage Frequency Frequency
Display Setting/
Adjusting
Point
Instrument
Connection
IF 10.7 MHz 98 MHz T302
(Turn the
core of trans-
former T302
fully counter-
clock wise)
*1
*1. Input: Antenna Output: TP301
Test Tape Adjusting
Point Specified
Value Instrument
Connection
Normal
speed MTT-111 Variable
Resistor in
motor.
3,000 ± 30 Hz Speaker Ter-
minal (Load
resistance: 6
ohms)
Figure 1
Figure 2 ADJUSTMENT POINTS
TAPE MECHANISM
Tape
Motor
Variable Resistor in motor
AM
LOOP
ANTENNA
IC302
T351
T301
IC303
T303
T306
T302
L312
CNP301
SO302
IC301
TP302
TP301
AM TRACKING fL
AM BAND
COVERAGE fL
AM IF
FM RF
FM IF
FM OSC
FM ANTENNA
TERMINAL
TUNER PWB-C
20
R356
C393

XL-G5000V/XL-G5000V(S)
2 – 2
3. CD SECTION
•Adjustment
Since this CD system incorporates the following automatic adjust-
ment functions, readjustment is not needed when replacing the
pickup. Therefore, different PWBs and pickups can be combined
freely.
Each time a disc is changed, these adjustments are performed
automatically. Therefore, playback of each disc can be performed
under optimum conditions.
Items adjusted automatically
1) Offset adjustment (The offset voltage between the head amplifier
output and the VREF reference voltage is compensated inside the
IC.)
* Focus offset adjustment
* Tracking offset adjustment
2) Tracking balance adjustment
3) Gain adjustment (The gain is compensated inside the IC so that the
loop gain at the gain crossover frequency will be 0 dB.)
* Focus gain adjustment
* Tracking gain adjustment
4. CD ERROR CODE DESCRIPTION
* 'CHECKING'
If Error is detected, 'CHECKING' will be displayed instead of 'ER-
CD**'. 'ER-CD**' display will only be displayed when error had been
detected for the 5th times.
Error Explanation
01 When Pickup set inner position, inner switch cannot detect
'ON' level for 10 secs.
10* CAM error. Can't detect CAM switch when CAM is moving.
11* When it detect cam operation error during initialize process.
20* TRAY error. Can't detect TRAY switch when TRAY is mov-
ing.
21* When it detect TRAY operation error during initialize pro-
cess.
31 When it change to CD function, DSP cannot read initial data.

XL-G5000V/XL-G5000V(S)
2 – 3
[2] TEST MODE
•Setting the test mode
During stand-by mode, press ON/STAND-BY button while pressing
down the button and X-BASS/DEMO button. then, press the CD
button to enter the test mode.
IL isn’t done
OPEN/CLOSE operation is using manual. IL isn’t done
<< >>,<< >>buttons make pick's slide possible. IL isn’t done
to page 2-4
<<PLAY>> key input.
Do TOC IL. Do normal play.
When these following key is input into PLAY key, track num-
ber can be appoint directly.
<<MEMORY>>
key input.
<< 1>> key: Track 4
<< 2>> key: Track 9
<< 3>> key: Track 15
Adjustment result automatically will
display as below for each 2 sec:
a) "FOF_XXXX"
b) "TOF_XXXX"
c) "TBAL_XX"
d) "TGAN_XX"
f) "FGAN_XX"
g) "RFLS_XX"
<<STOP>> key input.
STOP
explanation:
a) Focus off set = "FOF_XXXX"
b)Tracking off set = "TOF_XXXX"
c)Tracking balance = "TBAL_XX"
d)Tracking Gain = "TGAN_XX"
f) Focus Gain = "FGAN_XX"
g) RF level shift = "RFLS_XX"
VOL — Last memory
P.GEQ — FLAT
X-BASS — OFF
To cancel : Power OFF
CD TEST

XL-G5000V/XL-G5000V(S)
2 – 4
Sliding the PICKUP with<< >>, << >> button must only be
in STOP mode.
<<MEMORY>> key input.
Laser ON.
<<MEMORY>> key input.
Tracking OFF play at that specific point.
<<MEMORY>> key input.
Tracking ON play from that specific point.
<<MEMORY>> key input.
Adjustment result automatically will display as below for each 2 sec :
a) "FOF_XXXX"
b) "TOF_XXXX"
c) "TBAL_XX"
d) "TGAN_XX"
f) "FGAN_XX"
g) "RFLS_XX"
<<STOP>> key input.
STOP
explanation:
a) Focus off set = "FOF_XXXX"
b)Tracking off set = "TOF_XXXX"
c)Tracking balance = "TBAL_XX"
d)Tracking Gain = "TGAN_XX"
f) Focus Gain = "FGAN_XX"
g) RF level shift = "RFLS_XX"
VOL — Last memory
BAL — CENTER
P.GEQ — FLAT
X-BASS — OFF
To cancel : Power OFF

XL-G5000V/XL-G5000V(S)
2 – 5
[3] Standard Specification of Stereo System Error Message Display Contents
(*) CHECKING:
If CD changer mechanism error is detected, 'CHECKING' will be display instead of 'ER-CD**'. 'ER-CD**' display will only be display when error had
been detected for the 5 th times.
Speaker abnormal detection and +B PROTECTION display
In case speaker abnormal detection or +B PROTECTION had occurred, it can be check by pressing 'ON/STAND-BY', ' ' and 'X-BASS' button.
MicroComputer version number will displayed as "UVM****"?
Press ‘VIDEO/AUX’ button during version number display and then press ‘ON/STAND-BY’, ‘MEMORY/SET’ and ‘VIDEO/AUX’ button. Display will
show "S** B**". S is referring to speaker abnormal detection and B is referring to +B PROTECTION. ** is in hex valve.
+B PROTECTION is condition when irregular process occur on power supply line.
BEFORE TRANSPORTING THE UNIT
The following process need to be taken after set tapering/parts replacement.
1. Press the ON/STAND-BY button to enter stand-by mode.
2. While pressing down the button and the X-BASS/DEMO button, press the ON/STAND-BY button. The Micro Computer version number will
be displayed as "UVM****"?
3. Press OPEN/CLOSE button until "WAIT"--> "FINISHED" appears.
4. Unplug the AC cord and the unit is ready for transporting.
Error Contents DISPLAY Notes
CD Pickup Mechanism Error. 'ER-CD01' PU-IN SW Detection NG.
CD Changer Mechanism Error. 'ER-CD**' (*) 10: CAM SW Detection NG during normal operation
11: CAM SW Detection NG during initialize process
20:TRAY SW Detection NG during normal operation
21:TRAY SW Detection NG during initialize process
CD DSP Communication Error. 'ER-CD31' DSP COMMUNICATION ERROR.
Focus Not Match/IL Time Over. 'NO DISC'
TUNER PLL Unlock. FM MHz PLL Unlock.
87.50

XL-G5000V/XL-G5000V(S)
3 – 1
AudioXL-G5000VService ManualXL-G5000VMarketE
CHAPTER 3. MECHANICAL DESCRIPTION
[1] REMOVING AND REINSTALLING THE
MAIN PARTS
1. TAPE MECHANISM SECTION
Perform steps 1 to 11 of the disassembly method to remove the tape
mechanism.(see page 3-3,3-4)
1.1. How to remove the Record/Playback Head (See Fig. 1)
1. When you remove the screws (A1) x 2 pcs and (A2) x 1 pc., the
record/playback head can be removed.
1.2. How to remove the Pinch Roller (See Fig. 2)
1. Carefully bend the pinch roller pawl in the direction of the arrow
<A>, and remove the pinch roller (B1) x 1 pc., in the direction of the
arrow <B>.
NOTE: When installing the pinch roller, pay attention to the spring
mounting position.
1.3. How to remove the Belt (See Fig. 3)
1. Remove the main belt (C1) x 1 pc., from the motor side.
2. Remove the FF/REW belt (C2) x 1 pc.
1.4. How to remove the Motor (See Fig. 4)
1. Remove the screws (D1) x 2 pcs., to remove the motor.
Figure 1
Figure 2
Figure 3
Figure 4
(A1)x2
Ø2x6mm
(A2)x1
Ø2x9mm
Record/Playback
Head
Erase Head
Clutch Ass'y
Pinch Roller
(B1)x1 <A>
<B>
Pinch
Roller
Pawl
Pull
Main Belt
(C1)x1
FF/REW
Belt
(C2)x1
Motor
Clutch
Flywheel
(D1)x2
Ø2.6x5mm
Motor
Clutch Ass'y

XL-G5000V/XL-G5000V(S)
3 – 2
2. CD MECHANISM SECTION
Perform steps 1 to 2 and 14 to 15 of the disassembly method to
remove the CD mechanism.(see page 3-3,3-4)
2.1. How to remove the Optical Pickup (See Fig. 1)
1. Remove the stop washer (A1) x 1 pc and gear (A2) x 1 pc.
2. Remove the screws (A3) x 2 pcs and shaft (A4) x 1 pc.
3. Remove the optical pickup.
NOTE: After pulling out the optical pickup connector, wrap the tip of it
with conductive aluminium foil or the like to protect the optical
pickup from the static electricity.
2.2. How to remove CD Disc (See Fig. 2~6)
1. When CD is at play position, rotate reduction gear C clock-wise as
shown in Figure 2 Until disk tray is at ‘STOCK’ position, then rotate
the gear further to eject the disk tray (Figure 6) so that CD can be
removed from the tray.
2. In another case, if CD mechanism is at tray No. 1 play position and
to remove CD located in tray No. 3, the procedure is as follows:
If the gear up down board is located at tray No. 1 position, then
rotate Reduction gear C clock-wise until Disc tray is at stalk
‘STOCK’ position. Rotate reduction gear D clock-wise (Figure 3) to
move the CD mechanism to tray No. 3 position. This is confirmed
by checking the gear up down board position Base on the marking
as indicated on the main chassis as shown in Figure 4.
• Usually changer is covered with top plate. As for reference pur-
pose, we exclude the top plate for easy viewing. (Figure 5,6)
Figure 6
CD Disc
CD At play position.
Disc Tray
Guide Tray
CD Disc
CD At 'STOCK' position.
CD Disc
Tray eject
Remove CD from tray.
Figure 5
Figure 1
Figure 4
(A3) x2
ø2.6 x5mm
CD
Mechanism
Stop Washer
(A1) x1
Optical Pickup
Gear
(A2) x1
Shaft
(A4) x1
Reduction gear D
Figure 3
Up Down
Reduction gear C
Front
Figure 2
Rear
Mark 1
(DISC 1)
(DISC 2)
(DISC 3)
(DISC 4)
(DISC 5)
Gear up down board
Mark 3 Mark 5
Mark 2 Mark 4

XL-G5000V/XL-G5000V(S)
3 – 3
[2] DISASSEMBLY
Note 1:
After removing the connector for the optical pickup from the connector,
wrap the conductive aluminium foil around the front end of the connec-
tor so as to protect the optical pickup from electrostatic damage.
Caution on Disassembly
Follow the below-mentioned notes when disassembling the unit and
reassembling it, to keep it safe and ensure excellent performance:
1) Take cassette tape and compact disc out of the unit.
2) Be sure to remove the power supply plug from the wall outlet
before starting to disassemble the unit.
3) Take off nylon bands or wire holders where they need to be
removed when disassembling the unit. After servicing the unit,
be sure to rearrange the leads where they were before disas-
sembling.
4) Take sufficient care on static electricity of integrated circuits and
other circuits when servicing.
STEP REMOVAL PROCEDURE FIGURE
1 Cabinet 1. Screw..........................(A1) x11 1
2 Rear Panel Top 1. Screw............................(B1) x2 1
3 CD Changer unit 1. Hook.............................(C1) x2
2. Socket..........................(C2) x1
3. Flat Cable.....................(C3) x2
2
4 Rear Panel
Bottom 1. Screw...........................(D1) x9 2
5 Front Panel 1. Screw...........................(E1) x3
2. Flat Cable....................(E2) x2
3. Socket..........................(E3) x2
4. Hook............................(E4) x2
2,3
3
6 Tuner PWB 1. Screw............................(F1) x1
2. Socket..........................(F2) x1 2
3
7 Main PWB 1. Screw...........................(G1) x2
2. Socket.........................(G2) x4 2,4
4
8 Power PWB 1. Screw...........................(H1) x4 4
9 Terminal PWB 1. Screw............................(J1) x1 4
10 Display PWB 1. Knob.............................(K1) x1
2. Screw...........................(K2) x 8
3. Flat Cable....................(K3) x 1
5
11 Tape Mechanism 1. Screw...........................(L1) x 4 5
12 Headphones
PWB 1. Screw..........................(M1) x 1 5
13 Mic PWB 1. Knob.............................(N1) x1
2. Screw..........................(N2) x 1 5
14 CD Servo PWB
(Note 1) 1. Screw...........................(P1) x3
2. Flat Cable...................(P2) x 2
3. Socket..........................(P3) x1
6
15 CD Mechanism 1. Screw...........................(Q1) x3
2. Screw...........................(Q2) x4 6
7
Figure 1
Figure 2
Figure 3
Bottom
(A1) x1
ø3x10mm
(A1) x2
ø3x8mm
(A1) x1
ø3x8mm
(A1) x1
ø3x8mm
(A1) x2
ø3x8mm
(B1) x2
ø3x10mm
(A1) x2
ø3x8mm
(A1) x2
ø3x8mm
Front Panel
Cabinet
Rear
Panel
Rear
Panel Top
(D1) x9
ø3x8mm
(F1) x1
ø3x8mm
(G1) x1
ø3x10mm
(E1) x1
ø3x10mm
(E2) x1
(C2) x1
(C3) x2
Front Panel
Rear
Panel Bottom
Hook
(C1)x1
Hook
(C1)x1
Pull
Pull
CD Changer
Unit
Main PWB
Headphones
PWB
CD Servo PWB
(F2) x1
(E1) x2
ø3x10mm
(612) x1
ø3x6mm
Front Panel
Turner PWB
MIC PWB
Main PWB
(E2) x1
Pull
(E3) x1
Tape
Mechanism
(E3) x1
Pull
Hook
(E4)x1
Hook
(E4)x1

XL-G5000V/XL-G5000V(S)
3 – 4
Figure 4
Figure 5
Figure 6
(G1) x1
ø3x6mm
(H1) x4
ø4x6mm
(J1) x1
ø3x6mm
(G2) x2
(G2) x2
Terminal PWB
Main PWB
Power PWB
(K2) x8
ø2.6x8mm
(L1) x4
ø3x10mm
(M1) x1
ø3x10mm
(N2) x1
ø3x10mm
(K3) x1
(K1) x1
Front Panel
Headphones
PWB
Cassette
Holder
(N1) x1
Display PWB
Tape
Mechanism
MIC PWB
(P1) x3
ø3x10mm
(P2) x2
(P3) x1
(Q1) x1
ø3x10mm
(Q1) x2
ø3x10mm
CD Changer
Unit
CD Servo PWB
Figure 7
FRONT SPEAKER
STEP REMOVAL PROCEDURE FIGURE
1Woofer/
Tweeter 1. Net Frame................(A1) x1
2. Catching Holder.......(A2) x4
3. Screw.......................(A3) x4
4. Front Panel..............(A4) x1
5. Screw.......................(A5) x6
8
Figure 8
(Q2) x4
ø2.6x10mm
CD Changer
Unit
CD Mechanism
Net Frame
(A1)x1
Screwdriver
(A5)x2
ø3.5x14mm
(A3)x2
ø3.5x16mm
(A2)x2
(A2)x2
(A3)x2
ø3.5x16mm
(A5)x4
ø3.5x14mm Woofer
Front Panel
(A4)x1
Tweeter

XL-G5000V/XL-G5000V(S)
3 – 5
SURROUND SPEAKER
STEP REMOVAL PROCEDURE FIGURE
1 Fullrange
Speaker 1. Net Frame................(A1) x1
2. Catching Holder.......(A2) x4
3. Front Panel..............(A3) x1
4. Screw.......................(A4) x8
9
Figure 9
Speaker Box Assy
Front panel
(A3) x 1
Catching Holder
(A2) x 4
Net frame
(A1) x 1
Full range speaker
Full range speaker
Screwdriver
(A4) x 4
ø3.5x14mm
(A4) x 4
ø3.5x14mm

XL-G5000V/XL-G5000V(S)
4 – 1
CHAPTER 4. DIAGRAMS
[1] BLOCK DIAGRAM
+B5
+B5 +B5 +B10
+B8(D_+5V)
+B9(SW_+5V)
+B_PROTECT
+B7(A_+5V)
VIDEO/AUX
R
L
R
L
ATT
–20dB
Q108
REC/PLAY
CLK
CE
DI
L
R
BIAS
MUTING
AC BIAS
L
L
R
R
R
L
TAPE
TUNER
CD
PB
CNP6
FROM VCD SECTION
HEAD
ERASE
SWITCHING
SWITCHING
SWITCHING
BIAS
Q113
Q114
Q112
SWITCHING
OSC
BIAS
Q105
Q106
REC /P.B. HEAD
TAPE R-CH
L-CH
AUDIO PROCESSOR
LC75341
R
L
REC
R
L
RREC
LREC
SWITCHING L(TA)
R(TA)
/PLAYBACK AMP.
PLAYBACK AND RECORD
AN7345K
Q107
+B5
SYSTEM
MUTE
17
3
1
2
2
7
18
4
21
13
16
9
23
2
21
13
12
14
16
11
1
4
9
10
15
3
24
12
15
11
718
8
23
+B5
+B4
H/N
P.B
REC
A_+10V
LD_+8.5V
FM/AM
OUT
R
L
FM/AM
MPXIN
MO/ST
VCO
FM
DET
VCC
GND
AM IF
AM MIX
OUT
MIC JACK
MIC LEVEL
Q601
Q602 Q604
Q603
IC601
JK690
CNS6
Q104
Q101-
IC101
L103
Q111 Q110
Q109
Q860
JK1/2
VRK1
FM+B
+B5
CLK
+B5
AM IF
OSC
BUFF
10.7 MHz
DO
DI
CE
MO/ST
SWITCHING
FM/AM
IC302
LC72131
PLL(TUNER)
STEREO
AM RF IN
AM OSC IN
AM OSC OUT
FM
Q360
VT
OSC
X352
4.5 MHZ
AM BAND
COVERAGE
AM
TRACKING
FM RF
FM OSC
FM IF
T303 T306
L312 T301
X351
456 kHz
ZD351
5.1V
CF351
IC303
LA1832S
FM IF DET.
FM MPX./AM IF
CF352
T351
CF303T302
Q302
BF301
B.P.F
910
18
5413
21
7
98517
6
21
21
20 22 11
17
1615
13
14
12 20
15
162324
4
7
+B5
384
1
9
6
57
AM LOOP
ANTENNA
FM ANTENNA
TERMINAL
CNP301
SO302
IC301
TA7358AP
FM FRONT END
+B5
2
1
+B5
LATCH
CLOCK
DATA
ROUT
MIC1OUT
MIC2OUT
LOUT
LIN
RIN
VCC QK1
23
31
32
36
35
41
12
13
7
8
42
40
9
4
6
7
1
5
2
3
ICK2
TJM4558CD
OPE AMP.
ICK1
M65856SP
MIC AMP.
MIC IN
L
R
22
Figure 4-1 BLOCK DIAGRAM (1/3)

XL-G5000V/XL-G5000V(S)
4 – 2
+B10
+B10
+B10
+B3
+B10
0
+B3
T4.0A L 250V
VL+
VL-
VH+
VH-
GND
T4.0A L 250V
R-OUT
L-OUT
L
R
–B2
+B2
8
6
14
18
6
71
5
2F802
D802
D801
F801
AN80T53
IXA034AW
235671 4
T2A L 250V
T2A L 250V
AC_RLY NC
P_IN
AC_RLY
T_SOL
T_MOTOR
VOL_JOG
PROTECT
+B7(A_5V)
+
B
+B_PROTECT
)
13V
SW
VCC
GND
5.1V
8.5V
10V
SMUTE
TIME LED
SP_RLY
T_REC/PLAY
T_BIAS
VLOAD
TUN_SM/SPAN
VOL_LED
P_IN
SUPPLY CORD
AC POWER
SP DET
–VF
T.F
VDD
TRANSFORMER
POWER
REGULATOR
VOLTAGE
UNSW_5.6V AN78L05
VOLTAGE
REGULATOR
KIA7805AP
VOLTAGE
REGULATOR
SW701-SW72
1
VR701
VOLUME
KEY
SW722-SW72
7
KEY
ASS'
Y
MECHA
N
TAP
DRIVER
STK432-070
POWER AMP.
VF1
VF2
M971
RESET
SYSTEM MICROCOMPUTER
4.19403MHz
REMOTE SENSO
R
VDD
-20dBATT
+B10
+B10 LED701
VDD
+B3
FAN MOTOR
FL DISPLAY
CE
CLK
DI
DO
TO VCD
S
TO VCD SECTION
RESET
AVDD
REMOCON
HEADPHONES
SUB WOOFER
PRE-OUT
SPEAKER TERMINAL
M
SYSTEM
MUTE
48
32 413128
4443
27
242115121176
10
17 18 19 2034
2121 4445
78
69
60
59
80
83
49
52
62
66
84
2
3
1
31
30
29
47
53
56
41
42
45
5
79
5
8
9
36
3837 46
25
40
13
33
34
39
12 16
100
(MAIN)
MOTOR/
DRIVER
SOLENOID
10V
L
D_+8V
LED708
LED707
+B5 ILLU_LED
58
MULTI
REGULATOR
DSA_STB
DSA_DATA
DSA_ACK
MPEG_PWR
MOT_A+
MOT_A-
MOT_B+
MOT_B-
MIC_SW
PHOTO
PHOTO
KARA_LATCH
1
3
1
3
22
AC 110/127/220/
230-240V,50/60Hz
NEUTRAL
LIFE
VOLTAGE
SELECTOR
BLUE
BROWN
230-240V
220V
127V
110V
FL701
RX701
SW
SP
A
SE
L
Q906
XL700
Q701,702
Q712~715
Q904
Q901
IC901
Q
604
Q
603
IC854
IC852
Q
851
Q801
F804
F803
IC851
PT801
JK953
JK701
SO901
RL914
Q905
Q703
IC701
RELAY
Q711
Q719
Q710
CNP805
SW801
Figure 4-2 BLOCK DIAGRAM (2/3)

XL-G5000V/XL-G5000V(S)
4 – 3
FOCUS/TRACKING/
SPIN/SLED DRIVER
AGNDA
AGND
DGND
DGND
VGND
DGND
21 35 40
GND
GND
D_GND
D_GND
D_GND
TR–
TR+
TR+
FO+
FO+
FO–
FO–
F
C
B
A
E
VCC
PICKUP UNIT
TR–
VREF
CNP3
CNP5
CNP4 CNB1
CNP6
Q1
Q3
Q4
Q2
LDD
VREF
LDS
LVDD
RVDD
XVDD
AVDD1
AVDD2
VDD
VDD5
VVDD
A
+5V
A
+5V
D1
+5V
+8V
+5V
FIN
EIN
CIN
AIN
DIN
BIN
+B8
+B8
+B8
–
–
+
+
TR–
TR+
CAM–
MOT_A+
MOT_A–
MOT_B+
MOT_B–
CAM+
+5V
PHOTO
DISC
CLAMP
TRAY_SW1
TRAY_SW2
D_GND
CD_RESOUT
TRAY_SW2
PHOTO
D_GND
+5V
A_+5V
+B4
+B
+B8
0.82µH
L1
LASER
DRIVER
CD
DIGITAL SIGNAL PROCESSOR
LC78637E
IC1
SLDO
SPDO
FDO
TDO
XIN
XOUT
DRF
MON13
*RES
*WRQ
DO
DI
CL
CE
FROM DISPLAY SECTION TO MAIN SECTION TO DISPLAY SECTION
D_GND
16.9344 MHz
XL1
+B4
R-CH
AGND
L-CH
DGND
A_+10V
WRQ
DRF
CE
DO
DI
CL
CLAMP
DISC
TRAY_SW1
+8V
M
M
34 33810 3231 2421
22
23
19
20
5
1
2
35
36
3
4
5
6
30 26
7
25 27
9
28
11
13
15
17
49
48
5556576977585960 51 50 44 43 40 2837 17 6
19
20
18
10
41
46
47
7
38
75
2
3
4
5
13
12
2625 21 22 23 24
64
63
65
66
67
34
62
61
68
27
1
2
3
5
4
6
7
8
1
2
3
4
5
6
13
12
11
10
9
8
7
14
1
2
3
4
5
6
7
8
9
10
11
1
2
3
4
5
6
7
8
9
10
11
6
4
3
1
2
VCONT6 VCONT5
VREFIN
SVCC
PVCC1
VO4–
VO3+
VO3–
VO4+
PGND1
SGND
PGND2
VO1–
VO1+
VO2–
VO2+
VIN2
VIN1
VIN4
VIN3
VO6+
VO6–
VO5+
VO5–
LA6261
IC2
REV5
FWD5
REV6
FWD6
PVCC2
SLED
MOTOR
SPINDLE
MOTOR
PICKUP-IN
–
+
–
+M
MTRAY
MOTOR
DISC
CLAMP
TRAY SW1
TRAY SW2
MAIN CAM
MOTOR
PHOTO
INTERRUPTER
CONT5
MPEG_RESET
72
CONT1
/PUIN SW
ESS_DI
PAL/NTSC
TWS/SPLLOUT
AOUT/SEL_PLL0
ATFG/SEL_PLL1
ARFS
ARFS
ARCLK
ARCLK
AJN
AJN
RSCK_SER_IN
RSD/SPLL0
RWS/SPLL1
PAL/NTSC
DSA_STB
MPEG POW
DSA_DATA
DSA_ACK
ESS_DO
ESS_STB
ESS_ACK
LRSY
DATA
DATACK
(+B5)
(+B4)
(+B8)
(+B9)
SW1A
M1A
M2A M1
RX1
SW3
SW2
SW1
SW4
M2
AOL+
AOL–
AOR–
AOR+
+B5
+B5
+B8
L
R
+B7
ICM4
IX0528AW
EPROM
ICM3
ES3889F
VIDEO-ENCODER/AUDIO DAC
ICM2
ES3880FM
MPEG-DECODER
IC3
TJM4558CD
OPE. AMP.
ICM1
LC1625635T
4M/16M
D-RAM
QM1
QM2
QM3
QM4
JK690
VIDEO OUT
VDAC
AUX4
ACLK
ATCLK
AUX7
AUX3
AUX2
TDMDR
TDMFS
TDMCLK
VCC
VSS
LA0
LROMCE
LOE
LA11
LA12
LA17
LA17
VCC3
VCC
DBUS0
DBUS15
13125 26 72 75 77 9181 9383 85 95 97 99 8
100
6459 60534490787366
51311
49
88 89 90 91 93 94 95
2061
98 54 48 47
97 96
AUX0
AUX1
4546
32
22
24
1
2
12
25
30
16
23
~
68
65
64
79
82
87
~~
13
15
17
21
~~
2
5
7
10
13
14
29
28
27
3
2
39
36
34
31
26
22
~
13
28
~
4
12
99
~
~
MA0
DWE
RAS
MA8
~
~
~~~
16
19
~
~
LA0
~
LD0
LD7
55
62
~
~
~
~
~~
~
32165
48
47
46
45
41
43
51
86
89
92
94
96
98
81
5756 62 63
2
3
5
7
1
84
6
69
AUX4
17
19
21
22
MCLK
TSO
TSCK
13
RST
MCLK
TWS
TSO
TSCK
AUX6
52
CAS
DSC_D7
DSC_D6
DSC_D5
23 33 37
DSC_D4
DSC_D3
DSC_D2
DSC_D1
DSC_D0
PCLA
79
44
PCK
PCLA2X
80
43
PCK2
HSYNC
82
41
HSYNC
VSYNC
YUV7
YUV0
84
40 39 32
VSYNC
AUX5
10
53
DSC_5
LCSI
6
66
DSC_C
RESET
24
29
RSTOUT
92
DOE
Figure 4-3 BLOCK DIAGRAM (3/3)
This manual suits for next models
3
Table of contents
Other Sharp Stereo System manuals

Sharp
Sharp QT-CD180 User manual

Sharp
Sharp XL-B510 User manual

Sharp
Sharp CD-BA200 User manual

Sharp
Sharp CD-XP500A User manual

Sharp
Sharp CD-BH20 User manual

Sharp
Sharp XL-1200 User manual

Sharp
Sharp CD-PC1881V User manual

Sharp
Sharp CD-MD3000H User manual

Sharp
Sharp XL-3500H User manual

Sharp
Sharp CD-C449W User manual

Sharp
Sharp CD-DK891N User manual

Sharp
Sharp CD-SW300 User manual

Sharp
Sharp QT-CD121H User manual

Sharp
Sharp CD-DP2400H User manual

Sharp
Sharp CD-BA3000 User manual

Sharp
Sharp WQ-790W User manual

Sharp
Sharp CD-MPX860H User manual

Sharp
Sharp XL-DV60 User manual

Sharp
Sharp VZ-3500H User manual

Sharp
Sharp GX-CH170X User manual