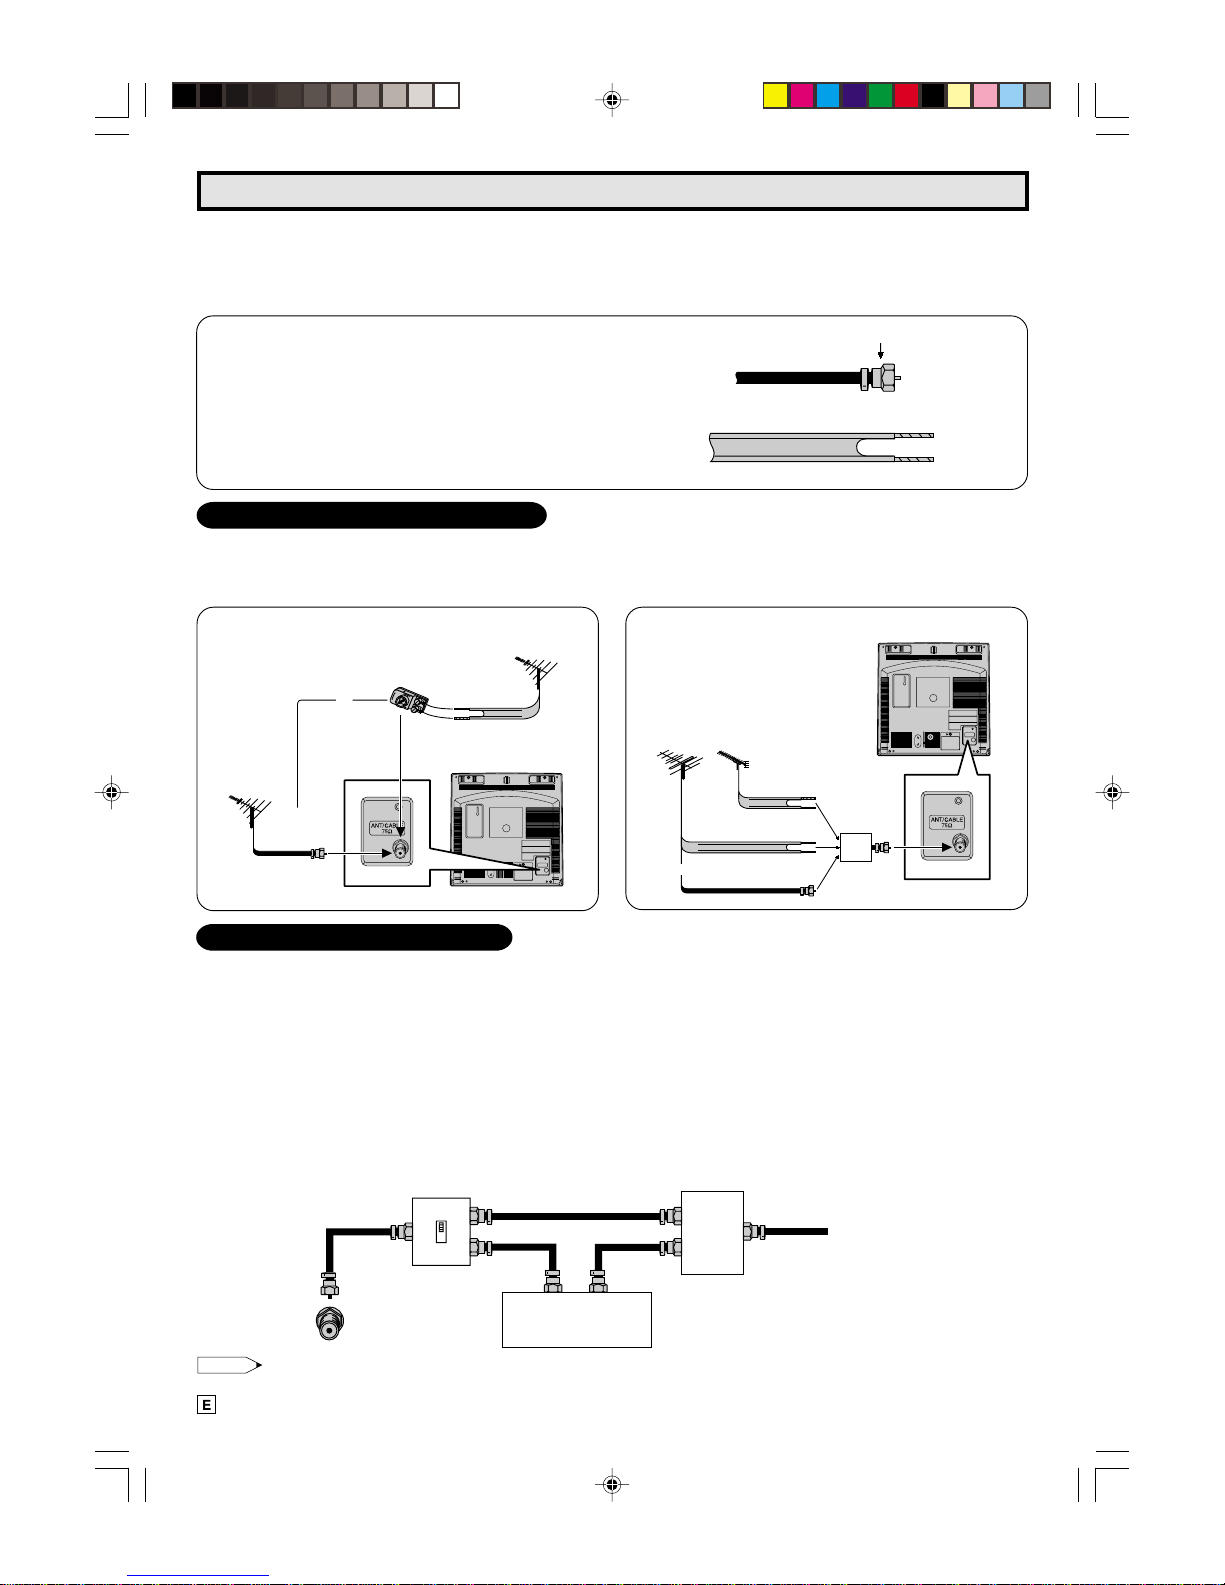
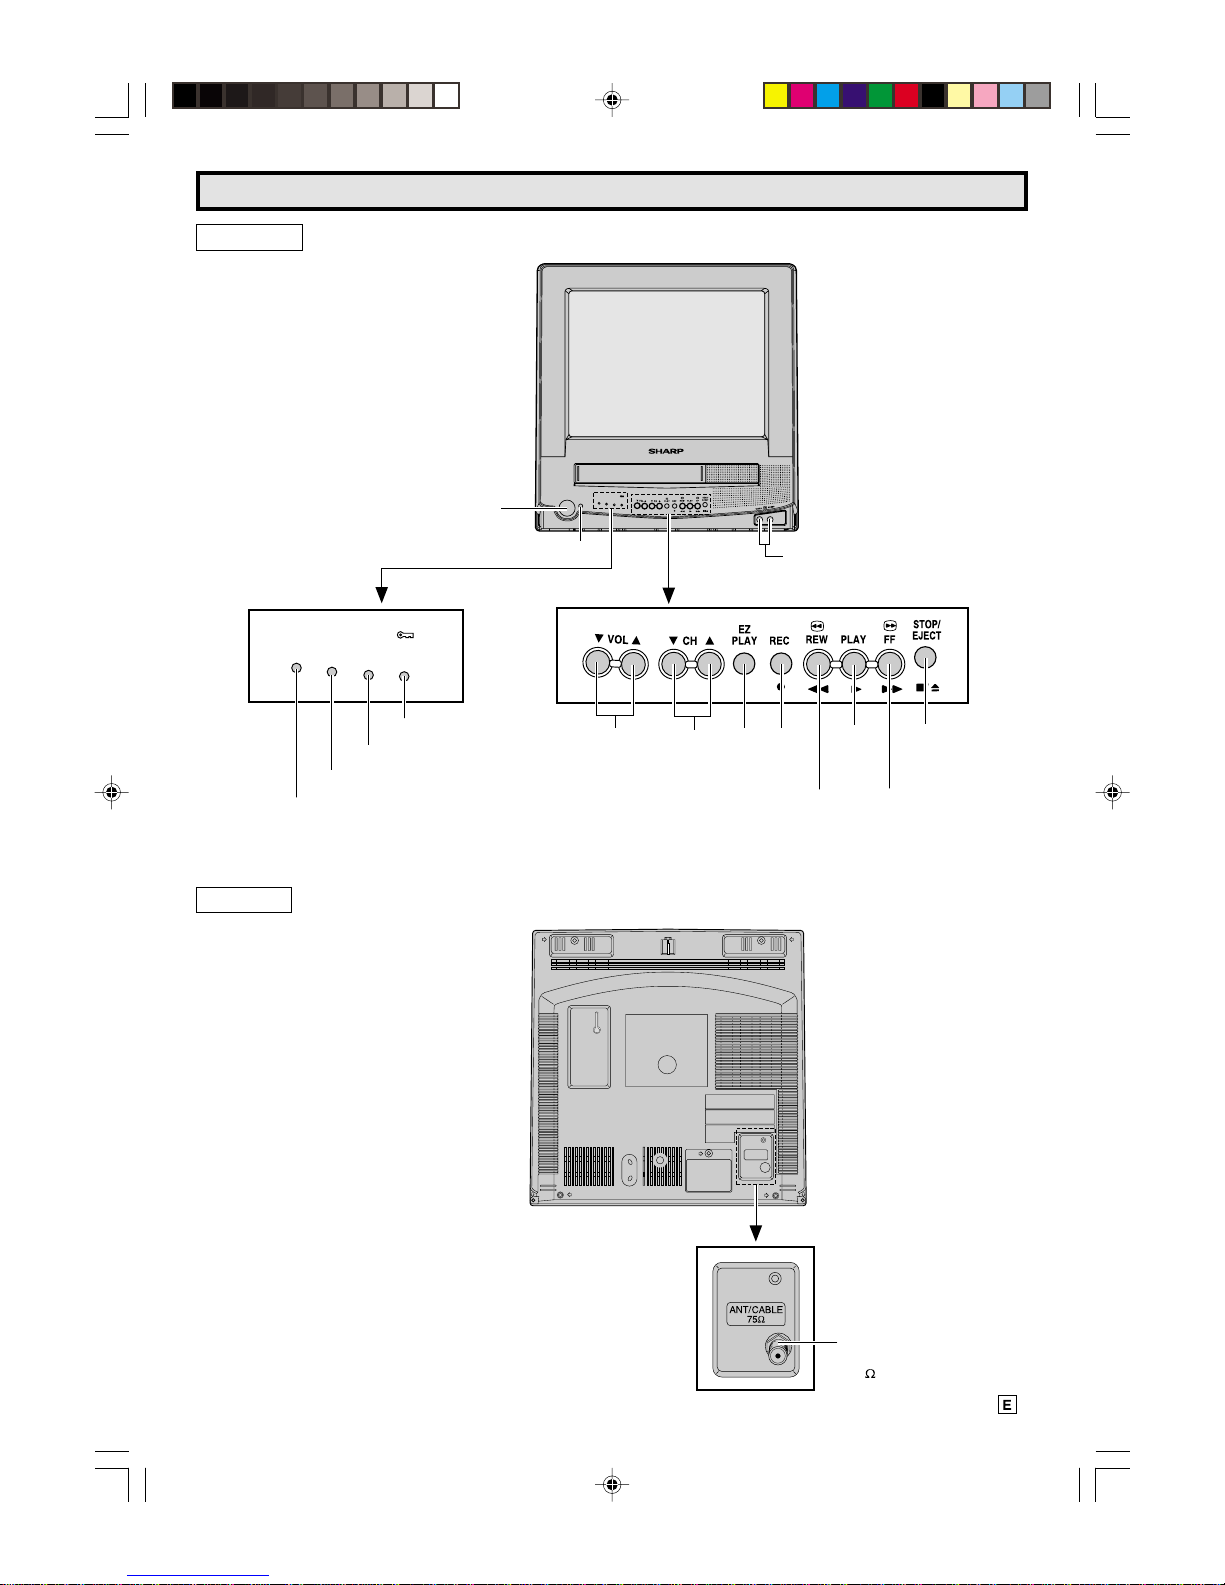
7
Watching A TV Program
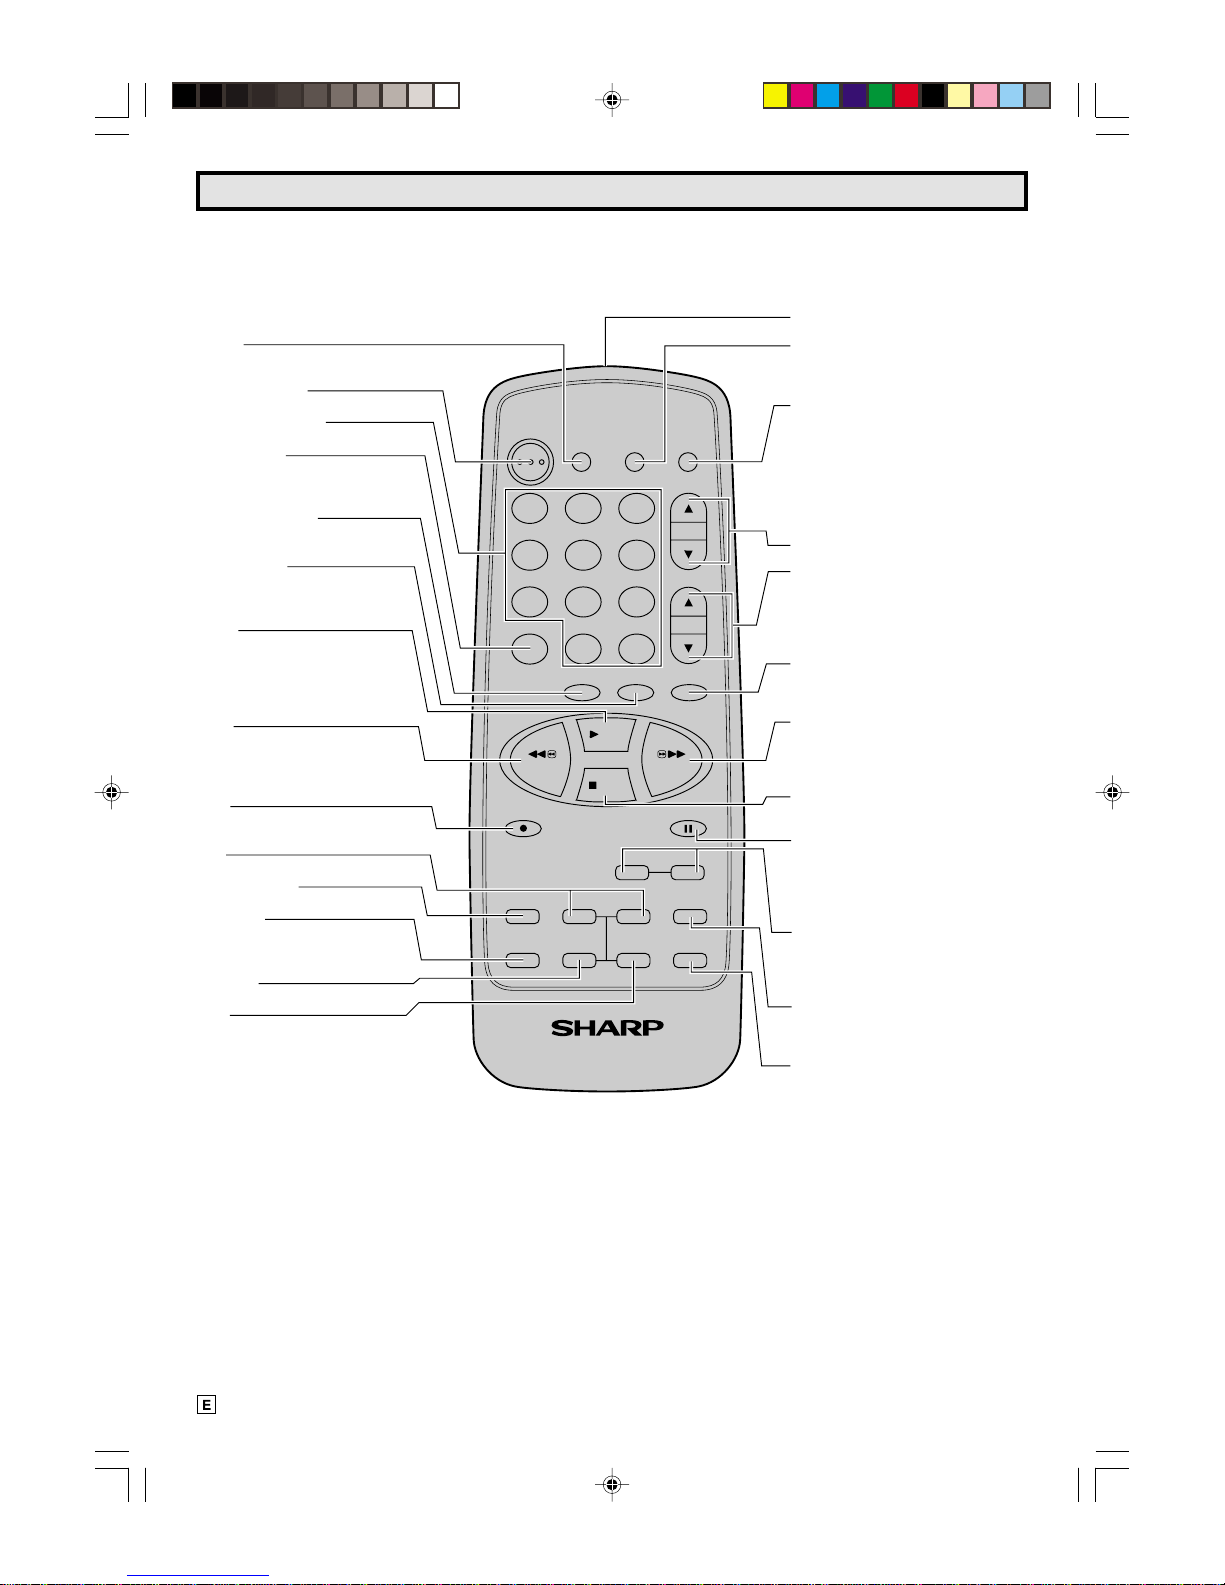
1POWER
• Press the POWER button to turn on the TV.
(The POWER indicator will be lit in RED.)
Sound will start instantly and picture will appear 5 to 10
seconds later.
• Press the POWER button again to turn off the TV.
(The POWER indicator will be turned off.)
2VOLUME
• Press the VOL UP(8) button to increase the sound to the
desired level, and then release.
• Press the VOL DOWN (9) button to decrease the sound
level.
LTo turn the sound off temporarily
• Press the MUTE button on the Remote Control to turn the
sound off.
“MUTE” will appear on the screen to confirm that this fea-
ture is in effect.
• Press the MUTE button again to restore the sound to its
previouslevel.
3CHANNEL SELECTION
• The desired channel can be selected instantly by press-
ing the CHANNEL SELECT buttons (0 ~ 9, 100) on the
Remote Control, or CHANNEL UP (8)/DOWN (9) but-
tons on the Remote Control or on the TV.
• To select cable channel numbers greater than “ 99 ”. First
press “ 100 ” button on the Remote Control; then the two
other numbers buttons to complete your total channel
number selection.
• The selected channel number will appear on the screen.
Example:
(1) To select channel 2 :
Press the “ 0 ” and “ 2 ” buttons.
To select channel 69 :
Press the “ 6 ” and “ 9 ” buttons.
To select channel 125 (CATV mode only) :
Press the “ 100 ”, “ 2 ” and “ 5 ” buttons.
(2) The memorized channel selection will changeinsequence
from the low preset channel to the high preset channel
when the CH UP (8) button is pressed, and vice versa
when the CH DOWN (9) button is pressed after you pre-
set the desired channels into the memory.
Note:
• For channel memory, please refer to page 11.
4DISPLAY CALL
• Pressing the DISPLAY button on the Remote Control will
changethedisplayon the screen in the following sequence.
Note:
• WhenCLOSEDCAPTION is turned ON,theONSCREEN
DISPLAY turns off automatically after about 3 seconds.
• For CLOSED CAPTION information, please refer to
pages 9 ~ 10.
Press Once* • Time and Date
• Channel Number
• (Tape Operation Display)
• (Tape Speed Mode — SP, LP, EP)
• (Tape Counter)
After about 3 • Channel Number
seconds • (Tape Operation Display)
• (Tape Speed Mode — SP, LP, EP)
• (Tape Counter)
PressTwice • Cleans Display
DISPLAY
Itemsin ( ) willbe displayed whena cassette isloaded in the
VCR.
5MENU FUNCTIONS
LCalling up the Functions
(1) Press the MENU button on the Remote Control to call the
MENU screen.
(2) Press the + or – button on the Remote Control to select
the desired function mode. Each time that you press the +
or – button, the “ :” mark moves down or up.
(3) Press the SET button on the Remote Control to access
desired function mode.
• To leave the MENU screen, press the MENU button on
the Remote Control.
MENU
TIMER
VIDEO ADJUST
CLOSED CAPTION
FUNCTION
CLOCK
LANGUAGE
CH SETTING
SELECT + / — : SET SET
PREVIOUS RETURN : QUIT MENU
(MENU screen)
6TRILINGUAL ON SCREEN DISPLAY
LThe language for this unit’s ON SCREEN DISPLAY can
be set to ENGLISH, SPANISH or FRENCH.
LSetting the ON SCREEN DISPLAY Language
(1) Select “LANGUAGE” from
the MENU screen by
pressing + or – button,
then press the SET
button.
(2) Press the + or – button
to select the language
(English, Spanish or
French) you wish to
display, then press the
SET button.
SELECT + / —: SET SET
PREVIOUS RETURN : QUIT MENU
MENU
TIMER
VIDEO ADJUST
CLOSED CAPTION
FUNCTION
CLOCK
LANGUAGE
CH SETTING
LANGUAGE
SELECT + / —: SET SET
PREVIOUS RETURN : QUIT MENU
ENGLISH
ESPANOL
FRANCAIS
05-07 13VT-CR10[E].pm65e 15/5/01, 7:51 pm7