Enables individual channel setting.
!Press
MENU
to call MENU screen.
@Press / to select CH-SETTING
icon.
#Press / to enter CH-SETTING
menu.
$Press / to select desired
setting.
%Each time you press / , setting
for individual items changes as follows:
•POSITION
The channel position changes to the higher or lower number.
•COLOUR
•SOUND
•SKIP
ON OFF
When set “SKIP”to “ON”, the channel number are set to SKIP. To turn off SKIP,
press the number buttons to select the desired channel and then set “SKIP”to
“OFF”.
•MANUAL (FINE tuning)
i) Each time / is pressed, the
frequency changes to allow fine tuning and
the colour of channel number changes to
yellow to indicate fine tuning.
ii) Press / for more than 2
seconds, the “Manual Channel Tuning”will
start. If a signal is found, the Manual Channel
Tuning will stop searching.
•AUTO
Press / and Auto Channel Tuning
is started. Auto tuning bar will shown during
Auto Search only.
^Press
MENU
until normal screen appears.
•Switching COLOUR system:
Set the system to “AUTO”for normal TV reception. The AUTO mode automatically detects the receiving signal system
and changes the reception system of the TV set. When the picture is not stable, switching to an appropriate system
may improve the picture quality.
•Switching SOUND system:
When the sound is not stable, switching to an appropriate system may improve the sound quality.
POS I T I ON
USO ND
KSIP
MAN U LA
SELE T :CDAJUS :TRETUNR:MENU
AUT O
COL OUR
21
B/G
FOF
168 . 25MHz
AU OT
E8 CHANNEL SETTING
POS I T I ON
USO ND
KSIP
MAN U LA
SELE T :CDAJUS:TRETUNR:MENU
AUT O
COL OUR
21
B/G
FOF
168 . 25MHz
AU OT
CH
CH
MENU/PRESET
[ Behind the door ]
AUTO SECAMPAL NTSC4.43 NTSC3.58
B/G D/KI
CH
CH
MENU
POS I T I ON
USO ND
KSIP
MAN U LA
SELE T :CDAJUS :TRETUNR:MENU
AUT O
COL OUR
21
B/G
FOF
168 . 25MHz
AU OT
[ TV Set (Bottom) ]
Power indicator
POWER
Turn on the power
•When the power indicator is off, press POWER .
•When the power indicator is red, press on the remote control. The power
indicator changes to green and a picture appears.
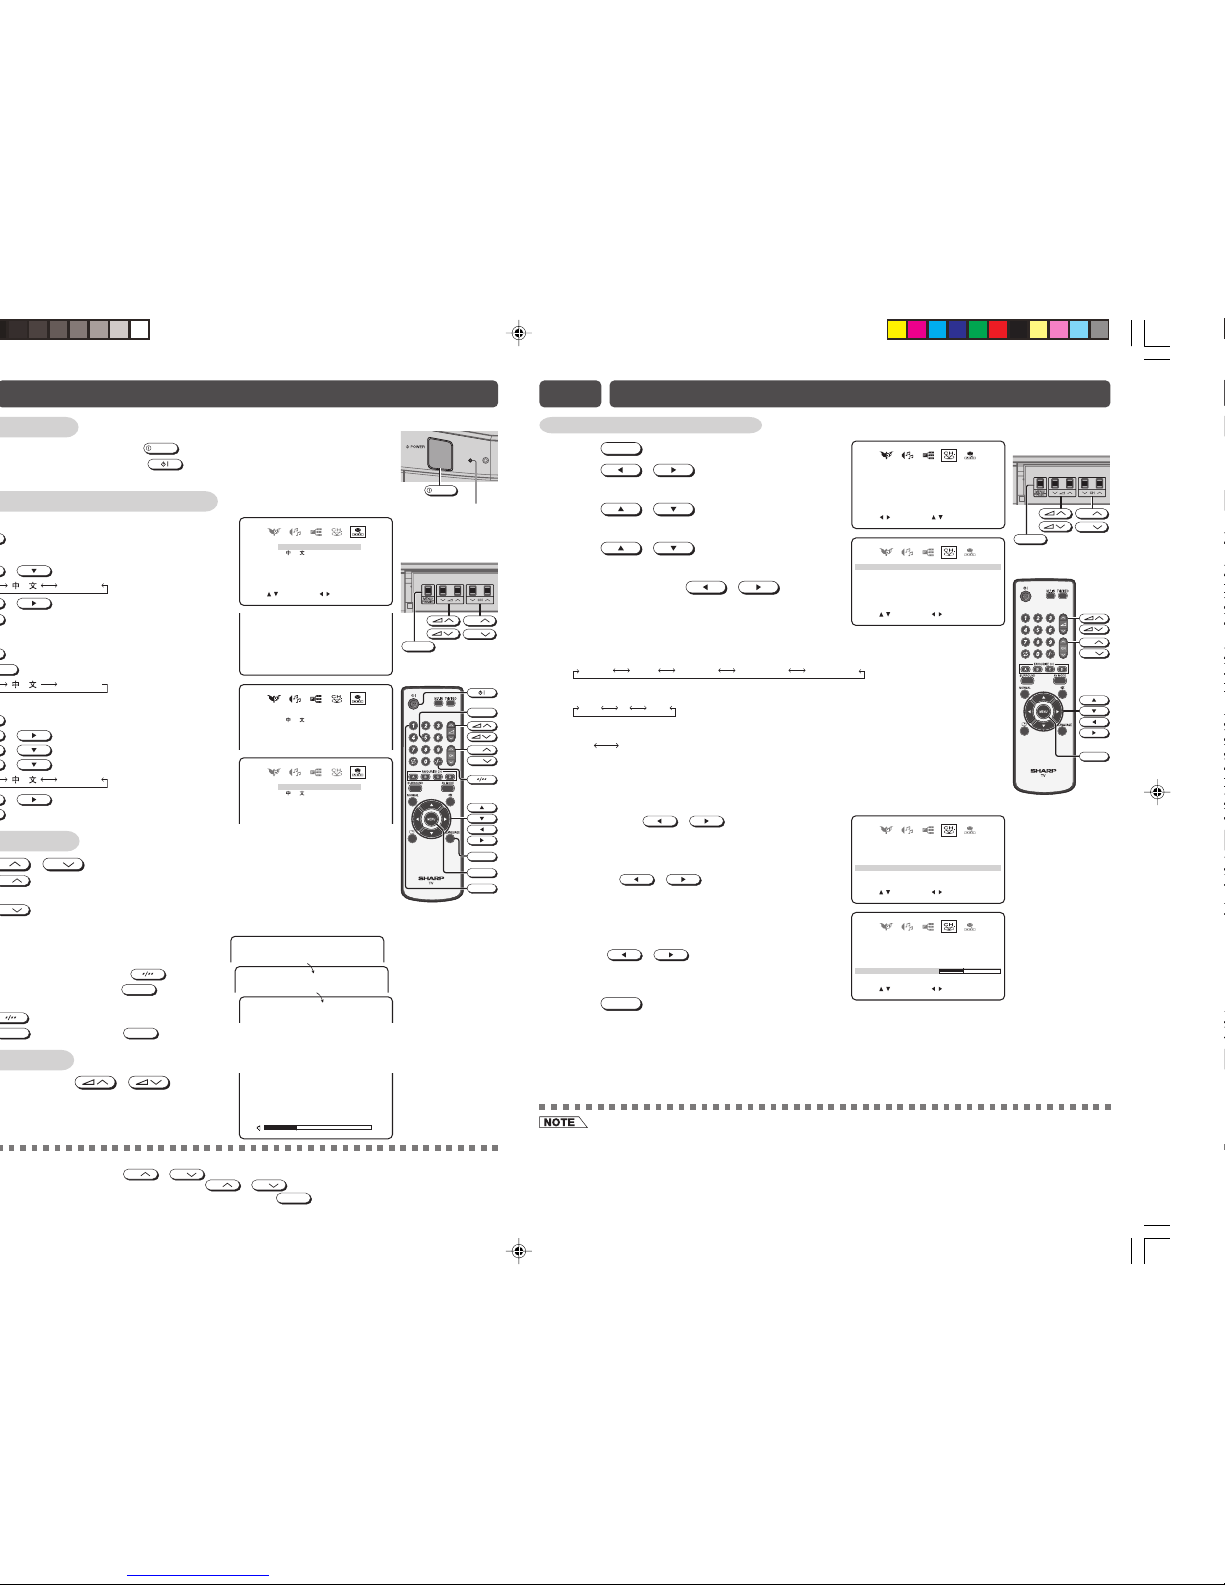
On-screen display language selection
TV set
•Press
MENU/PRESET
for more than two seconds, the
LANGUAGE menu appears.
•Press / to select desired language.
•Press / to set the language.
•Press
MENU/PRESET
until normal screen appears.
Remote Control
•Press
LANGUAGE
to select desired language.
•Pressing
LANGUAGE
changes the language as shown below.
MENU screen
•Press MENU to call MENU screen.
•Press / to select LANGUAGE icon.
•Press / to enter LANGUAGE menu.
•Press / to select desired language.
•Press / to set the language.
•Press MENU until normal screen appears.
CH
CH
MENU/PRESET
[ Behind the door ]
ENGLISH MELAYU
CH
CH
5
1
LANGUAGE
MENU
Channel selection
!Using
CH
/
CH
•Press CH and channels change as shown below.
1 /2 /... /98 /99 /COMPONENT /AV1 /AV2 /0 /1 /2 ...
•Press CH and channels change as shown below.
1 /0 /AV2 /AV1 /COMPONENT /99 /98 /... /2 /1 /0 ...
@With the number buttons (on remote control)
•To select a one-digit channel, such as 5, press
5. If “5-”is indicated, press to select
one-digit input, and then press 5again.
•To select a two-digit channel, such as 15,
press to select the two-digit input.
Press 1, and then press 5.
Adjusting volume
!Adjust volume using / .
•The volume bar disappears approximately five
seconds after the volume has been adjusted.
– –
1
–
15
E7 BASIC OPERATION
VOL UM 1E
ENGL I SH
ME L AY U
SELE T :CENTE:RRETUNR:MENU
ENGLISH MELAYU
ENGL I SH
ENTE :R
POS I T I ON
USO ND
KSIP
MAN U LA
SELE T :CRETUNR:MENU
AUT O
COL OUR
21
B/G
FOF
168 . 25MHz
AU OT
ENGLISH MELAYU
ENGL I SH
ME L AY U
ENGL I SH
ME L AY U
•When the power indicator is red, either CH / CH on the TV can be pressed to turn on the power.
•Channels that have been skipped cannot be selected by CH / CH .
•The COMPONENT, AV1 and AV2 input channels can be selected using TV/VIDEO .
29Q-FG1M[EN]3-4.p65 27/12/06, 1:52 PM4