Shengmilo MX03 User manual

1
2
OWNER'S MANUAL UPDATES
The following information updates your ebike's Owner's Manual. Please read it carefully. Keep your owner's manual and any
other documents that came with your ebike. All content in this update and the manual is subject to change or withdrawal
without notice. Visit www.shengmilo-bikes.com to view and download the latest version. Shengmilo makes every effort to
ensure the accuracy of its documentation and assumes no responsibility or liability if any errors or inaccuracies appear
within.
WARNING: Incorrect assembly, maintenance, or use of your ebike can cause component or performance failure, loss of control, serious injury,
or death. Even if you're an experienced bike rider, you must read and understand the entire manual and any documentation provided for
subcomponents or accessories before riding. If you are not sure you have the experience, skills, and tools to correctly perform all assembly
steps in the manual and the assembly video at www.shengmilo-bikes.com, consult a local, certified, reputable bike mechanic.
WARNING: To reduce the risk of injury, close supervision is necessary when the product is used near children.
Guard against rust, water damage, and corrosion
Like any vehicle used outdoors, your ebike needs care to ensure it isn't damaged by the elements. Follow these steps for a long, healthy life for your
ebike:

3
•Store under shelter and in an upright position; avoid leaving the bike in the rain or exposed to corrosive substances such as water, salt, or de-icing
substances. If exposed to rain, dry your bike afterward, and apply an anti-rust treatment to the chain and other unpainted steel surfaces.
•To clean your ebike, turn the bike and battery off and wipe the frame with a clean, damp cloth. If needed, apply a mild, non-corrosive detergent
mixture to the damp cloth and wipe the frame. Dry by wiping with a clean, dry cloth. Never use high-pressure water on your bike. Wipe down your
bike frequently and wipe or spray all unpainted mechanical parts with anti-rust treatment.
•If painted metal parts become scratched or chipped, use touch up paint or nail polish to prevent rust.
•Never immerse or submerge the bike or any components in water or liquid, which can damage the electrical system.
•Avoid riding on the beach, in coastal areas with high-salinity fog, or on surfaces treated with salt or de-icing compounds. Doing so exposes your
bike to salt or other substances that are very corrosive. Corrosion of electrical components can lead to permanent, irreversible damage that can
cause battery failure, electrical system failure, or electrical fire. Damage from corrosion is not covered under warranty.
WARNING:Damage to your ebike's electrical system caused in any manner, including water intrusion, can lead to
battery failure, electrical system malfunction, or electrical fire and consequent property damage, injury, or death. Follow all
recommendations to minimize chance of water damage. If you have any questions, contact Shengmilo Product Support.

4
WARNING: Using a damaged battery or charger can create additional bike damage or a fire hazard. Stop using your battery and
charger and contact Shengmilo immediately if any of the following occur: (1) Your charger's flexible power cord or output cable or any
of the electrical cables on your bike is frayed, has broken insulation, or any other signs of damage, (2) Your battery or charger is physically damaged,
non-functional, or performing abnormally, (3) Your battery or charger experienced a significant impact from a fall or crash, with or without obvious
signs of damage, or (4) Your charger becomes too hot to touch (it's designed to get warm with normal use), makes a funny smell, or shows other signs
of overheating. Store any damaged battery or charger in a safe location and, as soon as possible, recycle or otherwise dispose of it according to local
rules. Contact Shengmilo if you have any questions or to purchase a compatible replacement battery or charger.
How the electrical system works
This ebike is equipped with two ways for a rider to use power assistance from the motor to propel the bike forward: a pedal assist system (PAS) and a
half twist throttle.
HOW PEDAL ASSIST WORKS
The rider can engage the pedal assist system (PAS)while pedaling, and it will call up assistance from the motor to help propel the bike forward.
Pedal assist uses a cadence sensor built into the drivetrain of the bike. The sensor detects when the rider revolves the pedals and signals the electric
motor to provide the level of pedal assistance that has been selected.
HOW THE THROTTLE WORKS
The throttle is located on the right side of the handlebar. The rider can use it with a twist of the throttle grip to propel the bike forward without pedaling.

5
To engage the throttle while riding, slowly and carefully rotate it toward yourself. The more you twist, the more powerfully the throttle will propel the
bike forward. Once you release the throttle or apply the brakes, the throttle will no longer propel the bike forward. Always keep one hand on the brake
lever and be prepared to squeeze the lever to disengage the throttle if needed, or turn off the bike to prevent accidentally engaging the throttle.
Ebikes from Shengmilo are equipped with an on/off switch for the throttle. These switches can be set to “off ” even while the bike electrical system is
on in order to prevent use of the throttle. You should not use your throttle if regulations where you ride prohibit throttle use on ebikes. It is your
responsibility to research and follow local ebike regulations and all other traffic law.
Do not touch the brake rotor
WARNING: Touching the brake rotor, which has sharp edges and can get very hot while you're riding, can
cause serious injury, slicing damage, or burns. The brake rotor heats up from normal friction when the brake pads
press against the brake rotor to slow or stop the bike. Touching the brake rotor with bare skin can also transfer natural oils to
the rotor, which can decrease braking performance. Do not touch the brake rotor, especially when it's in motion or after
you've been riding your bike. Touch the brake rotor only for necessary maintenance when it is cool, not moving, and while
you are wearing gloves or using other appropriate protective equipment.
Warranty update
Notwithstanding the warranty information in the manual, the warranty period begins at the date of receipt of this ebike by the customer. The latest
version of the warranty terms is available at www.shengmilo-bikes.com.

6
Welcome
Thank you for purchasing the Shengmilo MX03 from Shengmilo® Global Official Store.
We take pride in bringing you a quality product that will offer years of enjoyment. Please read and understand this manual fully before assembling and riding
your bike.
If you have questions after reading this manual, please refer to the Shengmilo Support, contact us by email.
We are here to help!
Shengmilo Support: www.shengmilo-bikes.com
Email: support@shengmilo-bikes.com
Thanks for riding Shengmilo E-bikes!

7
Using This Manual
This manual contains details of the product, its equipment, and information on operation, maintenance, and other helpful tips for owners. Read it carefully and familiarize
yourself with the ebike before using it to ensure safe use and prevent accidents. This manual contains many warnings and cautions concerning the safe operation and
consequences if proper setup, operation, and maintenance are not performed. All information in this manual should be carefully reviewed and if you have any questions
you should contact Shengmilo immediately.
The notes, warnings, and cautions contained within the manual and marked by the triangular Caution
Symbol at the right of this page should be given special care. Users should also pay special attention to
information marked in this manual beginning with NOTICE.
Keep this manual, along with any other documents that were included with your bike, for future reference, however all content in this manual is subject to change or
withdrawal without notice. Visit www.shengmilo-bikes.com to view and download the latest version. Shengmilo makes every effort to ensure the accuracy of its
documentation and assumes no responsibility or liability if any errors or inaccuracies appear within.
Assembly and first adjustment of your bike from Shengmilo requires special tools and skills and it is recommended that this should be done by a certified, reputable bike
mechanic if possible.
Because it is impossible to anticipate every situation or condition that can occur while riding, this manual makes no representations about the safe use of bikes under all
conditions. There are risks associated with the use of any bike that cannot be predicted or avoided and are the sole responsibility of the rider.

8
Table of Contents
Using This Manual ....................................................................................................................................................................................................... 7
General Info ..................................................................................................................................................................................................................9
Assembly Instructions .................................................................................................................................................................................................13
Battery Charging .........................................................................................................................................................................................................24
Operation .................................................................................................................................................................................................................... 30
Maintenance................................................................................................................................................................................................................42
Troubleshooting ..........................................................................................................................................................................................................47
Warnings and Safety...................................................................................................................................................................................................49
Limited Warranty ........................................................................................................................................................................................................54
Link to Assembly Video and Online Resources ......................................................................................................................................................... 60

9
General Info
Assembly and Fit
Correct assembly and fit are essential elements of ensuring your bicycling safety, performance, and comfort. Even if you have the experience, skill, and tools to complete
these essential steps before your first ride, Shengmilo recommends having a certified;reputable bike mechanic check your work.
NOTICE: If you do not have the experience, skill, and tools to complete assembly and fit, Shengmilo highly recommends having a certified, reputable bike mechanic
complete these procedures as well as any future adjustments or tuning.
NOTICE: A critical aspect of assembling your bike by Shengmilo is securing the front wheel and checking the tightness of the rear wheel axle nuts. All bikes by
Shengmilo use a quick release front wheel mounting mechanism and the rear wheel is bolted on. These mechanisms may become loose or unsecured during shipment or
over time. The torque and security of all wheel mounting hardware should be inspected upon arrival and on a regular basis. Both wheels need to be properly secured
before operating your bike.
Mandatory Equipment and Use Locations
Before all rides, ensure you have all required and recommended safety equipment and are following all laws pertaining to using an electric bike in your region. For
example, these laws may specify the need for mandatory equipment, use of hand signals, and where you can ride.
Changing Components or Attaching Accessories
The use of non-original components or spare parts can jeopardize the safety of your ebike, void your warranty and, in some cases,
cause your ebike to not conform with laws pertaining to your bike.
The replacement of original components or installation of third-party accessories or accessories from Shengmilo not explicitly recommended for your
bike model is at your own risk. Using aftermarket accessories or components that have not been tested by Shengmilo for safety and compatibility may
void your warranty, create an unsafe riding condition, damage to property or your bike by Shengmilo, or result in serious injury or death.

10
Safety Check Before Each Ride
Always check the condition of your bike before you ride in addition to having regular maintenance performed. If you are unsure of how to conduct a complete check of
the condition of your bike before every ride, you should consult a certified, reputable bike mechanic for assistance. See the Pre-Ride Safety Checklist for more
information.
Electrical System
The electrical system on your ebike offers various levels of power assistance and lighting for different operating conditions and user preferences. It is critical that you
familiarize yourself with all aspects of your ebike's electrical system and check to see that it is working correctly before every ride. The front and rear brake levers contain
safety power cutoff switches, which disable the hub motor's assistance when applied, and both levers should be checked for correct operation. The throttle should provide
smooth acceleration when gradually applied. If the throttle, brake lever cutoff switches, pedal assistance, or lighting are functioning abnormally, intermittently, or not
working, please discontinue using your ebike immediately and contact the Shengmilo Product Support team for assistance.
Brakes
Ensure brakes are working correctly, all braking system components are free from damage, and properly secured. When you fully squeeze the brake levers, ensure neither
the front nor rear brake levers touch the handlebar. Take your bike to a certified, reputable bike mechanic to have the brakes repaired if you find a problem.
Tires and Wheels
Your wheels should always spin straight and must be repaired or replaced if they wobble side to side or up and down when spinning. If your wheels become untrue or
spokes loosen, which can happen with normal use, we recommend that a certified, reputable bike mechanic performs all wheel tuning and truing operations on your bike
from Shengmilo. Do not attempt to true wheels or tighten spokes unless you have adequate knowledge, tools, and experience. Ensure the tires and inner tubes are in good
working condition without any visual damage and have the correct amount of air pressure. Always replace tires and inner tubes with punctures, cuts, or damage before
you ride. Tires without the correct amount of air pressure can reduce performance, increase tire and component wear, and make riding your bike unsafe.

11
Quick Release Levers
Quick release levers are located on your ebike for securing the seatpost and the front wheel to the bike. These provide convenience to the user since they allow the
front wheel to be removed and the seatpost to be adjusted without tools. Since quick release levers can be loosened during transportation, or accidentally between
or during rides, it is important that you regularly check to ensure these components are properly secured.
Accessories, Straps, and Hardware
Ensure all hardware is secured and all approved accessories are properly attached per the specific component manufacturer's instructions. It is good practice to
look over all hardware, straps, and accessories before each ride and if you do discover something is wrong or find something you are not sure about, have it
checked by a certified, reputable bike mechanic.
Suspension, Handlebar, Grips, and Seat Adjustments
The suspension fork on your ebike will affect the handling of the bike so you must understand how it works before use. The suspension fork should be properly
adjusted for your weight and terrain. Ensure the handlebar and handlebar stem are properly aligned, fitted to the user, and secured to their recommended torque
values. Handlebar grips should not move easily on the handlebar end. Loose, worn, or damaged handlebar grips should be replaced before you ride and can be
purchased from www.shengmilo-bikes.com The seat and seatpost should be properly aligned, fitted to the user, and the seatpost quick release should be properly
tightened, fully closed, and secured before riding.
Battery Charged, Secured, and Unplugged
Ensure the battery is adequately charged and operating properly. The battery gauge on the LCD display and charge status indicator on the battery should read
similarly. Ensure the battery charger is unplugged from the outlet, battery, then stored in a safe location before you ride. The battery MUST be locked onto the
frame battery mount properly before use. Do not operate the electrical system if the battery is removed.
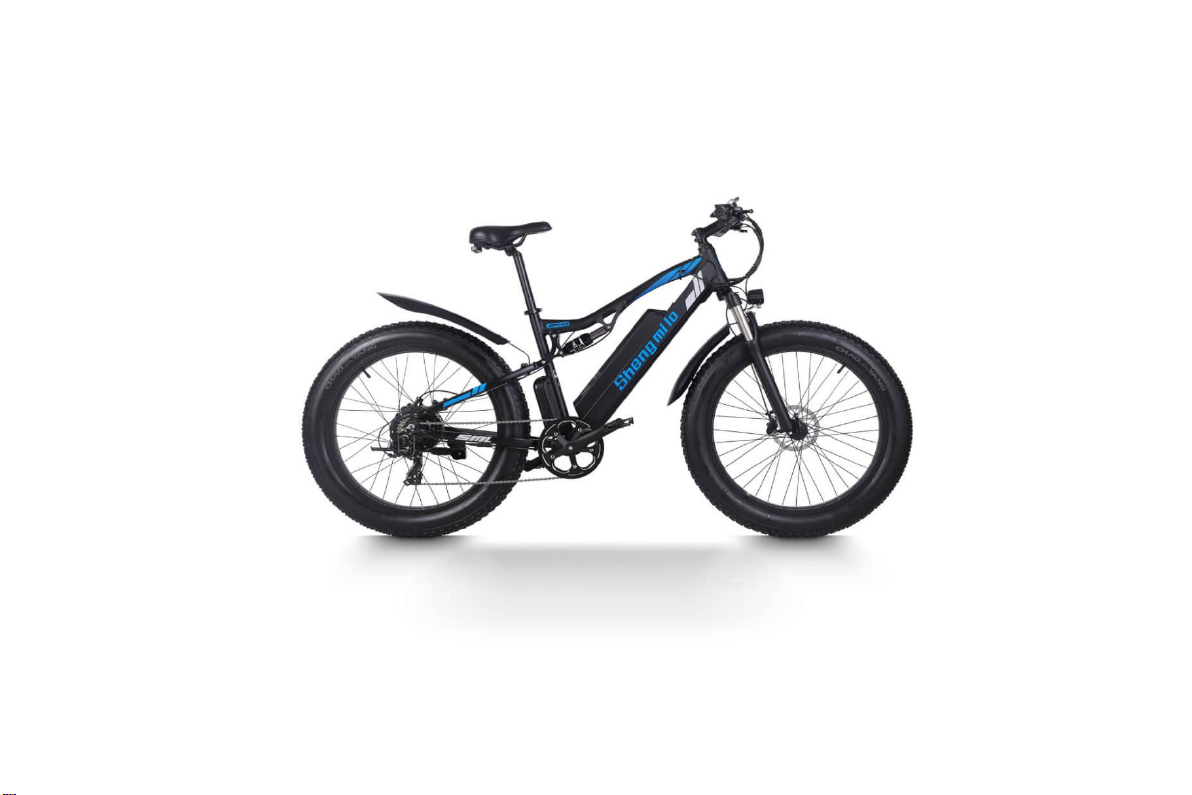
Assembled Shengmilo MX03

13
Assembly Instructions
NOTICE: The following steps are only a general guide to assist in the assembly of your ebike and are not a complete or
comprehensive manual of all aspects of assembly, maintenance, and repair. Consult a certified, reputable bike mechanic to assist
with assembly, repair, and maintenance of your ebike.
Step 1: Unpack the bike. Open the bike box and remove the small box inside. With the help of another person capable of safely
lifting a heavy object, remove the Shengmilo MX03 from the bike box. Carefully remove the packaging material protecting the
bike frame and components. Please recycle packaging materials especially cardboard and foam whenever possible. Open the
small box and carefully set out all contents.
Ensure all the following pieces are included with the Shengmilo MX03:
• Front Wheel • Manual • Assembly Tool
• Handlebar Stem
faceplate bolts (4x)
• Front Wheel Quick Release • Charger • Pedals (marked left and
(in fork protector plate) right)
• Tyre Pump
• Keys (2x, identical) • Headlight • Front&Rear Fenders
• Lithium Battery
If there are any missing parts, please contact Shengmilo.
14
Step 2: Install handlebar onto stem as shown in the assembly video for the Shengmilo MX03 in the
COMMUNITY>>Video>>MX03 ASSEMBLY Video at www.shengmilo-bikes.com.
Place the handlebar on the stem correctly. Trace the front brake cable directly up
A. from the front brake caliper to the left handlebar and ensure the cables and wires are not
twisted.
B. Locate the assembly tool in the accessory box.
Ensure the correct four bolts are used to install the handlebar faceplate.
The handlebar faceplate bolts use a 4 mm Allen wrench.
C. Center the handlebar and tighten the four stem faceplate bolts evenly and part way.
D. Adjust the handlebar so the grips are approximately parallel to the ground when the front
wheel is installed.
E. Secure to the recommended torque value. Once adjusted properly, use a torque wrench
with a 4 mm Allen bit to evenly tighten the four stem faceplate bolts (shown at right) to the
recommended torque value, 10 Nm.
Get help from a bike fitting professional for safety and optimal fit and bike ergonomics. Consult a
certified, reputable, and local bike fitting specialist for assistance properly fitting
the bike to a rider.

15
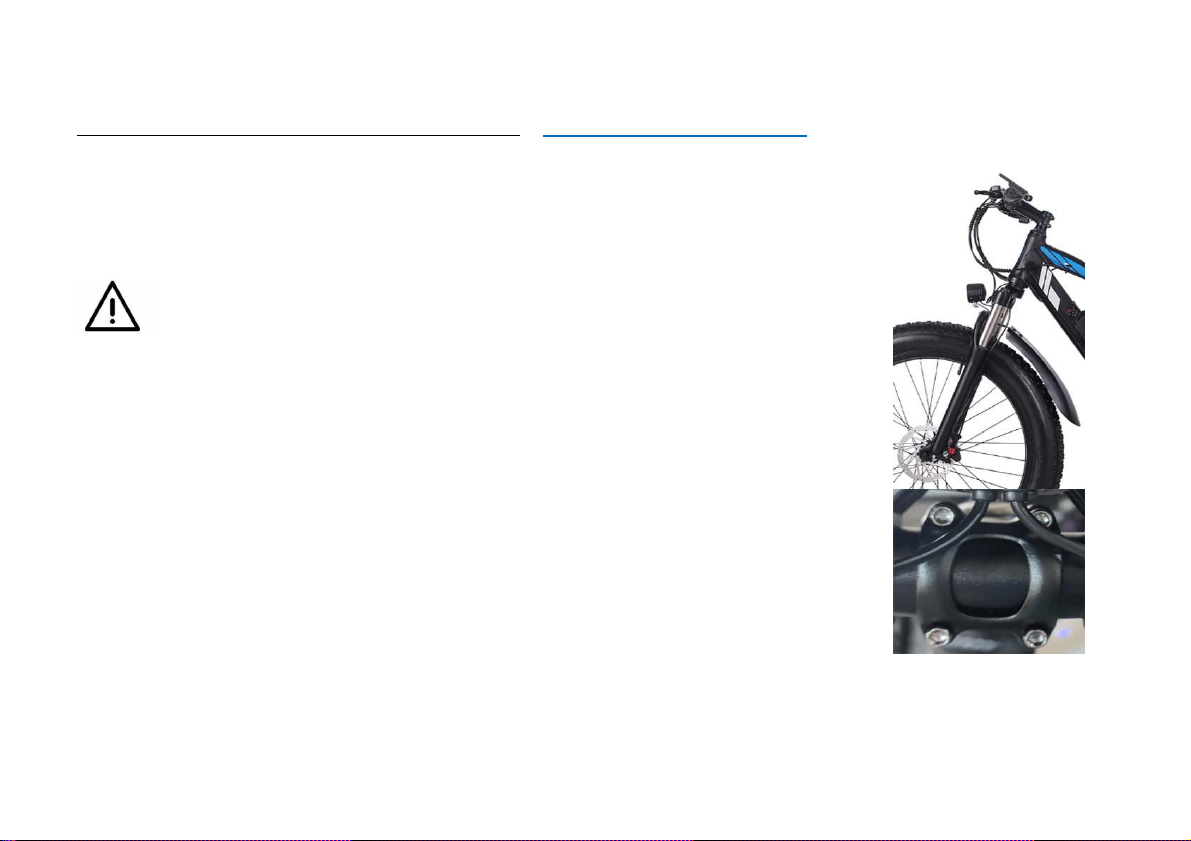
Step 3: Install the front wheel.
Locate the quick release lever, which holds the protector plate in place during shipment.
Open the lever and remove the thumb nut and cone spring (opposite the lever). Remove the
quick release skewer from the plate, keeping the washer and other cone spring in place on the
lever side.
Install the skewer into the front wheel axle from the brake rotor side. Reinstall the cone
spring so it points toward the wheel hub then thread the thumb nut onto the skewer only a
couple turns, leaving room for the fork dropouts. Make sure the lever is open and carefully lower the fork onto the axle and brake
caliper.
Fully seat the skewer in the fork dropouts (and the brake rotor in the caliper) and add tension to the lever by turning the
thumbnut. When there is enough resistance to hold the quick release lever in line with the axle, close the lever using the palm of
your hand without touching the brake rotor.
When properly installed, the front wheel should be fully seated and centered in the dropouts of the front fork, the brake rotor
should be in between the brake pads in the brake caliper, and the quick release lever should be fully and properly secured. Ensure
the front wheel and quick release lever are properly secured before moving on to the next step.
Caution: Never touch the brake rotor, especially when the wheel and/or bike is in motion, or serious injury could
occur. Hand oils can cause squeaking and decrease brake performance; do not touch the brake rotor while inspecting,
opening, or closing the quick release lever.

16
For detailed instructions please view the Shengmilo MX03 Video available in the COMMUNITY>>Video>>MX03
ASSEMBLY Video at www.shengmilo-bikes.com.
WARNING: an improperly secured front wheel and/or handlebar stem can cause loss of control, accidents, serious
injury, or death. Check that the front wheel and handlebar stem are properly secured to the bike during assembly and
before each ride.
Step 4: Perform a handlebar twist test to ensure the handlebar stem is secure.
A. Brace the front wheel. Stand at the front of the bike, facing the handlebar, and brace the front wheel between your feet
and lower legs.
B. Try to twist the handlebar. Hold both handlebar grips and push forward with one hand while pulling back with the other.
Push and pull at the same time with about 20 lb (9 kg) of force with each hand.
C. Ensure the handlebar and wheel stay properly aligned. The handlebar and handlebar stem should be tightly secured
perpendicular to the front wheel.
D. Repeat the twist test pulling/pushing with the opposite hands, again with 20 lb (9 kg)of force pulling with one hand
and 20 lb (9 kg) of force pushing with the other.
E. If needed, align the handlebar and stem and torque the stem clamp bolts evenly to the specification for the handlebar
stem clamp bolts in the Recommended Torque Values table below. After torquing the stem clamp bolts to the proper
specification, perform the twist test again. If the handlebar still moves, contact Shengmilo Product Support.

17
WARNING: If you are not sure you have the experience, skills, and tools to correctly perform all steps to properly
secure and verify the security of the handlebar, front wheel, and handlebar stem you MUST consult a certified,
reputable bike mechanic to check your work and/or secure those components to the bike properly.
Step 5: Install the pedals. Locate the pedal with a smooth pedal axle exterior and an "R" stamped into the end of the pedal axle (L
below), which indicate it is the right pedal. The right pedal goes on the crank on the right side of the bike (which has the drivetrain
gears and is the same as a rider's right side when riding).
The right pedal (1) is threaded so that it is tightened by turning clockwise. Carefully thread the right pedal onto the crank on
the right side of the bike slowly and by hand. Do not cross thread or damage the threads.
The left pedal (2) is reverse-threaded and tightens counterclockwise. Ensure the remaining pedal has notches on the exterior
of the axle and an "L" stamped into the end of the axle (2, below), indicating it is the left pedal. Carefully thread the pedal onto the
left crank by hand slowly. Do not cross thread or damage the threads.
Torque each pedal to 35 Nm. Use a pedal wrench to avoid damage caused by wider wrenches.
Identifying marks Right pedal (1) tightens clockwise Left pedal (2) tightens counterclockwise

18
Step 6: Install the headlight as shown in the assembly video available at www.shengmilo-bikes.com .
A. Remove the fender and headlight mounting bolt from the fork arch and set aside.
B. Place the fender in position. From the back of the front tire, pass the front fender
mounting point under the front fork arch.
C. Install the headlights. Only need to turn 3 screws to quickly fix the position.
Install the headlights to the front wheel fenders
D. Adjust the headlight angle to illuminate the road ahead and not blind oncoming traffic. Use a 5 mm Allen wrench and 5
mm wrench to loosen the headlight angle adjustment bolt, tilt the headlight to the optimal position, and then tighten in
place securely.

19
Step 7: Inflate the tires. Check that the tire beads and tires are evenly seated on the
rims. Use a pump with a Schrader valve and pressure gauge to inflate each tire to the
recommended pressure indicated on the tire sidewall, 20 PSI (1.4 Bar). Do not overinflate or
underinflate tires.
Step 8: Set the desired seat height. Open the quick release lever by hinging it open fully.
Ensure the seatpost clamp opening is aligned with the notch at the front of the seat tube. Adjust
the seatpost up or down to a comfortable height, while ensuring the seatpost is inserted into the
frame past the minimum insertion point.
If needed, use the thumb nut to add tension to the clamp so there is some resistance when the
lever is in line with the clamp bolt, but do not overtighten. Close the quick release lever to
secure the seatpost and check that it cannot move. See the Adjusting the Seat section of this
manual for more details.
Step 9: Always check that the battery is locked to the frame of the Shengmilo MX03
before riding. The Start-Up Procedure section of this manual has more information on the
Key positions of the battery; on and locked to the frame, off and locked to the frame, and off
and unlocked (ready for removal from the frame). Operate the electrical system when the
battery has been adequately charged and the battery is secured to the mounting
receptacle on the frame.

20
Step 10: Ensure all hardware is tightened properly following recommended torque values.
Recommended Torque Values
Hardware Location
Hardware
Torque Required (Nm)
Handlebar Area
Handlebar Stem Clamp Bolts
15
Handlebar Area
Handlebar Stem Faceplate Bolts
10
Handlebar Area
Brake Lever Clamp Bolt
6
Handlebar Area
Shifter Clamp Screw
6
Brakes
Caliper Adapter to Frame
6-8
Brakes
Caliper to Adapter
6-8
Brakes
Brake Cable to Caliper Clamp
6-8
Brakes
Disc Brake Rotor to Hub
7
Seatpost Area
Seat Angle Adjustment Bolt
20
Rear Dropout Area
Rear Axle Nuts
40
Rear Dropout Area
Rear Torque Arm Bolt
5
Rear Dropout Area
Derailleur Bash Guard Mounting Bolts
5
Rear Dropout Area
Derailleur Hanger Mounting Bolt
6
Rear Dropout Area
Derailleur Mounting Bolt
10
Rear Dropout Area
Derailleur Cable Pinch Bolt
6-8
Rear Dropout Area
Kickstand Mounting Bolts
8
Bottom Bracket and Crank Area
Bottom Bracket and Lockring
60
Bottom Bracket and Crank Area
Crank Arm Bolt into Bottom Bracket Spindle
35
Bottom Bracket and Crank Area
Pedal into Crank Arm
35
Bottom Bracket and Crank Area
Chainring Bolts
10
Bottom Bracket and Crank Area
Controller Mounting Bolts
6
Fenders
All Fender Mounting Bolts and Hardware
6
Table of contents
Other Shengmilo Bicycle manuals


