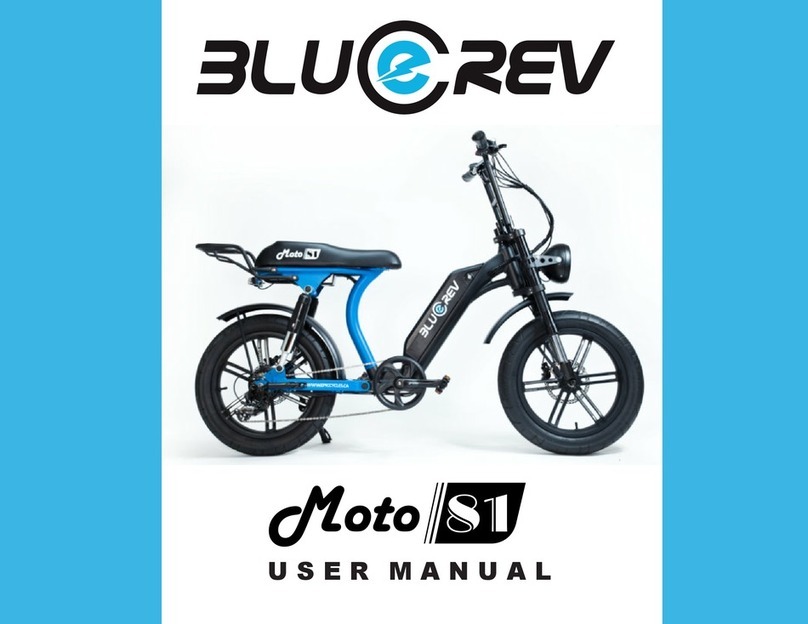
RKS MB6 User manual

www.rksmotor.eu
MB6
USER MANUAL

01
TABLE OF CONTENT
MB6
1. Matters Needing Attention to Users
2. Riding Safely
3. Check Before Driving
4. Structure and Technical Parameters of Complete Vehicle
5. Profile for Characteristic of Product
6. Method of Adjustment of All Parts
7. About Charging
8. About Riding
9. Maintenace and Service
10. Troubles and Solutions
11. Special Hints

02
PREFACE
ŸBattery with high performance offering stronger current and longer distance for drive.
Our company makes RKS brand electric bicycle become a kind of environmental protection type leisure traffic tool
instead of walk with elegant, beautiful shape and modern luxurious feeling by virtue of novel management model,
abundant technical force, perfect quality system, first-class workmanship equipment and an excellent professional
team of technology.
ŸDigital controller with indicator and protection from over voltage and under voltage.
ŸHigh-efficient brushless DC motor.
Dear Users;
This bicycle has safe and reasonable structure and design, adopts high-efficient and superior-performance electric
hub, high-energy seal type free of maintenance jelly battery and front fork shock-preventing device to improve the
comfort of riding. It has one knd of functon for rdng by pedal drvng. It is a kind of ideal traffic tool instead of walk.
This product is designed for transportation and is environmental friendly. Below are the characteristics and
advantages of this electric bicycle.
ŸFront and rear suspension system providing a smooth and comfortable riding
In order that this bicycle can offer better services for you, please read carefully this user's manual before use, please
make sure to follow the requirements of this user's manual in order to make your electric bicycle in the best status
and make you to travel more safely, comfortably and successfully.
ŸBrake system with power cut-off ability to ensure safe riding.
MB6

03
MATTERS NEEDING ATTENTION TO USERS
4.Inside the battery box of this bicycle there is a safety power source, when battery box is taken out, both jacks in
lower end (namely positive pole + and negative pole - of battery) can't be touched by hand (particularly damp hands)
at the same time, and also be prohibited to touch metal body (like key, etc.) or else unlimited short-circuit current
produced will cause an accident and burn of human body. Please give a great attention to the above.
Please note the following important safe matters in order to ensure your safe driving and use this bicycle better.
1.Please read the user manual carefully and check whether all spare parts is perfect before driving in order to ensure
your safe driving.
2.Overloading is prohibited strictly.
6.This bicycle can drive normally under the condition that depth of deposit water don't surpass center of electric hub
when driving on road surface with dropsy in rainy weather. Electric hub will be infiltrated by water and cause a trouble
from electric hub if dropsy of road surface surpass center of electric hub.
3.It is recommended to carry out charging every day, to charge after electric quantity of battery exhausts is prohibited
strictly
5.Please don't detach and disassemble spare parts or rebuild electric bicycle by itself, please purchase standard
spare parts from brand electric bicycle if to replace spare parts. Please repair the dealer RKS MOTOR EUROPE
timely if find power-cut don't happen when do a front or rear brake.
MB6

04
RIDING SAFETY
General Rules
ŸAlways wear an approved helmet when riding your bike, and follow the helmet manufacturer's instructions for fit,
use and care of your helmet.
ŸRide predictably and in a straight line. Never ride against traffic.
ŸUse correct signal lights to indicate turning or stopping.
ŸConcentrate on the path ahead. Avoid potholes, gravel, wet road markings, oil, curbs, speed bumps, drain grates
and other obstacles.
ŸRide defensively. To other road users, you may be hard to see.
ŸExpect the unexpected such as opening car doors or cars backing out of concealed driveways.
ŸBe very careful at intersections and when preparing to pass other vehicles.
ŸFamiliarize yourself with all the bike's features. Practice signal lights, braking and the use of horns.
ŸDon't carry packages or passengers that will interfere with your visibility or control of the bike. Don't use items that
may restrict your hearing.
ŸMaintain a comfortable stopping distance from all other riders, vehicles and objects. Safe braking distance and
forces are subject to the prevailing weather conditions.
Wet Weather
ŸDecrease your riding speed, avoid sudden braking, and take corners with additional caution.
ŸIn wet weather you need to take extra care.
ŸBe more visible on the road.
ŸWear reflective clothing and use safety lights.
ŸWhen riding obey the same road laws as all other road vehicles, including giving way to pedestrians, and stopping
at red lights and stop signs.
ŸBrake earlier, you will take a longer distance to stop.
ŸPotholes and slippery surfaces such as line markings and train tracks all become more hazardous when wet.
MB6

05
RIDING SAFETY
ŸDo not forget to lock your battery,charger the battery every month even if u do not use it.
Night Riding
ŸNo user serviceable parts inside.
ŸRefer servicing to qualified service personnel before charging read the instructions.
ŸWear reflective and light coloured clothing.
ŸDo not expose the product to fire,water or moisture!
Charger Use Caution
ŸEnsure that the front lights are on.
ŸTo reduce the risk of electric shock. Do not remove cover (or back).
ŸStore in cool and dry place!
ŸDo not short circuit.
ŸRide at night only if necessary. Slow down and use familiar roads with street lighting, if possible.
Battery Use Caution
ŸMust be disposed of properly.
ŸUse specified charger only.
MB6

FIND THE MOTOR NUMBER AND FRAME NUMBER
06
MB6
Please find the “frame number” & “motor number” according to the next instruction of picture.

07
WARNING
MB6
Ÿ Whether handlebar and saddle is adjusted well and tightened?
Check Before Driving
Ÿ Where electric energy is enough?
ŸOpen power lock, check whether all indication of bicycle head is normal, brake power cut is effective?
Ÿ Whether nut of front and rear wheel is locked
The product is not allowed to use by handicapped people!
Ÿ Whether tyre pressure is normal?(Short inflation will influence running speed or continual mileage.)
ŸStructure and technical parameters of complete vehicle
Ÿ Whether braking system is adjusted suitably and reliably?
Please do a check before driving in order to ensure your safety of driving
WARNING!

08
STRUCTURE AND TECHNICAL PARAMETERS
OF COMPLETE VEHICLE MB6
Standart
Engne Type
Maxmum Motor Rated Power - Watt
Motor Rated Voltage - V
Speed
Range
Load Capacty
Front Brake
Rear Brake
Battery Type
Battery Capacty - Ah
Battery Chargng Tme - h
Tare Weght - Net
EN15194:2017
Brushless Engne
250W
36V
25 km/h
30 - 45 km
100 kg.
V Brake
V Brake
Lthum Battery
10Ah
4- 6 Hour
27 kg.
* Informatve Values
There can be differences between the illustrated vehicles and the vehicles in real.
Structure and Technical Parameters of Complete Vehicle

09
STRUCTURE AND TECHNICAL PARAMETERS
OF COMPLETE VEHICLE
MB6
1.
2.
3.
4.
5.
6.
7.
8.
9.
10.
11.
12.
13.
14.
15.
16.
17.
18.
19.
Rear Tre/Tubes
Rearwheel
Spoke
Rear Dsc Brake
Freewheel
Deralleur
Chan
Rear Reflector
Seat Clamps
Seat Tubes
Saddles
Pedal
Wheel Stand
N/A
Battery Packs
Frame
Handle
Bar End Grps
Tube of Force
20.
21.
22.
23.
24.
25.
26.
27.
28.
29.
30.
31.
32.
33.
34.
35.
36.
37.
38.
Headset
N/A
Front Forks
Front Brake
Left Brake Lever
Rght Brake Lever
Shfter
LED Meter
N/A
Wheel Reflector
Shft Cables
Charger
Front Hub
Rear Motor
Spoke
Sensor
Chanwheel & Crank
Front Wheel
Front Tre/Tube

10
PROFILE FOR CHARACTERISTIC OF PRODUCT MB6
ŸIts rated vehicle speed is 25km/h, that make driver secure and family relieved.
ŸOperation of driving is simple, pedal design to get more comfortable effect.
ŸBe equipped with head light, it is safe and convenient for driving in the dark.
ŸTri-dimensional design body is carried out a scientific design to get the best riding effect according to body
engineering and esthetics.
ŸIt has one knd of drvng method by pedal drvng.
ŸIn order to ensure life of battery, please charge timely when indicating point of electric quantity is closing red area.
Part of electric quantity will be consumed if turn on headlight when drive in the dark, therefore that will cause
continual mileage is reduced correspondently. Please note that the lighting time of headlight in the dark should be
controlled suitably.
ŸLight, simple and elegant shape, exquisite selection of parts and materials make you get more comfortable driving
effect..
ŸIn order to ensure your safety during driving, electric safety system will power cut automatically when brake.
In order to ensure the life of battery, the users with enough conditions should keep charging as soon as possible
anytime after use to make the battery keeping in full status. You have to charge timely when indication of electric
quantity is only at a red light.
Fg 1 Fg 2
Adjustment of Steering Wheel
ŸInserted depth of vertical tube of wheel should be not lower than minimum depth
(red safety mark); safety mark must be inserted into below hexagonal nut. (See
fig. 1)
Stand in the front of wheel, clamp the front wheel by both legs and hold the handgrip
with both hands to adjust the angle degree at between cross tube of handgrip
and vehicle body. (See fig. 2)Screw down the fastening screw of wheel core, the
torque recommended should be not less than 18N.m. (See fig. 2)

PROFILE FOR CHARACTERISTIC OF PRODUCT
MB6
Keep the brake in the middle, and make sure the two brake pads work properly.
Level up the brakes (in its normal condition)
At the end, Make sure the brake pads can have fully touch with the surface of the steel wheel.
Adjustment of Brakes
Set up a 3mm distance between the wheel and the brake pads, and then adjust (see the picture below)
Adjust the brake pads, to keep it in line with the curve of the wheel.
If only one side of the brakes works, adjust the nut.
ŸScrew down clamping screw of saddle and saddle tube, recommended torque
should be not less than 18N.m. (See fig 3)
ŸInserted depth of saddle tube should be more than minimum depth of insert (safety
mark is for reference of minimum depth) to ensure the safety.
Adjustment of Saddle
ŸLoosen the clamping screw of saddle and put into saddle tube, tighten the screw
suitably, and then insert saddle tube into vertical tube of frame; put your both legs on
the saddle to adjust the position of saddle tightly in order to ensure you can drive
comfortably. (See fig. 4) Fg 3Fg 4
11

METHOD OF ADJUSTMENT OF ALL PARTS
Adjustment on Tightness of the Chain
When adjusting the chain, please first loose the nut of back shaft and then adjust the screw of chain-adjusting screw,
making the tightness of the chain in a proper degree and agile driving motion. Back wheel should be placed in the
position of central symmetry. As soon as the chain droops 10-15mm, tight the nut of back shaft at once. The
recommended tightening torque should not be less than 30N.m.(See Pic. 7)
12
MB6
Pedals
Check the sign on the pedal.
R: pedal for the right pedal-arm
L: pedal for the left pedal-arm

13
ABOUT CHARGING
IMPORTANT CHARGING INSTRUCTION
WARNING:
ŸBefore riding the electric bike for the first time, you must charge the batteries for 4-6 hours using the supplied
charger. To charge, remove the protective cover from the charging socket. Then plug in the charger into the
charging socket, before plugging the charger into a wall outlet.
The Power Switch Lock ust be in the off position when the electric bicycle is being charged
Do not place the battery near heat or fire. Do not expose the charger near water.
Removing the Battery
All batteries charge simultaneously. You should charge your electric bike after each ride. You must charge your
electric bike if it has not been used for 30 days or more. Recharging time is between 4-6 hours.
MB6
Turn the key clockwise,
unlocking the battery pack
Lift the battery pack
Put the bottom right in the place
when installing
Aim the top to the lock and press,
then it is locked

14
ABOUT CHARGING MB6
Open the dust cap, then plug in
Battery Indictor Shows the Electricity Allowance.
Green: the battery is fully charged.
LED Indicator of the Charger:
Blue:Power is connected. Please connect the charger
Red:Charging
Green:Charged
Orange: the battery is declining
Red: only 20% is left. Connect your charger.

15
ABOUT CHARGING
Put the battery charger in a flat level, and first plug in the output plug
to the charging socket of the battery box.
ŸAfter charging is finished, first pull out the power input plug
(230V) and then pull out the output plug.
When the Battery is Being Removed for Charging
After the battery box is removed, as we mention before, please
notice that the electrode “+” “-”can never be touched by hands
especially wet hands and the electrodes are also prohibited to be
touched by other metal conductor!
Then, plug in the input plug (230V) to the power socket and
charging is started. (See Pic. 9)
Do not charge the battery up-side down, otherwise the life time of
the battery will be severely affected.
MB6
Pcture 9
ŸAfter charging is finished, first pull out the power input plug (230V) and then pull out the output plug.
ŸRemove (rotate to open) rubber stopper in the charging hole and the stopper should be kept well. Then, first plug in
output plug of charger to the socket of battery box, after that, plug in power input plug (230V) to household power
socket to start charging.
When the Battery is Charging on the Bike
ŸPlease switch off power and remove the key.

16
WARNING!
ŸWhen the input and output terminal are connected, the red indication light of the charger will be turned on, showing
that the power is being connected.
Duration of Charging
ŸWhen the battery is charged for the first time, 8-10 hours should be spent for charging. When the green indication
light of the charger is turned on, showing that the battery is basically full and it will switch to trickle charge mode to
ensure that over-charging will not occur. It takes 2-8 hours for normal charging.
ŸThis charger has the protection device for over-charging. Long-time charging should not be more than 24 hours
without affecting the life time of the battery.
Matters Need Attention for Charging
ŸDuring charging, please place the charger in safety location which is beyond the reach of children.
ŸDo not charge with charger from other brands and the charger is also not for other storage battery.
ŸThe charger has 230V circuit; please do not dismantle.
ŸThe charge doesn't need to be grounded.
ŸThe battery should not be used when it is not full, otherwise the life time of the battery will be affected.
The attached cables of the battery charger can be used for the battery-charger only!
ABOUT CHARGING MB6

Preparation Before Powering on
Make sure you have your connector tightly connected, and then
switch the power on.
Powering on and Entering Into Settings
Press Power button to switch on.
Press + and –at the same time to set parameter after powering
on..
Setting Wheel Diameter and Impulse Number per Cycle
When in the setting mode, set the wheel diameter first. In the displayscreen, it will showthe current number.Press +
and –to choose the right diameter (Inch). Next, pressing Power button to confirmand to set impulse number per cycle.
For current number, see the display screen. Press + and –to set impulse per cycle. Finally, press the Powerbutton to
exit.
Powering ON/OFF
Operation
Press Power button to start the meter and the controller.
Press + or –to change the output of the motor, from 1stto 3rdgear. The 1stgear is the lowest, and the 3rdis the
highest.
When powered on, press the Power button to power off. When powered off,meterand the controller will no longer
consume electricity
Attention:After a 5-minute parking, you meter will automaticallypower off. Please press the button to start the meter.
Switch Gears
15
ABOUT CHARGING
MB6

E6: System initializing failure
E7: System failure
INDICATOR
E1: Excessive temperature of the controller
When a failure of the electric system occurs, a failure code will show on the display screen. See as follows: code
E2: Temperature sensor failure
E3: Current sensor failure
E0: Communication failure between the meter and thecontroller
ŸWhen the bike is started just now, the bike should be drved slowly to avoid wasting power during instantaneous
speed-up or damaging electrical parts.
ŸOn the precondition of safety, he should try his best not to brake or start too much in order to save power.
E9: Motor phase line failure
Matters Need Attention During Journey
ŸPedalng s better for economc use of battery and motor durng clmbng and t's prolong the lfe tme effectvely.
E8: Motor Hall failure
16
ABOUT RIDING MB6
3. “Unlock” position – unlocks the battery box
1. “ON” position
2. “OFF” position

20
ABOUT RIDING
MB6
Once you have completed the initial charge you are ready to ride. You must be aware of all local laws and ordinances
that govern and/or restrict the use of electric bicycle. The laws and ordinances vary greatly from municipality to
municipality. It is your responsibility to know and abide by your local restrictions.
To ride, turn the power switch lock to the “on” position. The power switch is located on the front bottom of the seat. The
battery gauge and the power indicator located at the panel will illuminate when the power is on.
Hold onto the handlebars with bot h hands. Assume a well-balanced position on the scooter and push off with
your foot. Your . Twist the slowly to avoid a sudden rush of speed forward. The hands wll control the handlebars pedal
speed of the bike will increase as you twist the more. Release the and apply the brakes to stop your bike. pedal pedal
You will control the speed of the bike b the brakes. When the brake handle is squeezed it cuts power to the y pedal.
Motor Starting:
Press the POWER button for more than 2 sec.
Table of contents
Other RKS Bicycle manuals

