Bzooma Unisex User manual

1
Owner’s Manual-Unisex
Marketed in Australia and New Zealand by Bzooma Pty Ltd ABN 37 640 907 07

2
CONTENTS
Heading ................................................................................................................................................. Error! Bookmark not defined.

3
BZOOM PTY LTD
This User Manual is written and published according to the latest BZOOMA PTY LTD specifications. We will continue the
policy of improvement and may make some changes in the design and specifications without notice. If you have any
enquiries, please contact your local dealer or buy directly from this web site bzooma.com.au. Delivery will be via your
nearest Bzooma dealer.
This manual is published by Bzooma Pty Ltd
M NUF CTURING PROFILE
Your Bzooma Roller is manufactured by AVIC Guangzhou Aviation Industry Group Company Ltd, founded in 19 1. The company
was founded to conduct scientific, production and management research. The enterprise belongs to China Aviation Industry Corp,
and has a staff of more than 10,000 people. Development of electric cars is a focus of the company’s efforts.
SSEMBLY
Tools Required
8 mm ring spanner, 10 mm ring spanner, 1 mm pedal spanner, 14 mm open end spanner, mm hex key, 6 mm hex key, screw
driver, cutters/plier
Set Up.
Remove all packaging materials from the bike.
Install front wheel
The front wheel is normal nut fasten one, make sure front hub nut
tightened with enough torque at 40-4 N/m, and safety hook washer
inside the fork sits right in the fork end. Then in the order of fork –spring
washer –washer nut.
Alignment of handle bars
The handle bar assembly may need some small adjustment for the alignment of the headset to the
front wheel.
Use a 6 mm Hex key to loosen the handle bar stem.

4
Relocate and lock the head stem hinge.
Align handle bars so it is perpendicular to the front wheel.
Carefully lower the handlebars back down and tighten the 6mm hex key firmly. Check and
recheck for firmness.
Install Pedals and Tighten Crank.
Use a small amount of axel grease on shaft before installing. Ensure you clearly identify Right and Left
pedals via the R or L stamped on the end of the pedal shaft. Screw pedal in clockwise. Tighten with pedal
spanner or 1 mm spanner. Remember bicycle pedals tighten in a clock wise direction.
Remove Plastic chrome cap on crank and tighten with 14mm socket. Both Left and right hand sides.
ront Brake Set Up
V-Type brake. Clip Cable Guide through black support holder as shown. Loosen the mm Allen key cable
holder and pull cable through until the pads are just touching the rim. Ensure you have removed the rubber
band from the lever. Adjust as necessary so brake shoes are square with wheel surface and are not rubbing
on wheel during rotation. Around 1-2 mm clearance is ideal.

5
Gear adjustments
It is recommended you have a bicycle workshop assist you with the adjustment of the gears.
Cable tension must be checked to ensure there is no slack in cable when in highest (fastest gear).
Failure to do this will result in poor gear changes.
Tension of cable can be adjusted on the rear of the cable insertion point on the back of the derailleur.
Lube chain and sprockets regularly with a Teflon based chain lube.
Inflate Tyres to 6 PSI and maintain ongoing by checking once per week. Correct tyre pressure is critical
to the performance of the bike.
Connect Battery Plug. Ensure no other plug is ever connected to the main battery slot.
Ensure you are familiar with operation of the bike before riding.
Ensure people/children are clear of moving wheels etc and test throttle.
Safety. Ride safely and always wear protective gear including knee pads, elbow pads gloves and
helmet. Always Use an approved bicycle helmet. Always obey local road rules and legal guidelines.
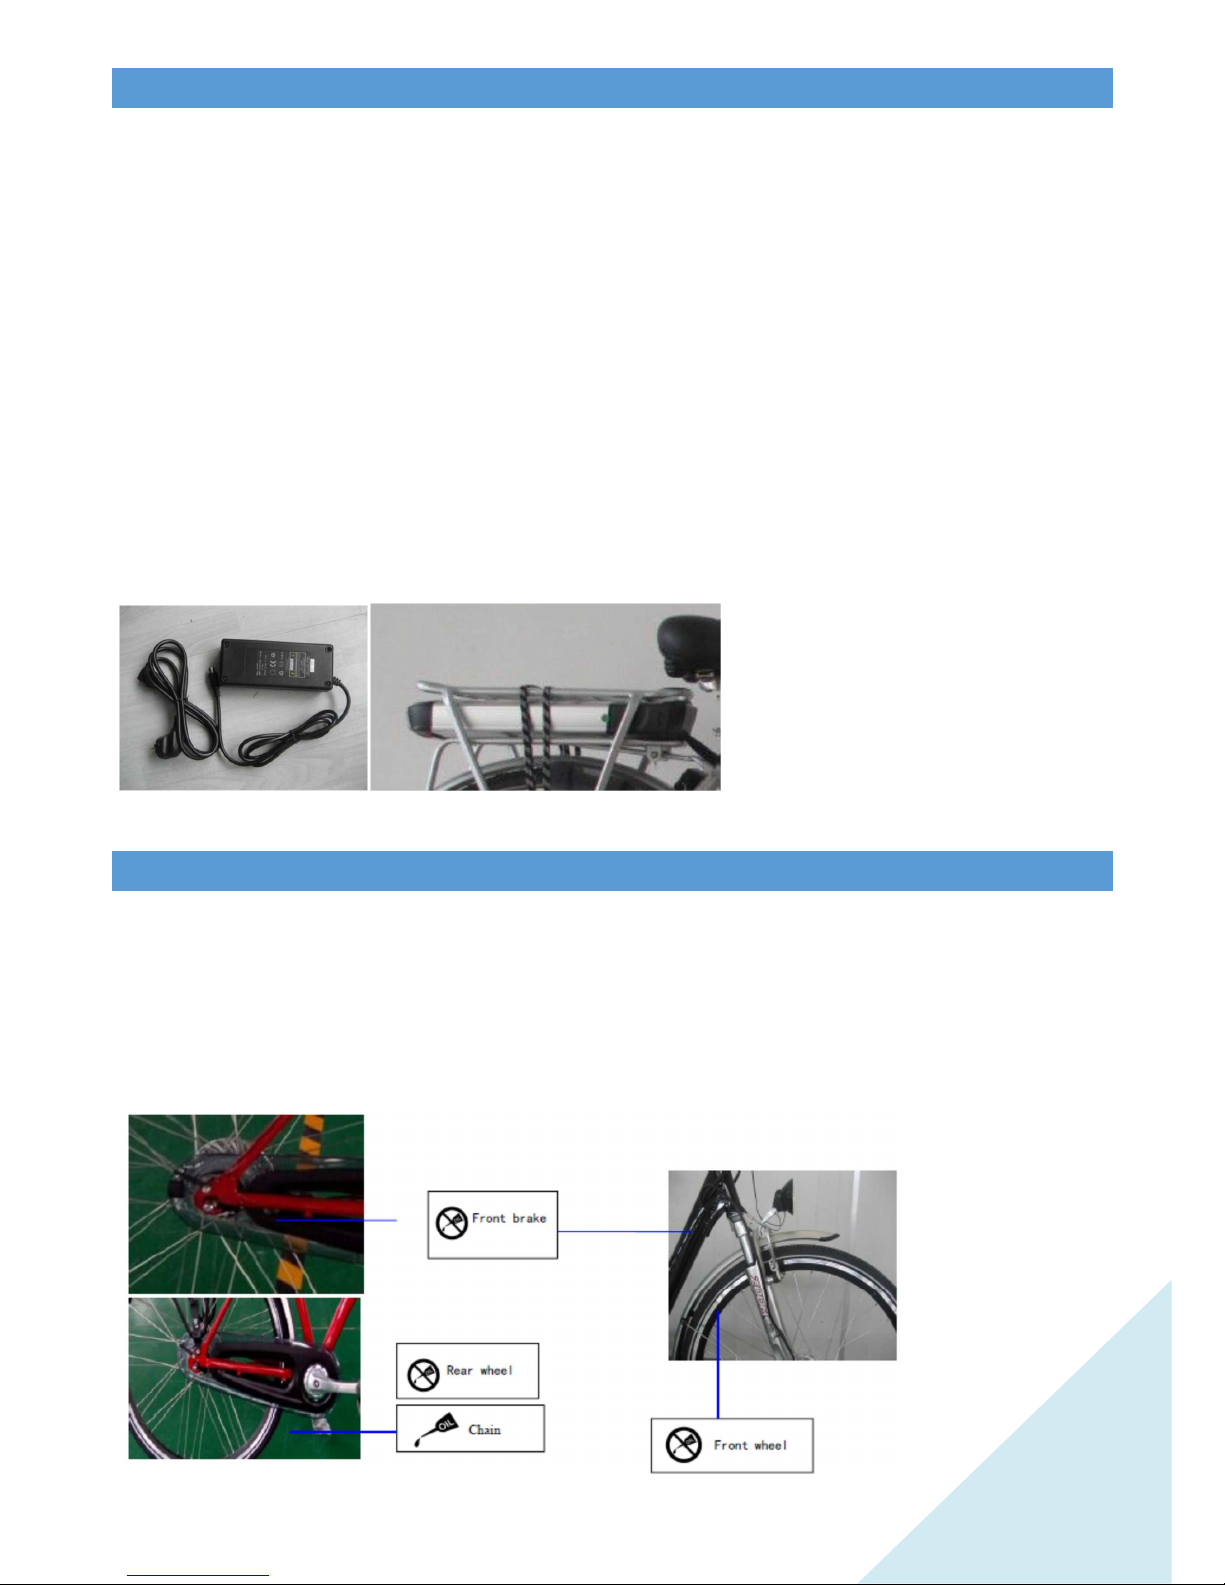
INSPECT BEFORE RIDING
Important note: Before riding ensure you are familiar with the operation of the throttle. The throttle turns
towards the rider. This engages the motor.
Pls check it before riding as below:
1.Check the grip.
2. Check tyre pressure.
3. Check brake pads for wear and replace in necessary.
4. Check Brakes for alignment of front pads and wear.
. Check the tightness of chain and Q-release
6.Check the gear function.
7. Check pedal tightness on crank.
8.Check the power indication.
9.Check battery status via Charge light on charger and on bike
10.Check the tightness of saddle.
11. Do not use front V-brake when State of emergency.

6
CH RGING
The bike arrives fully charged. Follow charging instructions provided with the charger carefully.
Connect the connector pin of battery case firstly, and then connect the alternating current power supply. When in charge
process, the charging indicator lights shows red, after fully charged, the charging indicator light shows green. When the batteries
are fully charged, (when the green light is on), unplug the connector pin off alternating current power supply firstly, and then
that of battery case.
•Check AC voltage is set to 220/240v. Never use on 110v setting.
•Do not drop the charger as it has sensitive electronics inside and damage may result.
•Do not cover with any material or substance that may restrict airflow into charger. The charger
•need to “Breath” and be kept cool.
•Charging you bike each time you use it no matter how far the trip will prolong the life of the battery.
•Remember that charging the bike each time you use it will ensure longer life of the battery. DO
•NOT leave the battery discharged for long periods. This will damage the battery.
•Charge only in a cool well ventilated area. Never cover charger.
•Never open the charger or change settings on charger.
M INTEN NCE
1. Wipe the bike with a dry cloth, or neutral detergent.
2. Use lubricating oil for metal parts.
3. Wipe the plastics, paint coating part with dishcloth.
4. Increase the frequency of lubricating oil at wet and humid areas
See as below (Recommend 30SAE lubricating oil).
Need lubricating oil: Do not wipe with lubricating oil

7
SIMPLE TROUBLESHOOTING

8
WARRANTY
Bzooma Pty Ltd Limited Warranty
Bzooma Pty Ltd provides this Limited Warranty to the original
purchasers of new Bzooma machines in Australia and New Zealand.
Bzooma Pty Ltd guarantees the machine, power base including Motor,
Battery and charger, against defects in materials and workmanship for
a period of one (1) year, from date of delivery to the original purchaser.
Damage caused by accident or obvious abuse is not covered by this
warranty.
To make a claim covered by this warranty the purchaser must contact
an authorised BZOOMA Pty Ltd Dealer for inspection and service.
Indications of abuse, accident, or unauthorised tampering with the
machine power base mechanical, or electrical equipment, will void any
claim. Bzooma Pty Ltd is not responsible for transport costs associated
with obtaining service or repairs under this warranty.
Table of contents
Other Bzooma Bicycle manuals