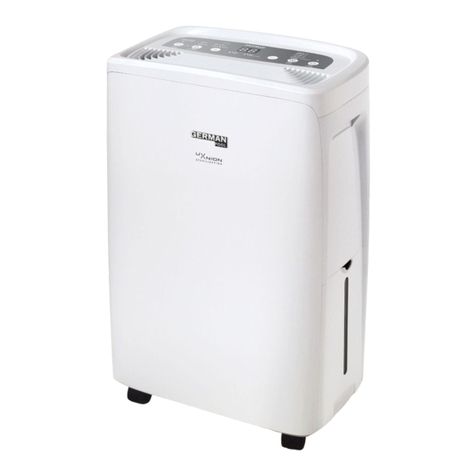
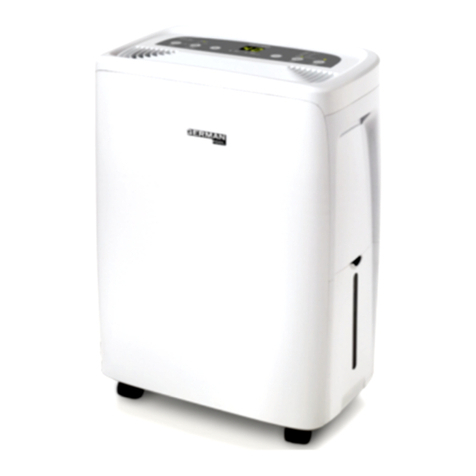
German pool DHM-911-SC User manual

P.1
360° Multi-Oscillation Fan RHS-126
Please read these instructions and warranty information carefully
before use and keep them handy for future reference.
USER MANUAL
WiFi Smart UVC Air Purifying Duhumidifier DHM-911-SC
Online Warranty Registration

P.2
Table of Contents
Warnings & Safety Precautions
Product Structure
Operation Instructions
Cleaning & Maintenance
Troubleshooting
Technical Specication
Warranty Terms & Conditions
04
06
07
19
21
22
43

P.3
Warnings & Safety Precautions
WARNING!
Read all instructions carefully before using this product.
• This product is for domestic indoor use only. If this product is used for any commercial, industrial,
rental or other purposes, product warranty will be VOIDED.
• This product is not intended for use by children or persons with reduced physical, sensory or
mental capabilities, or lack of experience and knowledge, unless they have been given
supervision or instruction concerning use of this product by an adult responsible for their safety.
• Mind your children and DO NOT let children play with this product.
• Cleaning and user maintenance shall not be made by children without supervision.
• Check the voltage indicated on the rating label before using this product.
• If the supply cord is damaged, it must be replaced by the manufacturer, its service agent or
similarly qualied persons in order to avoid hazards.
• Unplug this product from the power source before cleaning and maintenance.
• Contact German Pool authorized service technician for repair or maintenance of this product.
1. DO NOT use any method to speed up the defrosting process or clean frosted parts unless
specically recommended by the manufacturer.
2. This product must be stored in a room with no continuous sources of ignition (eg. open ames,
lighted gas appliances, electric heaters turned on).
3. DO NOT puncture or ignite this product.
4. Be aware that the refrigerant may be odorless.
5. Keep any required vents unobstructed.
6. Repair must only be carried out in accordance with the manufacturer’s recommendations.
7. This product must be stored in a well-ventilated area, and the room size should correspond to the
room area specied for the operation.
8. Anyone working on a refrigerant circuit must hold a valid certicate from an industry-recognized
assessment body that authorizes the safe handling of refrigerants in accordance with
industry-accepted assessment practices.
9. Repair work must be carried out in accordance with the manufacturer’s recommendations.
Maintenance and repairs should be carried out with the assistance of other technicians under the
supervision of persons competent to use ammable refrigerants.
10. All actions affecting safety must be carried out by professionals.
11. This product is only suitable for indoor use and is not suitable for other applications.
12. Follow local grid interconnection rules and make sure it is properly grounded when installing this
product. If you have any doubts about the electrical installation, follow the manufacturer’s
instructions and, if necessary, have a professional electrician perform the installation.
13. Place this product on a at and dry place and keep a distance of more than 50 cm between this
product and surrounding objects or walls.
14. After installing this product, make sure the power plug is intact and rmly inserted into the power
outlet, and place the power cords in order to someone from tripping or unplugging.
P.4
Warnings & Safety Precautions
15. DO NOT put anything into the air inlet and air outlet of this product. Keep air inlets and air outlets
clear of obstructions.
16. When installing the drainage hose, make sure it is properly connected and not twisted or bent.
17. When adjusting the air outlet louvre, please lift up gently by hand to avoid damage to the louvre.
18. When moving this product, make sure it is in an upright position.
19. This product must be kept away from gasoline, ammable gases, stoves and other heat sources.
20. DO NOT disassemble, overhaul and modify this product at will, otherwise it will cause machine
failure and even cause injury to people and property. To avoid danger, in the event of a machine
failure, it must be repaired by the manufacturer or a professional technician.
21. DO NOT install and use this product in a bathroom or other wet environment.
22. DO NOT unplug to turn off this product.
23. DO NOT place cups or other objects on the product body to prevent water or other liquids from
splashing into this product.
24. DO NOT use insecticides, sprays or other ammable substances near this product.
25. DO NOT use chemical solvents such as gasoline and alcohol to wipe or clean this product. When
you need to clean this product, you must disconnect the power supply and clean with a soft,
semi-moist cloth. If this product is very dirty, scrub it with a mild detergent.
26. Children 8 years of age and older and persons with reduced physical, sensory or mental abilities
may use this product if they have been supervised or instructed in the use of this product in a
safe manner and understand the hazards involved. Children should not use this product. Cleaning
and maintenance shall not be performed by unsupervised children.
27. DO NOT use this product if its power cord and other connections are damaged. If the power cord
is damaged, it must be replaced by the manufacturer or its service agent or other qualied
electricians to prevent any injury.
28. This product must be installed in accordance with national wiring regulations.
29. DO NOT operate this product in a damp room, such as a bathroom or laundry room.
Disposal:
DO NOT dispose of this product together with other unsorted waste. This product should be
recycled separately for other special purposes.

P.5
Product Structure
LED Display Panel
Air Outlet
Front Housing
(with Built-in LED Digital
Display)
Louvre Control Panel
Casters
Water Tank
Air Inlet & Filters
Continuous Drainage
Outlet
Front
Back

P.6
Operation Instructions
Icon Description
UVC/Anion Indicator Light When UVC/Anion Function is activated, this indicator light
lights up constant
• When connecting to WiFi, this indicator light blinks
• When WiFi connection is successful, this indicator light
lights up constant
When Timer Function is turned on, this indicator light lights up
constant
When operating in High Fan Speed, this indicator light lights
up constant
When operating in Low Fan Speed, this indicator light lights
up constant
When ambient humidity has reached target humidity level,
this indicator light lights up constant
When product is operating, it will auto deforst when necessary,
at which time this indicator light will light up constant
When Antimold Function is activated, this indicator light lights
up constant
When water tank is full, this indicator light lights up constant
When temperature is being displayed, this indicator light lights
up constant
When operating in Dehumidify Mode, this indicator light lights
up constant
When operating in Fan Mode, this indicator light lights up
constant
When operating in Dry Mode, this indicator light lights up
constant
When Child Lock is activated, this indicator light lights up
constant
When product is connected to power source, this indicator
light lights up constant
When humidity is being displayed, this indicator light lights up
constant
WiFi Indicator Light
Timer Indicator Light
High Fan Speed Indicator
Light
Low Fan Speed Indicator
Light
Target Humidity Indicator
Light
Defrost Indicator Light
Water Tank Full Indicator
Light
Antimold Indicator Light
Temperature Indicator
Light
Dehumidify Mode
Indicator Light
Fan Mode Indicator Light
Dry Mode Indicator Light
Child Lock Indicator Light
Power Indicator Light
Humidity Indicator Light
Control Panel

P.7
Button Description
Power • In standby state, press this button to turn on the product. By
default, product is set at 40% Humidity and High Fan Speed
• Press button again to turn off product
• Press this button repeatedly to cycle among Dehumidify Mode/Fan
Mode/Dry Mode
• Press this button 1 time to decrease target humidity or timer
duration
• Long-press this button 3 seconds to turn Antimold Function on or
off
• Press this button 1 time to increase target humidity or timer
duration
• Long-press this button 3 seconds to turn UVC/Anion Function on or
off
• Press this button to switch between High Fan Speed and Low Fan
Speed
• Long-press this button 3 seconds to turn the front housing’s LED
Display on or off
• Press this button to Set Timer/Check Timer/Cancel Timer
• In standby state, long-press this button 3 seconds to turn WiFi
Connection on or off
Mode
Decrease
Increase
Fan Speed
Timer/WiFi
Operation Instructions
A. Basic Operation
WARNING!
• Before using this product, make sure the power grid matches this product’s voltage.
• When using this product, make sure there is an empty space of at least 20 cm behind the
product’s back housing so that there is nothing blocking the air inlet.
Turn On / Mode Selection
1. After connecting to the power source, product enters standby state. Press Power Button to turn
on the product.
2. By default, product is set to Dehumidify Mode , High Fan Speed and 40% Target Humidity.
3. Press Mode Button repeatedly to cycle among Dehumidify Mode / Fan Mode / Dry
Mode .
Note:
When product is turned on, press Power Button again, the blower will continue to run for 1 extra
minute, after which the product will turn off.

P.8
Operation Instructions
Dehumidify Mode
In Dehumidify Mode , by default, the product will operate at target humidity of 40% and High Fan
Speed; press Increase Button or Decrease Button to adjust target humidity, and press Fan
Speed Button to adjust Fan Speed; LED Display will show target humidity.
• When ambient humidity is higher than target humidity by 3% or more, compressor will run, and
blower will run at your selected fan speed.
• When ambient humidity is lower than target humidity by 3% or more, compressor will not run, and
blower will automatically change to Low Fan Speed.
The LED Display Panel built inside this product’s front housing will change color according to the
current ambient humidity:
• Red indicates ambient humidity is above 65%
• Green indicates ambient humidity is between 45-65%
• Blue indicates ambient humidity is below 45%
Note:
When target humidity is set to 35% or below, LED Display Panel will show ”CO”, and product will run
continuously (to meet the 3-min delay protection of the compressor).
Fan Mode
In Fan Mode , compressor will not run, and blower runs in Low Fan Speed by default; fan speed is
adjustable, and LED Display shows ambient humidity.
Dry Mode
In Dry Mode , compressor will run continuously regardless of target humidity, blower runs in High
Fan Speed by default, fan speed is not adjustable, and LED Display shows ambient humidity.
B. Advanced Operation
Check Ambient Temperature
1. To check current ambient temperature, press Increase Button and Decrease Button
simultaneously; Temperature Indicator Light lights up constant, Humidity Indicator Light goes
dark, and LED Display shows ambient temperature.
2. After 10 seconds, LED Display automatically returns to showing humidity level, Temperature
Indicator Light goes dark, Humidity Indicator Light lights up constant.
Child Lock Function
1. To activate Child Lock, press Timer/WiFi Button and Fan Speed Button simultaneously;
Child Lock Indicator Light lights up constant, and all buttons become inoperable.
2. To deactivate Child Lock, press Timer/WiFi Button and Fan Speed Button simultaneously
again, Child Lock Indicator Light goes dark, and all buttons become operable again.

P.9
Operation Instructions
UVC/Anion Function
1. Long-press Increase Button for 3 seconds to activate UVC/Anion Function, UVC/Anion
Indicator Light lights up constant.
2. Long-press Increase Button for 3 seconds again to deactivate UVC/Anion Function, UVC/Anion
Indicator Light goes dark.
Antimold Function
When product is turned on, long-press Decrease Button for 3 seconds to activate Antimold
Function, Antimold Indicator Light lights up constant. When product is turned off while this function is
activated, the fan motor will continue to run for 5 minutes before shutting off.
Timer Function
1. Press Timer/WiFi Button to set timer; Timer Indicator Light lights up constant, LED Display
blinks timer duration.
2. Press Increase Button or Decrease Button to set timer duration between 0-24 hours,
LED Display blinks 5 times then automatically conrms timer, and Timer Indicator Light lights up
constant.
3. When timer is activated, press Timer/WiFi Button to check timer countdown, LED Display
blinks timer countdown; pressing Timer/WiFi Button again when LED Display is blinking will
cancel the timer.
Note:
• Setting the timer when product is in standby state will set the time when product will turn on
(on-timer); setting timer when product is operating will set the time when product will turn off
(off-timer).
• Setting the timer will not affect the current on/off status of the product; if user presses Power
Button , timer will be cancelled.
WiFi Function
1. Connecting WiFi: In standby state, long-press Timer/WiFi Button for 3 seconds to connect
WiFi, WIFI Indicator light blinks; when WiFi is successfully connected, WiFi Indicator Light lights
up constant.
2. Disconnecting WiFi: When WiFi is connected, long-press Timer/WiFi Button for 3 seconds to
disconnect WiFi, WiFi Indicator Light goes dark.
3. For detailed instructions regarding WiFi connection and using the smartphone App, please refer to
“Controlling The Product With The APP” section.

P.10
Operation Instructions
C. Drainage Instructions
When the water tank is full, the product will automatically stop operating, Water Tank Full Indicator
Light will light up constant, LED Display will show “FL”, and buzzer will beep 5 times.
1. Turn off the product, then pull out the water tank and empty out the water.
2. Reinstall the water tank properly into the product body.
3. Turn on the product and it will resume normal operation.
Continuous Drainage
This product is equipped with a continuous drainage outlet, user can purchase a drainage hose with
inner diameter of 10mm, and connect it to the back of the product body to drain off water. It is
recommended not to immerse the end of the drainage hose in water nor use a drainage hose that is
too long, which may lead to the opening of the hose becoming clogged and causing pressure to build
up inside the hose, resulting in inadequate drainage leading to water leakage.

P.11
Operation Instructions
Connecting The Product To WiFi
This product can be controlled via smartphone with German Pool Smart Control APP.
A. How To Set Up The APP
1. Connect your phone to WiFi then scan the QR Code below to download and install German Pool
Smart Control APP.
2. Click “Sign Up” to register your account (Pic 1).
3. Enter your email address, click “Get Verication Code” and a one-time verication code (OTP) will
be sent to your email (Pic 2).
4. Enter OTP, set up your password then click “Done” (Pic 3).
Pic 1 Pic 2 Pic 3
Apple IOS System
App Store
Android System
Google Play

P.12
Operation Instructions
B. Pairing Sequence
1. Click “+” on the upper right corner of the APP homepage, then click “Add Device” (Pic 4).
2. Long-press the dehumidier’s Timer/WiFi Button for 3 seconds until buzzer beeps for 5 times
and WiFi Indicator Light blinks.
3. APP will show “Discovering devices…”. When you see the dehumidier’s icon, click “Add” (Pic 5),
APP will show a large icon of the dehumidier, click “+” on the right.
4. Select WiFi name and enter your WiFi password, then click “Next” (Pic 6). Dehumidier and APP
will automatically pair up (Pic 7).
Note:
During Pairing Sequence, if APP shows an exclamation mark icon, it means pairing is unsuccessful.
Please repeat the steps in “B. Pairing Sequence” to pair again.
5. When pairing is completed, APP will show “Added successfully”. Click “Done” to return to
homepage (Pic 8).
Note:
• The product can only be paired to one account at a time. If another user pairs their smartphone to
the product, the previous account will lose their control of the product.
• User who has already been paired can share their control rights with other users. For details, see
“C. Sharing Control”.

P.13
Operation Instructions
Pic 4
Pic 7
Pic 5
Pic 8
Pic 6

P.14
Operation Instructions
C. Sharing Control
1. On the dehumidier’s homepage, click “Settings ” on the upper right corner (Pic 9), then click
“Share Device” (Pic 10).
2. Click “Add Sharing”, set the number of users with whom you wish to share control, then click
“Share with the Account Smart Control” (Pic 11).
3. Enter that account’s registered email address, then click “Done” on the upper right corner.
Note:
On the “Share Device” page, you can add or delete other accounts’ control rights.
Pic 9 Pic 10 Pic 11
Menu

P.15
• Tap Increase Key to increase target humidity by 5%; tap Decrease
Key to decrease target humidity by 5%
• Target humidity is adjustable from 30-85%, if target humidity is set
to below 30%, The product will enter Continuous Dehumidify Mode
• These keys are not operable in Dry Mode
Operation Instructions
Controlling The Product With The APP
Key Description
Power • Tap this key to turn on the product. By default, product is set at
40% humidity and High Fan Speed
• Tap key 1 time again to turn off the product. Compressor will stop
running, and blower will run for 1 extra minute more before turning
off
• Tap this key then select High Wind Speed or Low Wind Speed
• This key is not operable in Dry Mode or when product is defrosting
• Tap this key then select Dehumidify Mode / Fan Mode / Dry Mode
• Tap this key then select UVC/Anion Function, Timer Function or
Child Lock Function
Target Humidity
Decrease/
Increase
Fan Speed
Mode
Menu
Settings Key
Target Humidity
Display
Current Humidity
Display
Mode Key
Fan Speed KeyPower Key
Power Key
Timer Key
Target Humidity
Increase Key /
Decrease Key
Menu Key
Menu

P.16
Pic 1 Pic 2 Pic 3
Timer Function
1. Select Timer Function to enter into Timer Function page. Tap “Add” to enter Timer Setting page
(Pic 1).
2. In Timer Setting page, user can set the following parameters (Pic 2):
a. Select time.
b. “Repeat” section: Select whether you wish to repeat this timer (select day/s of the week; when
Timer is turned on, the dehumidier will run according to the setting for that specic day of the
week).
c. “Note” section: Make remark for your own reference.
d. “Power” section: Set the timer as On-Timer (time to turn on the product) or Off-Timer (time to
turn off the product).
3. After setting is completed, return to Timer Function page. If you wish to add more timers, tap “Add
Schedule” at the bottom of the page (Pic 3).
Operation Instructions

P.17
Operation Instructions
Child Lock Function
1. Tap the switch on the right of "Child Lock" to turn Child Lock on and off. Green indicates Child
Lock is on, grey indicates Child Lock is off (Pic 4).
2. When Child Lock is turned on, dehumidier homepage will show a Child Lock icon (Pic 5).
UVC/Anion Function
1. Tap the switch on the right of "UVC/Anion" to turn UVC/Anion Function on and off. Green indicates
UVC/Anion Function is on, grey indicates UVC/Anion Function is off (Pic 4).
2. When UVC/Anion Function is turned on, dehumidier homepage will show a heart icon (Pic 6).
Pic 4 Pic 5 Pic 6
Menu Menu

P.18
Cleaning & Maintenance
WARNING!
Turn off the product and unplug it from the power source before cleaning and maintenance to avoid the
possibility of electric shock.
Cleaning The Product Body
The product body may be wiped with a wrung out soft cloth. DO NOT use alcohol, gasoline or other
chemical solvents to clean the product to avoid damaging the housing or causing malfunction.
Cleaning The Filter Screen
1. Remove the lter screen from the back housing, and use vacuum cleaner to gently remove the
dust from the lter screen.
2. If the lter screen is very dirty, use warm water (40°C or below) to rinse off the dirt then allow the
lter screen to air dry completely.
3. Reinstall the lter screen properly onto the back housing of the product.
Note:
• It is recommended to at least clean the lter screen once per 2 weeks’ continuous use.
• To prevent the lter screen from becoming deformed, it needs to be air-dried naturally after
cleaning.
• DO NOT use dryer of any kind.
• DO NOT clean with hot water, alcohol, gasoline, benzene or other chemical solvents.

P.19
Cleaning & Maintenance
Install The HEPA Filter (Optional)
Remove the lter screen from the back housing, Insert the HEPA lter into the 4 latches, then reinstall
the lter screen.
Storage
If this product will not be used for a prolonged period of time, please store it away according to the
steps below:
1. Pour off any residual water in the water tank, and wipe off any water that has dripped onto the
base of the water tank slot.
2. Dry off the water tank, and store the power cord inside it.
3. Clean off the lter screen.
4. Store this product in a dry and ventilated place away from sunlight.

P.20
Troubleshooting
Problem Possible Cause Solution
Air blown out is
warm
Product does
not work
Dehumidifying
effect is not
pronounced
No air is blown
out
Product is noisy
when operating
The air of the dehumidier passes
through the temperature recovery unit,
so warm air is discharged (no cooling
function)
Is the power plug plugged in properly?
Is the water tank full? Or is the water
tank not inserted properly?
Is the air inlet or air outlet blocked?
Is the room temperature or humidity
too low?
Is the lter screen clogged?
Is the product placed on a slanted or
unsteady surface?
Is the lter screen clogged?
This is a normal phenomenon
Insert the power plug properly into the
socket
Empty the water tank and reinsert it
properly back into the correct position
Remove blockage from air inlet or air
outlet
In dry season, the product’s dehumidifying
effect will be less pronounced
Clean the lter screen according to
“Cleaning & Maintenance” section
Place product on a level and sturdy
surface
Clean the lter screen according to
“Cleaning & Maintenance” section
WARNING!
• DO NOT repair or disassemble this product by yourself. Before maintenance work, turn off the
product and unplug product from the power source.
• If user encounters problems not mentioned below or if problem persists, please contact German
Pool Customer Service & Repair Centre for assistance. This product must be repaired by German
Pool Customer Service & Repair Centre only; if user entrusts personnel not designated by German
Pool, or if user performs repair work on their own, there may be a risk of personal injury or
property loss.
Table of contents
Other German pool Dehumidifier manuals

German pool
German pool KD-708B2 User manual

German pool
German pool DHM-706S User manual

German pool
German pool DHM-717 User manual

German pool
German pool DHM-706 User manual

German pool
German pool DHM-914 User manual

German pool
German pool DH-310 User manual

German pool
German pool DHM-906 User manual

German pool
German pool DHM-522 User manual

German pool
German pool DHM-620 User manual

German pool
German pool DHM-613 User manual