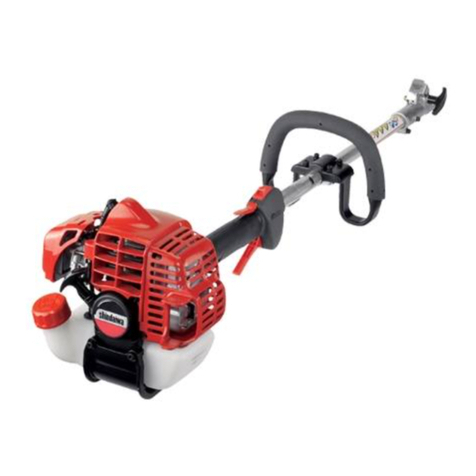
Shindaiwa 99909-22000 User manual

SHINDAIWA INSTRUCTIONS
Power Broom Conversion Kits
99909-22000, 99909-33000
X7502235503
10/15
Assembly:
1. Remove existing gear case assembly from unit.
2. Install tube guard (A) onto outer shaft tube.
3. Remove drum assembly from drum axle (C) on right
hand side of gear case.
4. Loosen clamping bolt on gear case (D) and remove
locating screw (E).
NOTE
Assure that locating hole of internal collar aligns with
locating hole in gear case.
5. Slide gear case onto outer tube. Align locating hole in
gear case with locating hole in outer tube and install
locating screw (E). Secure gear case by tightening
clamping bolt (D).
6. Install drum assembly on to drum axle (C).
IMPORTANT
Drum must be installed with its recessed end facing
toward the gear case.
Copyright© 2015 By Echo, Incorporated
All Rights Reserved.
CAUTION!
After converting your trimmer to a Power Broom, access www.shindaiwa.com or call Shindaiwa at 1-877-986-
7783 to get an appropriate Power Broom operator’s manual.
HAndle:
1. Remove existing handle from outer tube.
2. Remove adjustment knob (A). Locate the front handle assembly
at the best position for operator comfort (usually about 10 inches
ahead of the throttle trigger). Install and tighten adjustment knob.
A
A
B
A
B
C
D
E
D
E
7. Use cotter pin (B) to secure the drum assembly on the axle (see inset). The cotter pin is designed to t tightly
against the outboard end of the drum, so you may need to compress the drum face slightly during installation.
Spead the ends of the cotter pin to secure.
Contents:
Gear Case/ Sweeper Assembly 1
Tube guard 1
Front handle assembly 1
Cotter Pin 1
Assembly Tool (s)
IMPORTANT!
The terms “left,” “left-hand,” and “LH”: “right,” “right-hand,” and “RH”; “front” and “rear” refer to directions as
viewed by the operator during normal operation of the unit.

1. Saque de la unidad el conjunto de caja de engranajes
existente.
2. Instale el protector de tubo (A) en el tubo del eje exterior.
3. Quite el conjunto de tambor del eje del tambor (C) en
el lado derecha de la caja de engranajes.
4. Aoje el perno de sujeción de la caja de engranajes (D) y
quite el tornillo guía (E).
NOTA
Asegúrese de que el agujero guía del collar interno se
alinee con el agujero guía de la caja de engranajes.
5. Deslice la caja de engranajes en el tubo exterior. Alinee el
agujero guía de la caja de engranajes con el agujero guía
del tubo exterior e instale el tornillo guía (E). Fije la caja
de engranajes apretando el perno de sujeción (D).
6. Instale el conjunto de tambor en el eje del tambor (C).
ensAmblAr
Contenido:
Caga de engranajes 1
Protector de tubo 1
INSTRUCCIONES DE SHINDAIWA
Juegos de conversión de barredoras Power Broom
99909-22000, 99909-33000
Copyright© 2015 por Echo, Incorporated
Todos los derechos reservados
A
1. Quite el mango existente.
2. Quite el boton de ajuste (A). Sitúe el conjunto de mango en la
posición más cómoda para el operario, generalmente unos 25
cm por delante de la palanca del acelerador. Instalar y fíjelo
apretando el botón de ajuste.
mAngo
7. Utilice una chaveta (B) para jar el conjunto del tambor al eje de transmisión (consulte la página insertada).
La chaveta está diseñada para encajar justamente contra el extremo exterior del tambor, por lo que puede ser
necesario comprimir el frente del tambor ligeramente durante la instalación. Separe los extremos de la chaveta
para asegurar.
A
B
A
B
C
D
E
D
E
Conjunto de mango 1
Chaveta 1
IMPORTANTE
Los dos conjuntos de tambor son idénticos, pero cada tambor
debe instalarse con su extremo rebajado mirando hacia la caja
de engranajes.
PRECAUCIÓN!
Después de convertir su recortadora a un Power Broom, acceda a www.shindaiwa.con o llame a Shindaiwa
al 1-877-986-7783 para obtener un manual del operador apropiado de la barredora Power Broom.
X7502235503
10/15
IMPORTANTE
Los términos “izquierdo/a” y “lado izquierdo”; “derecho/a” y “lado derecho”; “parte delantera” y “parte
trasera” se reeren según las observa el operador durante la operación normal de la unidad.
Herramienta (s) de Montaje

1. Retirer de l’appareil le boîtier de transmission existant.
2. Mettre en place le protège-tube (A) sur le tube d’arbre
externe.
3. Retirer le tambour de son axe (C) du côté droite du
boîtier de transmission.
4. Desserrer la boulon de maintien du boîtier de transmis-
sion (D) et retirer la vis de centrage (E).
REMARQUE
Vérier que le trou de centrage dans le collier intérieue
est aligné avec le trou du boîtier de transmission.
5. Glisser le boîtier de transmission sur le tube externe.
Aligner le trou de centrage du boîtier de transmission
sur le trou de centrage du tube externe, et mettre en
place la vis de centrage (E). Fixer le boîtier de trans-
mission en serrant la boulon de maintien (D).
6. Mettre en place le tambour sur son axe (C).
AssemblAge
Conteu:
Boîtier de transmission 1
Protège-tube 1
INSTRUCTIONS SHINDAIWA
Kits de conversion PowerBroom
99909-22000, 99909-33000
Copyright © 2015 par Echo, Incorporated
Tous droits réservés.
1. Retirer la poignée qui est installé.
2. Retirer la bouton d’ajustement (A). Positionner la assemblage
du poign
é
e de façon à offrir un confort optimal à l’utilisateur (à
environ 25 cm (10 in.) de l’extrémité du corps de l’accélérateur).
Installer et serrer la bouton d’ajustement. A
Poignée
MISE EN GARDE!
Après avoir converti le taille-bordures en outil PowerBroom, aller sur www.shindaiwa.com ou téléphoner à
Shindaiwa au 1-877-986-7783 pour obtenir le manuel d’utilisation PowerBrown applicable.
A
B
A
B
C
D
E
D
E
Assemblage du Poign
é
e 1
Goupille fendue 1
IMPORTANT
Les deux tambours sontidentiques mais chacun doit
êtreinstallé de manière à ce que lasection incurvée soit ori-
entée versle boîtier d’engrenage.
7. Utiliser goupille fendue (B) pour xer le tambour sur l'axe (voir illustration). La goupille fendue est conçue
pour appuyer parfaitement la surface extérieure du tambour; vous devrez peut-être enfoncer légèrement la
surface du tambour pendant l'installation. Étendre les extrémités de la goupille fendue pour xer.
X7502235503
10/15
IMPORTANT
Les termes « gauche » et « LH » ; « droit(e) » et « RH » ; « avant » et « arrière » se rapportent au sens vu de
l’utilisateur lors du fonctionnement normal de l’appareil.
Outil(s) d’assemblage

Thank you for choosing Shindaiwa Power Equipment
Please go to http://www.shindaiwa-usa.com to register your new product on-line. It's FAST and EASY! NOTE:
your information will never be sold or misused by ECHO, Inc. Registering your purchase enables us to contact you
in the unlikely event of a service update or product recall, and veries your ownership for warranty consideration.
If you do not have access to the Internet, you can complete the form below and mail to:
ECHO Inc., Product Registration, PO Box 1139, Lake Zurich IL 60047
Gracias por elegir Shindaiwa Power Equipment
Por favor, ingrese a sitio web http://www.shindaiwa-usa.com/Warranty/Register-Your-ECHO para registrar su nuevo
producto en línea. Es RAPIDO y FACIL! NOTA: Su información nunca será vendida o mal utilizada por ECHO,
Inc. El registro de su compra nos permite comunicarnos con usted en el caso de una actualización de servicio,
o el retiro del producto del mercado, y vericar la propiedad de su producto para consideraciones de garantía.
Si no tiene acceso al Internet, usted puede completar el siguiente formulario y enviarlo a:
ECHO Inc., Product Registration, PO Box 1139, Lake Zurich IL 60047.
Merci d’avoir choisi Shindaiwa Power Equipment
SVP allez sur (http://www.shindaiwa-usa.com an d’enregistrer vos unités neuves en ligne. C’est rapide et facile!
NOTE : Vos informations ne seront jamais vendues ou utilisées inadéquatement par ECHO INC. L’enregistrement
des unités nous permet de vous contacter dans l’éventualité improbable d’un rappel ou d’une mise à niveau tech-
nique ainsi que certier que vous en êtes le propriétaire en cas de besoin d’une réparation sous garantie.
Si vous n’avez pas accès a l’internet vous pouvez compléter le formulaire ci-inclus et le poster à l’adresse suivante :
ECHO Inc., Product Registration, PO Box 1139, Lake Zurich IL 60047.


NOTES
NOTAS
REMARQUES

NOTES
NOTAS
REMARQUES

SERVICE APRÈS-VENTE ECHO: Pour toute assistance ou question concernant l’application, l’utilisation ou
l’entretien de ce produit, appeler le service après-vente ECHO au 1-800-673-1558, de 08:30 à 16:30 heures (heure
normale du centre), du lundi au vendredi. Avant d’appeler, veiller à disposer des numéros de modèle et de série de l’unité
an d’aider votre représentant du service après-vente.
ECHO CONSUMER PRODUCT SUPPORT: If you require assistance or have questions concerning the application,
operation or maintenance of this product you may call the ECHO Consumer Product Support Department at 1-800-673-
1558 from 8:30 am to 4:30 pm (Central Standard Time) Monday through Friday. Before calling, please know the model
and serial number of your unit to help your Consumer Product Support Representative.
ASISTENCIA AL CLIENTE DE ECHO: Si usted requiere asistencia o tiene preguntas concernientes a la aplicación,
operación, o mantenimiento de este producto llame al departamento de asistencia al cliente de ECHO al 1-800-673-1558
de 8:30 am. a 4:30 pm. (Hora del Centro) de Lunes a Viernes Antes de llamar por favor saber el modelo y numero de
serie de su unidad para ayudar a su representante de asistencia al cliente.
Yamabiko Corporation
7-2 Suehirocho 1-Chome, Ohme,
Tokyo, 198-8760, Japan
Phone: 81-428-32-6118
Fax: 81-428-32-6145
ECHO Incorporated.
400 Oakwood Road
Lake Zurich, IL 60047-1564 U.S.A.
Telephone: 1-877-986-7783
Fax: 1-847-540-8416
www.shindaiwa-usa.com
This manual suits for next models
1
Table of contents
Languages:
Other Shindaiwa Lawn And Garden Equipment manuals
Shindaiwa
Shindaiwa PowerBroom PB2500 User manual

Shindaiwa
Shindaiwa PowerBroom PS344 Owner's manual

Shindaiwa
Shindaiwa 230PH Owner's manual

Shindaiwa
Shindaiwa PowerBroom X7502891100 Owner's manual
Shindaiwa
Shindaiwa M254 Owner's manual

Shindaiwa
Shindaiwa PowerBroom X7502235300 Owner's manual
Shindaiwa
Shindaiwa T282 Owner's manual

Shindaiwa
Shindaiwa DH232 Owner's manual

Shindaiwa
Shindaiwa T2510 User manual
Shindaiwa
Shindaiwa LE242 Owner's manual