8
6. Running
After the unit is mounted to the control panel and wiring is completed, operate the unit following the procedures below.
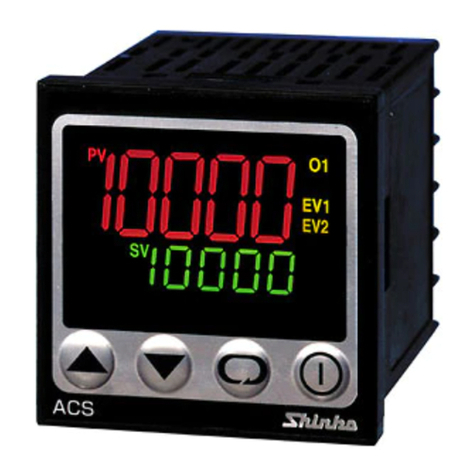
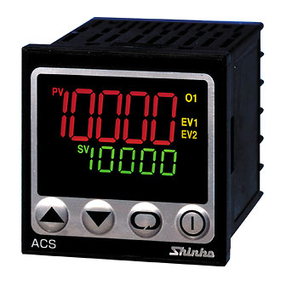
(1) Turn the power supply to the ACS-13A ON.
(2) Set up the unit. (Refer to “5. Operation flowchart”.) Setup should occur before using this controller, to set the Input
type,Alarm type, Direct/Reverse control, etc. in the Setup mode. If the users’ specification is the same as the default
value of the ACS-13A, it is not necessary to set up the controller. Proceed to Step (3).
(3) Input each set value. Input each set value. Refer to “5. Operation flowchart” and “7.Basic settings”.
(4) Turn the load circuit power ON. Control action starts so as to keep the control target at the SV.
7. Basic settings
Main setting mode (When setting SV to 100 ) Auto-tuning Perform/Cancel (PID control)
(1) Proceed to the Main setting mode.
Press the key in the PV/SV
display mode. The unit proceeds
to the Main setting mode.
(1) Proceed to the Sub setting mode.
Press the key while pressing
the key in the PV/SV display
mode. The unit proceeds to the
Sub setting mode.
(2) Set SV.
Set SV with the or key. (2) Select AT Perform/Cancel.
Select AT Perform with the
key, or select AT Cancel with
the key.
(3) Register the SV.
Register the SV by pressing the
key. The unit reverts to the
PV/SV display mode.
(3) Confirm AT Perform/Cancel.
Press the key. The unit
reverts to the PV/SV display
mode.
(4) Control starts.
Control starts so as to keep the
measuring temperature at 100 .
(4) AT Perform/Cancel
While AT is performing, the AT
indicator flashes, and it goes
off if AT is cancelled.
8. Specifications
Supply voltage : 100 to 240V AC 50/60Hz, 24V AC/DC 50/60Hz
Allowable voltage fluctuation: 100 to 240V AC: 85 to 264V AC, 24V AC/DC: 20 to 28VAC/DC
Accuracy (Setting and Indication):
Thermocouple : Within 0.2% of each input span 1digit, or within 2 (4 ), whichever is greater
However R, S input, 0 to 200 (0 to 400 ): Within 6 (12 )
B input, 0 to 300 (0 to 600 ): Accuracy is not guaranteed
K, J, E, T, N input, less than 0 (32 ): Within 0.4% of input span 1digit
RTD : Within 0.1% of each input span 1digit, or within 1 (2 ), whichever is greater
DC current, voltage : Within 0.2% of each input span 1digit
Control output (OUT1)
Relay contact : 1a, Control capacity: 3A 250V AC (resistive load)
1A 250V AC (inductive load cos =0.4),Electrical life: 100,000 cycles
Non-contact voltage (for SSR drive): 12V DC 15%, Max. 40mA DC (short circuit protected)
DC current : 4 to 20mA DC, Load resistance, Max. 550
Alarm 1, Alarm 2 (A2 option), Heater burnout alarm output (W, W3 option)
Relay contact 1a, Control capacity: 3A 250V AC (resistive load), Electrical life: 100,000 cycles
Control output (OUT2) (D option): Relay contact 1a, Control capacity, 3A250V AC(resistive load), Electrical life: 100,000 cycles
Non-contact voltage (for SSR drive): 12V DC 15%, Max. 40mA DC (short circuit protected)
Contact input : Circuit current when closed: Approx. 12mA
Power consumption : Approx. 8VA
Ambient temperature : 0 to 50 (32 to 122 )
Ambient humidity : 35 to 85%RH (No icing and condensation)
Weight : Approx. 120g
Accessories included : Instruction manual 1 copy, Mounting frame 1 piece
Gasket (Front mounted to the ACS-13A) 1 piece
CT (Current transformer):
CTL-6S: 1 piece [W (20A) option] CTL-12-S36-10L1U: 1 piece [W (50A) option]
CTL-6S: 2 pieces [W3 (20A) option] CTL-12-S36-10L1U: 2 pieces [W3 (50A) option]
Accessories sold separately: Terminal cover, 50 Shunt resistor(DC current input), USB communication cable(CMA)
