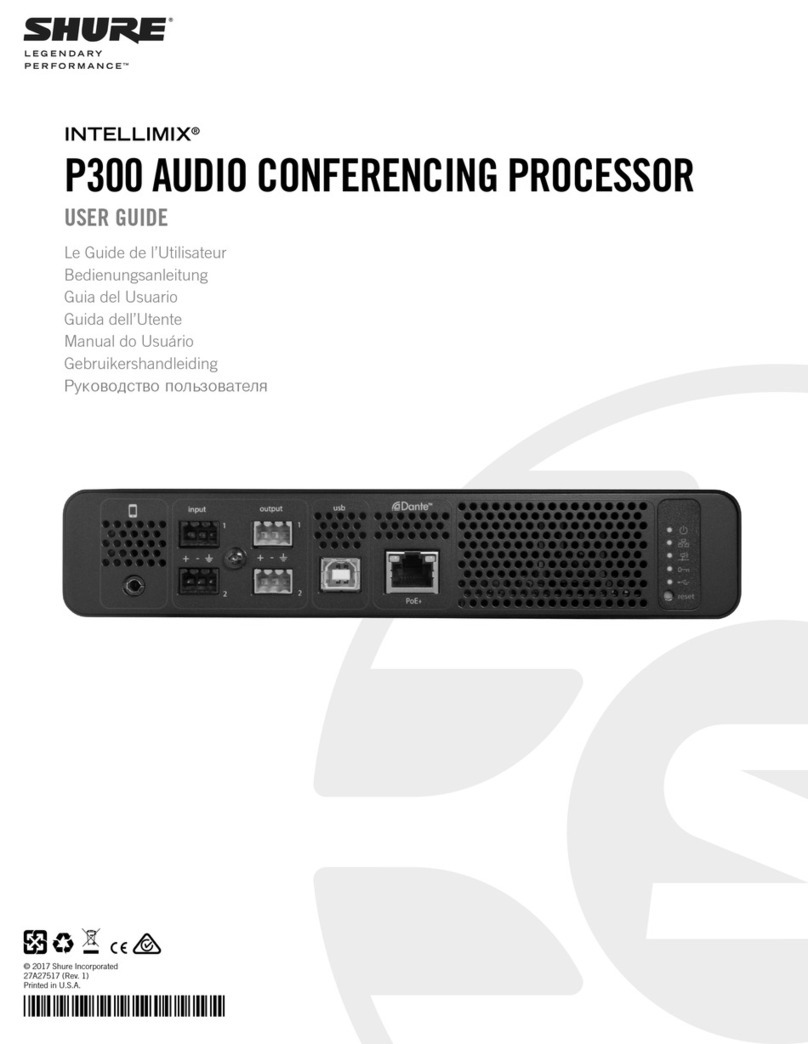
Shure INTELLIMIX P300 User manual

P300
IntelliMix Audio Conferencing Processor
®
Complete user guide for the P300. Includes system diagrams, specifications, installation instructions, command strings, and more.
Version: 5 (2020-B)

Shure Incorporated
2/46
Table of Contents
P300IntelliMix® Audio Conferencing Processor 4
Safety Information 4
IMPORTANT SAFETY INSTRUCTIONS 4
Overview 5
General Description 5
Features 5
Getting Started 5
Step 1: Connect to a Network 6
Step 2: Discover the P300 in Designer 6
Step 3: Route Audio to the P300 6
Step 4: Adjust DSP and Route Signals 7
Get More Information 8
Differences Between 3.x and 4.x Firmware 8
Use Cases 8
Overview of Shure Conferencing Devices 8
P300 and Computer with Soft Codec 10
Connecting a USB Device 10
Hardware Codec System 11
Mobile Phone System 12
Mobile Connection Cable Requirements 12
Controlling Devices with Shure Designer Software 13
P300 Hardware 14
Power Over Ethernet Plus (PoE+) 17
Cable Requirements 17
Reset 17
Installation 17
Installation and Rack Mounting 18
Schematic View 20
Adjusting Settings 20
Customizing the Workspace 21
Metering and Audio Routing 21
Mute and Fader Groups 21
Custom Presets 22
Parametric Equalizer (PEQ) 22
2-Band Equalizers 22
4-Band Equalizers 23
Equalizer Applications 24
Using Optimize audio 25
Example: Optimize Audio with P300 and MXA Microphone2
5
Automatic Gain Control (AGC) 26
Acoustic Echo Cancellation 26
Noise Reduction 27
Compressor 27
Delay 28
Matrix Mixer 28
Crosspoint Gain 28
Routing Channels 28
P300 Default Settings 28
Mute Synchronization 30
Setting Up Mute Sync on the MXA310 and P300 30
Adjusting Input levels 30
Digital Sources (Dante and USB) 31
Analog Sources 31
Mobile Devices 31
Adjusting Output Levels 31

Shure Incorporated
3/46
Pre- and Post-Gain Metering 32
Input Metering 32
Output Metering 32
Automix Modes 32
Gating 32
Gain Sharing 32
Manual 32
Automix Settings 32
Automixer Direct Out Tap Points 33
Encryption 34
Networking and Dante 34
Networking Best Practices 34
Network Audio and Shure Control Data 34
Device IP Settings 35
Configuring IP Settings 35
Manually Assigning Static IP Address 35
Operating the Control Software over Wi-Fi 35
Digital Audio Networking 36
Switch Recommendations for Dante Networking 36
Setting Latency 36
Pushing Device Names to the Dante Network 36
AES67 37
Compatibility with Dante Domain Manager 37
Packet Bridge 38
QoS (Quality of Service) Settings 38
IP Ports and Protocols 39
Using a Third-Party Control System 40
Troubleshooting 40
Event Log 40
Troubleshooting 41
Important Product Information 42
Information to the user 42
Specifications 43
Mobile Pin Assignments (TRRS) 46
Accessories 46
Furnished Accessories 46
Optional Accessories and Replacement Parts 46

Shure Incorporated
4/46
1.
2.
3.
4.
5.
6.
7.
8.
9.
10.
11.
12.
13.
14.
15.
16.
17.
18.
19.
20.
21.
P300
IntelliMix Audio Conferencing Processor
Safety Information
IMPORTANT SAFETY INSTRUCTIONS
READ these instructions.
KEEP these instructions.
HEED all warnings.
FOLLOW all instructions.
DO NOT use this apparatus near water.
CLEAN ONLY with dry cloth.
DO NOT block any ventilation openings. Allow sufficient distances for adequate ventilation and install in accordance
with the manufacturer’s instructions.
DO NOT install near any heat sources such as open flames, radiators, heat registers, stoves, or other apparatus (in
cluding amplifiers) that produce heat. Do not place any open flame sources on the product.
DO NOT defeat the safety purpose of the polarized or grounding type plug. A polarized plug has two blades with one
wider than the other. A grounding type plug has two blades and a third grounding prong. The wider blade or the third
prong are provided for your safety. If the provided plug does not fit into your outlet, consult an electrician for replace
ment of the obsolete outlet.
PROTECT the power cord from being walked on or pinched, particularly at plugs, convenience receptacles, and the
point where they exit from the apparatus.
ONLY USE attachments/accessories specified by the manufacturer.
USE only with a cart, stand, tripod, bracket, or table specified by the manufacturer, or sold with the apparatus. When a
cart is used, use caution when moving the cart/apparatus combination to avoid injury from tip-over.
UNPLUG this apparatus during lightning storms or when unused for long periods of time.
REFER all servicing to qualified service personnel. Servicing is required when the apparatus has been damaged in any
way, such as power supply cord or plug is damaged, liquid has been spilled or objects have fallen into the apparatus,
the apparatus has been exposed to rain or moisture, does not operate normally, or has been dropped.
DO NOT expose the apparatus to dripping and splashing. DO NOT put objects filled with liquids, such as vases, on the
apparatus.
The MAINS plug or an appliance coupler shall remain readily operable.
The airborne noise of the Apparatus does not exceed 70dB (A).
Apparatus with CLASS I construction shall be connected to a MAINS socket outlet with a protective earthing connec
tion.
To reduce the risk of fire or electric shock, do not expose this apparatus to rain or moisture.
Do not attempt to modify this product. Doing so could result in personal injury and/or product failure.
Operate this product within its specified operating temperature range.
®

Shure Incorporated
5/46
•
•
•
•
•
•
•
•
•
•
•
Note: Model information and power ratings are labeled on the bottom of the unit.
This symbol indicates that dangerous voltage constituting a risk of electric shock is present within this unit.
This symbol indicates that there are important operating and maintenance instructions in the literature accom
panying this unit.
Overview
General Description
The P300 IntelliMix Audio Conferencing Processor offers IntelliMix DSP algorithms optimized for audio/video conferencing ap
plications, featuring 8 channels of acoustic echo cancellation, noise reduction and automatic gain control to ensure a highqual
ity audio experience.
The P300 provides Dante (10 in/8 out), analog (2 block in/2 block out), USB (1 in/out) and mobile (3.5 mm) connectivity options
that makes connecting to room systems and collaborating with laptops and mobile devices easier than ever.
Features
Connects 10 Dante audio inputs, 2 analog inputs, USB, and a mobile device to an A/V conferencing system or a PC-
based videoconferencing application
Includes IntelliMix DSP algorithms to enhance audio quality in A/V conferences: 8 channels of AEC (acoustic echo cancel
lation), noise reduction, and automatic gain control, combined with automatic mixing, matrix mixing, delay, compressor
and parametric equalization
Flexible signal routing and connectivity: analog audio (2 block in/2 block out) to connect to room A/V conferencing system;
USB (1 in/out) to connect to laptop or room PC; one 3.5 mm TRRS jack to connect to a mobile device to enable an addi
tional participant to join
Power over Ethernet Plus (PoE+) eliminates the need for an outboard power supply
Compact form factor is easy to mount without equipment rack
Getting Started
To control the P300, use Shure Designer software to adjust settings and route audio between Shure devices. After completing
this basic setup process, you should be able to:
Control the P300 in Designer
Apply digital signal processing (DSP)
Route audio to and from devices
Before you get started, you'll need:
Cat5e (or better) Ethernet cable
Network switch that provides Power over Ethernet Plus (PoE+)
Shure Designer software installed on a computer. Download at www.shure.com.
™

Shure Incorporated
6/46
1.
2.
1.
2.
3.
1.
2.
Step 1: Connect to a Network
Connect the P300 to a PoE+ port on the network switch using Cat5e (or better) cable.
Connect your computer running Designer to the network switch.
Step 2: Discover the P300 in Designer
Open Designer, and check that you’re connected to the correct network in Settings.
Click Online devices. A list of online devices appears.
To identify devices, click the product icon to flash the lights on a device. Select the P300 in the list and click Configure
to open the device's configuration window.
Step 3: Route Audio to the P300
To route audio in Designer, create a project and a location. Learn more about both in Designer’s Help section.
For this example, we’ll connect an MXA910 ceiling array microphone. The process is the same for any networked Shure micro
phone in Designer.
From My projects, select New to create a new project.
Click New to add a location to your project. Once you enter a name, a new window for the location opens.

Shure Incorporated
7/46
3.
◦
4.
5.
6.
7.
1.
2.
3.
Click Live mode. Any online devices appear in the list.
In Designer, you can also design systems with virtual devices and send settings to real devices. Learn more in
Designer’s Help section.
Drag and drop the P300 to add it to your location. Add the MXA910 to the same location.
Go to Signal flow. This page creates Dante audio routes between Shure devices.
Note: To route audio to non-Shure devices, use Dante Controller software.
Drag and drop from the MXA910 outputs to the P300 inputs to create Dante audio routes.
If you have multiple MXA910s, route the automix outputs of the microphones to the P300 instead of the direct outputs.
Select Optimize audio. Designer automatically adjusts automix, gain, mic EQ, and applies DSP.
Step 4: Adjust DSP and Route Signals
The final steps vary depending on what other devices you connect to the P300. Regardless of what devices you connect, the fi
nal steps are to check DSP settings and route signals in the matrix mixer.
Connect any other analog, USB, or mobile audio devices to the P300.
Check the signal routes in the Matrix mixer tab. Designer establishes many common routes automatically.
Adjust levels as needed in the Inputs and Outputs tabs.

Shure Incorporated
8/46
4.
5.
•
•
•
•
•
•
•
•
Listen to your signal and adjust DSP settings as needed. Optimize audio applies DSP automatically, so you may not
need to make any adjustments.
Set the acoustic echo cancellation (AEC) reference source in Schematic > AEC. Use the channel that carries audio to
loudspeakers as the AEC reference. If your room has an analog loudspeaker system or built-in display speakers, Ana
log -- To Speaker is the most common source. If you're using Dante loudspeakers, one of Dante outputs is the refer
ence.
Get More Information
Now that the basic setup is complete, you should have access to the P300 in Designer and be able to pass audio.
Learn more about the P300 in the Designer Help section or in the complete user guide at pubs.shure.com/guide/P300.
Differences Between 3.x and 4.x Firmware
6 Dante Outputs Added
With 4.x firmware, the P300 has 10 Dante inputs and 8 Dante outputs for increased flexibility
Automixer Direct Out Tap Points Added
Choose where the microphone signals going to the matrix mixer come from: pre or postprocessing, and pre or postau
tomixer gating
These options add flexibility for reinforcement, voice lift, speaker zoning, and other applications.
Support for Dante Domain Manager
You can now add the P300 to domains in Dante Domain Manager software.
Audio Encryption Improvements
Firmware 4.x and newer has improved audio encryption, so make sure to update all Shure devices using encryption to the
same major firmware version.
Web Applications Removed
With firmware 4.x and newer, Shure Designer software is the only way to control the P300.
You can access basic settings for the device by opening it from the Shure Web Device Discovery tool, but you must use
Designer for full control.
Download Designer at shure.com/designer.
Use Cases
Overview of Shure Conferencing Devices
Shure offers a range of connectivity options for conferencing. MXA microphones, audio processors, and network interfaces all
use Dante to send audio over standard IT networks. You can use Shure's free Designer software to control most Shure devices
and route audio between them.
As you plan out a system, think about what other devices you need to connect to and whether you'll need extra inputs/outputs
in the future.

Shure Incorporated
9/46
Device Purpose Physical Connections Dante I/Os
MXA910
Ceiling array microphone
with IntelliMix DSP 1 PoE port
8 individual channel outputs
or 1 automix channel output
with IntelliMix DSP
1 AEC reference input
MXA310
Table array microphone 1 PoE port 4 individual channel outputs
or 1 automix channel output
P300
Audio processor with Intel
liMix DSP and matrix mixer
1 USB in/out
2 analog block in
2 analog block out
1 mobile TRRS port (3.5
mm)
1 PoE+ port
8 Dante inputs with IntelliMix
DSP
2 auxiliary Dante inputs
8 Dante outputs
IntelliMix Room
Audio processing software
with IntelliMix DSP and ma
trix mixer
Varies depending on device
8 or 16 Dante inputs with In
telliMix DSP
8 auxiliary Dante inputs
8 Dante outputs
1 virtual audio input and out
put
1 PC input and output
ANIUSB-MATRIX
Matrix mixer with USB and
analog input/output
1 USB in/out
1 analog block in
1 analog block out
1 PoE port
4 Dante inputs
2 Dante outputs
ANI4IN (block or XLR con
nectors)
Converts analog signals to
Dante signals
4 analog in
1 PoE port 4 Dante inputs
ANI4OUT (block or XLR
connectors)
Converts Dante signals to
analog signals
4 analog out
1 PoE port 4 Dante outputs
ANI22 (block or XLR con
nectors)
Converts 2 analog signals to
Dante signals
Converts 2 Dante signals to
analog signals
2 analog in
2 analog out
1 PoE port
2 Dante inputs
2 Dante outputs

Shure Incorporated
10/46
1.
2.
3.
4.
5.
P300 and Computer with Soft Codec
Connect the computer to the USB port on the P300.
Connect a powered loudspeaker or amplifier to the P300 analog output 2. In the matrix mixer, this is labeled Analog - To
Speaker. You can also use Dante PoE loudspeakers connected to the network switch.
In Designer, go to Matrix mixer to make connections between devices. Some connections are established automatical
ly.
Required Matrix Mixer Connections:
Input Output
Automix USB output
USB input Analog - To Speaker or Dante output
In Schematic, right-click any AEC block and choose an AEC reference source. The reference source is Analog - To
Speaker for analog loudspeakers, or one of the Dante outputs for Dante loudspeakers.
Adjust input and output levels using Designer and perform a sound check. Refer to the Help section for additional infor
mation.
Connecting a USB Device
The USB port connects the host computer to the entire room audio system, including microphones and loudspeakers.
When the P300 is connected for the first time, the computer recognizes it as a USB audio device. You may need to select it as
the input/output (recording/playback) device to pass audio. Assign the P300 as the default device to ensure it passes audio
every time it is plugged in. Refer to the manual for your computer to configure the audio settings.

Shure Incorporated
11/46
1.
2.
3.
4.
5.
6.
Adapter Compatibility
This device is compatible with USBB to USBC adapters. Using an adapter is only recommended for desktop and laptop com
puters, as many mobile devices do not support bi-directional audio through USB or lightning ports.
Hardware Codec System
Connect the hardware codec audio output to the P300 analog input 1. In the matrix mixer, this is labeled Analog From
Codec.
Connect the hardware codec audio input to the P300 analog output 1. In the matrix mixer, this is labeled Analog To
Codec.
Connect a powered loudspeaker or amplifier to the P300 analog output 2. In the matrix mixer, this is labeled Analog - To
Speaker. You can also use Dante PoE loudspeakers connected to the network switch.
In Designer, go to Matrix mixer to make connections between devices. Some connections are established automatical
ly.
Required Matrix Mixer Connections:
Input Output
Automix Analog - To codec
Analog - From Codec Analog - To Speaker or Dante output
In Schematic, right-click any AEC block and choose an AEC reference source. The reference source is Analog - To
Speaker for analog loudspeakers, or one of the Dante outputs for Dante loudspeakers.
Adjust input and output levels using Designer and perform a sound check. Refer to the Help section for additional infor
mation.

Shure Incorporated
12/46
1.
2.
3.
4.
5.
Mobile Phone System
In this example, when the phone is plugged in, the built-in microphone and speaker are disabled -- the phone simply carries
the call. The MXA310 microphone captures near-end audio, and the loudspeaker delivers audio from the far end of the call.
Connect the phone to the P300 with a 1/8-inch TRRS cable.
Connect a powered loudspeaker or amplifier to the P300 analog output 2. In the matrix mixer, this is labeled Analog - To
Speaker. You can also use Dante PoE loudspeakers connected to the network switch.
In Designer, go to Matrix mixer to make connections between devices. Some connections are established automatical
ly.
Required Matrix Mixer Connections:
Input Output
Automix Mobile output
Mobile input Analog - To Speaker or Dante output
In Schematic, right-click any AEC block and choose an AEC reference source. The reference source is Analog - To
Speaker for analog loudspeakers, or one of the Dante outputs for Dante loudspeakers.
Adjust input and output levels using Designer and perform a sound check. Refer to the Help section for additional infor
mation.
Mobile Connection Cable Requirements
A 1/8-inch TRRS cable is required to connect a phone to the P300. Avoid using cables with a metal flange, as it may create an
electrical connection to the exterior of the phone and interrupt the signal.

Shure Incorporated
13/46
•
•
To ensure proper operation, only use:
Apple-approved cables
Cables with a plastic or non-conductive flange
Note: If necessary, a TRS (tip/ring/sleeve) cable may be used to plug a stereo device into the P300, but the device will only be able to send audio to the P300.
The Enable auto-mute feature on the mobile input channel must be turned off in this case.
Controlling Devices with Shure Designer Software
To control this device's settings, use Shure Designer software. Designer enables integrators and system planners to design au
dio coverage for installations using MXA microphones and other Shure networked devices.

Shure Incorporated
14/46
1.
2.
3.
4.
To access your device in Designer:
Download and install Designer on a computer connected to the same network as your device.
Open Designer, and check that you’re connected to the correct network in Settings.
Click Online devices. A list of online devices appears.
To identify devices, click the product icon to flash the lights on a device. Select your device in the list and click Config
ure to control device settings.
Learn more at shure.com/designer.
You can also access basic device settings using Shure Web Device Discovery. Full control is available in Designer.
P300 Hardware
Rear panel
Front panel
①Mobile Input
TRRS mobile input connects to a mobile device. Supports bidirectional audio with a TRRS cable, or sends audio into the
P300 with a TRS cable.
Note: See the cable requirements for additional information.

Shure Incorporated
15/46
Pin Assignments:
Tip Audio Input (Left)
Ring 1 Audio Input (Right )
Ring 2 Ground
Sleeve Audio Output (To Phone)
Note: Left and Right audio signals are summed to a mono signal.
②Audio Inputs (Block Connector)
Balanced audio input connects to an analog audio device. Set the analog input level to match the output level of the analog
device.
Input sensitivity:
Line (+4 dBu)
Aux (-10 dBV)
Block Pin Assignments:
Audio +
Audio -
Audio ground
③Chassis Ground Screw
Provides an optional connection for microphone shield wire to chassis ground.
④Audio Outputs (Block Connector)
Balanced audio output connects to an analog device. Set the output level to match the input sensitivity of the analog device
(Line, Aux, or Mic level).
Audio +
Audio -
Audio ground
⑤USB Port
Connects to a computer to send and receive audio signals. Use the matrix mixer to sum any combination of signals from
the P300 into a single mono channel and send through the USB output.
⑥Dante Network Port
Connects to a network switch to connect Dante audio, Power over Ethernet (PoE), and data from the control software.
⑦Reset Button

Shure Incorporated
16/46
Resets the device settings back to the factory default.
⑧LED Indicators
Power: Power over Ethernet Plus (PoE+) present
Note: Use a PoE+ injector if your network switch does not supply PoE+.
Network: Ethernet connection active
Network Audio: Dante audio present on the network
Network Audio LED Behavior
LED Status Activity
Off No active signal
Green Device is operating successfully
Red Error has occurred. See event log for details.
Encryption:
LED Status Activity
Off Audio not encrypted
Green Encryption enabled
Red
Encryption error. Possible causes:
Encryption is enabled on one device and not on another
Passphrase mismatch
USB Audio
LED State Status
Off No USB device connected
Green USB device operating successfully
Red (flashing) Problem detected with connected USB audio device
Note: Error details are available in the Event Log.
⑨Level Indicators (Signal/Clip)
Tri-color LEDs indicate the audio signal level for the analog channels. Adjust output levels to avoid clipping.

Shure Incorporated
17/46
•
•
Analog Input/Output
LED State Audio Signal Level
Off less than -60 dBFS
Green -59 dBFS to -24 dBFS
Yellow -23 dBFS to -1 dBFS
Red 0 dBFS or more
Note: The input and output LEDs stay off when metering is set to Post-gain and the channel is muted.
Power Over Ethernet Plus (PoE+)
This device requires PoE Plus to operate. It is compatible with both Class 4 PoE+ sources.
Power over Ethernet is delivered in one of the following ways:
A network switch that provides PoE+
A PoE+ injector device (must be a Gigabit device)
Cable Requirements
Always use Cat5E cable or higher.
Reset
The reset button is located inside a small hole in the rear panel. Use a paperclip or other small tool to press the button.
There are 2 hardware reset functions:
Network reset (press button for 4-8 seconds)
Resets all Shure control and audio network IP settings to factory defaults.
Full factory reset (press button for longer than 8 seconds)
Resets all network and Designer settings to the factory defaults.
Software Reset Options
Reboot Device (Settings > Factory Reset): Power-cycles the device as if it were unplugged from the network. All settings
are retained when the device is rebooted.
Restore Factory Defaults (Settings > Factory Reset): Restores all network and Designer settings to the factory defaults.
This is the same as performing a full factory reset using the reset button on the device.
Default Settings (Presets > Load Preset > Default Settings): Reverts audio settings back to the factory configuration
(excluding Device Name, IP Settings, and Passwords).
If you’re using Shure Designer software to configure your system, please check the Designer help section for more about this topic.

Shure Incorporated
18/46
Installation
Installation and Rack Mounting
Two mounting solutions are available for installing the P300:
CRT1 19" Rack Tray (optional accessory): Supports up to 2 devices (two P300s or one P300 and one ANI4IN, ANI4OUT,
ANI22, or ANIUSB); mountable in a rack or under a table
Single-unit Mounting Tray (included accessory): Supports a single device for mounting under a table
Securing the Devices
Use the included screws from the mounting hardware kit to secure each P300 or Audio Network Interface (ANI). Devices can
be mounted to face either direction. Insert the screws from the bottom in the appropriate holes, according to the following dia
grams:
Align the holes as shown for securing a single device in the single-unit mounting tray

Shure Incorporated
19/46
1.
2.
Align the holes as shown for securing up to two devices in the 19" rack tray.
Rack Ear Configuration (CRT1)
The adjustable rack ears support mounting in a standard equipment rack or underneath a table.
Standard 19" Rack Mount
Align the ears with the mounting holes pointed forward.
Install the two screws that hold the ear to the tray as shown.

Shure Incorporated
20/46
1.
2.
1.
2.
3.
4.
5.
Under-table Mounting
Align the ears with the mounting holes pointed upward.
Install the two screws that hold the ear to the tray as shown.
Installing Underneath a Table
Hold the tray in the desired location under a table
Use a pencil to mark the location of the mounting holes on the table.
Drill 4 holes for the screws. The diameter of the holes in the tray are 7.1 mm.
Install the components into the tray
Install with 4 screws to secure the tray underneath the table
Schematic View
The schematic view in Designer provides an overview of the entire audio signal chain, with the ability to adjust settings and
monitor signals.
Adjusting Settings
Right-click an input, output, or processing block to access the following options:
Per Channel
Copy / paste
Copy and paste settings between items. For example, set the equalizer curve on the USB output, and then use the same
setting for the analog output. Or, copy the gain and mute status from one input channel to several others.
Other manuals for INTELLIMIX P300
3
This manual suits for next models
1
Table of contents
Other Shure Computer Hardware manuals

Shure
Shure DFR22AZ User manual

Shure
Shure DFR22E User manual

Shure
Shure P4800 User manual

Shure
Shure DFR22 User manual

Shure
Shure HTS5000 Operating and installation instructions

Shure
Shure HTS5000 Administrator Guide

Shure
Shure DFR22 User manual

Shure
Shure INTELLIMIX P300 User manual

Shure
Shure DFR22 Quick start guide