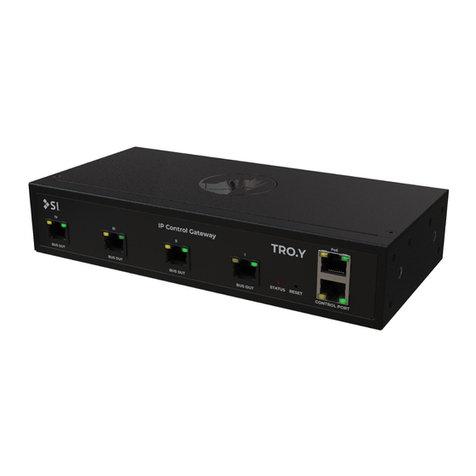
SI TRO.Y/2 Operating instructions

DOC.#400114
TRO.Y / 2
Programming Guide
201559 TRO.Y / 2 IP Gateway
302296 TRO.Y Off-line Site File Editor
®
www.screeninnovations.com | 512.832.6939 | Doc.#400114 | Version 1.5 | April 2023

2
Somfy®, UAI+™, and SDN are copyrighted and owned by Somfy Systems Inc. and are used in this
document with permission and are in full compliance with the June 2016 Somfy Trademarks, Logos
and marketing Assets Guide and Use Agreement.
Control4, the Control4 logo, the 4-ball logo, 4Store, 4Sight, Control4 My Home, Mockupancy,
BakPak, Pakedge, Pakedge TruStream, SmartWav, StealthPorts, and Triplex are registered
trademarks or trademarks of Control4 Corporation or its subsidiaries in the United States and/or
other countries.
Lutron, Pico, RadioRA 2, RadioRA 3, and Clear Connect are trademarks or registered trademarks of
Lutron Electronics Co., Inc., in the U.S. and/or other countries.
Bond, Bond Bridge Pro, Sidekick are trademarks or registered trades marks of Olibra LLC, in the U.S.
and/or other countries.
Crestron, Crestron Home, SIMPL, are trademarks or registered trademarks of Crestron Electronics,
Inc., in the U.S. and/or other countries.
Windows is a trademark or registered trademark of Microsoft, in the U.S. and/or other countries.
Apple is a trademark or registered trademark of Apple Inc., in the U.S. and/or other countries
The Zigbee logos used in this document are registered trademarks of the Connectivity Standards
Alliance (formerly, the Zigbee Alliance) and are used under the Screen Innovations limited use
grant. Screen Innovations has been an Associate Member of CSA/ZA since 10/28/2019
All product names, logos, and brands are property of their respective owners. All company, product
and service names used in this document are for identication purposes only. Use of these names,
logos, and brands does not imply any endorsement by or afliation with the trademark owner.
TRO.Y / 2 and integration connections use the following protocols and standards;
EIA/TIA-561
TIA/EIA-568B
ANSI/TIA/EIA-232-F-1997
ANSI/TIA/EIA-485-A-1998
IEEE 802.3at/bt
RFC 854 Telnet
IETF HTTP 1.1 RFC 9112
ITU-T X.274|ISO/IEC 10736:1995 TLS 1.3
Matter 1.1 Connectivity Standards Alliance
Zigbee 3.0
Thread 1.3
BLE 5.4
Synergy 2.0 API
RTS
SDN 2.0
DHCP IPv4 RFC 2131

3
Screen Innovations, SI, Nano, Zen, Transformer, Air, Solo, Janus, Killahurtz, KHz, Joule, J4M35,
Fontus, Moab, Kratos, Link Pro, Link ProZ, HELEN of TROY, Slate, Pegasus, Black Diamond, Black
Diamond Zero Edge, Flexglass, TRO.Y, Zen Roller Shades, Zero Edge, Rollable TV, and Zero-G
are all trademarks or registered trademarks of US SCREEN CORPORATION and US SHADE
CORPORATION in the U.S. and in other countries all rights reserved.
2003-2023 Copyright© US SCREEN CORPORATION
Table of Contents
Getting Started with TRO.Y / 2 4 - 7
TRO.Y / 2 Home Page Menu 8
Dashboard 9 - 11
System Settings 12
- User Interface Password /System Info/ Network Settings 13
- System Time Settings 14
- Firmware Update 14 - 15
Integration Settings 16
- Event Management 17
- Scene Management 18
- Telnet Server Settings (3rd party control systems) 19
- Telnet Client / Telnet Client Table / Phantom (Lighting Controller) 20 - 21
- HTTP / System Integration ID 22
- Wireless Bridge Settings - Link ProZ / TaHoma / TaHoma switch 23
- Wireless Bridge Settings - Helen 24 - 25
- Helen Firmware Update 26
- Integrating with J4M35 27
Integration Table 28 - 29
- 485 Device Discovery 30
- Device Conguration 31
- Zigbee Motor Conguration 31
- 485 Motor Conguration 32 - 34
- Sub GHz (RTS) Receiver Conguration 35
- 485 (SDN) Keypad Conguration(s) / Keypad CommandList 36 - 39
- Groups 40
- Super Groups 41
- Broadcast Alias / Special Groups 42
Reports / Files - Creating Site Files / Report-Backup Files / Loading Site Files 43 - 46
TRO.Y Firmware and Bootloader Fix Instructions 47
Programming Troubleshooting 48
Windows Advanced Sharing Settings 49 - 50
Firmware version used in this document 51

4
Introduction
This is a reference guide for the commissioning of a TRO.Y / 2 system. TRO.Y / 2 is the central
gateway and controller for any Screen Innovations shade, screen or drapery products.
Note: If your project contains any Zigbee or RTS motors, you must use a compatible wireless bridge
such as the SI HELEN, J4M35, Link ProZ, or TaHoma Switch. When using a Link ProZ TaHoma, or
TaHoma switch you must complete your conguration using the TaHoma app in combination
with your TaHoma/LinkPro Z.Before binding any RTS products to a TaHoma or LinkPro Z, all RTS
products must be fully commissioned. Up and Down end limits, any “my” positions, and group
hand controls (Situo remotes, DecoFlex switches, etc.) must be fully congured before working with
TRO.Y / 2.
Before starting the setup process, unbox the TRO.Y 2 unit and connect the PoE switch or PoE
injector. Verify the status LED light is solid red.
Getting started with TRO.Y / 2
1. Discover TRO.Y / 2 on the network (Pages 5-6)
2. Scan QR code on this page or goto https://support.screeninnovations.com/accessories/troy/
anddownload the latest TRO.Y / 2 rmware (Pages 14-15)
3. Using one of the four 485 ports Connect TRO.Y / 2 to your 485 network (Janus, or other PDU
or other 485 data hubs) and/or connect your wireless bridge (Helen, J4M35, Link ProZ,
TaHoma, or TaHoma Switch) (Pages 23-27)
4. Discover and congure Devices (Pages 30-39)
5. Connect any 3rd party control system(s) (Pages 19-22)
6. Save Site le and integration report (pages 43-46) and enjoy your new shade or
screen system
General Off-line Procedure Overview
1. Scan the QR code or go to TROY support page / Resource section to
download the latest version of the TRO.Y site le editor.
2. Click on the TRO.Y site le editor.
3. Congure settings for integration/devices.
4. Save site le and integration report.
Note: Throughout this guide, the green dot next to any topic means that the settings/features
are also available in the off-line editor.
TRO.Y2 is 100% backwards compatible with TRO.Y. TRO.Y2 adds a couple of new features that
was not available when the original TRO.Y was manufactured.This includes a real-time clock and
adding 12v DC power on the High-speed serial port (now labeled HELEN). The last TRO.Y rmware
is version 2.17 which is available on the SI website.TRO.Y2 ships with an initial rmware version
2.17. If you are using a TRO.Y and would like to move forward using the latest TRO.Y2 rmware,
then you must rst perform a boot-loader operation which can be found on page 47.

5
TRO.Y / 2 Discovery Procedures
Using a standard web browser, connect to TRO.Y / 2
Use one of the following methods to determine TRO.Y / 2’s IP address:
- without DHCP server
The default IP address is 169.254.169.254
- with DHCP server
If your project contains a DHCP server, the fastest way to discover
TRO.Y / 2 is using a standard “ping” comand.
Note: All TRO.Y / 2 MAC addresses start with “70:B3:D5” and can be
found on the bottom label
TRO.Y / 2 will not respond to any static pings or arp commands unless
the security bypass has been activated by pressing the reset button
once, and the status LED indicator is ashing.
- Windows Command Prompt (ping troy)
Using the windows search command, type in
“CMD”, then click to open the command prompt,
next type “ping troy” to see the current DHCP IP
address.
- Windows Command Prompt (arp -a)
Using the windows search command, type in
“CMD”, then click to open the command prompt,
next type “arp -a” to see the list of mac addresses.
- Apple Terminal
On your MAC open Terminal by clicking the
Launchpad icon in the Dock, and type Terminal in
the search eld, then click Terminal, you can now
use the “arp –a” command to nd the TRO.Y / 2
MAC address
(TRO.Y 2)
Note: In this document we highlight the sections which only apply for future rmware
releases on TRO.Y2 with this highlighted box

6
If you cannot see TRO.Y / 2 in your other devices then go to page 49 - 51 for any additional
information on how to turn on UP&P for your computer.
- Using universal plug-and-play with Windows
Open the le explorer and click on the network icon.
SI_TRO.Y is listed in “ Other Devices” in network devices.
- Double-click the TRO.Y / 2 icon to bring up the web
browser,
OR
- Right-click the TRO.Y / 2 icon to bring up the
TRO.Y / 2 properties including the IP address
The Home menu has all ve selections:

7
As with any web browser interface, refrain from using the standard back, forward or refresh buttons
as you can lose data that has not yet been saved or sent to TRO.Y / 2.
Pro-tip: You can auto-hide your address bar by going into your web browser settings to help
avoid this situation.
The refresh button is ok, but you can lose data that has not been saved or sent to TRO.Y / 2 on the
current page.
Inside the TRO.Y / 2 Interface you can use this back button, but if you have any unsaved or accepted
edits, these also may be lost, so a pop-up message will appear with this warning.
The refresh button is ok, but you can lose data that has not been saved or sent to TRO.Y / 2 on the
current page.
Web Browser Interface Etiquette

8
The TRO.Y / 2 Home menu contains 5 sub-menus:
- Dashboard – This menu provides system information and diagnostic features. The Wireless,
Telnet server and client and device status. You can also restrict any further set up
conguration menu access by creating a Password that must be entered to pass this menu.
- Integration Table – This selection provides access to the Device table, Group table, Super
Group table and Telnet Client table.
- Integration Settings – This selection provides access to the Events, Scene, Telnet server,
Telnet Client, Serial Control, Wireless Bridge, and System Integration ID conguration settings.
- System Settings – This selection provides access to the user interface password, system name,
network conguration, System Time, location, rmware loading, and system restart. You can
also view the current rmware, UI version. and the MAC address.
- Reports/Files – This selection provides access to creating/loading site les, Integration reports
and site backups.
While designing a SI shade/screen system, you will create data stored across multiple devices
such as motors, keypads, and gateway devices including the web browser that you are using to
congure or build site le for TRO.Y / 2. During the commissioning, you may experience slight
delays depending on which device(s) TRO.Y / 2 is communicating with.
Best Practice: Before leaving your unnished commissioning process, make sure to commit the
data to TRO.Y / 2 and other devices, and consider making a site backup. In other words, leaving
the browser before saving to TRO.Y / 2 and or saving a site le can cause you to lose your data
which is currently being stored in the web browser.
TRO.Y / 2 Data storage
TRO.Y / 2 Home Menu

9
Dashboard
(TRO.Y 2)
(TRO.Y 2)

10
- Using a browser and navigate to the TRO.Y / 2 IP
address found using one of the previous
methods listed on pg. 5 - 6
- If this is the 1st time, you are accessing TRO.Y / 2, no
password has been created yet. See the “User
Interface Password” option on pg. 13 to setup a
password (Must restart system to apply password).
If a password has already been created, enter it here
to navigate past this page
- If you have forgotten the password, press the reset
button on TRO.Y / 2 to bypass the security for 5
minutes. The status LED will ash during this time.
Dashboard
You can click on the “Set Time & Date” button to
set the current PC Browser Time. More options
for Time are available inside the “System Setting”
section.
Clicking on the Hypertext link will take you to the
location for the TRO.Y / 2 manual and this
Programming manual.
Clicking on the Show “485 Diagnostics” or the Show
“Helen Diagnostics” will provide a table of device(s) and the ability to test them
(TRO.Y 2)
(TRO.Y 2)
NOTE: This Menu will only appear if you have a
Helen connected to the Helen port also available inside the
system setting menu.
Clicking on the Show Helen Diagnostic will provide a table of devices,
the addresses and SILQ for each Zigbee node.

11
Connection Status Types
- Telnet Server Connection – shows the
current connection or conguration status
- Helen Wireless Bridge Connection – shows
the current connection or conguration and
authentication status
- LinkProZ/TaHoma Wireless Bridge
Connection – shows the current connection or
conguration and authentication status
- Telnet Client Connection – shows the current connection or conguration status
- 485 Devices Off-line – shows all the currently congured 485 devices that are currently
off-line
- Refresh – Click this button to update the connection status
Connection status types
Check Ethernet connection, IP and subnet address(es)
Current connection is good
Disabled in the Integration Settings Menu
Performing 485 Discovery
Connection is ok, but settings are not authenticated or are not at
the currently set IP address(es) in the integration Settings menu
(TRO.Y 2)

12
System Settings

13
User Interface Password
If it is desired to restrict access to the conguration set pages you must enter a password in the box
below and click on Submit.
Note: SI support does not have a way to unlock or change this password. If the password is lost,
you can use the Security Bypass button to allow 5 minutes to correct/modify the Password or
factory reset the unit
System Info
This displays the current Firmware version and
compile date as well as the User Interface
- Create a Network TRO.Y / 2 System Name
- MAC Address and spoof address version
Network Settings
- Enable and disable DHCP support (Note,
a system restart is needed for any logical
IP adjustments)
- Static IP, Subnet and gateway settings

14
System Time Settings
System Time Settings allow system time,
date and location to be entered for use
with events and scenes
System Reset, will perform a warm re-boot of
gateway(s)
TRO.Y / 2 Firmware
Update
Allow you to update TRO.Y / 2
system rmware with download
progress bar.
Note You must press the reset
button on the front of TRO.Y / 2
before you can submit rmware.
Note you must restart TRO.Y / 2
after any rmware update

15
Start by pressing the “Reset” button on the front of the TRO.Y unit, then select the “Choose File”
button, navigate to the recently downloaded TRO.Y / 2 rmware le that has been saved on your PC.
Then click the Submit button when ready to upload.
Firmware was uploaded successfully, if you
see the message as shown to the right in the
Results box
Firmware was not uploaded successfully, if
you see the message as shown to the right in
the Results box
You must press the “Security Bypass” button
on TRO.Y / 2 and have the status LED ashing
in order to upload the le successfully.
Note 1: On TRO.Y, if you have
attempted to load a newer
rmware greater than 2.17 you will need to
refer to page 47 for details on how to complete the upload process.
Note 2: Firmware after 2.17, is compatible with TRO.Y, however TRO.Y does not have a real time
clock, and does not provide the voltage for a Helen connected to a Control port. Features that
require a real-time clock will not function correctly on TRO.Y. Contact SI Sales if your customer
requires features from a real-time clock for information on how to upgrade to TRO.Y 2.
Q. Should I update my TRO.Y rmware to a version greater than 2.17?
A: As long as your system is working properly, the general answer is No.
Unless, the system is not working properly or you have been instructed to update the
rmware, then you may proceed.
Q. Will updating rmware beyond version 2.17 damage my TRO.Y?
A: No.
Bug xes and general le structure maintenance as well as access to new features such as
Scenes which can be triggered by other devices can be benecial.
Initiating TRO.Y / 2 Firmware Update

16
Integration Settings

17
Event Management
Events are a control command(s) that trigger (or start) a user scene at a designated time or oc-
currence.
Scenes must be crated before setting up an event
Create, Save and discard events
To create an event, click create event, type a label, select a scene and the time or occurrence of
the trigger

18
Scene Management
Scenes are command(s) that are triggered from events or 3rd party controls and send selected
commands to designated target(s)
To create a scene, click create scene, type a scene label and Integration ID, or use auto generated
ID from TRO.Y / 2
Click on the “Show Cong” button to open the drop-down menu for up to eight commands, se-
lect from the drop-down list of commands, enter any relevant parameters and select any avail-
able targets including any delay(s) required.
If you need more than 8 commands, a scene can also call another scene, for a virtually unlimited
amount of commands

19
- The Telnet Server Settings are used
for third party control systems
- Click “Enable” to start Telnet Server
Session
- Select Telnet port (default is 23)
- Select User Name and Password
- Click “Submit” when conguration is
complete
Note: Serial port data output (WHT/BLUE) is the transmit (TX) from (TRO.Y / 2 DCE) on pin 5
Serial port data input (GRN) is the receive (RX) to (TRO.Y / 2 DCE) on pin 6
Note: Use the server settings to connect to J4M35.
See page 27.
Default TRO.Y / 2 Serial Settings
Baud Rate - 4800-56K
Control bit – 8
Parity –None
Stop Bits - 1
Telnet Server Settings

20
Telnet Client
Telnet Client Action Table
- The Telnet Client Settings are typically used for
third party keypads
- Click “Enable” to start Telnet Client session
- Select IP address and TCP port
- Set User Name and Password
- Click “Submit” when your conguration is
complete
- Once your Telnet sessions are congured,
use the “Restart” button to Reboot TRO.Y / 2
Use this function to capture 3rd party control commands and create Phantom button
presses/triggers.
Once connected to 3rd party system using the network/serial connection from the Client settings
page, then create or capture commands by clicking on the capture button, then push the
corresponding 3rd party control button(s) required for your system.
Select which action (Press, Hold or Release), any command associated with this action, and
command data and any available target to send command(s) to.
This manual suits for next models
1
Table of contents
Other SI Gateway manuals