Siding Tools Industries UBENCH-B User manual

1
Table Universelle
MANUEL D’UTILISATION
Universal bench
OWNER’S MANUAL
AVERTISSEMENT
Lire et comprendre toutes les directives. Le non-respect
des directives décrites ci-dessous peut causer des
blessures graves.
VEUILLEZ CONSERVER CES DIRECTIVES POUR
RÉFÉRENCE ULTÉRIEURE.
WARNING
Read and understand all instructions.
Failure to follow all instructions listed
below may result in serious bodily injury.
SAVE THESE INSTRUCTIONS FOR FUTURE
REFERENCE.
UBENCH

2
WARNING: FAILURE TO FOLLOW THESE RULES MAY RESULT IN SERIOUS INJURY! USING
THIS MACHINE WITH RESPECT AND CAUTION WILL CONSIDERABLY LESSEN THE
POSSIBILITY OF PERSONAL INJURY.
SAFETY RULES FOR THE UNIVERSAL BENCH.
1. READ AND UNDERSTAND THIS INSTRUCTION MANUALBEFORE OPERATING
THE UNIVERSAL BENCH.
2. The Universal Bench comes with a 1 year warranty from the date of
purchase on parts only (labor excluded). To activate your warranty, we
invite you to register on our website in the service tab at :
www.sidingtoolsindustries.com
3.
If you are not thoroughly familiar with the operation of the Universal Bench,
obtain advice from a qualified worker or call 450-849-7840 or toll free
1-844-449-7840
4.
Stay alert. Do not operate while under the influence of drugs, alcohol, or
medication.
5.
Always wear safety approved eye protection with side shields (ANSI Z87.1)
6.
Keep work area and free of debris.
7.
Keep children and unauthorized persons away from the Universal Bench and
workarea.
8.
Make sure the Universal Bench and the other tools are secured. Operate
only on a firm substrate or solid stand.
9.
Always install the extension feet when using the Universal Bench
extensions.
10.
Always install the UniversalKut 12 drawer feet when cutting with the
UniversalKut12
11.
Always keep hands away from blade while operating or carrying.
12. Do not alter or misuse this tool. The Universal Bench is precision built;
modifications not specified in this manual may result in a dangerous
condition.
13.
Maintain the Universal Bench with care. Keep mechanism clean and in order.
14.
Use only recommended accessories. The use of improper accessories may
cause hazards or injury.
15.
Never leave the Universal Bench in inclement weather.
16. The Universal Bench have a capacity of 500 lbs (225 Kg). Do not exceed
this capacity.
17. The extensions have a capacity of 50 lbs (22.5 Kg). Do not exceed this
capacity. Always align the mass directly over the extension feet.
18.
Before using any tools associated or not to the Universal Bench, make sure
to read the owner’s manual and respect all safety rules.

3
Preparation of the Universal Bench
1. Put the bench on the side.
Warning:
•Keep your hand out of reach of
pinch point.
•150 lbs (68kg) assembly.
•Use team lifting
2. Open the 2 sets of legs assembly.
2.1. To do so, loosen the handle
on the internal side of the legs
assembly.
2.2. Fully close the adjustable leg.
2.3. Repeat step 2.1. for the
second legs assembly.
Warning:
•Keep your hand out of reach of
pinch point.
3. Be sure to put the legs braces in
lock position (4x).
Warning:
•Keep your hand out of reach of
pinch point.
UBENCH SETUP

4
4. Adjust the bench height according
to the next specifications
(Dimensions may vary according
to the ground flatness):
4.1. ProKut 6 :
•A : Fully open
•Height : 33,25 in (845 mm)
4.2. UniversalKut 12 :
•A : Fully close
•Height : 21.50 in (546 mm)
Warning:
•Keep your hand out of reach of
pinch point.
•Be sure to firmly tight all 4 legs
assembly handles before the
next step.
5. Pull on the bench to put it on his
foots.
Warning:
•Keep your hand out of reach of
pinch point.
•150 lbs (68kg) assembly.
•Use team lifting
To store the bench, remove all tools
and equipment on the bench or
attached to it and repeat the previous
5 steps backward.
UBENCH SETUP
A

5
Installation of the ProKut 6 on the
Universal Bench
1. Put the ProKut 6 on the drawer
provided for that purpose.
2. Align the shelf holes with the
ProKut 6 foots holes (4x).
3. Attach the ProKut 6 to the drawer
with the hardware provided for that
purpose.
Warning:
•Torque : 55 in-lbs
•Keep your hand out of reach of
pinch point.
•Do not put your fingers against
the sharp edge of the blade at
any time.
4. Insert the drawer assembly on the
track.
4.1. The drawer got 8 heights
positions and 3 depths
positions.
5. Validate the height and the depth
of the ProKut 6 with a siding slide
test.
6. Lock the drawer assembly in place
with both quick pin
Warning:
•Keep your hand out of reach of
pinch point.
•Do not put your fingers against
the sharp edge of the blade at
any time.
PROKUT 6 SETUP

6
Installation of the UniversalKut 12
on the Universal Bench
1. Prepare the UniversalKut 12
1.1. Remove the 2 rear feet
bumpers
1.2. Remove the original front feet
assembly
•A 9/16¨ wrench and a 5/16¨
Allen key is required.
1.3. Prepare the UniversalKut 12
drawer.
•The UniversalKut 12 front
foot is already installed on
the drawer.
2. Put the UniversalKut 12 on the
drawer provided for that purpose.
Warning:
•Keep your hand out of reach of
pinch point.
•Do not put your fingers against
the sharp edge of the blade at
any time.
UKUT 12 SETUP
1.1
1.2
1.3

7
3. Attach the UniversalKut 12 to the
front feet of the drawer with the
original UniversalKut 12 hardware
provided for that purpose.
•A 9/16¨ wrench and a 5/16¨
Allen key is required.
Warning:
•Torque : 43 ft-lbs (516 in-lbs)
•Keep your hand out of reach of
pinch point.
•Do not put your fingers against
the sharp edge of the blade at
any time.
4. Attach the UniversalKut 12 to the
rear feet of the drawer with the
hardware provided for that
purpose.
•A 3/8¨ wrench and a 1/8¨
Allen key is required.
Warning:
•Torque : 55 in-lbs
•Keep your hand out of reach of
pinch point.
•Do not put your fingers against
the sharp edge of the blade
at any time.
UKUT 12 SETUP

8
5. Insert the drawer assembly on the
track.
5.1. The drawer got 8 heights
positions and 3 depths
positions.
6. Validate the height and the depth
of the UniversalKut 12 with a
siding slide test.
7. Lock the drawer assembly in place
with both quick pin
Warning:
•Keep your hand out of reach of
pinch point.
•Do not put your fingers against
the sharp edge of the blade at
any time.
8. Adjust the drawer feet height so
the feet end touches the ground
and the drawer is leveled
correctly.
Warning:
•Keep your hand out of reach of
pinch point.
•Be sure to firmly tight the
drawer feet handles before the
next step.
•Do not put your fingers against
the sharp edge of the blade at
any time.
UKUT 12 SETUP

9
Adjustment of the Universal bench
extensions.
1. Loosen each handle under the
extensions.
2. Pull the extension at the desired
distance.
3. Tight each handle under the
extensions.
Warning:
•Keep your hand out of reach of
pinch point.
4. Loosen the handle on the
extension feet.
5. Rotate the extension feet to point
toward the ground.
6. Tight the handle on the extension
feet.
Warning:
•Keep your hand out of reach of
pinch point.
EXTENSIONS SETUP

10
7. Adjust the extension feet height so
the feet end touches the ground
and the extension is leveled
correctly.
Warning:
•Keep your hand out of reach of
pinch point.
•Be sure to firmly tight the
extension feet handles before
the next step.
8. Validate the height of the
extension support with a siding
slide test.
Warning:
•Keep your hand out of reach of
pinch point.
9. The extension support can be
installed on the middle extension.
EXTENSIONS SETUP

11
Warning:
•Keep your hand out of reach of
pinch point.
•Do not put your fingers against
the sharp edge of the blade at
any time.
1. Water bottle compartment and
some thin wall zone to attach
some tools with clip and some
measuring tape.
2. Screwdriver holes (2x), snips
holes (3x) and a square hole.
3. Slings passages for lifting.
Warning:
•Be sure to respect all lifting
regulations in effect.
•Never go under the
equipment.
•Be sure to secure the
equipment before lifting.
FRONT & GUTTER UTILITY

12
OVERALL DIMENSIONS

13
AVERTISSEMENT: LA NON-OBSERVATION DE CES RÈGLES PEUT ENTRAINER DE
GRAVES BLESSURES! L’UTILISATION DE CET APPAREIL AVEC RESPECT ET PRUDENCE
DIMINUERA CONSIDÉRABLEMENT LA POSSIBILITÉ DE BLESSURES CORPORELLES.
1. LISEZ ET COMPRENEZ BIEN LE MANUEL D’UTILISATION AVANT
D’UTILISER LA TABLE UNIVERSELLE.
2. La Table Universelle est munie d’une garantie de 1 an sur les pièces
seulement (main-d’œuvre exclue). Pour activer votre garantie, nous vous
invitons à vous enregistrer sur notre site internet dans l’onglet service au :
www.sidingtoolsindustries.com
3.
Si vous n’êtes pas complètement familier avec le fonctionnement de la
Table Universelle, demandez conseil à un travailleur qualifié ou appelez-nous
au 450-849-7840 ou au numéro sans frais 1-844-449-7840
4.
Soyez vigilant. N’utilisez pas l’appareil sous l’effet de drogues, d’alcool ou
de médicaments.
5.
Portez toujours des lunettes de sécurité homologues avec des œillères
(ANSI Z87.1)
6.
Maintenir votre zone de travail propre et sans débris.
7.
Gardez les enfants et les personnes non autorisées hors de portée de la
Table Universelle et de la zone de travail.
8.
Assurez-vous que l’outil est sécuritaire. Utilisez-le uniquement sur une
surface dure ou un support ferme.
9.
Toujours installer la patte l’extension lors de son utilisation de la Table
Universelle.
10.
Toujours installer la patte du tiroir à UniversalKut 12 lors de son utilisation.
11.
Gardez les mains loin de la lame lorsque vous l’utilisez où la transporter.
12.
Ne modifiez pas ou n’utilisez abusivement cet outil. La Table Universelle est
fabriquée avec précision; les modifications non spécifiées dans ce manuel
d’utilisation peuvent créer des conditions d’utilisation dangereuses.
13.
Entretenez la Table Universelle avec soin.
14.
Utilisez uniquement les accessoires recommandés. L’utilisation d’accessoires
inappropriés peut créer des dangers ou provoquer des blessures.
15. Ne jamais laisser la Table Universelle aux intempéries.
16.
La table universelle a une capacité de 500 lbs (225 Kg). Ne pas excéder
cette capacité.
17. Les extensions ont une capacité de 50 lbs (22.5 Kg). Ne pas excéder
cette capacité. Toujours aligner la masse au-dessus de la patte
d’extension.
18. Avant l’utilisation de tout outil associé ou non à la Table Universelle,
veuillez lire le manuel d’utilisation et respecter les règles de sécurités.
RÈGLEMENT DE SÉCURITÉ POUR LA TABLE UNIVERSELLE

14
Préparation de la Table Universelle
1. Déposer la table sur le côté.
Attention:
•Tenir les mains loin des points
de coincement.
•Assemblage de 150 lbs (68kg).
•Soulevez l’équipement en
équipe.
2. Ouvrir les 2 assemblages de
pattes.
2.1. Pour y arriver, desserrez la
poignée du côté interne de
l’assemblage de pattes.
2.2. Fermez complètement la
patte ajustable.
2.3. Répétez l’étape 2.1 pour le
second assemblage de
pattes.
Attention:
•Tenir les mains loin des points
de coincement.
3. Assurez-vous de bien verrouiller
les genouillères (4x).
Attention:
•Tenir les mains loin des points
de coincement.
MISE EN ROUTE DE LA TABLE UNIVERSELLE

15
4. Ajustez la hauteur de la table
suivant les spécifications
suivantes (Les dimensions
peuvent varier selon la planéité du
sol):
4.1. ProKut 6 :
•A : Ouverture complète
•Hauteur : 33,25 po
(845 mm)
4.2. UniversalKut 12 :
•A : Fermeture complète
•Hauteur : 21.50 po
(546 mm)
Attention:
•Tenir les mains loin des points
de coincement.
•Assurez-vous de serrer
fermement les poignées de
serrage des 4 assemblages de
patte avant de passer à l’étape
suivante.
5. Tirez sur la table afin de la
déposer sur ses pattes.
Attention:
•Tenir les mains loin des points
de coincement.
•Assemblage de150 lbs (68kg).
•Soulevez l’équipement en
équipe.
Pour ranger la table, retirez tout outil
ou équipement sur ou attaché sur la
table et répétez les 5 étapes
précédentes dans l’ordre inverse.
MISE EN ROUTE DE LA TABLE UNIVERSELLE
A

16
Installation de la Prokut 6 sur la
Table Universelle
1. Déposez la ProKut 6 sur le tiroir
prévu à cet effet.
2. Alignez les trous du tiroir avec les
trous des pieds de la ProKut 6
(4x).
3. Fixez la ProKut 6 au tiroir avec la
quincaillerie prévue à cet effet.
Attention:
•Couple : 55 lbs-po
•Tenir les mains loin des points
de coincement.
•Ne jamais poser les doigts sur
le bord tranchant de la lame.
4. Insérez l’assemblage tiroir dans
les rainures centrales.
4.1. Le tiroir a 8 positions de
hauteur et 3 positions de
profondeurs.
5. Validez la hauteur et la profondeur
de la ProKut 6 en effectuant un
essai d’insertion de tôle par
glissement.
6. Verrouillez l’assemblage tiroir en
place avec les 2 goupilles
Attention:
•Tenir les mains loin des points
de coincement.
•Ne jamais poser les doigts sur
le bord tranchant de la lame.
INSTALLATION DE LA PROKUT 6

17
Installation de la UniversalKut 12
sur la Table Universelle
1. Préparez la UniversalKut 12
1.1. Retirez les 2 pare-chocs de
caoutchouc arrière.
1.2. Retirez l’assemblage du pied
avant original.
•Une clé 9/16¨ et une clé
Allen 5/16¨ sont requises.
1.3. Préparez le tiroir à
UniversalKut 12.
•Le pied avant de
l’UniversalKut 12 est déjà
installé sur le tiroir.
2. Déposez l’UniversalKut 12 sur le
tiroir prévu à cet effet.
Attention:
•Tenir les mains loin des points
de coincement.
•Ne jamais poser les doigts sur
le bord tranchant de la lame.
INTALLATION DE LA UKUT 12
1.1
1.2
1.3

18
3. Fixez l’UniversalKut 12 au pied
avant du tiroir grâce à la
quincaillerie originale de
l’UniversalKut 12 prévue à cet
effet.
•Une clé 9/16¨ et une clé
Allen 5/16¨ sont requises.
Attention:
•Couple : 43 lbs-pi (516 lbs-po)
•Tenir les mains loin des points
de coincement.
•Ne jamais poser les doigts sur
le bord tranchant de la lame.
4. Fixez la UniversalKut 12 au tiroir
avec la quincaillerie prévue à cet
effet.
•Une clé 3/8¨ et une clé
Allen 1/8¨ sont requises.
Attention:
•Couple : 55 lbs-po
•Tenir les mains loin des points
de coincement.
•Ne jamais poser les doigts sur
le bord tranchant de la lame.
INTALLATION DE LA UKUT 12

19
5. Insérez l’assemblage tiroir dans
les rainures centrales.
5.1. Le tiroir a 8 positions de
hauteur et 3 positions de
profondeurs.
6. Validez la hauteur et la profondeur
de la UniversalKut 12 en
effectuant un essai d’insertion de
tôle par glissement.
7. Verrouillez l’assemblage tiroir en
place avec les 2 goupilles
Attention:
•Tenir les mains loin des points
de coincement.
•Ne jamais poser les doigts sur
le bord tranchant de la lame.
8. Ajustez la hauteur de la patte de
tiroir de sorte que la patte touche
au sol et que le tiroir soit de
niveau.
Attention:
•Tenir les mains loin des points
de coincement.
•Ne jamais poser les doigts sur
le bord tranchant de la lame.
•Assurez-vous de serrer
fermement la poignée de
serrage de la patte de tiroir
avant de passer à l’étape
suivante.
INTALLATION DE LA UKUT 12

20
Ajustement des extensions de la
Table Universelle.
1. Desserrez chaque poignée de
serrage sous les extensions.
2. Tirez les extensions à la distance
désirée.
3. Serrez chaque poignée de serrage
sous les extensions.
Attention:
•Tenir les mains loin des points
de coincement.
4. Desserrez la poignée de serrage
de la patte d’extension.
5. Faites pivoter la patte d’extensions
de sorte à pointer vers le sol.
6. Serrez la poignée de serrage de la
patte d’extension.
Attention:
•Tenir les mains loin des points
de coincement.
INSTALLATION DES EXTENSIONS
This manual suits for next models
2
Table of contents
Languages:
Popular Tools Storage manuals by other brands

IAC INDUSTRIES
IAC INDUSTRIES Quick Ship WORKMASTER Assembly instructions

Holzstar
Holzstar TKS 315 Pro instruction manual

TradeQuip
TradeQuip 1014T owner's manual

DIVERSIFIED WOODCRAFTS
DIVERSIFIED WOODCRAFTS 0313-W-7230L Assembly instructions

Sealey
Sealey APMS01 quick start guide
Grizzly
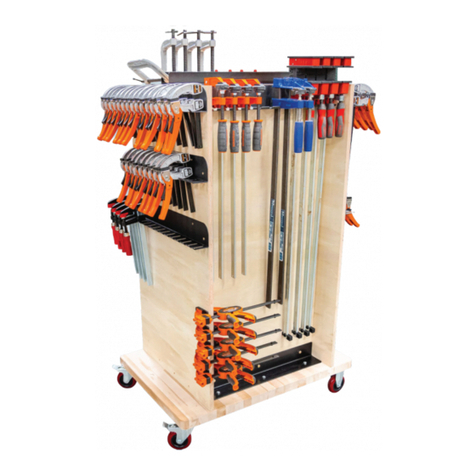
Grizzly CLAMP RACK Assembly instructions

