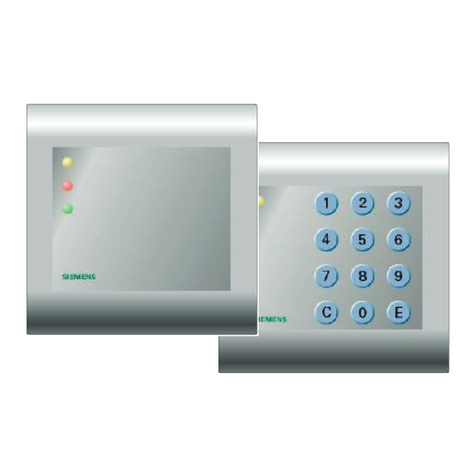
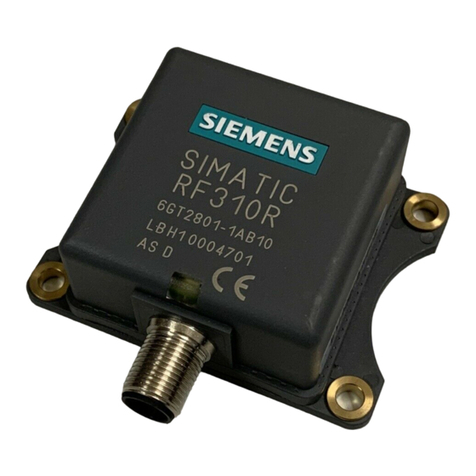
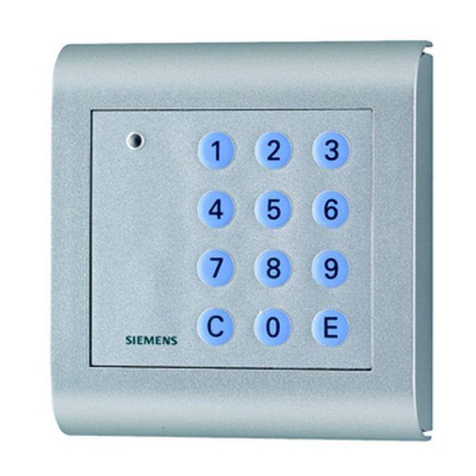
Siemens PM500-Cotag User manual

Siemens AB
EN DE FR SV
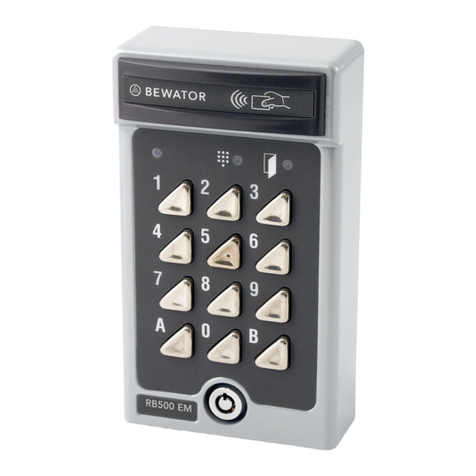
PM500-Cotag & PM500-EM
Card Reader
Installation Guide
PM500-Cotag PM500-EM

ENGLISH – PM500 Card reader
2
Siemens AB 03.2011
Description
This document is valid for both the Siemens and
Bewator branded products.
PM500 is a card reader for connection to
SiPass/Bewator Entro, Bewator Omnis 2010, DC800
or SiPass integrated. The PM500 Reader can be
mounted within a sheet metal or plastic panel using
four screws. The reader is compatible with both
active and passive Entro cards and tags. Note!
Different cards/tags are used for PM500-Cotag
and PM500-EM respectively.
The PM500 reader reads cards or tags without them
being in contact with the reader. The reader
continuously transmits a low power radio frequency.
When a card or tag is presented within the field of
the reader it activates and transmits a unique
identification number back to the reader. The reader
then sends this code to the connected control unit in
SiPass/Bewator Entro, Bewator Omnis 2010, DC800
or SiPass integrated.
See Illustration 1 on page 10
Safety
General safety precautions
Read the general safety precautions before
operating the device.
Follow all warnings and instructions marked on
the device.
Keep this document for reference.
Always pass this document on together with the
product.
The device has been approved for use in the
European Union. In countries outside the EU, the
local conditions and regulations need to be
checked before putting the device into service.
Please also take into account any additional
country-specific, local safety standards or
regulations concerning project planning,
operation and disposal of the product.
Target group
Installer with expert knowledge of building
installation technique or electronic installations.
Standards and guidelines
European directives
This product complies with the requirements of the
European Directives. The European declaration of
conformity is available from:
Siemens AB
Security Products
Englundavägen 7
SE-171 24 Solna, Sweden
European Directive 1999/5/EC on Radio
Equipment and Telecommunications Terminal
Equipment (R&TTE):
Compliance with the European Directive 1999/5/EC
has been proven by testing according to the
following standards:
EN 301 489-1
EN 301 489-3
EN 300 330-2
Details of ordering
Type PM500-Cotag, PM500-EM
Part nr. Siemens
PM500-Cotag: S24246-F4705-A1
PM500-EM: S24246-F3903-A1
Bewator
PM500-Cotag: GBI:21-425
PM500-EM: GBI:21-423
Description Card reader
Weight 0.15 kg
Technical data
Supply voltage
(nom.*):
12 V DC – 24 V DC
Absolute voltage
ratings**:
+10.6 V DC - +32 V DC1)
Current consumption: PM500-EM:
typ 20 mA@12V DC
max 41 mA@12V DC
typ 24 mA@24V DC
max 43 mA@24VDC
PM500-Cotag:
typ 33 mA@12V DC
max 58 mA@12V DC
typ 35 mA@24V DC
max 60 mA@24VDC
Temperature range: -30°C to +50°C
Colour: Black
Material: High impact
polycarbonate outer
casing, fully potted
electronics.
Card read distance2): Cotag: Up to 23 cm
(active card).
Cotag/EM4102: Up to 8 /
5 cm (passive card).
Dimensions
(H x W x D) :
73 x 68 x 13.5 mm
* Nominal voltage has margins for transformer tolerances,
mains supply variations and interruptions.
** Absolute voltage has no margins and should be used for
guidance only.
1) The PM500 is designed to be operated by 12V unregulated
power supplies, or 24V battery-backed power supplies.
Operating voltage range is 10.6 to 32.0V. The upper voltage
is intended to be compatible with the charging of 24V lead-
acid batteries. Charge methods vary, and may be
temperature dependent. 32V max is intended to be
compatible with commonly used charging methods. If the
upper operating voltage is exceeded then permanent damage
may be caused. Installers and systems designers should
check the max power supply voltage under all conditions. Do
not operate the PM500 using unregulated 24V supplies. The
PM500 current consumption can be significantly less than
100mA. The unloaded peak voltage from a nominal 24V
unregulated supply will exceed the absolute max.
2) The Read range is stated in an undisturbed electrical
environment, and that the reader is installed in accordance
with Siemens AB instructions, with the card presented parallel
to the reader.
Mounting and Mechanical
Installation
The Reader can be mounted on all types of
materials; it can be mounted behind glass. The only
limit is that the reader may not be completely
surrounded by metal.
Note! Avoid mounting the reader near sources of
electrical noise, such as motors, generators, pumps,
computer installations and mains cabling.
If there is too much electrical noise in the reading
area the amber LED flashes.
The PM500 Reader can be mounted within a sheet
metal or plastic panel using four screws. If the panel
is made of metal, the Reader must be mounted
behind a 40mm square cut-out in the panel which
must be positioned in the centre of the four mounting
holes as shown in the diagram overleaf. When
mounted on a metal panel, the Reader has a range
of 5cm to 15cm (2in to 6in) dependent on the type of
tag used, so it must be mounted in a position where
the card or tag can easily be brought within this
distance.
If the Reader is mounted in a plastic panel then
connect the screen at the host end only; at the
PM500 the screen must be cut back and insulated. If
the Reader is mounted in a metal panel then the
screen must be connected at the host end and also
to the metal panel. The screen must not be
connected to the PM500 itself in either of these
situations. A perspex window is supplied which may
be fitted (optional) to enhance the external
appearance of the reader.
Route the cables according to chosen illustration
below, mount the Reader on the panel using four M3
nuts and bolts or self-tapping screws and finally test
the Reader.
For outdoor mounting, we recommend that the
terminals should be covered with a suitable
compound, for example silicone grease.
All other information regarding installation and
programming can be found in the manual supplied
with the control unit.
Connection
Connecting the PM500 to
SiPass/Bewator Entro door central
DC22, DC12 - or DC800
Use a screened multicore cable (i.e. Belden
9534/9535/9538) for connection between the reader
unit and the door central. Maximum cable distance is
50 metres. See Illustration 1 on page 10.
Note!
For SiPass/Bewator Entro: connect to the
BCLINK terminal block. Set the link J4 in the
door central to +V = Vin.
For DC800: Set jumper J1 to Vin and jumper J4
to BCLINK.
The power to the door central will then also be fed to
the reader.
When the PM500 is powered for the first time, the
green and red LEDs light for 4 seconds. Then an
Auto detect procedure starts for approx 60 seconds
where the three LEDs are lit (to configure for
BCLINK protocol). It is important that cards or tags
are not presented to the reader until this Auto detect
procedure is completed. Once completed, the LEDs
will turn off, a sound is heard and the reader is now
ready for use. The readers LEDs are controlled
exclusively by the host system.

ENGLISH – PM500 Card reader
3
Siemens AB 03.2011
Connecting both Entry and Exit
readers (BCLINK)
If both Entry and Exit readers are to be used, the
Exit reader must be set to an exit function. This is
done with a link between terminal blocks HRN-Adr
and DA in the PM500 (before power-up). The
initialising process will then be the same as above.
See Illustration 3 on page 10.
Connecting the reader PM500 to
Bewator Omnis 2010 E2V
The drawing shows how the PM500 connects to the
Bewator Omnis 2010 system where the node E2V is
used.
The power supply for the PM500 is connected to the
E2V:s incoming power supply input. Maximum
+24V. Note that due to current limitations, no
connections are made to the +12V power supply
output terminals found within in the E2V. The
readers LEDs are controlled exclusively by the host
system. The two terminal blocks marked “Tamper”
are wired together internally inside the reader. This
can be used for a 24-hour tamper protection circuit
monitored from the host system (e.g. cutting the
reader cable would raise an alarm condition).
The power-up procedure will be the same as for
SiPass/Bewator Entro (approx 60 sec and then a
sound is heard).
See Illustration 4 on page 10
Connecting the PM500 to SiPass
integrated ADD5100
The drawing shows how the PM500 connects to the
SiPass integrated system where the ADD5100 (DRI)
is used.
Please see Illustration 5 on page 11.

DEUTSCH – PM500 Kartenleser
4
Siemens AB 03.2011
Bezeichnung
Dieses Dokument gilt für das Produkt mit den
Wahrenzeichen Siemens und Bewator.
Der PM500 ist ein kompakter Kartenleser zum
Anschluss an SiPass/Bewator Entro, Bewator Omnis
2010, DC800 oder SiPass integrated. Der PM500-
Leser kann mithilfe von vier Schrauben an ein
Metall- oder Kunststoffpanel montiert werden. Der
Leser liest aktive und passive Entro Karten und
„Schlüsselanhänger“ (Tags.) Hinweis! Für PM500-
Cotag und PM500-EM werden jeweils
verschiedene Karten/Marken verwendet.
Der PM500 liest Karten oder „Schlüsselanhänger“,
ohne dass diese mit dem Leser in Kontakt kommen
müssen. Dazu gibt der Leser kontinuierlich ein
niederfrequentes Funksignal aus. Die Karte wird
aktiviert, sobald sie sich im Lesebereich des Lesers
befindet, und dabei sendet sie einen eindeutigen
Identifikationscode zum Leser. Der Leser leitet
diesen Code an die angeschlossene Karten-
/Türzentrale weiter zum SiPass/Bewator Entro,
Bewator Omnis 2010, SiPass integrated oder
DC800.
Siehe Illustration 1 auf Seite 10.
Sicherheit
Allgemeine Sicherheitshinweise
Lesen Sie vor der Bedienung des Gerätes die
allgemeinen Sicherheitshinweise.
Befolgen Sie die am Gerät angebrachten
Sicherheitshinweise.
Bewahren Sie dieses Dokument zum
Nachschlagen auf.
Geben Sie dieses Dokument bei der Weitergabe
des Produktes mit.
Das Gerät besitzt die Zulassungen für den
Betrieb in der EU. Außerhalb der EU sind die
örtlichen Zulassungsvoraussetzungen vor
Inbetriebnahme zu prüfen.
Beachten Sie zusätzlich die landesspezifischen
oder ortsüblichen Sicherheitsnormen oder
Gesetze für die Planung, die Konzeption, die
Installation, den Betrieb und die Entsorgung des
Produktes.
Zielgruppe
Besitzt Fachkenntnisse im Bereich
Gebäudeinstallationstechnik oder
Elektroinstallationen.
Richtlinien und Normen
EG-Richtlinie
Das Produkt erfüllt die Anforderungen der
nachfolgenden EG-Richtlinien. Die EG-
Konformitätserklärung wird zur Verfügung gestellt
bei:
Siemens AB
Security Products
Englundavägen 7
SE-171 24 Solna, Sweden
EG-Richtlinie 1999/5/EC über Funkanlagen und
Telekommunikationsendeinrichtungen (R&TTE):
Die Konformität wird mit der EG-Richtlinie 1999/5/EC
nachgewiesen durch die Einhaltung folgender
Normen:
EN 301 489-1
EN 301 489-3
EN 300 330-2
Bestellangaben
Typ PM500-Cotag, PM500-EM
Art. -nr. Siemens
PM500-Cotag: S24246-F4705-A1
PM500-EM: S24246-F3903-A1
Bewator
PM500-Cotag: GBI:21-425
PM500-EM: GBI:21-423
Bezeichnung Kartenleser
Gewicht 0.15 kg
Technische Informationen
Versorgungsspannun
g (nom. *):
12 V DC – 24 V DC
Absolute
Spannungsbereich**:
+10.6 V DC - +32 V DC1)
Stromverbrauch: PM500-EM:
typ 20 mA@12V DC
Max 41 mA@12V DC
Typ 24 mA@24V DC
max 43 mA@24VDC
PM500-Cotag:
Typ 33 mA@12V DC
Max 58 mA@12V DC
Typ 35 mA@24V DC
max 60 mA@24VDC
Temperaturbereich: -30 bis +50
Farbe: Schwarz
Material: Schlagfestes
Polycarbonat-
Außengehäuse, mit
vollständig
eingeschlossener
Elektronik.
Leseabstand2): Cotag: Bis zu 23 cm
(aktive Karte).
Cotag/EM4102: Bis zu 8 /
5 cm (passive Karte).
Maße
(H x B x T):
73 x 68 x 13.5 mm
* Die Nennspannung hat Margen für Transformator
Toleranzen, Netzversorgung Variationen und
Unterbrechungen.
** Der absolute Spannungsbereich hat keine Margen und
dient nur zur Orientierung.
1) PM500 wurde für die ungeregelte 12 V oder
batteriegepufferte 24V Versorgung entwickelt. Der
Betriebsspannungsbereich liegt zwischen 10,6 bis 32,0 V. Die
obere Spannung ist für das Laden von 24 V-Bleibatterien
vorgesehen. Die Lademethoden variieren. Sie können
temperaturabhängig sein. Max. 32 V ist mit den häufig
verwendeten Lademethoden kompatibel. Wird die obere
Betriebsspannung überschritten, können dauerhafte Schäden
verursacht werden. nstallateure und Systemplaner müssen
die max. Versorgungsspannung unter allen Bedingungen
überprüfen. Nehmen Sie PM500 nicht bei ungeregelter 24V-
Versorgung in Betrieb. Der Stromverbrauch von PM500 kann
signifikant weniger als 100mA betragen. Die unbelastete
Spitzenspannung einer ungeregelten Nennversorgung von
24V wird das absolute Maximum übersteigen.
2) Der Leseabstand gilt für eine störungsfreie Umgebung
under der Leser muss entsprechend den Anweisungen von
Siemens AB installiert worden sein und die Karte auf
Leserhöhe gehalten werden.
Montage und Mechanische
Installation
Der Leser kann auf verschiedenen Materialien
angebracht werden, er lässt sich beispielsweise
hinter Glas einbauen. Dabei darf der Leser nicht
vollständig von Metall umgeben sein.
Hinweis! Vermeiden Sie die Installation in der Nähe
von Störfeldern wie z.B. Motoren, Generatoren,
Pumpen, Computerinstallationen sowie Last-
/Schaltkabeln.
Wenn es zu viel elektrische Störungen im
Lesebereich die gelbe LED blinkt.
Der PM500-Leser kann mithilfe von vier Schrauben
an ein Metall- oder Kunststoffpanel montiert werden.
Beim Metallpanel muss der Leser hinter einer
Panelaussparung von 40 mm² montiert werden, die
sich in der Mitte der vier Montagelöcher befindet
(siehe umseitiges Diagramm). Bei der
Metallpanelmontage verfügt der Leser über einen
Abstand von 5 bis 15 cm. Dies hängt von dem
verwendeten Schlüsselanhänger ab. Deshalb muss
er in einer Position angebracht werden, in der die
Karte oder der Schlüsselanhänger einfach auf
diesen Abstand ausgerichtet werden kann.
Wird der Leser mit einer Kunststoffpanel montiert,
verbinden Sie den Schirm nur mit der Zentralseite.
Bei PM500 muss der Schirm getrennt und isoliert
werden. Wird der Leser in einem Metallpanel
montiert, muss der Schirm mit der Zentralseite und
der Metalldose verbunden werden. Der Schirm darf
in beiden Fällen nicht mit PM500 verbunden werden.
Eine mitgelieferte Plexiglasabdeckung kann zum
optischen Aufwerten des Lesers angebracht
werden. (Nicht zwingend notwendig).
Verlegen Sie die Kabel wie in der unten aufgeführten
Abbildung. Montieren Sie den Leser mithilfe von vier
M3-Muttern und Bolzen oder Schneidschrauben an
das Panel. Testen Sie den Leser abschließend.
Bei der Außenmontage empfiehlt es sich, das Gerät
mit Silikon abzudichten.
Weitere Informationen zur Installation und
Programmierung entnehmen Sie dem Handbuch für
die entsprechende Zentrale.
Anschluss
Anschluss des PM500 an die
SiPass/Bewator Entro Türzentralen
DC22, DC12 - oder DC800
Benutzen Sie zwischen dem Leser und der
Türzentrale ein mehradriges abgeschirmtes Kabel,
z.B. LIYCY.Belden 9534/9535/9538) Die maximale
Kabellänge beträgt 50 m. Siehe Illustration 1 auf
Seite 10.
Hinweis!
Bei SiPass/Bewator Entro: anschließen an den
BCLINK Klemmenblock. Stecken Sie den
Jumper J4 der Türzentrale auf +V = Vin.
Bei DC800: stecken Sie den Jumper J1 auf Vin
und den Jumper J4 auf BCLINK.
Die Versorgungsspannung für die Türzentrale wird
dadurch ebenfalls für den Leser genutzt.
Beim ersten Einsatz von PM500 scheinen die
grünen und roten Leuchtdioden für vier Sekunden.
Dann startet für etwa 60 Sekunden ein
automatischer Erkennungsvorgang, bei dem die drei
Leuchtdioden scheinen (für die Konfiguration des
BCLINK-Protokolls). Es ist wichtig, dass die Karten
oder Schlüsselanhänger nicht dem Leser präsentiert
werden, bis der automatische Erkennungsvorgang
abgeschlossen ist. Nach Abschluss des Vorgangs
schalten sich die Leuchtdioden ab und es ertönt ein
akustisches Signal und der Leser ist einsatzbereit.
Die Leserleuchtdioden werden ausschließlich vom
Zentralsystem gesteuert.

DEUTSCH – PM500 Kartenleser
5
Siemens AB 03.2011
Anschluss von zwei Lesern parallel
für Ein- und Ausgang (BCLINK)
Bei der Verwendung von zwei Lesern für Ein- und
Ausgang muss der Ausgangsleser als Ausgang
adressiert werden. Dies erfolgt über eine
Steckbrücke zwischen Klemme HRN-Adr und
Klemme DA in dem PM500 (vor der
Spannungszuführung.) Der Initialisierungsvorgang
wird wie oben ablaufen.
Siehe Illustration 3 auf Seite 10.
Anschluss des PM500 an Bewator
Omnis 2010 E2V
Die Schaltplanabbildung zeigt den Anschluss des
PM500 an das vollintegrierte System Bewator Omnis
2010 unter Verwendung von Knoten E2V.
Die Stromversorgung des Leser PM500 findet über
die eingehende Versorgungsspannung von E2V
statt. Die maximale Spannung beträgt +24 V.
Hinweis: Wegen der Strombegrenzung sind keine
Verbindungen an die + 12V der
Stromversorgungsausgangklemmen innerhalb des
E2V anzuschliessen. Die Leserleuchtdioden werden
ausschließlich vom Zentralsystem gesteuert. Die
beiden als „Tamper“ bezeichneten Klemmenleisten
werden intern im Leser verdrahtet. Dies kann für
eine 24-stündige „Tamper“-Schutzschaltung
verwendet werden, die vom Zentralsystem
überwacht wird (z.B. würde ein Abtrennen des
Leserkabels einen Alarmzustand hervorrufen).
Der Einschaltvorgang entspricht dem für
SiPass/Bewator Entro (etwa 60 Sekunden und dann
ertönt ein akustisches Signal).
Siehe Illustration 4 auf Seite 10.
Anschluss des PM500 SiPass
integrated ADD5100
Der Schaltplan unten zeigt den Anschluss des
PM500 an das System SiPass integrated unter
Verwendung von ADD5100 (DRI).
Siehe Illustration 5 auf Seite 11.

FRANÇAIS – Lecteur de cartes PM500
6
Siemens AB 03.2011
Description
Ce document s'applique pour les gammes Siemens
et Bewator.
Le lecteur PM500 est compatible avec les systèmes
SiPass/Bewator Entro, á Bewator Omnis 2010, á
DC800 ou á SiPass integrated. Le lecteur PM500 se
monte à l’aide de quatre vis sur un panneau en
plastique ou en tôle. Le lecteur est compatible avec
les cartes et badges Cotag actifs et passifs.
Remarque! PM500-Cotag et PM500-EM utilisent
des modèles de cartes/badges différents.
Le lecteur de proximité PM500 permet de lire sans
contact les cartes et badges. Il émet un signal radio
continu de basse fréquence. Lorsqu'une carte ou un
tag se trouve dans le champ d'activité du lecteur, il
envoie au lecteur un code d'identification personnel.
À son tour, le lecteur transmet le code à l’unité de
contrôle connectée au système SiPass/Bewator
Entro, Bewator Omnis 2010, á DC800 ou á SiPass
integrated.
Voir Illustration 1 page 10
Sécurité
Consignes de sécurité générales
Lisez les consignes de sécurité générales avant
d'utiliser l'appareil.
Respectez tous les avertissements et toutes les
instructions figurant sur l'appareil.
Conservez ce document pour pouvoir vous y
référer ultérieurement.
Joignez systématiquement ce document au
produit.
L'appareil a été certifié utilisable au sein de
l'Union européenne. Dans les pays hors Union
européenne, les conditions et réglementations
locales doivent être vérifiées avant la mise en
service de l'appareil.
Veuillez également tenir compte de toute norme
ou réglementation de sécurité locale spécifique
au pays concernant la planification du projet,
l'utilisation du produit et sa mise au rebut.
Groupe ciblé
Installateur disposant d'une parfaite connaissance
de l'immotique ou des installations électroniques.
Standards et directives
Directives européennes
Ce produit est conforme aux exigences des
directives européennes. La déclaration de
conformité aux directives européennes est
disponible auprès de :
Siemens AB
Security Products
Englundavägen 7
SE-171 24 Solna, Sweden
Directive européenne 1999/5/EC portant sur les
équipements hertziens et les équipements
terminaux de télécommunication (R&TTE) :
Le produit a été testé conformément aux standards
suivants afin de démontrer sa conformité aux
exigences de la directive européenne 1999/5/EC :
EN 301 489-1
EN 301 489-3
EN 300 330-2
Informations pour passer
commande
Type PM500-Cotag, PM500-EM
Code
d’article
Siemens
PM500-Cotag: S24246-F4705-A1
PM500-EM: S24246-F3903-A1
Bewator
PM500-Cotag: GBI:21-425
PM500-EM: GBI:21-423
Description Lecteur de cartes
Poids 0.15 kg
Données techniques
Tension
d'alimentation (nom.
*) :
12 V CC – 24 V CC
Tension Absolue ** : +10.6 V CC - +32 V CC.1)
Consommation
électrique :
PM500-EM:
typ 20 mA@12V DC
Max 41 mA@12V CC
Typ 24 mA@24V CC
max 43 mA@24VDC
PM500-Cotag:
Typ 33 mA@12V CC
Max 58 mA@12V CC
Typ 35 mA@24V CC
max 60 mA@24VDC
Plage de
températures :
-30 à +50
Couleur : Noir
Matériau : Boîtier extérieur en
polycarbonate haute
résistance, électronique
totalement encapsulée.
Portée de lecture2) : Cotag : Jusqu’à 23 cm
(carte active).
Cotag/EM4102: Jusqu’à 8
/ 5 cm (carte passifs).
Dimensions
(H x L x P) :
73 x 68 x 13.5 mm
* La tension nominale inclut une marge de tolérance tenant
compte des tolérances sur les composants, la tension secteur
et les micro-coupures.
** La tension absolue n'a pas de marge de tolérance et de ce
fait doit être utilisée qu'à titre indicatif afin d'éviter tous
dommages.
1) Le PM500 est conçu pour être alimenté par du courant
12V non régulé ou par une alimentation à batterie de secours
24V. La tension de service varie de 10,6 à 30,0 V. La tension
supérieure est conçue pour être compatible avec le
chargement de batteries au plomb de 24 V. Les méthodes de
chargement varient et peuvent dépendre de la température.
Le maximum de 32 V est prévu pour les méthodes de
chargement les plus fréquentes. Un dépassement de la
tension de service supérieure peut entraîner des dégâts
permanents. La tension d’alimentation maximale doit être
vérifiée en toutes circonstances par les installateurs et
concepteurs des systèmes. Ne pas utiliser le PM500 avec
une alimentation 24 V non régulée. La consommation
électrique du PM500 peut être sensiblement inférieure à
100mA. Le pic de tension hors charge d’une alimentation
nominale non régulée de 24V dépassera le maximum absolu.
2) La portée de lecture annoncée suppose que le lecteur soit
installé dans un environnement sans interférences
électriques et conformément aux instructions Siemens AB ; la
carte doit en outre être présentée dans un plan parallèle au
lecteur.
Montage
Le lecteur peut être monté sur tous types de
matériaux, il peut être placé derrière une vitre. Seule
restriction : le lecteur ne peut être complètement
entouré de métal.
Remarque! Ne pas installer le lecteur à proximité de
sources d'interférences électriques (moteur,
génératrice, matériel informatique, circuit secteur,
etc.).
Si il y a trop de bruit électrique dans la zone de
lecture le LED ambre clignote.
Le lecteur PM500 se monte à l’aide de quatre vis sur
un panneau en plastique ou en tôle. S’il s’agit d’un
panneau en tôle, le lecteur doit être monté derrière
une découpe carrée de 40 mm pratiquée au centre
des quatre trous de vis, comme illustré dans le
schéma au verso. S’il est monté sur un panneau
métallique, le lecteur a une portée de 5 à 15 cm
selon le type de badge utilisé ; il doit donc être
monté à un endroit permettant aisément d’amener la
carte ou le badge à la distance requise.
Si le lecteur est monté sur un panneau en plastique,
connecter le blindage uniquement sur l’extrémité
hôte ; côté PM500, le blindage doit être coupé et
isolé. Si le lecteur est monté sur un panneau en
métal, le blindage doit être connecté sur l’extrémité
hôte ainsi que du côté du boîtier métallique. Dans
ces deux cas, ne pas raccorder le blindage
directement sur le PM500. Une vitre en plastique
est fournie pour modifier (éventuellement) l’aspect
extérieur du lecteur.
Acheminer les câbles selon l’illustration
correspondante ce-dessous, monter le lecteur sur le
panneau à l’aide de quatre boulons et écrous M3 ou
de vis autotaraudeuses, et tester le lecteur.
En cas de montage à l’extérieur, protéger les
borniers à l’aide d’un produit approprié, par exemple
de la graisse de silicone.
Pour plus d’informations sur l’installation et la
programmation, voir le manuel de l’unité de contrôle.
Connexion
Connexion du PM500 aux centrales
d’accès SiPass/Bewator Entro DC22,
DC12 - ou á DC800
Utiliser un câble multibrins blindés (par ex. Belden
9534/9535/9538) pour raccorder le lecteur à la
centrale d’accès. La longueur maximale du câble est
de 50 mètres. Voir Illustration 1 page 10.
Remarque!
Pour SiPass/Bewator Entro: connecter au
connecteur BCLINK. Mettre le cavalier J4 dans
la porte centrale de +V = Vin.
Pour DC800: Mettre le cavalier J1 en position
Vin et le cavalier J4 en position BCLINK.
Dans ce cas, le courant de la centrale d’accès
parvient également au lecteur.
À la première mise sous tension du PM500 , les
diodes rouge et verte s’allument pendant 4
secondes. Une procédure de détection automatique
démarre alors pour environ 60 secondes, pendant
lesquelles les trois diodes sont allumées (pour
configuration du protocole BCLINK). Il est important
de ne pas présenter de cartes ou badges au lecteur
avant la fin de la procédure de détection
automatique. À la fin du processus, les diodes
s’éteignent, et une tonalité retentit pour signaler que
le lecteur est prêt à l’emploi. Les diodes du lecteur
sont exclusivement contrôlées par le système hôte.
FRANÇAIS – Lecteur de cartes PM500
7
Siemens AB 03.2011
Connexion de lecteurs de contrôle
d’entrée et de sortie (BCLINK)
Lorsque les lecteurs sont utilisés pour contrôler à la
fois les entrées et les sorties, le lecteur de sortie doit
être réglé sur la fonction « sortie ». Pour cela, placer
un cavalier entre les bornes HRN-Adr et DA du
PM500 (avant sa mise sous tension). L’initialisation
se déroulera ensuite comme décrit ci-dessus.
Voir Illustration 3 page 10.
Connexion du lecteur PM500 au
Bewator Omnis 2010 E2V
Le schéma illustre la connexion du PM500 au
système Bewator Omnis 2010 avec utilisation du
nœud E2V.
L’alimentation pour le lecteur PM500 est connectée
sur l’entrée d’alimentation du E2V. Maximum +24 V.
À noter qu'aucune connexion n'est possible au
niveau des bornes d'alimentation 12 V du E2V, à
cause de limitations de courant. Les diodes du
lecteur sont exclusivement contrôlées par le système
hôte. Les deux borniers marqués « Tamper » sont
reliés entre eux à l’intérieur du lecteur. Ils peuvent
être utilisés pour un circuit autoprotégé de 24 heures
contrôlé à partir du système hôte (par ex., l’alarme
se déclenche lorsqu’un câble du lecteur est
sectionné).
La procédure de démarrage est la même que pour
SiPass/Bewator Entro (phase d’environ 60 secondes
suivie d’une tonalité)
Voir Illustration 4 page 10
Connexion du lecteur PM500 au
SiPass integrated ADD5100
Le schéma illustre la connexion du PM500 au
système SiPass integrated avec utilisation du
ADD5100 (DRI).
Voir Illustration 5 page 11.

SVENSKA - PM500 Kortläsare
8
Siemens AB 03.2011
Beskrivning
Detta dokument gäller för både den Siemens och
Bewatormärkta produkten.
PM500 är en kompakt, proxläsare (beröringsfri) för
anslutning till SiPass/Bewator Entro, Bewator Omnis
2010, DC800 eller SiPass integrated. PM500 kan
monteras i paneler av plast eller metall med hjälp av
fyra skruvar. Läsarna är komptaibla med Entro aktiva
eller passiva kort och brickor. Obs! Olika
kort/brickor används för PM500-Cotag respektive
PM500-EM.
PM500 läsare kan läsa kort/brickor utan att dessa
behöver vara i kontakt med läsaren. Läsaren sänder
konstant ut en lågfrekvent radiosignal. När ett
kort/bricka befinner sig inom läsarens aktivitetsfält
aktiveras det och sänder tillbaka sin unika
identifikationskod till läsaren. Läsaren sänder koden
vidare till ansluten kort-/dörrcentral i SiPass/Bewator
Entro, Bewator Omnis 2010, SiPass integrated eller
DC800.
Se Illustration 1 på sidan 10.
Säkerhet
Generella säkerhetsföreskrifter
Läs de generella säkerhetsföreskrifterna innan
enheten används.
Följ alla varningar och instruktioner som är
märkta på enheten.
Behåll detta dokument som referens.
Bifoga alltid detta dokument med produkten.
Enheten har godkänts för användning inom EU. I
länder utanför EU måste lokala villkor och regler
kontrolleras innan enheten tas i bruk.
Ta med i beräkningen ytterligare landspecifika,
lokala säkerhetsstandarder eller bestämmelser
som gäller projektplanering, användning och
kassering av produkten.
Målgrupp
Installatör med expertkunskap om bygginstallation
och elektroniska installationer.
Standarder och riktlinjer
EU direktiven
Produkten uppfyller kraven i EU-direktiven. EU-
deklarationen om överensstämmelse kan erhållas
från:
Siemens AB
Security Products
Englundavägen 7
SE-171 24 Solna, Sweden
EU-direktiv 1999/5/EC om Radioutrustning och
Teleterminalutrustning (R&TTE):
Överensstämmelse med EU-direktiv 1999/5/EC
råder genom att standarderna nedan uppfylls:
EN 301 489-1
EN 301 489-3
EN 300 330-2
Orderdetaljer
Typ PM500-Cotag, PM500-EM
Art nr. Siemens
PM500-Cotag: S24246-F4705-A1
PM500-EM: S24246-F3903-A1
Bewator
PM500-Cotag: GBI:21-425
PM500-EM: GBI:21-423
Beskrivning Kortläsare
Vikt 0.15 kg
Tekniska data
Matningsspänning
(nom. *):
12 V DC – 24 V DC
Absoluta
spänningsgränser **:
+10.6 V DC - +32 V DC1)
Strömförbrukning: PM500-EM:
typ 20 mA@12V DC
Max 41 mA@12V DC
Typ 24 mA@24V DC
max 43 mA@24VDC
PM500-Cotag:
Typ 33 mA@12V DC
Max 58 mA@12V DC
Typ 35 mA@24V DC
max 60 mA@24VDC
Temperaturområde: -30 till +50
Färg: Svart
Material: Robust kåpa av
polykarbonat plast med
inkapslad elektronik.
Läsavstånd2): Cotag: Upp till 23 cm
(aktivt kort).
Cotag/EM4102: Upp till 8 /
5 cm (passivt kort).
Mått
(H x B X D):
73 x 68 x 13.5 mm
* Nominell spänning har marginaler för
transformatortoleranser, nätspänningsvariationer och avbrott.
** Absoluta spänningsgränser har inga marginaler och bör
användas endast för vägledning.
1) PM500 är konstruerad för att drivas med 12V oreglerad
spänning eller 24V batteribackup. Spänningsområdet är 10,6
– 32V DC. Övre spänningsnivån är avsedd att vara
kompatibel med laddningsnivå och laddningsmetod för
blybatterier. Laddningsmetoderna kan dock variera och vara
temperaturberoende. Om 32V överskrids kan läsaren skadas.
Installatörer bör alltid kontrollera strömförsörjningens max
spänning. Använd inte oreglerad 24V DC då en
spänningstopp kan överskrida max 32V. Installatörer bör alltid
kontrollera strömförsörjningens max spänning. Använd inte
PM500 med oreglerad 24V DC. PM500 strömförbrukning kan
vara betydligt mindre än 100mA. En obelastad spänningstopp
från ett nominellt 24V oreglerat aggregat kommer att
överstiga absolut max
2) Läsavståndet avser en störningsfri miljö där läsaren har
installerats helt enligt Siemens AB instruktioner och där kortet
hålls i samma höjd som läsaren.
Montering
Läsaren kan monteras på valfritt material, den kan
även monteras bakom glas och i väggar. Den enda
begränsningen är att den inte får kringgärdas helt av
metall.
Obs! Placera inte läsaren i närheten av starka
magnetfält, som skapas t.ex. av elektriska motorer,
datorer, bildskärmar, och starkströmskablar.
Om det finns för mycket störningar i läsområdet
blinkar den gula lysdioden.
PM500 kan monteras i paneler av plast eller metall
med hjälp av fyra skruvar. Om panelen är av metall
monteras läsaren bakom ett kvadratiskt hål på 40
mm och måste positioneras i centrum av de fyra
monteringshålen som visas på sista sidan. Vid
montering i metall blir läsavståndet ca 5 – 15 cm
beroende på typ av kort/bricka, så den måste
placeras så att kort eller brickor lätt kan visas inom
detta avstånd.
Om läsaren monteras i en plastpanel, så ska
kabelskärmen endast anslutas i centralen (i PM500
klipps och isoleras skärmen). Vid montering i
metallpanel ansluts skärmen både i denna och i
överordnad central. Skärmen får inte anslutas till
PM500 i något av fallen. Det medföljande
”plastfönstret” kan valfritt monteras för att förbättra
utseende på den monterade läsaren.
Anslut kablar enligt vald illustration nedan, skruva
fast kåpan med M3 skruv och mutter (eller
självgängande skruv) och slutligen testa läsaren.
Vid utomhusmontage rekommenderas att
skruvplinten täcks med t.ex. silikon.
För övrig information om installation och
programmering - se manual för respektive central.
Anslutning
Anslutning av PM500 till
SiPass/Bewator Entro dörrcentral
DC22, DC12 - eller DC800
Som anslutningskabel mellan interfaceenhet och
dörrcentral används en rak, skärmad kabel, t.ex. LI-
YCY (Belden 9534/9535/9538). Max kabel längd 50
m. Se Illustration 1 på sidan 10.
Obs!
För SiPass/Bewator Entro: anslut till BCLINK
plinten. Sätt bygeln J4 i dörrcentralen på +V =
Vin.
För DC800: Sätt bygel J1 på Vin och bygel J4 på
BCLINK.
Matningsspänningen till dörrcentralen kommer då att
även försörja läsaren.
När spänningen ansluts till PM500 tänds de gröna
och röda lysdioderna i fyra sekunder. Därefter startar
automatiskt konfigurering i ca 60 sekunder då de tre
lysdioderna är tända (för att konfigurera BCLINK
protokollet). Det är viktigt att inga kort presenteras
för läsaren förrän denna automatiska procedur är
klar. När den är klar kommer lysdioderna att slockna,
ett ljud hörs och läsaren kan användas. Lysdioderna
styrs helt av överordnat system.

SVENSKA - PM500 Kortläsare
9
Siemens AB 03.2011
Anslutning av dubbla läsare för både
in- och utpassage (BCLINK)
Om dubbla läsare för in- och utpassage ska
användas, måste utläsaren adresseras för
utpassage. Detta görs med en bygel mellan plint
HRN-Adr och DA i PM500 (före spänningspåslag).
Konfigurering sker på samma sätt som ovan.
Se Illustration 3 på sidan 10.
Anslutning av läsaren PM500 till
Bewator Omnis 2010 E2V
Inkopplingsbilden visar hur PM500 ansluts till
Bewator Omnis 2010 totalintegrerat system där
noden E2V används.
Strömförsörjningen till läsaren PM500 hämtas från
E2V:s inkommande spänningsmatning. Max
spänning är då +24V. Observera att ingen
anslutning får göras till +12V utgången i E2V (på
grund av strömbegränsning i E2V). Lysdioderna
styrs helt av överordnat system. De två plintarna
märkta “Tamper” är sammankopplade internt i
läsaren. Detta kan användas som ett övervakat 24
timmars larm. (T ex kan avklippning av kabeln
generera ett larm).
Uppstart av läsaren sker på samma sätt som för
SiPass/Bewator Entro (ca 60 sekunder och sedan
hörs en ton).
Se Illustration 4 på sidan 10.
Anslutning av PM500 till SiPass
integrated ADD5100
Inkopplingsbilden visar hur PM500 ansluts till SiPass
integrated där ADD5100 (DRI) används.
Se Illustration 5 på sidan 11.

10
Siemens AB 03.2011
Illustration 1
Illustration 2
Illustration 3
Illustration 4

11
Siemens AB 03.2011
Illustration 5

12
Siemens AB 03.2011
Mechanical
Fixing dimensions
Montage Abmessungen
Dimensions de montage
Monteringsmått

13
Siemens AB 03.2011

Issued by
Siemens AB
Security Products
International Headquarters
Englundavägen 7
SE-171 24 Solna
Tel. +46 8 629 0300
www.buildingtechnologies.siemens.com
© 2011 Copyright by Siemens AB
Data and design subject to change without notice.
Supply subject to availability.
Document no. A24205-A335-N339
Edition 03.2011
This manual suits for next models
1
Table of contents
Languages:
Other Siemens Card Reader manuals

Siemens
Siemens SIMATIC RF650M User manual

Siemens
Siemens SC7 Installation and operation manual

Siemens
Siemens SIMATIC RF1070R User manual

Siemens
Siemens RB500 User manual

Siemens
Siemens AR6111-MX User manual

Siemens
Siemens AR50M-MF User manual

Siemens
Siemens AR6181-MX Operating and maintenance instructions

Siemens
Siemens SIMATIC MV440 User manual

Siemens
Siemens 6FL7171-8AD User manual

Siemens
Siemens AR10S-MF Installation instructions manual