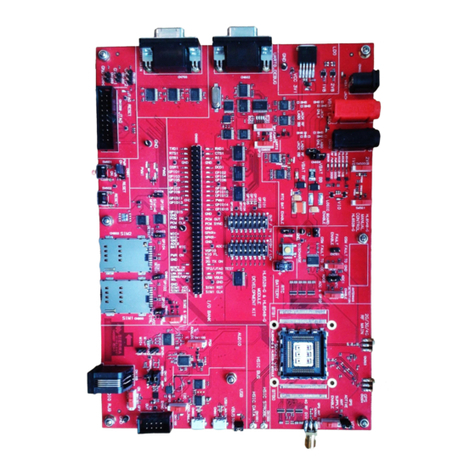
Sierra Wireless AirPrime XA12 Series User manual

AirPrime XA12xx and XM1210
Development Kit User Guide
41112817
Rev 1.2

Development Kit User Guide
Rev 1.2 Nov.18 2 41112817
Important
Notice
Due to the nature of wireless communications, transmission and reception of data
can never be guaranteed. Data may be delayed, corrupted (i.e., have errors) or be
totally lost. Although significant delays or losses of data are rare when wireless
devices such as the Sierra Wireless modem are used in a normal manner with a
well-constructed network, the Sierra Wireless modem should not be used in
situations where failure to transmit or receive data could result in damage of any
kind to the user or any other party, including but not limited to personal injury,
death, or loss of property. Sierra Wireless accepts no responsibility for damages
of any kind resulting from delays or errors in data transmitted or received using
the Sierra Wireless modem, or for failure of the Sierra Wireless modem to
transmit or receive such data.
Safety and
Hazards
Do not operate the Sierra Wireless modem in areas where blasting is in progress,
where explosive atmospheres may be present, near medical equipment, near life
support equipment, or any equipment which may be susceptible to any form of
radio interference. In such areas, the Sierra Wireless modem MUST BE
POWERED OFF. The Sierra Wireless modem can transmit signals that could
interfere with this equipment.
Do not operate the Sierra Wireless modem in any aircraft, whether the aircraft is
on the ground or in flight. In aircraft, the Sierra Wireless modem MUST BE
POWERED OFF. When operating, the Sierra Wireless modem can transmit
signals that could interfere with various onboard systems.
Note: Some airlines may permit the use of cellular phones while the aircraft is on the
ground and the door is open. Sierra Wireless modems may be used at this time.
The driver or operator of any vehicle should not operate the Sierra Wireless
modem while in control of a vehicle. Doing so will detract from the driver or
operator's control and operation of that vehicle. In some states and provinces,
operating such communications devices while in control of a vehicle is an offence.
Limitation of
Liability
The information in this manual is subject to change without notice and does not
represent a commitment on the part of Sierra Wireless. SIERRA WIRELESS AND
ITS AFFILIATES SPECIFICALLY DISCLAIM LIABILITY FOR ANY AND ALL
DIRECT, INDIRECT, SPECIAL, GENERAL, INCIDENTAL, CONSEQUENTIAL,
PUNITIVE OR EXEMPLARY DAMAGES INCLUDING, BUT NOT LIMITED TO,
LOSS OF PROFITS OR REVENUE OR ANTICIPATED PROFITS OR REVENUE
ARISING OUT OF THE USE OR INABILITY TO USE ANY SIERRA WIRELESS
PRODUCT, EVEN IF SIERRA WIRELESS AND/OR ITS AFFILIATES HAS BEEN
ADVISED OF THE POSSIBILITY OF SUCH DAMAGES OR THEY ARE
FORESEEABLE OR FOR CLAIMS BY ANY THIRD PARTY.
Notwithstanding the foregoing, in no event shall Sierra Wireless and/or its
affiliates aggregate liability arising under or in connection with the Sierra Wireless
product, regardless of the number of events, occurrences, or claims giving rise to
liability, be in excess of the price paid by the purchaser for the Sierra Wireless
product.

Preface
Rev 1.2 Nov.18 3 41112817
Patents This product may contain technology developed by or for Sierra Wireless Inc. This
product includes technology licensed from QUALCOMM®. This product is
manufactured or sold by Sierra Wireless Inc. or its affiliates under one or more
patents licensed from MMP Portfolio Licensing.
Copyright © 2018 Sierra Wireless. All rights reserved.
Trademarks Sierra Wireless®, AirPrime®, AirLink®, AirVantage®and the Sierra Wireless logo
are registered trademarks of Sierra Wireless.
Windows®and Windows Vista®are registered trademarks of Microsoft
Corporation.
Macintosh®and Mac OS X®are registered trademarks of Apple Inc., registered in
the U.S. and other countries.
QUALCOMM®is a registered trademark of QUALCOMM Incorporated. Used
under license.
Other trademarks are the property of their respective owners.
Contact
Information
Revision
History
Sales information and technical
support, including warranty and returns
Web: sierrawireless.com/company/contact-us/
Global toll-free number: 1-877-687-7795
6:00 am to 5:00 pm PST
Corporate and product information Web: sierrawireless.com
Revision
number
Release date Changes
1.0 October 22, 2018 Creation
1.1 October 29, 2018 Updated screenshots in Software Usage
1.2 November 05, 2018 Updated Packing Contents on page 9

Rev. 1.2 Nov.18 4 41112817
Contents
Introduction. . . . . . . . . . . . . . . . . . . . . . . . . . . . . . . . . . . . . . . . . . . . . . . . . . . . . 7
Caution . . . . . . . . . . . . . . . . . . . . . . . . . . . . . . . . . . . . . . . . . . . . . . . . . . . . . . 9
Packing Contents . . . . . . . . . . . . . . . . . . . . . . . . . . . . . . . . . . . . . . . . . . . . . . 9
Hardware Overview . . . . . . . . . . . . . . . . . . . . . . . . . . . . . . . . . . . . . . . . . . . . . 10
Function Testing. . . . . . . . . . . . . . . . . . . . . . . . . . . . . . . . . . . . . . . . . . . . . . . . 11
Preparation for Power and Data Communication . . . . . . . . . . . . . . . . . . . . . 11
Application for RF Reception. . . . . . . . . . . . . . . . . . . . . . . . . . . . . . . . . . . . . 13
Software Usage. . . . . . . . . . . . . . . . . . . . . . . . . . . . . . . . . . . . . . . . . . . . . . . . . 14
System Requirements. . . . . . . . . . . . . . . . . . . . . . . . . . . . . . . . . . . . . . . . . . 14
USB Driver and GNSS Tool . . . . . . . . . . . . . . . . . . . . . . . . . . . . . . . . . . . . . 14
Installing the USB Driver . . . . . . . . . . . . . . . . . . . . . . . . . . . . . . . . . . . . . 14
Using GNSS Tool. . . . . . . . . . . . . . . . . . . . . . . . . . . . . . . . . . . . . . . . . . . 16
Allystar USB Driver . . . . . . . . . . . . . . . . . . . . . . . . . . . . . . . . . . . . . . . . . . . . 18
Sensor Device Driver . . . . . . . . . . . . . . . . . . . . . . . . . . . . . . . . . . . . . . . . . . 20
Troubleshooting . . . . . . . . . . . . . . . . . . . . . . . . . . . . . . . . . . . . . . . . . . . . . . . . 22
Setup Troubleshooting . . . . . . . . . . . . . . . . . . . . . . . . . . . . . . . . . . . . . . . . . 22
Causes of Poor GPS Signals . . . . . . . . . . . . . . . . . . . . . . . . . . . . . . . . . . . . 23

Rev. 1.2 Nov.18 5 41112817
List of Figures
Figure 1-1: XA12xx and XM1210 Development Kit . . . . . . . . . . . . . . . . . . . . . . . . . . . . .7
Figure 1-2: Series 1 Development Kit Board . . . . . . . . . . . . . . . . . . . . . . . . . . . . . . . . . .8
Figure 1-3: Series 2 Development Kit Board . . . . . . . . . . . . . . . . . . . . . . . . . . . . . . . . . .8
Figure 2-1: Series 1 (for XM1210) Parts and Features. . . . . . . . . . . . . . . . . . . . . . . . . .10
Figure 2-2: Series 2 (for XA1210 and XA1220) Parts and Features . . . . . . . . . . . . . . .10
Figure 3-1: Power is On and Module is Ready for Data Connection . . . . . . . . . . . . . . .11
Figure 3-2: Button Position on Series 1 (for the XM1210) Development Kit. . . . . . . . . .12
Figure 3-3: Button Position on Series 2 (XA1210 and XA1220) Development Kit . . . . .12
Figure 3-4: External Active Antenna Attachments . . . . . . . . . . . . . . . . . . . . . . . . . . . . .13
Figure 3-5: Patch Antenna Module . . . . . . . . . . . . . . . . . . . . . . . . . . . . . . . . . . . . . . . . .13
Figure 4-1: Driver Installation Folder . . . . . . . . . . . . . . . . . . . . . . . . . . . . . . . . . . . . . . .14
Figure 4-2: Starting the Installation Process. . . . . . . . . . . . . . . . . . . . . . . . . . . . . . . . . .15
Figure 4-3: Selecting Manage. . . . . . . . . . . . . . . . . . . . . . . . . . . . . . . . . . . . . . . . . . . . .15
Figure 4-4: Accessing the Port Properties . . . . . . . . . . . . . . . . . . . . . . . . . . . . . . . . . . .16
Figure 4-5: Main Program Screen . . . . . . . . . . . . . . . . . . . . . . . . . . . . . . . . . . . . . . . . .17
Figure 4-6: COM Port Dialog . . . . . . . . . . . . . . . . . . . . . . . . . . . . . . . . . . . . . . . . . . . . .17
Figure 4-7: Allystar USB Driver Installation Folder . . . . . . . . . . . . . . . . . . . . . . . . . . . . .18
Figure 4-8: Start the Allystar USB Installation Wizard . . . . . . . . . . . . . . . . . . . . . . . . . .18
Figure 4-9: Select Manage . . . . . . . . . . . . . . . . . . . . . . . . . . . . . . . . . . . . . . . . . . . . . . .19
Figure 4-10: Accessing the USB Port Properties . . . . . . . . . . . . . . . . . . . . . . . . . . . . . .19
Figure 4-11: Sensor Location Driver Installation Folder . . . . . . . . . . . . . . . . . . . . . . . . .20
Figure 4-12: Start the Location Driver Installation Wizard . . . . . . . . . . . . . . . . . . . . . . .20
Figure 4-13: Select Manage . . . . . . . . . . . . . . . . . . . . . . . . . . . . . . . . . . . . . . . . . . . . . .21
Figure 4-14: Sensor Device Driver is Installed . . . . . . . . . . . . . . . . . . . . . . . . . . . . . . . .21

Rev 1.2 Nov.18 7 41112817
1
1: Introduction
The main purpose of the Development Kit is to simplify the evaluation process for
GNSS modules and to help testers operate our products with convenience and ease.
Figure 1-1: XA12xx and XM1210 Development Kit
This device can communicate with computer devices via USB cable, and it must be
used in conjunction with the software “GNSS Tool”, for users to record all GNSS
module data such as satellites’ status, time-to-first-fix (TTFF), date and time.
There are two types of development kit:
1. Series 1 is for stand-alone modules such as the XM1210
2. Series 2 is for patch antenna modules such as the XA1210 (which supports GPS
+ GLONASS) and the XA1220 (which supports GPS + Beidou)

Development Kit User Guide
Rev 1.2 Nov.18 8 41112817
Figure 1-2: Series 1 Development Kit Board
Figure 1-3: Series 2 Development Kit Board

Introduction
Rev 1.2 Nov.18 9 41112817
Caution
•GNSS signal may be cut off or become seriously weakened if you operate the
Development Kit inside any infrastructure such as buildings, tunnels, or near
any huge objects and/or obstruction. Signal being cut off does not mean the
Development Kit has malfunctioned; it will operate properly again once it
receives clear GNSS signals (works normally under the open sky).
•Select a suitable external active antenna based on the satellite system that
you use.
Packing Contents
The development kit is delivered with:
•USB cable
•External active antenna
You will also need the following documents and software which are available on
the Source:
•User manual / Software Application Program
•CP210X USB Bridge VCP driver
•Allystar USB driver
•Allystar Sensor device driver
•GNSS Tool with user manual
•Development Kit user manual

Rev 1.2 Nov.18 10 41112817
2
2: Hardware Overview
Figure 2-1: Series 1 (for XM1210) Parts and Features
Figure 2-2: Series 2 (for XA1210 and XA1220) Parts and Features

Rev 1.2 Nov.18 11 41112817
3
3: Function Testing
Preparation for Power and Data
Communication
1. Connect USB cable between the PC and UART port of USB port of the Devel-
opment Kit.
·The PC supplies power for the development kit and transmits data.
·Make sure the Power LED Indicator (LED1) is lit.
2. The 1PPS LED Indicator (LED2) indicates fix status:
·1PPS LED Indicator is off: no fix status
·1PPS LED Indicator is blinking (with a green light): 3D fix status
Figure 3-1: Power is On and Module is Ready for Data Connection
3. Push button SW2 to power reset the development kit.
4. Push button SW3/SW4 to wake the module up from sleep mode.
5. Use the Boot ROM to upgrade firmware on the GNSS module. Refer to the
following steps:
a. Push SW1/SW5 until the module is powered on.
b. Connect the USB cable to the UART port. (The USB cable supplies power
and transmits data. Make sure that the Power LED Indicator, LED1, is on.)
c. Release SW1/SW5.
d. Use the GNSS Tool to upgrade the firmware.

Development Kit User Guide
Rev 1.2 Nov.18 12 41112817
Figure 3-2: Button Position on Series 1 (for the XM1210) Development Kit
Figure 3-3: Button Position on Series 2 (XA1210 and XA1220) Development Kit

Function Testing
Rev 1.2 Nov.18 13 41112817
Application for RF Reception
1. External active antenna with a GNSS module on the Series 1 (for XM1210)
Development Kit.
Figure 3-4: External Active Antenna Attachments
2. Built-in patch antenna module on the Series 2 (for XA1210 and XA1220)
Development Kit.
Figure 3-5: Patch Antenna Module

Rev 1.2 Nov.18 14 41112817
4
4: Software Usage
System Requirements
•Operating System: Microsoft Windows 7, 8, and 10
•USB Driver: CP210x VCPInstaller.zip
For Windows 7, Windows 8 or Windows 8.1, please use CP210xVCP driver v6.7
or the latest version (v6.7.5).
For Windows 10, please use CP210xVCP driver v6.7.5; v10.1.1
•Allystar USB Driver: Allystar -USB driver.zip
•Sensor Device Driver: Allystar-Sensor Device driver.zip
•GUI Tool: GNSS Tool
•Microsoft .NET Framework 4.5
•Microsoft Visual C++ 2015 Redistributable Package (x86)
USB Driver and GNSS Tool
Before setting up the connection between the module’s UART port and the PC, you
will need the Development Kit USB Driver (CP210x VCP) and GNSS Tool.exe to
operate the Development Kit.
Please download and install the USB Driver (CP210x VCP) from https://
source.sierrawireless.com/resources/airprime/software/cp210x-windows-drivers.
Please download the GNSS tool from https://source.sierrawireless.com/resources/
airprime/software/gnss_tool/.
Important: Please check whether you have the correct USB driver before you proceed to the
next step. The Development Kit will not function without the correct driver.
Installing the USB Driver
1. Double click CP210x_VCP_Win.exe to begin driver installation:
Figure 4-1: Driver Installation Folder

Software Usage
Rev 1.2 Nov.18 15 41112817
2. Click Install:
Figure 4-2: Starting the Installation Process
3. After the installation is complete, you may need to restart your computer.
Please follow the instructions on screen to restart your computer.
4. After the computer restarted, right click on My Computer and select
Manage:
Figure 4-3: Selecting Manage

Development Kit User Guide
Rev 1.2 Nov.18 16 41112817
5. Left click Device Manager and select Ports (COM &LPT). Check to see if a
device named Silicon Labs CP210x USB to UART Bridge (COM#) is
present. If so, the Development Kit is set up and ready for use.
Figure 4-4: Accessing the Port Properties
“COM9” represents the virtual COM port number generated for the USB
connection to the Development Kit. This generated COM port value must match
the COM port value in the program setting for the application to establish proper
communication with the Development Kit.
After completing the installation, please proceed to Using GNSS Tool.
Using GNSS Tool
Microsoft Framework 4.5 or higher is required before you launch the GNSS Tool
software on your PC.
Double click GNSSTool.exe to start the application, the main screen of the
program is shown below:

Software Usage
Rev 1.2 Nov.18 17 41112817
Figure 4-5: Main Program Screen
1. Command Tx and Rx List: clicking on this menu item will display the
Command window.
2. NMEA List: clicking on this menu item will display a window with NMEA infor-
mation.
3. CNR Signal: clicking on this menu item will display the CNR signal window.
4. Sky View: clicking on this menu item will display a window with a sky view of
satellites.
5. Statistics Plot: clicking on this menu item will display the statistics plot
window.
6. Map: clicking on this menu item will display the map window.
After the Development Kit is connected with the PC, please choose the correct
<COM Port> and < Baud Rate > then click the OK button and select the
appropriate value.
Figure 4-6: COM Port Dialog

Development Kit User Guide
Rev 1.2 Nov.18 18 41112817
If you want more information about the GNSS Tool software, refer to the Sierra
Wireless GNSS Tool User Guide.
Allystar USB Driver
Before setting up the connection between the module’s USB port and the PC, you
will need the DEV USB Driver (Allystar GNSS USB) and GNSS Tool.exe to
operate the Development Kit.
Please download and install the USB Driver (Allystar GNSS USB) from the
Source.
Important: Please check whether you have the correct USB driver before you proceed
to the next step. The Development Kit will not function without the correct driver.
To install:
1. Go to the driver installation folder and double-click
ALLYSTAR_GNSS_USB_Driver.exe to begin driver installation.
Figure 4-7: Allystar USB Driver Installation Folder
2. Click Next from the Installation Wizard.
Figure 4-8: Start the Allystar USB Installation Wizard

Software Usage
Rev 1.2 Nov.18 19 41112817
3. You may need to restart your computer after installation. Please follow the
instructions on your screen to restart your computer.
4. After your computer has been restarted, right-click on My Computer and
select Manage.
Figure 4-9: Select Manage
5. Left-click Device Manager and select Universal Serial Bus controllers.
Check to see if a device named ALLYSTAR-GNSS is present. If so, the Devel-
opment Kit is set up and ready for use.
Figure 4-10: Accessing the USB Port Properties

Development Kit User Guide
Rev 1.2 Nov.18 20 41112817
Sensor Device Driver
Microsoft Windows 7 introduced a built-in platform for the support of sensor
devices including location sensors, as GNSS sensor is part of the Location
category.
The Allystar Sensor Device Driver connects GNSS receivers to the sensor and
location API structure for Windows 7 onwards.
Before setting up the connection between the module’s USB port and the PC, you
will need the Allystar Sensor Location Driver to operate the Development Kit.
Please download and install the GNSS Sensor device driver from the Source.
Important: Please check whether you have the correct USB driver before you proceed
to the next step. The Development Kit will not function without the correct driver.
To install:
1. Go to the driver installation folder and right-click usbgps.inf to begin driver
installation.
Figure 4-11: Sensor Location Driver Installation Folder
2. Click Next from the Installation Wizard.
Figure 4-12: Start the Location Driver Installation Wizard
This manual suits for next models
1
Table of contents
Other Sierra Wireless Microcontroller manuals

Sierra Wireless
Sierra Wireless AirPrime WMP Series User manual

Sierra Wireless
Sierra Wireless EM7590 Quick setup guide

Sierra Wireless
Sierra Wireless AirPrime MC Series User manual

Sierra Wireless
Sierra Wireless AirPrime XM0110 User manual

Sierra Wireless
Sierra Wireless AirPrime XS1110 User manual

Sierra Wireless
Sierra Wireless MC Series User manual

Sierra Wireless
Sierra Wireless mangOH Yellow User manual

Sierra Wireless
Sierra Wireless AirPrime HL6528 Series User manual

Sierra Wireless
Sierra Wireless mangOH Red HL78 Series User manual

Sierra Wireless
Sierra Wireless MC5720 User manual