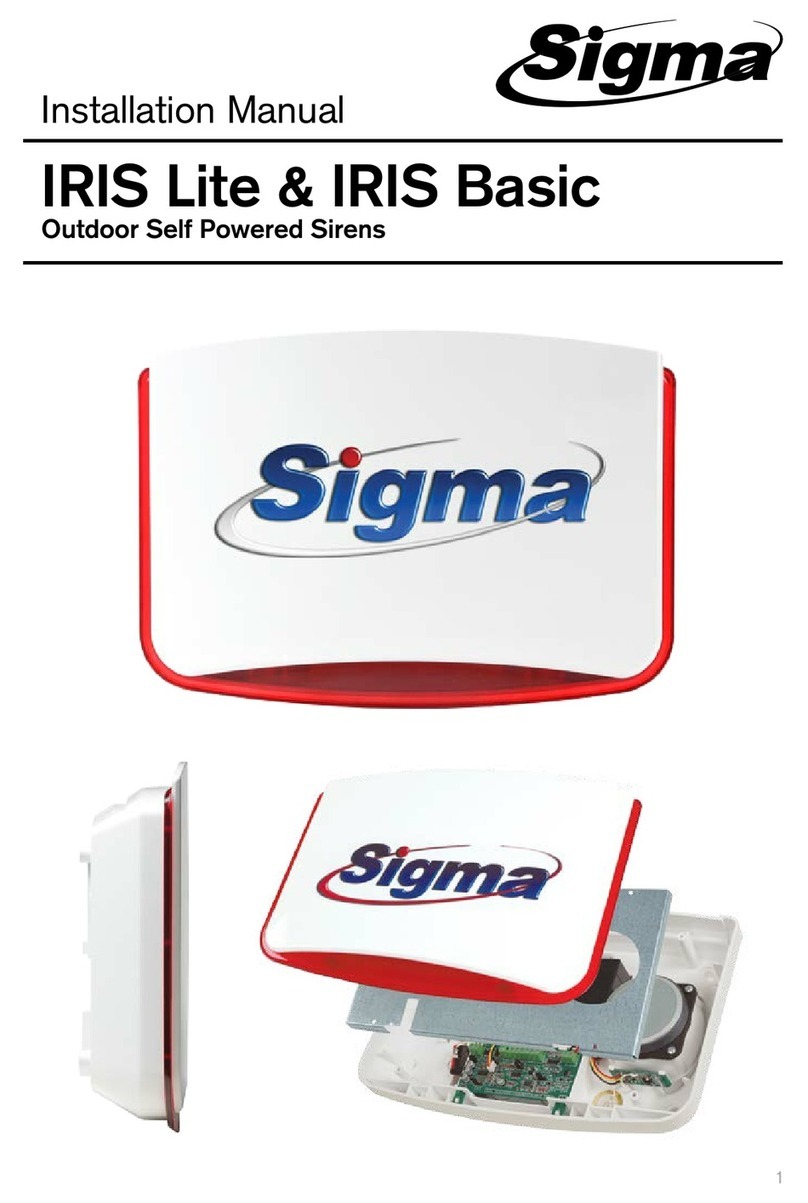
Sigma IRIS User manual

IRIS & IRIS FSD
OUTDOOR SELF POWERED
SIRENS
General characteristics
Τhe installation of the siren can be completed without applying power from the control
panel and remain so for a long time. It is activated by applying the supply voltage powered
from the control panel. This is particularly useful in cases of a building, which the siren is
placed first and the panel is powered after a long time.
• Five different alarm sounds (selectable) and different sound for fire alarm.
• Seven different operating modes of the five LEDs in standby mode of siren (selectable).
• Different activating inputs for alarm and for fire alarm.
• Activation of the siren can be made with the following triggering methods:
- by interrupting positive voltage (SSP) – by applying positive voltage
- by interrupting negative voltage – by applying negative voltage
IRIS / IRIS FSD - 1

General characteristics
IRIS / IRIS FSD - 2
• The siren sounds alarm if the wires connected to the control panel are shorted or cut or
when the voltage of the panel is below 8.0 V.
• The siren will follow the alarm duration of the control panel. However, in case of interruption of
voltage from the control panel, the maximum alarm duration of the siren is 15 minutes.
• The siren when starts operating will sound at low volume for 8 seconds and then the
intensity will turn to normal level (selectable).
• The siren will sound an alarm of up to 5 times in 24 hours. This time counts from the first
activation of the siren and the process is canceled just spend the 24 hours or if there is siren
power cut off for two seconds.
• Special circuit controls the voltage of the battery of the siren and the panel and activates
the “LB” (LOW BATTERY) output, if the battery voltage drops below 10.5 V.
• If the battery voltage is below 9.0 V, the siren stops sounding, but still the flash blinking.
• Integrated 3-G Sensor, with adjustable detection sensitivity. 3-G Sensor activates an alarm
when it detects violent blows or siren drilling effort, and when changing the inclination of
the siren more than 45 ° in any direction (Only in IRIS PLUS FSD).
• Built in TAMRER switch to protect the siren from the opening the outer casing and the
detachment from the wall.
• Built in foam detection sensor, to protect the siren from fire extinguisher foam,
polyurethane foam, etc.
• Integrated FLASH, with five high brightness and low consumption LEDs. These LEDs are
flashing in various programmable modes when the siren is at standby mode.
• The FLASH continues to operate for 30 minutes after the end of the alarm, for easier locating
of the area in alarm (selectable). This function is canceled when the panel is disarmed.
• The siren has short circuit protection of LEDs of the FLASH.
• Alarm verification output (“ALARM VER”) which is activated whenever the speaker sounds,
regardless of the reason activation. It is used to give an alarm command in the control panel
and report to the Monitoring Station.
• In any attempt of sabotage, the TAMRER switch and other protection systems of the siren
(foam detector, 3-G Sensor), except of the siren activation, activates and “ALARM TMP”
output. This output can be connected to the control panel to give an alarm and report to the
Monitoring station.
• The alarm duration from ΤΑΜΡΕR switch or 3-G Sensor or foam detector is 90 seconds,
and is independent of the alarm duration of the control panel.
• Through “TC” input, with a very intelligent, automated process you can isolate the TAMRER
switch, the 3-G Sensor and foam detector and then you can open the cover of the siren to
change the battery or make service, without the siren sound.
• “SIGN” Input, with selectable visual or audible confirmation of arming or disarming of the panel,
if used remote control. This input activates the flash or the speaker, or both.
Electronic level enables you to place the siren correctly. The indication of correct leveling is
provided by the flash LEDs (Only in IRIS PLUS FSD).
• Thermostat to prevent the destruction of the siren by torch (to be introduced very soon).
• Poly-carbonate external cover and galvanized internal cover for the siren protection.

Technical Characteristics IRIS IRIS FSD
Power Supply 11-14 V DC
Consumption (standby) 8-20 mA (depending on the LEDs that are on during stand by)
Consumption in alarm 1.2 A (with FLASH on)
Operation frequency 900-2700 Hz
Acoustic Power 122 dB at 1 meter
LED FLASH Consuption 5 x 30mA
Alarm Duration (Maximum) 15 min.
Movement protection
(3-axis accelerometer) -Activated if the siren position
angle changes more than
45οto any direction
Anti-foam & anti-shock protection NO YES
ΤΑΜΡΕR switch On front and back cover
ΤΑΜΡΕR contacts (NC-NO) 600 mA / 125 V DC
ΤΑΜΡΕR Alarm Duration/
3-axis accelerometer / Foam detector 90 seconds
Activation By applying or interrupting positive or negative voltage
Protection Rate IP 44
Battery (Pb) 12 V /1.3 or 2.3 Ah
Weight (without battery) 1650 gr
Dimensions 348 x 245 x 78 mm (WxHxD)
12 V POWER SUPPLY INPUT(12V) OF THE SIREN. IS ALSO USED FOR CHARGING
THE SIREN’S BATTERY
ΙN ALARM ACTIVATION INPUT+12V, (PANEL CONTROLABLE AND ALSO
SELECTABLE)
FIRE ACTIVATION INPUT +12V FOR FIRE ALARM
TC INPUT +12V FOR TAMPER, 3-AXIS ACCELEROMETER AND FOAM DETECTOR
CANCELATION
SIGN INPUT +12V FOR AUDIBLE AND VISUAL VERIFICATION OF THE CONTROL
PANEL STATUS
LB LOW BATTERY OUTPUT FOR PANEL’S OR SIREN’S BATTERY
(it is 0 on stand by and turns to O.C. - Open Collector)
ALARM TMP TAMPER ALARM OUTPUT
(it is 0 on stand by and turns to O.C. - Open Collector)
ALARM VER ALARM VERIFICATION OUTPUT
(it is 0 on stand by and turns to O.C. - Open Collector)
SPEAKER SPEAKER CONNECTION INPUT
Terminals description
IRIS / IRIS FSD - 3

Siren’s activation Mode
MODE + / - OPERATION
Interrupt positive voltage: Connect “ ΙΝ” terminal of the siren to a PGM
output of the control panel. This PGM output must have 12 V at stand by
and turn to 0V in case of alarm (connect “SSP”, in Sigma alarm control
panels).
xInterrupt positive voltage: Connect “ ΙΝ” terminal of the siren to a PGM
output of the control panel. This PGM output must have 0 V at stand by
and turn to +12V in case of alarm.
xApply positive voltage: Connect “ ΙΝ” terminal of the siren to a PGM output
of the control panel. This PGM output must have 0 V at stand by and turn
to +12V in case of alarm.
x x Apply negative voltage: Connect “ ΙΝ” terminal of the siren to a PGM out-
put of the control panel. This PGM output must have 12 V at stand by and
turn to 0 in case of alarm.
With Links “MODE IN” & “ +/- IN”, select the way in which the siren will be activated:
• “MODE ΙΝ”: determines whether the siren will sound alarm on application or interruption of
voltage.
• “+/- ΙΝ”: determines whether the siren will be activated by positive (+) or negative (- )
command.
In the following table you can see in detail the operation modes of the siren according to
the selection of links “MODE IN” & “+/- IN”:
Selecting the way in which the TAMPER of the siren will trigger
alarm
Programming IRIS siren
The TAMPER of the siren, factory default activates both, siren and “AL” output. If you wish the siren
to be activated, only by the “AL” output, then cut the link “AL”. The “AL” output terminal of the siren
must be connected to an EOL zone of the alarm control panel. The EOL resistor must be connected
inside of the siren, in series with the cable, as shown in the wiring diagram (page 7).
All the other functions of the siren can be programmed via “MENU” button and “SELECT” button
which are on the siren board.
• Use the “MENU” button, to select the programming step you need. Each time you press
“MENU” button, you select different programming mode and this is indicated by lighting the
relative LED.
• Use the “SELECT” button to select the parameters of each sub “MENU”. Every time you press
“SELECT” button, you change a parameter. If you have missed the desired parameter just press
“SELECT” button, as many times it is needed to return to the parameter you need.
IRIS / IRIS FSD - 4

Entrance to the programming mode
Siren sound selection
To enter programming mode of the siren, leave siren’s Tamper open and connect the battery to the
corresponding terminals of the siren, ensuring the correct polarity.
Then, hold for three seconds the “MENU” button, until the LED “SOUND” lights and the confirma-
tion beep - BEEP, BEEP, BEEP, BEEP, BEEP- will be heard.
Now, the siren is in programming mode and settings that you can change are indicated by the light-
ing of the corresponding LEDs of the siren.
To select the siren’s sound, press “SELECT” button, when the LED “SOUND” lights. Each time
you press “SELECT” button, the siren’s sound will change. This sound will come out of the siren’s
speaker in low volume, for 3 seconds each time. The last sound you hear will be the new sound of
the siren.
Press “MENU” to save settings and navigate to next menu The LED “FLASH” will light.
Select the siren’s lighting at standby mode
When the LED “FLASH” lights, use “SELECT” button, to select the lighting mode of the siren at
standby or even disable it. Each time you press “SELECT” button, will change the format of move-
ment of the siren’s LEDs. will be the one the siren will have. The form of movement that, you will
see at the LEDs, is the one, the siren will follow. If all the LEDs are off then, the siren will have no
lighting at stand by mode.
Press “MENU” to save settings and navigate to next menu The LED “L/S” will light.
Select the siren’s indication of arming or disarming of the system
Select the level of the siren sound at the start of alarm
Once the LED “L/S” lights, press “SELECT” button to select how they will be displayed through
siren signaling the arming and disarming of the system. Each time you press “SELECT” button, will
illuminate the LEDs “SOUND” and “5/24” or the siren will sound or both. In any of these cases you
stay, this will be the way in which the siren will signal arming or disarming of the system.
Press “MENU” to save settings and navigate to next menu. The LED “Hi-Lo” will light.
Once the LED “Hi-Lo” lights, press the SELECT button to select the level of the siren sound at the
start of the alarm. Each time you press “SELECT” button, the siren will sound with high or low sound
level (Hi-Lo). If you select low sound level, the siren will sound at low volume level for 8 seconds at
the beginning of its operation and then gives all its intensity. If you select high sound level, the siren
will sound with all its intensity in case of alarm.
Press “MENU” to save settings and navigate to next menu. The LED “5-24” will light.
IRIS / IRIS FSD - 5
Select the number of siren’s activations during twenty-four hours
As soon as the LED “5-24” lights, press “SELECT” button to select if the siren will sound every time
the alarm system is activated or only five times during a twenty-four hours (the duration of each alarm
should be longer than 20 seconds).
Each time you press “SELECT” button, you will hear the sound of the siren and will turn on or turn

Sensitivity adjustment of the siren’s shock sensor (Only in IRIS FSD)
As soon the LEDs “FLASH” & “Hi-Lo” lights, press “SELECT” button to adjust the sensitivity of siren
to blows, which are detected by the 3-Axis accelerometer.
Each time you press “SELECT” button, you will turn on or turn off one or more of the five LEDs,
which show the sensitivity of the siren blows. When all five LEDs are turned off, this function is de-
activated it remains, however, active detection of inflection.
Press “MENU” button to save your setting and navigate to next selection. The LEDs “FLASH” &
“L/S” & “Hi-Lo” will light.
Factory programming
To restore factory settings, press simultaneously “MENU” and “SELECT” buttons for 3 seconds,
when the siren is in standby mode, until you hear the confirmation sound – BEEP, BEEP, BEEP,
BEEP, BEEP-.The LEDs “SOUND” & “5-24” will light and the siren will be again, in standby mode.
Also, the siren exits programming and returns to standby mode, after three minutes without pressing
any of the two buttons.
Selecting the foam detector function (Only in IRIS FSD)
Exit Setup
As soon the LEDs “FLASH” & “L/S” & “Hi-Lo” light, press “SELECT” button to select if the foam
detector will be active or inactive. Every time you press “SELECT” button, will increase or decrease
the brightness of the three LEDs.
When the LEDs have a low brightness, the foam detector will be deactivated and when the light level
is high the foam detector will be activated.
Press “MENU” button to save your setting and navigate to next selection. The LED “SOUND”, will
light to indicate you are in the first step of setup.
To exit setup press continuously “MENU” button for 3 seconds. The siren will sound – BEEP, BEEP,
BEEP, BEEP, BEEP-for verification. The LEDs “SOUND” & “5-24” will light for 3 seconds and the
siren will be in standby mode.
IRIS / IRIS FSD - 6
off all five LEDs of the siren. If you choose the situation has light up all five LEDs, then the siren will
alarm up to five times during a the day.
If you chose the situation with five LEDs turned off, then the siren will operate always, repeatedly if
an alarm is given.
Press “MENU” to save settings and navigate to next menu. The LEDs “FLASH” & “Hi-Lo” will light
simultaneously.
To install the siren, please follow the steps, as described below:
• Select where you place the siren, this should be as high as possible, that the siren can be easily
viewed and secure.
• Fix the base of the siren to the wall using the existing brackets.
Installation

Wiring Connections
IRIS / IRIS FSD - 7
• Connect the “12V” input, which is to power the siren and charge the battery, to the power
supply output of the alarm control panel. Beware to use correct polarity.
• Connect the “ΙΝ”, which is the alarm input of the siren to the relative output of the Control Panel
(“SSP” for Sigma Control Panels). This input follows the mode you select by the links “MODE
IN” and “+/- IN” (see page 4). If you do not cut any of the links “MODE IN” and “+/- IN”, the
input must be at + 12V to standby mode and becomes 0 in alarm (in Sigma’s alarm control
panels, the “IN” input is connected to the “SSP”).
• Pass the cable connecting the siren to the panel, from the hole which is at the base of the siren.
For maximum safety, prefer the passing of the cable in the inside of the siren to be directly
behind this hole.
NOTE: To power the siren from the alarm panel, you must, definitely, use wire with
diameter 0,5-0,75mm2.

WARRANTY
Thank you for selecting our products which have been designed and manufactured to offer you security and safety for
many years. They have been thoroughly tested before reaching your hands, and has passed all nessecary performance
tests. All our products are covered by a 24 (twenty four) months waranty of good operation,from the date of pur-
chase and covers the products that are accompanied by invoice or receipt of purchase.
This warranty covers the free of charge repair of the device (parts and labour) in case the malfunction is due to failure of
device itself and not if the failure is cause to any wrong installation, improper use or external factors such as lightnings,
floods, excess power voltage etc. Waranty ceases to excist if the device has been installed or repaired by an unauthorised
person. Also, this warranty does not cover the losses, failures or injuries that might happen to the secured area, in
case of miss operation of the device.
Finally, our company is not responsible for the correct installation and use of the security system, for which solely re-
sponsible is the installer.
ATTENTION!
You must regularly test the siren operation. We advice you to perform operation tests at least once
per month. Thus, you will make sure that the siren will sound in case of alarm.
IRIS / IRIS FSD - 8
• If, however, cut or shorted wires to connect the siren to the alarm control panel, the siren gives
alarm, maximum duration 15 minutes.
• In normal operation the siren follows the alarm duration of the alarm control panel. In case,
however,a cut or shorted wire to connect the siren to the alarm control panel, the siren gives
alarm, maximum durationof 15 minutes.
• “TC” input (Tamper Control input) is used to deactivate the siren’s Tamper, when you open the
cover of the siren for service, without given an alarm. Connect “TC” input to a “PGM” output of
the alarm control panel, which provides 12 V at standby mode and goes to 0 when the panel
arm (at Sigma alarm control panels connected to PGM1, type 27). The presence of 12V on this
input disables the Tamper of the siren for 10 minutes. For security reasons the siren’s Tamper
will be active 10 minutes after the application of voltage on “TC” input.
To openthe cover of the siren, follow the procedures below:
Disarm the panel (in the case of Sigma alarm control panels) or senda12V to the TC input.
You have ten minutes to open the cover without activating the siren, because these time the
Tamper of the siren is inactive. After opening, the time may to be keep open the siren is
unlimited.
When you completethe Service on the siren, close the cover. One minute from the time you will
close the cover, the siren returns to normal operation and the Tamper is active again.
• The “SIGN” input is used to signal audibly or visually the arming and disarming of the alarm
control panel, when remote control is used. It is activated for as long as there are +12 V at this
input. Connect this input to a PGM output of the alarm control panel, programmed accordingly.
In Sigma’s alarm control panels connected to PGM type 29.
• Connectsiren’s “AL” output to a 24 hours zone of the alarm control panel, as shown in the
above schematic. If you wish, except an alarm that will give siren in every attempt violation of
this, to give an alarm and the control panel.
For more safety, place the EOL resistor of this zone inside the box of the siren. The “AL” output
is at 0 at standby mode and is and turns to Open Collector, in case of violation (opening the
front cover or detaching of the siren from the wall).
• When you finish cable connections, connect the battery to thesiren. The siren can remain in this
condition until you finish theinstallation. The siren will start to operate normally only when
supplied with power from the alarm control panel.
• Insert the innercover and fasten it with four corresponding screws.
• Close siren’s external cover and fasten it with two corresponding screws.
This manual suits for next models
1
Table of contents
Other Sigma Security System manuals