Silentnight 25Z720150MR0001 User manual

Thank you for purchasing from Silentnight.
Warranty and care instructions booklet.
PO Box 9, Barnoldswick, Lancashire BB18 6BL
tel: 01282 851111 fax: 01282 850107
email: enquiries@silentnight.co.uk
web: www.silentnight.co.uk
Silentnight Brands reserves the right to modify product specifications at any time.

Care Instructions Protect your mattress
We recommend that you use a mattress cover,
which will protect it from coming into contact
with body moisture or other liquids.
Do not use detergents
or chemical cleaners
Using detergents or chemical cleaners on your
mattress may damage the fabric and stitching.
‘Mattress Now’ foam recovery
If you have purchased a rolled up mattress, please
ensure that you unroll and place it on a bed in a
warm room for hours before use. After this time
the mattress will fully regain its normal shape.
Please note that recovery time will be faster when
placed in a warm environment. The mattress cover
should not be removed and is not suitable for
machine washing.
‘Miraform’ mattress cover
If you have purchased a Miraform mattress, please
ensure you follow the washing instructions on the
product. The fabric on the base of the mattress
cover is not suitable for washing.
Do not bend or
roll your mattress
Bending or rolling your mattress will damage it and
invalidate the guarantee.
Softening foam
If this is your first foam mattress, it may take a few
days to get used to the feel as it is very dierent to
a traditional spring mattress. Please be aware that
slight softening of the foam may occur during the
first few weeks but this should not be a cause
for concern.
Foam discolouration
Over a period of time, you will notice a yellowing of
the foam. This is perfectly normal and is due to the
properties within the foam, it will not aect either
the quality or performance of your mattress.
Do not overload
or overfill drawers
If your bed has drawers, they have been designed
to take lightweight items only. Excessive weight
can cause distortion or damage to the drawers.
Overfilling them may cause them to jam. Maximum
weight: Mini drawers - kg. Standard drawers - kg.
Upholstery
Micro Suede - A fabulously sensual fabric, Micro
Suede is soft and durable, making it an extremely
popular choice. The fabric is water repellent and
dirt resistant. However, should you need to remove
any heavier stains, please use a neutral detergent,
taking care not to over rub. Rinse with clean,
lukewarm water.
Woven Fabrics - Our luxurious woven fabrics have
a soft, rich texture. These fabrics should be
specialist cleaned only.
Faux Leather - Faux leather has all the look of real
leather, but is easy to care for. If you need to clean
your faux leather headboard, simply wipe it with a
clean, damp cloth.
Getting used to your bed
Chances are that the springs and upholstery in your
old bed were not what they used to be, so your new
bed may seem a little strange at first. Please allow
time for your body to adjust to your new bed and for
the fillings to settle.
Filling settlement is normal
Due to modern day fillings being more sumptuous
than their predecessors, settlement within your
mattress should be expected and is perfectly normal.
Your new mattress is zoned to complement the
human body. As such, you may observe some
settlement of the upholstery in the zoned areas
where your body weight is greatest. There is no need
for concern; it demonstrates that the mattress zones
are working as designed, oering optimum support
in the zoned areas.
The main causes for settlement are attributed to:
• Extra pressure in areas where body weight is
most pronounced.
• Body heat and moisture, which can escalate
settlement and slow down the recovery
process of the fillings.
Ensuring that your mattress is cared for properly
may help to reduce settlement:
• Only use your mattress with a base for which
it has been designed.
• Turn your mattress regularly (unless your mattress
is ‘No Turn’ – this will be stated on the mattress
label).
• Rotate your mattress top-to-tail so that settlement
from body pressures are evenly distributed.
• Air your mattress daily by pulling bed covers back.
It is important to remember that, as with any soft
furnishing product, it is unreasonable to expect
your mattress not to show settlement after several
months of use. Whilst fillings may settle over time,
the support system within your mattress will
ensure that you receive many years of comfort
from your mattress.
Let your mattress breathe
After its removal from the packaging, please leave
your bed uncovered for a few hours to allow any
condensation to escape. To avoid risk of suocation,
please ensure that the polythene bag is well out of
reach of small children.
Turn and rotate your
mattress regularly
Unless you have bought a single sided ‘No Turn’
mattress, which will be indicated on the mattress
label, it is important that you turn your mattress over
and rotate it from top-to-tail once a week for the first
two or three months and then monthly thereafter.
This will prolong the lifespan of your mattress and
ensure even settlement of the fillings. ‘No Turn’
mattresses should be rotated from top-to-tail
periodically to ensure even wear. When turning
or rotating your mattress please do not allow it to
impact with or fall against the side of the bed as this
may damage the spring system. We recommend
having assistance when moving a mattress.
Find us online at www.silentnight.co.uk Call our customer care line on 01282 851111

For full height headboards: Using scissors, carefully
pierce the fabric where the stickers mark the hole in the
headboard. Line up the headboard hole with the divan
hole, thread the headboard bolt through them both and
tighten into position.
If additional fittings have been supplied, please use
these instead of the standard fittings issued with the
Divan Base. Pierce the Divan with the bolts and screw
into the base until the shorter thread is no longer visible.
Position the headboard in place*. Place a single plastic
cap on each of the bolts and tighten until headboard is
secure. Place a second plastic cap on each of the bolts
to prevent them from catching*
*The additional cap can also be used as a spacer between the
Headboard and the Divan. This should only be used as a spacer
if the Divan Drawer is restricted from opening by the Headboard.
. Storage:
To release the drawers, please cut the temporary
restraining straps and trim o any excess. Pulling the
straps o may tear the fabric.
Do not overload the drawers.
Maximum weight is: Mini drawers – kg,
Standard drawers – kg.
Bases with Castors
or Legs
Assembly Instructions
. Unwrapping:
Carefully remove any cardboard protectors and all
packaging staples with pliers to avoid injury. To avoid risk
of suocation, keep all polythene away from children.
Please recycle your packaging.
. Fittings:
Remove the fittings from the bags that are attached to the
divan base.
. Attaching the castors, legs
or feet:
Castors: Push into the corner
sockets and gently tap with a
wooden mallet until it is fully
‘home’. Do not use a metal
hammer or object as this
may damage the castors
or divan base.
Legs: To ax legs, screw bolts
into the threaded holes marked
‘pierce here for fittings’.
Round Feet: To ax, screw the feet into the marked
threaded holes on the base.
Square Feet: To ax, screw the large gold screw into hole
as indicated on the diagram. Then screw the silver screw
into hole . Make sure both screws have been fastened
securely. Repeat on all corners.
. Connecting the bases:
The base halves can be connected in one of two ways.
Black Unit Connectors: Position the two divan halves where
they are to be used and bring them together ensuring that
the black unit connectors are facing each other. Stand to
one side of the bed, lift the right hand base approx mm,
while holding the left hand base in position. Then, squeeze
the divan halves together and lower the right hand base
ensuring the connectors locate. Repeat on the other side.
U Clips: Stand the divan halves on their side and attach the
u clips as indicated on the diagram below.
. Attaching a headboard:
First of all decide which end of the bed is to be used for a
headboard, then use scissors to carefully pierce the fabric
where the hole can be felt underneath the stickers.
For strutted headboards: Place the headboard bolt into
the hole and fasten into place. Lower the headboard into
position before fully tightening the bolt.
Find us online at www.silentnight.co.uk Call our customer care line on 01282 851111
You will need:
A wooden mallet, a large Phillips or slotted screwdriver, a pozidrive, pliers and scissors.
To avoid the risk of injury, it is recommended that a minimum of two people
assemble and install this product.
Hole Hole
(Double Bed only)
Join the divans with clips.

Find us online at www.silentnight.co.uk Call our customer care line on 01282 851111
. Unwrapping:
Carefully remove any cardboard protectors and all
packaging staples with pliers to avoid injury. Remove red
retaining straps from either end of struts with scissors.
To avoid risk of suocation, keep all polythene away from
children. Please recycle your packaging.
. Fittings:
Remove the fittings from the bags that are attached to the
underside of the divan base.
. Attaching the
castors or legs:
Castors: Push into the corner
sockets and gently tap with a
wooden mallet until it is fully
‘home’. Do not use a metal
hammer or object as this may
damage the castors or divan base.
Legs: To affix legs, screw boltsinto
the marked threaded holes.
. Connecting the bases:
Place bases side by side, correctly align and attach
headboard. Leave one base free from mattress until bases
connected fully.
Fully raise empty adjustable platform at both head and
foot end. Switch o power supply and ensure trailing
wires and handset do not pose a tripping hazard.
Kneel next to base at head-end of bed and carefully lean
into the recess to position first U-clip. Slot clip upwards
from beneath the central rails and connect the divan
halves. It is recommended that the divans be connected
by two people, one of whom should ensure the safety of
the person connecting the halves.
Repeat the connection process at the foot-end of the
base with the second U-clip. Due to limited extension of
the foot-end of the base, it is advised that only the arm
be placed inside the base – do not lean inside the raised
foot-end of the bed.
. Mattress
and plug:
Position the bed where
it is to be used. Fix the
mattress guard at the
foot end of the bed (see
Fitting the Mattress
Guard) and plug into
the mains.
. Attaching a headboard:
First of all decide which end of the bed is to be used for a
headboard, then use scissors to carefully pierce the fabric
where the hole can be felt underneath the stickers.
For strutted headboards: Place the headboard bolt into
the hole and fasten into place. Lower the headboard into
position before fully tightening the bolt.
For full height headboards: Using scissors, carefully
pierce the fabric where the stickers mark the hole in the
headboard. Line up the headboard hole with the divan
hole, thread the headboard bolt through them both and
tighten into position.
Fitting the Mattress Guard
Safety Instructions
• The adjustable mechanism is controlled by a ‘Hold-to-
Run’ control for your safety. However, please be aware
that the mechanism will continue to move as long as
the directional button is depressed and care should
be taken to avoid entrapment of the electrical wire,
bedding or hands/fingers when adjusting the base.
• Please ensure children and pets are at a safe distance
when the mechanism is in motion to avoid injury.
• When getting on/o the bed please ensure the leg
end of the bed is in a flat/lowered position. It is not
necessary to lower the upper/back section of the bed
prior to getting on/o the bed.
• Please do not operate the adjustable mechanism
without the mattress guard in position on the foot
end of the bed. The mattress may not conform to the
shape of the base when the mattress is unoccupied
and may slip o the foot end of the base if not secured
in position with the guard.
Step :
Fix the guard to the first
wooden slat by angling it
at 45º and hooking it over
the slat.
Step :
Once the lower edge
of the guard has gone
around the slat it must be
pulled to enclose the slat
fully by moving toward the
outer edge of the bed.
Step :
Rotate the guard forward
until the bottom edge of
the guard hooks round the
first slat.
Step :
Once in place the mattress
can be placed on the
bed where the guard
provides a safe enclosure,
preventing the mattress
from slipping o.
Adjustable Bases
Assembly Instructions You will need:
A wooden mallet, pliers, slotted screwdriver and scissors.
To avoid the risk of injury, it is recommended that a
minimum of two people assemble and install this product.
(King size / Super King Beds only)
Join the divans with 2 clips.
U-clip
If additional fittings have been supplied, please use
these instead of the standard fittings issued with the
Divan Base. Pierce the Divan with the bolts and screw
into the base until the shorter thread is no longer
visible. Position the headboard in place*. Place a
single plastic cap on each of the bolts and tighten until
headboard is secure. Place a second plastic cap on each
of the bolts to prevent them from catching*.
*The additional cap can also be used as a spacer between the Headboard and the Divan. This should only be used as a spacer if the Divan
Drawer is restricted from opening by the Headboard.

Find us online at www.silentnight.co.uk Call our customer care line on 01282 851111
. Attaching the footboard:
The bottom of the bracket hooks under the base panel
on the bed.
. Fitting the board to the bed:
The top of the bracket is slotted over the top of the base
panel and screwed to secure
You will need:
A large Phillips or slotted screwdriver.
To avoid the risk of injury, it is recommended that a
minimum of two people assemble and install this product.
Footboard
Fitting Instructions
Stand clear when opening or closing the base
Operating the Hand Control
A clip on the reverse of the
hand control allows it to be
fitted to the side of the divan.
Press to lift head end
Press to lower head end
Press to lift head and
feet together
Press to lower head
and feet together
Press to lift foot end
Press to lower foot end
Ottoman storage
Important usage instructions
The Ottoman provides the ultimate storage solution helping
you maximise your bedroom space. To get the best out of
your new bed please follow these instructions at all times.
Cutting the Ottoman strap will cause the Ottoman
to open immediately. Please ensure you follow the
instructions below.
Unwrapping the Ottoman base:
. Remove all the polythene and corner card packaging.
. Remove any proud packaging staples.
. Stand the divan vertically on the short side.
. Before cutting the strap, please note that the lid
will open automatically. Allow sucient space
for the lid to open.
. Cut the strapping.
. Remove castor pack from inside the Ottoman ensuring
all packaging staples are removed & insert the castors.
. Attach both bases together.
. Place your mattress on top of the bed.
• Never operate the recliner mechanism without
a mattress on the divan base.
• Never allow children or pets to play on or inside
the Ottoman divan base.
• Stand clear when opening or closing the Ottoman
divan base.
• Ensure bed linen does not get caught within the
recliner mechanisms.
• Close the Ottoman divan base by pushing down
with both hands centrally on the mattress.
• Do not operate the mechanism while the bed is
being used.
• Maximum loading weight is kg evenly distributed.

These assembly instructions
apply to the Ottoman divan
base only. Please disregard
the plastic clip in the
standard Divan half fittings
pack. Please use the metal
clips to join the Divan and
Ottoman halves together.
Step :
Position the two divan halves on the floor together.
Step :
Ensure the metal clips are positioned in the recess of the
black undercover.
Step :
Use screws provided to fix the clip to the divan.
You can rely on us
to deliver a great
night’s sleep
We’re so confident that our beds
and mattresses will provide you
with a great night’s sleep that they
all come with a year guarantee.
All our beds are made in the
UK and are tested to British
standards.
Silentnight Brands is fully certified
by the Forest Stewardship Council®
(FSC®). The FSC Chain Of Custody
label guarantees that the timber
or fibre used in all our divans and
headboards come from FSC®certified forests,
where trees harvested are replaced or allowed
to regenerate naturally.
Silentnight Brands is a full
member of the Furniture Industry
Sustainability Programme (FISP).
FISP is based around sustainable
development and was set up by the government with
main objectives:
• Social progress that recognises the needs of everyone
• Eective protection of the environment
• Prudent use of natural resources
• Maintenance of high and stable levels of
economic growth and development
To become a member of FISP, Silentnight Brands
has shown commitment to social, economic and
environmental sustainability across the business,
including commitments to environmental policy and
legal compliance mechanisms for safety,
health and environment legislation.
Our advanced onsite
testing laboratory has been
established for more than
30 years and holds fully
certified UKAS ISO status and independent
accreditation with SATRA; the UK’s largest and
most advanced test house.
Independent accreditation ensures test methods,
laboratory standards, sta competence, testing
equipment and Silentnight’s products meet
the standards required under UK legislation for
flammability, fitness for purpose and safety.
SATRA have accredited laboratories worldwide
and Silentnight are one of only accredited
laboratories in the UK.
Call our customer care line on 01282 851111
Ottoman
Assembly Instructions You will need:
A large Phillips or slotted screwdriver.
To avoid the risk of injury, it is recommended that a
minimum of two people assemble and install this product.
Find us online at www.silentnight.co.uk
Table of contents
Other Silentnight Indoor Furnishing manuals
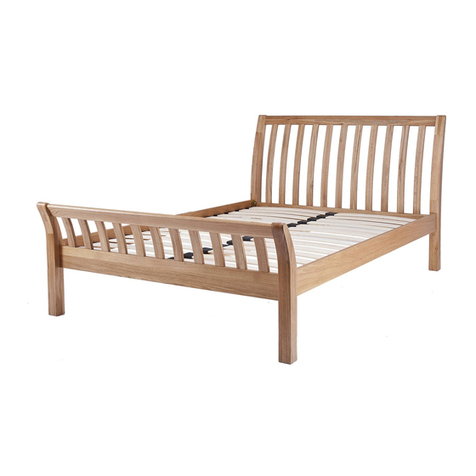
Silentnight
Silentnight Lancaster User manual

Silentnight
Silentnight Sydney Metal Bed Frame User manual
Silentnight
Silentnight Ayton User manual
Silentnight
Silentnight Hayes User manual

Silentnight
Silentnight divan User manual

Silentnight
Silentnight Hamilton User manual

Silentnight
Silentnight Minerve User manual
Popular Indoor Furnishing manuals by other brands

Regency
Regency LWMS3015 Assembly instructions

Furniture of America
Furniture of America CM7751C Assembly instructions

Safavieh Furniture
Safavieh Furniture Estella CNS5731 manual

PLACES OF STYLE
PLACES OF STYLE Ovalfuss Assembly instruction

Trasman
Trasman 1138 Bo1 Assembly manual

Costway
Costway JV10856 manual


