Simfer Good User manual
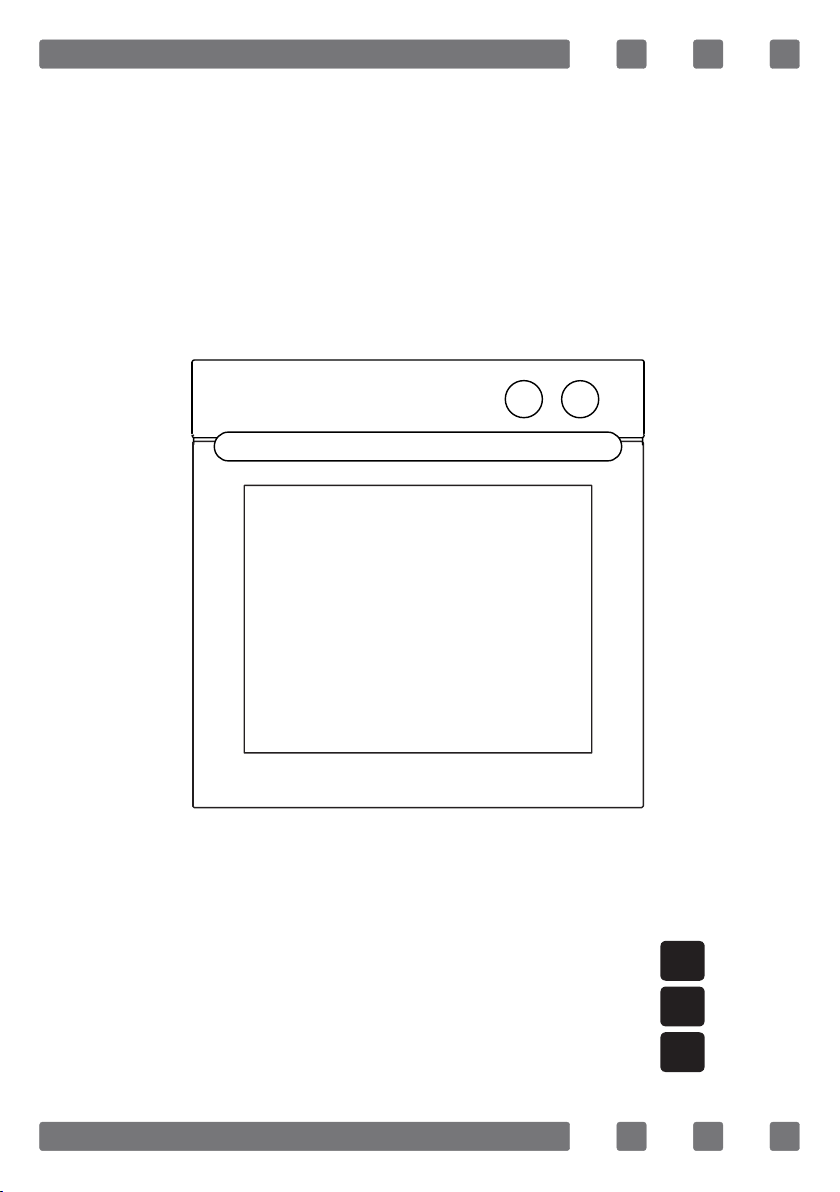
BUILT-IN OVEN
Good Model
USER MANUAL GB
SI
HR

2
Dear Customer,
Thank you for relying on products.
We aim to allow you to optimally and efciently use this environment-friendly
product produced in our modern facilities under precise conditions with respect
to sense of quality in total.
We advise you to read these operating manual thoroughly before using your
built-in oven and keep it permanently so that the features of the oven you have
purchased shall stay the same as the rst day for a long time.
NOTE:
This Operating Manual is prepared for multiple models. Your appliance may
not feature some functions specied in the manual.
The product images are schematic.
Products marked with an * are optional.
Our appliances are intended for domestic use. It is not intended for
commercial use.
"PLEASE READ THE INSTRUCTIONS BEFORE INSTALLING OR USING THIS APPLIANCE."
This product has been produced in modern environment-friendly facilities
without adversely affecting nature.
"Complies with AEEE Regulation"
GB

3
CONTENTS
1. Important Warnings 4
1.1 Intended Use 9
2. Introducing the Appliance 10
3 Technical Specications 11
4 Installation of the Appliance 11
4.1 Important Warnings for Installation 12
4.2 Right Place for Installation 12
4.3 Installation and Assembly of the Oven 13
4.4 Installation Under Counter 13
4.5 Installation In a High Cabinet 13
4.6 Installation Conditions 13
4.7 Placing and Securing of the Oven 13
4.8 Electrical Connection 14
4.9 Assembly 14
5. Electrical Connection and Safety 18
6 Control Panel 18
7 Program Types 19
8 Operation of the Oven 21
8.1 Initial Operation of the Oven 21
8.2 Normal Operation of the Oven 21
8.3 Booster (Quick Pre-Heating) Operation 21
8.4 Operation of the Chicken Roast 22
8.5 Operation of the Timer 22
8.6 Operation of the Grill 27
9. Cooking Recommendations 27
9.1 Cooking Chart 28
10. Maintenance and Cleaning 30
10.1 Cleaning and Assembly of the Oven Door 31
10.2 Cleaning of the Oven Glass 32
10.3 Replacement of the Oven Lamp 32
11. Accessories 33
12. Handling Rules 34
13. Energy Saving Tips 34
14. Troubleshooting 35
14.1 If the Oven Does Not Operate 35
15. Compliance with AEEE Regulations and Waste Disposal 35
16. Packaging Information 35
GB

4
1. IMPORTANT WARNINGS
• WARNING: To avoid electric shock, ensure that the
device circuit is open before changing the lamp.
• WARNING: Cut off all supply circuit connections
before accessing the terminals.
• WARNING: The accessible parts may be hot while
using the grill. Keep away from children.
• WARNING: Fire hazard; do not store the materials on
the cooking surface.
• WARNING: If the surface is cracked, open the circuit
of the device to avoid risk of electric shock.
• WARNING: Device and its accessible parts are hot
during operation.
• Setting conditions of this device are specied on
the label. (Or on the data plate)
• The accessible parts may be hot when the grill is
used. Small children should be kept away.
• WARNING: This appliance is intended for cooking.
It should not be used for other purposes like heating
a room.
• To clean the appliance, do not use steam cleaners.
• NEVER try to put out the re with water. Only shut
down the device circuit and then cover the ame
with a cover or a re blanket.
• Ensure that the oven door is completely closed
after putting food inside the oven.
GB

5
• Children under 8 years of age should be kept
away, if they cannot be monitored continuously.
• Touching the heating elements should be avoided.
• This device can be used by children over 8 years
of age, people with physical, hearing or mental
challenges or people with lack of experience or
knowledge; as long as supervision is ensured or
information is provided regarding the safe oper-
ation of the device and understanding the risks
involved.
• The appliance is not suitable for use with an
external timer or a separate remote control system.
• This device has been designed for household use
only.
• Children must not play with the appliance. Cleaning
or user maintenance of the appliance shall not be
performed by children unless they are older than
8 years and supervised by adults.
• Keep the appliance and its power cord away from
children less than 8 years old.
• Put curtains, tulles, paper or any ammable
(ignitable) material away from the appliance before
starting to use the appliance. Do not put ignitable
or ammable materials on or in the appliance.
• CAUTION: Cooking process shall be supervised.
Cooking process shall always be supervised.
GB

6
• Keep the ventilation channels open.
• Do not heat closed cans and glass jars. The pressure
may lead jars to explode.
• Do not place the oven trays, plates or aluminium
foils directly on the oven base. The accumulated
heat may damage the base of the oven.
• Oven handle is not a towel drier. Do not hang
towels, etc. on the oven handle.
• While placing food to or removing food from the
oven, etc., always use heat resistant oven gloves.
• Do not use cut or damaged cords or extension
cords other than the original cord.
• Make sure that there is no liquid or humidity in
the outlet where the product plug is installed.
• Do not use the product in states like medicated and
/ or under inuence of alcohol which may affect
your ability of judgement.
• Be careful when using alcohol in your foods.
Alcohol will evaporate at high temperatures
and may catch re to cause a re if it comes
in contact with hot surfaces.
• The rear surface of the oven also heats up when
the oven is operated. Electrical connections shall
not touch the rear surface, otherwise the connections
may be damaged.
GB

7
• Do not tighten the connecting cables to the oven
door and do not run them over hot surfaces. If
the cord melts, this may cause the oven to short
circuit and even a re.
• After each use, check if the unit is turned off.
• If the appliance is faulty or has a visible damage,
do not operate the appliance.
• Do not touch the plug with wet hands. Do not pull
the cord to plug off, always hold the plug.
• Unplug the unit during installation, maintenance,
cleaning and repair.
• It is important to place the wire grill and tray
properly on the wire racks and/or correctly
place the tray on the rack. Place the grill or tray
between two rails and make sure it is balanced
before putting food on it.
• Do not use the appliance with its front door glass
removed or broken.
• Place the baking paper together with the food into
a pre-heated oven by putting it inside a cooker or
on an oven accessory (tray, wire grill etc.).
• Against the risk of touching the oven heater
elements, remove excess parts of the baking paper
that hang over from the accessory or container.
• Never use it at higher oven temperatures than the
maximum usage temperature indicated on your
baking paper. Do not place the baking paper on
the base of the oven.
GB

8
• When the door is open, do not place any heavy
object on the door or allow children to sit on it.
You may cause the oven to overturn or the door
hinges to be damaged.
• Do not put objects that children may reach on
the appliance.
• The packaging materials are dangerous for children.
Keep packaging materials away from the reach of
children.
• If the power supply cable is damaged, it must be
replaced by its manufacturer or authorized technical
service or any other personnel qualied at the same
level, in order to avoid any dangerous situation.
• Do not use abrasive cleaners or sharp metal
scrapers to clean the glass as the scratches that
may occur on the surface of the door glass may
cause the glass to break.
GB

9
1.1. Intended Use
• This product is designed for home use. Commercial
use of the appliance is not permitted.
• This appliance may only be used for cooking
purposes. It shall not be used for other purposes
like heating a room.
• This appliance shall not be used to heat plates
under the grill, drying clothes or towels by hanging
them on the handle or for heating purposes.
• The manufacturer assumes no responsibility for
any damage due to misuse or mishandling.
• Oven part of the unit may be used for thawing,
roasting, frying and grilling food.
Operational life of the product you have purchased
is 10 years. This is the period for which the spare
parts required for the operation of this product as
dened is provided by the manufacturer.
GB

10
2. INTRODUCING THE APPLIANCE
1. Control Panel 4. Wire Grill Inside Tray
2.Deep Tray* 5.Standard Tray
3.Chicken Roast Skewer* 6.Oven Door
7. Light
8. Wire Grill Inside Tray
9. Standard Tray
1
2
3
4
5
6
7
8
9
GB

11
3. TECHNICAL SPECIFICATIONS
MGA1-8..... :
Lamp Power 15-25W
Thermostat 40-240 / Max °C
Bottom heater 1200W
Top heater 1200W
Turbo Heater 1800W
Grill Heater Small Grill 1200W Large Grill 2400W
Supply Voltage 220V-240V 50/60 Hz
MGA1-6..... :
Lamp Power 15-25W
Thermostat 40-240 / Max °C
Bottom heater 1200W
Top heater 1000W
Turbo Heater 1800W
Grill Heater Small Grill 1000W Large Grill 2000W
Supply Voltage 220V-240V 50/60 Hz
WARNING: In order to increase the product quality, the technical
specications may be changed without prior notice.
WARNING: The values provided with the appliance or its accompanying
documents are laboratory readings in accordance with the respective
standards. These values may
differ depending on the usage of the appliance and ambient conditions.
WARNING: Figures in this manual are schematic and may not exactly
match your product.
4. INSTALLATION OF APPLIANCE
Check if the electrical installation is proper to bring the appliance in
operating condition. If not, call an electrician and plumber to arrange
the utilities as necessary. Manufacturer shall not be held responsible
for damages caused by operations performed by unauthorized persons.
WARNING: It is customer’s responsibility to prepare the location the
product shall be placed on and also to have the electrical installation
prepared.
GB

12
WARNING: The rules in local standards about electrical installations
shall be followed during product installation.
WARNING: Check for any damage on the appliance before installing it.
Do not have the appliance installed if it is damaged. Damaged products
cause a risk for your safety.
4.1. Important Warnings for Installation:
During operation of the oven, the cooling
fan shall move excess steam out and
prevent the appliance from overheating.
This is necessary for ensuring your
appliance to work well and to cook well.
The cooling fan continues to operate
after cooking is nished. After cooling
is complete, the fan shall automatically
turn off.
A clearance shall be left behind the compartment where you shall
place your appliance to ensure efcient and proper operation of your
appliance. This clearance shall not be neglected as it is necessary for
the operation of the ventilation system of the appliance.
4.2. Right Place For Installation
The appliance is designed so that it shall t commercially available
counters. A safe clearance shall be left between the product and kitchen
walls or furniture. Refer to the drawings on the installation section (see
pages 14-17) for suitable clearances. (dimensions are given in mm)
• Surfaces, synthetic laminates and adhesives used shall be resistant
to heat. (minimum 100°C).
• Kitchen cabinets shall be level with the appliance and xed.
• A rack shall be placed between the oven and the shelf if there is
a shelf under the oven.
WARNING: Do not install the appliance beside refrigerators or coolers.
Heat radiated by the appliance increases the energy consumption of
cooling devices.
Figure 1
GB

13
WARNING: Do not use the door and/or handle to carry or move the
appliance.
4.3. Installation and Assembly of the Oven
Operating space of the appliance shall be determined before starting
the installation.
Appliance shall not be installed on areas with high ow of air.
Handle the appliance with two persons at least. Do not drag the
appliance to prevent damage to the ground.
Remove all transportation materials inside and outside of the
packaging. Remove all materials and documents inside the product.
4.4. Installation Under Counter
Cabinet shall conform with dimensions specied in Fig. 2.
A clearance with the dimensions specied in the gure shall be
ensured at the rear compartment of the cabinet to provide the required
ventilation.
After installation, the clearance that shall be left between the bottom
of the counter and the top of the appliance is indicated by “A” in Fig.
5. This is for ventilation and
it shall not be closed.
4.5. Installation In a High Cabinet
The cabinet shall comply with the dimensions given in Fig. 4.
In the rear part of the cabin, and at the top and bottom, clearances
with the dimensions specied in the gure shall be ensured to provide
the required ventilation.
4.6. Installation Conditions
The dimensions of the appliance are given in gure 3.
The furniture surfaces to be installed and the installation materials to
be used shall resist a temperature of at least 100 °C.
To prevent the appliance from turning over, the cabinet to be installed
shall be fixed and the cabinet floor shall be level.
The floor of the cabinet shall be strong enough to withstand a load of
at least 60 kg.
GB

14
4.7. Placing and Securing of the Oven
Place the oven to the cabinet with two or more persons.
Make sure that the frame of the oven and the front of the furniture
are properly aligned.
The supply cord shall not be left under the oven or be stuck or bent
between the oven and the furniture.
Secure the oven to the furniture using the screws supplied with the
appliance. Screws shall be installed by putting them through the plastics
attached on the frame of the appliance as shown in Fig. 5. The screws
shall not be tightened too much. Otherwise, the screw holes may wear
out.
Check that the oven does not move after installation. If the oven has
not been installed in accordance with the installation instructions, there
is a risk of overturning during operation.
4.8. Electrical Connection
The place where the product shall be installed shall have proper
electrical installation.
The mains voltage shall comply with the rating given on the product
type plate.
Connection of appliance shall be made in accordance with local and
national electrical regulations.
Disconnect the mains power before starting to install the product. Do
not connect the product to the mains until the installation is nished.
4.9. Assembly
GB

15
Figure 2
560
600
35
500
30 30
555
545
595
595
565
22
Figure 3
GB

16
590
550
560
35
500
30 30
Figure 4
GB

17
At the front of the kitchen counter, a space at least 5 mm high from
the bottom of the counter should be left.
A
Figure 5
A
B
AMin. 80mm
B
(Air outlet) 5mm
B
GB

18
5. ELECTRICAL CONNECTION AND SAFETY
This oven shall be correctly installed and connected by the authorized
service and according to the manufacturer’s instructions.
The appliance shall be installed in an oven housing which provides
high ventilation.
The electrical connections of the appliance shall be made only by
using grounded sockets equipped with a grounding system laid in
accordance with the instructions. If the place where the appliance shall
be installed is not designed for a grounded system, immediately contact
an authorized service. The manufacturer shall never be responsible for
damages caused by non-grounded sockets, to which the appliance has
been plugged.
Your oven’s plug is grounded; make sure that the outlet you shall
connect the plug is grounded, too. The plug shall be placed so that it
can be accessed after installation.
Your oven is manufactured as compatible with the 220-240 V 50/60
Hz. AC power supply and requires a fuse of 16 Amp. If your power
network does not provide these specications, contact an electrician
or an authorized service.
When you need to replace the fuse, please make sure that the
electrical connection is as follows:
• Brown wire to the phase (live end)
• Blue wire to neutral
• Yellow-green wire to ground terminal
The circuit breaker switches of the oven shall be placed so that end
user can reach them when the oven is installed.
The power supply cord (the cord with plug) shall not contact the hot
parts of the appliance.
If the power supply cord (the cord with plug) is damaged, this cord
shall be replaced by the manufacturer or its service agent or an equally
qualied personnel to prevent a hazardous situation.
6. CONTROL PANEL
Function Button Digital Timer Thermostat
GB

19
Thermostat Button: Used for determining the cooking
temperature of the dish to be cooked in the oven.
You may set it to the desired temperature after
placing the dish inside the oven. Refer to relevant
cooking chart for cooking temperatures of different
dishes.
Function Button: Used for determining the heaters
to be
used for cooking the dish to be cooked in the oven.
The heater program types in this button and their
functions are described below. All heater types and
program types consisting of these heaters may not
be available at all models.
7. PROGRAM TYPES
The types of heating programs provided on your appliance so that you
can cook different meals suitable for your taste, and their descriptions
are given below.
Lower heating element: Select this program towards the end of the cooking
time if the bottom of the food being cooked shall be roasted, too.
Upper heating element: Used for heating or roasting very small pieces
food.
Figure 7
Lower and Upper Heating
Elements Fan
Lower Heating Element and Fan Turbo Heater and Fan
Grill and Chicken Roast Lower and Upper Heating Ele-
ment and Fan
Upper Heating Element and Fan Grill and Fan
Multi Functional Cooking (3D) Grill
Lower Heating Element Upper Heating Element
Small Grill and Fan Lower Heating Element or
Steam Cleaning
Figure 6
GB

20
Lower and upper heating elements: This program may be used to cook
foods such as cakes, pizza, biscuits and cookies.
Lower heating element and fan: Use it to cook food more like fruit
cakes, etc.
Lower and upper heating element and fan: This program is suitable for
cooking foods such as cakes, cookies, lasagne. It is also suitable for
cooking meat dishes.
Grill: The grill cooker is used to grill meats such as steaks, sausages
and sh. Place tray to the lower rack and put water inside the tray while
grilling.
Turbo heater and fan: It is suitable for baking and roasting in the oven.
Keep the temperature setting lower than the “Lower and Upper Heater”
program as the heat reaches the food immediately thanks to the air ow.
Grill and fan: Suitable for cooking meats. Do not forget to put a cooking
tray on the lower rack and some water into this tray while grilling.
Multi Functional Cooking (3D): It is suitable for baking and roasting in
the oven. Besides the fact that the heat reaches the food immediately
thanks to the air current, the upper and lower heaters are also operated.
Suitable for cooking with a single tray and intense heat.
Steam Cleaning*
This allows cleaning of the dirt that is
softened by the steam occurred inside
the oven.
1. Remove all accessories from the
oven.
2. Put half a litre of water in the tray,
and place the tray to the bottom of the
cooker.
3. Bring the switch to steam cleaning
mode.
4. Set the thermostat to 70°, and
operate the oven for 30 minutes.
5. After operating the oven for 30 minutes, open the door and wipe
the inner surfaces of oven with a damp cloth.
6. Clean the oven using dish washing detergent, warm water, and a
soft cloth for dirt that does not come out easily and wipe the area you
have cleaned with a dry cloth.
Figure 8
GB
Table of contents
Languages:
Other Simfer Oven manuals

Simfer
Simfer SMF-BO 6813 User manual

Simfer
Simfer M34 Series User manual

Simfer
Simfer MIDI OVEN 45 LT User manual

Simfer
Simfer MGA1-8 Series User manual

Simfer
Simfer B6EB16011 User manual

Simfer
Simfer 90x60 User manual

Simfer
Simfer B6EW56022 User manual

Simfer
Simfer B4EW56016 User manual

Simfer
Simfer B6EW06011 User manual

Simfer
Simfer B6EB56001 User manual
Popular Oven manuals by other brands

Bosch
Bosch hbe5451uc installation manual

Siemens
Siemens CM676GB.6B User manual and installation instruction

Frigidaire
Frigidaire FEB30S5D Factory parts catalog

Alfa Network
Alfa Network QUICK user manual

Bosch
Bosch CMG7361B1B User manual and installation instructions

TZS First AUSTRIA
TZS First AUSTRIA FA-5042-2 instruction manual