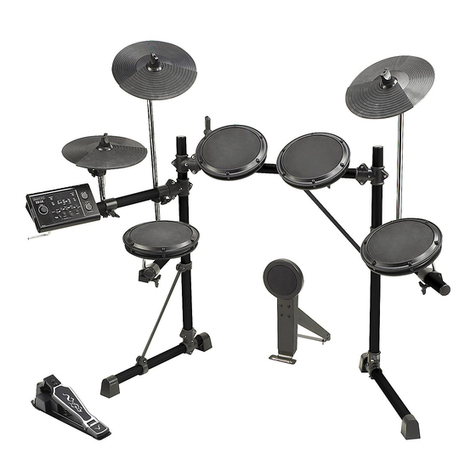
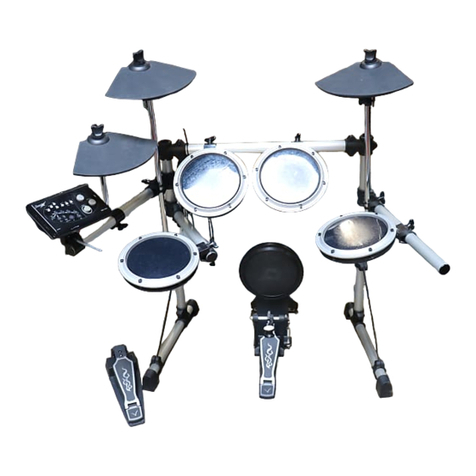
Simmons SD9K User manual

SD9K
Digital Drum Kit
QUICK START GUIDE
www.simmonsdrums.net

FCC Statements
1. Caution: Changes or modifications to this unit not expressly approved by the party responsible for compliance could void
the user’s authority to operate the equipment.
2. Note: This equipment has been tested and found to comply with the limits for a Class B digital device, pursuant to Part 15 of the FCC Rules.
These limits are designed to provide reasonable protection against harmful interference in a residential installation. This equipment generates,
uses, and can radiate radio frequency energy and, if not installed and used in accordance with the instructions, may cause harmful interference
to radio communications. However, there is no guarantee that interference will not occur in a particular installation. If this equipment does cause
harmful interference to radio or television reception, which can be determined by turning the equipment off and on, the user is encouraged to
try to correct the interference by one or more of the following measures:
•Reorientorrelocatethereceivingantenna.
•Increasetheseparationbetweentheequipmentandreceiver.
•Connecttheequipmentintoanoutletonadierentcircuit.
•Consultanexperiencedradio/TVtechnicianforhelp.

SD9K
www.simmonsdrums.net 1
congratulations!
Thank you for purchasing the Simmons®SD9K Digital Drum Kit. In an effort to be environmentally
friendly and use less paper we have decided to include this “mini” Quick Start Manual. For in-depth
detail on your Simmons®SD9K you can visit www.simmonsdrums.net and download a PDF file
version of the full manual. We estimate that by doing this we are saving approximately 250,000
pieces of paper annually.
We recommend that you skim through this Quick Start manual at least once to get started on
enjoying your new Simmons®SD9K Drum Kit.
Taking Care of Your Digital Drum Kit
Location
•Keepthedrumkitawayfromdirectsunlight,hightemperaturesources,andexcessivehumiditytoprevent
deformation, discoloration, or more serious damage.
Power Supply
•TurnthepowerswitchOFFwhentheSD9Kisnotinuse.
•TheACadaptershouldbeunpluggediftheSD9Kisnottobeusedforanextendedperiodoftime.
•AvoidpluggingtheACadapterintoanoutletthatisalsopoweringhigh-consumptionappliancessuchas
electricheatersortelevisions.Alsoavoidusingmulti-plugadapters,sincethesecanreducesoundquality,
cause operation errors and result in possible damage.
•TurnOFFtheSK9K’spowerswitchandallrelateddevicespriortoconnectingordisconnectingcables,
to avoid damaging the unit.
Handling and Transport
•Neverapplyexcessiveforcetocontrols,connectors,andotherparts.
•Unplugcablesbygrippingtheplugrmly.Donotpullonthecables.
•Disconnectallcablesbeforemovingthemodule.
•Physicalshockscausedbydropping,bumping,orplacingheavyobjectsonthemodulecanresultin
scratches and more serious damage.
Cleaning
•Cleanthemodulewithadry,softcloth.
•Aslightlydampclothmaybeusedtoremovestubborngrimeanddirt.
•Neverusecleanerssuchasalcoholorpaintthinner.
•Toavoiddiscoloration,donotplacevinylobjectsontopofmodule.
Electrical interference
•Themodulecontainsdigitalcircuitryandmaycauseinterferenceifplacedtooclosetoradioortelevision
receivers.Ifthisoccurs,movetheSD9Kfurtherawayfromtheaectedequipment.
Service and Modification
•Therearenouser-serviceablepartsinthedrummodule.
•Donotattempttoopenthedrummoduleormakeanychangeinthecircuitsorpartsoftheunit.
This would void the warranty.

SD9K User’s Manual
digital drum kit
SD9K setup
SetupyourSD9Kkitfollowingtheincludedassemblyinstructionsheet.
2

SD9K
www.simmonsdrums.net
table of contents
•Congratulations 1
•TakingCareofYourDigitalDrumKit 1
•SD9KSetup 2
•Contents 3
•Features 4
•Operation 5
•TopPanel 6-7
•LCDScreen 8-9
•ConnectionPanels 10
•Connections 11-12
•GettingStarted 13-18
PlayingthePads 13
SelectingKits 14
EditingKits 14
SavingKits 15
UsingtheMetronome/ClickFeature 16
ListeningtoDemonstrations 16
PlayingSongs 16-17
One-ClickRecording 17-18
•Appendixes 19-28
DrumsVoiceList 20-23
Hi-HatComboList 24
KitList 24
Song List 25
GMKitList 26-27
BackingInstrumentsList 28
•Warranty 29
3

SD9K User’s Manual
digital drum kit
features
Hardware
Sturdy4-LeggedDrumRackwithAllMountingHardware
KickPad
11”Dual-ZoneSnarePad
9”TomPads(x3
11” Floor Tom Pad
Dual-ZoneCrashPadswithChoke(x2
14”Dual-ZoneRidePadwithChoke
Dual-ZoneHi-HatPadwithChoke
Hi-HatControllerPedal
Drum Kits
DrumKits:100(40PresetKits+59UserKits+1ExternalMIDIKit
GeneralMIDIKits:12GMKits
Instruments
DrumVoices:725(Drums,Percussion,SFX+19Hi-HatCombos
GeneralMIDIBackingVoices:128GMInstruments
MaximumPolyphony:64Notes
Effect Types
Reverb/Delay
4-BandMasterEQ
Sequencer
PresetSongs:110
UserSongs:100
ExternalMIDIControlSong:1
SongParts:7(Drum,Percussion,Part1-Part5
PlayModes:OneShot,Loop
Tempo:30-280
Resoution:192ticksperquarternote
MaximumStorageFunction:12,000Notes
Metronome Function
TrackMuteFunction
SD Card Reader
Save/LoadKits,SongsandUserSettings
PlayStandardMIDIFiles(upto16channels
UpdateOperatingFirmware
MIDI and USB Ports
TriggerExternalDrumSoundGenerator(soundmodule,computersoftware
UsetheSD9Kasa16-channelGeneralMIDIsoundmoduleforMIDIsequencing
4

SD9K
www.simmonsdrums.net
operation
TheSD9Khastwomainmodesofoperation:KITandSONG.
Eachofthesetwomodeshasthreesub-modes(sub-menus:EDIT,MIXandUTILITY,plusaSavemenu.
KIT mode
•InKITmode,youcanselecttheactivekittoplayfromthepads.
•InKIT/EDITsub-mode,youcanselecttheVoiceforeachpadandadjustitsTuning(PitchandDecay.
•InKIT/MIXsub-mode,youcanadjusttheLevel,PanandReverbLevelforeachpad,aswellastheReverbType
andEqualizationforthewholekit.
•InKIT/UTILITYsub-mode,youcanadjustthetriggerresponseforeachpad(forallkits,aswellastheGlobalMIDIsettings.
•InKit/Savemenu,youcansavethecurrentkitintoaUserKitmemory.
SONG mode
•InthemainSONGmode,youcanselecttheactivesongtoplay.
•InSONG/EDITsub-mode,youcanselecttheVoiceforeachpartofthesong,aswellasthesong’sTEMPOandPLAYmode.
•InSONG/MIXsub-mode,youcanadjusttheLevel,PanandReverbLevelforeachpartofthesong,aswellastheGlobal
Accompanimentlevel.
•InSONG/UTILITYsub-mode,youcancreateanewsong,eraseanexistingsongorpartofasong,aswellasadjustthe
GlobalMIDIsettings.
•InSong/Savemenu,youcansavethecurrentsongintoaUserSongmemory.
•InSONG/RECORDmode,youcanrecordyourperformanceplayingthepadsoradditionalpartsusingaMIDIkeyboard.
Extra features:
CLICK:OnboardMetronome
MUTE:Mutepart(sofasong(orMIDIFile.Drumsisthedefaultmutedpart.
CARD menus
Inaddition,tothemainmodes,theSD9KhasaCardmenuwithvefunctions:
•Play:PlayaMIDIFilefromtheSDCard
•Save:SaveKits,SongsorGlobalSettingstotheSDCard
•Load:LoadKits,SongsorGlobalSettingsfromtheSDCard
•Delete:DeletealefromtheSDCard
•Format:FormattheSDCard
DEMOmodeallowsplayingoftwodemonstrationsongs.
About the SD Card Reader:
TheSD9KisequippedwithanSDCardReader,locatedinfrontofthesoundmodule.
Insertthecard,terminalfaceup,asshownonthetoppanelgraphicicon:(
Pushthecardallthewayinuntilitclicksinplace.
Toremovethecard,pushthecardagainuntilitclicksandstartsstickingoutwhenyoureleaseit,thenpullthecardout.
NOTES:
NevertouchtheterminaloftheSDCard.
Alwaysdischargeanystaticelectricityfromyourhandsbeforehandlingthecard.
Never force the card in the wrong direction.
Never bend the card or try to open the card.
SDCardshaveasmall“lock”switchononeedge.Itisnotpossibletowritetoor
erasethecardwhenthelockswitchisenabled.
5

SD9K User’s Manual
digital drum kit
TOP panel
1
2
34
5
67
8
9
10
11
12
13
14
15 16 17
18 19
20
21 22
23
24
LCD SCREEN AND NAVIGATION
DATA ENTRY SECTION
SONG SECTION
SUB-MENU SECTION
KIT SECTION
6

SD9K
www.simmonsdrums.net
VOLUME CONTROLS:
MAIN OUT Volume knob
Controls the volume of the Stereo Line output.
PHONES ( ) Volume knob
Controls the volume of the Phones output.
CLICK Volume knob
Controls the volume of the Metronome.
AUX IN Volume knob
ControlsthevolumeoftheStereoAuxiliaryinput.
LCD NAVIGATION:
LCD Screen
PleaserefertotheLCDScreensectiononthenextpage.
PAGE buttons
Scrollthroughthemenupages,ormovethecursorleft/rightwhennaming.
[EXIT] button
Exitsfromthecurrentsub-menubacktothetopmenu.
[SAVE] button
EnterstheSavemenuwhenavailable.Alsoactsas“Enter”whennaming.
DATA ENTRY:
Data Wheel
Quicklyscrollsthroughparametervalues.
[+] and [-] buttons
Increaseordecreasethecurrentparameter.AlsoactasYES/NObuttonswhenprompted.
KIT SECTION:
[KIT] button
SelectstheKitmenu.
Pad Select buttons and indicators
Thesebuttonscanplaythepadvoicesofthecurrentkit.
InKITEDIT/MIX/UTILITYmodes,theyselectthepadtobeeditedandtheindicatorsshowthecurrentselectedpad.
InSONGmode,theindicatorswilldisplaywhichpadsarebeingplayedbythedrumtrack.
The[RIM]buttonallowsaccesstothesecondvoicefordual-zonetriggers(Snare,Hi-Hat,Cymbals,AUXs.
SONG SECTION:
[SONG] button
Selects the Song menu.
[PART MUTE] button
Mutesselectedpart(softhesong(bydefault,mutestheDrumpart.EntersthePartMutemenuwhenheldformorethan2seconds
[PLAY] button
Playsthecurrentselectedsong.AlsoactsasPause/Resumewhenasongisplaying.
[REC] button
EnterstheRECORDmode.
[STOP] button
Stops the current song.
[CLICK] button
Turns the Metronome on or off. Enters the Metronome menu when held for more than 2 seconds.
[TEMPO] button
AdjuststhecurrentTempo.
Beat indicators
ShowthebeatwhenasongortheMetronomeisplaying.TheGreenindicatorshowstherstbeat,theRedindicatorshowsthe
remaining beats.
SUB-MENUS SECTION:
[EDIT] button
EnterstheKITEDITorSONGEDITmode.
[MIX] button
EnterstheKITMIXorSONGMIXmode.
[UTILITY] button
EnterstheKITUTILITYorSONGUTILITYmode.
[CARD] button
EnterstheSDCardmenu.
1
2
3
4
5
6
7
8
9
10
11
12
13
14
15
16
17
18
19
20
21
22
23
24
control panel: several “logical” sections
7

SD9K User’s Manual
digital drum kit
lcd screen
TheLCD(LiquidCrystalDisplayscreenisdividedintotwoareas:
Info Line:
ThetoplineoftheLCDdisplayalwaysshowsthesame
information,regardlessofcurrentmode/menu.
KIT
•Kitnumber:ShowcurrentactiveKitnumber.
•USERicon:ShowsifthecurrentkitisaUserKit.
•EDITicon:Showsifthecurrentkithasbeeneditedandnotsaved.
SONG
•Songnumber:ShowscurrentactiveSongnumber.
•USERicon:ShowsifthecurrentsongisaUserSong.
•EDITicon:Showsifthecurrentsonghasbeeneditedandnotsaved.
TEMPO
•DisplaysthecurrentTempoandTimeSignature.
Main Display:
ThelowerpartoftheLCDisan85x24dotmatrixthatallowsdisplayingvariablesizefontsandicons.
Themainpartofthisdotmatrixisusedtodisplaythecurrentkitorsongname,andallthevariousmenus.
Inallmenus,thecurrentselectedeldishighlighted(inverted,onblackbackground.Forinstance:
ThebottompartofthescreenisforLCDnavigation,inconjunctionwiththe[PAGE] buttons and [EXIT] and [SAVE] buttons that
arelocatedjustundertheLCD:
The function of the [PAGE] buttonsisshownbyup/downcursor(orleft/rightcursorwhennamingiconsabovethosebuttons.
AnEntericon(isdisplayedinthebottomleftcornerwhenthe[SAVE] button is active.
8

SD9K
www.simmonsdrums.net
Naming
Invariousmodes,itispossibletoinputaname,upto8characters.(UserKitname,UserSongname,CardSavelename
In naming mode, the [PAGE]buttonsareusedasleft/rightcursorcontrolstoselectacharacter.
ThehighlightedcharactercanbechangedusingtheDataWheelor [+]/[-] buttons.
Pressing both the [+]/[-]buttonssimultaneouslyallowsjumpingquicklythroughthefollowingcharactergroups:
•Specialcharacters(space,’,-,_
•Numeric(0,1,…,9
•Uppercase(A,B,…,Z
•Lowercase(a,b,…,z
Naming screen example
Whenyouhavenishedinputtingthename,pressthe[SAVE]button(usedasan“Enter”key.
Aconrmationscreenwillappear:
Press the [+] button to confirm or the [-] button to cancel.
9

SD9K User’s Manual
digital drum kit
connection panels
Pad input jacks
InputconnectionsforKick,Snare,Tom,AUX,
CymbalpadsandHi-Hatcontrolpedal.
MIDI IN and OUT
These ports allow communication
with other products equipped with a
MIDIinterface.PleaseseetheMIDI
section of the advanced manual for details.
USB port
This port is used to connect to a
computer(MIDIIn/OutviaUSB.
Line output jacks
Stereo output connection to an
audio system or drum amplifier
suchastheSimmonsDA50or
DA200S.
Phone jack
Thisstereojackisusedto
connect headphones.
AUX input jack
Thisstereoinputjackisfor
an external sound source
suchasanMP3orCDplayer.
Power switch
This switch turns power
on and off.
DC input
ConnectionfortheDC
9Vpoweradapter.
rear panel
left panel
right panel
10

SD9K
www.simmonsdrums.net
connections
Pads and Pedal:
Usingtheprovidedcables,connecteachpadtoitscorrespondingtriggerinputjack,followingthemarkingsonthecables.
TheunderlinedtriggerinputnamesshowwhichinputsuseTRS(“stereo”cables.Secureallthecablestothestandusingthe
providedhook-and-loopstrips.
pads and pedals
CAUTION!
To avoid damage, turn OFF the SD9K’s power switch and all related devices
prior to connecting or disconnecting cables.
AUX1 & AUX2 inputs
TheSD9Khastwoadditionalauxiliarytriggerinputjacks,which
allowforexpandingthekitwithoptionalpads.EachAUXinputcan
beconguredindividuallyforusewithadual-zonepad(head/rim
ortwosingle-zonepads.ThecompatiblepadsareoneSD9K11”
dual-zonesnarepadortwoSD9KorSD5K/SD7Ksingle-zonetom
pads.Connectingtwosingle-zonepadstoanAUXinputrequires
astandard“insert”cable.(OneTRStotwo“mono”jacks
11

SD9K User’s Manual
digital drum kit
audio equipment
headphones
mp3/cd player
power supply
power switch
WhenusinganampliersuchastheSimmonsDA50orDA200S,
connecttheOutputL/MONOandRjacksontherearpanelto
theinputoftheamplier.(Formonoplayback,usetheL/MONO
jack;forstereoplayback,connectbothL/MONOandRjacks.
ThelineoutputvolumeiscontrolledbytheMAINOUT
volumeknob.
Anoptionalsetofstereoheadphonescanbeconnectedtothe
PHONESjacklocatedonthesideofthedrummodule.
TheheadphonesoutputvolumeiscontrolledbythePHONES(
volumeknob.
1.ConnecttheaudiooutputofanMP3/CDplayerorotheraudio
sourcetothestereoAUXINTRSjackontherearpanel.
2. The input signal is mixed with the drum signal,
allowing you to play along.
ThevolumeoftheexternalsourceiscontrolledbytheAUXIN
volumeknob.
MakesurethepowerisswitchedOFF.Connectthepower
adaptertotheDCINjackontherearpanel.
NOTE:
MakesurethepowerisswitchedOFFwhenconnectingthe
drum module with external devices.
Afterconrmingthatallconnectionshavebeencompleted,
rotatethevolumeknobtotheleft(minimumvolumelevel
before switching the power on.
Setthepowerswitchtothe“ON”position.TheKitindicator
willlightupandthedisplaywillshowKitnumber001.
Caution:Afterthepoweristurnedon,theSIMMONS
logowillappearontheLCDforafewseconds,and
thentheDrumKitnamewillbedisplayed.Donot
pressanypadorpedaluntiltheKitindicator
turns on.
Left Side Panel
Left Side Panel
Right Side Panel
Right Side Panel
Right Side Panel
12

SD9K
www.simmonsdrums.net
Similartoanacousticdrumkit,theSD9Kallowsvariousplayingtechniquestobeused.
Allthepadsarevelocitysensitive.Somevoicescanchangesounds,dependingonthestrikingforce.
Snare Head or Rim Shot
TheSD9KSnarepadcandetectHeadandRimShots(RimShotstriggertheRimVoice.
Cymbal Bow or Edge Shots
TheSD9KCymbalscandetectBowandEdgeShots(EdgeShotstriggertheRimVoice.
CymbalChoke
ChokingtheCymbal’sedgewiththehandimmediatelyafterhittingmutesthecymbalsound.
TheHi-Hatsoundvaries,dependingonthepositionoftheHi-Hatpedal:
•OpenHi-Hat:StriketheHi-Hatpadwithoutpressingthepedal
•Half-OpenHi-Hat:StriketheHi-Hatpadwiththepedalpressedhalfwaydown
•ClosedHi-Hat:StriketheHi-Hatpadwiththepedalpressedallthewaydown
•FootClose:Pressthepedalallthewaydown
•Splash:Stepfullyonthepedalandreleaseitimmediately
getting started
Afterpoweringup,theSD9KwillbeinKITmode([KIT] buttonindicatorON
withtherstkitselected.Thedisplayshouldlooklikethis:
PressingthePadSelectbuttonsallowsyoutopreviewthecurrentkit
(xedvelocity.Hitthepadstoplaythecurrentkit.UsetheData
Wheelorthe[+]/[-]buttonstoselectanotherkit.
playing the pads
13

SD9K User’s Manual
digital drum kit
Press the [KIT]buttontoentertheKITmode.TheKitindicator
lightsupandtheLCDdisplaysthecurrentKitnumberandKitname.
UsetheDataWheelorthe[+]/[-]buttonstoselectakit,and/orthePAGEbuttonstoquickly
skipthroughKitgroups(PresetKits,UserKits,orExternalKit.
InKitmenu:
Press [EDIT]buttontoeditPadVoicesofthecurrentkit.
(orMIDIparametersoftheExternalKit
Press [MIX]buttontoadjustPadMixorKitMixparametersofthecurrentkit.
Press [UTILITY]buttontoadjustPadTriggerparameters.
Use[PAGE +] or [PAGE-]toscrollthroughparameterswithineachsub-mode.
ThecurrentpadtobeeditedcanbeselectedeitherbypressingitsPadSelectbuttonorbystrikingthepaditself.
The Pad Select indicator lights up to show which pad is currently selected.
If the rim of a pad is selected, both the Pad indicator and the Rim indicator will turn on.
WhileeditingVoiceNumber,Tuning,DecayLevel,PanandReverb,youcanalsopreviewtheresultofthecurrentsettings
by pressing the Pad Select button to play the edited voice.
IfyouchangeanyoftheKitEditorMixparameters,theKitEditicon(ontheLCDwillbedisplayedtoindicatethatthecur-
rentactivekithasbeeneditedandisthereforedierentfromthekitstoredinmemory.Thisiconwilldisappearwhentheeditedkit
issavedtoaUserKit,orwhenanotherkitisselected.
selecting kits
editing kits
14

SD9K
www.simmonsdrums.net
Press the [SAVE] button
UsetheDataWheelorthe[+]/[-]buttonstoselectaUserKitlocation(Kits41-99
Press the [PAGE DOWN] button to get to the naming screen
Usethe [PAGE] buttons to move the cursor.
UsetheDatawheelorthe[+]/[-] buttons to select characters.
Youcanuseupto8characters.
NOTE: Pressing the [+] and [-]buttonssimultaneouslywilljump
throughdierentcharactergroups(Numeric,Uppercase,orlowercase.
Press the [SAVE] button and the save confirmation screen will show.
Press [+] to save or [-] to cancel.
Afterthesaveoperationiscompleted,thisscreenwillbebrieydisplayed.
The(signdisappearsandtheSD9KreturnstothemainKitmodepage.
NOTE:IftheeditedKitisnotsavedbeforeselectinganotherKit,playingaSong
orpoweringdowntheSD9K,thechangeswillbelost.SettingSavePromptto
ON(inUTILILTYmenuwilldisplayapromptscreenifyoutrytoselectanother
kitbeforesavingthecurrenteditedkit.RefertotheUTILITY/Promptsection
of the advanced manual for details.
saving kits
15

SD9K User’s Manual
digital drum kit
using the metronome/click feature
listening to demonstrations
playing songs
Pressthe[CLICK]buttontostartthemetronome.TheClickindicatorlightsup.
ThemetronomewillplayatthecurrentTimeSignatureandTempo(asdisplayed
inthetopleftcorneroftheLCD,andtheBeatindicatorswillblinkaccordingly.
Usethe[CLICK]knobtoadjustthemetronomelevel.Pressthe[CLICK] button
againtostopthemetronome.TheClickindicatorturnso.
To change the tempo, press the [TEMPO] button to enter the Tempo display, and
usetheDataWheelor[+]/[-]buttonstoadjusttheTempo.
Press the [EXIT] button to exit the Tempo display and return to the previous menu.
Formoremetronomefunctions(changingmetronomeparameterssuchasTime
Signature,Interval,Instrument,etc.,pleaserefertotheClicksectionofthe
advanced manual.
TherearetwodemonstrationsongsbuiltintotheSD9K.
Press the [SONG] and [MUTE]buttonssimultaneouslytoentertheDEMOmode.
TherstdemosongwillstartplayingandtheSongindicatorwillash.
UsetheDataWheelor[+]/[-]buttonstoselectDemo1orDemo2.Otherwise,
Demo2willautomaticallyplayafterDemo1.
Demo1(SoloisusingonlydrumsandpercussionfromvariousPresetKits.
Demo2(Fusionisusingthebuilt-inGeneralMIDIVoicesforthebackinginstruments.
TostopandexittheDEMOmode,pressthe[EXIT]button(orthe [STOP] button.
Press the [SONG]buttontoentertheSONGmode.TheSongindicatorlightsup.
Thedisplayshouldlooklikethis:
UsetheDataWheelorthe[+]/[-] buttonstoselectanothersong,and/orthe
[PAGE]buttonstoquicklyskipthroughsonggroups(Patterns,Songs,Loops,
UserSongs,ExternalSong.
AniconintherightcorneroftheLCDshowsthetypeofsong:
•Loopmodesong
•OneShotmodesong
•EmptyUsersong
•Externalsong
16

SD9K
www.simmonsdrums.net
Press the [PLAY] button to start playing the selected song. The Play indicator lights up
andtheBeatindicatorswillblinkaccordingtothesong’sTempoandTimeSignature.
TheBar/BeatcounterisdisplayedontheLCD.
Press the [PLAY]buttonagaintopauseplaybackatthecurrentbar.ThePlayindicatorashes.
Press the [PLAY] button again to resume from the top of the current bar. The Play indicator lights up.
Press the [STOP] button to stop the song and return to the first bar. The Play indicator turns off.
YoucanalsomutetheDrumspartofthesongbypressingthe[MUTE] button.
The Mute indicator lights up when the part is muted.
Press the [MUTE]buttonagaintoun-mutetheDrumspart.TheMuteindicatorturnso.
FormoreMutefunctions(mutingotherparts,pleaserefertotheSong/PartMutesectionoftheadvancedmanual.
NOTE:Youcanplaythecurrentsong,evenwhentheSD9KisinKITmode(thecurrentSongnumberisalwaysshownonthetop
lineoftheLCD.YoucanalsousetheMUTEfunction.
one-click recording
One-Click Recording
TheOne-ClickRecordingfeatureallowsyoutoquicklyrecordyourperformanceasyouplaytheSD9Kdrums.
Pressthe[SONG]buttontoentertheSONGmode.
SelectanemptyUserSong(markedbytheemptysongicon
Note:Toquicklyjumptotherstavailableemptysong,pressthe
[+]and[-]buttonssimultaneously.
Pressthe[RECORD]button.
ThePLAYandRECORDLEDswillashandtheLCDdisplaywillshow:
Recording will start as soon as you start playing the drum pads
(orpressingthePadSelectbuttons.
TheRECORDandPLAYLEDswillbelit(solidandthedisplaywillshow:
17

SD9K User’s Manual
digital drum kit
Pressthe[STOP]buttontostopRecording.ThePLAYLEDturnso
and the display will show:
Pressthe[PLAY]buttontoplaybackyourrecording.
ThePLAYLEDturnson,theRECORDLEDturnsoandthedisplaywillshow:
Press[STOP]tostopplayback.ThePLAYLEDturnso,theRECORDLED
turns on and the display will show:
Ifyouarenotsatisedwithyourrecording,presstheRECORD[button]torestarttheRecordingprocess.
Whenyouaresatisedwithyourrecording,pressthe[EXIT]buttontoexittheRecordmode.PLAYand
RECORDLEDsturno.ThedisplaybrieydisplaysSaveSongOK!andthenreturnstothemainSong
modedisplay.YourlastrecordingissavedintothecurrentUserSong.
NOTE:TheOne-ClickRecordmodeisintendedforreal-timeperformancerecordingandplayback.Therefore,bydefault,the
Click/MetronomeisdisabledwhenenteringOne-ClickRecordmode.However,ifyouprefertorecordwithatimereference,you
canenabletheClick/Metronomebeforestartingtorecord,bypressingthe[CLICK]button.Inthiscase,Tempo,TimeSignature
andothermetronomeadjustmentsshouldbemadebeforeenteringtheRecordmode.
Formorerecordingfunctions,pleaserefertotheSONGRECORDsectionoftheadvancedmanual.
18
Other manuals for SD9K
1
Table of contents
Other Simmons Drum manuals

Simmons
Simmons sd1000 kit User manual

Simmons
Simmons SDS 8 User manual

Simmons
Simmons SD1000 User manual

Simmons
Simmons SDS 1 User manual

Simmons
Simmons SDXpress2 User manual

Simmons
Simmons SD1500 User manual

Simmons
Simmons SD5Xpress User manual

Simmons
Simmons SD7K User manual
Simmons
Simmons SD81 User manual
Simmons
Simmons SD600 User manual

Simmons
Simmons SD2000 User manual
Simmons
Simmons SD1250 User manual
Simmons
Simmons SD9K User manual

Simmons
Simmons SD500 User manual

Simmons
Simmons SDMK4 User manual

Simmons
Simmons SD7PK User manual

Simmons
Simmons SDHB2 User manual

Simmons
Simmons TITAN 20 User manual
Simmons
Simmons SDD7 User manual
Simmons
Simmons SDS 9 User manual
