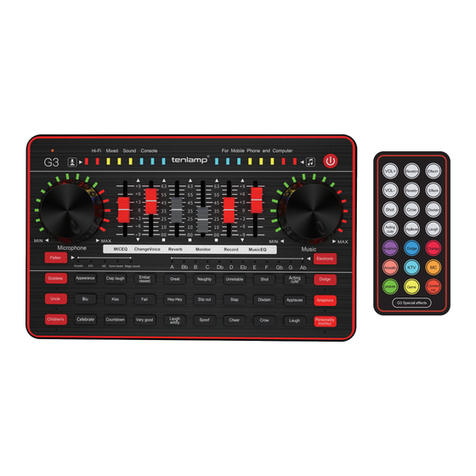
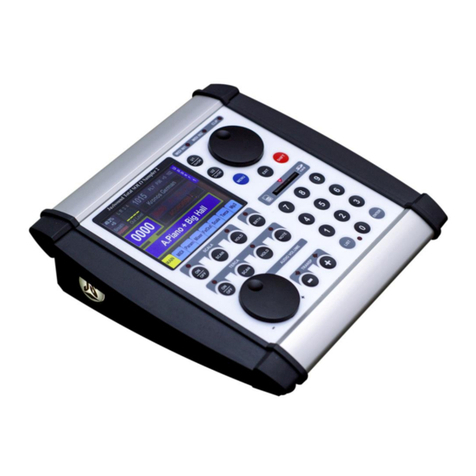
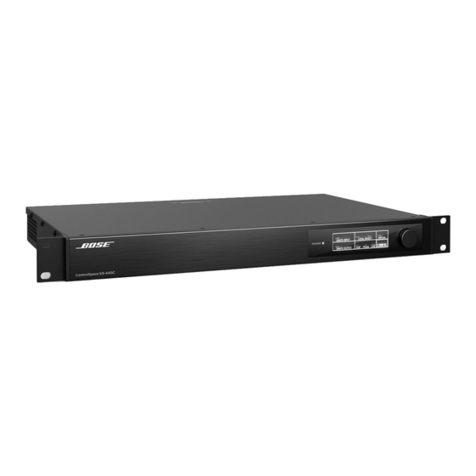
Simon TUNE MAESTRO I User manual

1
User Manual
English
TUNE MAESTRO
I
SIMON LABORATORIES©

2
Simon Laboratories LLC has complete ownership of Tune Maestro I with Patent Application Number 63121238.
Patent Application Number Includes:
Software Development.
Hardware Design.
Mechanical and 3D Model.
All Features Introduced.
Device operating temperature -100C – 490C.
Device operating voltage 5v, USB powered.
Contents:
User Manual
3 x MIDI Cables
1 x USB Power Cable
1 x Tune Maestro I
4 x Rubber Feet
Improper use of this device can cause physical and bodily harm.
Utilizing this device outside of the listed specification can render the device damaged.
Follow this icon in setting the device by following the images displaying the pressed buttons.
www.simonlab.net
Info@Simonlab.net
Sterling Height. Mi
USA.

3
Table of Contents
Top Panel and Button Description .......................................... 4
Rear Panel and Side Panel Connections .................................. 4
Second Functions of the Buttons under Main Menu. ............. 4
Setting Up The Tune Maestro I. .............................................. 5
Setting Up The Main Quarter Tune. ................................................................................................................................................. 6
Setting Up MIDI Channel. ................................................................................................................................................................. 6
Setting Up the Instrument(s). .......................................................................................................................................................... 8
Setting Up and Calibrating the Expression Pedal. .......................................................................................................................... 10
Max Calibration: ......................................................................................................................................................................... 10
Min Calibration: ......................................................................................................................................................................... 10
Saving the Entire Setup. ................................................................................................................................................................. 11
Initializing the Tune Maestro I to Factory Settings. .............. 11
Features of the Tune Maestro I. ............................................ 12
Local Quarter Tune Application. .................................................................................................................................................... 12
Using the Pre-Defined Maqams Buttons........................................................................................................................................ 12
Tuning and Preset Saving. .............................................................................................................................................................. 14
Tune Maestro I Connection to Special Instrument. .............. 15
Setting up Instruments to Operate with Tune Maestro I ...... 15
Korg Trinity, V3. .............................................................................................................................................................................. 16
Korg Triton Studio, Korg Triton Extreme. ....................................................................................................................................... 17
Korg PA Series. ............................................................................................................................................................................... 18
Korg KRONOS Series. ...................................................................................................................................................................... 20
Korg PROPHECY. ............................................................................................................................................................................. 21
Yamaha Genos. ............................................................................................................................................................................... 23
Yamaha Montage 6, 7, 8. ............................................................................................................................................................... 24
Issues and Troubleshooting. ................................................. 26

4
Top Panel and Button Description
Rear Panel and Side Panel Connections
Second Functions of the Buttons under Main Menu.
1. 12 Octave Keys, C-B
2. Setup/Cancel Key
3. Data Encoder/Enter
4. Transpose -
5. Transpose +
6. 1.8 Inch Display
7. Maqams/Presets
8. USB Power Input
9. Expression Pedal Port
10. MIDI OUT 3
11. MIDI IN 3
12. MIDI OUT 2
13. MIDI IN 2
14. MIDI OUT 1
15. MIDI IN 1
16. Main Quarter Tune Setup
17. Global MIDI Channel Setup
18. Selecting Instrument(s)
19. Expression Pedal calibration
20. Reset Transpose to 0, Press T- and T+ simultaneously

5
Setting Up The Tune Maestro I.
The first thing the user needs to do is setup the device prior to start using it. In order to start the setup process,
press and hold the “Setup” button for 3 sec as shown below.
At this point, the 4 buttons, C#, D#, F#, and G# will start flashing as shown above. This indicates that the user is in the
main menu for setting up the device. Each button will set a feature in the device.
C#: This sub menu will set the main quarter tune used in the device. This is the default quarter tune applied each
time one of the 12 scale keys are pressed, C-B.
D#: This sub menu will set the main MIDI Channel used to communicate with each instrument that’s connected to the
3 MIDI ports. This corresponds to the Global channel of the instrument connected to the Tune Maestro. Refer to the
instrument’s Global MIDI channel to match it with the ports of the Tune Maestro.
F#: This sub menu will set the Instrument(s) that the Tune Maestro is connected to, i.e. Yamaha, Roland, etc. This is
where the user selects what brand name of instrument that is being used.
G#: This sub menu will setup/calibrate the Expression Pedal to be used.

6
Setting Up The Main Quarter Tune.
While the 4 keys are flashing, C#, D#, F#, and G#, press the C# as shown below:
The display will show the default value, which should be -50.
Using the dial, set the desired tune, keep in mind that clockwise will set the tune in the positive direction, and
counterclockwise will set the tune in the negative direction.
Note: the dial color will change to the direction of tuning, i.e. if the tune chosen is positive, the dial LED color will be
“Green”, and if the tune chosen is negative, the dial LED color will be “Red”.
Once the necessary tune is chosen, either click the “Dial” or click the “C#” key to confirm the selection. Once the
main quarter tune is asserted, the 4 LEDs, C#, D#, F#, and G# will start flashing again indicating the user is at the main
menu.
Setting Up MIDI Channel.
To setup the MIDI channel for each instrument press the “D#” button as shown below. Once the D# is pressed,
then C, D, and E buttons will start flashing, indicating the user is at the “Submenu”. Each button corresponds to one
of the MIDI ports.
C MIDI Port 1
D MIDI Port 2
E MIDI Port 3

7
To setup MIDI channel on Out Port 1, press the C key, as shown below. This will flash the key of C, indicating your
setting the MIDI Channel for Out Port 1. Turn the “Dial” clockwise to the desired MIDI Channel and press the Dial or
the key of C for confirmation. Keep in mind that this MIDI channel chosen here must correspond to the instrument’s
Global MIDI Channel. At this point, the 3 keys, C, D, and E will start flashing again
indicating to the user that the device is back at the Submenu.
To setup MIDI Channel for Out Port 2, press the key of D as shown below. The
key of D will start flashing indicating its ready to set the MIDI Channel for Out
Port 2. Turn the “Dial” clockwise to the desired MIDI Channel and press the Dial
or the key of D for confirmation. At this point, the 3 keys, C, D, and E will start
flashing again indicating to the user that the device is back at the Submenu.
To setup MIDI channel on Out Port 3, press the E key as shown below. This will
flash the key of E, indicating your setting the MIDI Channel for Out Port 3. Turn
the “Dial” clockwise to the desired MIDI Channel and press the Dial or the key of
E for confirmation. At this point, the 3 keys, C, D, and E will start flashing again
indicating to the user that the device is back at the Submenu.
This completes the setup of MIDI channels for all 3 ports.
Note: The user is not required to setup all 3 MIDI ports. Only setup the ports that are being used. I.e. if only MIDI Out
Ports 1 and 2 are used, then only setup 1 and 2, setting Out Port 3 can be skipped.

8
Setting Up the Instrument(s).
The Tune Maestro is designed to communicate with external instruments via
the 3 MIDI Ports. To setup each Out Port to the proper instrument to be
controlled, while the “Setup” mode is still active, press F# as shown below, at
this point, C, D, and E will start flashing indicating that the user is in “Submenu”
to setup the different OEMs of instruments.
To setup the Tune Maestro to control the instrument connected to MIDI Out
Port 1, press the C key as shown below. The key of C will start flashing indicting
its ready. Use the “Dial” to select the OEM number corresponding to the
instrument connected to MIDI Out Port 1. For a list of OEMs pre-programmed
into the Tune Maestro, refer to Table 1 below for the different OEM numbers.
To setup the Tune Maestro to control the instrument connected to MIDI Out
Port 2, press the D key as shown below. The key of D will start flashing indicting
its ready. Use the “Dial” to select the OEM number corresponding to the
instrument connected to MIDI Out Port 2. For a list of OEMs pre-programmed
into the Tune Maestro, refer to Table 1 below for the different OEM numbers.
To setup the Tune Maestro to control the instrument connected to MIDI Out
Port 3, press the E key as shown below. The key of E will start flashing indicting its
ready. Use the “Dial” to select the OEM number corresponding to the instrument
connected to MIDI Out Port 3. For a list of OEMs pre-programmed into the Tune
Maestro, refer to Table 1 below for the different OEM numbers.
Note: The user is not required to setup all 3 MIDI ports. Only setup the OEMs of instruments
connected to the ports that are being used. It’s highly recommended to keep unused Ports set to
“OF”.

9
OEM
Number KORG
OEM
Number Roland
OEM
Number
Yamaha
2 Pa80 21
Fantom X
Series 14 Tyros Series
2 Pa50 22 XV-5080 11 PSR Series
2 Pa60 23
XP30, XP50,
XP60, XP80 12 Genos
2 Pa55Tr 13
Montage
6/7/8
2 Pa1X 15
PSR-
A2000/A3000
2 Pa2X 16 MODX 6/7/8
2 Pa800
2 Pa3X
2 Pa4X
2 Pa1000
2 Pa700
2 Pa500
2 Pa500ORT
4 Studio
4 Extreme
6 Kronos
1 Trinity
7 Prophecy
3 M1
TABLE 1. Different OEMs That Are Pre-Programmed in the Tune Maestro.

10
Setting Up and Calibrating the Expression Pedal.
The Tune Maestro is equipped with Expression Pedal to provide expressive musical phrases as the musician is
playing. To setup the expression pedal, all that is needed is calibration. Therefore, the menu has been setup to
provide the calibration aspect of the pedal.
To calibrate the expression pedal, click the G# key as shown below; this will start
flashing the F and G keys. Keep in mind the expression pedal requires two values
to be calibrated, Max and Min.
Max Calibration:
Press the G key as shown below, the display will indicate “UP”, at this point
press on the calibration pedal forward to reach Maximum position as the picture
below shows, then press the G key again.
Min Calibration:
Press the F key as shown below, the display will indicate “DN”, at this point
press on the calibration pedal backwards to reach Minimum position, then
press the F key again.

11
Press the “Setup” key 2 times as shown below to be brought back to the “Main” menu. At this point, the keys, C#,
D#, F#, and G# will again start flashing.
Saving the Entire Setup.
Once all the settings have been asserted and the Tune Maestro has been
setup completely, press the “Setup” key for 3 seconds as shown below. The
“Setup” key will flash 3 times indicating that the settings have been saved.
Don’t power off the unit while saving the settings as this will cause all the
settings to be deleted and the setup process must be repeated.
Keep in mind that if the data is not saved, once the device is powered off, then
all data will be erased, and the Tune Maestro will have to be setup all over
again.
Congratulations, the Tune Maestro has been completely setup and ready for
use.
Initializing the Tune Maestro I to Factory Settings.
The Tune Maestro I is equipped with initializing procedure in case the user needs to set it back to factory settings.
Follow the steps below to reset the Tune Maestro I back to factory settings.
1- Make sure the Tune Maestro I power is turned Off.
2- Press and hold C, E, and G simultaneously, as the picture shows below.
3- While the above keys are pressed, plug the power cord back in to turn
the device back On.
4- Keep the above buttons pressed simultaneously for 5 seconds while
plugging the power cord in.
5- The 2 decimal points in the display will flash while your fingers are
pressing the keys above. Once they flash for 5 times, release your
fingers.
6- Restart the Tune Maestro I again by doing a power cycle.
7- The device is now reset back to factory settings.

12
Features of the Tune Maestro I.
The Tune Maestro Iis equipped with a number of nice features under its hood. As mentioned before, it was
designed with a “live performing” musician in mind. Therefore, the features implemented makes performing easy by
taking some of the responsibilities off of the musician shoulders by processing data, preparing data, and recalling
data. The Tune Maestro I is not like every day micro-tuning controllers. Instead it’s very powerful device and brings
convenience on stage. Here is the list of features that Tune Maestro I brings forward:
1- Micro-tuning, C-B.
2- Transposing. Positive Transposition, and Negative Transposition.
3- Large Display.
4- Dial encoder, for data entry and confirmation.
5- Local micro-tuning per key. This gives the musician the ability to tune any key positive or negative micro-
tuning, and not be constrained to one general tuning.
6- 4 Pre-defined Maqams, Bayati, Rast, Saba, and Sikah.
7- 4 Memory locations for User Defined tunings/settings.
8- Expression Pedal for expressive musical phrases.
9- 3 MIDI Ports. 3 Inputs. 3 Outputs.
Local Quarter Tune Application.
Tune Maestro is designed with the live performing musician in mind. And therefore, one of the great features
implemented is the “Local” quarter tune capability. Local quarter tune capability
is simply the ability to tune any key in any desired micro-tuning.
1- To implement Local quarter tune, choose one of the 12-scale keys, C-
B:
2- Press the key for 3 seconds.
3- The key will start flashing, indicating its ready for the semitone
desired.
4- Use the “Dial” to tune up or down the desired tune. Keep in mind that
clockwise direction will increment the tune, while counterclockwise
will decrement the tune. This is indicated by the Green LED versus
Red LED on the Dial.
Using the Pre-Defined Maqams Buttons.
Another great feature implemented in Tune Maestro is the pre-defined maqam mode that is designed and
implemented to make the selecting process of maqams very easy. Tune Maestro has 4 different middle eastern
maqams implemented in its ROM. The 4 different maqams are the following:
1- Bayati
2- Rast
3- Sikah
4- Saba
Often times the musician is asked to play a song composed in one of these maqams. Therefore, the musician is
required to calculate the different musical steps/increments required to implement the maqam. These
calculations must happen very fast, and must be accurate, otherwise, wrong tuning will result in an issue, and
wrong keys will be played. With the pre-defined maqams implemented in Tune Maestro, this frustration has been
removed completely, and it’s no longer required that the musician do any calculation.

13
To use the pre-defined maqam buttons, follow the steps below.
1- Select the desired maqam that needs to be played, for example, Bayati, Rast…., etc.
2- The 12-scale keys, C-B, will start flashing sequentially, starting from C all the way to B.
3- Select the scale key to be played with the desired maqam selected in Step 1.
4- Tune Maestro will calculate all the different steps/increments required for the chosen maqam and will
implement quarter tuning to the necessary keys.
Example. If the musician needs to implement Rast on C (C here is used only for example):
1- Press the “Rast” key as shown below.
2- The LEDs will start flashing sequentially starting from C all the way to B.
3- Press “C”, then the Tune Maestro will calculate the necessary steps to turn on the keys of E and B.
4- This completes the implementation of maqam of Rast.

14
Tuning and Preset Saving.
One of the most outstanding features of the Tune Maestro is the ability to save micro-tuning predefined by the
musician. The Tune Maestro is equipped with 4 buttons that are designed for saving tunings that are implemented by
the musician, and the purpose of this feature is to give the musician the ability the recall those tunings instantly.
The four preset saving buttons are the same buttons for the 4 maqams, both features share the same set of
buttons. So, in definition:
1- Bayati/PST1
2- Saba/PST2
3- Sikah/PST3
4- Rast/PST4
However, keep in mind that when one of the presets are used as a memory save/recall, then the corresponding
maqam will no longer apply as long as that button is used for memory save/recall. For example, if the button
Bayati/PST1 has a user micro-tuning saved, then pressing that button will not apply Bayati maqam, instead it will
recall whatever is saved by the user. If the user happens to have certain tuning saved, i.e. -50 tuning on D#, +32
tuning on F#, and -40 tuning on B. Then pressing PST1 will recall the above tuning to their corresponding keys.
To use the preset keys for saving and recalling user tuning,
1- Apply the micro-tuning desired to any of the keys necessary.
2- Press and hold any one of the 4 preset buttons for 3-seconds as shown
below.
3- The preset button chosen will flash 3 times, indicating that the user
tuning has been saved.
4- To recall the user tuning that was saved, simply click on the button where
the tuning is saved, and the Tune Maestro will recall the user tuning
instantly on the desktop.

15
Tune Maestro I Connection to Special Instrument.
The Tune Maestro is capable to operate special instruments, such as Korg Trinity. However, this is done with special
connection. This particular instrument requires both connections, namely MIDI In and MIDI Out, to be connected
from the Tune Maestro to the MIDI Ports of the Korg Trinity. All MIDI Ports on the Tune Maestro are capable to
communicate with the Korg Trinity; however, It’s highly advisable to use MIDI OUT 3 and MIDI IN 3 on the Tune
Maestro for faster data processing. Follow the diagram below to connect the Tune Maestro to the Korg Trinity.
Figure 1. Tune Maestro I Connection to the Korg Trinity V3.
Note: Although the Tune Maestro is capable to communicate with the Korg Trinity on all MIDI Ports; however, it’s advisable to use MIDI OUT
3 and MIDI IN 3 as this particular port has faster data processing.
Setting up Instruments to Operate with Tune Maestro I
For the Tune Maestro I to be compatible with the Korg Products, certain settings has to be implemented on each
keyboard, this includes Global MIDI message, SysEx to be enabled, etc etc...

16
Korg Trinity, V3.
Image Courtesy of Korg.com Documents. Korg Trinity.
Image Courtesy of Korg.com Documents. Korg Trinity.
Korg Products.
Make sure “Enable Control
Change” is checked.
Make sure “Local Control On” is NOT
checked. As the picture is showing.
Set MIDI channel as in Pg.7
“Setting Up MIDI Channel”

17
Korg Triton Studio, Korg Triton Extreme.
Image Courtesy of Korg.com Documents. Korg Triton Studio.
Image Courtesy of Korg.com Documents. Korg Triton Studio.
Set MIDI channel as in Pg.7
“Setting Up MIDI Channel”
Under “Scale”, make sure its
set to “User Octave Scale 00”
Enable SysExec

18
Korg PA Series.
Image Courtesy of Korg.com Documents. Korg PA Series.
Image Courtesy of Korg.com Documents. Korg PA Series.
Set Position to
“Post-KB/Pre-Scale”
Unlock “Master Transpose” so Tune
Maestro can control Transpose.

19
Image Courtesy of Korg.com Documents. Korg PA Series.
Image Courtesy of Korg.com Documents. Korg PA Series.
Make sure all MIDI In
Filters are set to
“
OFF
”
Select the MIDI Channel as in Pg.7
“Setting Up MIDI Channel” and
make sure its set to “Global”

20
Korg KRONOS Series.
Image Courtesy of Korg.com Documents. Korg KRONOS Series.
Image Courtesy of Korg.com Documents. Korg KRONOS Series.
Select the MIDI Channel as in Pg.7
“Setting Up MIDI Channel” and make
sure its set to the same channel.
Set Convert Position to
“Pre MIDI”
Make sure “Enable Exclusive
”
is checked.
Table of contents
