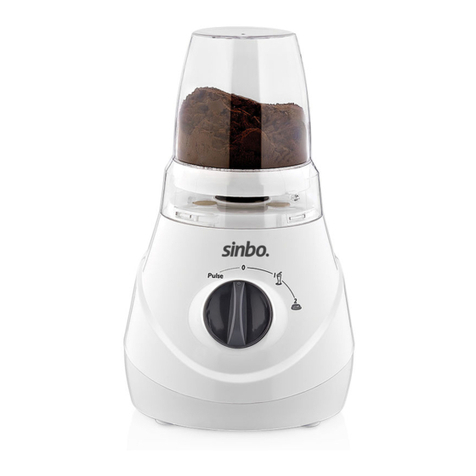
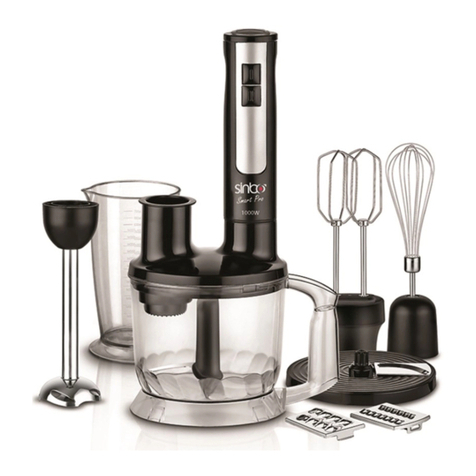
Sinbo SHB 3082 User manual

SHB 3082 BLENDER
KULLANMA KILAVUZU
TR
EN
FR
NL
DE
ES
RU
UA
HR
AR

- 1 -
2
3
4
5
6
8
7
9
1
A B
C
FE
D
G
GENEL GÖRÜNÜM • OVERVIEW • ASPECT GENERAL • ALGEMENESCHIJN • ÜBERS‹CHT •
APARICIÓN EN GENERAL • éÅôàâ ÇàÑ • áÄÉÄãúçàâ ÇàÉãüÑ • OP´
CI PRIKAZ •

Cihazla oynamamalarını güvenceye almak için çocuklar gözetim altında tutulmalıdır.
Bu ürün (çocuklar dahil ) fiziksel hassasiyeti az, zihinsel olarak yetersiz, deneyimsiz ve yeterli bilgiye
sahip olmadan yada kendilerinin güvenli¤inden sorumlu olan kifliler tarafından bu ürünü kullanmak
için gerekli talimatlar verilmemifl kiflilerin kullanımına uygun de¤ildir.
Children being supervised not to play with the appliance.
This appliance is not intended for use by persons (including children) with reduced physical,sensory
or mental capabilities, or lack of experience and knowledge, unless they havebeen given supervision
or instruction concerning use of the appliances by a personresponsible for their safety. Children
should be supervised to ensure that they do not play with the appliance.
De¤erli Müflterimiz,
Ürün seçiminde S‹NBO'yu tercih etti¤iniz için teflekkür ederiz.
Uzun ve verimli bir kullan›m için cihaz› kullanmadan önce bu k›lavuzu özellikle güvenlik
talimatlar›na dikkat ederek okuman›z› ve devaml› suretle saklaman›z› tavsiye ederiz.
Sayg›lar›m›zla,
Sinbo Küçük Ev Aletleri
- 2 -
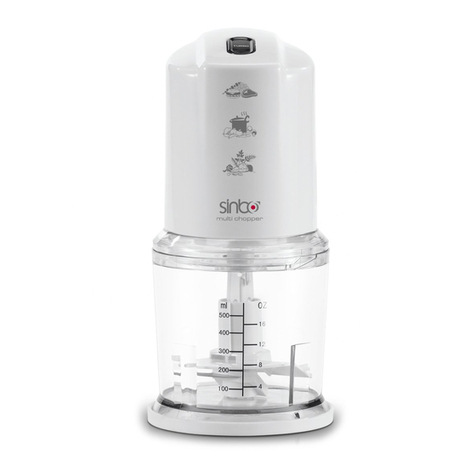
GENEL AÇIKLAMA
1. Yüksek h›z için TURBO dü¤mesi
2. Ana priz ile güç kablosu
3. Motor blo¤u
4. Çal›flt›r›c› kapa¤›
5. Ç›rpma bölümü
6. B›çak bölümü (yay monte edilmifl)
7. Hazne (al›m kapasitesi: 500 ml)
8. Çevirme çubu¤u
9. Hazne kapa¤› (taban olarak ta kullan›labilir)
Güveniniz için teflekkürler!
Yeni çok ifllevli do¤ray›c›n›z hay›rl› olsun.
Ürünün güvenli kullan›m› ve özelliklerinin bütün kapsam›n› bilebilmek için:
• ‹lk kullan›mdan önce çal›flt›rma talimatlar›n› dikkatlice okuyun.
• Hepsinden önemlisi, güvenlik talimatlar›n› inceleyin.
• Cihaz, sadece bu talimatlarda aç›kland›¤› flekilde kullan›labilir.
• Bu talimatlar›, referans olarak saklay›n.
• E¤er cihaz› baflkas› kullanacaksa, bu talimatlar› ona verin.
Yeni çok ifllevli do¤ray›c›n›zdan memnun olman›z› dileriz!
Kullan›m amac›
Çok ifllevli do¤ray›c›, sadece yiyeceklerin do¤ranmas› ve krema ç›rpmak için kullan›l›r.
Cihaz, özel olarak evde kullan›m için tasarlanm›flt›r. Cihaz, sadece içerde kullan›l›r.
Bu cihaz, ticari amaçlar için kullan›lmamal›d›r.

- 3 -
SINBO SHB 3082 ÇOK ‹fiLEVL‹ DO⁄RAYICI
KULLANIM KILAVUZU
Öngörülen yanl›fl kullan›m
UYARI! Maddi hasar riski!
Cihaz›, özellikle sert yiyecekleri do¤ramak için kullanmay›n, örne¤in, donmufl g›da, kemik, hindistancevizi,
tah›l, kahve çekirde¤i.
Güvenlik uyar›lar›
Uyar›lar
E¤er gerekli ise, bu kullan›m talimatlar›nda afla¤›daki uyar›lara dikkat edilecektir.:
TEHL‹KE! Yüksek risk: Bu uyar›n›n dikkate al›nmamas›, yaralanma ile sonuçlanabilir.
UYARI! Orta risk: Bu uyar›n›n dikkate al›nmamas›, yaralanma ya da ciddi maddi hasar ile sonuçlanabilir.
UYARI: Düflük risk: Bu uyar›n›n dikkate al›nmamas›, hafif yaralanma ya da ciddi maddi hasar ile
sonuçlanabilir.
NOT: Cihaz› kullan›rken, gözlemlenmesi gereken koflullar ve özellikler.
Çocuklar için TEHL‹KE
• Ambalaj malzemeleri çocuklar›n oyuncaklar› de¤ildir. Çocuklar›n, plastik torbalarla oynamalar›na
izin verilmemelidir. Bo¤ulma riski vard›r.
• Bu cihaz, çocuklar taraf›ndan kullan›lmamal›d›r.
Temizleme ve kullan›c› bak›m› çocuklar taraf›ndan yap›lmamal›d›r. Çocuklar, cihazdan ve güç kablosundan
uzak tutulmal›d›r
• Bu cihaz, e¤er cihaz› nas›l güvenli flekilde kullanacaklar› konusunda bilgilendirilirlerse ve denetlenirlerse
ve do¤uraca¤› risklerin fark›nda iseler, fiziksel ya da zihinsel engelli kiflilerce ya da yetersiz deneyim
ve/veya anlay›fla sahip kiflilerce de kullan›labilir.
TEHL‹KE! Nem dolay›s› ile elektrik floku riski
• Bu cihaz, asla, küvet, dufl, lavabo ya da benzeri fleylerin yak›n›nda çal›flt›r›lmamal›d›r.
• Motor blo¤u, güç kablosu ve ana fifl suya ya da baflka herhangi bir s›v›ya bat›r›lmamal›d›r.
• Motor blo¤unu, nem, su dökülmesi ve s›çramas›na karfl› koruyun.
• E¤er motor blo¤unu s›v› girerse, hemen ana fifli çekin. Yeniden kullanmadan önce cihaz› kontrol edin.
• Asla cihaza ›slak eller ile dokunmay›n.
• E¤er cihaz suya düflerse, hemen ana fifli çekin. Cihaz› güvenli oldu¤u zaman yeniden çal›flt›r›n.
• S›v›n›n motor blo¤una girmesini önleyebilmek için hazneyi, maksimum 200 ml s›v› ile doldurun.
TEHL‹KE! Elektrik flok riski
• Cihaz tamamen monte edilip tak›ld›ktan sonra fifli prize sokun.
• Ana fifli, voltaj, ölçüm levhas›ndaki özelliklere uyan, uygun flekilde monte edilmifl ve kolay eriflilebilir
prize tak›n. Cihaz fifle tak›ld›ktan sonra da prize kolay ulafl›lmal›d›r.
• Güç kablosunun keskin köfleler ya da s›cakl›ktan hasar görmedi¤inden emin olun.
Güç kablosunu, cihaz›n çevresine sarmay›n.
• Cihaz, kapat›ld›ktan sonra bile tamamen güç kablosu ile ba¤lant›s› kesilmez. Ba¤lant›y› tamamen
kesmek için, ana fifli çekin.
• Cihaz› kullan›rken, güç kablosunun s›k›flt›r›lmamas›n› ya da ezilmemesini sa¤lay›n.
• Ana prizi ç›kar›rken, her zaman fifli çekin kabloyu de¤il.
• Ana prizi, fiflten çekin.
… e¤er ar›za varsa,
… cihaz› kullanmad›¤›n›zda
… cihaz› monte etmeden ya da sökmeden önce
… cihaz› temizledikten sonra ve
… f›rt›na s›ras›nda
- 4 -
• E¤er cihaz ya da güç kablosunda görülür bir hasar varsa cihaz› kullanmay›n.
• Herhangi bir riskten kaç›nmak için, cihazda de¤ifliklikler yapmay›n. Ayr›ca, güç kablosunu kendiniz
de¤ifltirmeyin. Onar›m, uzman onar›m merkezi ya da Hizmet Merkezi taraf›ndan yürütülmelidir.
TEHL‹KE! Kesmeden dolay› yaralanma riski
• B›çak keskindir. Dikkatli tutun. Elle y›karken, su yeterli derecede berrak olmal› böylece b›çaklar›
kolayca görebilirsiniz.
• Cihaz, hazne olmadan asla çal›flt›r›lmamal›d›r.
• Döner b›çaklara asla dokunmay›n. Döner parçalara, kafl›k ya da benzer mutfak aletleri ile dokunmay›n.
Saç ya da bol giysileri döner parçalardan uzak tutun.
• Cihaz kapand›ktan sonra da, b›çak dönmeye devam eder. Haznenin kapa¤›n› ç›karmadan önce durmas›n›
bekleyin.
UYARI! Maddi hasar riski
• Kat› yiyecekler için maksimum dolum düzeyi, 350 ml dir.
• S›v›lar için maksimum dolum hacmi, (örne¤in krema) 200 ml dir.
• Cihaz, müdahale edilmeden maksimum 1 dakika çal›flma için tasarlanm›flt›r.
Bundan sonra, cihaz, oda s›cakl›¤›nda so¤uyana kadar kapal› kalmal›d›r.
• Cihaza zarar gelmesini önleyebilmek için, e¤er b›çak/ç›rp›c› dönmezse ya da yavafl dönerse hemen
kar›flt›rma ifllemini durdurun.
Ana fifli çekin ve haznede hareketi engelleyen bir fley olup olmad›¤›n› ya da yiyece¤in çok sert olup
olmad›¤›n› kontrol edin. Ayr›ca, cihaz›n do¤ru monte edilip edilmedi¤ine bak›n.
• Motorun fazla ›s›nmas›na neden olaca¤›ndan ve hasar görmesi ile sonuçlanabilece¤inden cihaz›
boflken çal›flt›rmay›n.
• Sadece orijinal aksesuarlar› kullan›n.
• Sert ya da afl›nd›r›c› temizlik maddeleri kullanmay›n.
• Cihaz, kaymayan plastik tabana uyar. Mobilyalar, genifl çeflitte vernik ve plastik ve çeflitli bak›m
ürünleri ile temizlendi¤inden, bu ürünlerden baz›lar›n›n, plastik tabana etki edecek ve yumuflatacak
içeri¤e sahip olma olas›l›klar› göz ard› edilemez. E¤er gerekli ise, cihaz›n alt›na kaymayan bir mat
koyun.
Tedarik edilen parçalar
1 Motor blo¤u 3
1 Çal›flt›r›c› kapak 4
1 Hazne 7
1 Hazne kapa¤› 9
1 B›çak 6 ve 1 ç›rp›c› 5 (monte edilmifl)
1 Set çal›flt›rma talimat›
Nas›l kullan›l›r
• Bütün ambalaj malzemesini ç›kar›n.
• Bütün parçalar›n tam ve hasars›z oldu¤unu kontrol edin.
• ‹lk kez kullanmadan önce cihaz› temizleyin! (“Temizleme” bölümüne bak›n.)
Çal›flt›rma
TEHL‹KE! Elektrik flok riski!
Çok ifllevli do¤ray›c›y› tam olarak monte edilip doldurulduktan sonra, ana prizi (2) fifle tak›n.
TEHL‹KE! Kesmeden dolay› yaralanma riski
• B›çak keskindir. Dikkatli tutun.
• Cihaz, hazne olmadan asla çal›flt›r›lmamal›d›r
• Cihaz kapand›ktan sonra da, b›çak dönmeye devam eder. Haznenin kapa¤›n› ç›karmadan önce durmas›n›
bekleyin.

- 5 -
UYARI! Cihaza zarar gelmesini önleyebilmek için, e¤er b›çak (6)/ç›rp›c› (5) dönmezse ya da yavafl dönerse
hemen kar›flt›rma ifllemini durdurun. E¤er bu olursa, ana fifli (2) çekin ve haznede (7) hareketi engelleyen
bir fley olup olmad›¤›n› ya da yiyece¤in çok kat› olup olmad›¤›n› kontrol edin. Ayr›ca, cihaz›n do¤ru monte
edilip, edilmedi¤ine bak›n.
B›çak a¤z›
Uygulama alan›
B›çak a¤z› (6), kat› yiyecekleri do¤ramak için uygundur örne¤in, so¤an, havuç, peynir, f›nd›k.
Yiyecek haz›rlama
• Kullan›m
… maksimum 350 ml kat› yiyecek doldurma düzeyini geçmemelidir ya da
… maksimum 200 ml s›v›.
• Yiyece¤i y›kay›n.
• Yiyece¤i, küçük küpler halinde kesin (yaklafl›k 2-3 cm uzunlu¤unda).
• F›nd›¤›n d›fl kabu¤unu ç›kart›n. ‹ç kabuk istenirse kullan›labilir, örne¤in badem ile.
• Bitkileri köklerinden ç›kar›n.
• Kemikleri, etinden ay›r›n ve sinir ve derisinden ç›kar›n.
‹fllem tablosu
‹çerik Tavsiye edilen miktar Tavsiye edilen ifllem süresi / h›z
So¤an (dörde bölünmüfl) 100 g Pulse/TURBO
Sar›msak (bütün bir difl) 100 g Pulse/TURBO
Ceviz 50 g 2 x 8 sn. TURBO
Badem 50 g 1 x 10 sn. (kaba) 1 x 30 sn. (düzgün) TURBO
Peynir (örne¤in Gouda, so¤uk) 100 g 4 x 15 sn. TURBO
Salam 130 g 3 x 5 sn. TURBO
Dilimlenmifl s›¤›r eti
(yaklafl›k 2 cm uzunlu¤unda ) 250 g 3 x 12 sn. TURBO
Havuç 100 g 3 x 5 sn. normal
Kurutulmufl meyve 130 g 4 x 15 sn. TURBO
Buz küpleri 100 g Pulse/TURBO
NOT: Burada belirtilen ifllem süreleri ve h›zlar›, genel bilgidir.
• Yiyeceklerin miktarlar› ve uygunluklar›na ba¤l› olarak, as›l de¤erler farkl› olabilir.
• Yiyece¤i ne kadar küçük oldu¤una ba¤l› olarak, sonuçlar› tekrar kontrol edin.
• K›sa PULSE ile çal›fl›n (1 pulse: yaklafl›k 1 saniye için çal›fl›n).
Cihaz› monte etme
UYARI: Yiyece¤in kat›l›¤›na ve uygunlu¤una ba¤l› olarak, b›çak a¤z› (6) hazneyi (7) engelleyebilece¤i için
hazneyi (7) maksimum düzeyde doldurmay›n.
Burada, “‹fllem tablosu” bölümünde çeflitli yiyecekler için yönerge de¤erlerine dikkat edin.
1. Hazne kapa¤› (9) üzerindeki hazneyi yerlefltirin.
2. Haznede ç›rpma çubu¤unu (8) b›çak a¤z›na (6) yerlefltirin.
3. Haz›rlanm›fl yiyece¤i, hazneye (7) yerlefltirin.
4. fiekil B: Çal›flt›r›c› kapa¤› (4), haznenin (7) üzerine öyle bir yerlefltirin ki, çal›flma kapa¤› üzerinde iki
küçük girintiyi, haznedeki oyuklara yerlefltirin ve çal›flt›r›c› kapa¤› saat yönünde yerine yerleflene kadar
döndürün.
5. Motor blo¤unu (3) çal›flt›r›c› kapa¤›n (4) üst köflesine yerlefltirin.
NOT: Motor blo¤u, do¤rudan sa¤ taraftaki çal›flma kapa¤›na uymuyor.
6. Ana fifli (2), teknik verilere uyan prize sokun.

- 6 -
Do¤rama
• fiekil C: Normal h›zda çal›flabilmesi için, motor blo¤unu (3) afla¤› do¤ru bast›r›n ve sonra yine b›rak›n.
• fiekil D: Yüksek h›zda çal›flabilmesi için, ayr›ca TURBO (1) dü¤mesini afla¤› do¤ru bast›r›n.
• K›sa PULSE ile çal›flt›rma (1 Pulse: yaklafl›k 1 saniye bas›n). Pulselerin say›s› ve uzunlu¤u, yiyece¤in
miktar› ve uygunlu¤una ba¤l›d›r. “‹fllem tablosu” bölümündeki özelliklere bak›n.
• Sonucu tekrar kontrol edin. E¤er yiyecek düzgün do¤ranmad› ise:
- Ana fifli (2) çekin, motor blo¤unu (3) ç›kar›n ve dikkatlice hazneyi (7) çalkalay›n.
- E¤er yiyecek, haznenin içine yap›flt› ise, çal›flma kapa¤›n› (4) saat yönünün tersine do¤ru çevirin ve
ç›kar›n. Spatula kullanarak, parçalar› afla¤› do¤ru itin.
- Ana prizi (2), fifle yeniden tak›p, çal›flt›rmaya bafllamadan önce, parçalar› bir araya getirin.
Ç›rpma parças›
Uygulama alan›
Çok ifllevli do¤ray›c›, ç›rpma parças› (5), özellikle krema ç›rpma için tasarlanm›flt›r. B›çak girifli (6)
tepede bulunmaktad›r.
NOT: Nerede mümkün olursa, çok iyi so¤utulmufl ç›rp›lm›fl krema kullan›n (buzdolab› ›s›s›nda), böylece
ç›rp›lm›fl krema kat› hale gelir.
Ç›rp›lm›fl krema
1. Hazne kapa¤›n›n (9) üzerine hazneyi (7) yerlefltirin
2. Ç›rpma parças›n› (5) dikkatlice yukar›da b›çak a¤z›na (6) yerlefltirin.
3. B›ça¤› (6), ç›rpma parças› (5) ile birlikte hazne içindeki döndürücünün (8) üzerine koyun.
4. So¤umufl ç›rp›lm›fl kremay› (maksimum 200 ml) haznenin (7) içine dökün.
5. Çal›flt›r›c› kapa¤› (4) haznenin (7) içine öyle bir yerlefltirin ki, çal›flt›r›c› kapa¤›n üzerindeki iki ç›k›nt›,
haznenin oyuklar›na yerleflsin ve yerine yerleflene kadar çal›flt›r›c› kapa¤› saat yönünde döndürün.
6. Motor blo¤unu (3), çal›flt›r›c› kapa¤›n (4) üst köflesine yerlefltirin.
NOT: Motor blo¤u, do¤rudan sa¤ taraftaki çal›flt›r›c› kapa¤a tamamen uymuyor.
7. Motor blo¤unu (3) afla¤› do¤ru bast›r›n ve yaklafl›k 30 ila 50 saniye afla¤› do¤ru bast›r›n.
Bunu yaparken sonucu kontrol edin.
Yiyece¤i ç›karma
NOT: Kapak ya da taban olarak hazne kapa¤›n› (9) kullanmay› seçebilirsiniz. (fiekil G).
1. Ana fifli (2) prizden ç›kar›n.
2. Motor blo¤unu ç›kar›n (3).
3. Çal›flt›rma kapa¤›n› (4) saat yönünün tersine çevirin ve ç›kar›n.
4. B›çak a¤z›n› (6) hazneden (7) dikkatlice ç›kar›n (e¤er gerekli ise, ç›rpma eki ile birlikte (5)).
5. Yiyece¤i ç›kart›n, örne¤in, spatula kullanarak.
6. Kulland›ktan sonra, mümkün olan en k›sa sürede cihaz› temizleyin.
Temizleme
‹lk kullan›mdan önce cihaz› temizleyin!
TEHL‹KE! Elektrik floku riski!
• Cihaz› temizlemeden önce ana fifli (2) prizden ç›kar›n.
• Motor blo¤u (3), güç kablosu ve ana priz (2) suya ya da herhangi bir s›v›ya bat›r›lmamal›d›r.
TEHL‹KE! Kesmeden dolay› yaralanma riski!
Elde y›karken, su yeterince duru olmal›d›r böylece b›çak a¤z›n› (6) kolayca görebilirsiniz.

UYARI! Maddi hasar riski!
Sert ya da afl›nd›r›c› herhangi bir madde kullanmay›n.
Cihaz› sökmek
1. Ana fifli (2) çekin.
2. Motor blo¤unu (3) ç›kar›n.
3. Çal›flt›r›c› kapa¤› (4) saat yönünün tersine do¤ru döndürün ve ç›kar›n.
4. Dikkatlice, b›çak a¤z›n› (6) hazneden (7) ç›kar›n (e¤er gerekli ise ç›rpma parças› (5) ile birlikte).
5. fiekil A: Dikkatlice, b›çak a¤z›n› (6) ç›rpma parças›n›n (5) afla¤›s›na do¤ru itin.
6. Hazne kapa¤›n› (9), hazneden (7) ç›kar›n.
Nas›l düzgün temizlenir
1. E¤er gerekli ise, motor blo¤unu (3) ve güç kablosunu (2), nemli bez ile silin. Motor blo¤unun (3) bir
sonraki kullan›mdan önce tamamen kurumas›n› sa¤lay›n.
2. Motor blo¤u (3) hariç bütün aksesuar parçalar›n› elde y›kay›n.
3. Kenara koymadan ya da cihaz› yeniden kullanmadan önce bütün parçalar›n tamamen kurumas›n›
sa¤lay›n.
Baz› temizlik ipuçlar›
• Yiyecek art›klar›n kurumas›n› önleyebilmek için kulland›ktan sonra mümkün oldu¤u kadar çabuk
cihaz› temizleyin.
• Çok tuzlu ya da asitli yiyecekleri ifllemden geçirdikten sonra, hemen b›çak a¤z›n› (6) dikkatlice durulay›n.
Depolama
Çocuklar için TEHL‹KE! Cihaz›, çocuklar›n eriflemeyece¤i yerlerde saklay›n.
TEHL‹KE! Kazalar› önleyebilmek için, saklarken ana fifl (2), asla prize sokulmamal›d›r.
• Cihaz› saklama amac›yla sökün. Bu b›çak a¤z›n›n (6) güvenli flekilde saklanmas›n› sa¤lar.
• Ne yüksek ›s›n›n ne de nemin cihaz› etkileyece¤i bir yer seçin.
Sorun giderme
E¤er cihaz›n›z, istendi¤i flekilde çal›flmazsa, lütfen önce kontrol listesine bakmay› ve problem kendiniz
çözmeyi deneyin.
TEHL‹KE! Elektrik floku riski!
Cihaz› kendiniz, herhangi bir koflul alt›nda tamir etmeye çal›flmay›n.
Bozukluk Olas› nedenler/ Eylem
Çal›flm›yor Cihaz güç kayna¤›na ba¤l› m›?
Ba¤lant›y› kontrol edin.
Çal›flt›rma kapa¤›n›n (4) üst köflesi temiz mi?
B›çak a¤z› (6), dönmüyor ya da
çok zor dönüyor. • Hemen kapat›n, ana fifli (2) çekin ve kontrol edin. :
- Hazne de t›kan›kl›k m› var?
- Yiyecek çok sert mi?
- Cihaz do¤ru monte edilmifl mi?
Hazne (7) sert yiyecekten dolay›
hareli mi? • Bu normaldir ve çal›flmay› etkilemez.
- 7 -

- 8 -
Elden çıkarma
Çarp› iflaretli büyük çöp tenekesini gösteren sembol, ürünün Avrupa Birli¤inde, ayr› bir at›k toplama
bölümüne at›lmas›n› gerektirir. Bu, ürüne ve bu sembol ile iflaretlenen tüm aksesuarlara uygulan›r.
Bu sembol ile tan›mlanan ürünler, normal ev at›klar› ile birlikte at›lamaz ancak elektrikli ve elektronik
cihazlar›n geri dönüflümü için toplama noktas›na al›nabilir.
Geri dönüflüm, ham maddelerin tüketimini azalt›r ve çevreyi korur.
Ambalaj
Ambalaj› atarken, ülkenizde uygulanan çevre düzenlemelerine uygun oldu¤undan emin olun.
Teknik özellikler
Ana voltaj : AC230V, 50Hz
Koruma s›n›f› : II
Güç derecesi : 260 W
Maksimum sürekli çal›flma (KB) : 1 dakika

- 9 -
ENGLISH
SINBO SHB 3082 MULTI CHOPPER
INSTRUCTION MANUAL
OVERVIEW
1. TURBO Button for high speed
2. Power cable with mains plug
3. Motor block
4. Working cover
5. Cream attachment
6. Blade insert (spring-mounted)
7. Vessel (holding capacity: 500 ml)
8. Spindle
9. Vessel cover (can also be used as the base)
Thank you for your trust!
Congratulations on your new multi chopper.
For a safe handling of the product and in order to get to know the entire scope of features:
• Thoroughly read these operating instructions prior to initial commissioning.
• Above all, observe the safety instructions!
• The device should only be used as described in these instructions.
• Keep these instructions for reference.
• If you pass the device on to someone else, please include these instructions.
We hope you enjoy your new multi chopper!
Intended purpose
The multi chopper is intended exclusively for chopping food and for whipping cream.
The device is designed for use in private households. The device must only be used indoors.
This device must not be used for commercial purposes.
Foreseeable misuse
WARNING! Risk of material damage!
Do not use the device for chopping particularly hard food, e.g. frozen food, bones, nutmeg, grain or
coffee beans.
Safety information
Warnings
If necessary, the following warnings will be used in these operating instructions:
DANGER! High risk: Failure to observe this warning may result in injury to life and limb.
WARNING! Moderate risk: Failure to observe this warning may result in injury or serious material
damage.
CAUTION: Low risk: Failure to observe this warning may result in minor injury or material damage.
NOTE: Circumstances and specifics that must be observed when handling the device.
DANGER for children
• Packing materials are not children's toys. Children should not be allowed to play with the plastic
bags. There is a risk of suffocation.
• This device must not be used by children.
Cleaning and user maintenance must not be performed by children. Children must be kept away from
the device and the power cable.
• This device can be used by people with restricted physical, sensory or intellectual abilities or people
without adequate experience and/or understanding if they are supervised or instructed on how to use
this device safely and if they are aware of the resulting risks.

- 10 -
DANGER! Risk of electric shock due to moisture
• This device must never be operated close to a bathtub, shower, filled hand basin or similar.
• The motor block, the power cable and the mains plug must not be immersed in water or any other
liquids.
• Protect the motor block against moisture, drips and splashes.
• If liquid gets into the motor block, remove the mains plug immediately. Have the device checked
before reusing.
• Never touch the device with wet hands.
• If the device falls into water, disconnect the mains plug immediately. Only then is it safe to retrieve
the device.
• Fill the vessel with a maximum of 200 ml of liquid in order to prevent liquid from getting into the
motor block.
DANGER! Risk of electric shock
• Only insert the mains plug into the wall socket after the device has been completely assembled and
filled.
• Only connect the mains plug to a properly installed and easily accessible wall socket whose voltage
corresponds to the specifications on the rating plate. The wall socket must continue to be easily
accessible after the device is plugged in.
• Ensure that the power cable cannot be damaged by sharp edges or hot points.
Do not wrap the power cable around the device.
• The device is not fully disconnected from the power supply, even after it is switched off. In order to
fully disconnect it, pull out the mains plug.
• When using the device, ensure that the power cable cannot be trapped or crushed.
• When removing the mains plug, always pull the plug and never the cable.
• Disconnect the mains plug from the wall socket…
… if there is a fault,
… when you are not using the multi chopper,
… before you assemble or disassemble the multi chopper,
… before you clean the multi chopper, and
… during thunderstorms.
• Do not use the device if there is visible damage to the device or the power cable.
• To avoid any risk, do not make modifications to the device. You also must not replace the power cable
yourself. Repairs must be carried out by a specialist workshop or the Service Centre.
DANGER! Risk of injury from cutting
• The blade insert is sharp. Handle it with care. When washing manually, the water should be sufficiently
clear that you can see the blades easily.
• The device must never be operated without the vessel.
• Never reach into the rotating blades. Do not touch rotating parts with spoons or similar utensils. Keep
long hair or loose clothing away from rotating parts as well.
• The blade insert continues to rotate after the device is switched off. Wait for it to stop moving before
you remove the working cover.
WARNING! Risk of material damage
• The maximum filling level for solid food is 350 ml.
• The maximum filling volume for liquids (e.g. cream) is 200 ml.
• The device is designed for a maximum operating time of 1 minute without interruption.
After this, the device must remain switched off until it has cooled down to room temperature.
• In order to avoid damage to the device, interrupt the mixing process immediately if the blade insert
/ cream attachment does not rotate or only rotates slowly.
Pull out the mains plug and check whether there is something in the vessel blocking movement or
whether the food is too tough. Also check whether the device is assembled correctly.

- 11 -
• Do not operate the device when it is empty, as this causes the motor to overheat and may result in it
being damaged.
• Only use the original accessories.
• Do not use any astringent or abrasive cleaning agents.
• The device is fitted with a non-slip plastic base. Because furniture can be coated with a wide variety
of varnishes and plastics and treated with various care products, the possibility cannot be excluded that
some of these substances have ingredients that may attack and soften the plastic base. If necessary,
place a non-slip mat under the device.
Items supplied
1 Motor block 3
1 Working cover 4
1 Vessel 7
1 Vessel cover 9
1 Blade insert 6 and 1 cream attachment 5 (assembled)
1 Set of operating instructions
How to use
• Remove all packing material.
• Check to ensure that all parts are present and undamaged.
• Clean the device prior to its first use! (See “Cleaning” on page 8.)
Operation
DANGER! Risk of electric shock!
Only insert the mains plug 2 into a wall socket when the multi chopper is fully assembled and filled.
DANGER! Risk of injury from cutting!
• The blade insert is sharp. Handle it with care.
• The device must never be operated without the vessel.
• The blade insert continues to rotate after the device is switched off. Wait for it to stop moving before
you remove the working cover.
WARNING! In order to avoid damage to the device, interrupt the mixing process immediately if the
blade insert 6 / cream attachment 5 does not rotate or only rotates slowly. If this happens, pull out the
mains plug 2 and check whether there is something in the vessel 7 blocking movement or whether the
food is too tough. Also check whether the device is assembled correctly.
Blade insert
Application area
The blade insert 6 is suitable for chopping solid foods, e.g. onions, carrots, cheese, nuts.
Preparing food
• Use
… no more than the maximum filling level of 350 ml of solid food, or
… a maximum of 200 ml of liquid.
• Rinse or wash the food.
• Cut the food into small cubes (approx. 2-3 cm edge length).
• Remove the outer shell from nuts. The inner shell can be used if so desired, e.g. with almonds.
• Free herbs from their stems.
• Separate the bones from meat and remove sinews and skin.

- 12 -
Processing table
Ingredients Recommended quantity Recommended processing time / speed
Onions (quartered) 100 g Pulse/TURBO
Garlic (whole cloves) 100 g Pulse/TURBO
Walnuts 50 g 2 x 8 sec. TURBO
Almonds 50 g 1 x 10 sec. (coarse) 1 x 30 sec. (fine) TURBO
Cheese (e.g. Gouda, cold) 100 g 4 x 15 sec. TURBO
Salami 130 g 3 x 5 sec. TURBO
Diced lean beef (approx.
2 cm edge length) 250 g 3 x 12 sec. TURBO
Carrots 100 g 3 x 5 sec. normal
Dried fruit 130 g 4 x 15 sec. TURBO
Ice cubes 100 g Pulse/TURBO
NOTE: The processing times and speeds specified here are guidelines.
• Depending on the quantities and consistency of the foods, the actual values may differ.
• Repeatedly check the results, depending on how small you want to chop the food.
• Work using short pulses (1 pulse: press for approx. 1 second).
Assembling the device
CAUTION: Depending on the hardness and consistency of the food, do not fill the vessel 7 up to the
maximum level, as this can cause the blade insert 6 to become blocked.
Pay attention here to the guideline values for various foods in the "Processing table" section.
1. Place the vessel 7 on the vessel cover 9.
2. Place the blade insert 6 on the spindle 8 in the vessel.
3. Place the prepared food into the vessel7.
4. Figure B: Place the working cover 4 onto the vessel 7 in such a way that the two small tabs on the
working cover fit into the grooves in the vessel and rotate the working cover clockwise until it clicks
into place.
5. Place the motor block 3 into the upper edge of the working cover 4.
NOTE: The motor block does not fit onto the working cover entirely straight on the right-hand side.
6. Insert the mains plug 2 into a wall socket corresponding to the technical data.
Shredding
• Figure C: In order to work at normal speed, press the motor block 3 down and then release it again.
• Figure D: In order to work at high speed, additionally press down on the TURBO 1 button.
• Work using short pulses (1 pulse: press for approx. 1 second). The number and length of the pulses
will depend on the quantity and consistency of the food. See the specifications given in the "Processing
table" section.
• Repeatedly check the result. If the food is not being chopped evenly:
- Pull out the mains plug 2, remove the motor block 3 and thoroughly shake the vessel 7.
- If food is sticking to the inside wall of the vessel, rotate the working cover 4 anti-clockwise and remove
it. Push the pieces downwards using a spatula.
- Put all the pieces back together before you reinsert the mains plug 2 into a wall socket and resume
work.
Cream attachment
Application area
The cream attachment 5 has been specially designed for whipping cream in the multi chopper. It is
placed on top of the blade insert 6.

- 13 -
NOTE: Wherever possible, work with well cooled whipping cream (refrigerator temperature),
so that the whipped cream reaches a firm consistency.
Whipping cream
1. Place the vessel 7 on the vessel cover 9.
2. Carefully place the cream attachment 5 onto the blade insert 6 from above.
3. Place the blade insert 6 together with the cream attachment 5 onto the spindle 8 in the vessel.
4. Pour the cooled whipping cream (maximum 200 ml) into the vessel 7.
5. Place the working cover 4 onto the vessel 7 in such a way that the two small tabs on the working
cover fit into the grooves in the vessel and rotate the working cover clockwise until it clicks into place.
6. Place the motor block 3 into the upper edge of the working cover 4.
NOTE: The motor block does not fit onto the working cover entirely straight on the right-hand side.
7. Press down on the motor block 3 and hold it pressed down for approx. 30 to 50 seconds.
Check the result while doing so.
Remove food
NOTE: You can choose to use the vessel cover 9 as the cover or the base (Figure G).
1. Disconnect the mains plug 2 from the wall socket.
2. Remove the motor block 3.
3. Rotate the working cover 4 anti-clockwise and remove it.
4. Carefully remove the blade insert 6 (if necessary together with the cream attachment 5) from the
vessel 7.
5. Remove the food, e.g. using a spatula.
6. Clean the device as soon as possible after use.
Cleaning
Clean the device prior to its first use!
DANGER! Risk of electric shock!
• Pull the mains plug 2 out of the wall socket before you clean the multi chopper.
• The motor block 3, the power cable and the mains plug 2 must not be immersed in water or any other
liquids.
DANGER! Risk of injury from cutting!
When washing manually, the water should be sufficiently clear that you can see the blade insert 6 easily.
WARNING! Risk of material damage!
Do not use any astringent or abrasive cleaning agents.
Dismantling the device
1. Pull out the mains plug 2.
2. Remove the motor block 3.
3. Rotate the working cover 4 anti-clockwise and remove it.
4. Carefully remove the blade insert 6 (if necessary together with the cream attachment 5) from the
vessel 7.
5. Figure A: Carefully press the blade insert 6 downwards out of the cream attachment
6. Remove the vessel cover 9 from the vessel 7.
How to clean properly
1. If necessary, wipe down the motor block 3 and the power cable 2 with a damp cloth. Ensure that the

motor block 3 is completely dry before the next time it is used.
2. Rinse all accessory parts manually, except for the motor block 3.
3. Allow all parts to dry completely before you put them away or use the device again.
Some cleaning tips
• Clean the device as soon as possible after use in order to prevent food remnants from drying on.
• After processing very salty or acidic types of food, you should immediately rinse the blade insert 6
thoroughly.
Storage
DANGER for children! Keep the device out of the reach of children.
DANGER! In order to avoid accidents, the mains plug 2 must never be connected to a wall socket while
in storage.
• Assemble the multi chopper for storage purposes. This allows the blade insert 6 to be stored safely.
• Select a location where neither high temperatures nor moisture can affect the device.
Trouble-shooting
If your device fails to function as required, please try this checklist first. Perhaps there is only a minor
problem, and you can solve it yourself.
DANGER! Risk of electric shock!
Do not attempt to repair the device yourself under any circumstances.
Fault Possible causes/ Action
No Function Has the device been connected to the power supply?
Check the connection.
Is the top edge of the working cover 4 clean?
Blade insert 6 does not • Switch off immediately, pull out mains plug 2 and check:
rotate or only rotates - Blockage in the vessel?
with great difficulty - Food too tough or too hard?
- Device not assembled correctly?
Vessel 7 looks cloudy
due to hard food • This is normal and does not affect the function.
Disposal
The symbol showing a wheelie bin crossed through indicates that the product requires separate refuse
collection in the European Union. This applies to the product and all accessories marked with this
symbol. Products identified with this symbol may not be discarded with normal household waste, but
must be taken to a collection point for recycling electric and electronic appliances.
Recycling helps to reduce the consumption of raw materials and protect the environment.
Packaging
When disposing of the packaging, make sure you comply with the environmental regulations
applicable in your country.
Technical specifications
Mains voltage: AC230V, 50Hz
Protection class: II
Power rating: 260 W
Max. continuous operation (KB):1 minute
- 14 -

- 15 -
FRANÇAIS
SINBO SHB 3082 HACHOIR MULTI-FONCTIONNEL
MODE D’EMPLOI
DESCRIPTION DE L’APPAREIL
1. Bouton TURBO pour grande vitesse
2. Fiche et Câble d’alimentation
3. Bloc moteur
4. Couvercle du hachoir
5. Fouets
6. Lames (montées en ressort)
7. Bol ( capacité : 500 ml)
8. Bâton rotatif
9. Couvercle du bol( peut être utilisé en tant que base)
Merci pour votre sécurité !
Merci d'avoir acheté un nouveau hachoir multifonctionnel.
Afin d’une utilisation sécuritaire et de bien connaitre votre appareil :
• Lisez attentivement toutes les instructions avant d’utiliser l’appareil.
• Examinez attentivement les consignes de sécurité.
• N’utilisez pas cet appareil hors de son but.
• Concervez ces instructions pour y référer ultérieurement.
• Rejoignez ces instructions au cas d’utilisation par un tiers.
Nous vous souhaitons une bonne utilisation de votre hachoir multifonctionnel!
But d’utilisation
Cet hachoir multifonctionnel est uniquement utilisé pour hacher les aliments et fouetter la crème. Cet
appareil est conçu pour un usage domestique. Utilisez l'appareil uniquement à l'intérieur. Cet appareil
ne peut pas être utilisé pour un but commercial.
Usage abusif prévu
AVERTISSEMENT! Risque des dommages matériels!
Ne pas utiliser l’appareil particulièrement pour hacher les aliments durs, par exemple des aliments
congelés, des os, des noix de coco, des céréales, des grains de café.
Consignes de Sécurité
Avertissements
Si nécessaire, respectez les précautions suivantes des notices d’utilisation
DANGER! Risque élevé: Non-respect de ce consigne, pourrait entrainer des blessures graves.
AVERTISSEMENT: Risque moyen : Non-respect de ce consigne, pourrait causer des blessures ou des
dommages matériels graves.
AVERTISSEMENT: Risque faible : Non-respect de ce consigne, pourrait causer des blessures mineures
ou des dommages matériels graves.
REMARQUE: Les conditions et les spécifications à observer lors de l’utilisation de l’appareil.
DANGER pour les enfants
• Les emballages ne peuvent pas être utilisés en tant que jouet. Surveillez les enfants pour qu’ils ne
jouent pas avec des sacs en plastiques. Risque d'étouffement.
• Cet appareil ne doit pas être utilisé par les enfants.
Le nettoyage et l'entretien ne doit pas être effectué par les enfants. Les enfants doivent être tenus à
l'écart de l'appareil et le cordon d'alimentation.
• Cet appareil n'est pas prévu pour être utilisé par des personnes (y compris les enfants) dont les
capacités physiques, sensorielles ou mentales sont réduites, ou des personnes dénuées d'expérience

- 16 -
ou de connaissance, sauf si elles ont pu bénéficier, par 'intermédiaire d'une personne responsable de
leur sécurité, d'une surveillance ou d'instructions préalables concernant l'utilisation de l'appareil.
DANGER! Risque du choc électrique à cause d’humidité !
•Ne jamais utiliser cet appareil à proximité des douches, des baignoires, des lavabos ou des lieux
similaires.
• Ne pas immerger le bloc moteur, le cordon d'alimentation et la fiche de l'appareil dans l'eau ou tout
autre liquide.
• Protéger le bloc moteur contre l’humidité et l’éclaboussures de l’eau.
• Si le liquide entre dans le bloc moteur, débranchez immédiatement la fiche de la prise. Vérifiez
l’appareil avant d'utiliser à nouveau.
• Ne jamais maintenir l’appareil avec les mains mouillées.
• Si l’appareil tombe accidentalement dans l’eau, débranchez immédiatement la fiche de la prise. Faites
l'appareil fonctionner à nouveau lorsque l'appareil est en sécurité.
• Afin d’empêcher le liquide entrer dans le bloc moteur, remplissez le bol avec 200 ml de liquide max.
DANGER! Risque du choc électrique !
• Branchez la fiche à la prise après l’installation complète.
• Branchez la fiche à la prise dont la tension électrique est bien correspond à celle indiquée sur la
plaque signalétique de l’appareil et qui est installée de manière appropriée et facilement accessible.
• Vérifiez que le cordon d’alimentation n’est pas endommagé par les coins pointus et la chaleur. Ne
pas enrouler le cordon d’alimentation autour de l’appareil.
• L’appareil n’est pas déconnecté avec le cordon d’alimentation même après l’éteint complet. Débranchez
la fiche de la prise murale pour déconnecter complètement.
• Protégez le cordon d’alimentation contre l’écrasement ou le resserrement.
• Lorsque vous débranchez le câble d’alimentation, tirez-le toujours au niveau de la fiche, ne tirez pas
sur le câble lui-même.
• Débranchez la fiche de la prise principale.
… si l’appareil a été endommagé
… lorsque vous n’utilisez pas l’appareil
… avant d'installer ou démonter l'appareil
… après le nettoyage de l’appareil et
… pendant le tempête
• Ne pas utiliser l’appareil si l’appareil ou le cordon d’alimentation est endommagé
• Ne pas faire des changements sur l'appareil afin d'éviter un risque et ne pas tenter de renouveler
le cordon d'alimentation vous-même. Toute réparation doit être faite par le centre de réparation et le
centre de service après- vente.
DANGER! Risque de blessure à cause des lames!
• La lame est très tranchante. Maintenez avec précaution. L'eau doit être suffisamment claire lors de
lavage à la main donc vous pouvez facilement voir les lames.(6)
• Ne jamais faire fonctionner l’appareil sans le bol.
• Ne jamais toucher les lames rotatives. Ne pas toucher les pièces rotatives avec la cuillère ou des
ustensiles de cuisine similaires. Gardez les cheveux et les vêtements éloignés des pièces rotatives.
• La lame continue à tourner une fois l'appareil éteint. Attendez pour l'arrêt complet de l'appareil avant
de retirer le couvercle du bol.
AVERTISSEMENT! Risque des dommages matériels!
• Le niveau de remplissage maximum pour les aliments durs est 350 ml
• Le niveau de remplissage maximum pour les liquides ( par exemple la crème ) 200 ml.
• Le temps d’utilisation maximum en continu est 1 minute.
Ensuite, l’appareil doit être éteigné jusqu’au refroidissement à la température ambiante.
• Afin d’empêcher les endommagements, si la lame/ le fouet ne tourne pas ou tourne lentement, arrêtez

- 17 -
immédiatement le mixage.
Débranchez la fiche de la prise principale et vérifiez le bol ou la dureté d’aliment. Ensuite, vérifiez si
l'appareil est bien installé.
• Ne pas faire fonctionner l’appareil lorsqu’il est vide afin d’éviter le surchauffage exessif du moteur
et qu’il pourrait provoquer des dommages.
• Utilisez uniquement les accessoires fournies avec l’appareil.
• Ne pas utiliser les nettoyants abrasifs ou durs.
• L’appareil s’adapte à la base antidérapante en plastique. Les meubles sont nettoyés par une large
gamme de produits de soin, de vernis, et de plastique, certaines de ces produits peuvent avoir un
impact sur la base plastique et un contenu à l’amortir. Si nécessaire, mettez un mat antidérapant sous
l’appareil.
Pièces fournies
1 Bloc moteur 3
1 Couvercle du hachoir 4
1 Bol 7
1 Couvercle du bol 9
1 Lame 6 ve 1 fouet 5 (monté)
1 Set de notice d’utilisation
Comment utiliser
• Retirez tous les emballages.
• Vérifiez toutes les pièces.
• Nettoyez l’appareil avant la première utilisation ( Voir la chapitre “Nettoyage “)
Utilisation
DANGER! Risque du choc électrique !
Installez correctement le hachoir multi-fonctionnel et puis remplissez –le enfin branchez la fiche(2) à
la prise principale.
DANGER! Risque de blessure à cause des lames!
• La lame est tranchante, maintenez le avec précaution.
• Ne jamais faire fonctionner l’appareil lorsqu’il est vide.
• La lame continue à tourner une fois l'appareil éteint. Attendez pour l'arrêt complet de l'appareil avant
de retirer le couvercle du bol
AVERTISSEMENT! Afin d’empêcher les dommages, si la lame(6)/ le fouet (5) ne tourne pas ou tourne
lentement, arrêtez immédiatement le mixage. Débranchez la fiche (2) de la prise principale et vérifiez
le bol(7) ou la dureté d’aliment. Ensuite, vérifiez si l'appareil est bien installé.
Lames
Champ d’Application
La lame (6) est appropriée pour hacher les aliments solides tels que l’oignon, les carottes, le fromage
et les noisettes.
Guide de Préparation
• Utilisation
… Max 350 ml d’aliment solide ou les aliments ne doivent pas passer le niveau maximum
….Max. 200 ml de liquide
• Lavez les aliments.
• Découpez l’aliment en petits cubes( envrion 2-3 cm de longeur)
• Retirez les coques extérieures des noisettes. La coque intérieure peut être utilisée selon le souhait
par exemple l’amande.

- 18 -
• Prenez les racines des plantes.
• Prenez les os de la viande et retirez les nerfs et la peau.
Guide de Préparation
Ingrédients Quantité recommandée Temps / Vitesse recommandé
Oignon (divisé en quatre) 100 g Pulsée/TURBO
Ail(Gousses d’ail entières) 100 g Pulsée/TURBO
Noyer 50 g 2 x 8 sec. TURBO
Amandes 50 g 1 x 10 sec. (gros) 1 x 30 sec. (normale) TURBO
Fromage (par exemple
Gouda, froide) 100 g 4 x 15 sec. TURBO
Salami 130 g 3 x 5 sec. TURBO
Tranches de boeuf (environ
2 cm de long ) 250 g 3 x 12 sec. TURBO
Carottes 100 g 3 x 5 sec. normale
Fruits secs 130 g 4 x 15 sec. TURBO
Glaçons 100 g Pulsée/TURBO
REMARQUE: Le temps et la vitesse spécifié sur le tableau est le renseignement général.
•Les valeurs réelles peuvent être différentes selon la quanitié et la qualité des aliments.
• Re-vérifiez les résultats selon les aliments .
• Faites fonctionner l’appareil avec des impulsions courtes. (1 pulsée: 1 seconde environ).
Installation de l’appareil
AVERTISSEMENT: En fonction de l’approprieté et la sévérité des aliments,ne pas remplir le bol (7) au
niveau maximum pour que la lame(6) n’empêche pas le bol (7)
Prenez en considération des valeurs des enseignements pour les aliments sur le tableau.
1. Placez le bol sur le couvercle du bol(9)
2. Placez la lame(6) sur le bêton rotatif (6)
3. Mettez les aliments dans le bol (7).
4. Figure B : Placez le couvercle du hachoir (4) sur le bol (7) de manière que les deux dents du couvercle
correspondent dans les rainures du bol et tournez le couvercle du hachoir vers le sens des aiguilles
d’une montre jusqu’il est bien placé.
5. Placez le bloc moteur(3) sur la partie supérieure du couvercle du hachoir (4)
REMARQUE: Le bloc moteur ne correspond pas directement sur le couvercle du hachoir à droite.
6. Branchez la fiche (2) à la prise appropriée.
HACHER
• Figure C : Pour une vitesse normale, appuyez le bloc moteur(3) vers le bas et puis lâchez le.
• Figure D : Pour une vitesse rapide, appuyez aussi sur le bouton de TURBO(1) vers le bas.
• Fonctionnement avec l’impulsion courte (1 pulsée: 1 seconde environ). Le nombre et la longeur des
impulsions dépend la quantité et l'approprieté des aliments. Voir le tableau.
• Vérifiez la resolution. Si les aliments n'ont pas été découpés comme il faut ;
- Débranchez la fiche (2), retirez le bloc moteur(3) et rincez soigneusement le bol (7).
- Tournez le couvercle du hachoir(4) vers le sens inverse des aiguilles d’une montre et retirez -le si
les aliments sont coincés dans le bol et poussez les aliments vers le bas à l'aide d'une spatule.
- Avant de branchez la fiche (2) à la prise, installez les pièces.
Pièce de fouetter
Champ d’application
Le fouet(5) du hachoir multifonctionnel est spécialement conçu pour fouetter la crème.L’entrée de

- 19 -
lame(6) est au sommet.
REMARQUE: Si possible, utilisez la crème fouettée bien refrodie ( à la température de refrigerateur),
ainsi la crème devient en forme solide.
Crème fouettée
1. Placez le bol (7)sur le couvercle du bol (9).
2. Placez le fouet (5) soigneusement à l'entrée de lame (6)
3. Mettez la lame (6) avec le fouet(5) sur le bâton rotatif (8) dans le bol.
4. Mettez la crème refroidie (max 200 ml) dans le bol (7).
5. Placez le couvercle du hachoir(4) sur le bol(7) de manière que les deux dents du couvercle correspondent
dans les rainures du bol et tournez le couvercle du hachoir vers le sens des aiguilles d’une montre
jusqu’il est bien placé.
6. Placez le bloc moteur(3) sur la partie supérieure du couvercle du hachoir (4)
REMARQUE: Le bloc moteur ne correspond pas directement sur le couvercle du hachoir à droite.
7. Appuyez le bloc moteur(3) vers le bas pendant 30 à 50 secondes et vérifiez le résultat.
Retirer les aliments
REMARQUE: Vous pouvez utiliser le couvercle du hachoir(9) en tant que le couvercle ou la base (Figure
G).
1. Débranchez la fiche (2) de la prise de courant.
2. Retirez le bloc moteur(3)
3. Tournez le couvercle du hachoir(4) vers le sens opposé des aiguilles d’une montre et retirez –le.
4. Retirez la lame (6) soigneusement du bol (7) ( si nécessaire, avec le fouet (5) ).
5. Retirez les aliments, par exemple à l’aide d’une spatule.
6. Après l’utilisation, nettoyez l’appareil dès qu’il est possible.
Nettoyage
Nettoyez l’appareil avant la première utilisation !
DANGER! Risque du choc électrique !
• Débranchez la fiche (2) de la prise de courant avant le nettoyage.
• Ne pas immerger le bloc moteur (3), le cordon d’alimentation ou la fiche (2 ) dans l’eau ou toute autre
liquide.
DANGER! Risque de blessure à cause des lames!
L'eau doit être suffisamment claire lors de lavage à la main donc vous pouvez facilement voir les
lames.(6)
AVERTISSEMENT! Risque des dommages matériels!
Ne pas utiliser les nettoyants abrasifs ou durs
Démonter l’appareil
1. Débranchez la fiche (2)de la prise de courant.
2. Retirez le bloc moteur (3).
3. Tournez le couvercle du hachoir(4) vers le sens opposé des aiguilles d’une montre et retirez –le.
4. Retirez la lame (6) soigneusement du bol (7) ( si nécessaire, avec le fouet (5) ).
5. Figure A: Poussez soigneusement la lame(6) vers l’inférieur du fouet (5)
6. Retirez la couvercle du hachoir (9) du bol (7)
Pour un nettoyage efficace
1.. Si nécessaire, nettoyez le bloc moteur (3) et le cordon d’alimentation(2) avec un chiffon humide. Laissez le
Other manuals for SHB 3082
1
Table of contents
Languages:
Other Sinbo Blender manuals

Sinbo
Sinbo SHB 3029 User manual

Sinbo
Sinbo SHB 3036 User manual

Sinbo
Sinbo SHB 3150 User manual

Sinbo
Sinbo SHB 3172 User manual

Sinbo
Sinbo SHB 3036 User manual

Sinbo
Sinbo SHB 3155 User manual

Sinbo
Sinbo SHB 3154 User manual

Sinbo
Sinbo SHB 3048 User manual

Sinbo
Sinbo SHB 3082 User manual

Sinbo
Sinbo SHB-3174 User manual

Sinbo
Sinbo SHB 3036 User manual

Sinbo
Sinbo SHB 3153 User manual

Sinbo
Sinbo SHB 3075 User manual

Sinbo
Sinbo SHB 3112 User manual

Sinbo
Sinbo SHB 3028 User manual

Sinbo
Sinbo SHB 3149 User manual

Sinbo
Sinbo SHB 3042 User manual

Sinbo
Sinbo SHB 3100S User manual

Sinbo
Sinbo SHB 3086 User manual

Sinbo
Sinbo SHB 3113 User manual