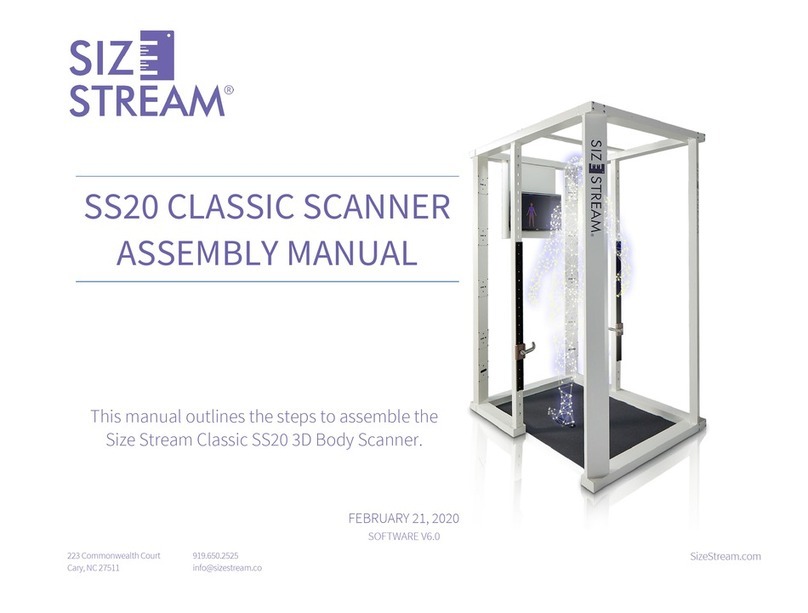
Size Stream SS20 User manual

2
TABLE OF CONTENTS
Welcome .............................................................................................................................................3
Maintenance........................................................................................................................................4
Starting the Scanner Computer..............................................................................................................4
Logging into Windows............................................................................................................................5
Licensing the Scanner.............................................................................................................................5
Aligning the Scanner ..............................................................................................................................6
Updating the Size Stream Body Scanner Software ................................................................................7
Scanning .............................................................................................................................................8
Scan Wear ..............................................................................................................................................8
Scan Posture...........................................................................................................................................8
Step by Step Instructions .......................................................................................................................9
Printing.................................................................................................................................................10
Configuration ..................................................................................................................................... 11
Changing a Setting................................................................................................................................11
Scan Process.........................................................................................................................................12
Measurements .....................................................................................................................................12
User Interface.......................................................................................................................................13
Navigating the Scanner Display......................................................................................................... 14
New Scan..............................................................................................................................................15
Status....................................................................................................................................................15
3D Image Display..................................................................................................................................15
Measurements .....................................................................................................................................16
Utility....................................................................................................................................................17
Troubleshooting the Size Stream Body Scanner............................................................................... 19

3
WELCOME
The Size Stream 3D Body Scanner is a full-body, non-contact surface scanner that uses depth sensor
technology to output accurate body measurements and a 3D rendering of the scan subject.
The scanner collects millions of data points from the reflection of infrared light shone on the surface of the
person being scanned. Twenty infrared sensors, like those used in home-gaming systems, surround the
subject, covering 95% of the body.
From the coordinates of the reflected light, the scanner software uses complex algorithms to define a mesh
that shows the surface of the body by identifying the torso, head, arms and legs. The active scan time is
about 4-10 seconds (depending on system setup) and additional algorithms are used to determine 240
separate measurements and landmarks that are displayed about a minute later.
Every Scanner is assembled at our factory and certified to meet functional and accuracy standards prior to
being disassembled and packaged for shipping. Quality Control processes ensure that the product leaves the
factory in excellent working condition.
Additional resources and up-to-date documentation are online at Size Stream’s Knowledge Base, available at
http://sizestream.com/knowledge-base. Should the customer experience any issues or problems with
assembling or using the product, they should send an email to support@sizestream.com. This will
automatically create a tracking ticket which is routed to the support staff who will work diligently to provide
a fast response and customer satisfaction.

4
MAINTENANCE
Starting the Scanner Computer
Note that the power button is located on the computer underneath the main scanner display screen. The
power button is recessed to avoid an accidental power off. If the scanner is running, pressing the power
button will cause a normal Windows Shutdown. Note: never use the Windows Restart option, but instead
always use the power button or the Windows Shut Down option, and restart with the power button.

5
Logging into Windows
The Admin user {Password is “Configure!”} is installed with Administrative privileges, allowing access to all
standard windows functions. This account is used to upgrade and troubleshoot the software. At login, the
Windows desktop will appear with the Size Stream application icon on the desktop. Double touch the icon or
double click with a mouse to launch the application.
Licensing the Scanner
The License Information Window will appear when launching the Size Stream Software as an alert that you
should contact Size Stream to renew your license.
The Licensing box shows the number of days remaining for the active Scanner software license and
instructions on how to have the Scanner license activated or renewed.
The administrator is required to agree to the Size Stream Scanner Terms and Conditions before they can
apply a license to their software. Please make sure this checkbox is marked before applying a Serial Number
or Site Key. You can click on the Terms and Conditions link to see the full agreement.
Upon entering a Serial Number or Site Key, press the appropriate Apply button. A message will appear in the
box at the bottom of the window to tell you if the license was successfully applied. You can then touch/click
on the Close button and operate the Size Stream Scanner. If the message window indicates any problems,
please contact support@sizestream.com.

6
Aligning the Scanner
The data coming from each of the sensors in the scanner must be aligned to maintain the accuracy of the 3D
body image. The system administrator does this with the Alignment Board provided with the scanner. If the
board is lost or damaged, contact support@sizestream.com.
Size Stream recommends that the scanner be aligned every day or whenever it is moved or modified. When
the Scanner Software initializes it will prompt the user to do a system alignment. The user can choose to skip
this step if the system is already aligned. If not, please follow the instructions below before clicking Yes to the
alignment prompt.
1. If not previously done, carefully unpack the scanner Alignment Board. Make sure to find and keep
the “stabilizer” foam tube. It is easy to mistake the stabilizer tube as packing material.
2. Hang the Alignment Board on the Alignment Bar, in the center of the scanner. Numbers 1-10 should
be facing the monitor and 11-20 should be facing the back of the scanner.
3. Attach the stabilizer tube to one side of the alignment board. Dampen any swaying motion and lower
the foam slider to the floor once the Alignment Board is centered and vertical with the scanner
frame.
Important: The alignment board must be as still as possible. The alignment directly affects the accuracy
of the scan.
4. If the Align pop-up window was skipped, alignment can be started from the Utility Menu. Click the
gear icon on the left side of the screen to open the Utility Menu and touch or click the Align System
button. (CTRL+m)
Note: The system will play music while the system alignment is active.
5. When system alignment is completed a message in the status box will appear and an audio
notification saying, “Alignment Complete!”.

7
Note: If the system alignment failed, go to the Troubleshooting section of this manual for possible
causes and solutions.
6. Remove the Alignment Board and store it in a safe place for future use. You are now ready to begin
scanning!
Updating the Size Stream Body Scanner Software
The scanner comes from our factory with the software pre-installed. Size Stream periodically releases
updates for the scanner software to improve measurement quality and user experience. Please check the
Size Stream Knowledge Base for release notes with more details about what changes are included in the
latest software updates.
When connected to the Internet, the software will automatically check and download updates for the
system. The software will alert the user when an update is ready to apply and allow the user to choose when
to apply the update. Please note the software will prompt the user to apply the update at start up, system
alignment time, or manually by using the “Update” button on the Utility menu.
If an internet connection is not available, a manual update installer is available upon request. Please contact
support@sizestream.com for more information.

8
SCANNING
Scan Wear
Since the SS20 is a surface scanner, it can’t see through clothes or any
other object. The person to be scanned must wear close-fitting garments,
such as underwear, biking shorts, leotards or tight gym wear for best
results. Clothing color does not matter, but loose-fitting clothing such as
boxer shorts, baggy jeans, sweatshirts, etc. should not be worn.
Note: Size Stream does not recommend scanning in the nude due to
privacy considerations.
Long hair should be worn "up" in a bun and away from the neck. Watches
should be removed for the scan. Long beards can also adversely affect
measurement accuracy.
If the scanner is assembled using the cloth walls and dressing area drape,
the scan subject should remove their street-clothing in the private
dressing room and enter the scanning area. The subject should leave their
clothes and personal items in the dressing room area before beginning the scan.
Scan Posture
1. The footprints on the carpet show where to stand, with feet approximately shoulder-width apart and
toes pointed slightly out to assure complete foot coverage.
2. The body should be aligned with the handhold bars.
3. The adjustable handholds should be grasped with each hand. The handholds will slide so the subject
is standing upright in a normal relaxed posture while holding the handholds.
4. The subject should look straight ahead.

9
Step by Step Instructions
1. The user can enter their name which will be applied to the saved data files.
2. Click the large red button, “New Scan.”
3. The subject may follow the instructions presented on the screen, observing correct Scan Posture.
4. When active scanning is complete the voice instructions will advise that the process has completed.
The subject may get dressed while measurements are determined.
5. When the scan is finished processing, a 3D image will appear on the monitor while the software is
extracting measurements.
Note: The measurement list will open automatically when the extraction is complete.
The image shown is interactive. You can rotate the image on the touch screen. You can also touch on
individual measurements in the list, which will highlight the corresponding measurement line on the
avatar.
6. If configured with the Cloud Upload feature, a QR claim code will appear. To learn more about the
QR claim code please go to the Cloud Upload Feature section.
If the scanner is configured with an external monitor and keyboard so an Operator outside the
scanner can control the scan event, the subject should let the Operator know when they are ready to
be scanned. In less than 10 seconds the scan is complete, and the subject can relax while the
operator determines if the scan was successful or whether they want to repeat the scan. After the
scan image and measurements become available and are reviewed the Operator should tell the
subject to get dressed.
If the subject is initiating the scan themselves from the touchscreen they can follow the steps
described below.

10
Printing
A printout of the displayed scan data can be generated in either of the two different formats shown below,
along with the choice of either the Standard Measurement list, the Custom Measurement list, or both. The
scan file name appears in the space at the bottom of the printout and can be edited by the user prior to
printing. The output will appear in Print Preview for approval.
Normal printout shown with Custom and Standard measurement lists: The Standard Measurement list can be
changed to suit your application. See: “Changing the Standard Measurement List Order”. The blue
measurement labels shown on the printout above will correspond to the Standard measurements contained
in your edited list.
Note: The measurement labels only appear for the Standard Measurements and not for any Custom
Measurement files, e.g., Men’s Custom Suit, etc.
Alternate printout (with Custom Measurement list only):

11
CONFIGURATION
Changing a Setting
Under the Utilities pull-out on the left side of the screen is a Setting button. Touching this button will bring
up the Settings window, shown below. By touching the name for each setting, the explanation of the setting
is shown at the bottom. If you need additional information on a setting, see the Knowledge Base page under
the Resources section of the Sizes Stream web site or contact support@sizestream.com. Remember to
touch the “Save Changes” button after making your changes.

12
Scan Process
MULTI-SCAN
It is difficult for people to maintain perfect stillness during the short period when they are being scanned. To
minimize the variations in measurements due to movement and posture changes, the Size Stream Scanner is
configured to take multiple scans (three is the default) in one continuous sequence. The number of scans
taken for a multi-scan can be changed using the Settings Tool.
Multi-scan produces a raw data image, a refined mesh and an extracted measurement list for each scan in
the sequence. Each will be displayed onscreen as they are processed. In addition, a Composite list of
measurements is also generated. If the multi-scan option is set to 3 or 5 scans, the composite value given for
each measurement will be the median (middle value) of all the values for that measurement. If multi-scan is
set to either 2 or 4, the composite value given will be the average of the two middle values. In multi-scan, the
Custom Measurements will be calculated using the composite measurement values as described above and
the landmarks from the final scan in the sequence.
Note: Pressing the ESC key will abort the processing of the multi-scan sequence. This saves time if the scan is
determined to have errors so a rescan of the subject can occur immediately.
Measurements
MEASUREMENT LIST
The Size Stream Scanner Software processes over 240 measurements. A Measurement Order file can be
chosen to limit this list to only a few key measurements and determine the order in which they are shown. To
select a Measure Order file, point the Measurement Order File Path setting to the file of your choice. A
demo Measure Order file is provided, as well as an alphabetically sorted list of all available measurements.
This setting is available in the Settings tool. Contact support@sizestream.com to request assistance with
selecting which measurement will be displayed.
CUSTOM MEASUREMENTS
Custom Measurement functionality is available if your application requires a measurement that is not in the
standard list. Custom Measurements can be created with simple adjustments on the existing measurements.
A sample set of Custom Measurements are included to demo an example use-case.
To obtain a Custom Measurement script specific for your application please send a request to
support@sizestream.com. A diagram and description of each measurement requested should be included
with your request.

13
User Interface
ADDITIONAL LANGUAGES
The Size Stream Scanner software supports several languages including: English, Spanish, French, Japanese,
Simplified Chinese and Traditional Chinese. Languages can be selected in the Settings Menu on the Utility
Pane.
Contact [email protected] for information about customizing the language of the audio narration.
LOGO CUSTOMIZATION
The Size Stream logo that appears at the top of both the scanner screen and on the printout sheets can be
changed to display the customer’s logo.
To replace the Size Stream logo:
1. Close the scanner software.
2. Save your logo image file as Logo.png.
3. Copy the .PNG file into: C:\ProgramData\Size Stream\Size Stream Scanner
4. Launch the scanner software and your logo will appear at the top of the screen and at the top of the
printout page.
THEMES
The colors for all UI elements are customizable. To select a theme, point the “Theme File” setting towards a
valid .xaml theme file. Contact support@sizestream.com to learn more about custom themes.
In addition to the default white theme, a dark theme is also included. This theme follows the color scheme of
the v5.X series of the scanner software and is therefore called “Legacy”. The .xaml file for this theme is
available at C:\ProgramData\Size Stream\Size Stream Scanner\Themes\Legacy.xaml

14
NAVIGATING THE SCANNER DISPLAY
The Size Stream Scanner Display is divided into multiple sections:
New Scan: This button initiates a new scan. Depending on the user’s configuration a form field for
entering a name for the scan is also provided. This pane disappears when the scan is started
and reappears after the scan results are no longer being viewed.
3D Image: This pane displays the scan image as the data is processed. It disappears when the scan
results are no longer being viewed.
Status: Text messages will appear here showing what the scanner is doing, and if the operation was
completed. Any error messages will also appear here.
Measurements: Measurements will appear here after they are calculated. Click or touch the “Gear” control
icon to hide or view the results.
Utility: This pane is intended only for Administrative Users and can be accessed by touching or
clicking on the Gear icon. You will then be provided with options to Align the Scanner
Sensors, load existing scan data files, save files, scan without guidance, and print results.
Please note that this screen does not appear for Unattended Mode users.

15
New Scan
The red New Scan button will start the scan sequence. Touch or click the circled arrow (show below) to hide
or open the New Scan pane. Touching or clicking this arrow will also clear the scan image and measurement
output list from the screen so the system will be ready for the next scan.
Status
The box at the bottom of the Main Screen shows the status of scanner operations as they occur with the top
line being the most recent entry. The status lines can be hidden by clicking the circled arrow at the upper left
of the box. The box can be hidden or resized by dragging the top edge of the box.
3D Image Display
When scanning is complete a 3D view of the resulting data will
be visible in the middle of the screen. Selecting measurements
on the Measurement Pane will affect which measurement lines
are visible in this view.
In addition to the processed body mesh, the raw data captured
by the sensors is available for review. The Raw Data button in
the corner of the 3D view allows the user to toggle the scan
image between the finished Body Mesh and its 3D Raw Data.

16
Measurements
The measurements calculated by the scanner are displayed automatically in the Measurements Pane when
the scanning process is complete. The Measurements Pane can be hidden or displayed by touching or clicking
the Ruler Icon tab. The measurements will be shown in inches or metric units depending on the choice
selected in the “Measurement Units” setting in the Settings Tool.
If Custom Measurements are in use, the top of the Measurements Panel will show two buttons that select
which set of measurements are visible. The “Measurements” button shows or hides the Standard
Measurement list. The other button’s title will change depending on which Custom Measurement list is
selected in the Settings Tool. This button will show or hide the custom measurements.

17
Utility
The Utility Pane is accessed by clicking on the Gear icon on the left side of
the screen. This symbol does not appear if the system is operated in
Unattended Mode as it is intended for the system administrator/operator. If
a keyboard is available, The Utility Pane can be accessed using the hotkey
combination Ctrl+m.
SHOW LICENSE INFORMATION
The Licensing window shows the number of days remaining for the active
Scanner software license as well as instructions on how to have the Scanner
license activated or renewed. This box will automatically pop up if the
license has not been activated or when the license is down to 14 days or less
remaining as a reminder to renew.
SETTINGS TOOL
Opens the Settings Tool Dialog which allows you to access and change the
current system configuration and settings. Settings can be changed in
memory (as soon as you change the value) and they can be saved so that
they will be available the next time the software is restarted.
Note: Clicking on the settings name will display the documentation about
that setting at the bottom of the window.
ALIGN SYSTEM
Initiates the process of aligning the 20 sensor views, with respect to each
other, to render an accurate 3D image of the person being scanned. See the
System Alignment section for more information.
MANUAL SCAN
Touch or click this option to manually start the scanning sequence. In this
mode, the audio instructions remain silent and scanning starts immediately.
This option is useful for scanning objects or for test scanning.
Note: This data is not saved automatically. Click Save Raw Data to manually save this data.
SAVE RAW DATA
Touch or click this option to save the raw sensor data in a different location than the default, for example, on
a USB memory stick. The raw data can be saved in binary, XYZ, OBJ or WRL format.
SAVE BODY MESH DATA
Touch or click this option to save the body mesh data in a different location than the default, for example, on
a USB memory stick. Data is saved in OBJ format only.

18
LOAD RAW DATA
Loads a raw data file (binary, XYZ, OBJ or WRL format) from a saved location for onscreen examination. The
data is processed to Body Mesh and Measurements. Loading multi-scan data will yield a composite file.
LOAD BODY MESH DATA
Load a body mesh file (.OBJ format) from a saved location for onscreen examination. The loaded data will be
processed to Body Mesh and Measurements according to the scanner’s configuration.
PRINT
Opens the Print Preview window for the current scan image. See the Printing section for more details about
print options.
CHECK FOR UPDATES
When connected to the internet the Scanner software will check if an update is available and will begin the
download. Once the download is complete the button will change to “Apply Update” to allow the user to
choose when the update is applied. The loading bar above the button shows the download progress during
an update download.

19
TROUBLESHOOTING THE SIZE STREAM BODY SCANNER
The following paragraphs provide tips for identifying and resolving issues that may occur.
Problem: A scan produces no data.
Solution: Perform a system alignment and do a new scan to see if this resolves the problem.
Problem: The software fails to create a claim code at the end of processing when configured to use
cloud upload.
Solution:
1. Verify the scanner is connected to the Internet.
2. Check the system logs found in C:\ProgramData\Size Stream\Size Stream Scanner\Logs\
folder for additional information.
3. Check that the scan succeeded in processing to measurements.
4. Check that the Scanner has access to a robust internet connection.
5. Check that the save folder exists. (Transfer files are temporarily written to that location.)
Problem: During a computer Restart, the software hangs up and/or does not recognize all 20 sensors.
Solution: The Windows Restart function causes a problem with the sensor drivers and should never be
used! If the computer requires a restart, for any reason, it should be manually SHUTDOWN
using the Windows Shutdown command or by depressing the computer power button until
the computer completely shuts down. Wait 5 seconds and then start the computer again.
This will clear the problem and the software will function normally.

20
Problem: System Alignment was successful, but now I’m getting bad or no body data.
Solution: It is possible that one or more of the sensors have locked up in an unknown state.
1. SHUTDOWN the computer.
2. Disconnect AC power to the computer.
3. Unplug all 20 sensor USB cables from the back of the computer.
4. Reconnect all 20 sensor USB cables.
5. Connect AC power and start the computer.
6. Launch the Scanner software.
Problem: System Alignment failed
Solution: Ensure the Alignment Board is the only thing inside the scanning area, and that nothing is
obstructing the sensors.
Make sure the Alignment Board is vertical and not moving. Lower the Alignment Board
stabilizer foam tube to the floor to steady the object.
If the alignment continues to fail contact support@sizestream.com
Problem: An error message says the computer is looking for 20 sensors but only sees 19.
Solution: There are several things that can cause this error:
1. A loose USB connection: Check all the USB connections at the computer and at the sensors
and make sure they are secured.
2. A sensor that has gone into an unknown state and needs to be reset: You can reset the
sensors to a known state by shutting down the computer; disconnecting the AC power to
the computer; disconnecting all sensors from the computer and re-connecting all sensors
back into the computer; connect AC power and start the computer.
3. A failed USB port: This can be checked by disconnecting the sensors from one USB card at-a-
time and monitoring the number of sensors in the Device Manager as you do this. You
should be able to determine if a USB card has a bad port if the number of sensors does not
change when you unplug the cable. Move that cable to one of the unused USB ports and see
if the sensor appears on the list again.
4. A failed USB cable: This is not common but is possible. If you have tried the above steps and
the sensor still does not appear in the Device Manager, switch the USB cable with one from
another sensor. If the sensor now appears in the Device Manager, it is probably the cable.
Replace it with a new cable. You can purchase a USB cable locally if you do not have any
spare cables or request one from Size Stream. Contact support@sizestream.com
5. A failed sensor: If you have tried all the above steps and the sensor does not appear in the
Device Manager, it has probably failed and needs to be replaced. Contact
support@sizestream.com
Other manuals for SS20
1
Table of contents
Other Size Stream Scanner manuals

