SKAARHOJ Atem TCP Link User manual

SKAARHOJ DEVICE CORES
SKAARHOJ Atem TCP Link
The ATEM TCP Link establishes a connection to an ATEM switcher for programs and devices without
native ATEM protocol support.
1

SKAARHOJ DEVICE CORES
Introduction 3
Update December 2020 3
Update May 2020 3
Update January 2020 3
Known Limitations 3
Port Information 3
Set Up 4
Firmware Updater 4
Shipping Configuration 4
Changing IP Information 5
Confirm Connection 5
Establishing a Telnet Connection 6
Controlling You ATEM 7
Extract of ATEM-TCP Link Commands 7
Command Structure Examples 10
Updating Firmware 12
Finding the Latest Firmware 12
Load Firmware from File 12
Change Log 13
Troubleshooting 14
Error on Check: Your controller is not yet registered 14
Controller does not show up under Port in Firmware Application 14
Network Recommendations 16
Facts 16
Power over Ethernet (PoE) Specifications 16
Troubleshooting 16
WEEE Information 17
2

SKAARHOJ DEVICE CORES
Introduction
A larger number of functions on the ATEM series of switchers can be controlled from a SKAARHOJ ATEM
TCP Link and we have integrated with the ATEM switchers for a long time.
When using the ATEM TCP Link one can connect to the ATEM Switcher directly without the need of
running ATEM Software Control Panel on your computer. But you can, and any change made either way
will be reflected on each device.
You can connect to a single ATEM Switcher from a single SKAARHOJ ATEM TCP Link but limitations apply.
The different ATEM Switchers varies in how many clients can be connected at the same time. For details
see https://www.youtube.com/watch?v=ApYouYfX5G4
Theoretically, up to 7 clients can be connected to the ATEM TCP Link simultaneously.
Please notice the ATEM Switchers are very picky as to latency for connected clients. Ensure a stable and
fast network. If using VPN or other long distance network solutions latency may be too high and
connection will not be established.
Update December 2020
With the release of ATEM2TCP Firmware v1.5.5 we now support recording and streaming for the Atem
Mini and Atem Mini Pro.
Update May 2020
After the release of the ATEM Mini and ATEM Mini Pro, we can confirm that our current ATEM2TCP Link
firmware is able to control the base functions of the ATEM Mini series but we have not yet implemented
full support for the ATEM Mini series with our ATEM TCP Link.
Update January 2020
With release of ATEM2TCP Firmware v1.5 we now have support for ATEM 8.1 and the ATEM Constellation.
Known Limitations
- Audio control has not yet been fully implemented on the Atem TCP Link.
- Atem Mini and Atem Mini Pro support has not yet been fully implemented.
- For the ATEM-TCP Link on AVR control of ME3 and ME4 is not possible due to memory restrictions. On
the Due it works.
- Please note that not all commands are meant to change a parameter on an Atem switcher, some are for
the return of the current status.
Port Information
Protocol
Listening Port
Destination Port
TCP
8899
9910
3

SKAARHOJ DEVICE CORES
Set Up
Firmware Updater
You won’t get far without the SKAARHOJ Firmware Updater application. Download it www.skaarhoj.com/
support/firmware-updater/. Install, run it and connect your controller. Please notice the USB cable is only
to be used for configuration and firmware upgrade. The USB plug is not designed to be connected during
normal operation. More details are found in the “Firmware Updater Application” section of Installation and
Operations Manual at “https://www.skaarhoj.com/support/manuals/".
Shipping Configuration
The ATEM-TCP Link ships with the following IP settings
•ATEM-TCP Link IP: 192.168.10.99
•Subnet: 255.255.255.0
•Gateway: 192.168.10.1
•ATEM IP: 192.168.10.240
These settings can be confirmed and changed by the use of our!Firmware Updater Application!via the
commands listed in the section “Changing IP Information”. Do!not!use any features from the Firmware
Updater!besides!the Serial Monitor. Pressing “Update Firmware" will render the firmware on the ATEM-
TCP Link unusable and require reloading the firmware. Please see the “Troubleshooting” section of this
manual for more information if you pressed “Update Firmware”.
Commands to/from the ATEM-TCP Link are not done from the Serial Monitor but by establishing a telnet
connection to the device. Please see the section "Establishing Telnet Connection”.
Connect the SKAARHOJ controller to your
computer with the included USB cable. The device
shows up in the Port list. Only connect one
SKAARHOJ controller at a time.
4

SKAARHOJ DEVICE CORES
Changing IP Information
The IP information for the ATEM-TCP Link can be changed by entering the following commands in the
Serial Monitor. You will need to restart the device for changes to take effect.
Device IP Address
•ip=A.B.C.D
ATEM IP Address
•atem=A.B.C.D
Gateway and Subnet
•subnet=A.B.C.D
•gateway=A.B.C.D
Confirm Connection
When a SKAARHOJ controller have successfully connected to the ATEM the serial monitor will report:
ATEM has initialized
Connection to ATEM Switcher established!
If the SKAARHOJ controller is unable to locate the ATEM the network the serial monitor will report:
.Connection to ATEM Switcher has timed out - reconnecting!
Continuously connecting to ATEM switcher on IP 192.168.10.240
5

SKAARHOJ DEVICE CORES
Establishing a Telnet Connection
A Telnet connection can be established from Terminal on a Mac or Command Prompt on a Windows
computer.
In order to establish a Telnet connection use the port 8899 and the IP address of the ATEM-TCP Link
entered into Terminal or Command
•telnet 192.168.10.99 8899
•nc 192.168.10.99 8899 (some versions of Mac OS do not have telnet, us “nc” instead)
!Check the connection by making a CUT or similar action on the ATEM in order to verify you receive state
changes.
On the ATEM-TCP Link Auto negotiation is turned off and default interface is set to 100 mbit full duplex.
Enabling Telnet on Windows Computers
Please note, Telnet is not enable by default on windows computers. If when trying to establish a Telnet
connection from Command Prompt you receive the error “Telnet is not recognized as an internal or
external command, operable program or batch file.” you will need to enable Telnet under “Turn Windows
Features On or Off”.
6
Establish Connection
Test Connection
Windows- Command Prompt
Establish Connection
Test Connection
Mac-Terminal

SKAARHOJ DEVICE CORES
Controlling You ATEM
Extract of ATEM-TCP Link Commands
This list is only of the base command, you will need to test using your Atem to discover the individual
parameters of each command.
Items marked in Blue only feedback the current state of the ATEM.
Item marked in Red are currently not working or feedback incorrectly.
AtemConnected,
!InputLongName,
!InputShortName,
!InputAvailability,
!InputMEAvailability,
!MultiViewerInputVideoSource,
!ProgramInputVideoSource,
!PreviewInputVideoSource,
!TransitionStyle,
!TransitionNextTransition,
!TransitionStyleNext,
!TransitionNextTransitionNext,
!TransitionInTransition,
!TransitionFramesRemaining,
!TransitionPosition,
!TransitionMixRate,
!TransitionDipRate,
!TransitionDipInput,
!TransitionWipeRate,
!TransitionWipePattern,
!TransitionWipeWidth,
!TransitionWipeFillSource,
!TransitionWipeSymmetry,
!TransitionWipeSoftness,
!TransitionWipePositionX,
!TransitionWipePositionY,
!TransitionWipeReverse,
!TransitionWipeFlipFlop,
!TransitionDVERate,
!TransitionDVEStyle,
!TransitionDVEFillSource,
!TransitionDVEKeySource,
!TransitionDVEEnableKey,
!TransitionDVEPreMultiplied,
!TransitionDVEClip,
!TransitionDVEGain,
!TransitionDVEInvertKey,
!TransitionDVEReverse,
!TransitionDVEFlipFlop,
!KeyerOnAirEnabled,
!KeyerType,
!KeyerFlyEnabled,
!KeyerFillSource,
!KeyerKeySource,
!KeyerMasked,
!KeyerTop,
!KeyerBottom,
!KeyerLeft,
!KeyerRight,
!KeyDVESizeX,
!KeyDVESizeY,
!KeyDVEPositionX,
!KeyDVEPositionY,
!KeyDVERotation,
!KeyDVEBorderEnabled,
!KeyDVEShadow,
!KeyDVEBorderBevel,
!KeyDVEBorderOuterWidth,
!KeyDVEBorderInnerWidth,
!KeyDVEBorderOuterSoftness,
!KeyDVEBorderInnerSoftness,
!KeyDVEBorderBevelSoftness,
7

SKAARHOJ DEVICE CORES
!KeyDVEBorderBevelPosition,
!KeyDVEBorderOpacity,
!KeyDVEBorderHue,
!KeyDVEBorderSaturation,
!KeyDVEBorderLuma,
!KeyDVELightSourceDirection,
!KeyDVELightSourceAltitude,
!KeyDVEMasked,
!KeyDVETop,
!KeyDVEBottom,
!KeyDVELeft,
!KeyDVERight,
!KeyDVERate,
!DownstreamKeyerFillSource,
!DownstreamKeyerKeySource,
!DownstreamKeyerTie,
!DownstreamKeyerRate,
!DownstreamKeyerPreMultiplied,
!DownstreamKeyerClip,
!DownstreamKeyerGain,
!DownstreamKeyerInvertKey,
!DownstreamKeyerMasked,
!DownstreamKeyerTop,
!DownstreamKeyerBottom,
!DownstreamKeyerLeft,
!DownstreamKeyerRight,
!DownstreamKeyerOnAir,
!DownstreamKeyerInTransition,
!DownstreamKeyerIsAutoTransitioning,
!DownstreamKeyerFramesRemaining,
!FadeToBlackRate,
!FadeToBlackStateFullyBlack,
!FadeToBlackStateInTransition,
!FadeToBlackStateFramesRemaining,
!AuxSourceInput,
!CameraControlIris,
!CameraControlIrisf,
!CameraControlFocus,
!CameraControlGain,
!CameraControlWhiteBalance,
!CameraControlSharpeningLevel,
!CameraControlZoomNormalized,
!CameraControlZoomSpeed,
!CameraControlColorbars,
!CameraControlLiftR,
!CameraControlGammaR,
!CameraControlGainR,
!CameraControlLumMix,
!CameraControlHue,
!CameraControlShutter,
!CameraControlLiftG,
!CameraControlGammaG,
!CameraControlGainG,
!CameraControlContrast,
!CameraControlSaturation,
!CameraControlLiftB,
!CameraControlGammaB,
!CameraControlGainB,
!CameraControlLiftY,
!CameraControlGammaY,
!CameraControlGainY,
!MediaPlayerSourceType,
!MediaPlayerSourceStillIndex,
!MediaPlayerSourceClipIndex,
!MediaPlayerStillFilesIsUsed,
!MediaPlayerStillFilesFileName,
!MacroRunStatusState,
!MacroRunStatusIsLooping,
!MacroRunStatusIndex,
!MacroPropertiesIsUsed,
!MacroPropertiesName,
!SuperSourceFillSource,
8

SKAARHOJ DEVICE CORES
!SuperSourceKeySource,
!SuperSourceForeground,
!SuperSourcePreMultiplied,
!SuperSourceClip,
!SuperSourceGain,
!SuperSourceInvertKey,
!SuperSourceBorderEnabled,
!SuperSourceBorderBevel,
!SuperSourceBorderOuterWidth,
!SuperSourceBorderInnerWidth,
!SuperSourceBorderOuterSoftness,
!SuperSourceBorderInnerSoftness,
!SuperSourceBorderBevelSoftness,
!SuperSourceBorderBevelPosition,
!SuperSourceBorderHue,
!SuperSourceBorderSaturation,
!SuperSourceBorderLuma,
!SuperSourceLightSourceDirection,
!SuperSourceLightSourceAltitude,
!SuperSourceBoxParametersEnabled,
!SuperSourceBoxParametersInputSource,
!SuperSourceBoxParametersPositionX,
!SuperSourceBoxParametersPositionY,
!SuperSourceBoxParametersSize,
!SuperSourceBoxParametersCropped,
!SuperSourceBoxParametersCropTop,
!SuperSourceBoxParametersCropBottom,
!SuperSourceBoxParametersCropLeft,
!SuperSourceBoxParametersCropRight,
!AudioMixerInputMixOption,
!AudioMixerInputVolume,
!AudioMixerInputBalance,
!AudioMixerMasterVolume,
!AudioMixerMonitorMonitorAudio,
!AudioMixerMonitorVolume,
!AudioMixerMonitorMute,
!AudioMixerMonitorSolo,
!AudioMixerMonitorSoloInput,
!AudioMixerMonitorDim,
!AudioMixerLevelsSources,
!AudioMixerLevelsMasterLeft,
!AudioMixerLevelsMasterRight,
!AudioMixerLevelsMasterPeakLeft,
!AudioMixerLevelsMasterPeakRight,
!AudioMixerLevelsMonitor,
!AudioMixerLevelsSourceOrder,
!AudioMixerLevelsSourceLeft,
!AudioMixerLevelsSourceRight,
!AudioMixerLevelsSourcePeakLeft,
!AudioMixerLevelsSourcePeakRight,
!AudioMixerTallySources,
!AudioMixerTallyAudioSource,
!AudioMixerTallyIsMixedIn,
!TallyBySourceSources,
!TallyBySourceVideoSource,
!TallyBySourceTallyFlags,
!performCutME,
!performAutoME,
!performDownstreamKeyerAutoKeyer,
!performFadeToBlackME,
!CameraControlAutoFocus,
!CameraControlAutoIris,
!CameraControlResetAll,
!MacroAction,
!MacroRunChangePropertiesLooping,
!AudioLevelsEnable,
RecordingStatus,
StreamingStatus,
dumpState,
9

SKAARHOJ DEVICE CORES
Command Structure Examples
For detailed reference please see: https://www.skaarhoj.com/fileadmin/BMDPROTOCOL.html
The correct syntax for a Cut on 1 M/E is:
•performCutME:0=1
The correct syntax for a Cut on 2 M/E is:
•performCutME:1=1
The correct syntax for a Auto Transition on 1 M/E is:
•performAutoME:0=1
The correct syntax for a Auto Transition on 2 M/E is:
•performAutoME:1=1
The correct syntax for starting macro playback is:
•MacroAction:1=0
Where 1 in this case is macro number 2, as the numbering starts from 0. The number 0 is a parameter
meaning ”Run Macro", where the following different parameters are available for this particular command.
"
If you wanted to stop macro playback, you would send 1 as the parameter, and hexadecimal 0xFFFF as
the index, which is 65535 in decimal, so that the command would be
•MacroAction:65535=1
10

SKAARHOJ DEVICE CORES
If you want to set AUX1 to CAM4 use
•AuxSourceInput:0=4
"
If you want to set PGM on ME1 to CAM3 use
•ProgramInputVideoSource:0=3
"
11

SKAARHOJ DEVICE CORES
Updating Firmware
Finding the Latest Firmware
The firmware for the ATEM-TCP Link can be found in the section “Stand Alone Firmwares” from https://
www.skaarhoj.com/support/firmware-updater/
Please use the picture below to determine the microprocessor type in your product. It is important to
upload/update with a firmware file that matches the microprocessor type, the two are not compatible.
If you are unsure of which type your ATEM-TCP Link uses, please email a picture of the ports with not
Load Firmware from File
The function “Load Firmware from File” is in the Options tab in the Firmware Application. The function is
used to for the ATEM-TCP Link.
Please note that though you need the SKAARHOJ Firmware Updater to do firmware updates, you do not
use “Update Firmware” in the Firmware Application as this will render the firmware on the device useless.
If “Update Firmware” have been pressed, please re-upload the proper firmware .hex file found in the
section “Stand Alone Firmwares” from https://www.skaarhoj.com/support/firmware-updater/
On Mac
On PC
12

SKAARHOJ DEVICE CORES
Change Log
v.1.5.5
-Add support for record and stream for Atem Mini Pro
-Fix SuperSourceBorder parameters control
-Added support for Downstream Keyer parameters
-Added support for Keyer Type and parameter control
v1.5.4
-Fix Downstream Keyer command
v1.5.3
-Prevent firmware-updater from uploading wrong file
v.1.5.2
-Fix bug that cause verbose output with Atem Constellation
v.1.5.1
-Fix bug that stopped updates from being displayed
v.1.5
-Added support for Atem v8.1
v.1.4
-Updated to work with Skaarduino DUE V2.0
v.1.3
-Updated Atem Library to newest version, increases connection stability
v.1.2
-Added hardcoded ethernet 100 mbps full duplex mode setting, auto-negotiation disabled for better
support for Lynksys Switches
v1.1
-Added support for Irisf command
-Added support for Atem 7.5.1+
V1.0
-Initial release
13

SKAARHOJ DEVICE CORES
Troubleshooting
Error on Check: Your controller is not yet registered
If you press Update Firmware you might experience a message from the Firmware Updater stating that
the connected controller is not fully registered yet. The Atem-TCP Link uses Stand Alone firmware and is
not updated through the “Update Firmware” button on the firmware updater.
To upload the latest Atem-TCP Link firmware please see the “Updating Firmware” section of this manual.
If you were trying to change the IP address for you Atem-TCP Link please see the “Changing IP
Information” section of this manual.
Controller does not show up under Port in Firmware Application
If your controller doesn’t show up under ports, try these things first:
• Make sure you have attached your controller with a micro USB cable to your computer. Check the
micro USB is fully inserted into the USB plug on the controller
• Is the controller turned on?
• Reboot you computer
• Change the USB cable for another one
• Avoid using USB adapters to eliminate point of failures
• Try to use a different USB port on your computer
• Boot the controller in config mode: Disconnect the controllers power, then hold the config button
under the power plug down with a pen tip, power on the controller and hold the button until it lights
blue, then release.
14

SKAARHOJ DEVICE CORES
If none of the above brings up the USB port, you may try this procedure but only after clearing it with
the SKAARHOJ support team!:
• Locate the small hole just below the config button
• Power on the controller and press this tiny button for a second and release. You may repeat this.
(Pressing this button while the controller is on should reset it completely).
• Turn off the controller, then turn it on again. Now you should see the USB port in the firmware
application.
Old method if no hole below config button are present:
• Open the controller carefully and locate the SKAARDUINO main board (the one with the ethernet
plug)
• Locate the flat cable connector in the corner of this board. Next to this connector you will see a tiny
button.
• Power on the controller and press this tiny button for a second and release. You may repeat this.
(Pressing this button while the controller is on should reset it completely).
• Turn off the controller, then turn it on again. Now you should see the USB port in the firmware
application.
15

SKAARHOJ DEVICE CORES
Network Recommendations
Facts
•SKAARHOJ controllers have a 100 mbps network interface
•Network switch must have Auto-MDI/MDIX
•Network switch must support 100 mbps
•PoE: IEEE 802.3af
•SKAARHOJ controllers only support Half Duplex mode without Auto-Negotiate
When connected to a network switch, the yellow LED (lower left) at the ethernet jack will be on. If the
device in the other end supports TX/RX auto detection you may be able to connect the SKAARHOJ
controller directly to your device, otherwise use a crossed cable or a network switch (the supported
setup). Remember a SKAARHOJ controller and client must be on the same subnet (192.168.10.* or one
you set up in the controller). If you have multiple SKAARHOJ units connected to the same network they
need to have different IP addresses!
Power over Ethernet (PoE) Specifications
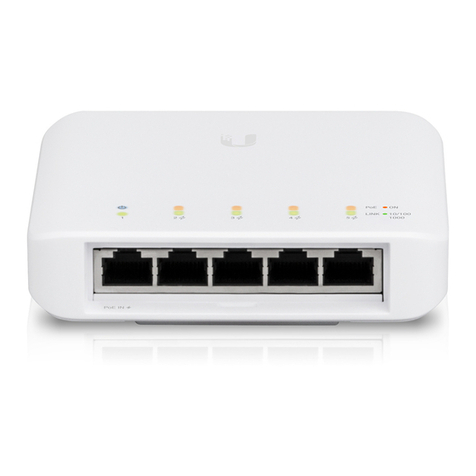
We use the PoE industry standard 48V IEEE 802.3af. If you want to power our controllers using PoE it is
important your switch supports this standard. Please notice some manufactures such as Ubiquity have
their own non-standard 24V type of PoE which is incompatible with our controllers. Especially pay
attention to the standard if you use a PoE injector.
Troubleshooting
If you experience no network activity at all try one or more of the following suggestions:
•Use a managed network switch
•Force network switch port to 100 mbps
•Try a different network switch
1GB or 10 GB switches can have issues with our 100 mbps interface if not properly managed. The iMac
Pro with 10 GB have issues if connected directly to our controller. Try with a USB to ethernet adapter in this
case.
16

SKAARHOJ DEVICE CORES
WEEE Information
For private households: Information on Disposal for Users of WEEE
This symbol (figure 1) on the product(s) and / or accompanying documents means that used electrical and electronic equipment
(WEEE) should not be mixed with general household waste. For proper treatment, recovery and recycling, please take this product(s)
to designated collection points where it will be accepted free of charge.
Alternatively, in some countries, you may be able to return your products to your local retailer upon purchase of an equivalent new
product.
Disposing of this product correctly will help save valuable resources and prevent any potential negative effects on human health and
the environment, which could otherwise arise from inappropriate waste handling.
Please contact your local authority for further details of your nearest designated collection point.
Penalties may be applicable for incorrect disposal of this waste, in accordance with you national legislation.
For professional users in the European Union
If you wish to discard electrical and electronic equipment (EEE), please contact your dealer or supplier for further information.
For disposal in countries outside of the European Union
This symbol is only valid in the European Union (EU). If you wish to discard this product please contact your local authorities or
dealer and ask for the correct method of disposal.
17
Figure 1
Table of contents
