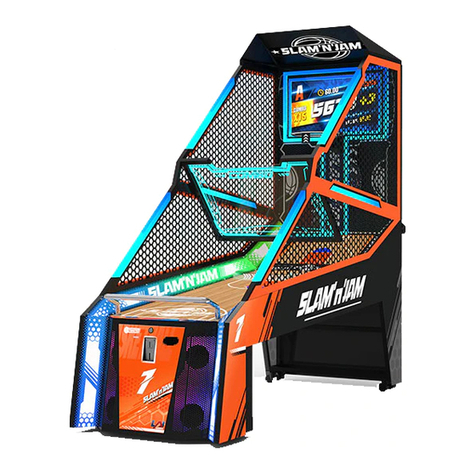
Skee Ball Super Shot Jr. User manual


INTRODUCTION ........................................................................................................................... 2
WARNINGS........................................................................................................................................ 2
LETTER FROM SKEE – BALL SERVICE DEPARTMENT.............................. 3
SPECIFICATIONS......................................................................................................................... 4
FUNCTIONAL DESCRIPTION............................................................................................. 5
ASSEMBLY INSTRUCTIONS ............................................................................................... 7
GAME OVERVIEW...................................................................................................................... 8
OPTIONS AND TESTS ............................................................................................................. 10
GAME OPTIONS.......................................................................................................................... 11
CLEANING AND ROUTINE MAINTENANCE........................................................ 16
WIRING SCHEMATICS.......................................................................................................... 17
TROUBLE-SHOOTING GUIDE ......................................................................................... 19
WARRANTY.................................................................................................................................... 23

Rev. Date: 8/12/2004 Page 2 of 24
Skee Ball Inc. (Corporate Offices) • 121 Liberty Lane • Chalfont, PA 18914 • USA • (215) 997-8900 • Fax (215) 997-8982
Phoenix Offices: (Sports Games Division) • 3669 East La Salle Street • Phoenix, AZ 85040 • USA • (602) 470-1490 • Fax (602) 470-1495
Introduction
Congratulations! You have purchased SUPER SHOT JUNIOR, the best basketball game designed for
younger people available in the world. Inside this manual, you will learn about the many features of this
product including the wide variety of programming capabilities for redemption and game play.
Warnings
READ THIS MANUAL THOROUGHLY BEFORE ASSEMBLING YOUR GAME. FAILURE TO FOLLOW
THE INSTRUCTIONS COULD CAUSE DAMAGE TO YOUR GAME AND VOID YOUR WARRANTY. IN
ADDITION, THE MANUAL EXPLAINS THE GAME IN DETAIL AND THE OPTIONS YOU HAVE SO
THAT YOU AND YOUR PLAYERS CAN ENJOY THE GAME TO ITS FULLEST.
THE POWER CORD MUST BE PLUGGED INTO A GROUNDED THREE-PRONG OUTLET. FAILURE TO DO
SO COULD CAUSE PERMANENT INJURY OR GAME DAMAGE.
THIS GAME IS SUITABLE FOR INDOOR USE ONLY. THE GAME SHOULD NOT BE INSTALLED
OUTDOORS OR IN AREAS DIRECTLY EXPOSED TO SUNLIGHT, HIGH HUMIDITY, DIRECT WATER
CONTACT, DUST, HIGH HEAT OR EXTREME COLD. INSTALLATION IN ANY SUCH ENVIRONMENT
SHALL VOID THE WARRANTY.
REPLACEMENT OF FUSES, LAMPS AND ANY OTHER SERVICING ON THE PRODUCT SHALL BE
CONDUCTED BY TRAINED PERSONNEL.
Federal Communication Commission (FCC) Compliance
THIS EQUIPTMENT HAS BEEN TESTED AND FOUND TO COMPLY WITH THE LIMITS FOR A CLASS
“A” DIGITAL DEVICE, PURSUANT TO PART 15 OF THE FCC RULES. THESE LIMITS ARE DESIGNED
TO PROVIDE REASONABLE PROTECTION AGAINST HARMFUL INTERFERENCE WHEN THE
EQUIPTMENT IS OPERATED IN A COMMERCIAL ENVIRONMENT. THIS EQUIPMENT GENERATES,
USES AND CAN RADIATE RADIO FREQUENCY ENERGY AND, IF NOT INSTALLED AND USED IN
ACCORDANCE WITH THE INSTRUCTION MANUAL, MAY CAUSE HARMFUL INTERFERENCE TO
RADIO COMMUNICATIONS. OPERATION OF THIS EQUIPMENT IN A RESIDENTIAL AREA IS LIKELY
TO CAUSE HARMFUL INTERFERENCE IN WHICH CASE THE USER WILL BE REQUIRED TO CORRECT
THE INTERFERENCE AT HIS OWN EXPENSE.

Super Shot JR.
Assembly and Operating Manual
Page 3 of 24
Letter from Skee – Ball service department
SKEE-BALL
America’s Leading Sports Game Company
Dear Skee-Ball Customer:
Thank you for your recent purchase of an interactive game from Skee-Ball. We know that you will be happy with its
performance.
Our goal at Skee-Ball is to provide you with the best service possible on a continuing basis. Our purpose in writing to you is to
invite you to call us if we can assist you with the information on servicing your Skee-Ball game. We can be reached in our
Phoenix Headquarters at (602) 470-1490, Monday through Friday from 7:00 a.m. to 11:30 and from 12:00 p.m. to 3:30 p.m.,
Arizona Time.
Prior to calling us, it is imperative you have the following information at hand in order to help you effectively:
Serial number of game
Software Revision Code and Check Code (see Test Instructions)
Name of Distributor through which the game was purchased
Date of purchase
Once again, thank you for your purchase. We look forward to helping you enjoy your Skee-Ball game to the fullest.
Sincerely,
SERVICE DEPARTMENT

Super Shot JR
Assembly and Operating Manual
Specifications
Height 83” (211 cm)
Width 45½” (116 cm)
Length 75” (191 cm)
Shipping Width 46” (117 cm)
Shipping Length 80” (204 cm)
Shipping Height 86” (218 cm)
Power Maximum: 110 Volts, 715 Watts, 6.5 Amps
Average: 110 Volts, 330 Watts, 3 Amps
Power Supply 5 Amp Fast-Blo Little Fuse #218-005
Page 4 of 24

Super Shot JR
Assembly and Operating Manual
Functional Description
A. MAJOR GAME COMPONENTS
1. Main Game Chassis - This houses all components and electronics and is a complete integrated unit.
2. Ball Gate Assembly - This controls the balls usage for play. The gate opens or drops to start play,
and will close or rise at the end of game time to capture the balls.
3. Backboard Assembly - The frame assembly that holds the hoops and basket sensors (part #EA3144).
4. Ball Return Area - This area holds the balls during game play, and also houses the speakers. Volume
is controlled via software and can be accessed according to the Option section of this manual.
5. Left Ticket Dispenser - This is the left player’s ticket dispenser, and the housing also holds the left
player’s start button. Inside the door is the left ticket counter.
6. Right Ticket Dispenser - This is the right player’s ticket dispenser, and the housing also holds the
right player’s start button. Inside the door is the right ticket counter.
7. Back Court - This is the area of the game between the ball guard and the baskets. During attract
mode, the balls will be here.
8. Ball Guard - This is the clear Lexan and frame assembly that is bent at a 45°angle at the top. It’s
purpose is to prevent balls from coming directly back at the players.
9. Front Cabinet - This is the area of the game that encloses the game electronics, coin mechanisms, and
coin box.
10. Power Supply - Located on the back panel of the Front Cabinet. The power button is located on the
top of the power supply and the 5 Amp Fast-Blo Fuse is on the upper right side.
11. Logic Board - Located on the back panel of the Front Cabinet. The PCB that controls the game. On
the logic board is a sound EPROM and a program EPROM.
12. Power Distribution Board - Located on the back panel of the Front Cabinet. The PCB that controls
the gate assembly. Also supplies the power for the Flashing Light.
13. Load Resistor Assy - This assembly is used to maintain power supply regulation.
14. Flashing Beacon - The light is used for completed basket recognition. It will also flash at the end of
the game.
Page 5 of 24

Super Shot JR
Assembly and Operating Manual
15. Coin Mechanisms - Located on the inside of the left front door, are the mechanisms for accepting
coins of the preferred denominations. The number of coins required for a credit is programmable.
The coin box is below the coin mechs. Mounted on the coin box is the coin counter.
16. Score Board Display - The scoreboard consists of 2 groups of 2 pairs of 7-segment displays. During
game play, information for the left player (player 1) is on the left, and the right player (player 2) is
on the right.
17. Option Switches Assembly - This assembly is mounted in the front cabinet behind the left front door.
This group of 3 switches is used to configure the game.
B. OPERATOR CONTROLS
1. Power Button - The main power on/off switch is located on the right side of the power supply inside
of the front cabinet.
2. Reset Button - Located inside the front cabinet behind the left front door. Pushing this button
enables the operator to access software used for making adjustments to the game (see “Game
Options”).
3. Vol+ Button - Allows upward or forward movement through the various options. It also allows you
to view the last game score if pressed between games, or at the end of a game. If this option is used,
clear by pressing left start button
4. Vol- Button - Allows Down or reverse movement through the various options. It will display the
number of tickets awarded for the last game if pressed at the end of a game, or between games. . If
this option is used, clear by pressing left start button
5. Left Start Button - Located on the left ticket dispenser housing, allows the left player (Player 1) to
select entry into a game if the button is flashing. If the button is not flashing, then the left player
cannot join any game in progress. Also used in setting options (see “Game Options”).
6. Right Start Button - Located on the right ticket dispenser housing, allows the right player (Player 2)
to select entry into a game if the button is flashing. If the button is not flashing, then right player
cannot join any active game in progress..
7. Volume - The volume is controlled through the software. See “Game Options - Game Volume,
Attract Volume” .
Page 6 of 24

Super Shot JR
Assembly and Operating Manual
Assembly Instructions
A. PRE-ASSEMBLY
1. Remove all parts from the shipping boxes and inspect for any possible damage during handling. Use
the following list on to inventory the items. If any part (s) are missing, call your salesperson
immediately. If shipping damage is noted, call the trucking company making the delivery.
2. Shipping Parts Inventory
1 - Game Chassis
5 - Mini Basket Balls
1 - Manual
1 - Coin box
2 - Ticket Bins
B. ASSEMBLY
1. Adjust the levelers to make the chassis level.
2. Place the game in it’s approximate final position.
3. Unlock and open the left and right ticket dispenser covers. Unlock and open the coin door in the
front cabinet. Install tickets in the ticket holders. Route the tickets from the bins into the ticket
dispensers. Close and lock the ticket dispenser doors.
4. Remove deflated balls from the front cabinet. Inflate to 2-4 psi or 14-28 kPa. The balls must be
round and soft to avoid fast rebounds. We do NOT recommend that the balls be inflated to the
values used in normal basketballs. The balls must be squeezable. Install balls in the Back Court.
5. Plug the AC cord into a known good 110-120VAC power source. If the game does not start
activating the display, check the on/off switch on the power supply. The game is now performing it’s
power on reset tests, and will soon be ready to play or program.
Page 7 of 24

Super Shot JR
Assembly and Operating Manual
Game Overview
Skee-Ball Super Shot Junior is designed to be universal by offering an array of programming capabilities in
hopes that you, the game operator, will have the setting regarding tickets, coins, number of balls, etc. that
you need, available for your location.
A. Power On and Reset Test
Following the Reset or Power Up operation, the game will do several quick tests. Prior to leaving your
game for open play, you should do a visual verification that the test information is acceptable. See
“Reset Tests” .
B. Options
The game must be programmed according to the specific location and operator desires and any special
circumstances. See “Game Options”.
C. Idle Display (Attract Mode)
The game will display the score of “00” for each player for 30 seconds. Then the display will turn off,
leaving several segments cycling in a clockwise fashion. Every so often (see “Game Options - Attract
Time” ), the game will play a small segment of the theme music while waiting for some coins to be
entered.
D. Coins
1. Insert coin(s). (Not necessary if the game is set for free play. See “Game Options - Coins Per
Credit” )
2. The number of coins required for one credit is adjustable. See “Game Options - Coins Per Credit” .
E. Press Start Button Or Buttons
After inserting one (1) or more coins or credits, the scoreboard will display the credits and coins and the
last score in a continuous cycle. This display will be active until the player presses a start button. The
credit and coin display show full credits, and coins that have not added up to a credit yet. Due to the
restrictions inherent in the 7-segment display, the messages on the left side will look like this “CrEd” and
“Coin”. Note: during this phase, the attract mode sounds will still be active. Two (2) seconds after the
first start button is pressed, the gate will start to release the balls, after an additional 2 seconds, the
second player will be unable to join the game in progress.
F. Game Play
The object is to score as many points as possible in the time given (see “Game Options - Game Time” ).
There is a possibility of 3 point bonus baskets at the end of the game (see “Game Options - 3-Point
Bonus Time” ). In a one player game, both baskets add to the single players score. In a 2 player game,
the baskets are tied to the player only, so don’t give your opponent any points! The left basket and left
ticket dispenser are for player 1, and the right side equipment is for player 2.
Page 8 of 24

Super Shot JR
Assembly and Operating Manual
G. Scoring
Balls successfully thrown into a hoop will score either 2 points, or if into bonus time (indicated by the
blinking score display) each basket will score 3 points. When the ball crosses the path of the
optoelectronic sensor in the basket, the logic board will register the basket.
H. End Of Game
1. At the end of the game, the display will show the final score total and go back into the attract mode
until additional coins/credits are inserted. At the end of the game, the ball gate will close, trapping
balls in the back court area.
2. As an added convenience at end of game, the software allows the operator to view the last game
statistics including game score and ticket payout. To view, open the coin mech door or the left front
cabinet door and push the Vol+ button to view score. To view payout of tickets during the last game
push Vol- button. To return to the attract mode, push Left Start.
I. Credits
The game accepts money at any time. At the end of the game, if there are any credits remaining, the
scoreboard will display the “Coin” and “CrEd” messages as appropriate. See paragraph E above.
Whenever a coin/token is entered, the game will make a chirp sound. Whenever a credit is reached, there
is a reverberating ring sound.
J. Tickets
1. The game will dispense tickets to the player according to the many different operator adjustable
options. See “Game Options - Tickets”.
2. In the event the game is out of tickets or a malfunction occurs, the display will inform the player
“dSP 1 xx” or “dSP 2 xx” where the xx represents the number of tickets the game is trying to issue
and the 1 or 2 represents the player to issue to. The attendant must correct the malfunction and or
reload the tickets. Then press and release both Start buttons, which will be flashing. Tickets owed to
the player will be dispensed and if the other ticket dispenser has no problem, the game will be
returned to the attract mode. If the ticket alarm feature is disabled, the game simply continues as if
tickets were not to be dispensed. See “Game Options - Ticket Alarm” .
Example:
Player 1 is owed 8 tickets, the display is “dSP 1 08”.
Player 2 is owed 14 tickets, the display is “dSP 2 14”.
Page 9 of 24

Super Shot JR
Assembly and Operating Manual
OPTIONS AND TESTS
The Program Mode is used to change options. To enter Program Mode press the button labeled “RESET”
located behind the coin door. The display will show “100A0024”, alternating with “0xxAd266” where the
first display is the revision information, and the second display is the current option and ROM checksum.
Pressing “RESET” a second time will exit the test mode.
Example:
First display is “100A0024”
Second display is “000Ad266”
The following chart is used to describe what functions the buttons or button combinations will perform when
pressed. Buttons enclosed in braces, {}, signify holding the button while pressing and releasing another.
Main Menu
Button Function
RESET Enter program mode or game
mode.
VOL+ Select game options
VOL- Unused
VOL+:Options
Used for setting the various options for the game.
VOL-:Unused
Reserved for future use..
Page 10 of 24

Super Shot JR
Assembly and Operating Manual
GAME OPTIONS
Skee-Ball Super Shot Junior has been designed to give the operator a great deal of flexibility in operating the
game. Rather than employing a dip switch system, Skee-Ball Super Shot Junior employs a system using the
RESET Button and EEPROM which affords the operator many more choices than could otherwise be
practically provided. The following pages describe the Options available to you, how to review the Option
Settings and how to select the Option Settings you want.
1. With the game powered up, press the RESET button located behind the coin door on the front left side
of the game.
2. To access, view and/or change the game options, the operator must use all 3 of the buttons located
behind the coin door as well as the game Left START button. Each button has a specific function and
location as outlined below:
LOCATION LABEL FUNCTION
Top right VOL+ Cycle forward/up
Left RESET Access/exit program features
Bottom right VOL- Cycle backward/down
Top left side of
game
Left
START
Select or enter
3. Upon pushing the RESET button, the display will show the software revision. Press the VOL+ button
to access options.
+It is important to have the software revision number and checksum
available when calling with service inquiries.
4. Press the VOL+ Button to access the options programming area.. After releasing the VOL+ button, the
option 100 will show on the left, and it’s value will show on the right. The option number will blink
rapidly indicating that the option number is what will be affected when the VOL+ and VOL- buttons are
pressed.
The current option number will be displayed on the left side, and the current option value will be
displayed on the right side.
Example: “100 30” Option 100 has the value 30
Page 11 of 24

Super Shot JR
Assembly and Operating Manual
“112 09” Option 112 has the value 9.
5. Cycle through the options
To cycle through the options, continue pressing the VOL+ or VOL- buttons. When an option that you
wish to change is displayed, press the START button. At this point, the left side of the display will stop
blinking, and the right side will start blinking. This indicates that the option value is now subject to the
VOL+ and VOL- buttons.
After pressing the START button, the current value will then be modifiable by pressing the VOL+ and
VOL- buttons until the appropriate value is reached. There are minimum an maximum limits on every
value. The VOL+ button will increment the display value until the maximum value for the option is
reached. The VOL- button will decrement the display until the minimum for the option is reached. The
setting on which this option is currently operating will be displayed. After setting the value to what is
appropriate, press the START button. The game will make a ‘credit’ sound indicating the EEPROM
was changed. To skip changing the option, press both VOL+ and VOL- buttons at the same time.
When you are finished reviewing the options, press the RESET button. The game will reset and perform the
power up and reset tests.
Page 12 of 24

Super Shot JR
Assembly and Operating Manual
VII. OPTIONS
The options are a series of numbers in the range 100 to 114. Each option controls a specific function on the
game.
100 Game Time
Game Time is the duration of the game in seconds, and ranges from 10 to 99 seconds. The default time
for the game is 30 Seconds.
101 3 Point Bonus Time
3 point time is the optional end of game bonus time where the game will record every basket as 3 points
instead of 2. The range of values is 0 to 99 seconds. The default value is 15 Seconds. You should look
at this value as the remaining seconds of the game. Example: if the value is 10, when the remaining time
in the game is 10, the baskets will all be 3 point baskets.
102 Tickets Enable
This value determines whether tickets are awarded or not. The value 0 means no tickets are to be
awarded, the value 1 means award tickets. The default is to award tickets.
103 Ticket Alarm Enable
This value determines whether the game will post a message and halt if there is a ticket error or the game
is out of tickets. The value 0 means no tickets alarms are to be shown, the value 1 means announce ticket
errors. The default is to announce ticket errors.
104 Tickets At Start
This value tells the game how many tickets to give immediately for playing the game. This is sometimes
referred to as “Loser Tickets” or “Minimum Tickets”. This value has the range 0 to 19. The default is to
award 6 tickets immediately. Note: this value will be awarded even if the maximum tickets value is
smaller.
105 Issue Tickets At End Enable
This value tells the game to issue the tickets at the end of the game, instead of during the game. The
value 0 means issue tickets as they are awarded. The value 1 means hold the tickets until the end of the
game. The default is 0. Note: if the game is supposed to issue tickets at the end, the start tickets will be
held as well.
106 Maximum Tickets
This value is a limit on the maximum tickets that may be issued by the game for any player. The range is
0 to 99. The default is 15. Note: start tickets will always be issued, even if they exceed the value of this
option.
107 Score Threshold
This value is the used to determine when players start earning points based on their play. Before this
score is reached, the only tickets issued will be start tickets. After this point value is reached, the game
will start computing extra tickets based on how many points over this threshold they have. This value
ranges from 0 to 99. The default value is 6.
Page 13 of 24

Super Shot JR
Assembly and Operating Manual
108 Points Per Ticket
This value is the points increment that determines when to issue extra tickets. This value plus the
threshold value is the point where the game will issue it’s first extra tickets. This value ranges from 0 to
99. The default is 2.
Example:
If the threshold is 6 and the points per ticket is 2, then the first extra ticket will be issued at 8 points.
If the threshold is 0 and the points per ticket is 6, then the first extra ticket will be issued at 6 points.
109 Ticket Multiplier
This is the number to tickets to issue when the game awards extra tickets. This has a range of 0 to 9 and
a default of 1. When the game computes that the player should be awarded some extra tickets, it then
multiplies the awards by this value.
110 Game Volume
This is the volume the game will play at. The range is 0 to 63. The default is 31. When set to 0, the
game will make no game sounds.
111 Attract Volume
This is the volume the attract mode sounds will play at. The range is 0 to 63. The default is 31. When
set to 0, the game will make no attract sounds. This also affects the “coin” and “credit” sounds, but they
will never be completely stopped.
112 Attract Minutes
This value is the number of minutes between playing segments of the theme music when the
game is not actively be played. This value has the range of 0 to 9 and defaults to 2 minutes. The
value 0 will stop attract mode sounds.
113 Coins Per Credit
This value determines how many coins are needed to make a game credit. The range of values is 0 to 9.
The default value is 1. If set to 0, the game will free-play.
114 DEFAULTS
When this option is selected, the left side display will show “dEF 00” . This option has valid values of
0 and 1. 0 means no change. 1 forces the game to use the default values. When the value 1 is set, and
the START button is pushed, the ‘Twilight Zone’ will sound.
+If the game detects corrupted or damaged values for options at power up or reset, the game will
activate this option automatically, and the ‘Twilight Zone’ sound will occur.
Page 14 of 24

Super Shot JR
Assembly and Operating Manual
OPTION Menu
Button Function
RESET Exit program mode and reset game.
VOL+ Move forward through menu.
VOL- Move backwards through menu.
Left START Select option.
VOL+ and VOL- Exit option menu and return to main.
VIII. RESET TESTS
A) After a reset, the game will display some information about internal status. First, the leftmost 2 digits will
display the value 00, 01, 02, 03 which is the type of reset. If the game resets and ever displays 01,02, or 03;
please call the service department and report this condition. The rest of the display shows what was in the
display memory at the time of the reset.
B) Next the game will perform some internal checks. If the game seems to freeze at this point, try to note what is
displayed.
C) The game will say “Have a nice day!” . This is to test the sound system.
D) Following that is a display segment test, where the game will successively light matching segments on the
display, then turn off groups of segments. Look for any segments that don’t follow the pattern.
E) The game will then count down on the right display (about 3 seconds).
F) The game then enters the attract mode.
Page 15 of 24

Super Shot JR
Assembly and Operating Manual
Cleaning and Routine Maintenance
1. Polycarbonate Panels:
Skee-Ball, Inc. recommends using only “Kleenmaster Brillianize” which can be purchased through Skee-
Ball as Part Number 800600-1.
2. Electronics Board:
Skee Ball Inc. recommends using canned air to blow any dirt off the surface of the Electronics board.
3. Laminated Surfaces:
Skee-Ball, Inc. recommends “Kleenmaster Brillianize”.
4. Optical Sensors:
Skee-Ball, Inc. recommends using canned air to blow any dirt off of the surface of the sensors on a
weekly basis.
5. Hinges
Monthly, lightly spray the Ball Gate hinges with a light lubricant.
6. Painted Surfaces:
Skee Ball Inc. recommends using Windexor any other mild, non-abrasive household cleaner.
Page 16 of 24


Super Shot JR
Assembly and Operating Manual
Trouble-shooting Guide
Prior to calling Skee-Ball with questions regarding service or parts orders, please have the Model # (FP4200-
xxxxx) and Serial # available. These numbers will be located on the coinbox..
It is also important to know the software revision number and software checksum. To get these numbers,
open the front cabinet door and press the Reset button. The numbers will be displayed on the
scoreboard. Press Reset again to reset the game.
Problem: Suggested Action:
No Display........... 1. Check to see that the alley is plugged in.
2 Open the front cabinet and check the ON/OFF switch located on
the power supply. It should be pushed in.
3. Check the 5 amp Fast-Blo Fuse located on the
power supply for continuity.
4. Loosen the mounting nuts holding the display in
place and remove it from the enclosure to check
cable connections.
5. Replace the display assembly with a tested new assembly.
Balls don’t activate hoop 1. Verify that the reflective tape on the inside front
sensor(s).................. of the hoop is still there and in good shape.
Verify that sensor is correctly aligned, the yellow
and green LED’s on the sensor are solidly lit..
2. Clean the optic sensor.
3. Replace the optic sensor.
Page 19 of 24
Table of contents
Other Skee Ball Arcade Game Machine manuals
Popular Arcade Game Machine manuals by other brands
Ace Amusement
Ace Amusement Zombie Land Battle manual
MecPower Tecway
MecPower Tecway Crazy Crab Operation manual
Sega
Sega Rambo owner's manual
Sega
Sega TARGET BRAVO Operators & service manual
Universal Space
Universal Space FRUIT MANIA STD Operation manual
Universal Space
Universal Space SAFARI RANGER Operation manual
Bob's Space Racers Incorporated
Bob's Space Racers Incorporated Big Dog Kiddie Dog Pounder manual
Sega
Sega SOUL SURFER owner's manual
falgas
falgas FORMULA GP1 CHRONO user guide

Kriss Sport
Kriss Sport Boxer user manual

Hoffmann Automaten
Hoffmann Automaten 3613203 Assembly manual
IGS
IGS Diamond Progressive Operator's manual
